Quick Start for Administrators
This guide ensures a seamless transition from a fresh installation to a fully configured, production-ready ServiceOps platform.
This guide is designed to help new customers (Tenant Admins) and super administrators configure their ServiceOps environment for the first time.
The setup journey is divided into two parts:
- Product Wizard → For Tenant Admins, who perform the initial setup when logging in for the first time.
- Product Setup Guide → For Technicians and Administrators, who complete the detailed configuration of ITSM modules after the basic setup is done.
By following this guide, you will move from a fresh installation to a fully configured, production-ready ServiceOps platform.
Product Wizard
The Product Wizard launches automatically when a Tenant Admin logs in for the first time (typically an IT Admin responsible for tenant setup). It guides you through the essential configuration required to brand the portal, set up outbound email, and invite Technicians.
1. Welcome
The welcome screen serves as the starting point for your ServiceOps setup, guiding you through the initial configuration process. It provides a clear overview of the setup journey, which is divided into five sequential steps:
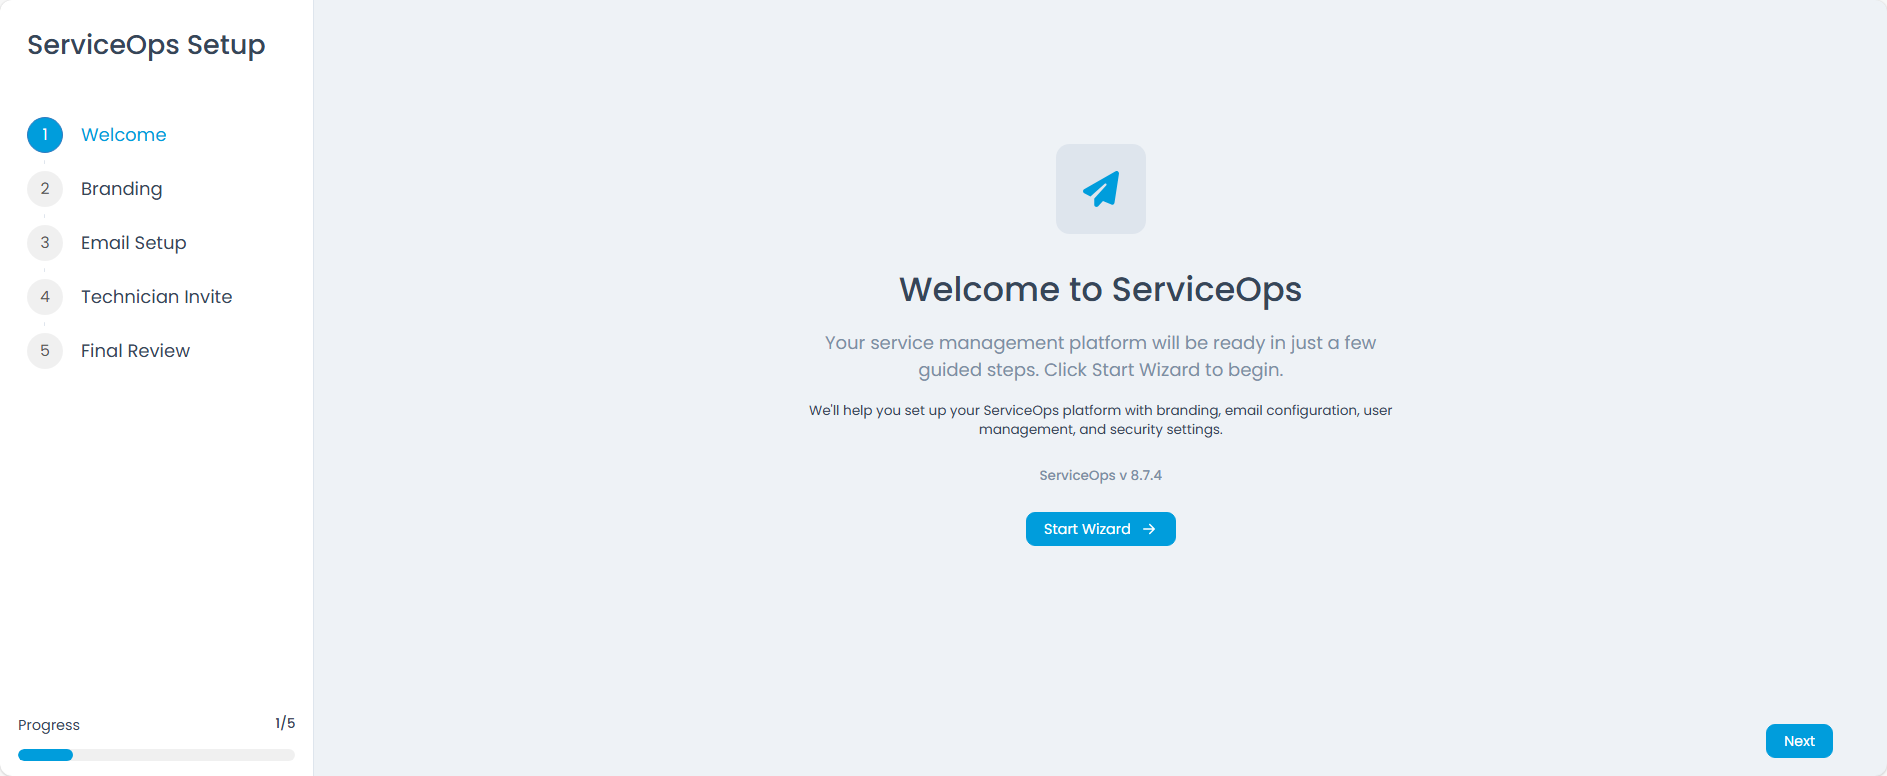
- Welcome: Introduces the wizard and its purpose.
- Branding: Allows customization of your ServiceOps portal's appearance.
- Email Setup: Configures outbound email for notifications and invitations.
- Technician Invite: Enables inviting and onboarding your technical staff.
- Final Review: Summarizes your configurations before completion.
Throughout this process, an In Progress bar, displayed at the bottom left, visually tracks your advancement, showing which step you are currently on (e.g., 1/5). This ensures you can easily monitor your progress and provides the flexibility to pause and resume the setup at any time.
Click the Start Wizard button to begin the guided setup. You also have the option to Skip or navigate to the Next step once a step is completed.
2. Branding
Customize how the ServiceOps portal looks for your organization. If no custom images are uploaded, the system uses default images for branding:
Upload the Company Logo for the light theme. Once uploaded, you can view the preview of the logo below the image. The allowed image types are: PNG, JPG, JPEG, and GIF.
Upload the Company Logo (Dark Theme) for dark backgrounds. Once uploaded, you can view the preview of the logo below the image. The allowed image types are: PNG, JPG, JPEG, and GIF.
Upload a Favicon. Once uploaded, you can view the preview of the favicon below the image. The allowed image types are: PNG, JPG, and JPEG.
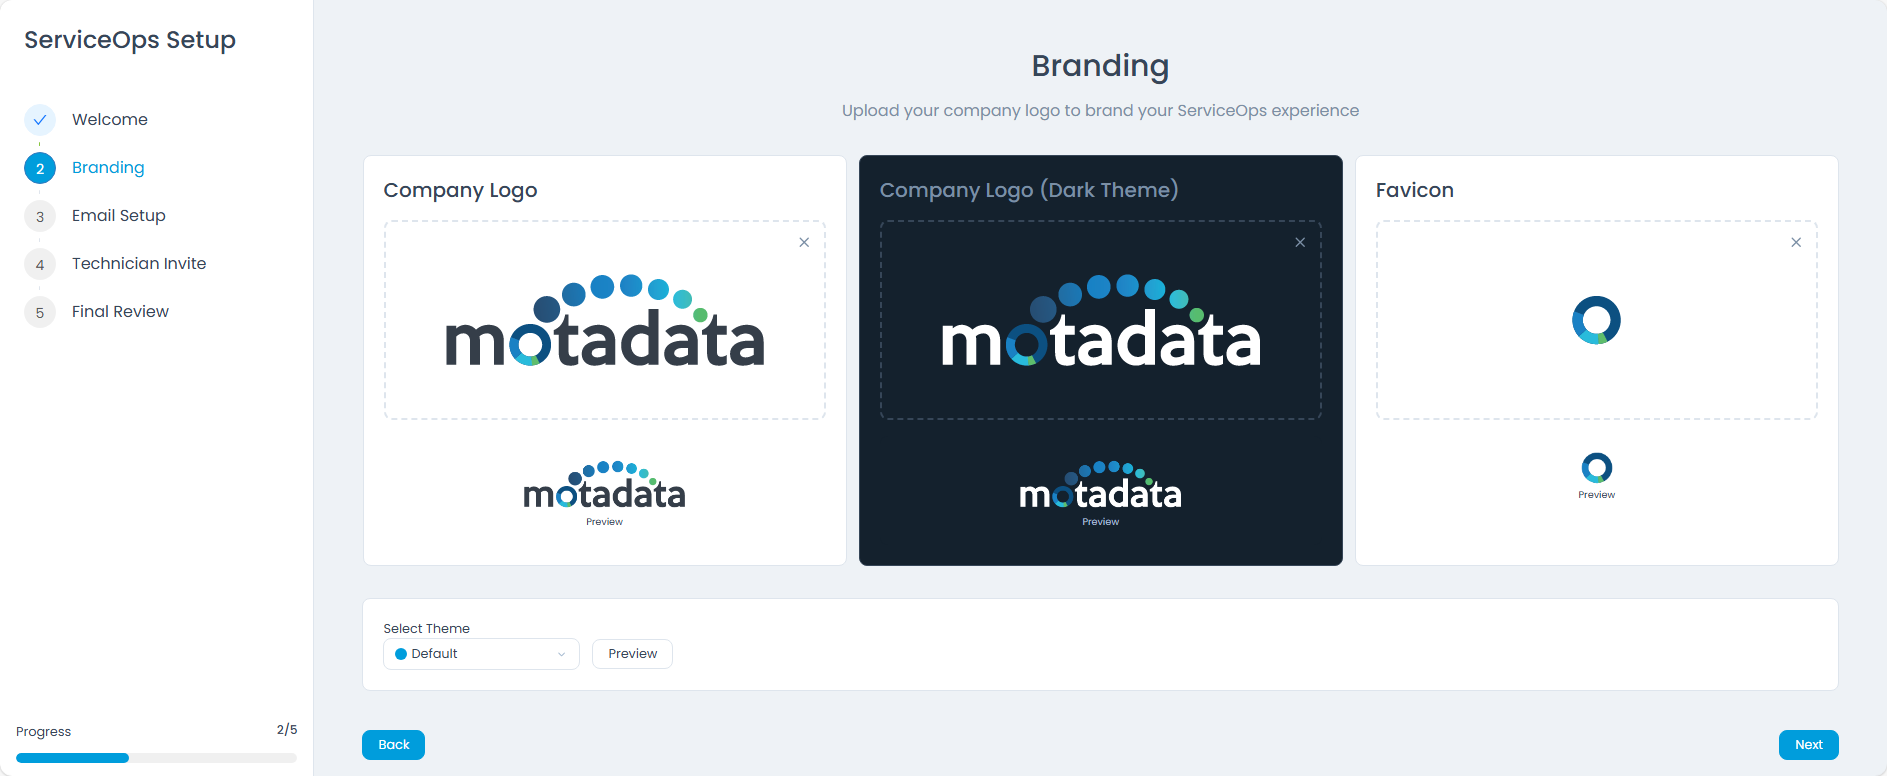
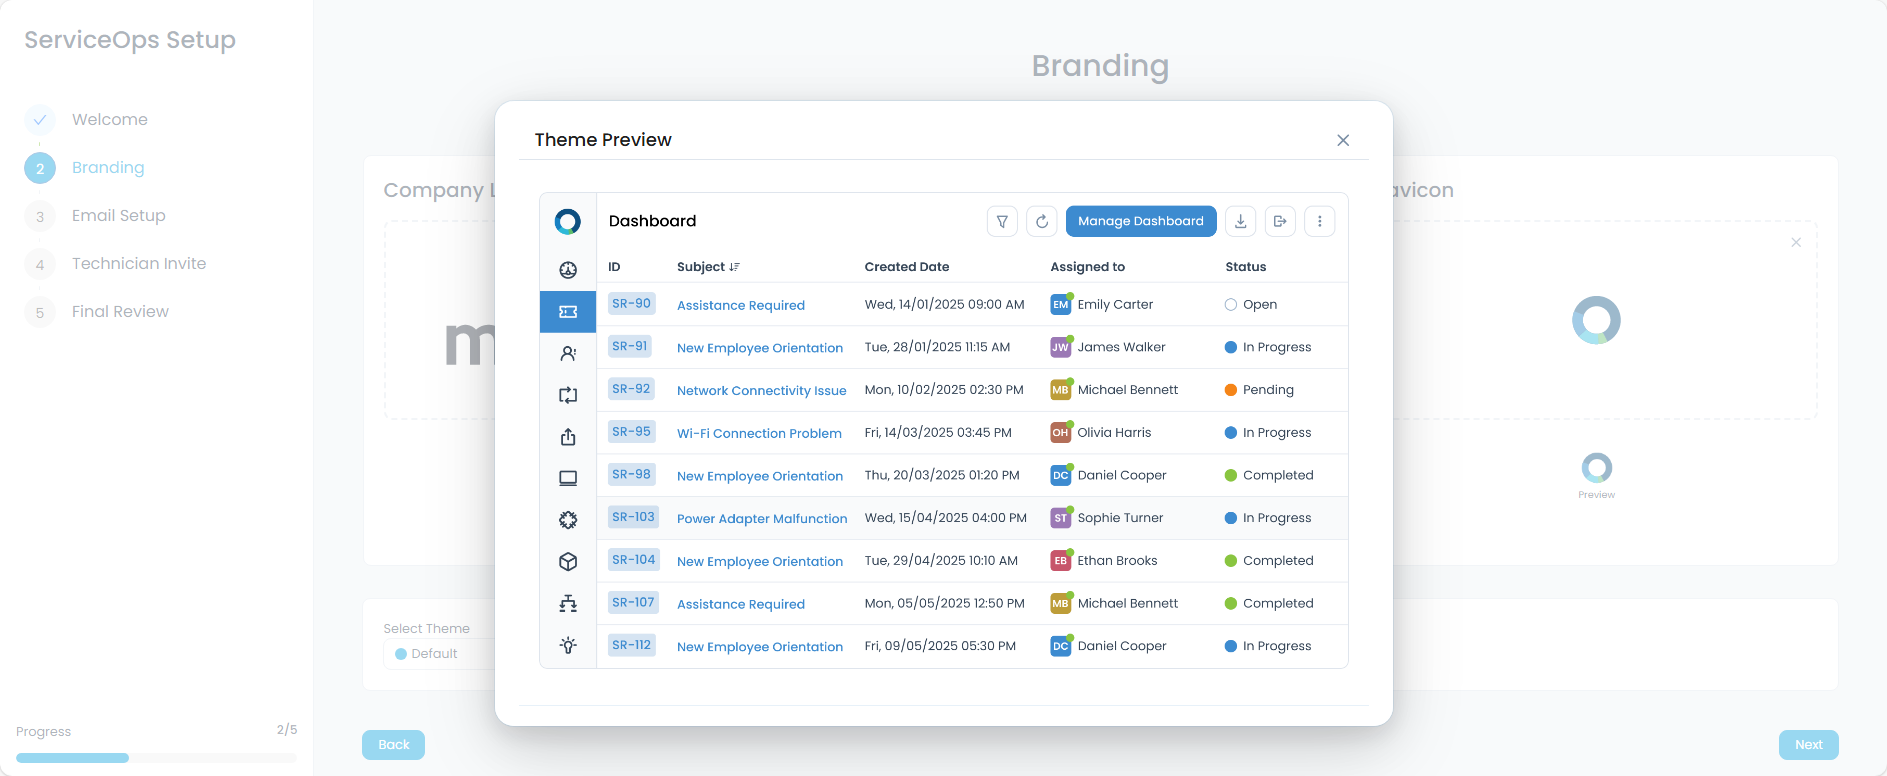
Select a portal theme and use Preview to review how the UI looks before proceeding. Here, default theme (blue) is selected. If you want to change the theme, you can select the theme from the dropdown and click on Preview to review the changes.
3. Email Setup
In this step, the Tenant Admin configures the outgoing email used by ServiceOps to send notifications, approvals, and technician invitations.

Enter the sender Name and Email that will be used for outbound messages.
Choose an Email Provider:
- Sign in with Microsoft → Connect a Microsoft account for sending emails. Enter the Name, Email Address, and click on Sign in with Microsoft to connect the Microsoft account.
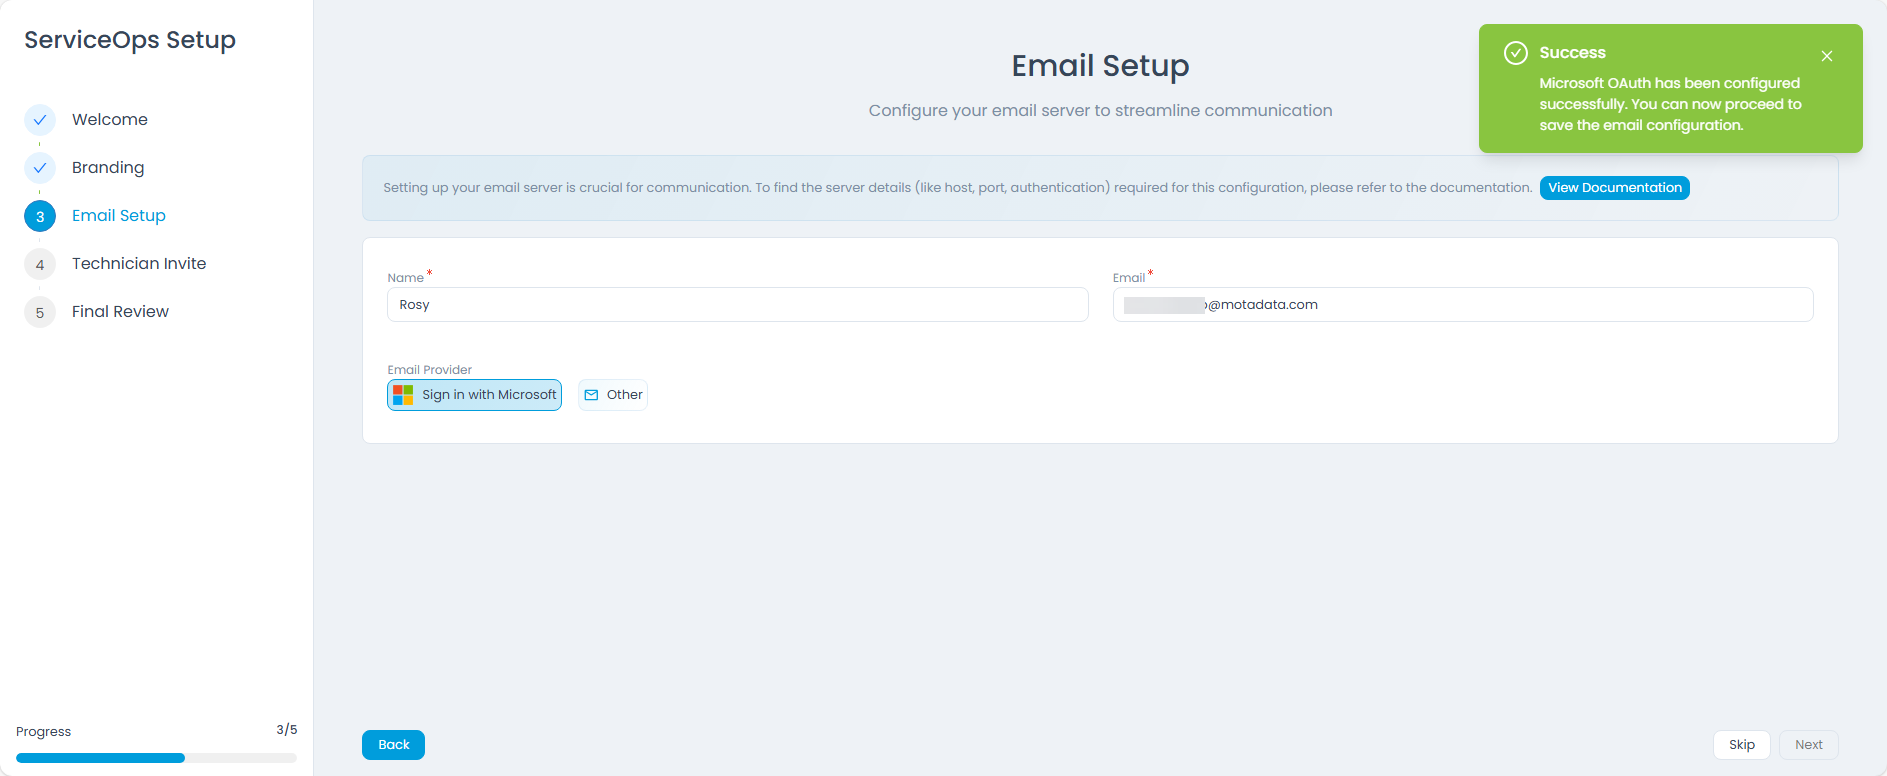
- Other → Configure a custom mail server (SMTP) using details like protocol, server, port, security type, authentication type, username, and password.
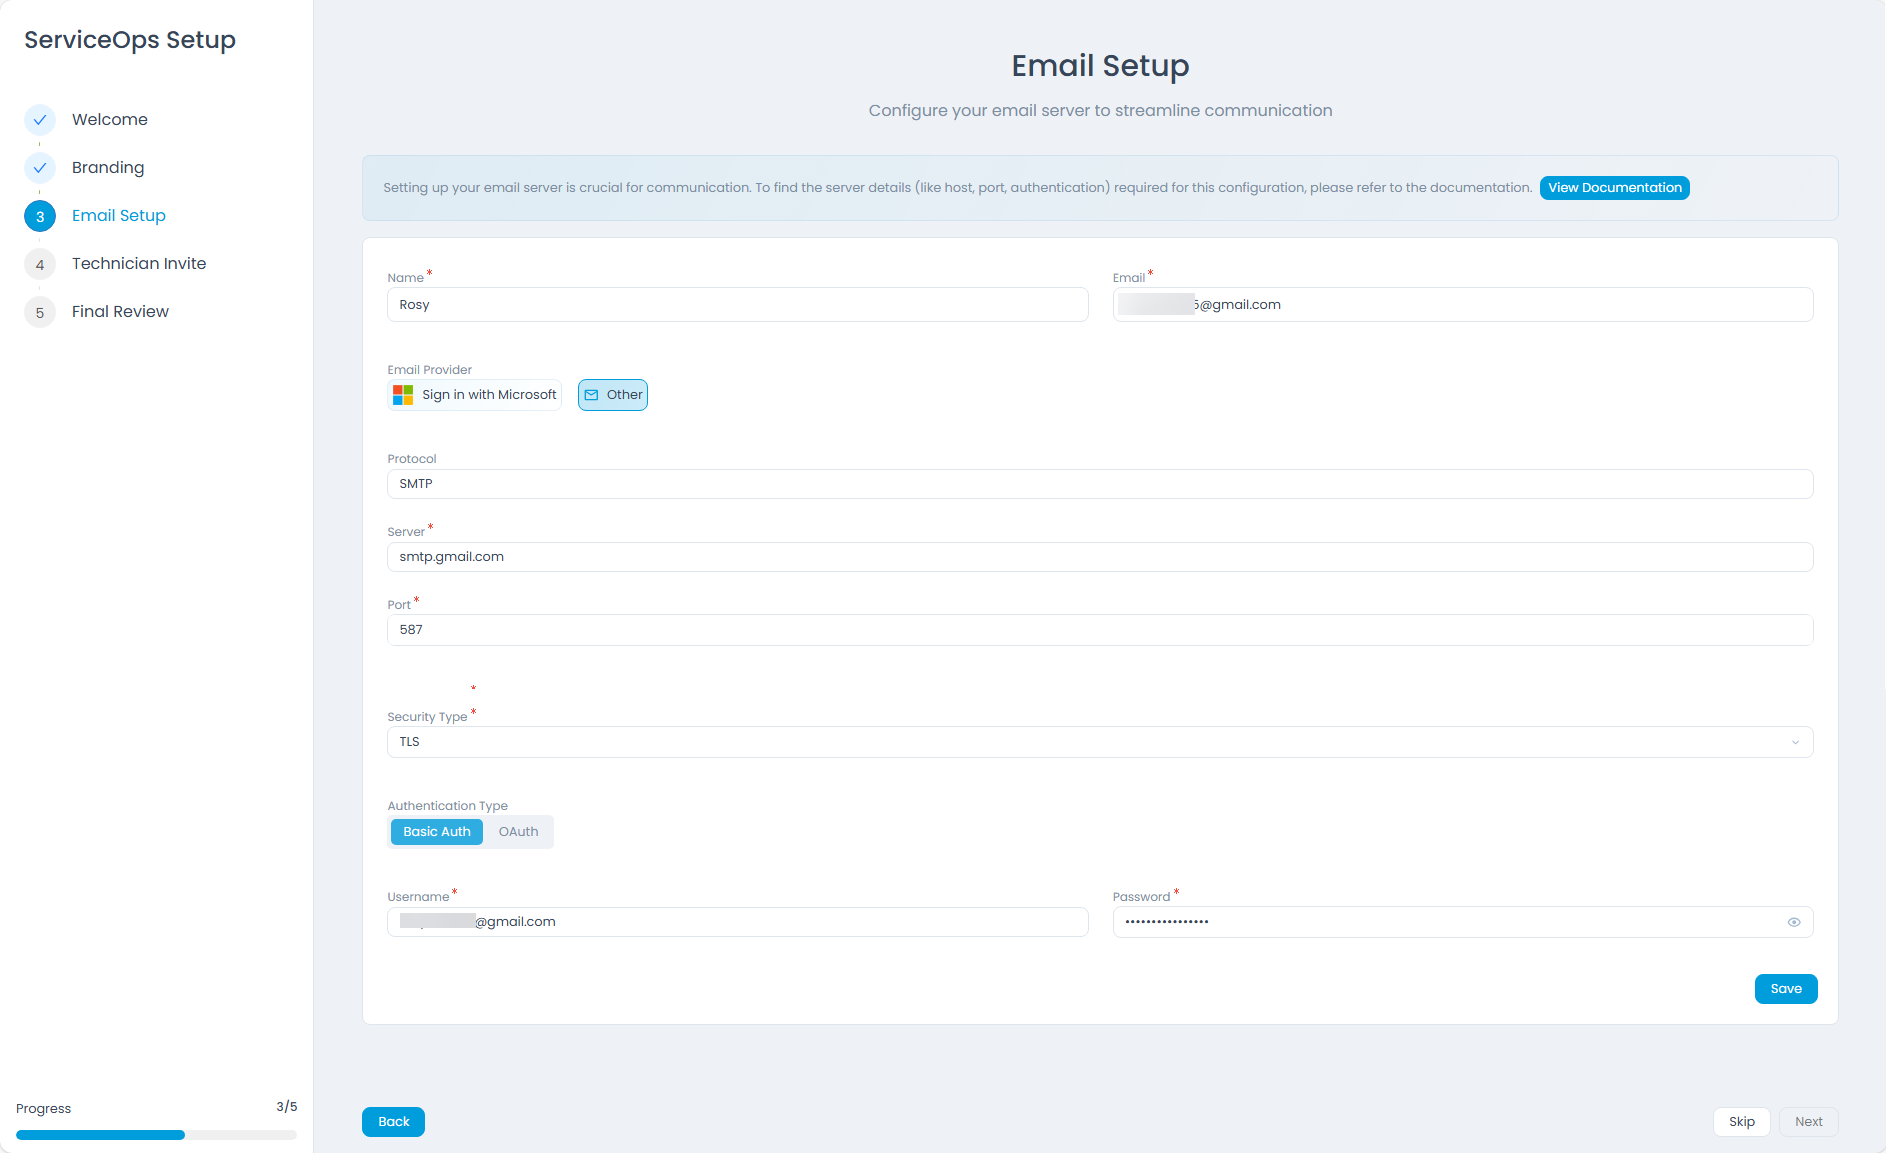
Use View Documentation if you need help finding the required server details (for example, host, port, and authentication method).
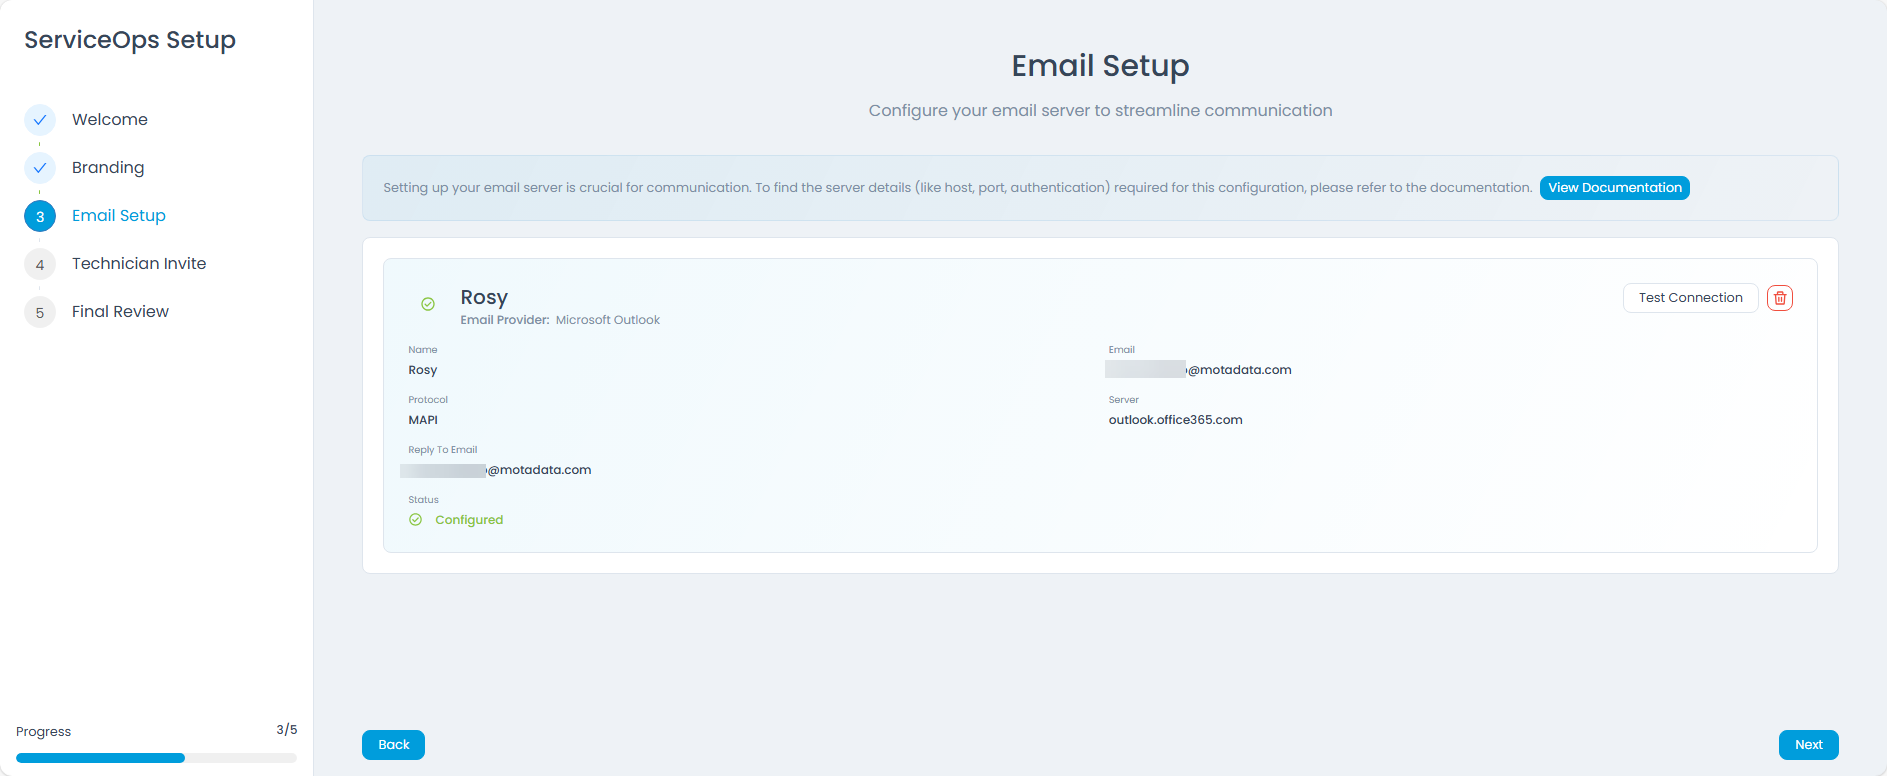
After you save the configuration, ServiceOps validates the setup and shows the configuration summary (for example, server, port, security type, etc). You can use Test Connection to verify connectivity before proceeding, or remove the configuration and reconfigure if required.
At a time only one email server can be configured.
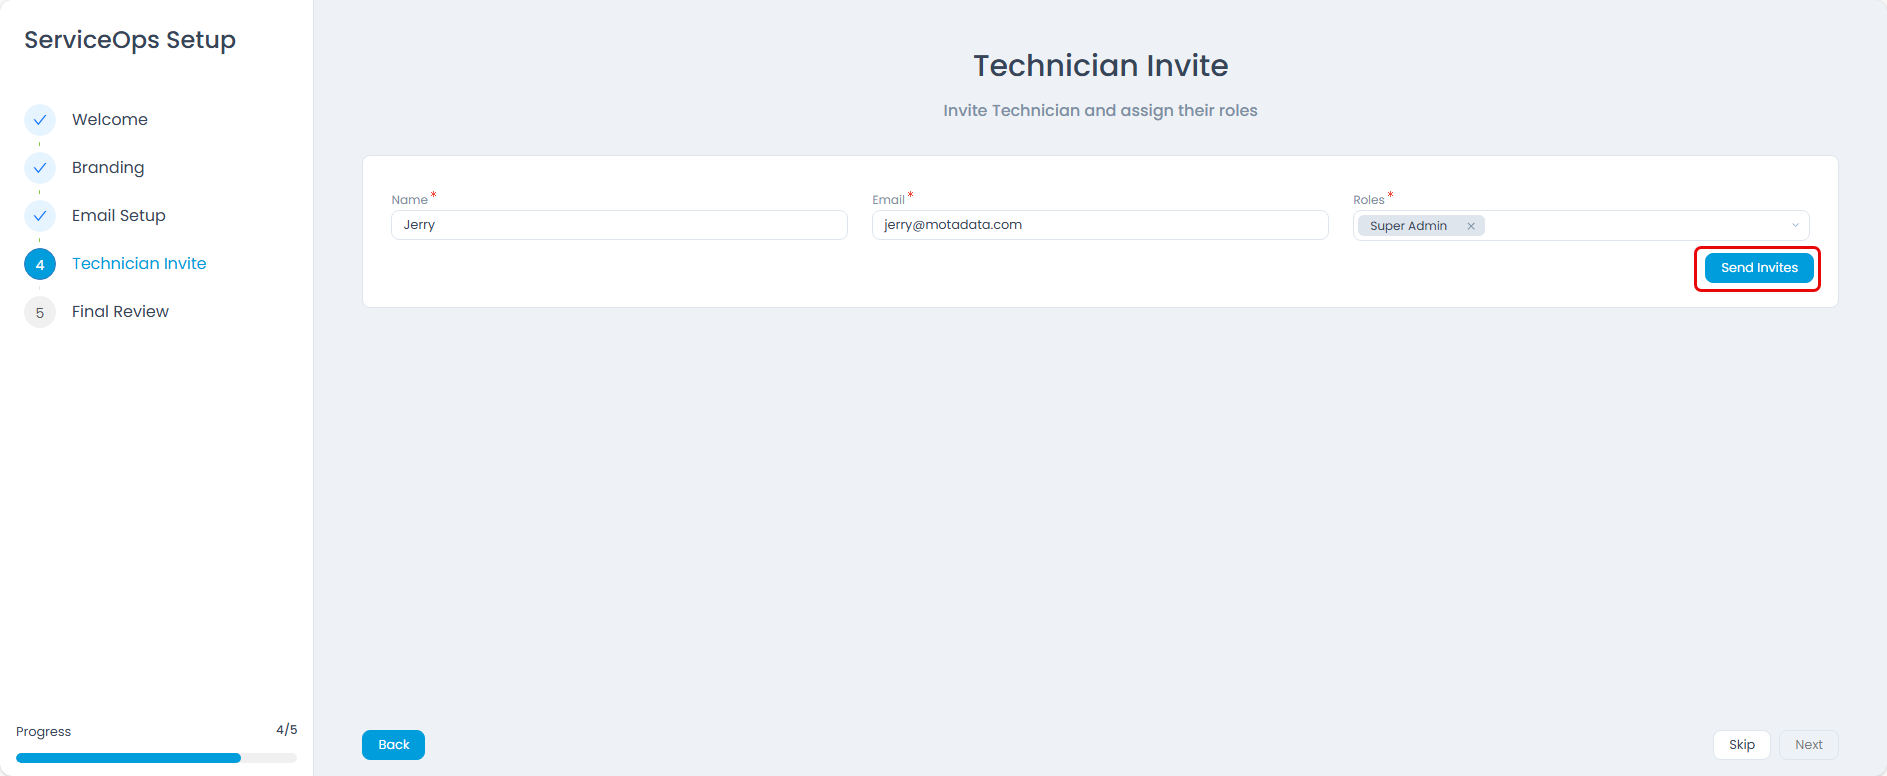
4. Technician Invite
Before you begin, ensure the outgoing email server is configured.
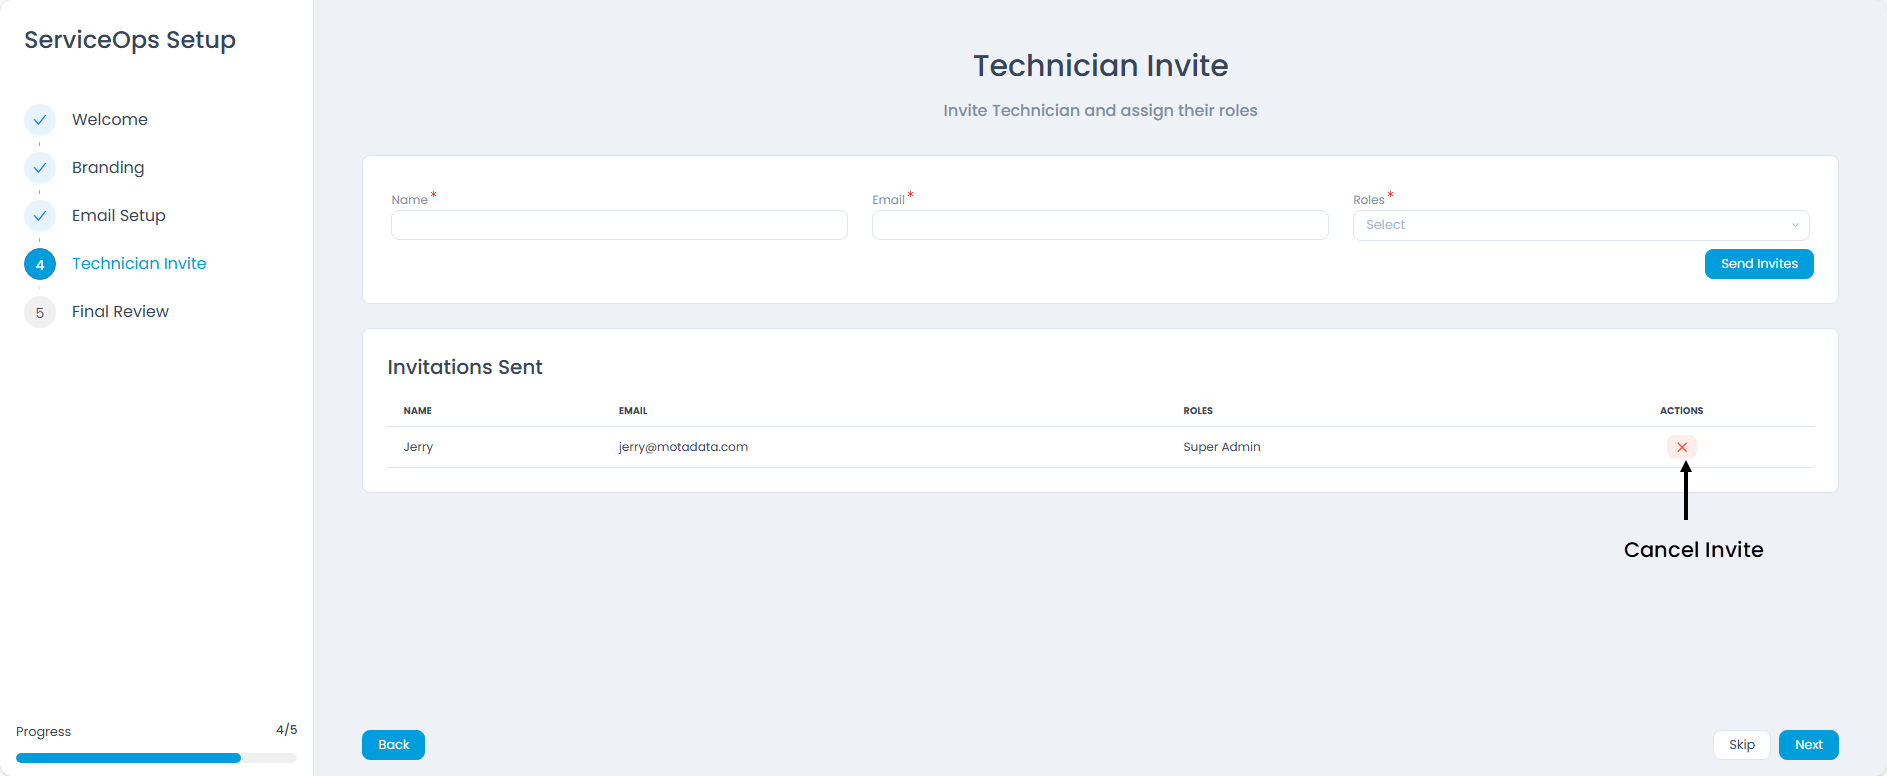
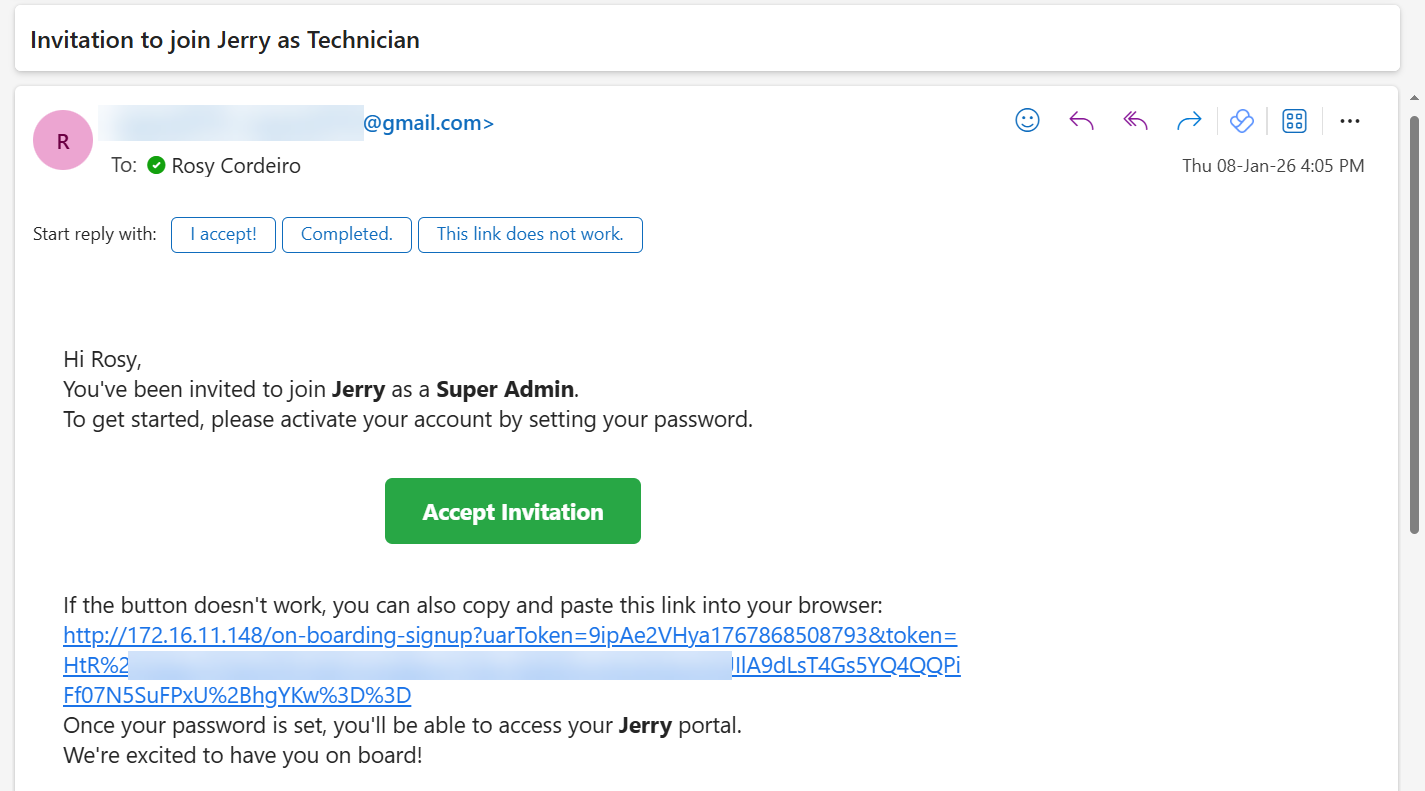
Once the outgoing email server is configured, invite the required Technicians by entering their details, selecting roles, and sending invitations. After invites are sent, the wizard shows an Invitations Sent list, allowing you to review who was invited and to remove an invitation if required.
Important Considerations for Technician Invitations:
- If an invitation is removed before the technician uses the link, the link will become invalid, preventing login.
- If a technician has already used the invitation link and logged into the support portal, the option to remove that invitation will no longer be available.
Here is the sample invitation email that is sent to the technician:
5. Final Review
The final review page provides a comprehensive summary of your ServiceOps setup. It clearly indicates which configuration steps—such as branding, outgoing email, and technician invitations—have been completed successfully and which, if any, still require attention. This allows for a quick verification of your setup progress.
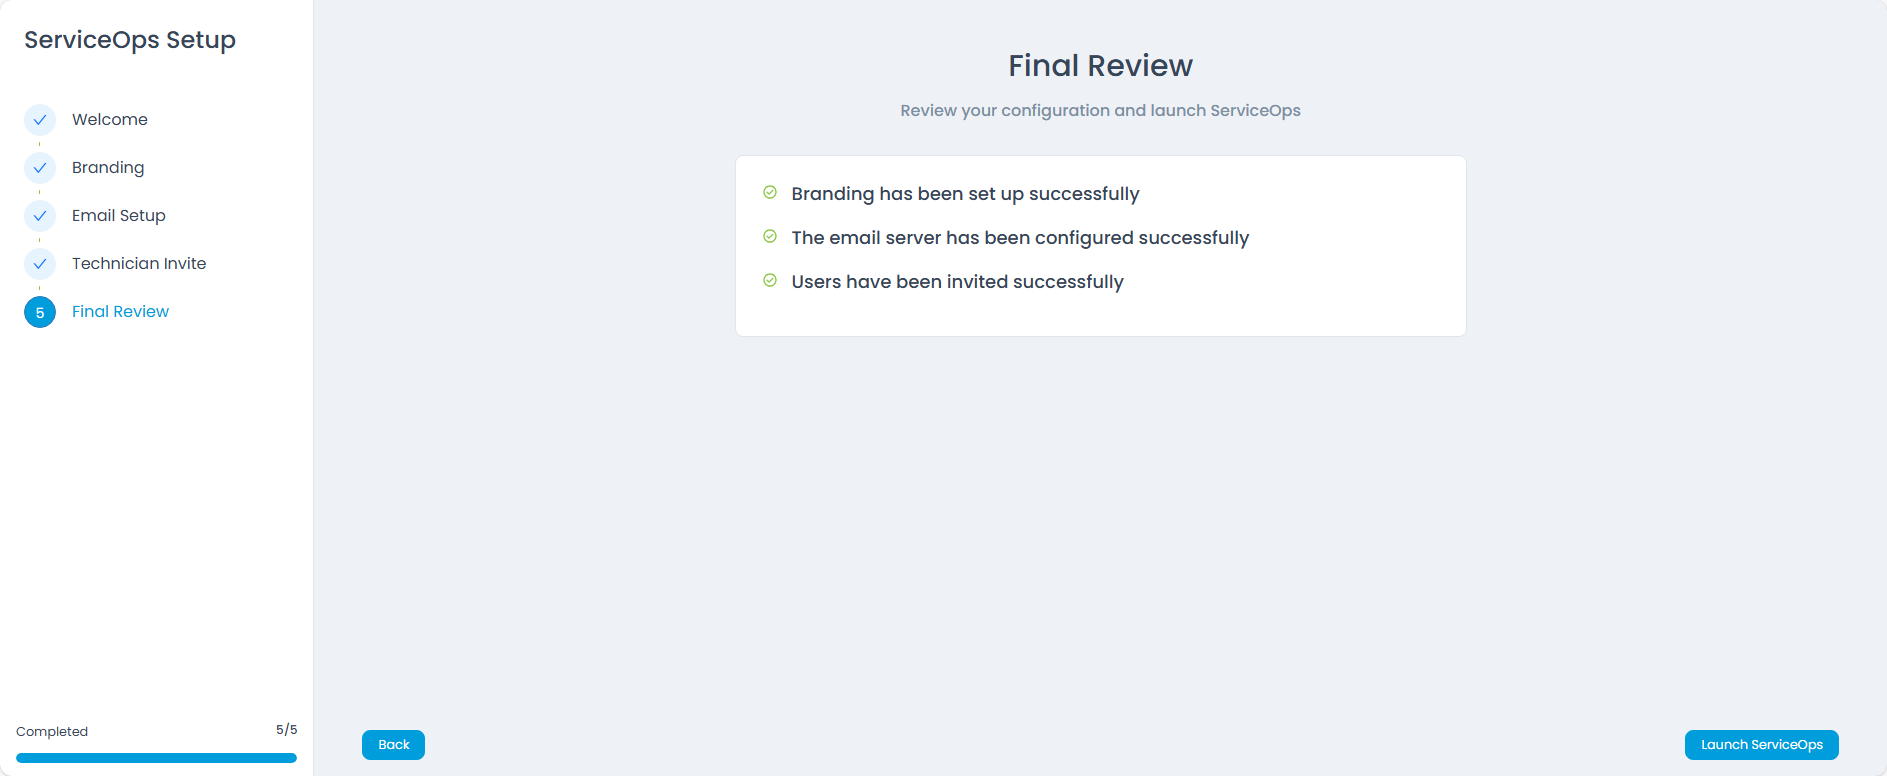
After reviewing all configurations, click Launch ServiceOps to finalize the setup. You will then be redirected to the Product Setup Guide.
Key Features of the Product Wizard:
- Auto-save progress
- Input validation at each step
- Secure technician onboarding
- Marks platform as “Ready for Use”
Product Setup Guide
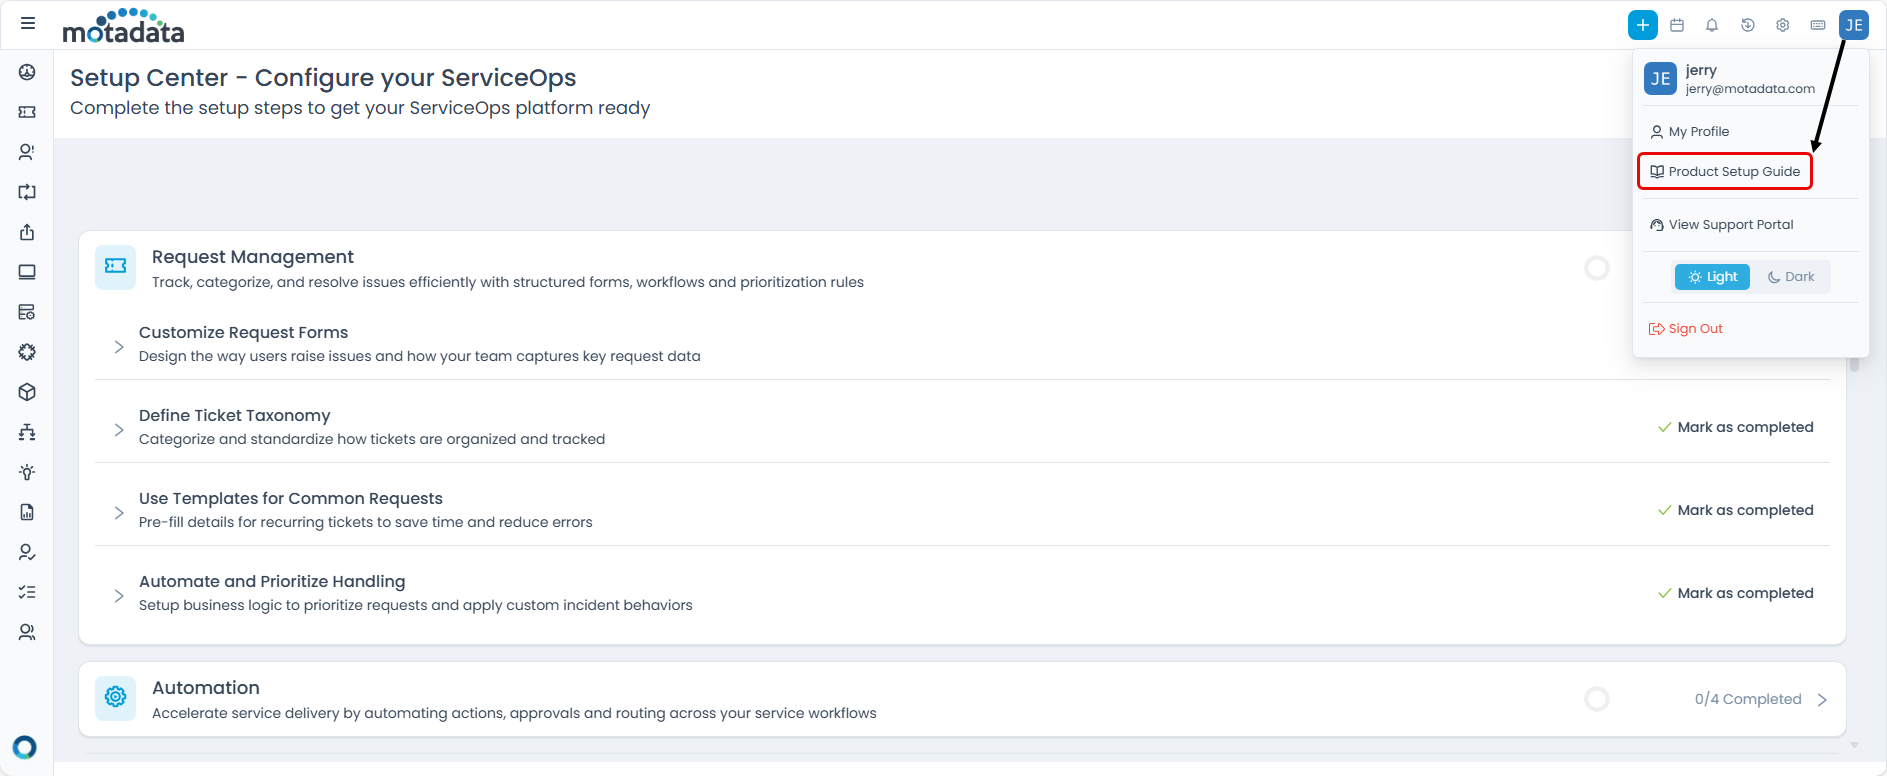
Once the Product Wizard is complete, admins continue with the Product Setup Guide. This is where detailed configuration of modules takes place to align the system with organizational policies and workflows. You can also access this guide from the Technician Portal by clicking the Username and selecting the Product Setup Guide from the dropdown.
Key Features of the Product Setup Guide:
The Product Setup Guide is designed for efficient and guided configuration, offering:
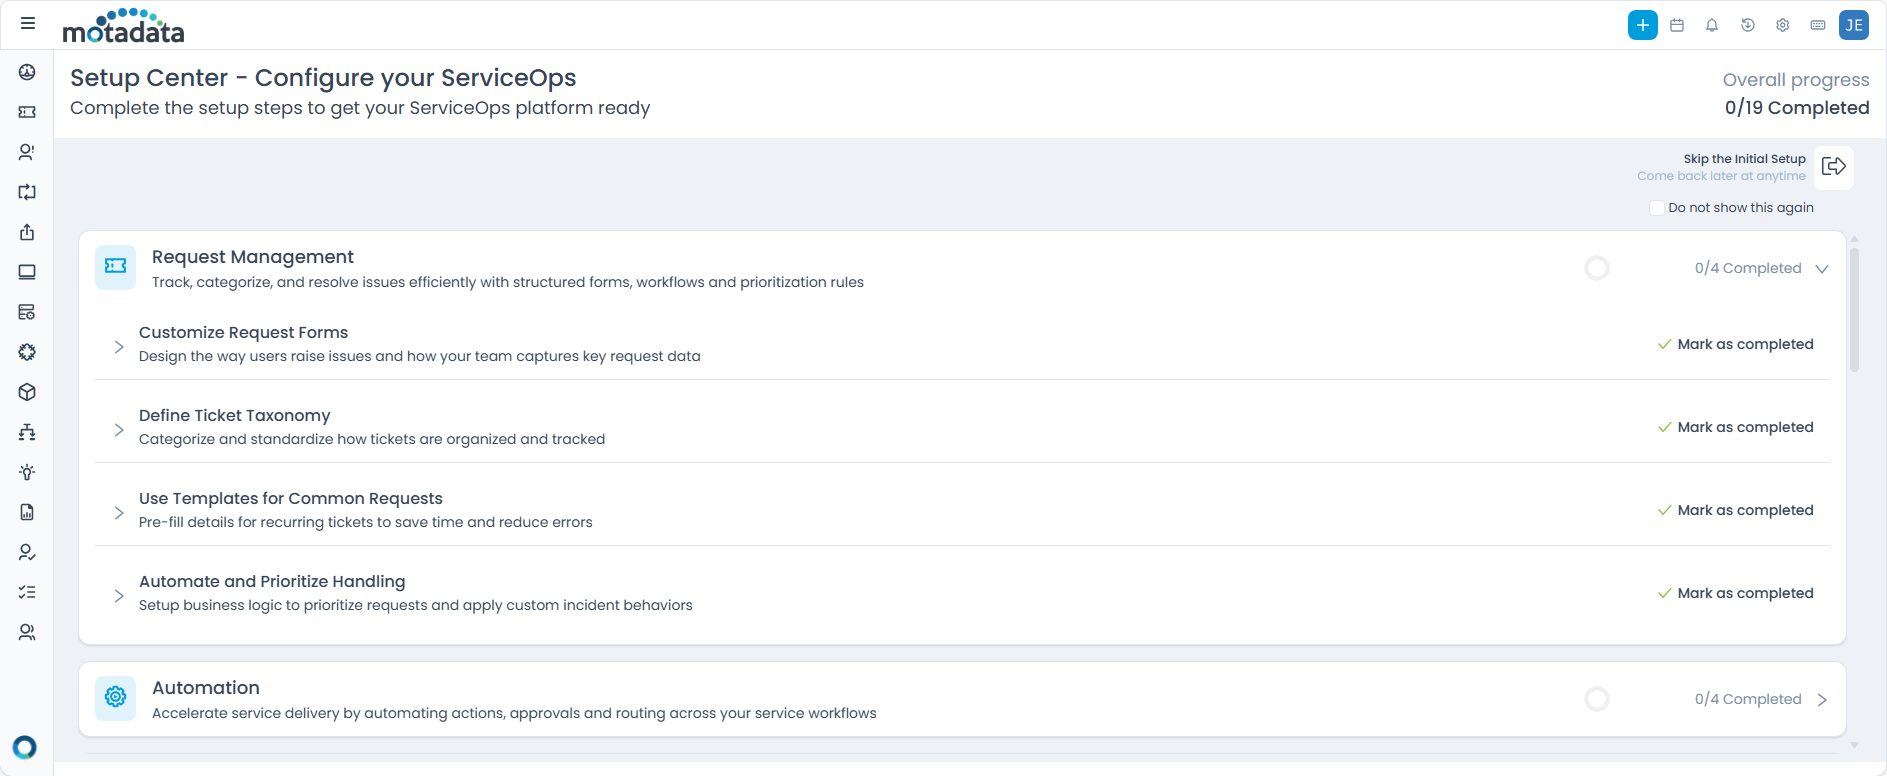
- Overall Progress Tracking: An Overall progress indicator at the top right of the screen shows your completion status across all 19 modules (e.g., 0/19 completed), giving you a clear view of your entire setup journey.
- Individual Module Progress: Each module, such as Request Management, displays its own progress bar (e.g., 0/4 Completed), detailing the number of sub-configurations completed within that specific module.
- Module-Based Grouping: Setup items are logically grouped by functional modules, ensuring that all related configurations (e.g., request forms, form rules, categories, statuses, and templates for Request Management) are accessible together for a streamlined setup experience.
- Estimated Effort and Difficulty: Each configuration item is clearly labeled with its estimated completion time (e.g., 5 minutes) and difficulty level (e.g., Basic, Intermediate, or Advanced), helping you plan and prioritize your setup tasks more effectively.
- Skip Initial Setup: The Skip the Initial Setup option, available at the top right, allows you to defer the wizard and return to complete the setup at a later time without losing any progress.
- Do not show this again: Selecting the Do not show this again checkbox will hide the Product Setup Guide on subsequent logins once the initial configuration is complete. This ensures a cleaner interface for experienced users.
1. Request Management
Request Management is organized into four setup areas to help you track, categorize, and resolve issues efficiently with structured forms, workflows, and prioritization rules.
Customize Request Forms
Design how users raise issues and how your team captures key request data:
- Create Request Form → Design how users submit requests.
- Add Request Form Rules → Apply conditional logic and validations to request fields.
Define Ticket Taxonomy
Categorize and standardize how tickets are organized and tracked:
- Setup Request Categories → Define request categories to classify and route tickets.
- Configure Request Statuses → Configure statuses to track request progress.
Use Templates for Common Requests
Pre-fill details for recurring tickets to save time and reduce errors:
- Create Request Templates → Pre-fill recurring request details to standardize submissions.
Automate and Prioritize Handling
Set up business logic to prioritize requests and apply custom incident behaviors:
- Define Incident Custom Rules → Automate incident behaviors based on conditions.
- Setup Priority Matrix → Define priority using impact and urgency.
Click Setup to start each configuration item. Use View Documentation for guided help. Once this section is done, it will be marked as completed and the progress indicator will also be updated. (for example, (1/4) Completed).
2. Automation
Automation is organized into four setup areas to accelerate service delivery by automating actions, approvals, routing, and notifications across your service workflows.
Automate Workflows & Approvals
Reduce manual intervention by setting up intelligent workflows that trigger based on user actions and business rules:
- Create Workflow Rules → Automate actions and escalations based on conditions.
- Setup Approval Workflows → Route approvals to the right stakeholders.
Smart Ticket Routing
Automatically assign requests to the right agents based on skills, workload, or availability:
- Enable Auto Assignment → Distribute tickets intelligently across technicians.
Define Service-Level Goals
Ensure timely resolution of issues with service-level targets and escalations:
- Configure SLAs → Define response and resolution targets.
Keep Teams Notified
Proactively inform users and stakeholders about key updates and system events:
- Setup Event Notifications → Keep users informed about important updates.
Click Setup to start each configuration item. Use View Documentation for guided help. After completing each area, it will be marked as completed and the progress indicator will be updated. (for example, (0/4) Completed).
3. Users
Users is organized into four setup areas to manage your user base with tailored roles, groups, and authentication methods for a secure and organized service environment.
Setup User Forms
Customize how user data is captured and managed in the platform:
- Configure User Form → Capture and manage user data fields.
Define Roles & Permissions
Control access and capabilities for different types of users in the system:
- Create Roles → Control access for technicians and requesters.
Manage Users & Groups
Organize your workforce by defining users, departments, and support teams:
- Add Technicians → Add technicians who will work on tickets and tasks.
- Add Requesters → Add end users who will raise requests.
- Setup Technician Groups → Group technicians into support teams for routing and ownership.
- Setup Requester Groups → Group requesters by department or function for better organization.
Enable Authentication & Directory Sync
Secure login access with single sign-on and directory-based provisioning:
- Configure LDAP → Configure directory-based authentication and user sync.
- Setup SSO (Single Sign-On) → Enable single sign-on with supported identity providers.
Click Setup to start each configuration item. Use View Documentation for guided help. Once this section is done, it will be marked as completed and the progress indicator will also be updated. (for example, (1/4) Completed).
4. Support Channels
Support Channels helps you connect communication channels like email and chat to centralize customer interactions and boost responsiveness.
Setup Communication Platforms
Integrate the tools your team already uses to ensure nothing slips through the cracks:
- Connect Email → Configure email to enable ticket creation and notifications.
- Enable Virtual Agent → Enable self-service and conversational support for users.
Click Setup to start each configuration item. Use View Documentation for guided help. Once this section is done, it will be marked as completed and the progress indicator will also be updated. (for example, (1/1) Completed).
5. Organization
Organization helps you customize your workspace to reflect your company's identity, structure and operational policies.
Personalize Your Workspace
Make the platform feel like home with your brand assets and display settings:
- Setup Branding → Configure portal branding and visual identity.
- Define System Preferences → Define platform-wide defaults and preferences.
Configure Operational Hours
Set standard business hours and holidays to align SLAs with your support schedule:
- Set Business Hours → Define working hours and holiday calendars.
Define Organizational Structure
Reflect your enterprise hierarchy for reporting, user segmentation and automation:
- Create Departments → Create departments to represent teams and functions.
- Add Locations → Add locations to reflect your physical/branch structure.
Setup Security Policies
Control session security and platform access configurations:
- Configure Security Settings → Configure session and access security settings.
Click Setup to start each configuration item. Use View Documentation for guided help. Once this section is done, it will be marked as completed and the progress indicator will also be updated. (for example, (1/4) Completed).
6. Service Catalog
Service Catalog helps you design and publish self-service offerings with tailored forms, SLAs, and automated fulfillment workflows.
Build Your Service Offerings
Create structured service items with approval flows, automation, and fulfillment logic:
- Configure Service Catalog → Build and publish service items for end users.
Click Setup to start each configuration item. Use View Documentation for guided help. Once this section is done, it will be marked as completed and the progress indicator will also be updated. (for example, (1/1) Completed).
7. Problem Management
Problem Management helps you identify the root cause of recurring issues and take corrective actions to prevent future incidents.
Customize Problem Forms
Capture the right details to investigate problems thoroughly and standardize reporting:
- Create Problem Form → Customize the problem form to add and manage fields.
- Configure Problem Form Rules → Apply conditional logic and validations to problem fields.
Standardize Problem Classification
Organize and track problems consistently across the lifecycle:
- Setup Problem Categories → Manage problem categories for consistent classification.
- Define Problem Statuses → Manage problem status values to track lifecycle progress.
Use Templates & Models
Create reusable structures for common or known problems:
- Create Problem Templates → Create predefined templates for recurring problems.
- Setup Problem Models → Configure transition models to automate status movement.
Custom Problem Handling
Apply custom rules based on predefined conditions:
- Configure Problem Custom Rules → Configure compliance rules for problem processing.
Click Setup to start each configuration item. Use View Documentation for guided help. Once this section is done, it will be marked as completed and the progress indicator will also be updated. (for example, (0/4) Completed).
8. Change Management
Change Management helps you control risk and ensure compliance through structured planning, approvals, and implementation of changes.
Customize Change Forms
Standardize how change requests are raised, captured, and evaluated:
- Create Change Form → Define the fields used to capture change requests.
- Setup Change Form Rules → Apply rules and validations to change form fields.
Classify & Track Changes
Define categories, types, and statuses to manage various change requests:
- Define Change Categories → Set up categories for consistent classification.
- Create Change Types → Define change types for better tracking.
- Configure Change Statuses → Configure status values to track lifecycle progress.
Use Templates & Models
Speed up recurring changes with predefined templates and reusable models:
- Create Change Templates → Create predefined templates for common changes.
- Setup Change Models → Configure change transition models.
Custom Change Handling
Apply custom rules based on predefined conditions:
- Configure Change Custom Rules → Configure compliance rules for change processing.
Click Setup to start each configuration item. Use View Documentation for guided help. Once this section is done, it will be marked as completed and the progress indicator will also be updated. (for example, (0/4) Completed).
9. Release Management
Release Management helps you deploy releases with governance and visibility to minimize service disruptions.
Customize Release Forms
Standardize how release data is captured for better planning and tracking:
- Create Release Form → Define the fields used to capture release information.
Classify & Track Releases
Define categories, types, and statuses to streamline release workflows:
- Configure Release Statuses → Configure status values to track lifecycle progress.
- Setup Release Categories → Set up categories for consistent classification.
- Define Release Types → Define release types for better tracking.
Use Templates & Models
Accelerate common release operations with reusable templates and models:
- Create Release Templates → Create predefined templates for common releases.
- Setup Release Models → Configure release transition models.
Custom Release Handling
Apply custom rules based on predefined conditions:
- Configure Release Custom Rules → Configure compliance rules for release processing.
Click Setup to start each configuration item. Use View Documentation for guided help. Once this section is done, it will be marked as completed and the progress indicator will also be updated. (for example, (0/4) Completed).
10. Asset Management
Asset Management helps you discover, manage, and track all hardware and software assets across their lifecycle.
Define Asset Structure
Standardize asset types, categories, and statuses to organize your asset inventory:
- Setup Asset Types → Define asset types for consistent inventory structure.
- Configure Asset Status → Configure status values to track asset state.
- Define Asset Categories → Define categories to classify assets.
Organize & Group Assets
Group assets for reporting, automation, and easier management:
- Create Asset Groups → Create groups to organize assets for reporting and automation.
- Enable Geolocation Tracking → Enable geolocation tracking for applicable assets.
Configure Asset Rules
Apply conditional logic to automate asset handling and validation:
- Setup Asset Custom Rules → Configure custom rules for asset processing.
- Configure Asset Form Rules → Apply rules and validations to asset form fields.
Manage Software Inventory
Track and organize software assets and license details:
- Setup Software Categories → Define software categories for classification.
- Define Software Types → Define software types for better tracking.
- Apply Software Rules → Apply rules to automate software inventory handling.
- Configure License Custom Fields → Configure custom fields for license details.
Track Asset Lifecycle
Monitor asset movement and activity throughout its lifecycle:
- Setup Asset Movement → Configure asset movement tracking across locations/ownership.
Click Setup to start each configuration item. Use View Documentation for guided help. Once this section is done, it will be marked as completed and the progress indicator will also be updated. (for example, (0/5) Completed).
11. Supplier Management
Supplier Management helps you manage vendor relationships, product catalogs, and warranty information in one place.
Manage Product Catalog
Define types and fields for hardware/software products and standardize the product database:
- Configure Manufacturer Catalog → Manage manufacturer information used in the product catalog.
- Define Product Types → Define product types for consistent classification.
- Setup Product Catalog → Configure the product catalog for hardware/software products.
- Configure Product Custom Fields → Add custom fields to capture additional product details.
Manage Vendor Information
Organize vendor details and contracts for better supplier management:
- Setup Vendor Catalog → Configure vendor information and details.
- Configure Vendor Custom Fields → Add custom fields to capture additional vendor details.
Enable Warranty Sync
Auto-sync warranty details with vendor-provided information or contract terms:
- Setup Warranty Sync → Configure warranty sync to auto-populate warranty information.
- EOSL Sync Settings → Configure EOSL sync settings.
Click Setup to start each configuration item. Use View Documentation for guided help. Once this section is done, it will be marked as completed and the progress indicator will also be updated. (for example, (0/3) Completed).
12. CMDB
CMDB helps you map your IT landscape with linked configuration items to understand impact and dependencies.
Define CI Structure
Create types, statuses, and groups to categorize configuration items effectively:
- Setup CI Types → Define configuration item types.
- Configure CI Status → Configure status values for CIs.
- Create CI Groups → Create groups to organize configuration items.
Custom CI Management
Apply custom rules based on predefined conditions:
- Configure CI Custom Rules → Configure custom rules for CI handling.
Click Setup to start each configuration item. Use View Documentation for guided help. Once this section is done, it will be marked as completed and the progress indicator will also be updated. (for example, (0/2) Completed).
13. Discovery & Agents
Discovery and Agents helps you automatically detect assets and devices using network scans and endpoint agents.
Setup Discovery Mechanism
Configure methods to identify devices using IP ranges, agents, and credentials:
- Configure Discovery → Configure discovery settings to identify devices.
- Install & Register Agent → Install and register agents on endpoints for discovery.
- Setup Credentials → Configure credentials used for discovery.
- Define IP Range Location → Define IP ranges and map them to locations.
Advanced Discovery Configurations
Set rules and relationship mapping logic to enhance discovery outcomes:
- Configure Discovery Pattern → Configure discovery patterns to enhance scanning.
- Setup Relationship Types → Define relationship types for CI relationship mapping.
Click Setup to start each configuration item. Use View Documentation for guided help. Once this section is done, it will be marked as completed and the progress indicator will also be updated. (for example, (0/2) Completed).
14. Contract Management
Contract Management helps you digitally track lease and service contracts tied to assets and suppliers.
Customize Contract Fields
Setup contract types and custom fields to capture all relevant agreement data:
- Configure Contract Custom Fields → Configure the custom fields used to capture contract details.
- Define Contract Types → Define contract types to categorize agreements.
Click Setup to start each configuration item. Use View Documentation for guided help. Once this section is done, it will be marked as completed and the progress indicator will also be updated. (for example, (0/1) Completed).
15. Knowledge Management
Knowledge Management helps you document resolutions and SOPs to deflect tickets and promote self-service with searchable articles.
Custom Knowledge Rules
Apply custom rules based on predefined conditions:
- Configure Knowledge Custom Rules → Configure custom rules to control knowledge behavior.
Click Setup to start each configuration item. Use View Documentation for guided help. Once this section is done, it will be marked as completed and the progress indicator will also be updated. (for example, (0/1) Completed).
16. Purchase Management
Purchase Management helps you manage procurement vendor quotations and purchase orders in one place.
Customize Purchase Fields
Setup custom fields and rules to align purchase orders with organizational policies:
- Configure Purchase Custom Fields → Configure the custom fields used to capture purchase details.
- Setup Address Fields → Configure address fields used in purchase documents.
- Define Purchase Price Fields → Define the fields used to capture pricing details.
- Configure GL Code → Configure GL codes for financial tracking.
- Setup Cost Center → Configure cost centers for purchase allocation and reporting.
Custom Purchase Logic
Apply custom rules based on predefined conditions:
- Configure Purchase Custom Rules → Configure rules to automate and validate purchase workflows.
Customize Output Templates
Design printable templates for purchase documents like quotes and orders:
- Setup Print Template → Configure print templates for purchase outputs.
Click Setup to start each configuration item. Use View Documentation for guided help. Once this section is done, it will be marked as completed and the progress indicator will also be updated. (for example, (0/3) Completed).
17. Patch Management
Patch Management helps you automate the detection and deployment of OS and third-party patches across endpoints.
Configure Patch Scope
Define target endpoints and remote locations to control patch coverage:
- Setup Deployment Management → Define the endpoints that receive patch deployments.
Set Patch Policies
Establish baseline configurations and deployment preferences:
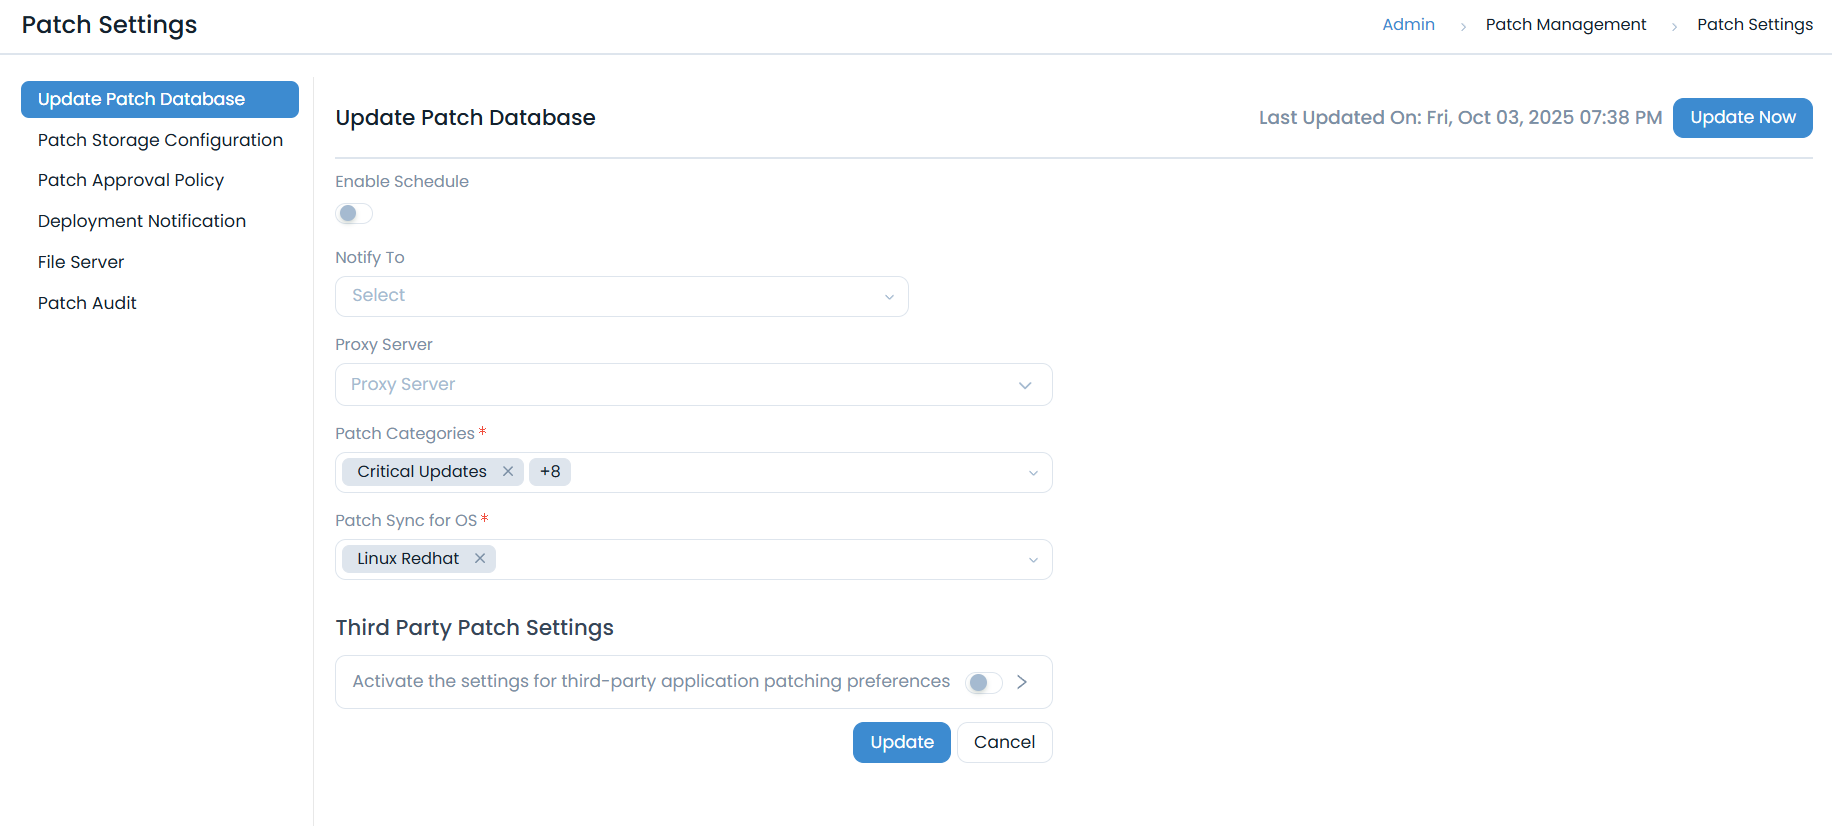
- Configure Patch Administration → Configure patch repositories, application updates, and deployment controls.
Define System Health Parameters
Track endpoint readiness using health indicators before patch deployment:
- Configure System Health Settings → Configure health parameters to validate endpoint readiness.
Manage Patch Packages
Add and configure patch packages to be deployed across endpoints:
- Configure Packages → Add and configure patch packages for deployment.
Click Setup to start each configuration item. Use View Documentation for guided help. Once this section is done, it will be marked as completed and the progress indicator will also be updated. (for example, (0/4) Completed).
18. Project Management
Project Management helps you plan, track, and execute IT and business projects with milestones and task dependencies.
Setup Project Structure
Create project forms, roles, and rules to streamline project planning and execution:
- Configure Project Form → Configure the project form used to capture project details.
- Configure Project Roles → Configure project roles to define responsibilities and access.
Custom Project Logic
Apply custom rules based on predefined conditions:
- Configure Project Custom Rules → Configure rules to automate and validate project workflows.
Click Setup to start each configuration item. Use View Documentation for guided help. Once this section is done, it will be marked as completed and the progress indicator will also be updated. (for example, (0/2) Completed).
19. Task Management
Task Management is organized into two configuration areas that help you define how tasks are captured and how task actions are validated/automated.
Setup Task Structure
Define the building blocks for consistent task tracking:
- Configure Task Form → Create and customize the task form fields used by your teams.
- Define Task Status → Define the statuses used to track a task through its lifecycle.
- Setup Task Types → Create task types to categorize tasks based on your operational needs.
Apply Task Logic
Use rules to automate or validate task actions:
- Configure Task Form Rule → Apply conditional logic and validations to the task form.
Click Setup to start each configuration item. After completing a section, it will be marked as completed and the progress indicator will be updated.
Best Practices for Setup
- Follow the Sequence → Start with the Product Wizard, then move into the Product Setup Guide.
- Prioritize Essentials → Configure email, users, and automation first.
- Use Templates → Save time with built-in request, problem, and change templates.
- Start Small, Expand Later → Configure core modules before advanced ones.
Outcome of Completing Setup
By the end of this process:
- The portal is branded and ready for use.
- Email communication is configured for tickets and notifications.
- Technicians and requesters are onboarded securely.
- All ITSM modules are set up to match organizational needs.
- ServiceOps is fully operational and aligned with IT service delivery goals.