Quick Start for Requesters
Get help, find answers, and get back to work—fast.
Welcome to the Support Portal! This guide will help you get started with the essential features to get help, request services, and find answers to your questions.
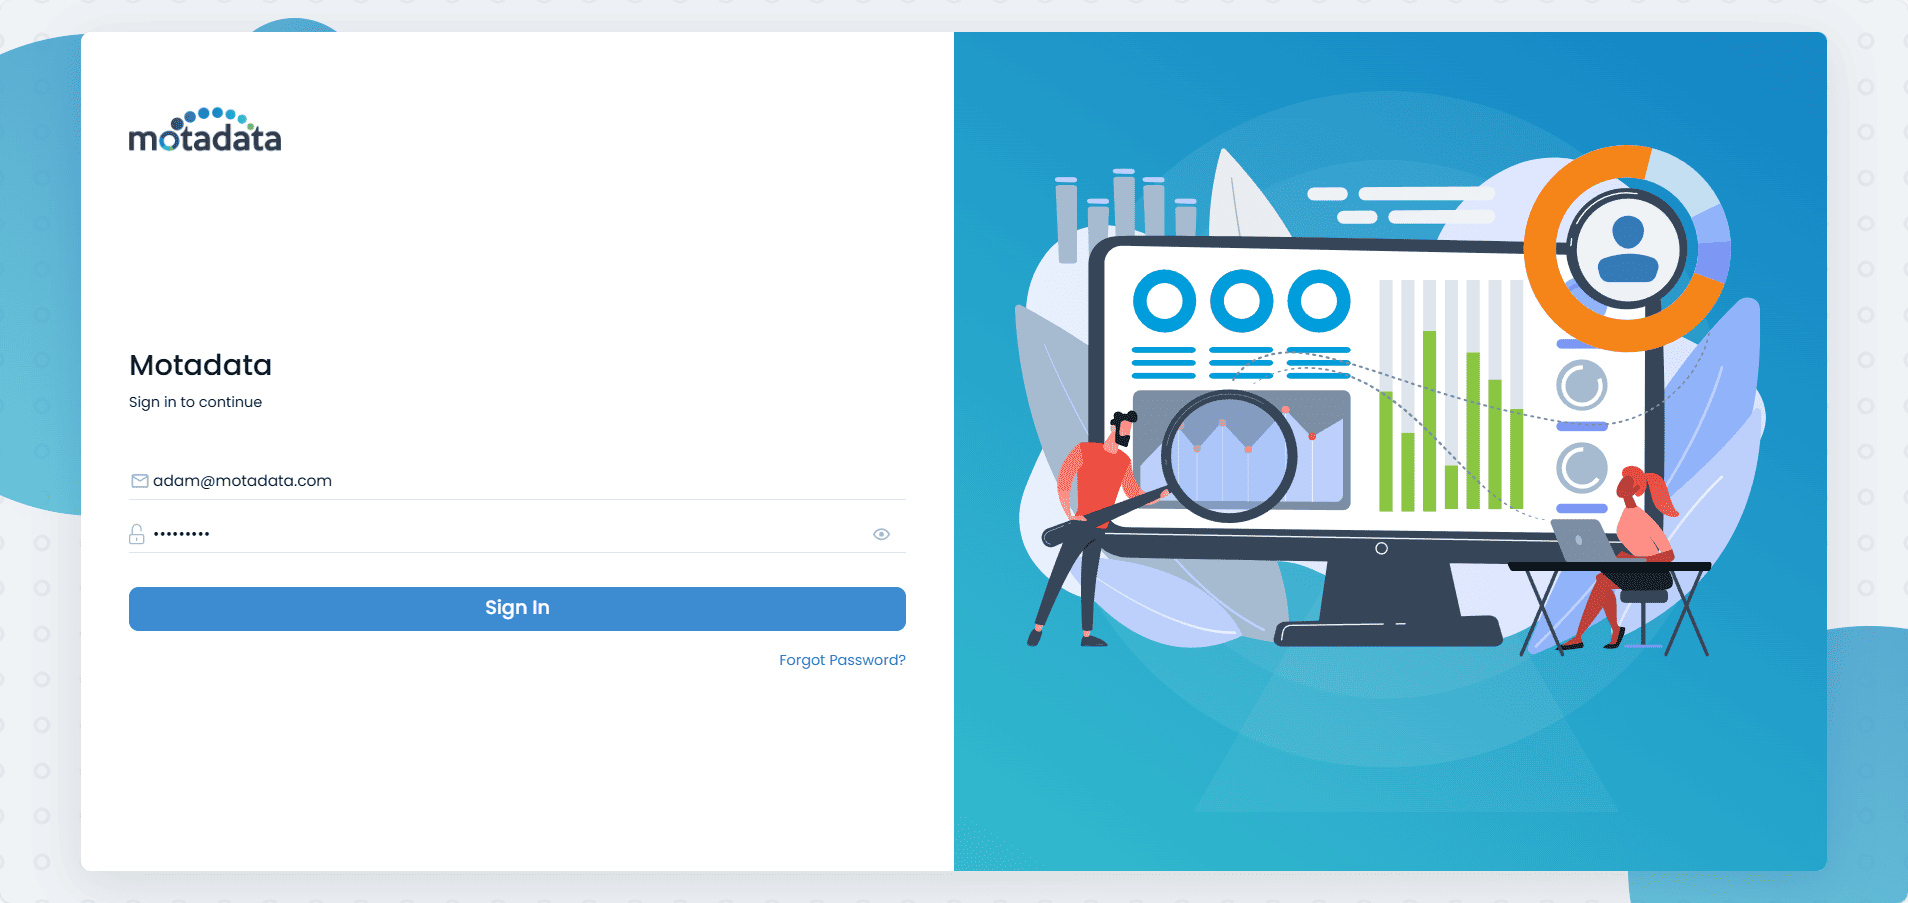
Logging In
You can access the Support Portal using the URL provided by your administrator. The single login page allows you to sign in using your email, company SSO, or Google credentials.
If this is your first time, your administrator will create an account for you and you'll receive a verification email to set up your password.
If your organization requires it, you may be asked to provide consent to access your personal data upon your first login.
Exploring the Home Page
Once you log in, you'll see the main dashboard. This is your central hub for all activities.
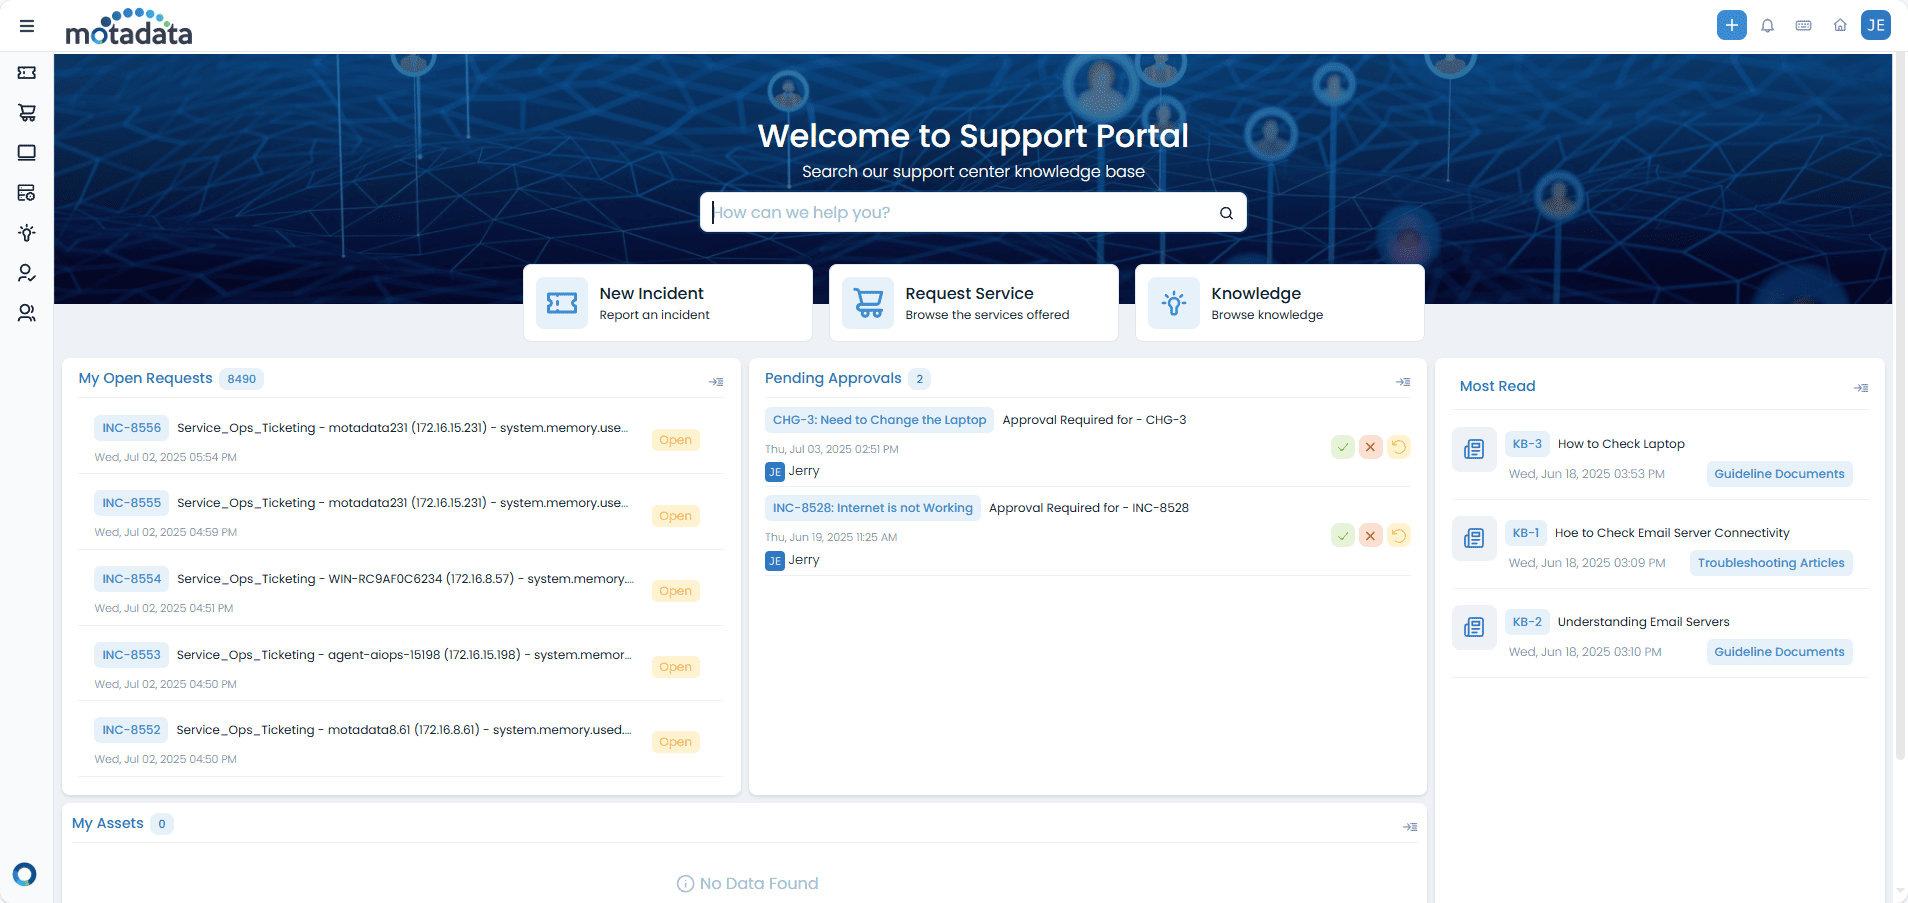
From here, you can:
- Create New Requests: Quickly create a new incident or service request.
- View Announcements: Stay updated with important news from your organization. You can click on an announcement or a dedicated icon to view all active announcements.
- Check Open Requests: See the status of your current tickets at a glance.
- Access Knowledge Articles: Find solutions in the knowledge base.
- Manage Approvals: Review any pending approvals assigned to you.
- Chat with Support: Get live help from a support agent.
Announcements
System administrators post important updates and information as announcements. These are visible directly on your home page. Click on any announcement to see its full details, or use the dedicated icon to view a list of all active announcements.
My Tasks
The My Tasks menu provides a centralized place to view and manage your assigned project tasks. This helps you track progress, monitor deadlines, and collaborate effectively without needing to access the full Project Management module.
Chat with Support
For immediate assistance, you can use the chat support feature. A chat window allows you to communicate directly with available technicians. You can also share images and documents to help resolve your issues faster. This feature is particularly useful for quick queries and offers immediate resolution.
Creating a Request
Need help or a new service? Creating a request is straightforward.
- Click the Create New + button in the top header bar.
- Select Create Incident to report an issue or Request Service for a new service from the catalog.
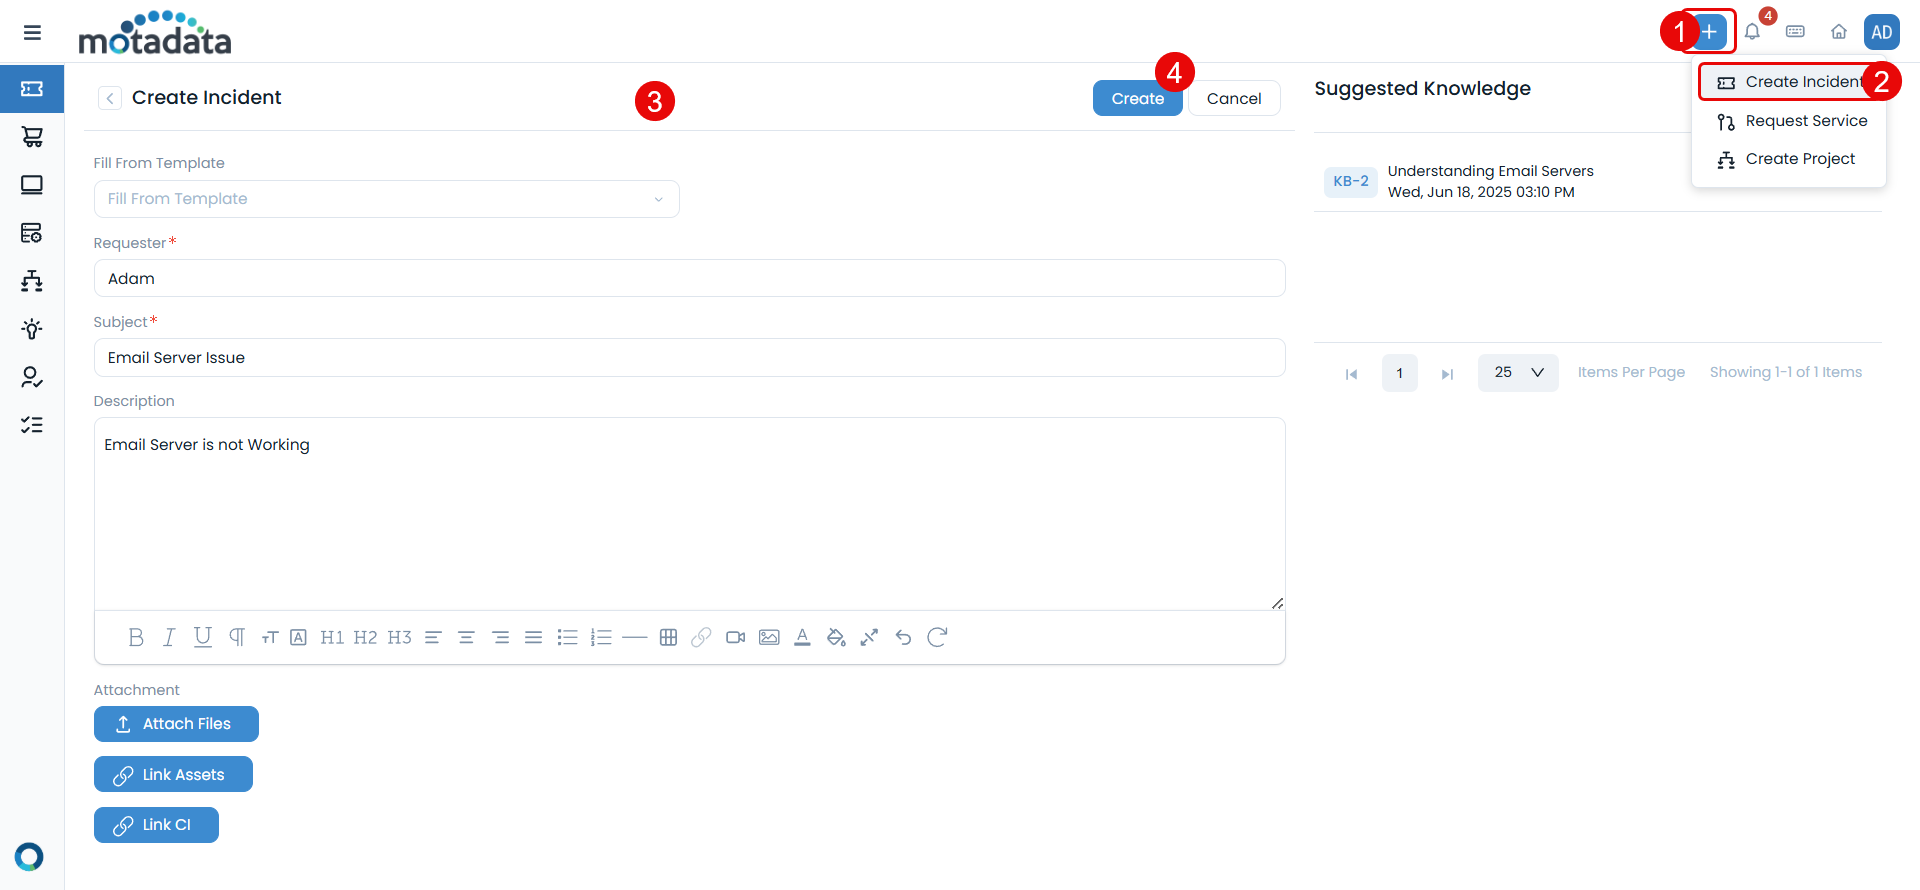
Reporting an Incident
When you select Create Incident, you'll see a form to describe your issue.
- Use a Template: If available, you can use a pre-filled template for common issues.
- Subject: Provide a clear, concise summary of the issue. As you type, the system may suggest relevant knowledge base articles to help you solve the problem immediately.
- Description: Give a detailed account of the incident.
- Attachments: You can attach screenshots or other relevant files.
Once you fill in the details, click Create.
Requesting a Service
When you select Request Service, you can browse the service catalog.
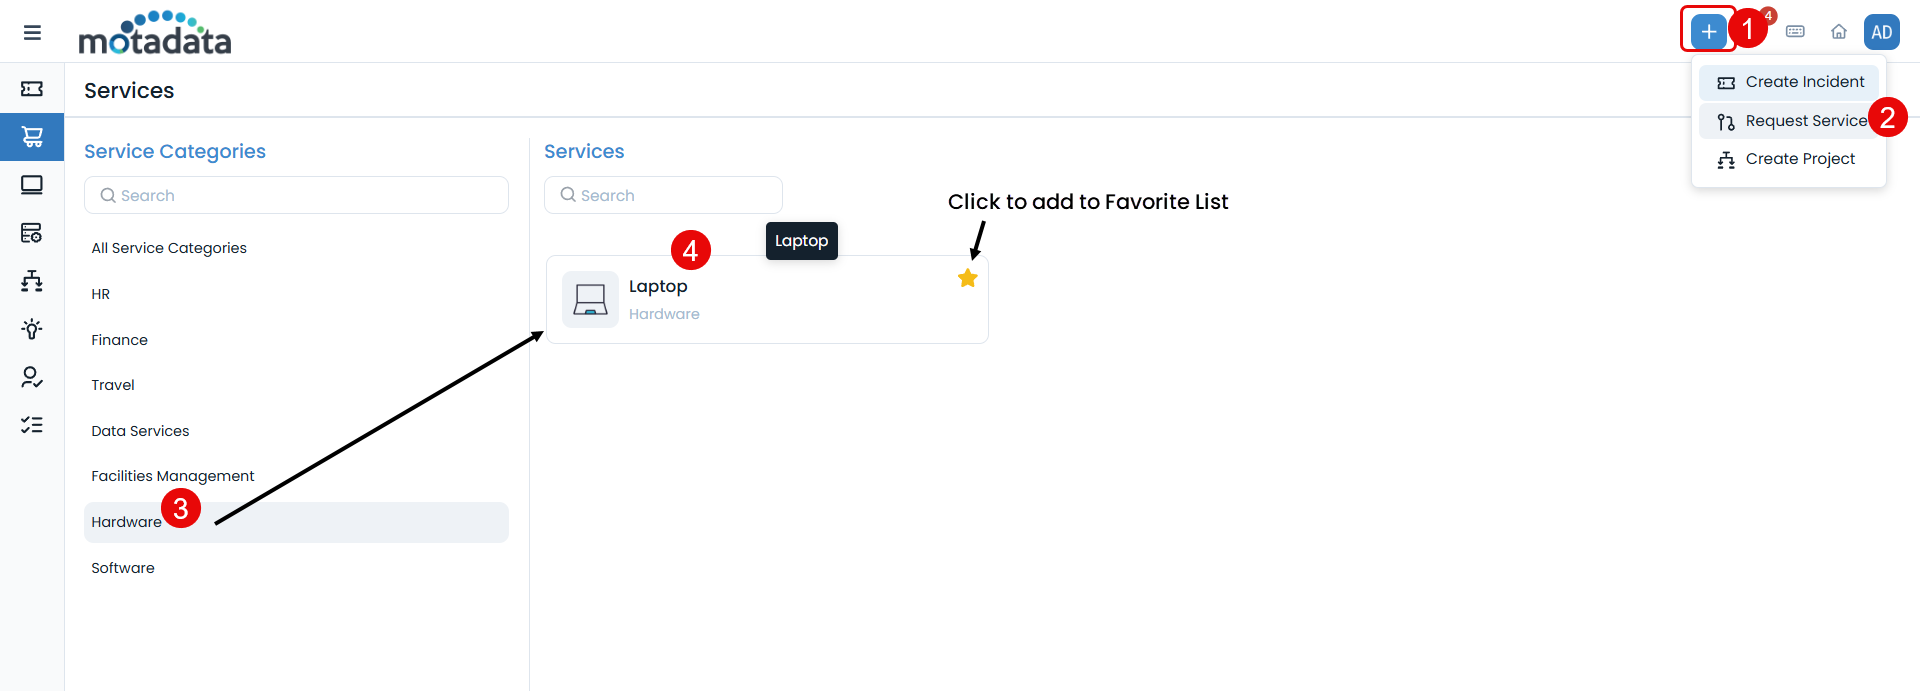
- Choose a Service Category and then the specific Service you need.
- Fill out any additional information required for that service.
- Click Submit Request.
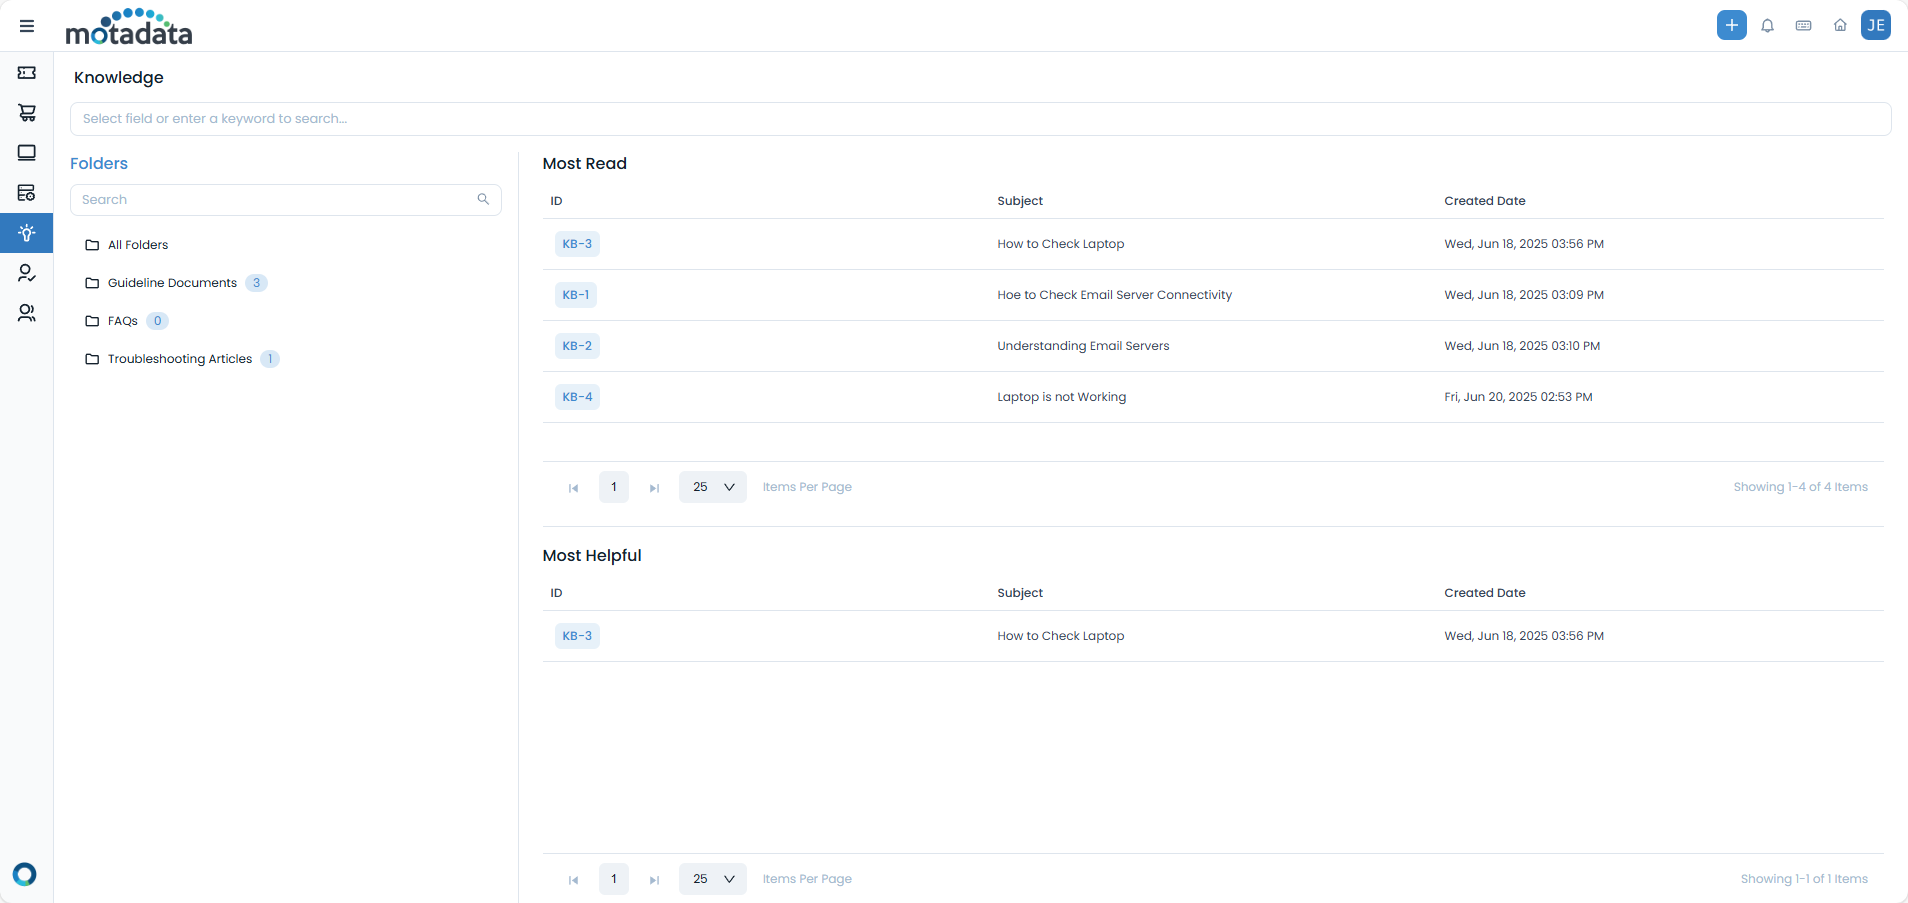
Finding Answers in the Knowledge Base
You can often find solutions to common problems without needing to create a ticket. The Knowledge section contains helpful articles, guides, and FAQs. You can browse through folders or use the search bar to find what you're looking for.
Tracking Your Requests
You can easily check the status of all your submitted requests. On the home page, the "My Open Requests" section gives you a quick view. For a complete list, navigate to the My Requests page from the main menu to see details, add comments, and track progress.
Managing Your Profile
You can manage your user profile and update your personal and contact details through the 'My Profile' option, typically found in the top-right corner of the application.
Profile Details
In your profile, you can update information such as your name, contact number, time zone, language preferences, and date/time formats. You can also set a signature that will be used when sending emails from the system.
Preferences
This section allows you to customize your experience, including setting your theme (light or dark) and managing your attachment password. The attachment password, if set, will be used for all reports, attachments, and attachment links in formats like PDF, Excel, and Word, when no specific password is provided.
Change Password
You can change your portal password directly from your profile. Simply enter your current password, then your new password, and confirm it. The system will then update your password securely.
Delegate Approval
If you are an approver, you can delegate your approval responsibilities to another user in case of your unavailability. You can enable this feature, select the delegate, specify the start and end dates for the delegation, and add any relevant comments. The delegated user will then be able to approve or reject requests on your behalf, and both you and the delegate will receive notifications.
Related Topics
- End User Guide (for comprehensive details on all end-user features)
- Mobile Guide for End Users (for using the Support Portal on mobile devices)
- Manage Approvals (for more details on approval workflows)
- My Assets (to view and manage your assigned assets)
- Active Directory Self-Service (if your organization uses AD Self-Service for password resets or account unlocks)