Software Rules
In service-based industries, predefined rules for management software are configured during installation. In Asset Management, assets are broadly divided into three categories: hardware, software, and non-IT.
Software as an asset plays a key role because managing software assets can be a tedious job. These predefined rules help you identify and address violations when they occur.
To view the Software Rules page, navigate to Admin > Asset Management > Software Rules.
Below is a list of predefined software rules:
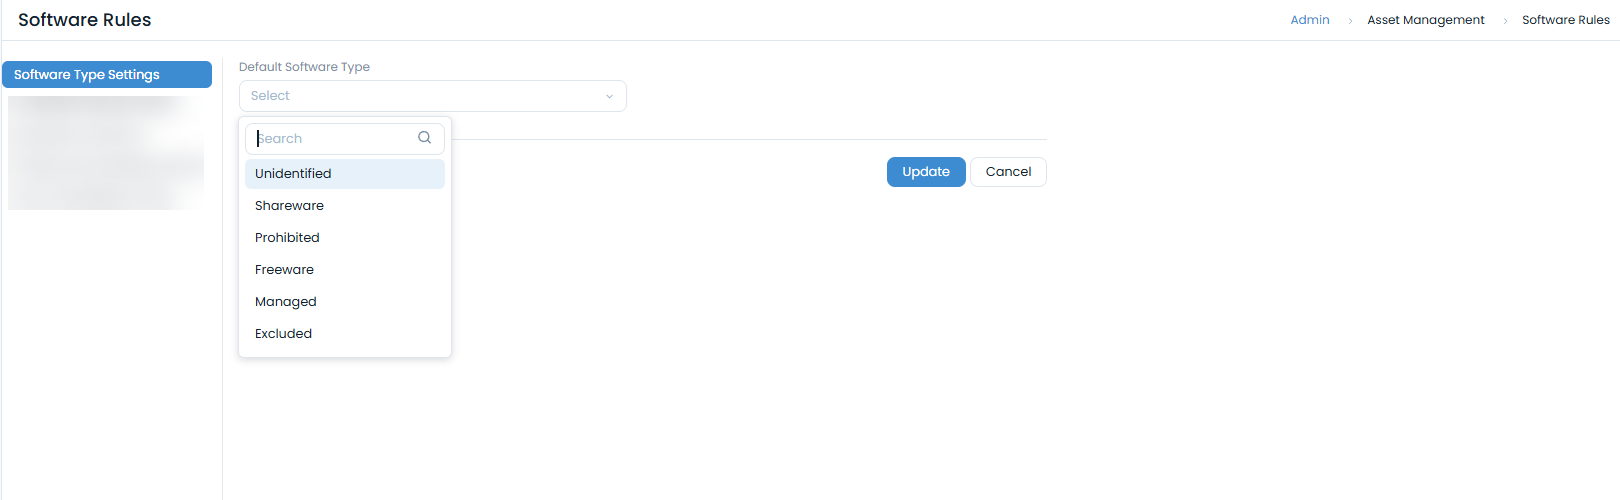
Software Type Settings
This allows you to set the Default Software Type to any of the predefined types. When an asset is added or discovered, the software type defaults to the selection made here
Prohibited Software Rules
This tab allows you to create rules to prohibit (blacklist) certain software in the organization's assets, enabling precise management of software usage. Additionally, it helps in safeguarding against security threats, ensuring compliance, and streamlining the IT environment. For example, torrent clients are prohibited at most workplaces.
Motadata provides a default prohibited type called Prohibited to flag certain software assets. The process of flagging can be done both manually and through automation by adding a rule.
Flagging software as prohibited has the following behavior:
When prohibited software is discovered, a notification is sent to the user listed in Used by for the installed asset and to admins. Prohibited software is displayed in the All Prohibited Software filter. You can manually mark any asset as prohibited by changing the Software type. To view all prohibited software, use the filter shown below:

Flagging software as prohibited is done by adding a software rule with a condition.
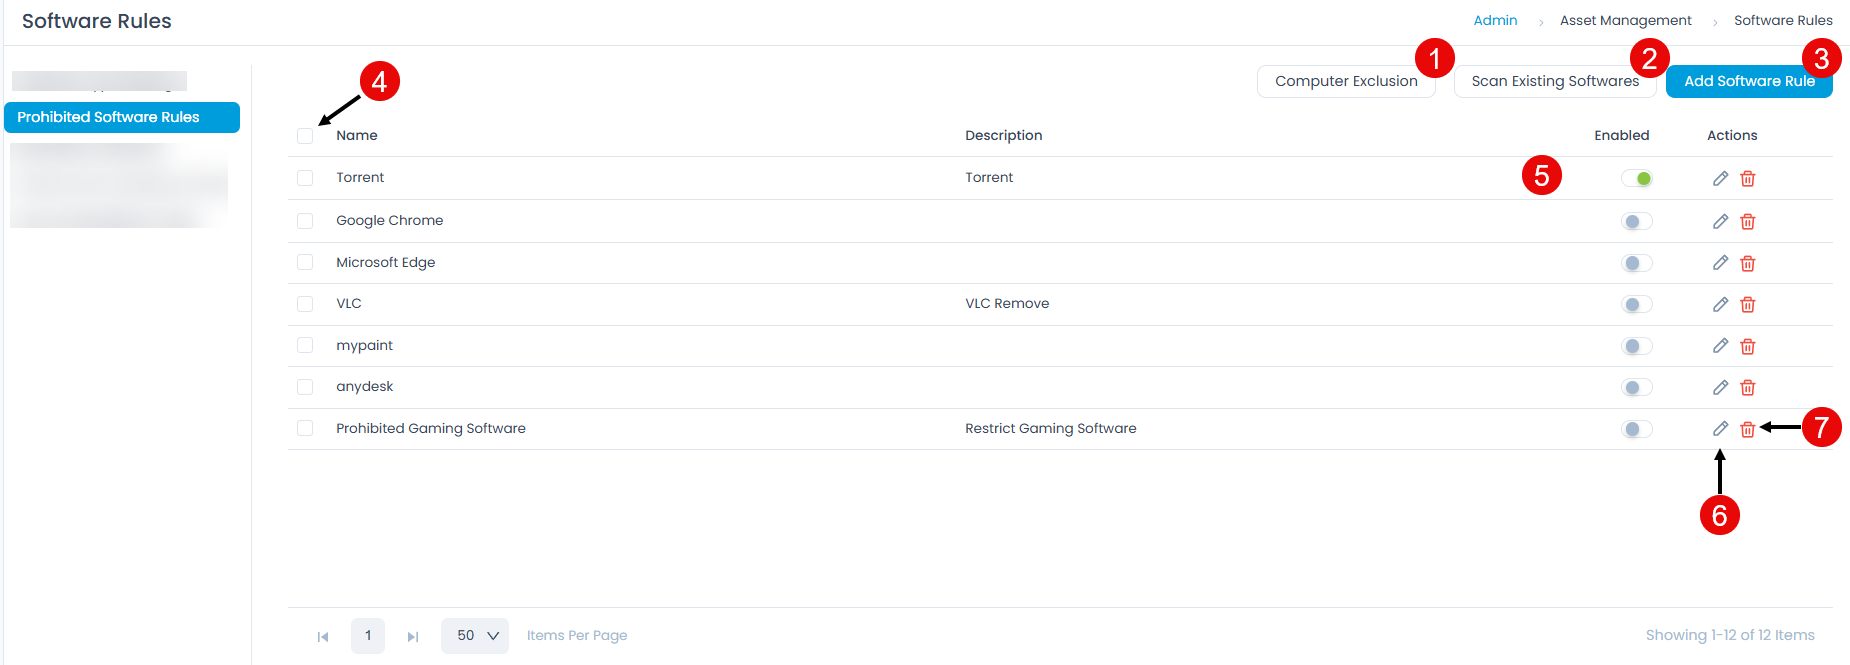
Here, you can perform the following actions:
- Computer Exclusion: Add assets that you want to ignore for prohibited software.
- Scan Existing Softwares: Scan all existing software and,if applicable, mark it as prohibited and send it to the Auto Uninstallation Policy.
- Add Software Rule: Add rules to prohibit or allow software.
- Bulk Actions: Select multiple rules and enable, disable, or delete them in one operation.
- Enabled: Enable or disable the prohibited/allowed software rule.
- Edit: Edit the rule.
- Delete: Delete the rule if it is no longer required. A confirmation message will appear. Click Yes to continue or Cancel to stop the process.
- Grid: View a list of rules along with their description.
Computer Exclusion
The Computer Exclusion feature allows you to exempt specific hardware assets from being flagged under the Prohibited Software rule. In scenarios where certain systems require otherwise restricted software for valid operational or administrative reasons, this feature provides flexibility and control. By configuring Computer Exclusion, you can:
- Allow specific computers to run the prohibited software without triggering alerts or violations.
- Maintain compliance across the organization.
- Prevent false alarms.
To exclude computers, follow these steps:
- Click on Computer Exclusion. A pop-up appears showing the list of excluded computers.
- To add more computers to the list, click the Add to Exclusion List button. A list of hardware assets will then appear.
- Select the assets to exclude.
- Click Add.
- Lastly, click Done. The prohibited software rules will now ignore these computers and allow them to run the software.


Add a Software Rule
To create a software rule, follow these steps:
- Click the Add Software Rule button. A popup window will then appear.
- Enter the Name and Description of the rule.
- Add Conditions based on which the software will be marked as prohibited. You can add multiple conditions using the Add Condition Group button. To delete conditions, click Remove All Condition.
- In the Actions section, select an Action Type to define how detected software is removed:
- Silent Uninstall Command: Enter a command to silently uninstall the software on the endpoint. If the command is not provided or fails, ServiceOps falls back to the system-fetched uninstall command from the endpoint's registry.
- Script: Upload a script file to handle the software removal.
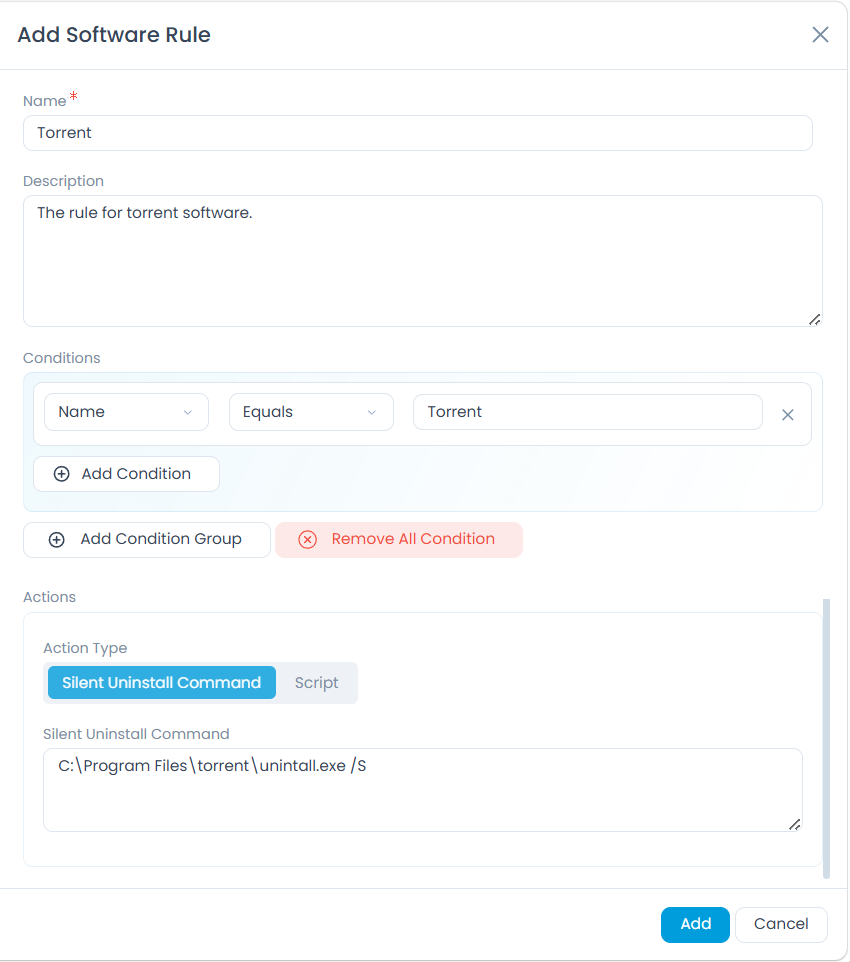
- Once completed, click Add. The rule will be enabled by default. When the configured conditions match a software item, the rule triggers and removes it using the configured action.
Mandatory Software
This provides an option to select a mandatory list of software that must be installed on all computers. After each scan, the list of software is checked against the mandatory list. If any mandatory software is missing, an email alert similar to the alert for prohibited software is sent.
The page displays a list of mandatory software along with their details, as shown below.
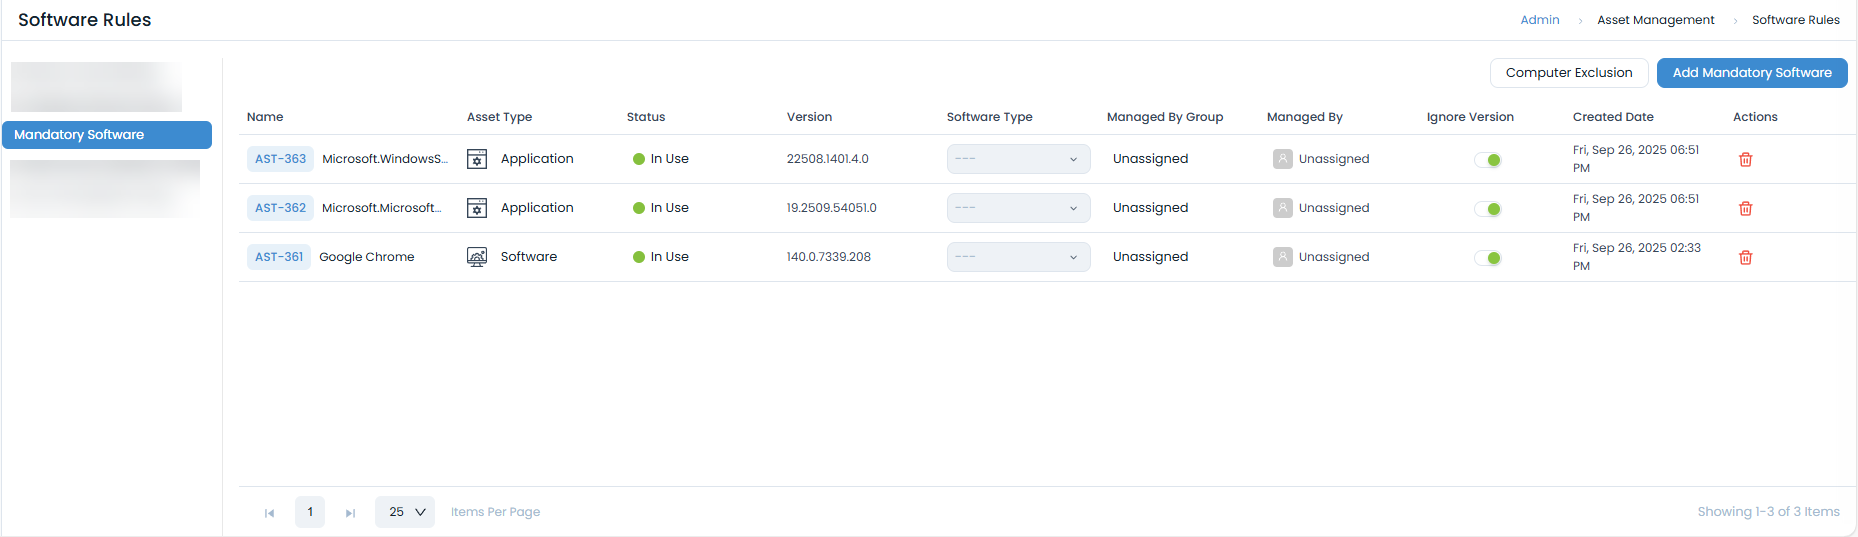
Here, you have the following options:
- Computer Exclusion: You can add assets that you want to ignore for prohibited software. For more details, refer to the section Prohibited Software Rules.
- Add Mandatory Software: Add software that must be installed on the computers.
- Enable/Disable: Enable or disable the rule.
- Delete: Delete the rule if it is no longer required.
Add Mandatory Software
To add software to the mandatory list, follow these steps:
- Click the Add Mandatory Software button. A popup window will then appear.
- Select the desired software from the list.
- Click Done.

Software Normalization Rules
Software Normalization is a rule-based automation that:
- Makes changes to software asset details when specific condition(s) are met.
- Consolidates software that meets predefined conditions.
- Manages a controlled software installation type by putting software either in a whitelist or blacklist (Prohibited Software).
Software normalization is useful when you cannot manage every discovered software asset and need to manage a smaller set for compliance. Thus, Software Normalization can be used to change the type of software satisfying some predefined conditions.
If users want to control what software can be installed or uninstalled and receive notifications about unauthorized installations, you can mark unauthorized software as Prohibited (blocklist). When prohibited software is discovered, a notification is sent to the user and admins.
Set up Software Normalization
You can create normalization rules with two types of actions:
- When triggered, normalization sets certain field values for a software asset. For example,it can change the asset type to Software.
- When triggered, normalization consolidates all software that matches the normalization rules into a single suite.
Create a Normalization Rule for Field Assignment
To create a normalization rule, follow these steps:
- Click Add Software Normalization Rule. A pop-up window appears.
- Enter the following details:
- Name: Change Asset Type
- Description Statement: Changes the asset type.
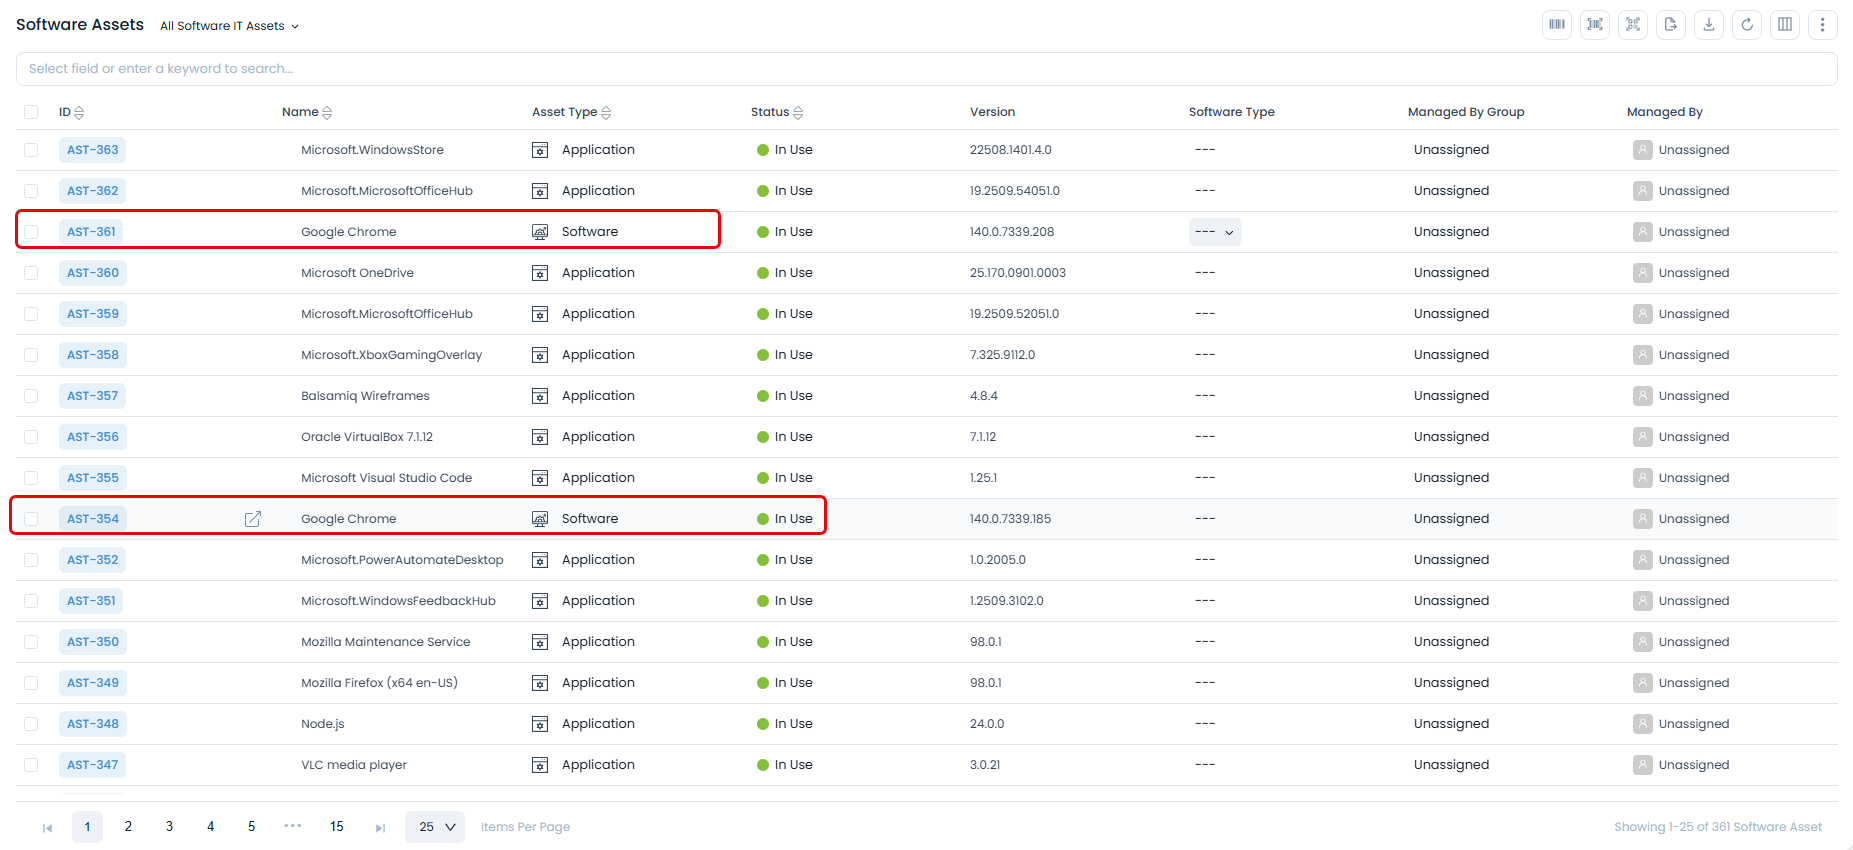
- Condition Statement 1: When the Name = Google Chrome.
- Action for Condition Statement 1: Set Asset typetoSoftware.

- Here, the rule type is Field Assignment.
- Set the condition to Name equals Google Chrome; this means the rule applies to software assets whose name is Google Chrome.
- Add an action: Set Asset Type to Software. The set action is performed when the rule is triggered.
- Turn on Include Normalized Softwares in Next Run. Turning on this option allows software that has been normalized by this rule or any other rule to be included if conditions are satisfied during its next run.
- When you are done creating the rule, click Add. When the rule is triggered(in Next Run or immediately using Run Now), the asset type is converted to Software, as shown below.
Create a Normalization Rule for a Suite To create a normalization rule, follow these steps:
- Click Add Software Normalization Rule. A pop-up window appears.
- Enter the following details:
- Name: Microsoft Office Suite
- Description Statement: Contains all Office software.
- Rule Type: Software Suite
- Condition Statement 1: When Name contains Visual
- Condition Statement 2: When NamecontainsMicrosoft
- Action for Condition Statements 1 and 2: Add to suite:Microsoft Visual Studio Installer.

- Here, the rule type is Software Suite.
- Set the condition to match names containing Microsoft or Visual; this means the rule applies to software assets related to Microsoft Visual Studio.
- Add an action: Add to Suite. The set action will be performed when the rule is triggered.
- Turn on Include Normalized Softwares in Next Run. Turning on this option allows software that has been normalized by this rule or any other rule to be included if conditions are satisfied during its next run.
- When you are done creating a rule, click Add.
Auto-Uninstallation Policy
This tab allows you to create a policy that automatically uninstalls software from all computers. You can also add an uninstallation command.
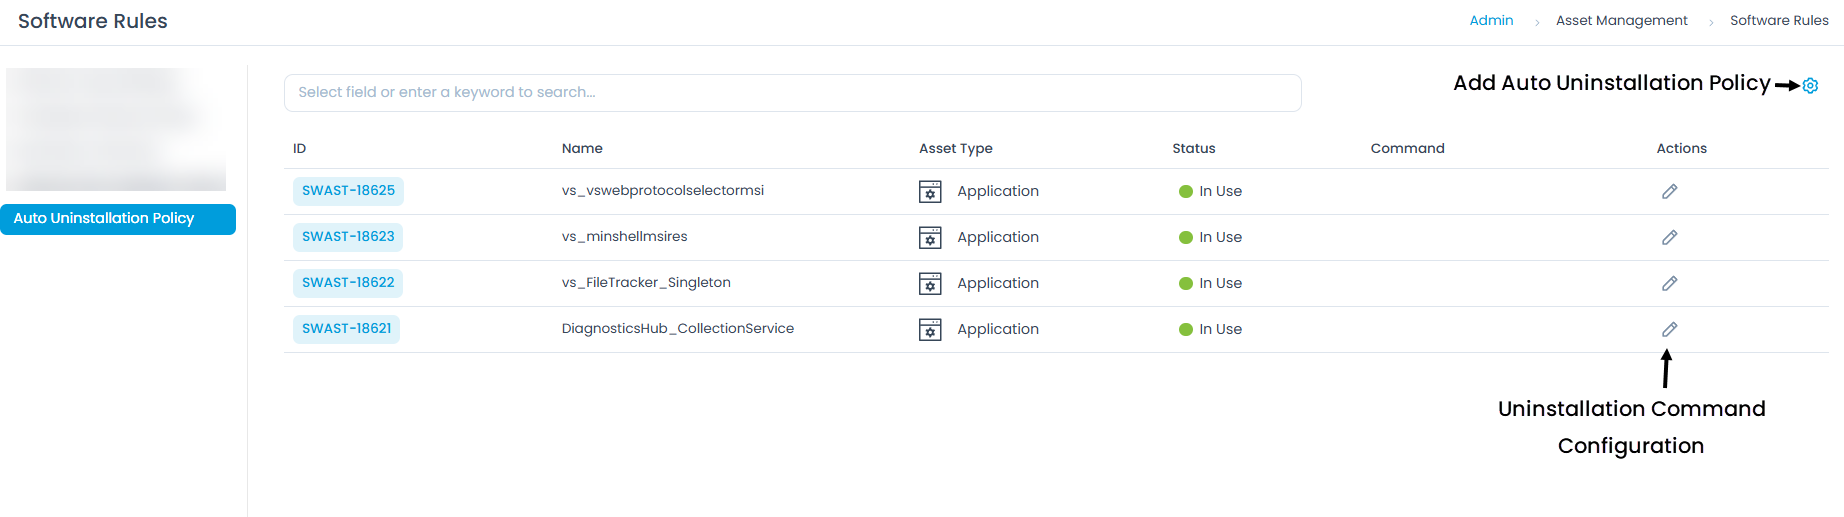
The page displays a list of prohibited software that you can uninstall using the auto-uninstallation policy. You can also click the ID to view the asset details.
Configure the Uninstallation Command
To configure the uninstallation method for a software entry, follow these steps:
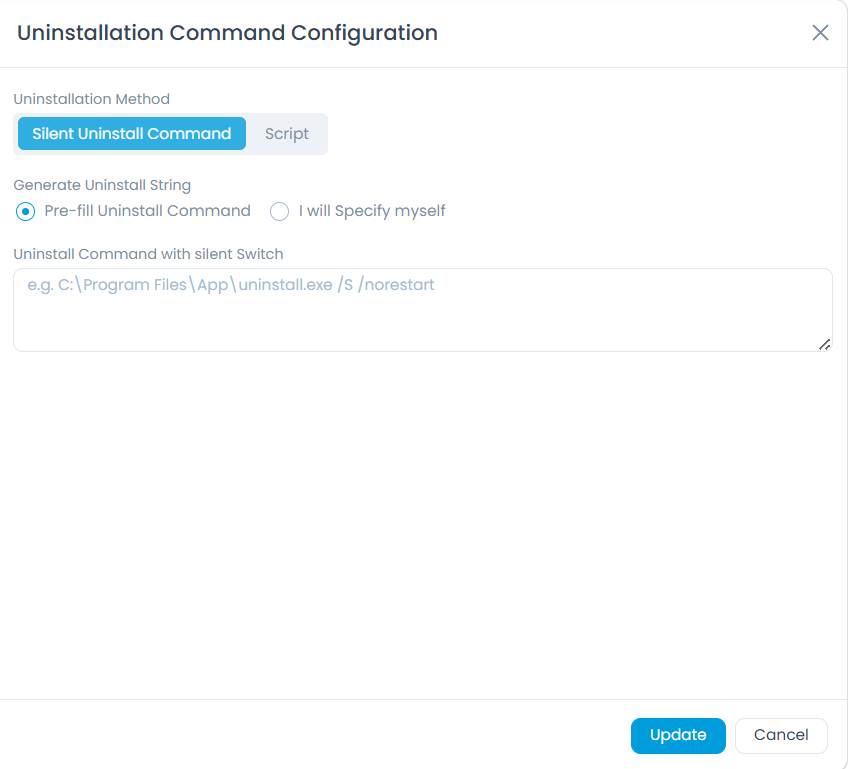
Click the Edit icon next to the desired software. The Uninstallation Command Configuration pop-up appears.
Select an Uninstallation Method:
- Silent Uninstall Command: Under Generate Uninstall String, choose one of the following:
- Pre-fill Uninstall Command: ServiceOps automatically fetches the uninstall command from the endpoint's registry and pre-fills the Uninstall Command with Silent Switch field. You can edit the command if needed.
- I will Specify Myself: Enter the uninstall command manually in the Uninstall Command with Silent Switch field (for example,
C:\Program Files\App\uninstall.exe /S /norestart).
- Script: Upload a script file to handle the software removal.
- Silent Uninstall Command: Under Generate Uninstall String, choose one of the following:
Click Update.
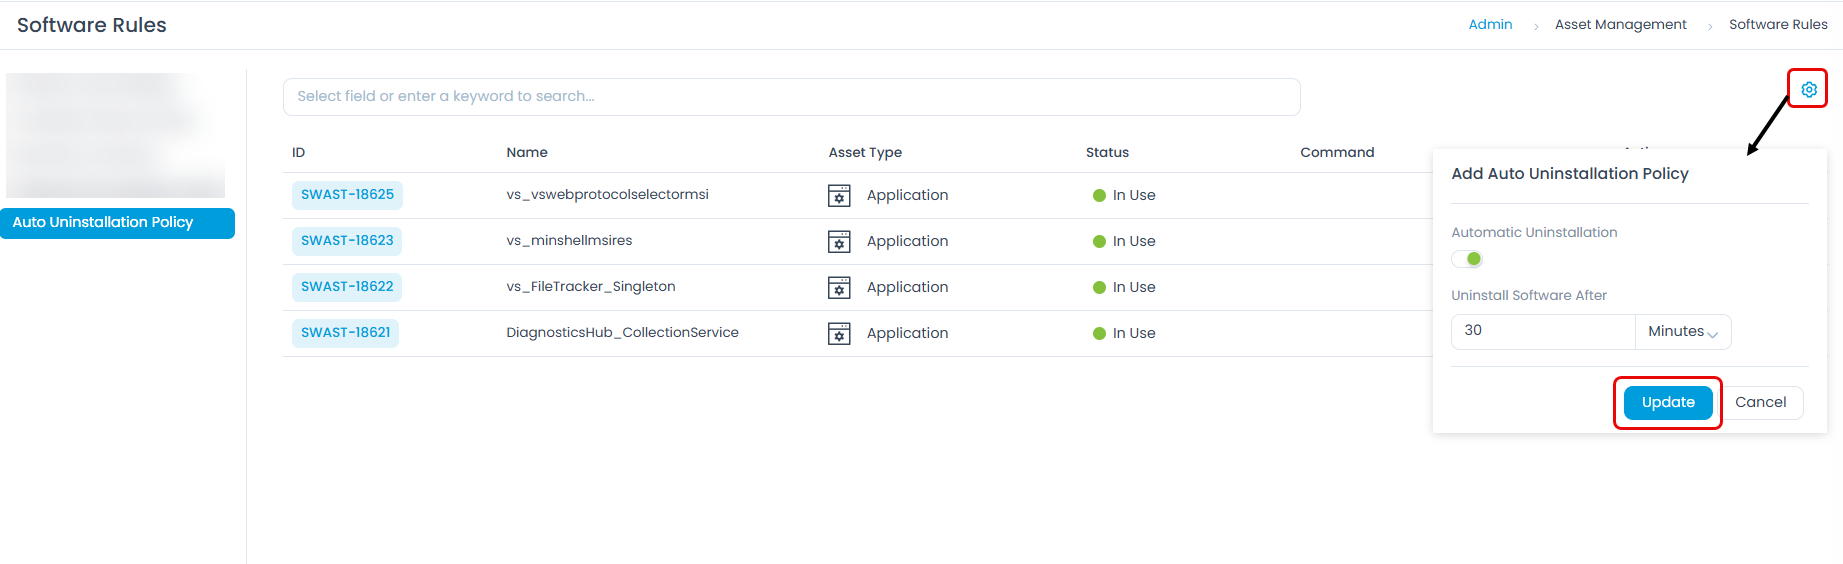
Add an Auto Uninstallation Policy
- Automatic Uninstallation: Enable this option if you want to apply the policy to uninstall software automatically.
- Uninstall Software After: Specify the number of days, hours, or minutes after which the software is uninstalled automatically.
- Once configured, click Update.