Software License Custom Fields
The asset management layout includes all fields necessary to manage an organization’s software licenses. However, to meet organizational needs, you can modify the default template and add new fields. These fields can later be used in automation settings.
To view the Software License Custom Fields, navigate to Admin > Asset Management > Software License Custom Fields. The following page appears.
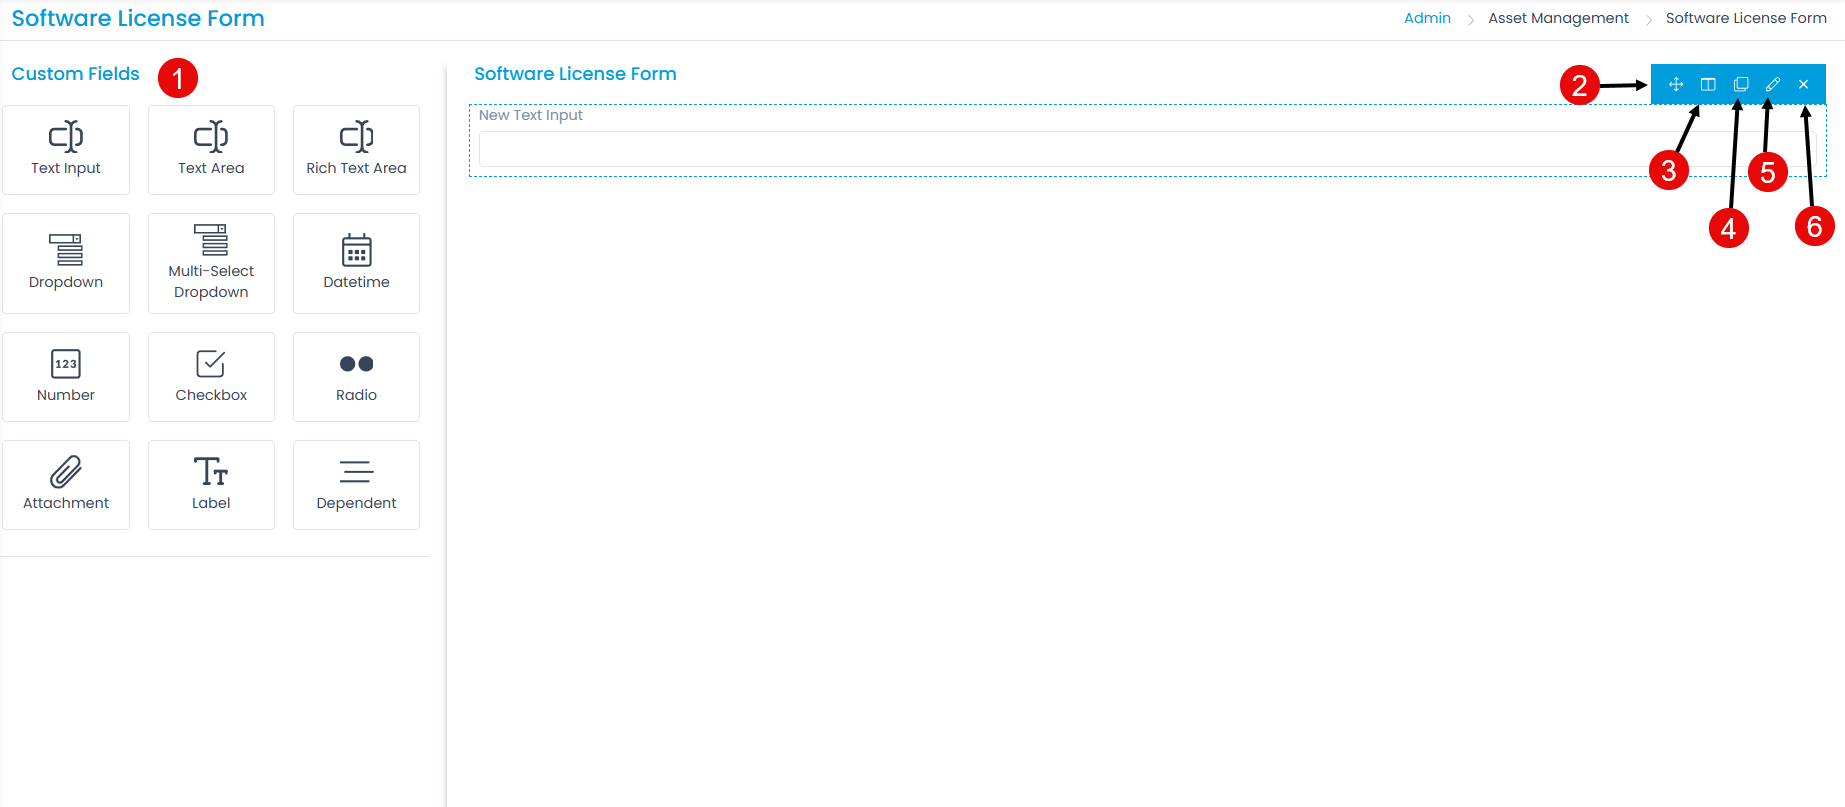
Here, you can customize the form using the following options:
- Field Palette: Drag and drop fields from the palette to add them to the form.
- Reorder: Drag and drop fields to change the order of the form.
- Expand/Collapse: Expand or collapse fields to display one or two fields in a row. When collapsed, the field width is reduced by half.
- Duplicate: Create duplicate custom fields.
- Edit: Edit fields to make them mandatory or change their characteristics.
- Remove: Delete custom fields.
Example scenario: To add a text input field, drag and drop it from the left panel to the form. A pop-up window appears.
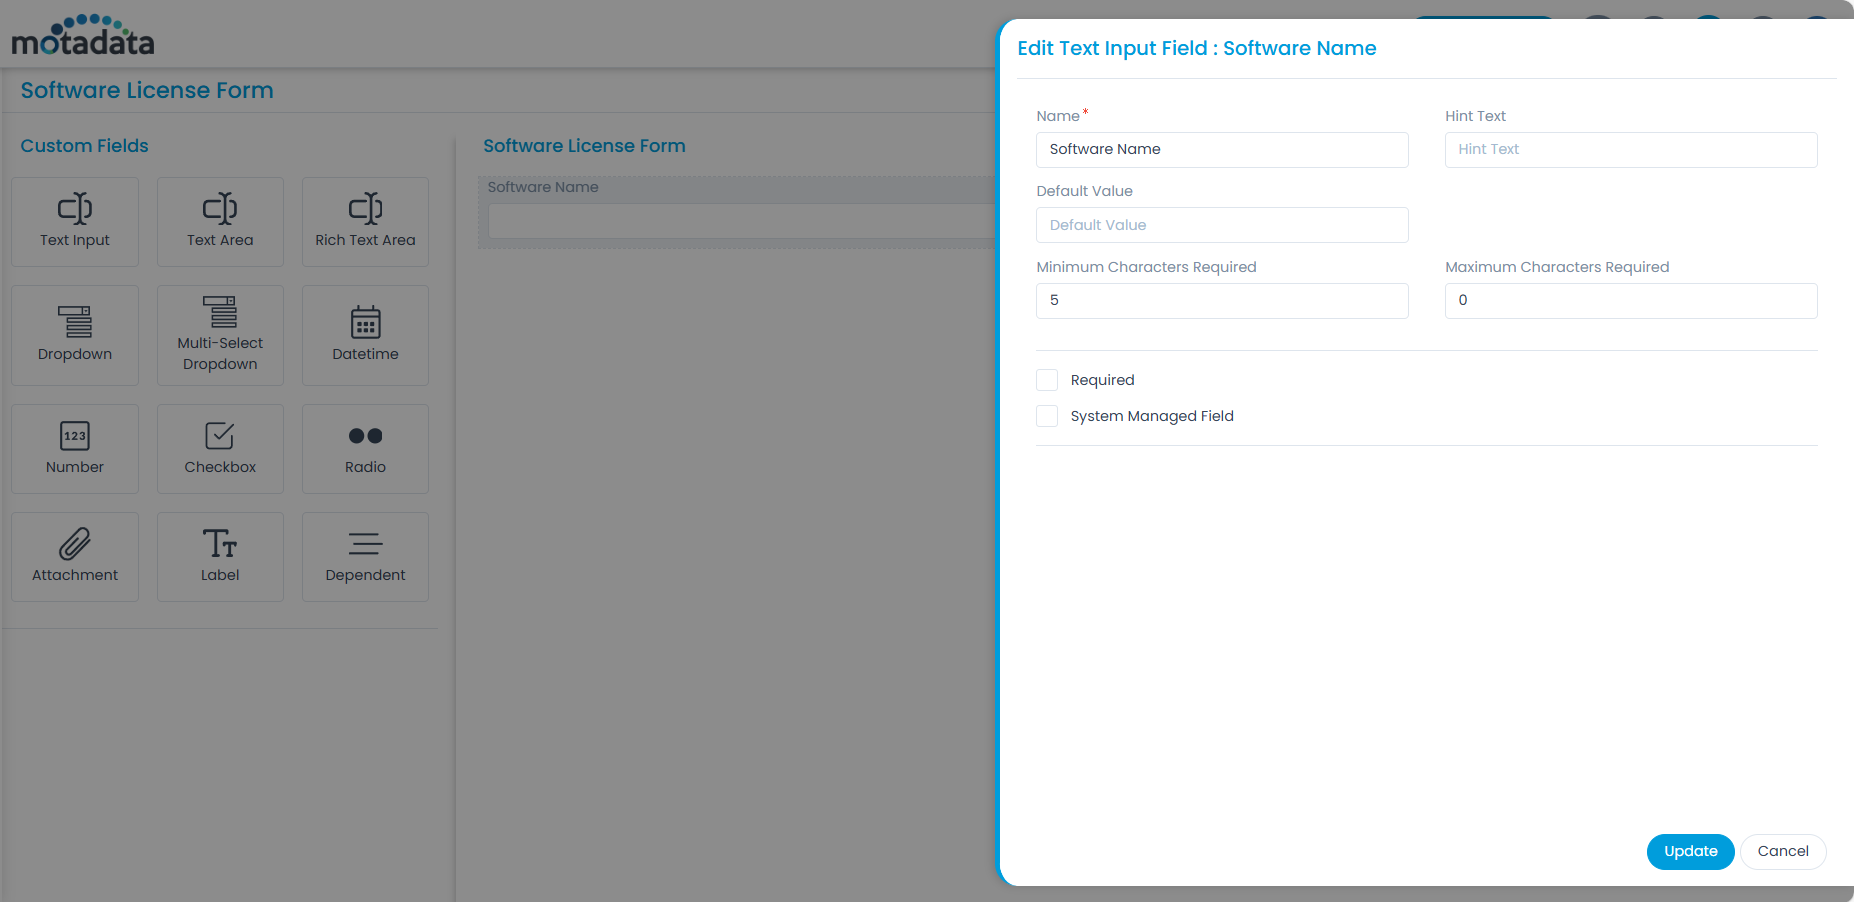
Enter the following details:
- Name: Enter the name of the field.
- Hint Text: Enter the hint text to display (it appears in gray).
- Default Value: Enter the default value for text input and text area fields.
- Minimum Characters Required: Enter the minimum number of characters required in the field.
- Maximum Characters Required: Enter the maximum number of characters allowed in the field.
- Required: Enable this option to make the field mandatory.
- System Managed Field: Enable this option to make the field non-editable. It displays values from dependent fields. You can enable this option for Text Input, Text Area, Rich Text Area, Dropdown, Date/Time, Number, and Radio fields.
When finished, click Add. You can then rearrange the field, duplicate it, edit it, or delete it as needed. Similarly, you can add other custom fields. For details about other field types, refer to the Request Form link.