RDP Configurations
Motadata ServiceOps allows you to configure and record RDP sessions. Before you configure RDP, install the RDP Server on the server. After you configure the RDP Server, install the required RDP Agent on the target machine. For more details, refer to the Agent Installation Guide.
To view the RDP Configurations page, navigate to Admin > Asset Management > RDP Configurations.

The page displays four tabs:
- RDP Configuration: Configure RDP sessions.
- RDP Permission: Grant department heads remote access to machines within their department.
- User Confirmation Settings: Configure settings for user confirmation during RDP sessions.
- Recorded RDP Sessions: View and download recorded RDP sessions.
RDP Configuration
To establish an RDP connection, first install the RDP Server, then configure the following fields:
Enable RDP: Enable Remote Desktop functionality. If enabled, the following parameters become available for configuration.
Enable Video Recording: Enable video recording for remote sessions.
Show Remote Session Indicator: Enables the remote session indicator (enabled by default).
Refresh Cycle: Enter the time in minutes after which the remote desktop display refreshes and updates are displayed.
Connection Type: Select the connection type for the RDP server.
Local: If both the ServiceOps Server and the RDP Server are installed on the same PC, enter the Username and Password of the RDP server.
Remote: If the ServiceOps Server and the RDP Server are installed on different machines, select Remote and provide the following additional details.

- Server FQDN: Enter the Fully Qualified Domain Name (FQDN) of the RDP server.
- Server IP Address: Enter the IP Address of the RDP server.
- SSH Port: Enter the SSH communication port number (e.g., 22).
- Username: Enter the username of the RDP server.
- Authentication Type: Select the authentication type as Password or SSH Key.
- Password: Enter the password of the RDP server.
- SSH Key: Enter the SSH key for the RDP server (For example, when it is hosted in a cloud environment).
After completing the configurations, click Update. Click Reload Certificate whenever you modify the FQDN.
Next, install the RDP agent on the target machine and then establish the RDP session.
- The RDP session will last for a maximum of 90 minutes.
- The Auto-Upgrade feature does not support Combined Agents (Discovery + RDP). To auto-upgrade Discovery and RDP agents, upload them separately.
RDP Permission
Here, you can allow department heads to access only the machines in their department via RDP.
This tab is available only if RDP functionality is enabled and configured.

User Confirmation Settings
The User Confirmation Settings tab provides administrators with enhanced control over RDP session behavior in ServiceOps. Traditionally, RDP confirmation prompts were uniformly enforced across all assets. This enhancement allows admins to define confirmation exceptions, enabling RDP sessions to bypass user confirmation for selected, less-sensitive assets. This feature helps maintain strict controls on critical systems while improving operational efficiency on trusted endpoints.
This feature is available for both On-Premises and SaaS deployments with valid Asset and RDP module licenses.
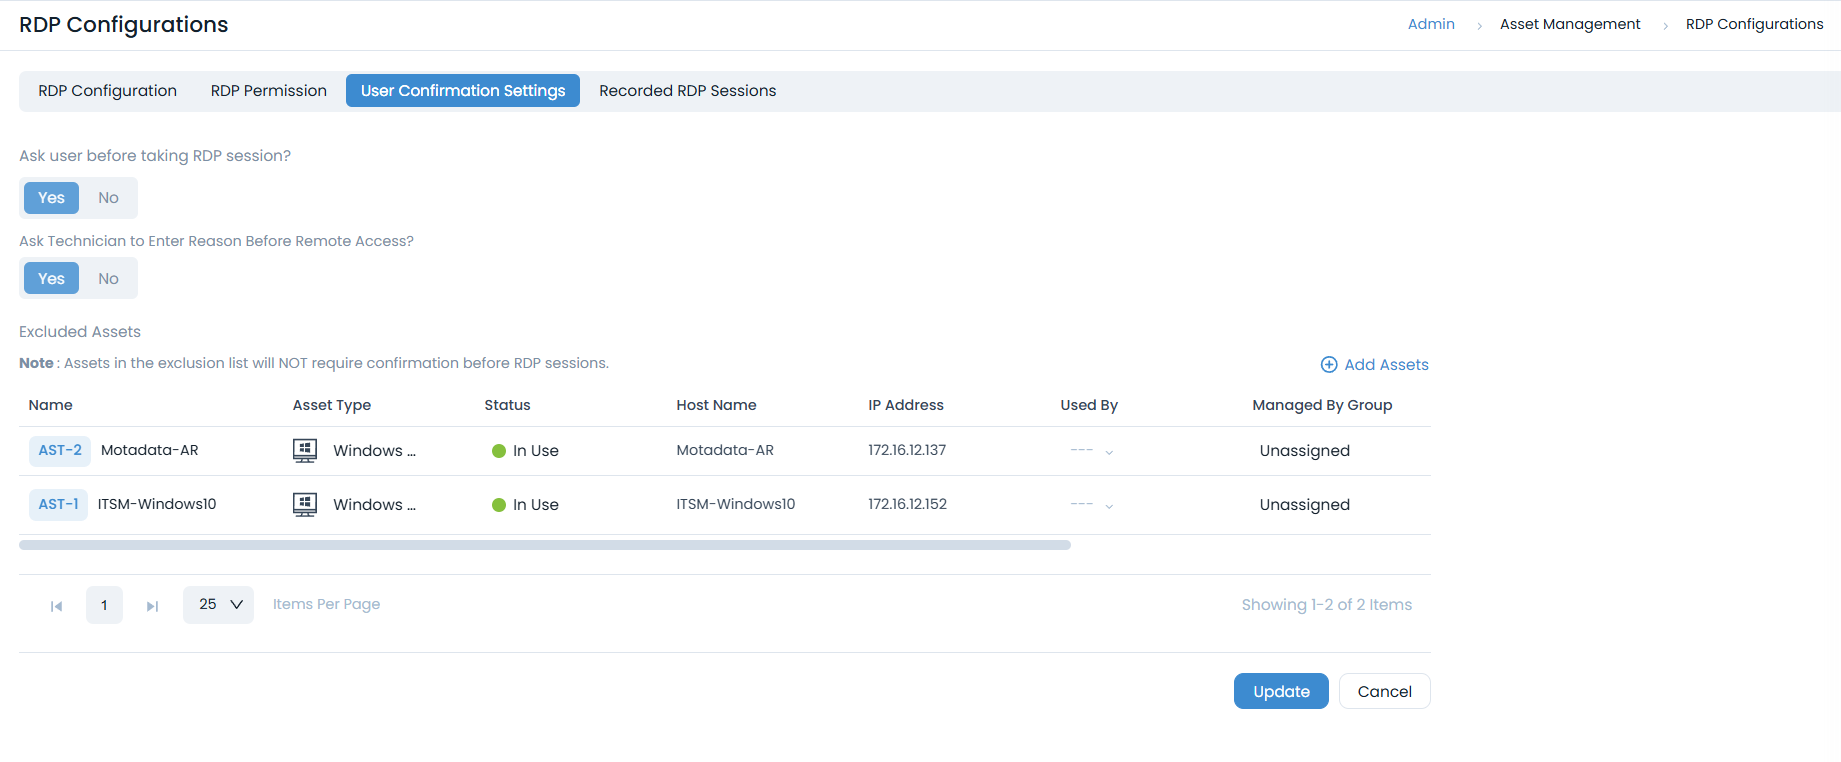
To view User Confirmation Settings, navigate to Admin > Asset Management > RDP Configurations > User Confirmation Settings tab. The following screen appears.
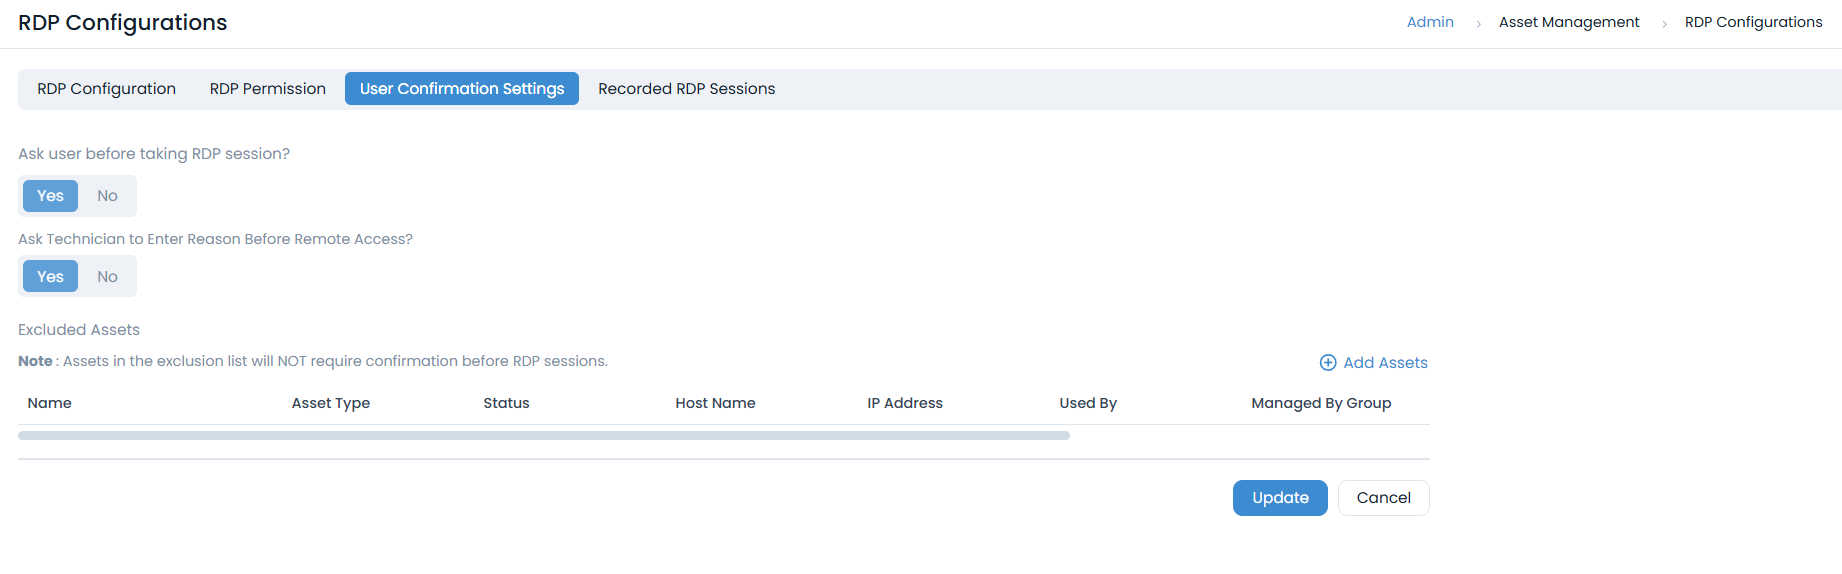
It contains the following components:
- Ask user before taking RDP session?: Enables or disables the global confirmation prompt for all RDP sessions.
When you change this setting, a warning message appears with an option to clear the current exclusion list.
- If you do not clear the list,excluded assets will automatically follow the opposite of the new global behavior.
- Ask Technician to Enter Reason Before Remote Access?: Enables or disables the prompt for technicians to provide a reason before initiating an RDP session. This helps maintain accountability and ensures users are informed about the purpose of remote access. When enabled, technicians will see a mandatory prompt to enter a reason each time they initiate a remote session from the Hardware Asset Details page. After submission, the reason is shown to the end user in the confirmation dialog before access is granted. Additionally, it is recorded in the RDP history and reports for audit and compliance purposes.
Viewing Reason Message after Upgrade to v8.7.0
If you're upgrading your server to v8.7.0, follow these steps to configure and view the Reason message in the consent prompt:
Login to the terminal server as the root user.
Navigate to the directory:
/opt/meshcentral/meshcentral-data/Open the config.json file for editing. The structure will look similar to the example below.
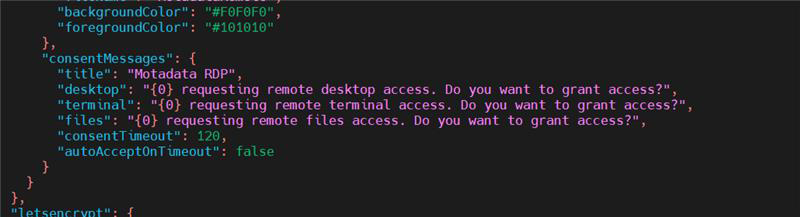
In the Consent Messages section, add the following parameter to the message body:
\n\nReason : {2}
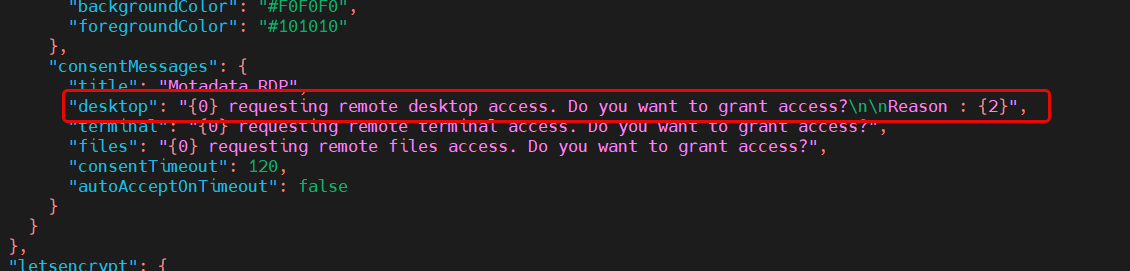
Save the
config.jsonfile.Restart the
meshcentralservice using the following command:systemctl restart meshcentral.service
This ensures that the reason for the remote connection is clearly displayed to the user.
Excluded Assets: Allows admins to configure specific assets for which the global confirmation behavior should be reversed. For example:
If "Ask user before taking RDP session?" is set to Yes, excluded assets will not prompt for confirmation.
If it is set to No, excluded assets will prompt for confirmation.
Assets can be added to the exclusion list using the Add Assets link. Only RDP-enabled assets are available for selection, and multiple assets can be added or removed at once.
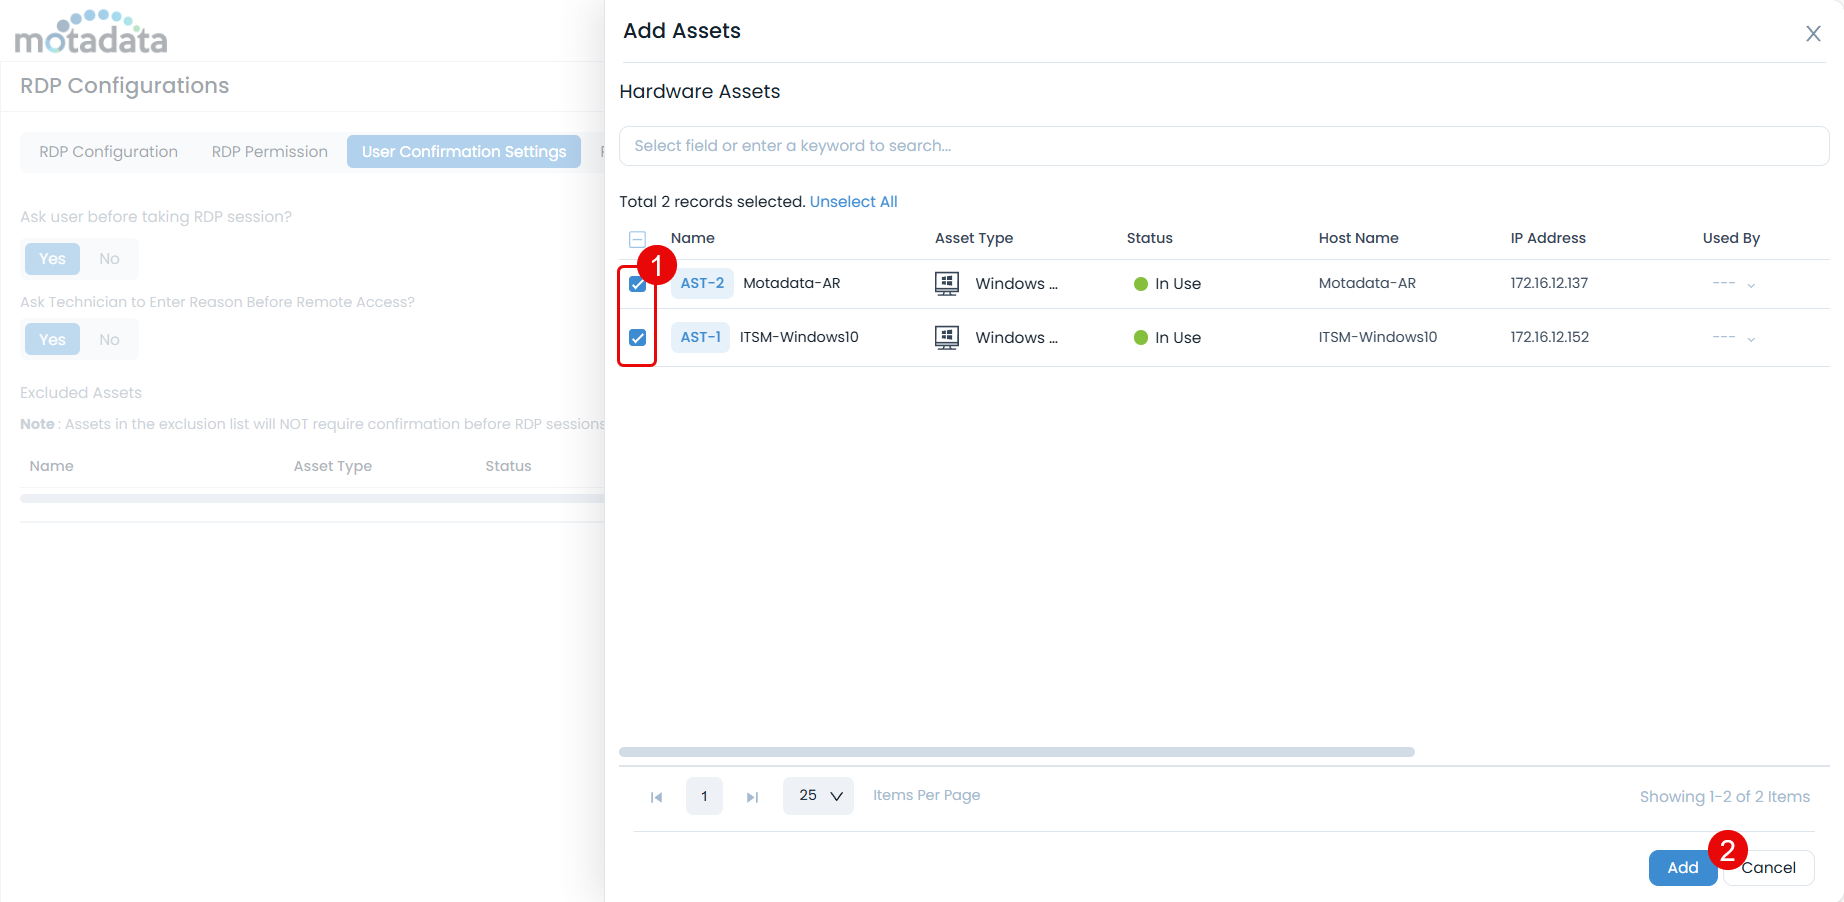
Once assets are added, they will appear in the exclusion grid. All configuration changes are tracked via audit logs, and updates apply only to new sessions (not active ones).
Recorded RDP Sessions
A consolidated list of all recordings is available here. You can use these recordings for reference later.
- The sessions are recorded only if the setting is enabled from the RDP Configuration tab.
- Records are available for RDP config types.

You can also do the following:
- Refresh: Refresh the list to get the latest records.
- Download: Download the required recording for later use.
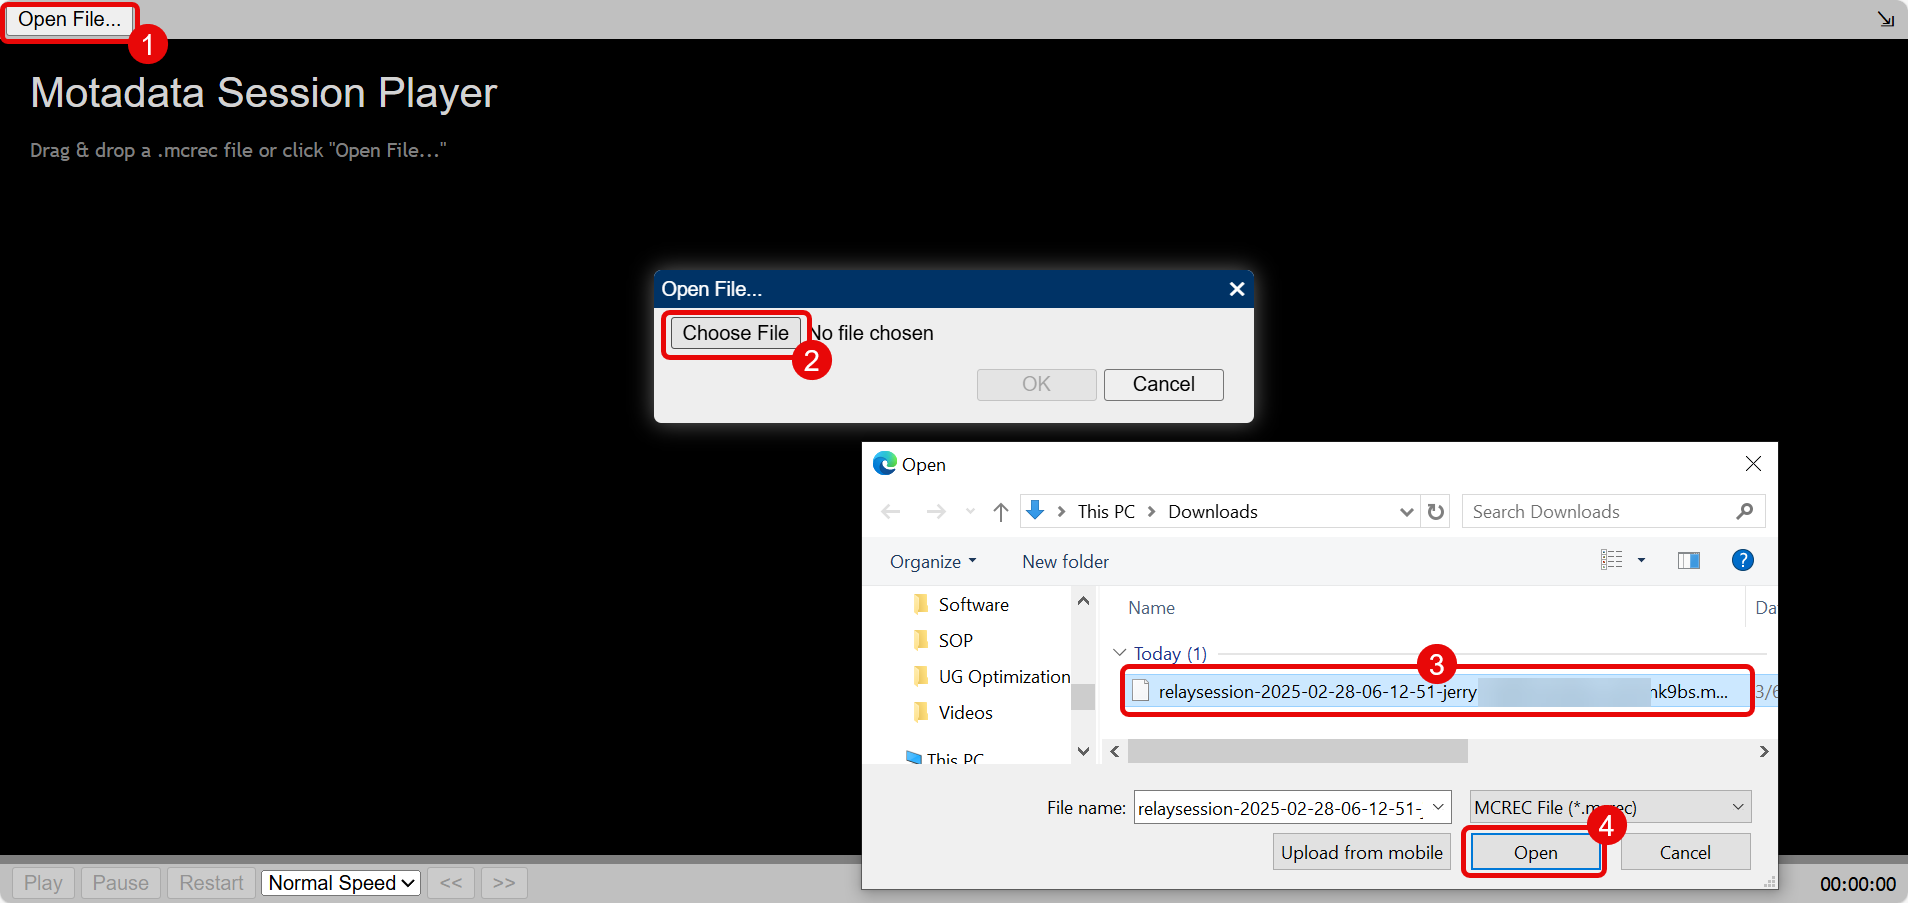
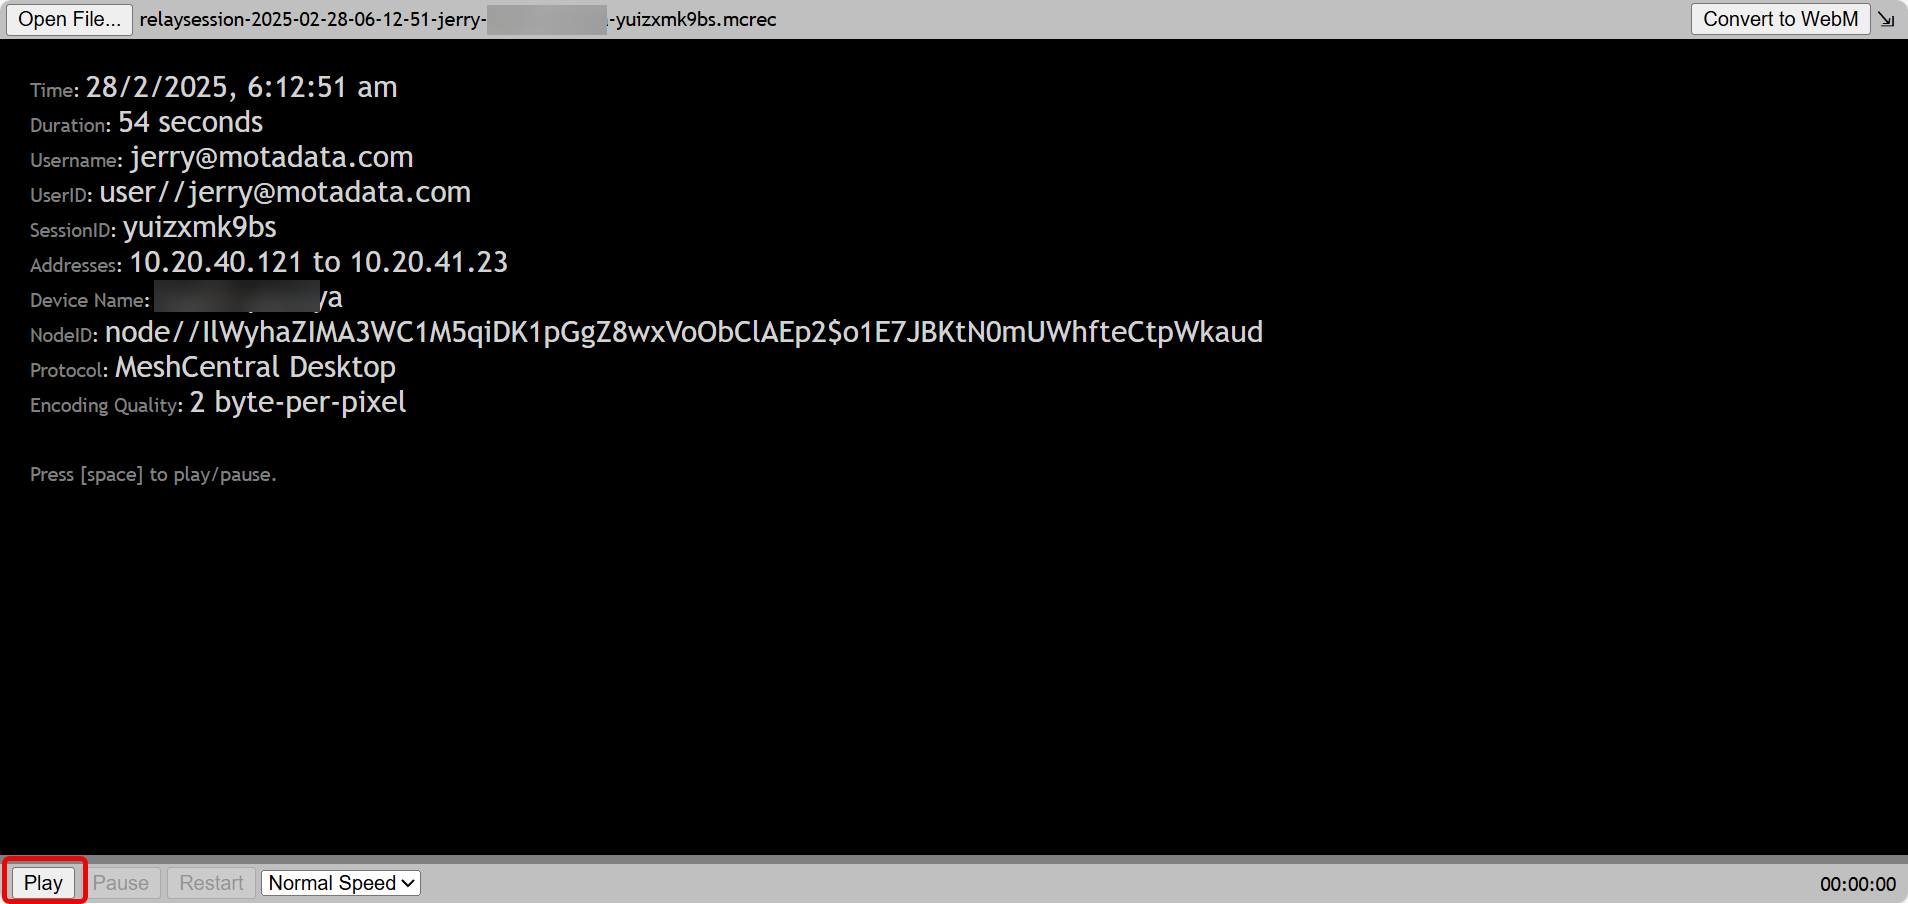
- Play: Play the recording to review it. When prompted, select the downloaded file to play.
After you open the file, its details will appear as shown below. You can now play the recording by clicking the Play button.
- Delete: Delete the recording if no longer required.
Frequently Asked Questions
What are Reload Session and Reload Certificate used for?
A: These options are used as follows:
- Reload Certificate: Used when the RDP server certificate is updated; the RDP Agent must be re-bound to the new certificate.
- Reload Session: Helps manage concurrent RDP sessions when license details are updated in ServiceOps and MeshCentral.
When should RDP configuration be done?
A: Once the RDP server is successfully installed and the necessary changes are made, you can configure RDP settings from the UI.
Does RDP support concurrent sessions?
A: Yes, but there are limitations on concurrent RDP sessions based on the purchased license.