Asset Groups
Motadata allows you to categorize assets in the CMDB into groups. Groups provide a convenient way to differentiate assets based on specific similarities.
Some of the benefits of using Asset Groups are:
- Asset Groups help technicians manage assets within Configuration Management Databases (CMDBs). For example, if a technician is responsible for an asset group called 'DATA CENTER ASSETS', they can easily search for assets within that group.
- Groups are used in Hardware Asset notifications. For example, if there is a hardware change in a specific asset group, a notification is sent to designated users.
To view the Asset Groups page, navigate to Admin > Asset Management > Asset Groups. The list page will then appear.
List Page
The list page displays created asset groups. You can view, add, edit, and delete asset groups, as well as search and view their details.
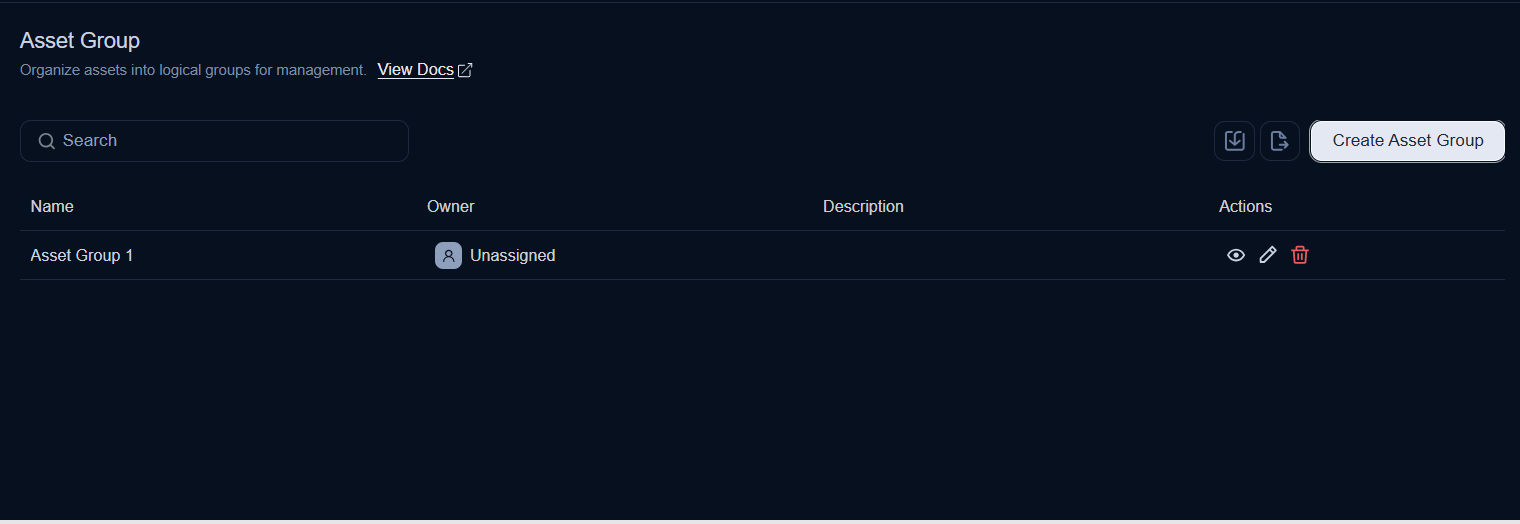
- Search: Search for an asset group by keywords.
- Import: Import a list of asset groups in bulk.
- Export: Export the list of asset groups as a .csv or .xlsx file.
- Create: Create an asset group.
- Edit: Edit the details of an asset group.
- Delete: Delete an asset group if it is no longer required.
- View: View the assets associated with the group by clicking the eye icon.
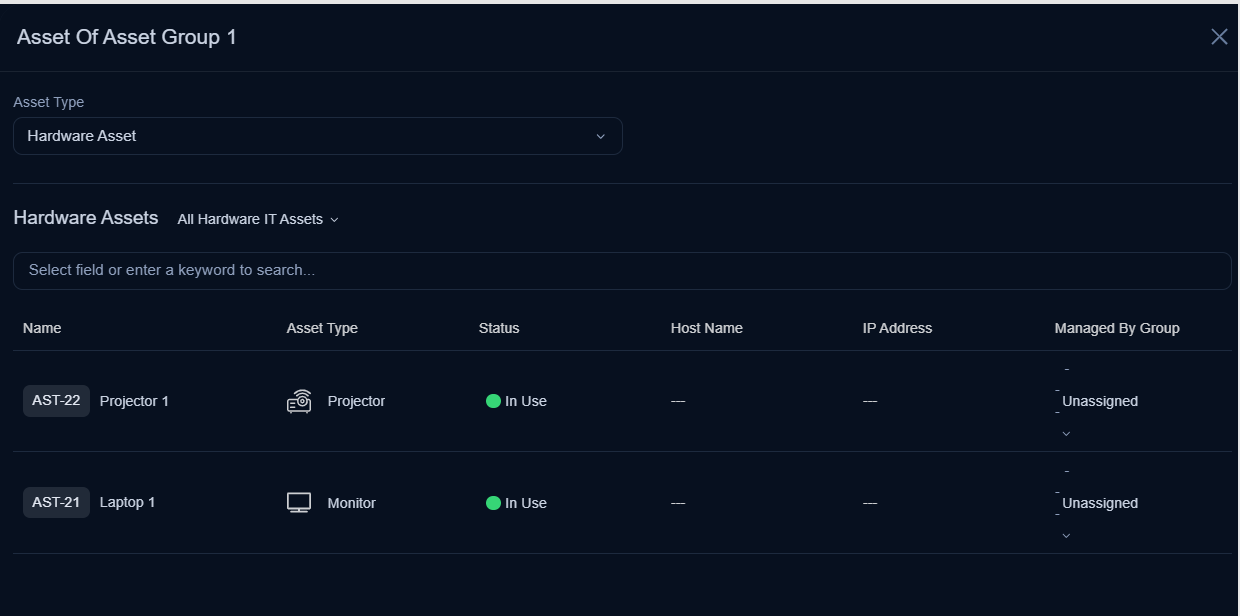
Add Asset Group
To add an asset group,
- Click the Create Asset Group button in the top-right corner of the page. A popup window will appear.
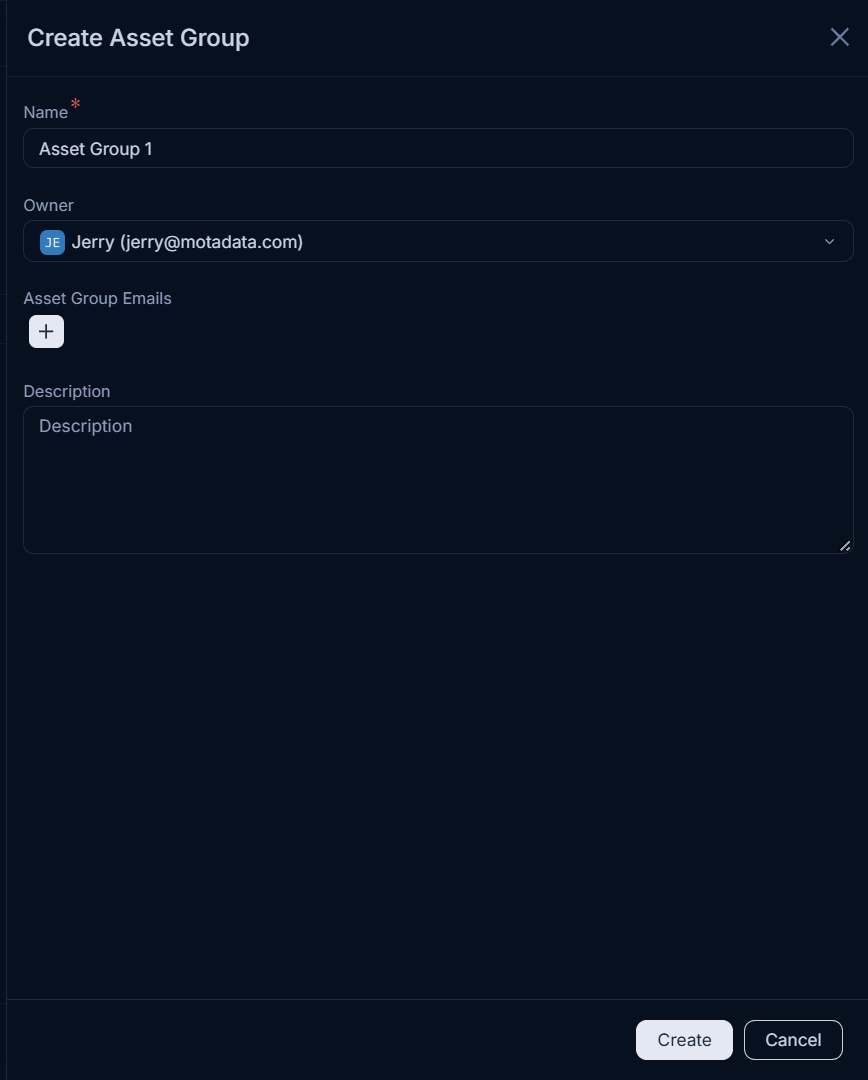
- Enter the following details:
- Name: Enter the name of the asset group.
- Owner: Select the owner of the asset group from the technician list.
- Asset Group Emails: Add the email addresses of the users who should receive notifications related to this group.
- Description: Enter a short description of the asset group.
- Once completed, click Create. The asset group will then be added to the list page.
Import Asset Group
To import asset groups,
- Click the Import button. The Asset Group Batches page appears.
- Click the Import Batch button.
- Select the Import File Type as CSV or Excel.
- Select the Date Format from the dropdown.
- Select the file to upload. If you do not have a file, click Click here to download the sample CSV file, fill in the required details, and upload it.
- Click Next.
- Map the fields as required and click Save Batch.
- The Asset Group Batches page displays the status of the import along with details such as processing time, total records, success records, and failed records.