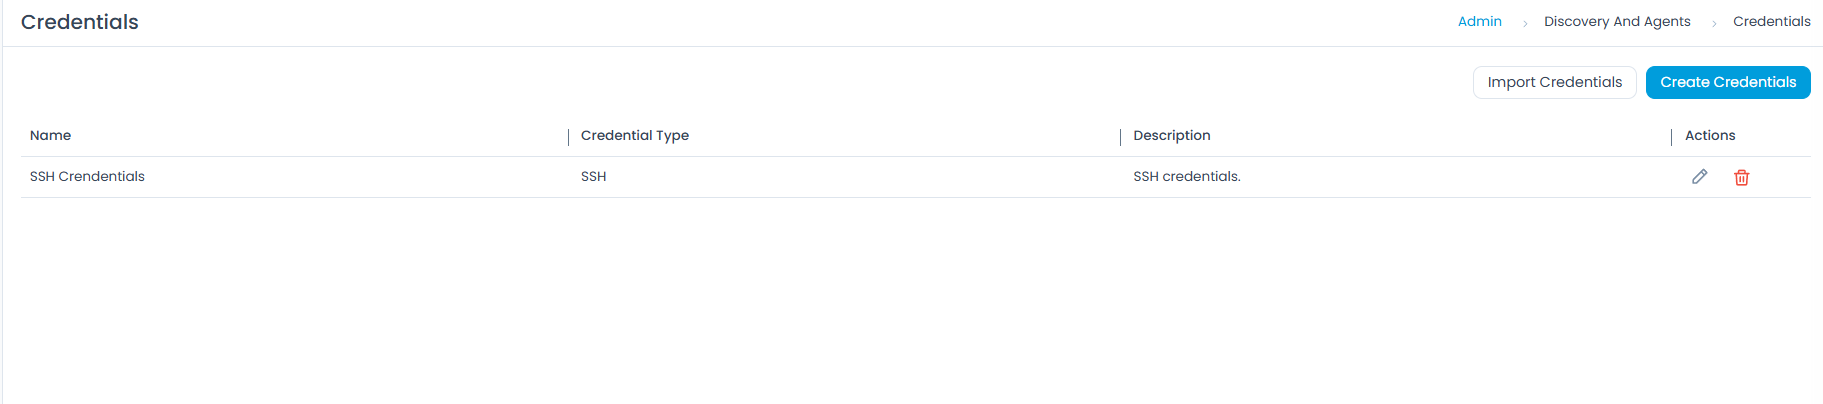
Credentials
Motadata ServiceOps provides an interface to upload all your credentials, allowing our product to authenticate for authorized network access. All credentials are stored in a repository, also known as a library, where you can add, edit, and delete them.
- Managing credentials require administrative rights.
- If the credentials are incorrect, authentication fails, and the asset discovery fails too.
Adding Credentials
To create credentials, click the Create Credentials button. A popup will appear where you need to provide the details.

The details are as follows:
- Name: Enter the name of the credential.
- Credential Type: Select the type of credentials. The options are:
WMI: For WMI credential type, used to discover and manage Windows machines, you need to provide the following details:
- Domain Name \ Username: Enter the domain name and username for the credential.
- Password: Enter the password for the credential.
- Use Case: Discover and manage Windows machines.
- Pre-Requisites:
- Local or Domain Administrator rights on target machines.
- WMI service enabled.
- Firewall rules allowing WMI.
- Remote UAC disabled (for workgroup).
- Required Ports: TCP 135, 445, 5000–6000, 49152+.
- Notes: Best for Windows OS discovery. Ensure the account has necessary DCOM permissions.
SSH: For SSH credential type, used to discover and manage Linux/Unix devices, you need to provide the following details:
- Username: Enter the username for the credential.
- Port: Enter the port number for the SSH connection. The default port is 22.
- Authentication Type: Select the authentication type, either Password or SSH Key.
- If you select Password, enter the password in the Password field.
- If you select SSH Key, you will need to upload the SSH private key:
- SSH Key: Upload the private SSH key.
- SSH Passphrase: Enter the passphrase for the SSH key, if applicable.
- Use Case: Discover and manage Linux/Unix devices.
- Pre-Requisites:
- SSH service enabled.
- Valid username or password, or a public key uploaded on the target device.
- Firewall allows SSH.
- Public key uploaded on target device.
- Private key stored securely in ServiceOps (for Key-Based).
- Required Ports: TCP 22.
- Notes: Recommended for Unix/Linux discovery and agentless management. Key-based SSH is more secure. Ensure correct key permissions (
chmod 600) for key-based authentication.
SNMP: For SNMP credential type, used to discover network devices (routers, switches, printers, storage), you need to provide the following details:
- Community String: Enter the community string for SNMP.
- Port: Enter the port number for SNMP connection. The default port is 161.
- Use Case: Discover network devices (routers, switches, printers, storage).
- Pre-Requisites:
- SNMP enabled on target device.
- Correct community string (RO/RW).
- ServiceOps server IP allowed.
- Required Ports: UDP 161.
- Notes: Simple setup but less secure.
SNMP v3: For SNMP v3 credential type, you need to provide the following details:
- Security Level: Select the security level:
- Private Authentication: Provides both authentication and encryption for SNMPv3 messages.
- No Private Authentication: Provides authentication but no encryption for SNMPv3 messages.
- No Private No Authentication: Provides neither authentication nor encryption for SNMPv3 messages.
- Port: Enter the port number for SNMP v3 connection. The default port is 161.
- Authentication Protocol: Select the required protocol for authentication, as described in the table below:
Authentication Family Supported Variants When to Use Not Recommended For Recommendation MD5 MD5, MD5DES, MD53DES, MD5AES128, MD5AES192, MD5AES256, MD5AES192C, MD5AES256C Use only for legacy devices that do not support SHA-based authentication. New deployments and security-sensitive environments. If required, use AES variants (e.g., MD5AES256) instead of DES/3DES. SHA (SHA-1) SHA, SHADES, SHA3DES, SHAAES128, SHAAES192, SHAAES256, SHAAES192C, SHAAES256C When devices support SHA-1 but not SHA-2. Suitable for moderate-security environments. High-security or compliance-driven environments. Prefer AES variants (e.g., SHAAES256). Consider upgrading to SHA-2 where possible. SHA224 (SHA-2) SHA224, SHA224DES, SHA2243DES, SHA224AES128, SHA224AES192, SHA224AES256, SHA224AES192C, SHA224AES256C Mid-level security environments where SHA-2 is supported but higher variants are not required. Environments requiring stronger cryptographic assurance. Use AES256 variants for better encryption strength. SHA256 (SHA-2) SHA256, SHA256DES, SHA2563DES, SHA256AES128, SHA256AES192, SHA256AES256, SHA256AES192C, SHA256AES256C Recommended default for enterprise environments and production networks. — Use SHA256AES256 wherever supported. Use AESxxxC variants only for Cisco devices. SHA384 (SHA-2) SHA384, SHA384DES, SHA3843DES, SHA384AES128, SHA384AES192, SHA384AES256, SHA384AES192C, SHA384AES256C High-security environments and networks handling sensitive data. Legacy systems with limited cryptographic support. Prefer AES256 variants for optimal security. SHA512 (SHA-2) SHA512, SHA512DES, SHA5123DES, SHA512AES128, SHA512AES192, SHA512AES256, SHA512AES192C, SHA512AES256C Maximum security environments and regulated industries. Devices with limited performance capacity. Use SHA512AES256 for strongest authentication and encryption. - Username: Enter the username for SNMP v3.
- Auth Passphrase: Enter the authentication passphrase.
- Privacy Passphrase: Enter the privacy passphrase.
- Use Case: Secure discovery of network devices.
- Pre-Requisites:
- SNMP v3 enabled with auth/encryption.
- User credentials configured.
- ServiceOps server IP allowed.
- Required Ports: UDP 161.
- Notes: Supports
authPriv/authNoPriv. More secure than v1/v2c but requires more setup.
- Security Level: Select the security level:
VMWARE: For VMWARE credential type, used to discover VMs and hosts from VMware infrastructure, you need to provide the following details:
- Username: Enter the username for the credential.
- Password: Enter the password for the credential.
- Port: Enter the port number for the VMware connection. The default port is 443.
- Connection Timeout: Enter the connection timeout in seconds. The default is 60 seconds.
- Use Case: Discover VMs and hosts from VMware infra.
- Pre-Requisites:
- vCenter/ESXi accessible.
- Read-only or admin account in vSphere.
- API access enabled.
- Required Ports: TCP 443.
- Notes: vCenter preferred for centralized VM discovery; direct ESXi also possible.
AWS: For AWS credential type, used to discover EC2, RDS, and other AWS resources, you need to provide the following details:
- Access Key Id: Enter the Access Key Id for the AWS account.
- Secret Key Id: Enter the Secret Key Id for the AWS account.
- Regions: Select the AWS regions from the dropdown.
- Use Case: Discover EC2, RDS, and other AWS resources.
- Pre-Requisites:
- AWS Access Key ID & Secret Key.
- IAM role with
ec2:Describe*+ relevant permissions. - API enabled.
- Required Ports: HTTPS TCP 443 (AWS API endpoints).
- Notes: Best for cloud asset inventory. Ensure least-privilege IAM policy.
Azure: For Azure credential type, used to discover VMs, storage, and other Azure resources, you need to provide the following details:
- Subscription Id: Enter the Subscription Id for the Azure account.
- Client ID: Enter the Client ID for the Azure application.
- Client Secret: Enter the Client Secret for the Azure application.
- Tenant ID: Enter the Tenant ID for the Azure Active Directory.
- Regions: Select the Azure regions from the dropdown.
- Use Case: Discover VMs, storage, and other Azure resources.
- Pre-Requisites:
- Azure App Registration (Client ID, Tenant ID, Secret).
- API permissions assigned (Azure RM read access).
- Required Ports: HTTPS TCP 443 (Azure API endpoints).
- Notes: Works across subscriptions; requires proper role assignments.
Nutanix: For Nutanix credential type, used to discover VMs and clusters in Nutanix, you need to provide the following details:
- Username: Enter the username for the credential.
- Password: Enter the password for the credential.
- Use Case: Discover VMs and clusters in Nutanix.
- Pre-Requisites:
- Prism Central accessible.
- Admin API account.
- v2 and v3 API enabled in Nutanix.
- Required Ports: HTTPS TCP 9440 (default Nutanix API port).
- Notes: Recommended to connect via Prism Central for multi-cluster discovery.
OAuth: For OAuth credential type, used for secure authentication to APIs & cloud services, you need to provide the following details:
- Client ID: Enter the Client ID for the OAuth application.
- Client Secret: Enter the Client Secret for the OAuth application.
- Authorization Url: Enter the Authorization URL for the OAuth provider.
- Token URL: Enter the Token URL for the OAuth provider.
- Scope: Enter the Scope for the OAuth application.
- Redirect URL: Enter the Redirect URL for the OAuth application.
- Proxy Server: Select the Proxy Server from the dropdown.
- Use Case: Secure authentication to APIs & cloud services.
- Pre-Requisites:
- OAuth Client ID & Secret.
- Redirect URL configured.
- Token endpoint and scopes defined.
- Required Ports: HTTPS TCP 443 (token & resource endpoints).
- Notes: Used to authenticate and discover ChromeOS devices. Requires username and password details based on the selected option (e.g., for SSH: username, port, authentication type, and password).
- Once you are done, click Save. You can also click the Test Connection button to check the connectivity. Later, you can also edit or delete the credentials if they are no longer required.
The Test Connection button is unavailable in the SaaS application.
You can also create multiple credentials for future asset discoveries.
Troubleshooting
Issue in discovering the asset via WMI/winRM*
If the asset discovery fails, verify the ports and Firewall settings:
Check whether the below ports are open on the target server:
If winRM (HTTP): 5985
If winRM (HTTPS): 5986
If WMI: 135
On the target server, check the status of the port by using the below command:
netstat -ano | findstr <port_number>
Check whether the Firewall is not blocking connections from Poller/ServiceOps server to the target.
On the Poller/ServiceOps server run the below command:
telnet <ip> <port>
SNMP Credential Verification
Verify that the authpass (Authentication Password) and privpass (Privacy Password) are 8 characters long, excluding the special characters. If it is not working with the current password need to change it accordingly.
To verify SNMP credentials, use the snmpwalk tool as shown below:
snmpwalk -v3 -u {username} -l authPriv -a {auth_protocol} -A {auth_pass} -x {privacy_protocol} -X {privacy_pass} {ip} {oid}Example:
snmpwalk -v3 -u ospf1md5des -l authPriv -a MD5 -A ospf1md5des -x DES -X ospf1md5des 172.16.14.6snmpwalk -v 2c -c public <IP>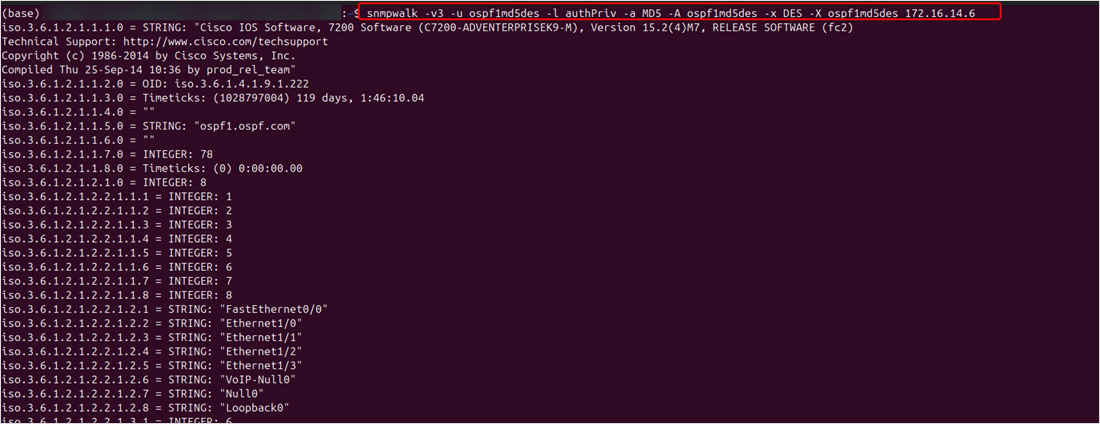 note
noteThe snmpwalk package is now included with the ServiceOps installer starting with version 8.7.3. In earlier versions, it must be installed manually if not already installed.
Import Credentials
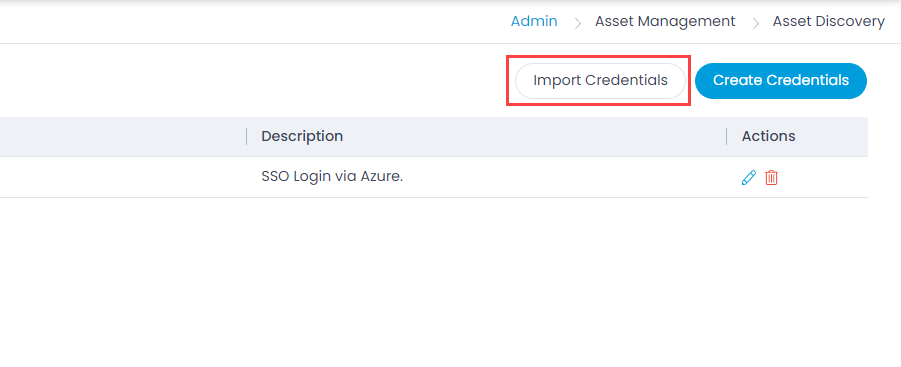
This option allows you to import the credentials in bulk. To do so,
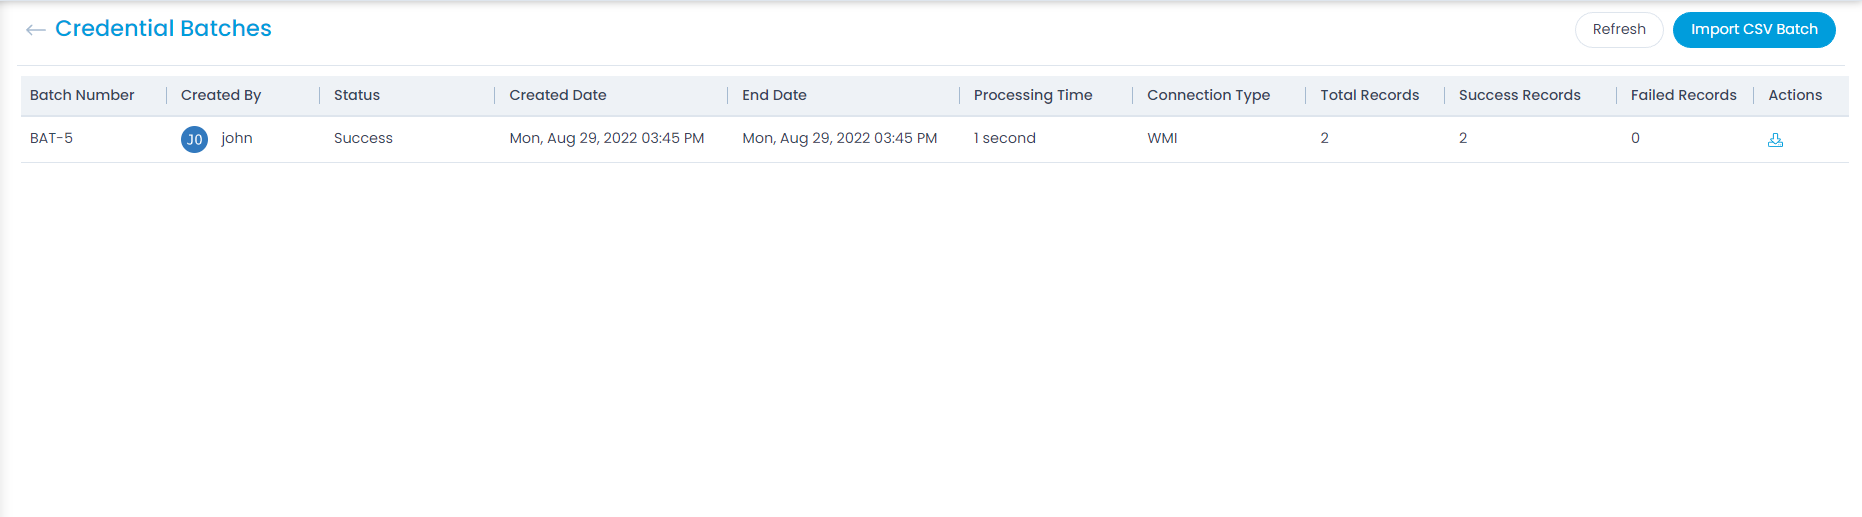
- Click the Import Credentials button. The Credential Batches page appears.
- Click the Import CSV Batch button.
- Select the .csv file if you already have it filled with the respective fields. If not, select the new .csv file using Click Here and fill the respective details. Once the file is uploaded, click Next.

- Map the fields as per the requirement. By default it is mapped, only in case of removal or change of some parameters mapping is necessary, and click Save Batch.

- The Credential Batches page appears. It displays the status of the import along with the details like processing time, total records, success records, failed records, etc. as shown below. Once successful, the imported credentials will appear in the list page.