Wake on LAN
Wake on LAN (WOL) is an Ethernet computer networking standard that enables you to wake or start a computer remotely from anywhere. It wakes up the target computer by sending a network message. A computer that has an internet connection and is Advanced Configuration and Power Interface (ACPI) compliant can be turned on remotely. It requires special software, such as Motadata ServiceOps, to send a wake-up signal to another computer on the same LAN. It is also possible to initiate the message from another network by using subnet-directed broadcasts.
With WOL configured, you do not need to physically turn on the system to perform tasks. You can simply initiate the WOL process remotely through ServiceOps, either manually or automatically using a scheduler.
Prerequisites
- Wake on LAN must be enabled on the target machine.
- Wake on LAN must be enabled in the BIOS Power Management settings.
- Ethernet connection
- Power cable (charger/adapter) should be connected.
- A network interface card (NIC) should support Wake on LAN.
- The source and target machines must be on the same LAN network.
- The target computer must be either in sleep or shutdown mode.
- Continuous LAN connectivity is required, even in sleep mode.
Configuring WOL on a Target Machine
To configure WOL, enable the related settings from the sections below:
In the BIOS Settings
Navigate to Config and enable the Wake on LAN parameter. The path to enable Wake on LAN may vary based on the computer's manufacturer.
The Deep Sleep Mode parameter should be disabled. This mode may only be available on some computers.
In the Windows OS
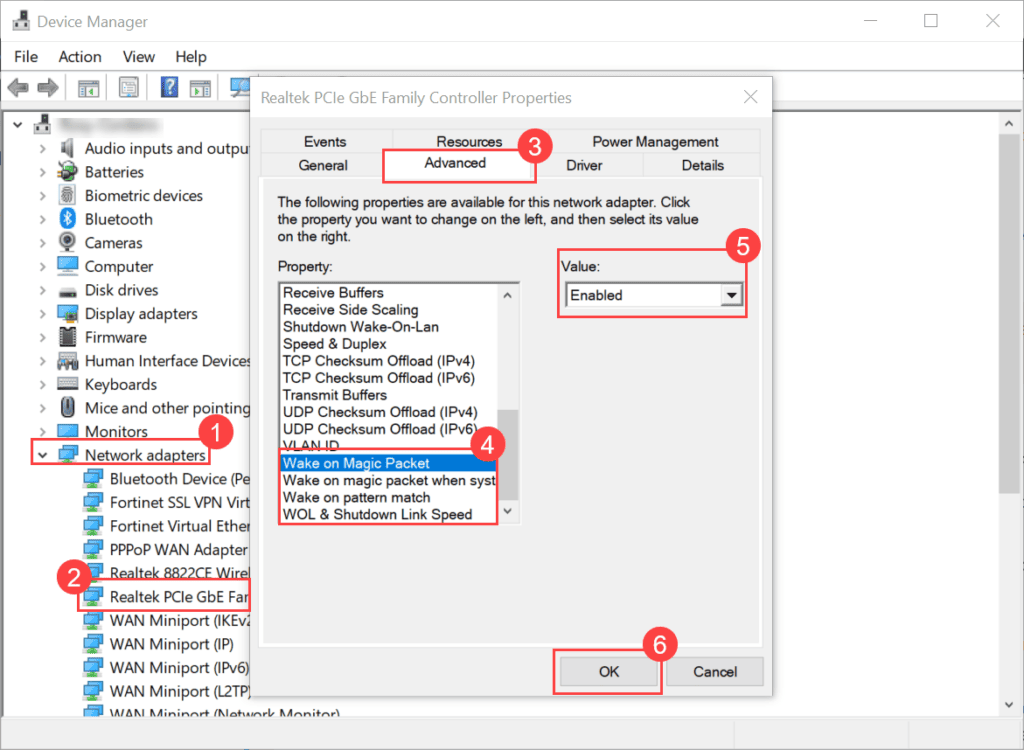
- Open the Device Manager. Expand Network Adapters, select your Ethernet adapter, right-click it, and select Properties. Here, the Realtek PCIe GbE Family Controller Ethernet adapter is used. In the Advanced tab, enable Wake on Magic Packet and other related fields such as 'Wake on magic packet when system,' 'Wake on pattern match,' and 'WOL & Shutdown.'
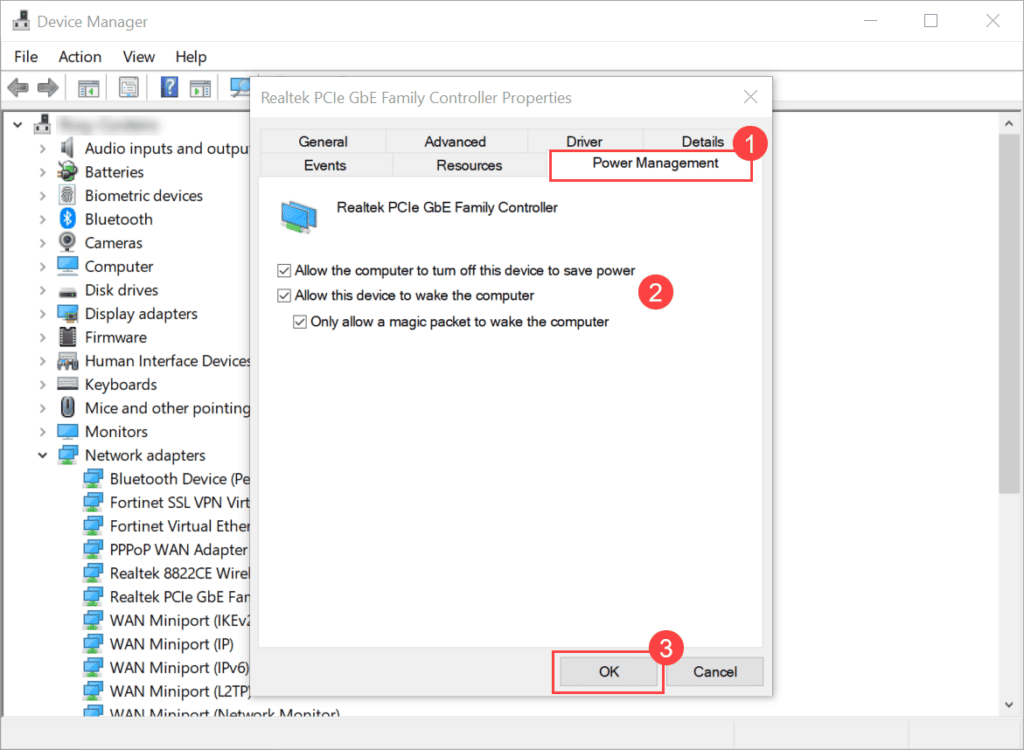
In the Power Management tab, enable Allow this device to wake the computer, as shown below.
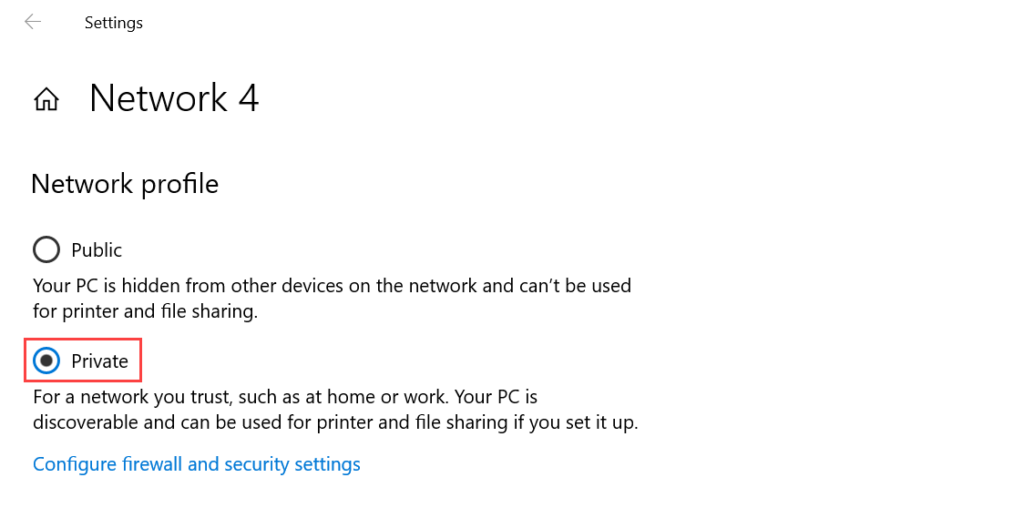
- Set the Network Profile to Private from the Network and Internet settings.
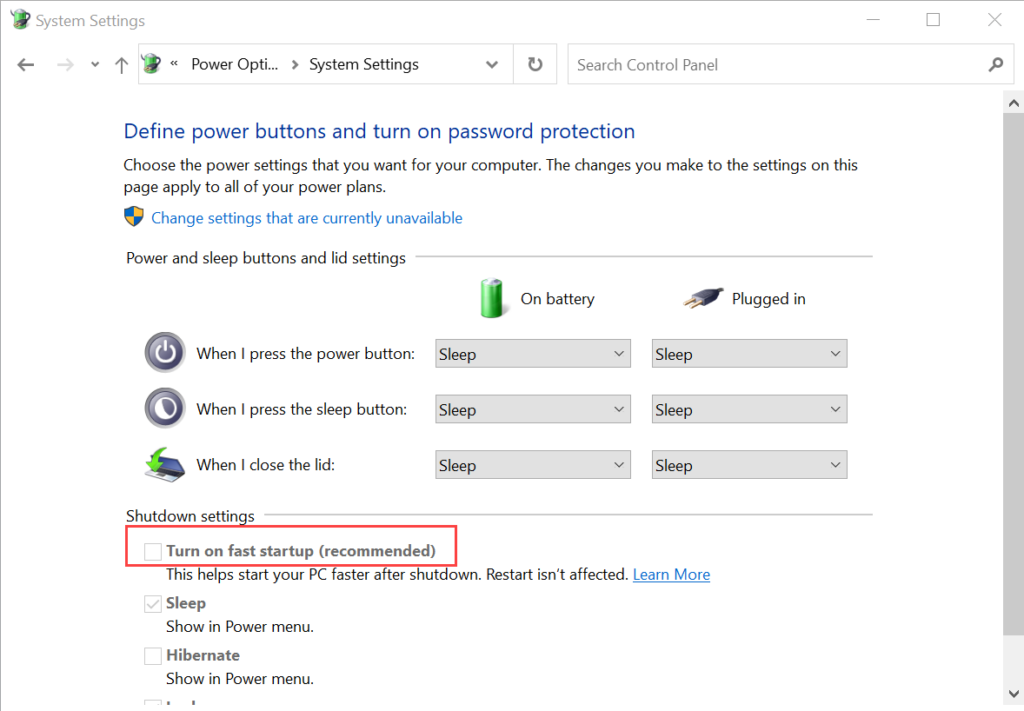
- Disable the parameter Turn on fast startup from Control Panel > Hardware and Sound > Power Options > System Settings.
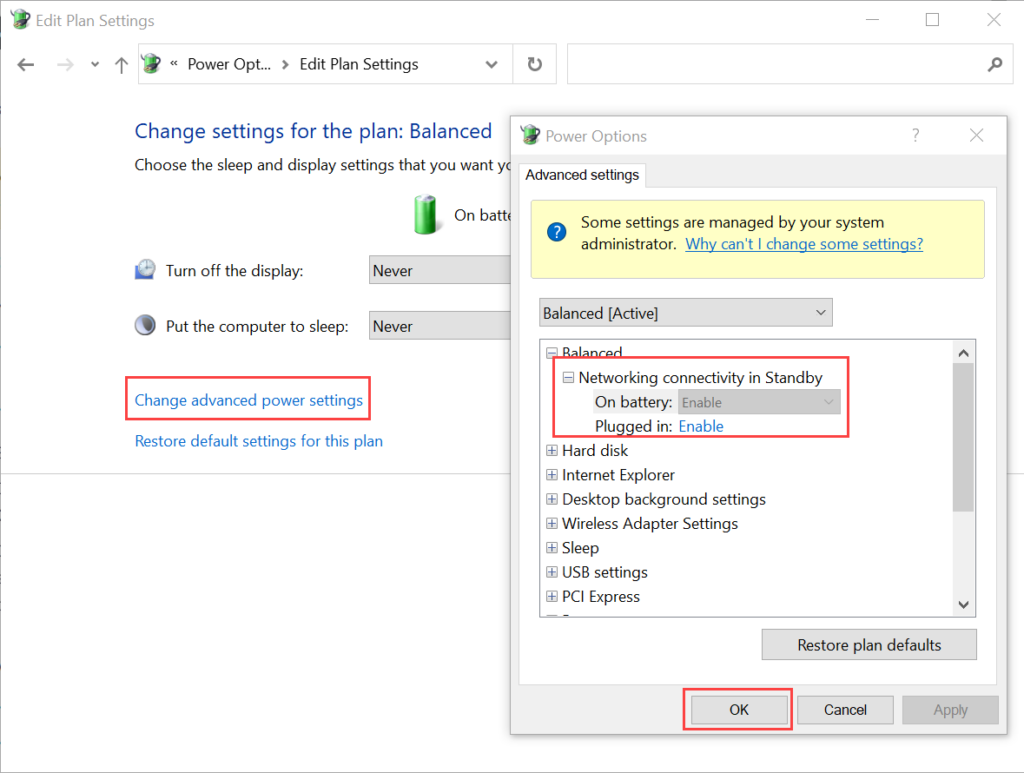
- Open Edit Power Plan and click the Change advanced power settings link. Under the Balanced option, expand Networking connectivity in Standby. Enable both the On Battery and Plugged in options.
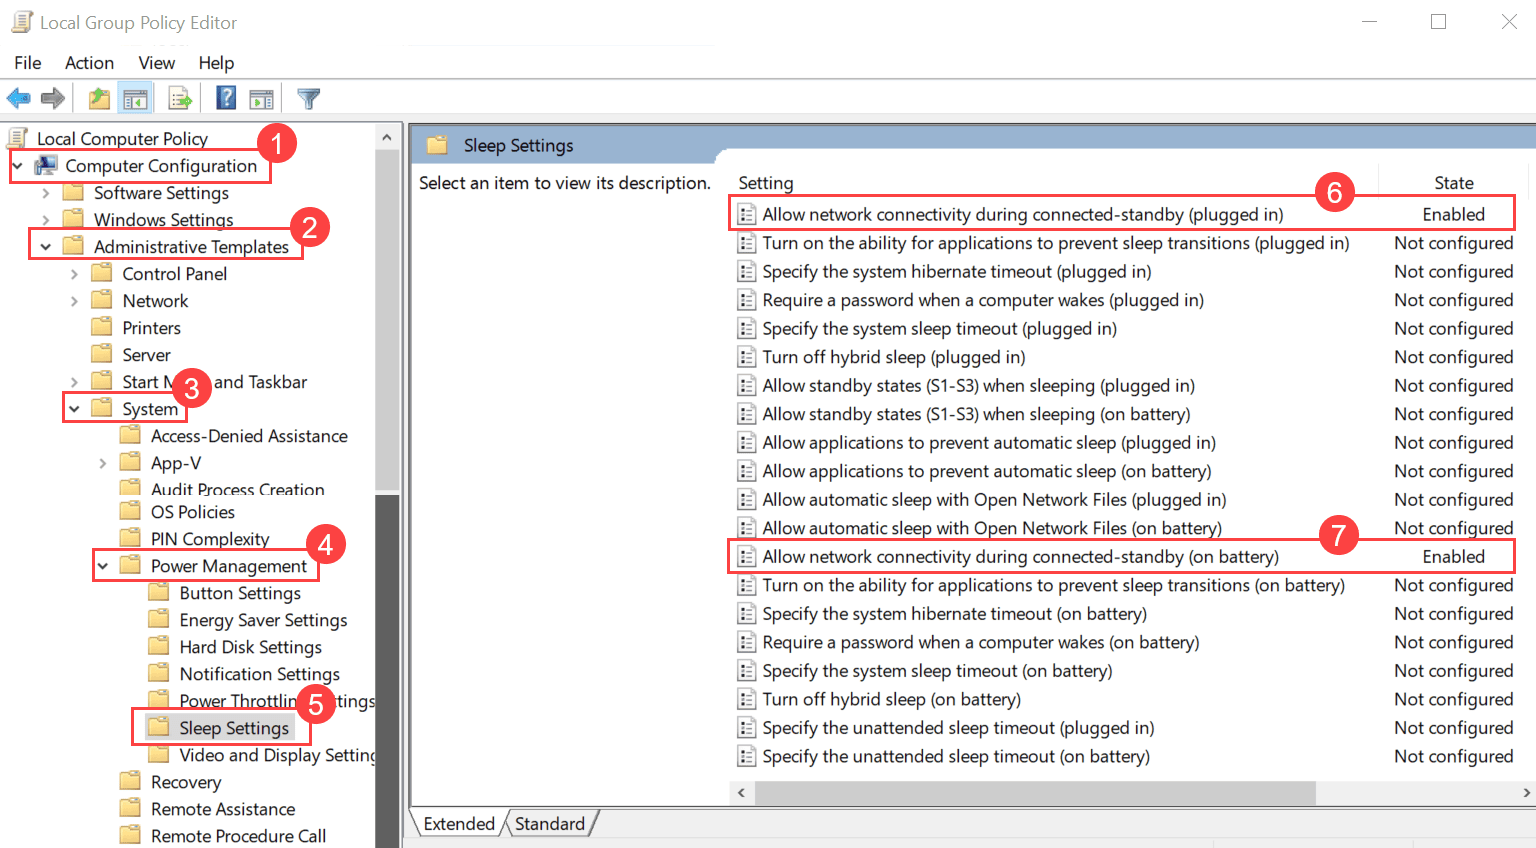
- In the Edit Group Policy > Computer Configuration > Administrative Templates > System > Power Management > Sleep Settings, enable the following two parameters:
- Allow network connectivity during connected-standby (on battery)
- Allow network connectivity during connected-standby (plugged in)
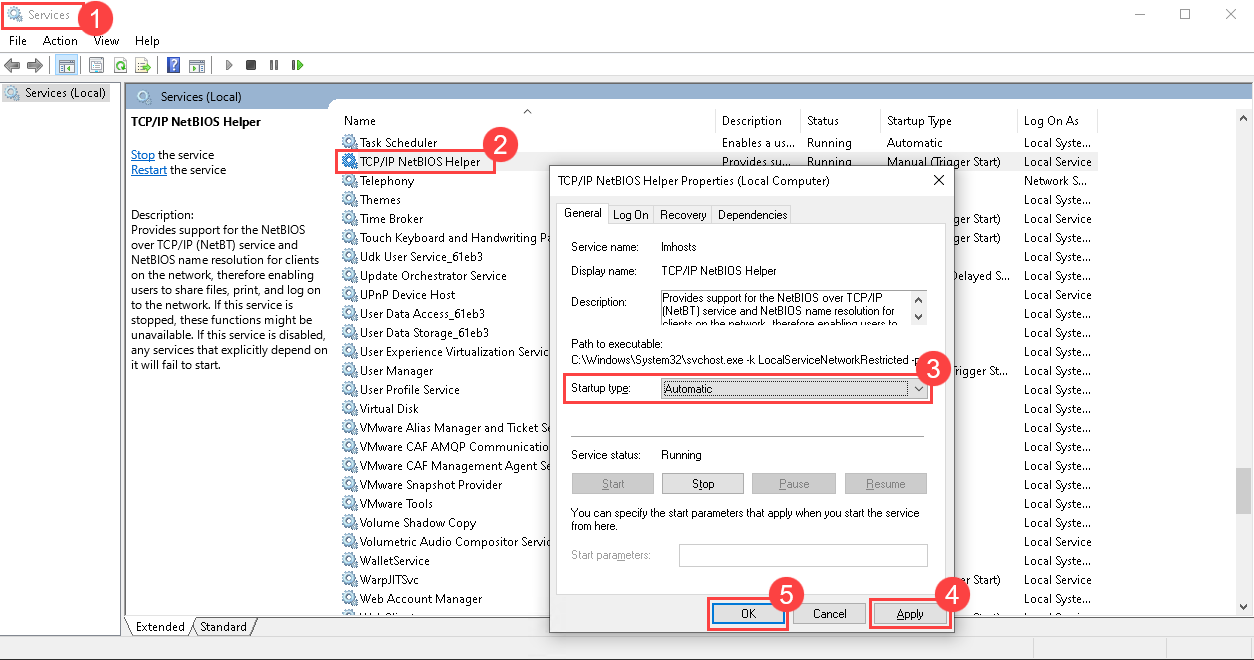
- Open the Services application with Run as Administrator, enable the TCP/IP NetBIOS Helper Service, and set the Startup Type as Automatic. Once completed, click Apply and OK.
Methods to Initiate Wake on LAN
You can turn on the remote computer in two ways:
- Manually: You can use the Wake Up Now option from the Hardware Details page of a particular computer.
- Automatically (via scheduler): You can schedule the timing to execute the WOL process on multiple computers. For more details, refer to Create WOL Schedule.
- Currently, WOL is supported for Windows (computer and laptop) assets with IPv4 addresses only.
- The Wake on LAN settings on the target machine may vary from manufacturer to manufacturer.