Security
Security deals with securing the application from inside and outside threats. This section enables you to view the different audit logs, user sessions as well as configure the various security policies. You can also blacklist certain IP Addresses from accessing the ServiceOps Portal.
To view the Security page, navigate to Admin > Organization > Security.
It consists of the following tabs:
- Configuration Audit
- Tenant Audit
- Operation Audit
- PII Audit
- Email Audit
- Password Policy
- User Security
- User Sessions
- IP Address Restriction
- Scheduled Operation Audit
Configuration Audit
This tab displays the configuration summary along with the audit logs about all the technical changes. You can also download the summary in PDF or Excel format if required.
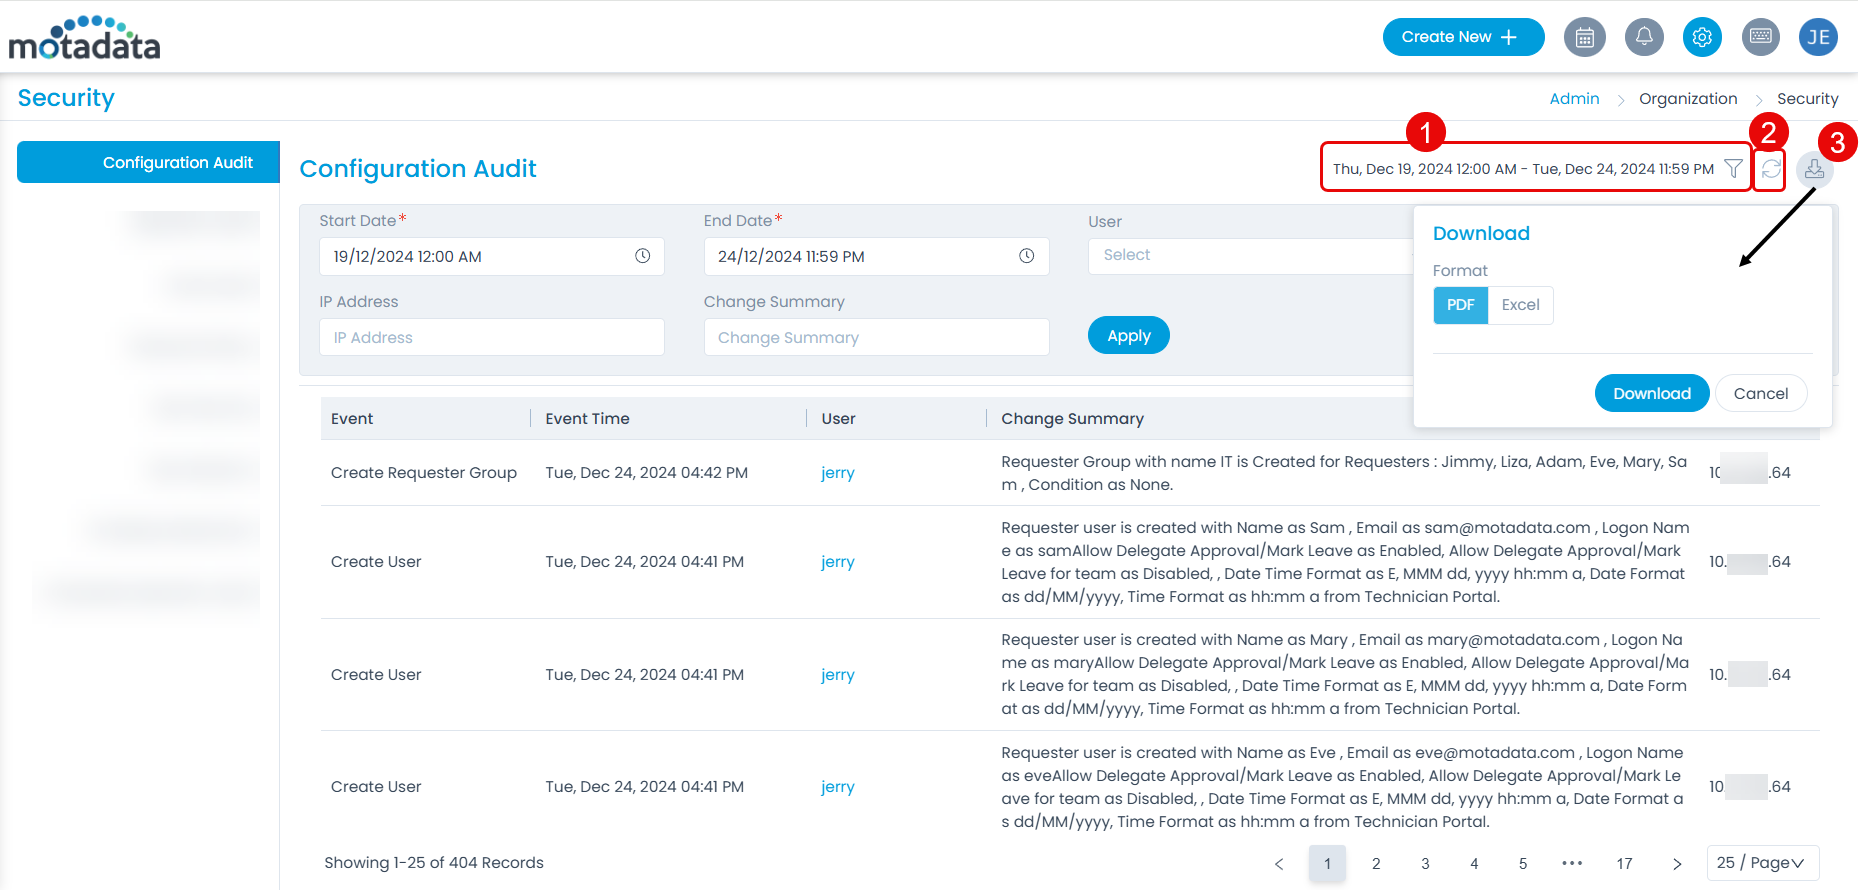
From this page, you can perform the below tasks:
- Filter: You can select the Date range, User, Event, IP Address, and Change Summary based on which the log data is to be filtered.
- Refresh: You can refresh the log list to sync and get the latest activities.
- Download: You can download the summary in PDF or Excel format.
Tenant Audit
This tab displays the summary of the changes made in the tenant configuration.
This tab is available only if Tenant Management feature is enabled in the license.
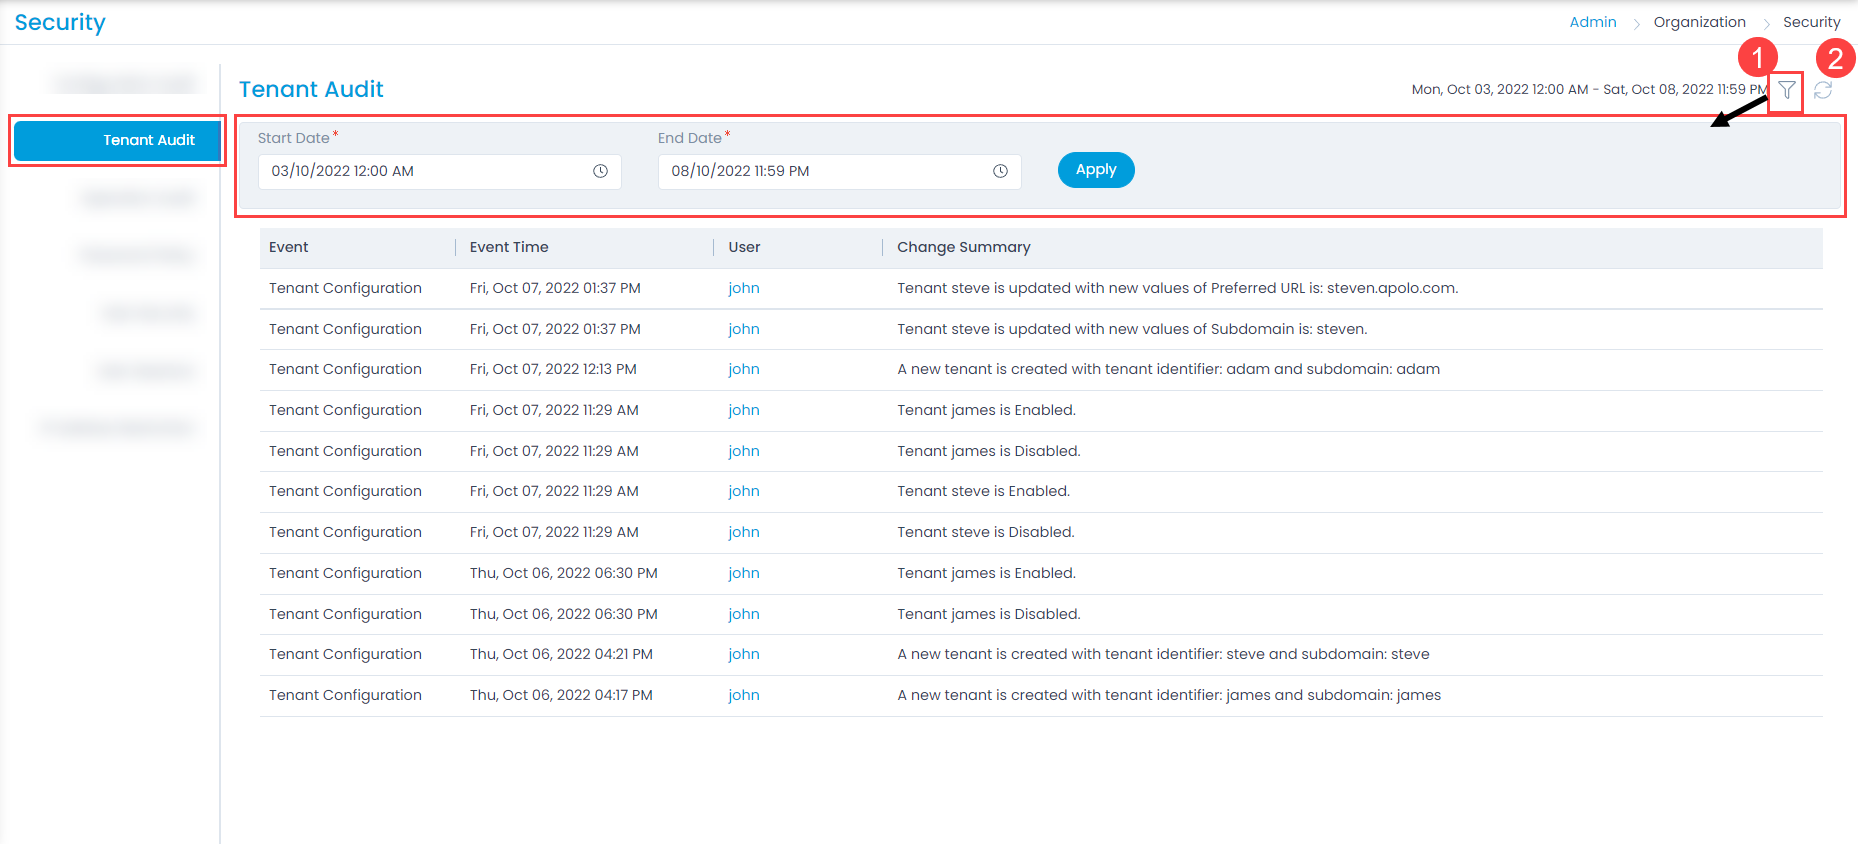
From this page, you can perform the below tasks:
- Filter: You can select the date range based on which the log data is to be filtered.
- Refresh: You can refresh the log list to sync and get the latest activities performed in the tenant section.
Operation Audit
This section displays the changes made in the application along with the details. You can view the logs based on the selected module.
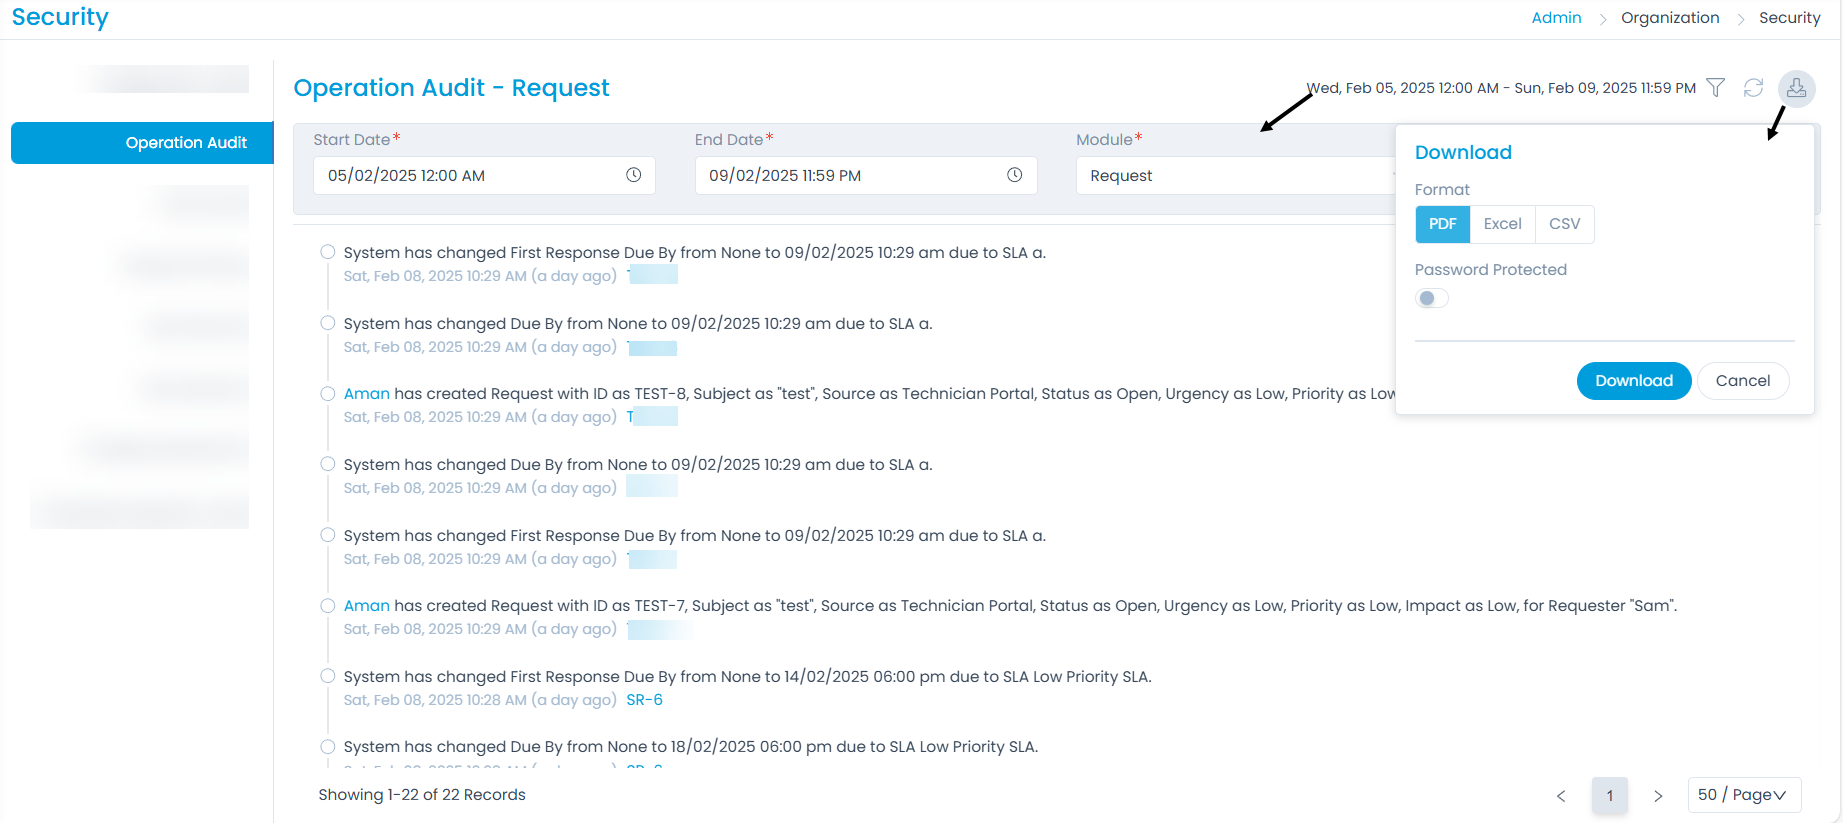
Here, you can filter the logs based on the selected module. Also, you can set the number of records to be viewed per page.
Also, you can download the records in PDF, Excel, and CSV format. Moreover, to enhance security you can password protect the PDF and Excel files.
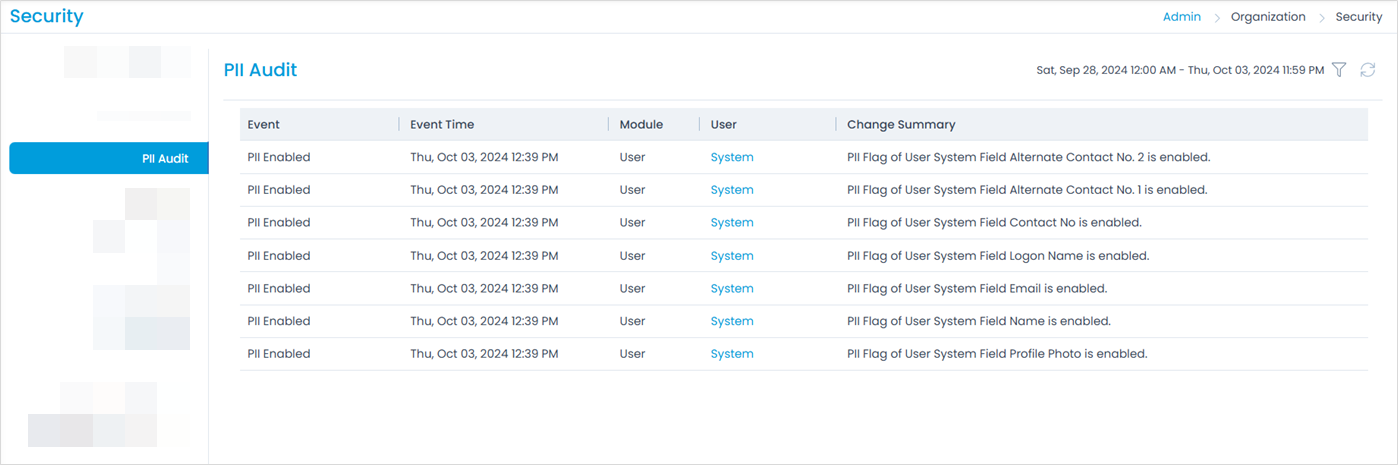
PII Audit
This tab enables to view the audit of the PII events as per the selected filter. You can filter the data based on the selected date range. Uou can also refresh the audit list to view the latest updates.
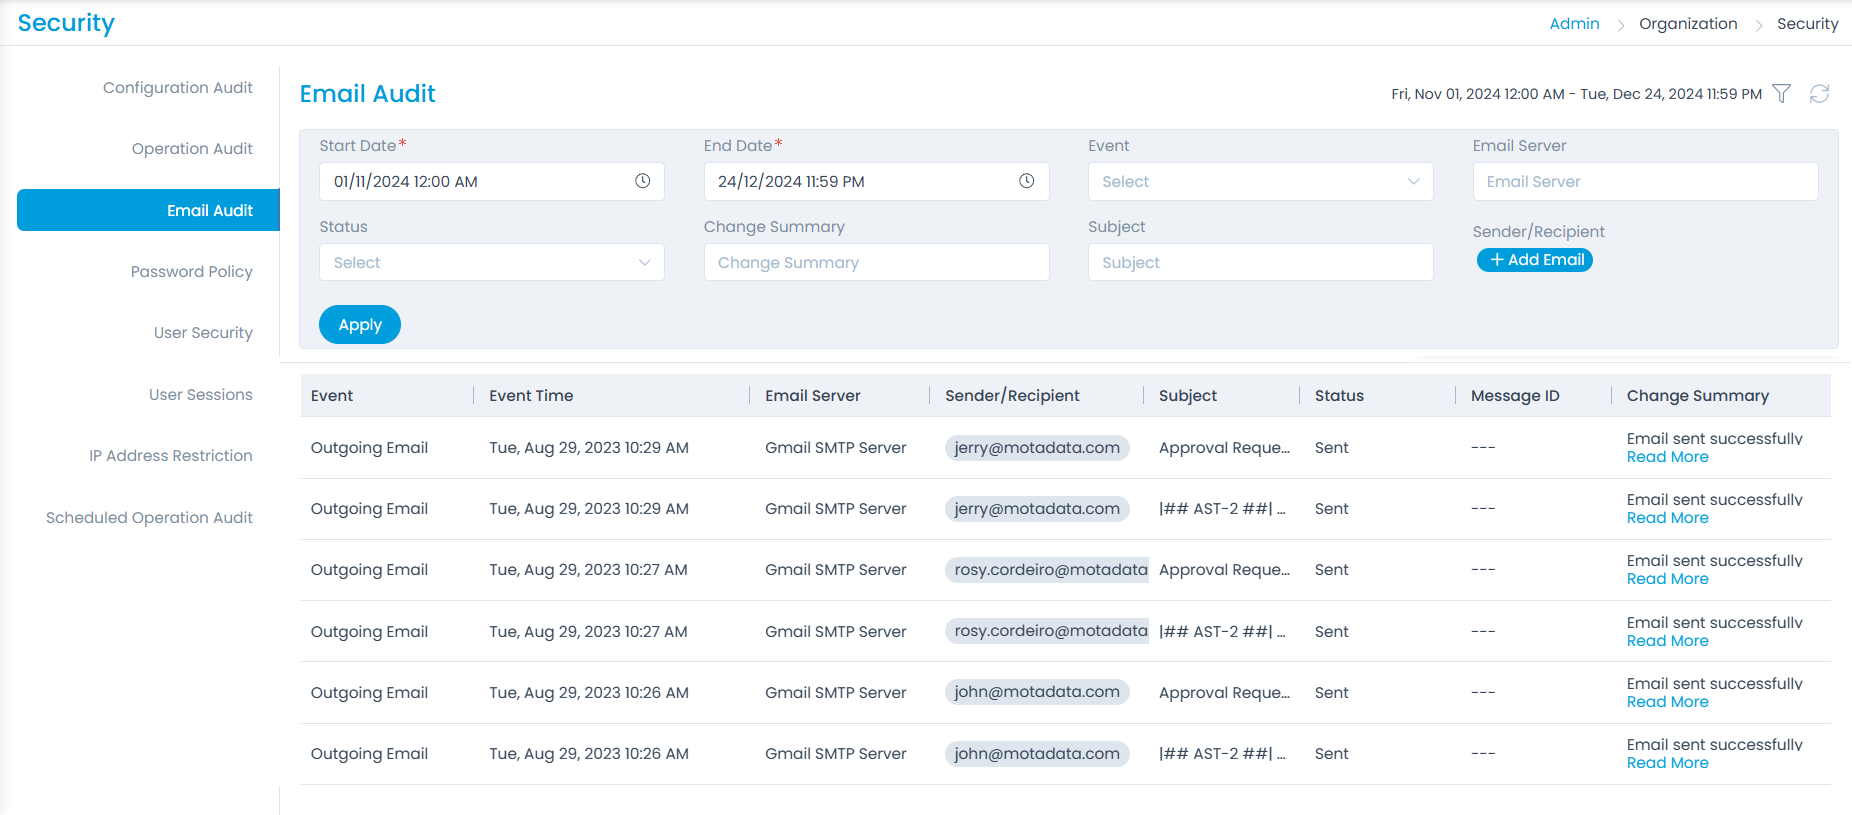
Email Audit
This tab enables to view the details of the emails sent like Event, Event Time, Email Server, Sender/Recipient, Subject, Status, Message ID, and Change Summary. Here, you can perform the following actions:
- View the audit as per the selected filter. You can filter based on Date Range, Event, Email Server, Status, Change Summary, Subject, and Sender/Recipient Email Address.
- Refresh the audit list to view the latest updates.
- Download the audit entries in PDF and Excel format.
Password Policy
This tab enables you to add validations for the password to increase its security. The Password Policy is a preventive measure to keep the threats off the bay. You can either make it simple or complicated as per the organization's needs. There are default
The configurations are available based on their type, i.e. High, Medium, and Low. Also, a custom policy can be created if required. If "Privacy Regulations" is enabled, the Custom policy will be selected by default. If disabled, the existing configurations will be available in the Custom Policy.
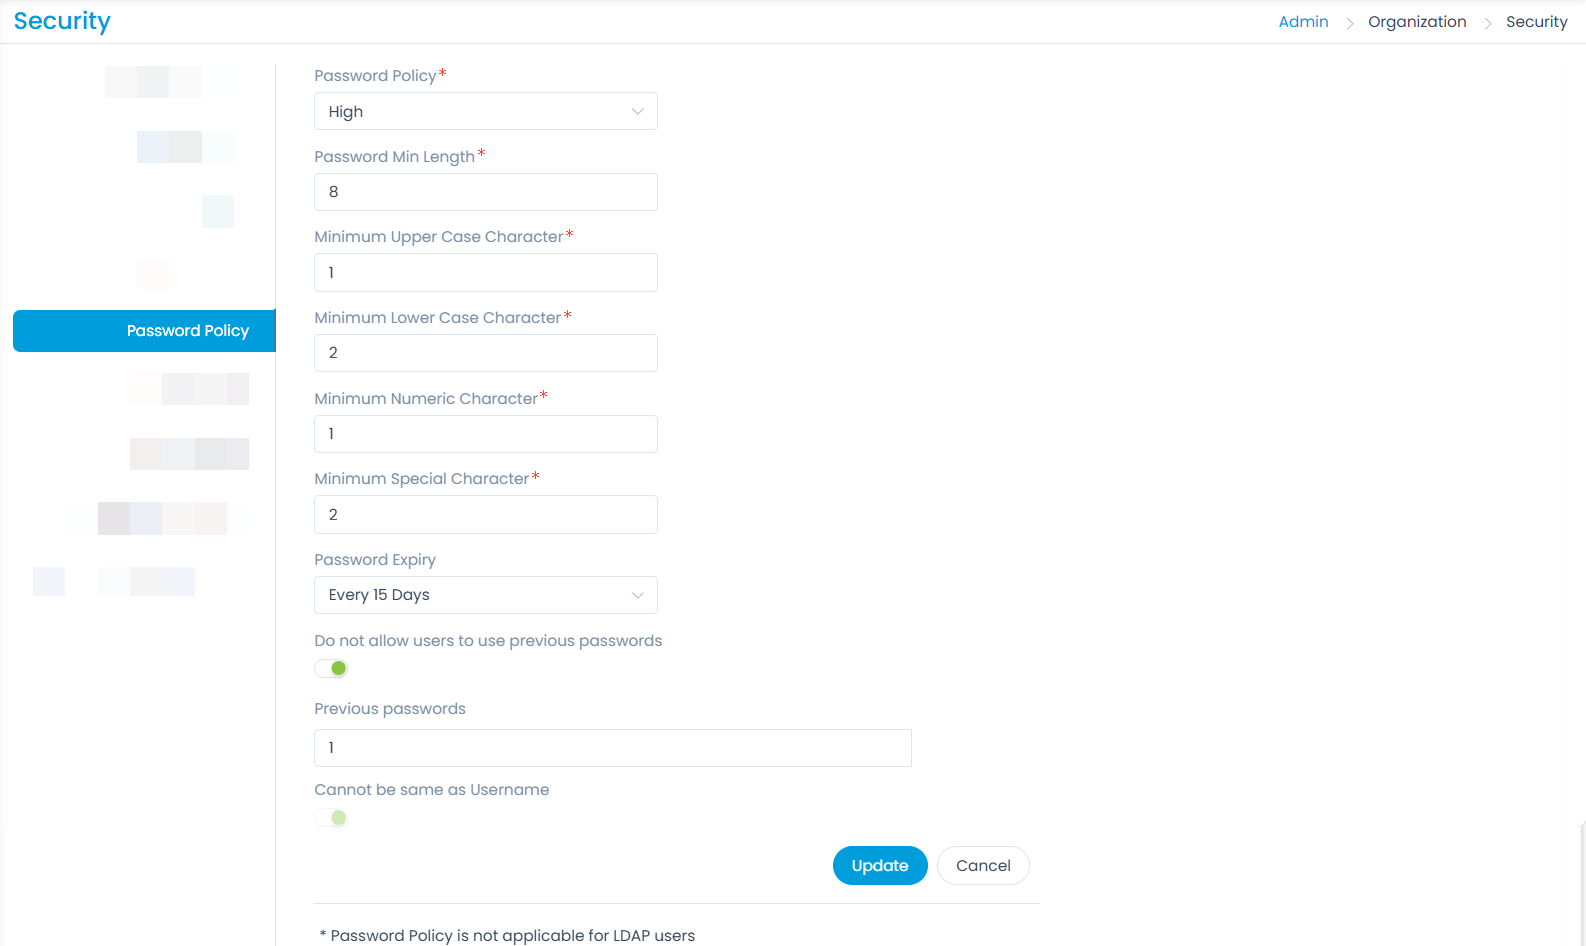
You can configure the below parameters for the password:
| Parameter | Description |
|---|---|
| Password Policy | Select the type of policy to implement. The options are: Custom, High, Medium, and Low. |
| Password Min Length | Enter the required minimum length of the password. |
| Minimum Upper Case Character | Enter the minimum number of upper case characters required in the password. |
| Minimum Lower Case Character | Enter the minimum number of lower case characters required in the password. |
| Minimum Numeric Character | Enter the minimum number of numeric characters required in the password. |
| Minimum Special Character | Enter the minimum number of special characters required in the password. |
| Password Expiry | Select the option when you want the password to expire. The options are: - Never - Every 15 Days - Every 30 Days - Every 60 Days - Every 90 Days Based on the selected option, the password will expire and you are required to reset it. |
| Do not allow users to use previous passwords | Enable if you do not want the user to use previous passwords again. |
| Previous Passwords | If the above option is enabled, enter the number of previous passwords which cannot be used. For example, if 2 is entered, the user will not be allowed to set the last 2 previously used passwords. |
| Cannot be same as Username | Whether the password can be same as the username or not. |
Once done, click Update to apply the policy.
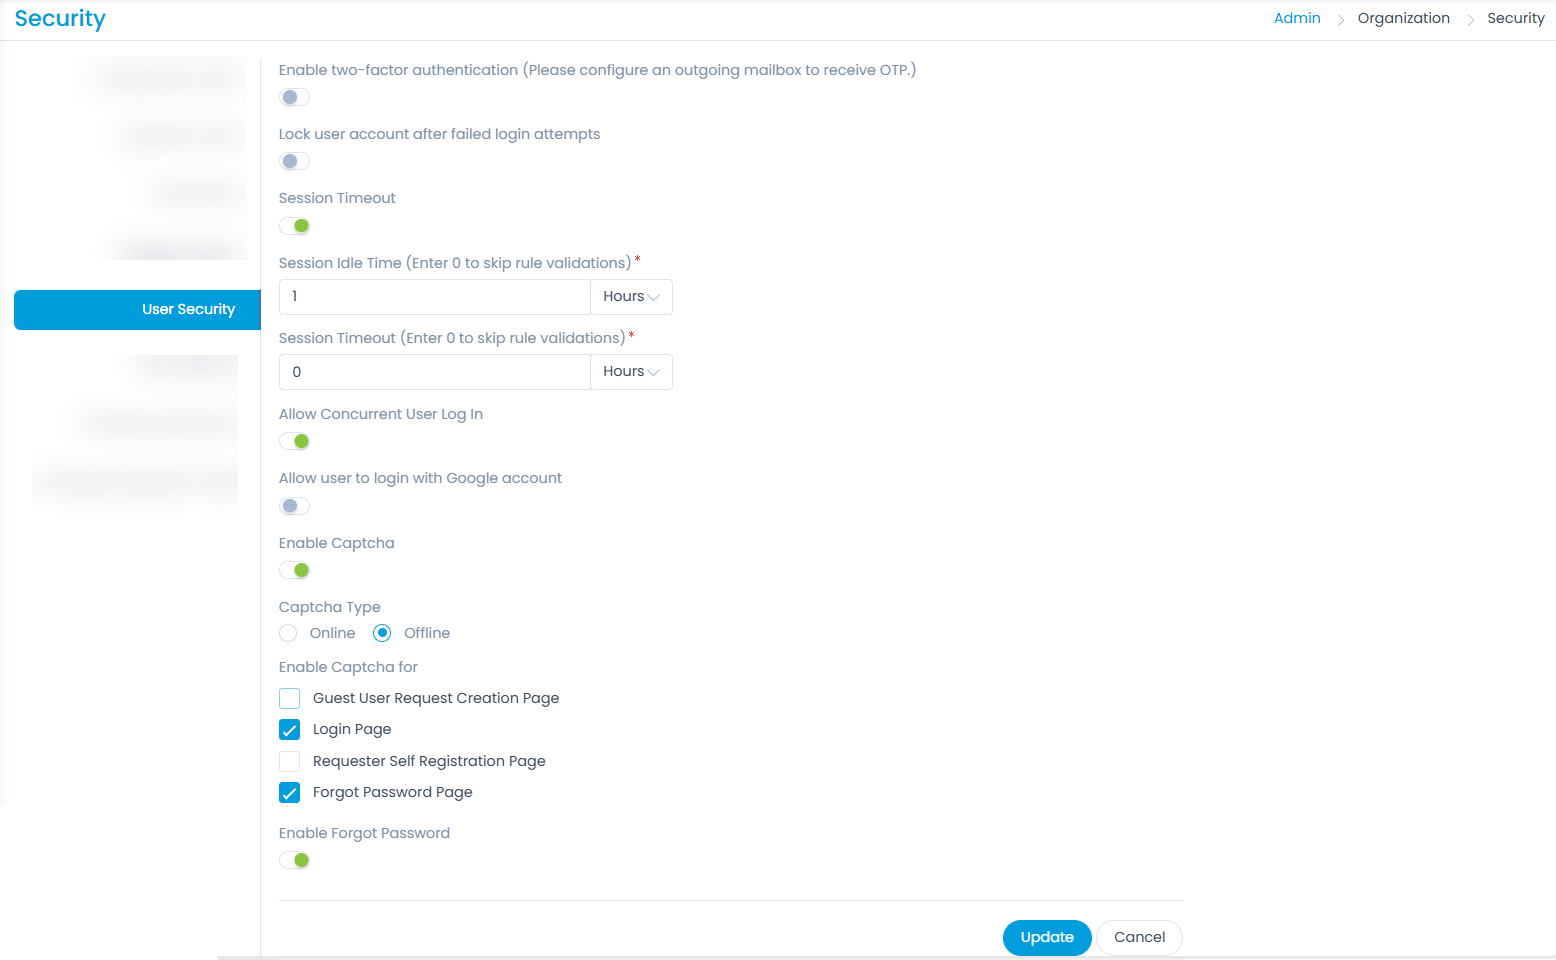
User Security
This tab enables you to enhance the security of the user accounts. You can set the two-factor authentication, lock user account, allow concurrent login, allow to use Google account to login, and use captcha. Also, you can set the session timeout parameters.
The parameters are:
| Parameter | Description |
|---|---|
| Enable two-factor authentication | Enable if you want to use the two-factor authentication method to login. Once enabled, select the Authentication Type that you want to use. The options are: - Email: Along with the credentials you need to enter the OTP sent on the registered email address, to login to the portal. To receive the OTP, you need to configure an outgoing mailbox. - Authenticator App: Along with the credentials you need to enter the code generated by the authenticator app. For more details, refer to the topic "How to use Authenticator App". Once selected, the main Super Admin will have the options to regenerate recovery codes and reset two-factor authentication. |
| Lock user account after failed login attempts | Enable if you want to lock the user account once the limit of the failed login attempts exceeds. If enabled, specify the number in the Failed Login Attempts field. |
| Session Timeout | Enable if you want to configure when the session should timeout. If enabled, provide the Session Idle Time and Session Timeout in hours or minutes. Once, the idle session timeout duration is exceeded, the user's session will automatically close, and the login page will appear. |
| Allow Concurrent User Log In | Enable if you want to allow the users to have concurrent sessions. |
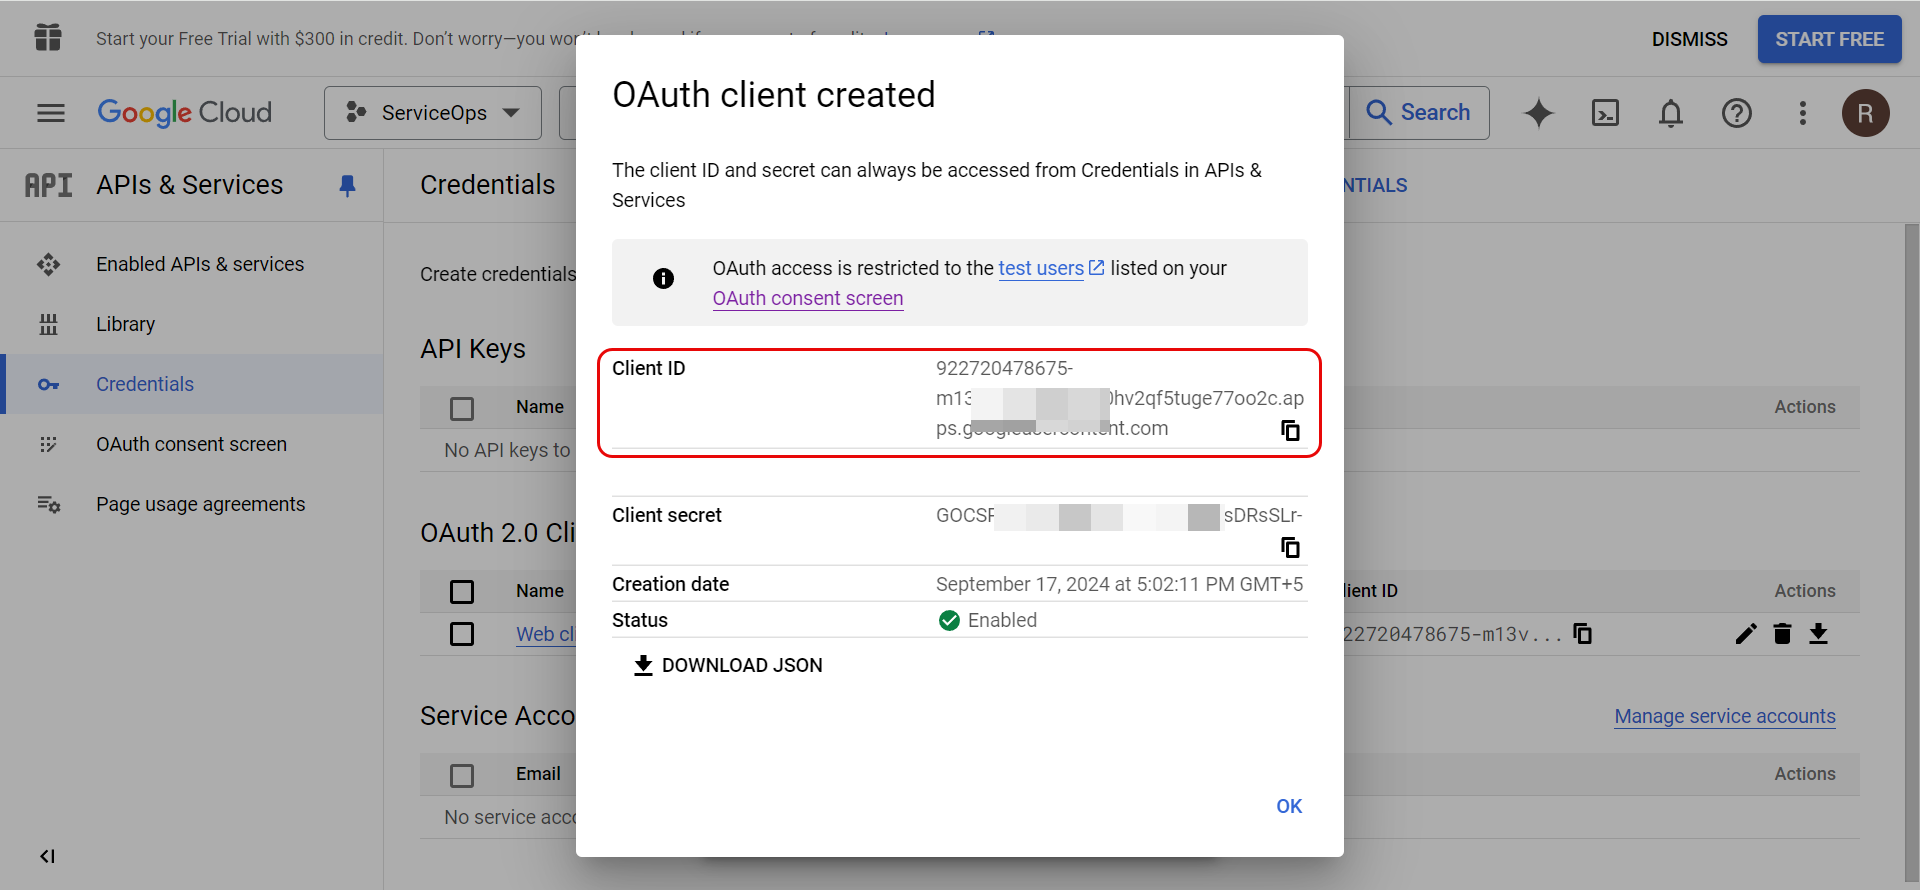
| Allow user to login with Google account | Enable if you want to allow the user to use the Google Account to login to the portal. If enabled, enter the unique Google Web Client ID using which the user can login. This client ID can be generated by creating an Oauth2.0 Client ID from the Google Cloud Console. For more details, refer to the Configuring Gmail as Authentication Server section steps 4 to 10. |
| Enable Captcha | Enable if you want to use the Captcha on the login screen. Once enabled, provide the following inputs: - Captcha Type: You can select either Online or Offline type of captcha to be used. If Online is selected, enter the Site Key, Secret Key, and select the Proxy Server if required. |
| Enable Captcha for | Select the page(s) on which you want to use the captcha. The options are: - Guest User Request Creation Form - Login Page - Requester Self Registration Page - Forgot Password Page Once selected, the captcha will be available on the respective page. |
| Enable Forgot Password | Enable to view the Forgot Password link on the Login page. If disabled, the link will be hidden. |
Once all the settings are configured, click Update.
How to use Authenticator App?
To use the Authenticator App for Two-Factor Authentication:
- In ServiceOps, go to Admin > Organization > Security > User Security, and enable the Authenticator App option for the two-factor authentication field.
- Login to the ServiceOps portal. Once the credentials are entered, the Setup Two-factor Authentication screen will appear as shown below. This screen appears if you have not enrolled the authenticator app.
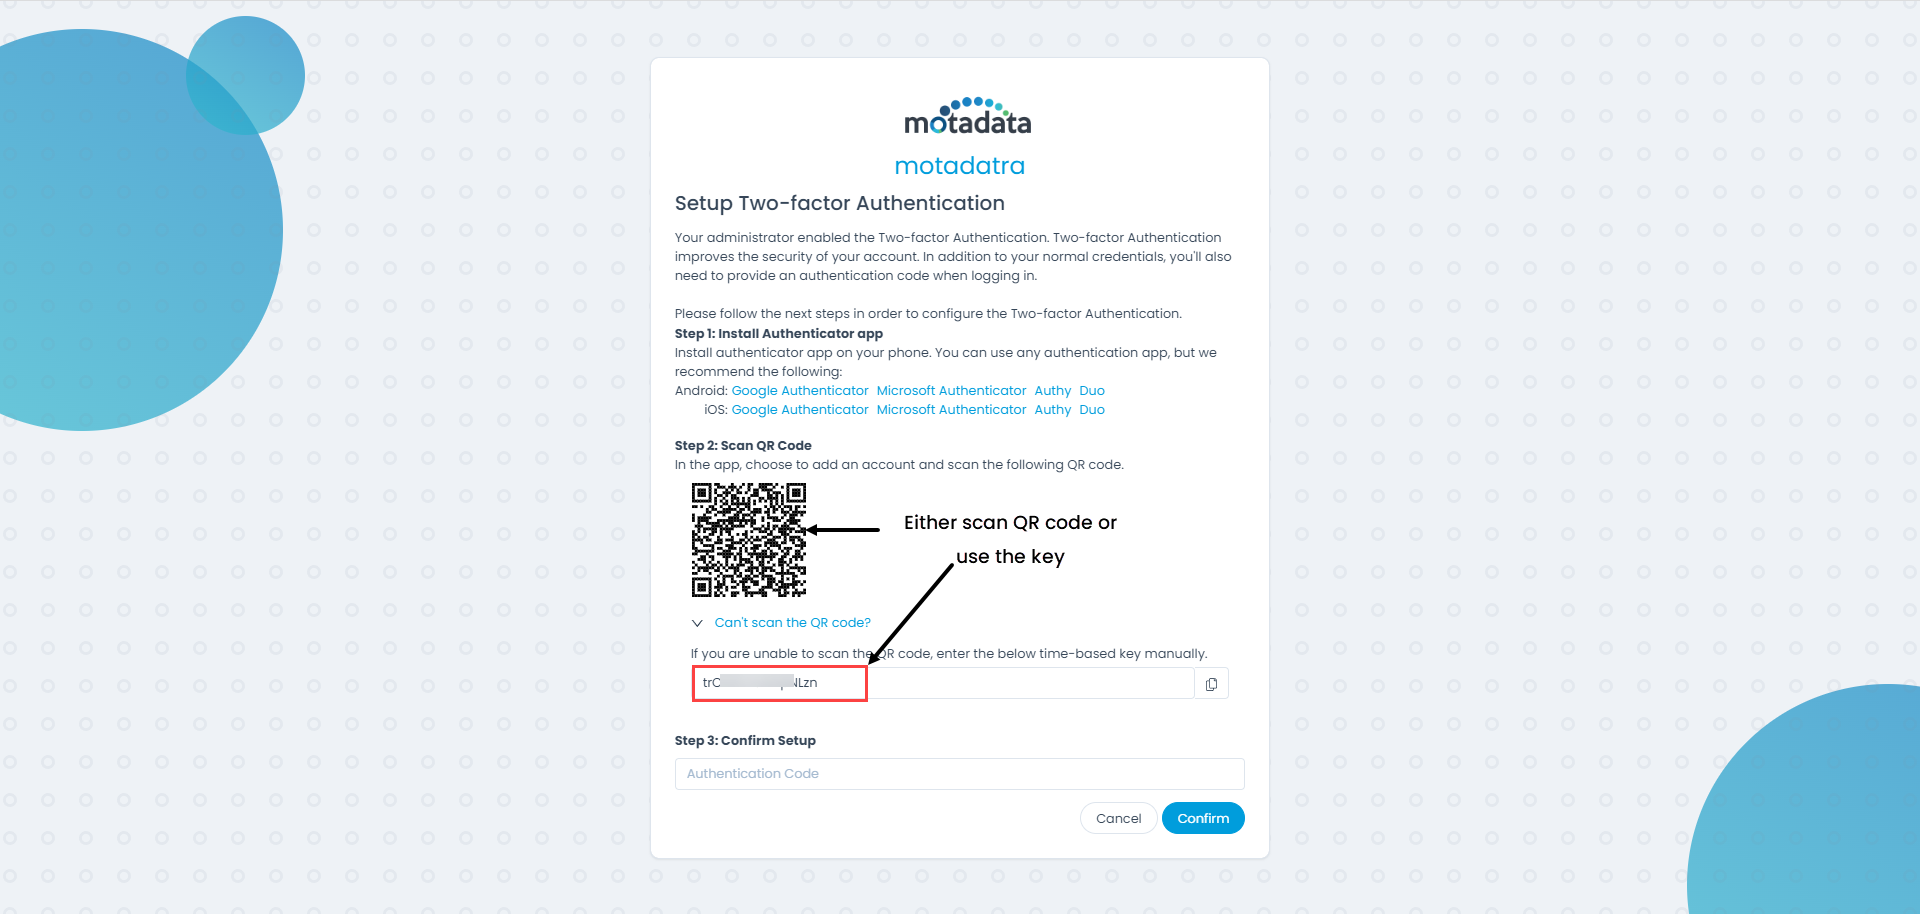
In your mobile phone, install the desired authenticator app from the App Store. You can find the recommended apps list in the above figure.
In the App, choose to add an account, and scan the QR code displayed on the screen. You can also use the code available by clicking the link "Can't scan the QR code?".
Enter the Verification code displayed in the app to Confirm setup.

- The Recovery Codes will appear. You can either download or copy these codes in a separate text file. You can use these codes when you cannot access the app from your phone. Recovery codes can be used only once, after which they will become invalid. Tap Finish Setup.
The user will get enrolled for two-factor authentication even if the Finish Setup is not clicked.

- On the portal, enter the code generated by the Authenticator App, and Verify it.

- If you face any issue in accessing the code, you can use any of the below options:
- Use a Recovery Code: Click to use a recovery code for authentication. A popup will appear where you need to enter the recovery code and verify it. note
The main Super Admin can regenerate the recovery codes from the Edit Profile page, if the codes are about to get used or the app code is inaccessible.
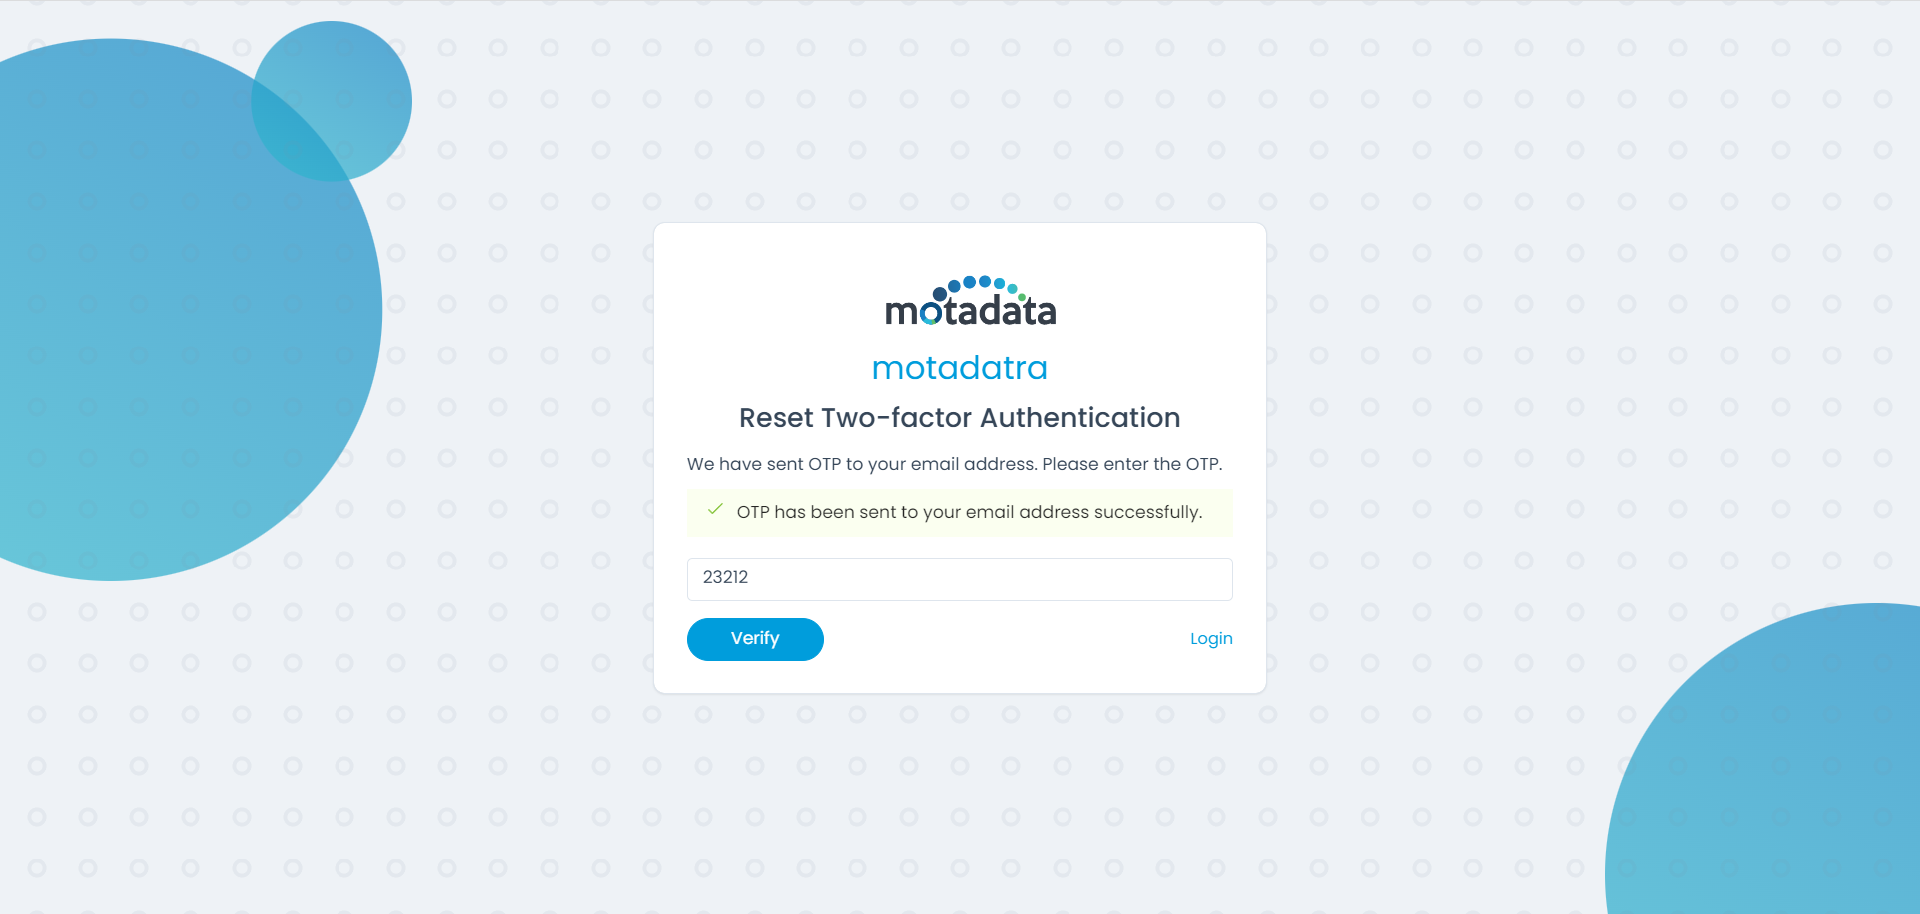
- Reset Two-Factor Authentication: Click to reset the Two-Factor Authentication account linked with the technician. Once clicked, enter the OTP sent to your registered email address, and verify it.
Once verified, the login screen will appear.
- Now, you need to enter the credentials on the ServiceOps portal, and login.
- Once signed-out, next time when you login again, along with the credentials you will only have to enter the authentication code received from the app.
User Sessions
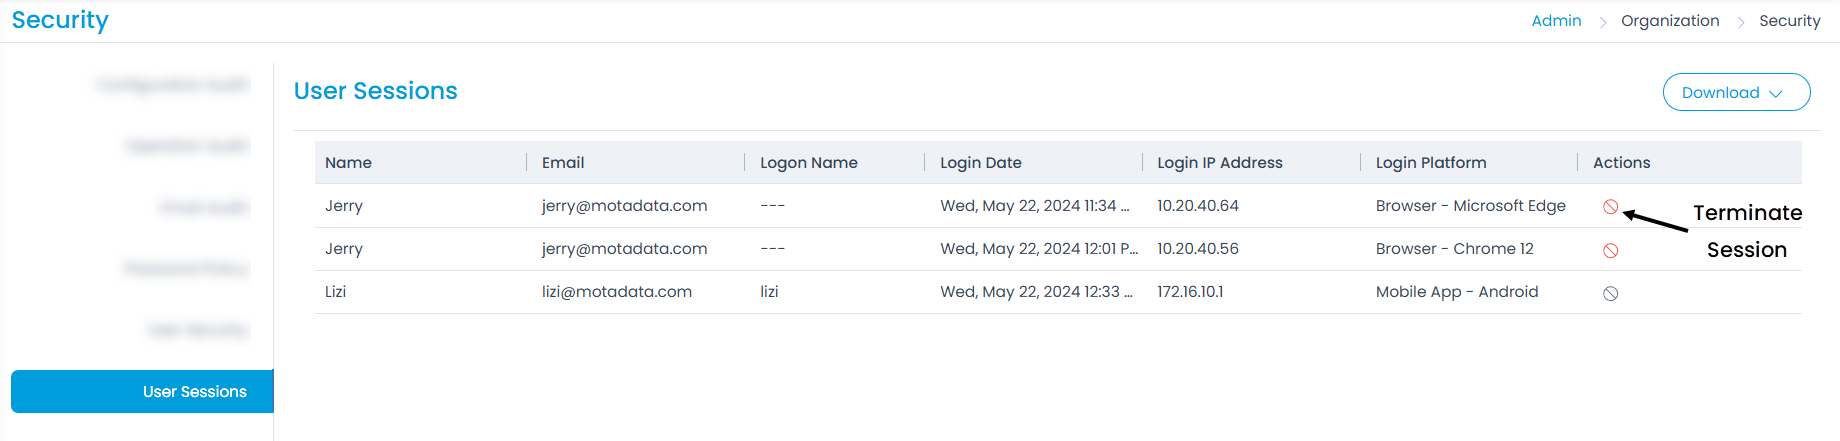
This tab displays the login sessions of the users along with their details. The details include Name, Email, Logon Name, Login Date, Login IP Address, and Login Platform (Browser or Mobile App). This helps to keep a track of the users who are logged in to the portal and Mobile App. All these details can be downloaded in PDF and Excel format. Also, you can terminate any session if required using the red Terminate Session icon from the Actions column.
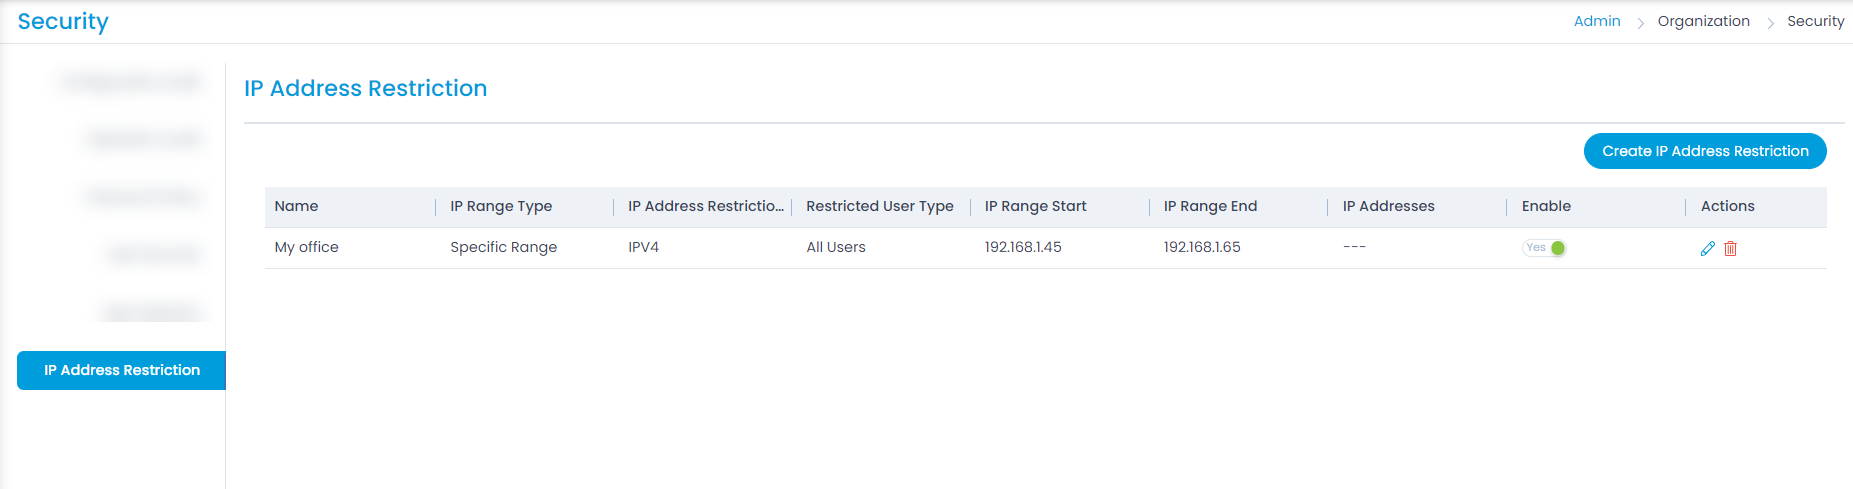
IP Address Restriction
This tab displays a list of IP Addresses configured to allow access to the ServiceOps Portal. If the IP Address of the user is within the configured range, the user will be allowed to sign-in to the portal. If it is outside the configured range, the user will be restricted from signing-in with a message, "You are not allowed to login from current location".
- All the activities performed here will be logged and displayed in the Configuration Audit section. Also, if the user fails to sign-in due to the IP Address Restriction, the details will be displayed in the Configuration Audit.
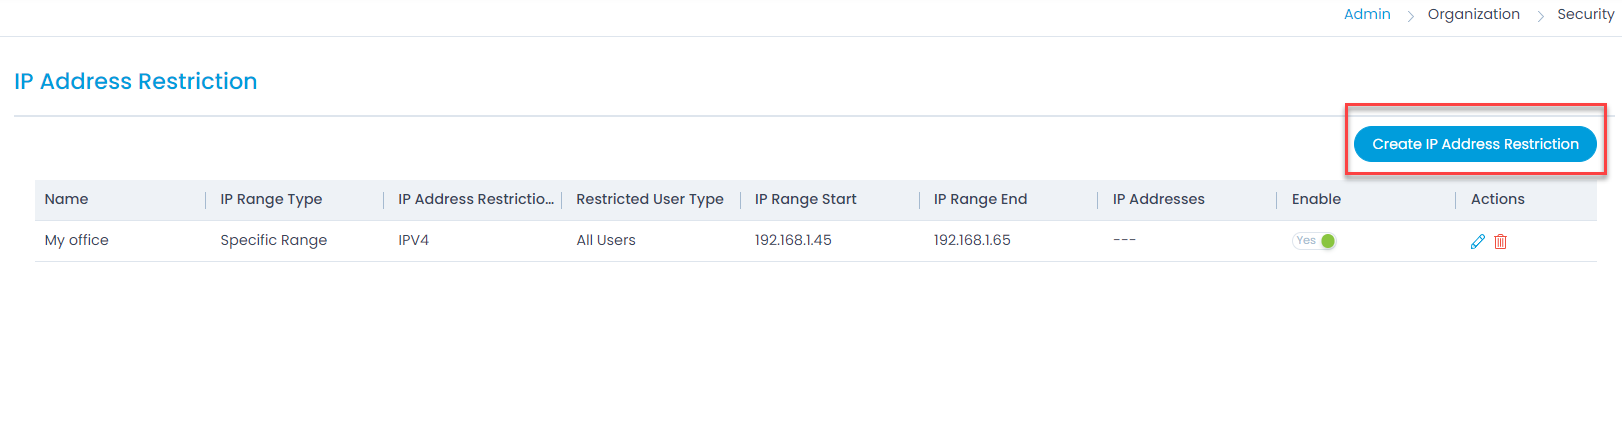
- You can also create a new IP Address Restriction table configuring the range as well as other details as below:
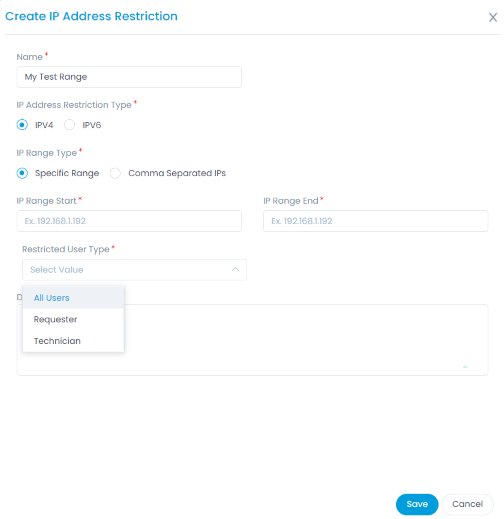
Enter the following details:
- Name: Provide the name of the IP Address Restriction list.
- IP Address Restriction Type: Select the type of IP Address to be restricted. Options available: IPV4 and IPV6.
- IP Range Type: Select the IP Range Type as:
- Specific Range: Provide the IP Address Range by mentioning the IP Range Start and IP Range End.
- Comma Separated IPs: Provide the list of IP Addresses separated by comma.
- Restricted User Type: Select the type of users to be restricted. Available Options are: All Users, Requester, and Technician.
- Description: Provide a brief description about the list.
Click Save and the IP Address Restriction list will be visible.
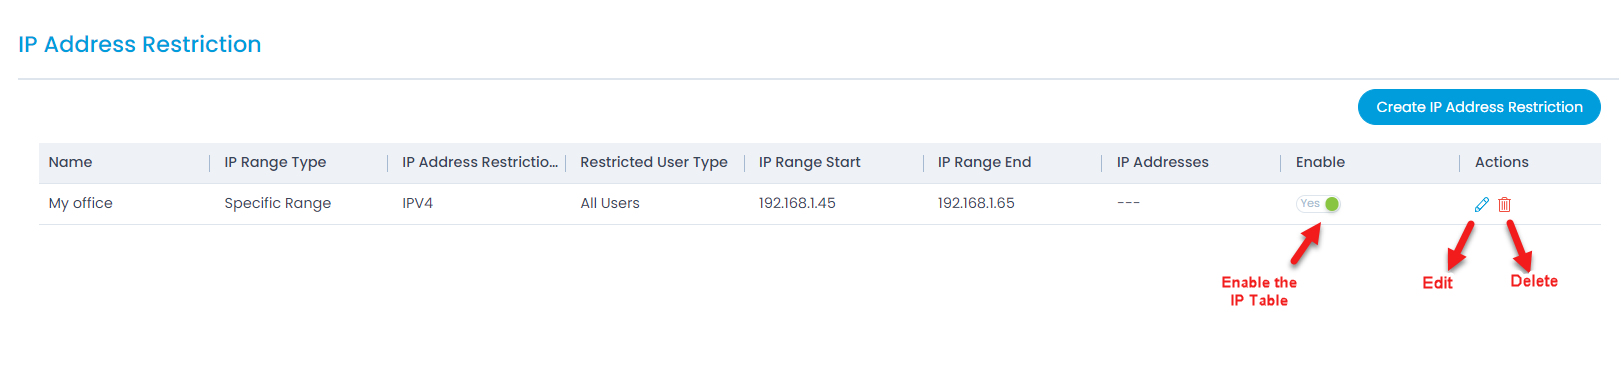
- Enable/Disable: Enable or Disable a list for the Restriction. If enabled the list will be applied to the users and accordingly allowed to sign-in.
- Edit/Delete: You can edit or delete the list from the Actions column.
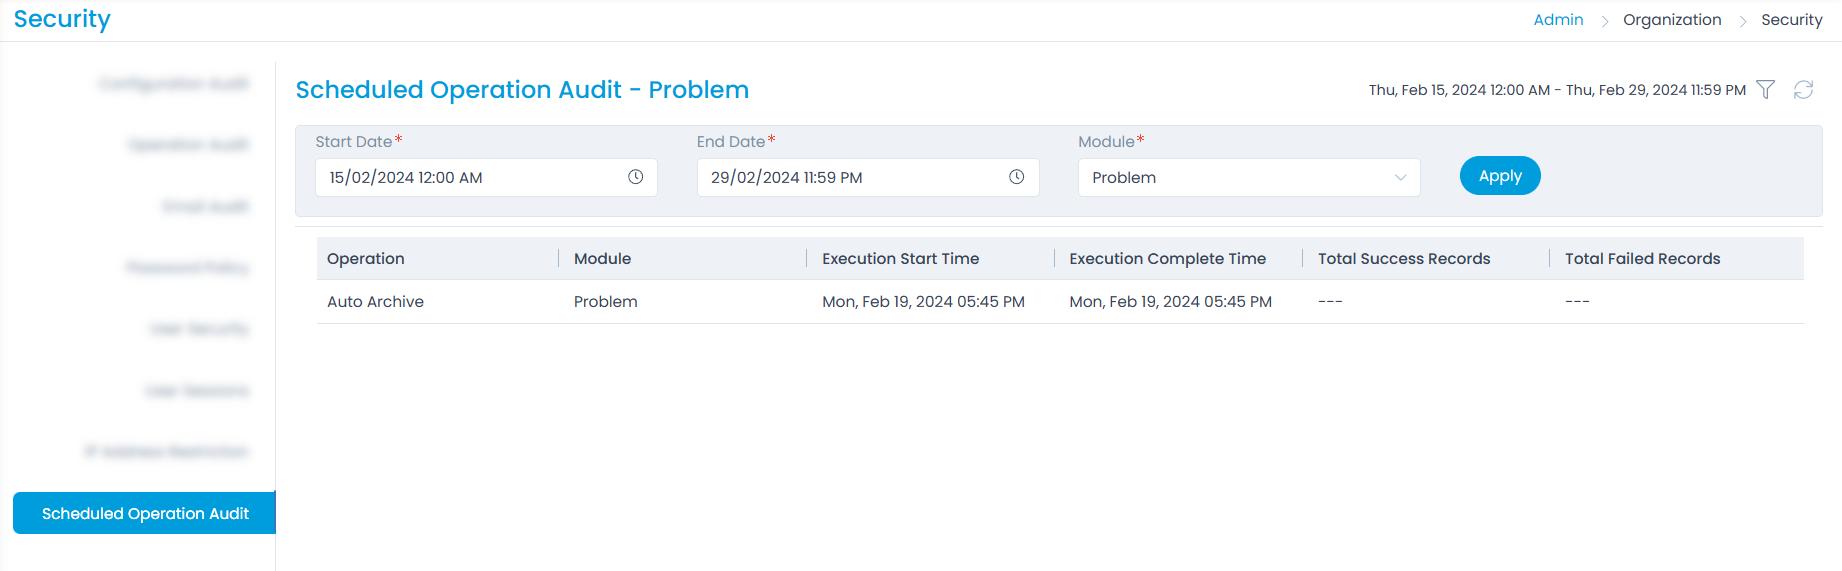
Scheduled Operation Audit
This section displays the audit logs of the scheduled archiving and purging operations. Once the scheduler is executed, the audit entry appears in this tab.
To view the audit, select the time range and module whose details you want to view.