For OAuth
What is OAuth?
OAuth is an Open Standard Authorization protocol that allows you to authenticate one application communicating with another on your behalf without sharing the password. It uses client secret values instead of a password to allow access to a secured resource. Thus, it enables secure email communication between ServiceOps and Gmail. Here, the Gmail application will be used for authentication.
This functionality is applicable from version 8.1 and above.
Configuring Gmail as Authentication Server
To configure Gmail as the authentication server, follow the below steps:
Sign in to the Gmail account.
Enable IMAP or POP from the Gmail Settings > Forwarding and POP/IMAP tab.
To enable IMAP, refer to the Check Gail through other email platforms page.
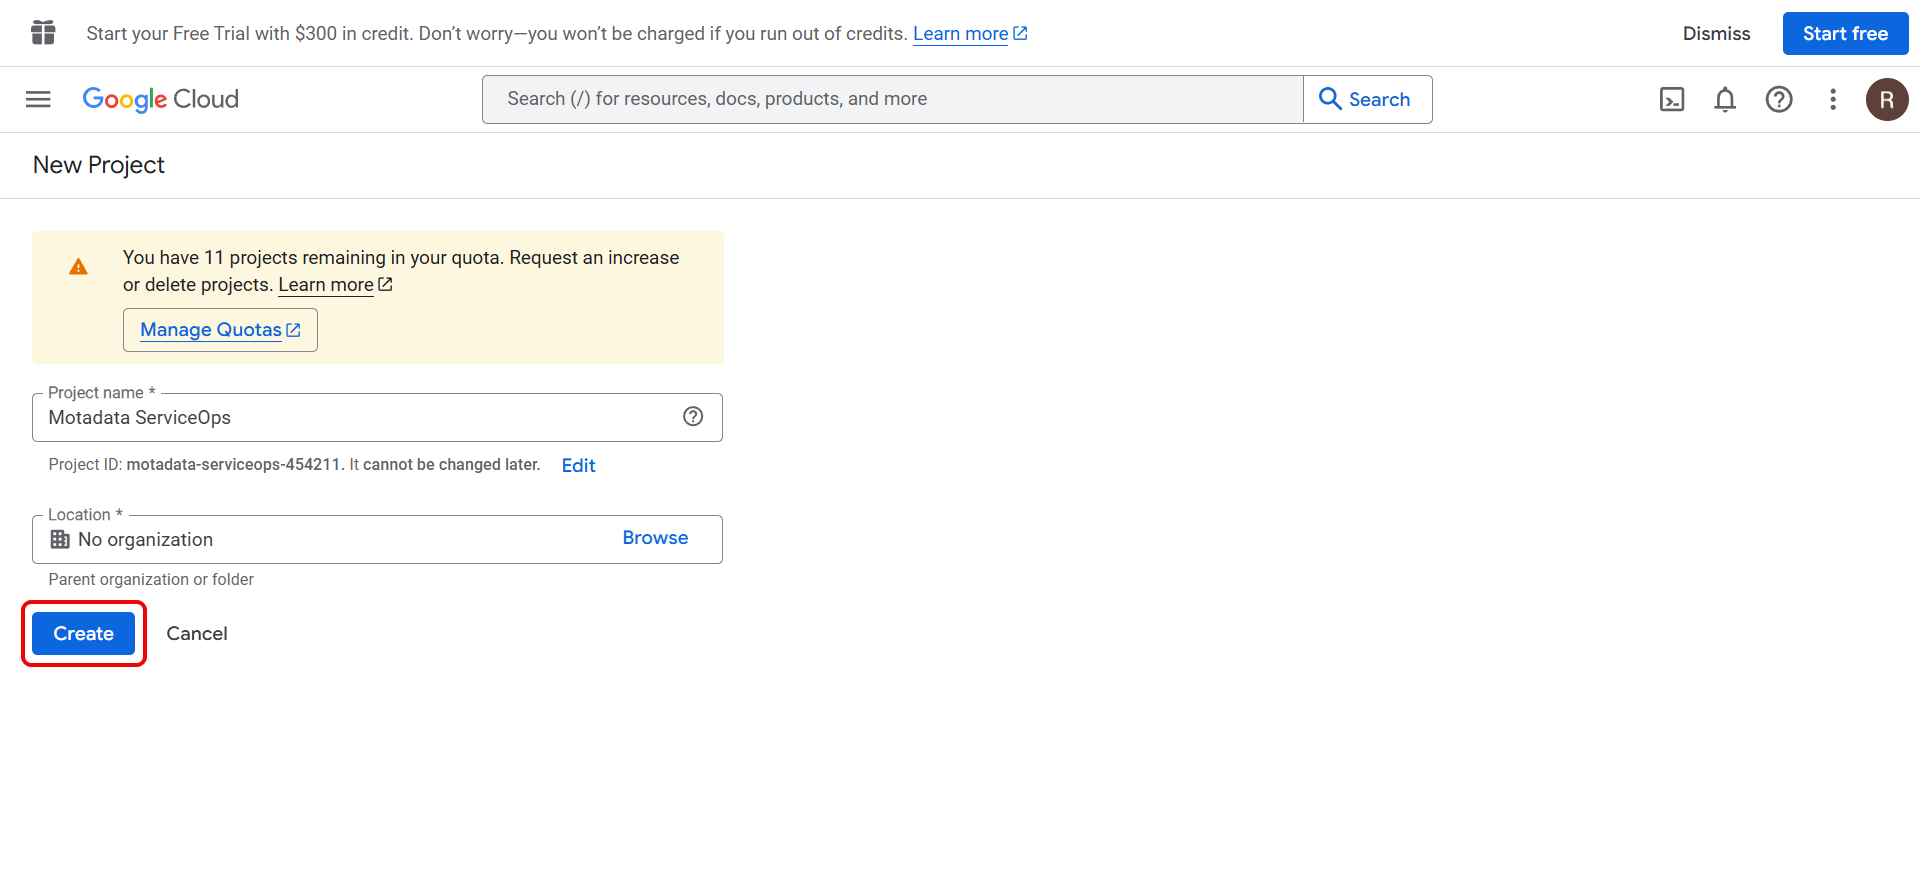
To enable POP, refer to the Read Gmail messages on other email clients using POP page.Navigate to Google Developers Console and create a new Project. To create, click the Create Project button

Enter the Project Name and click Create.
The following page appears.
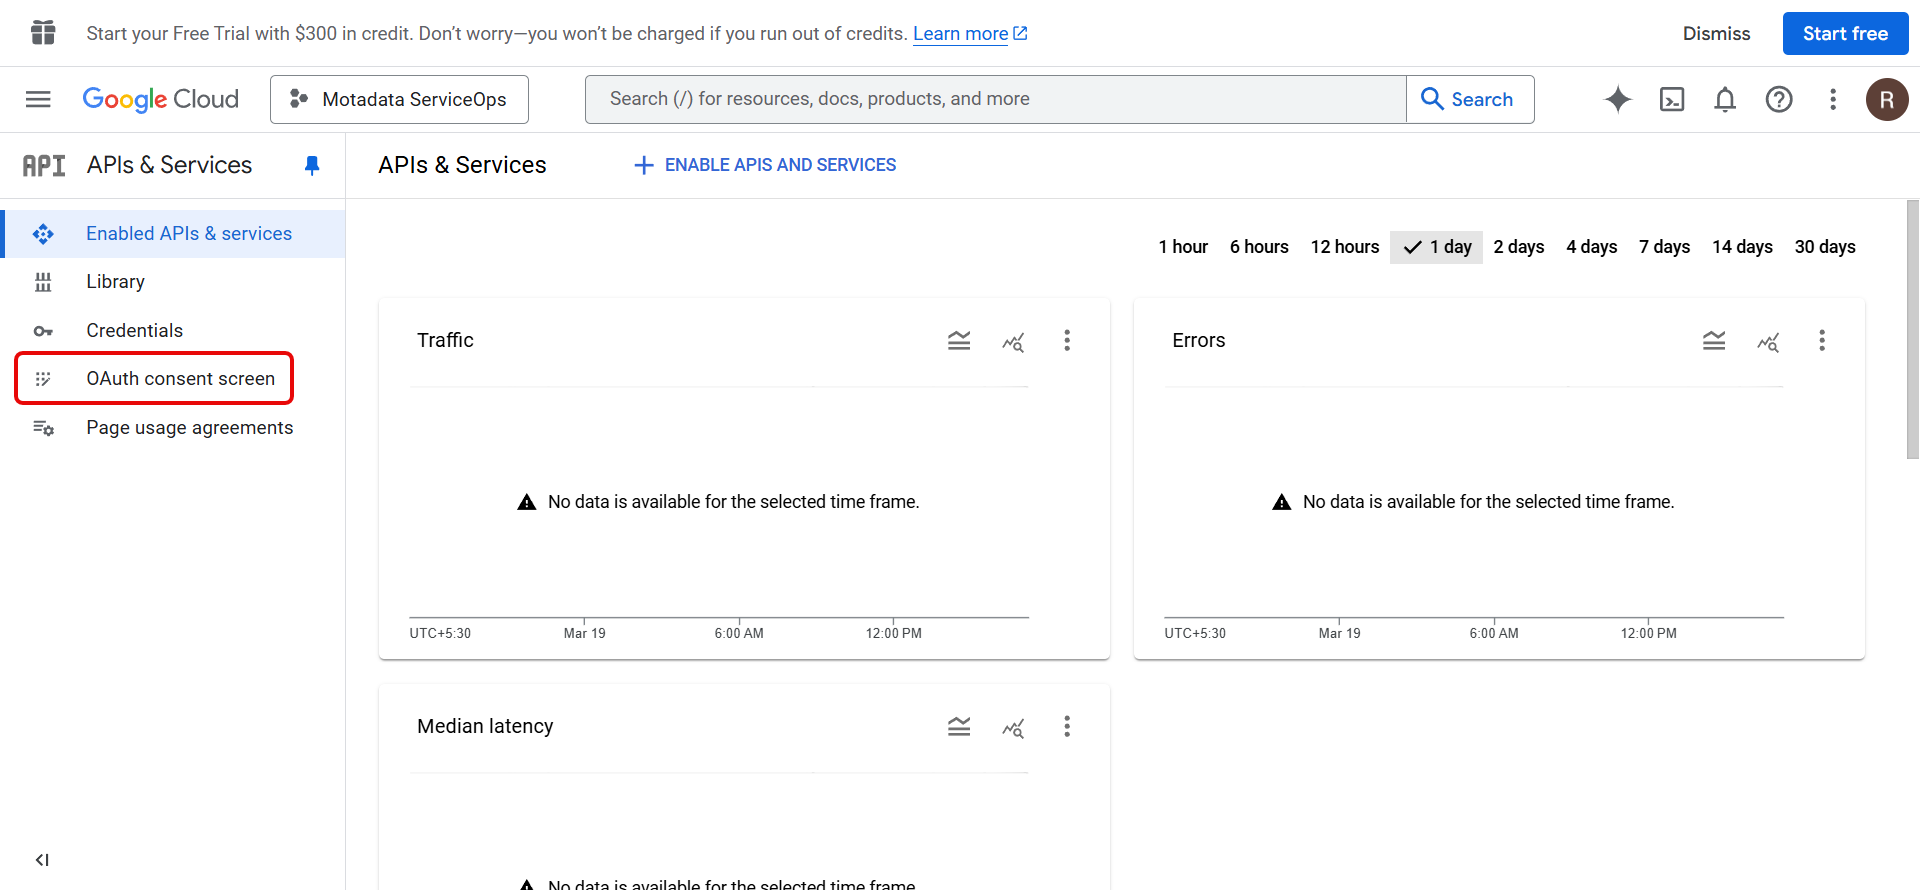
- Now, go to the OAuth consent screen tab, and click Get Started.
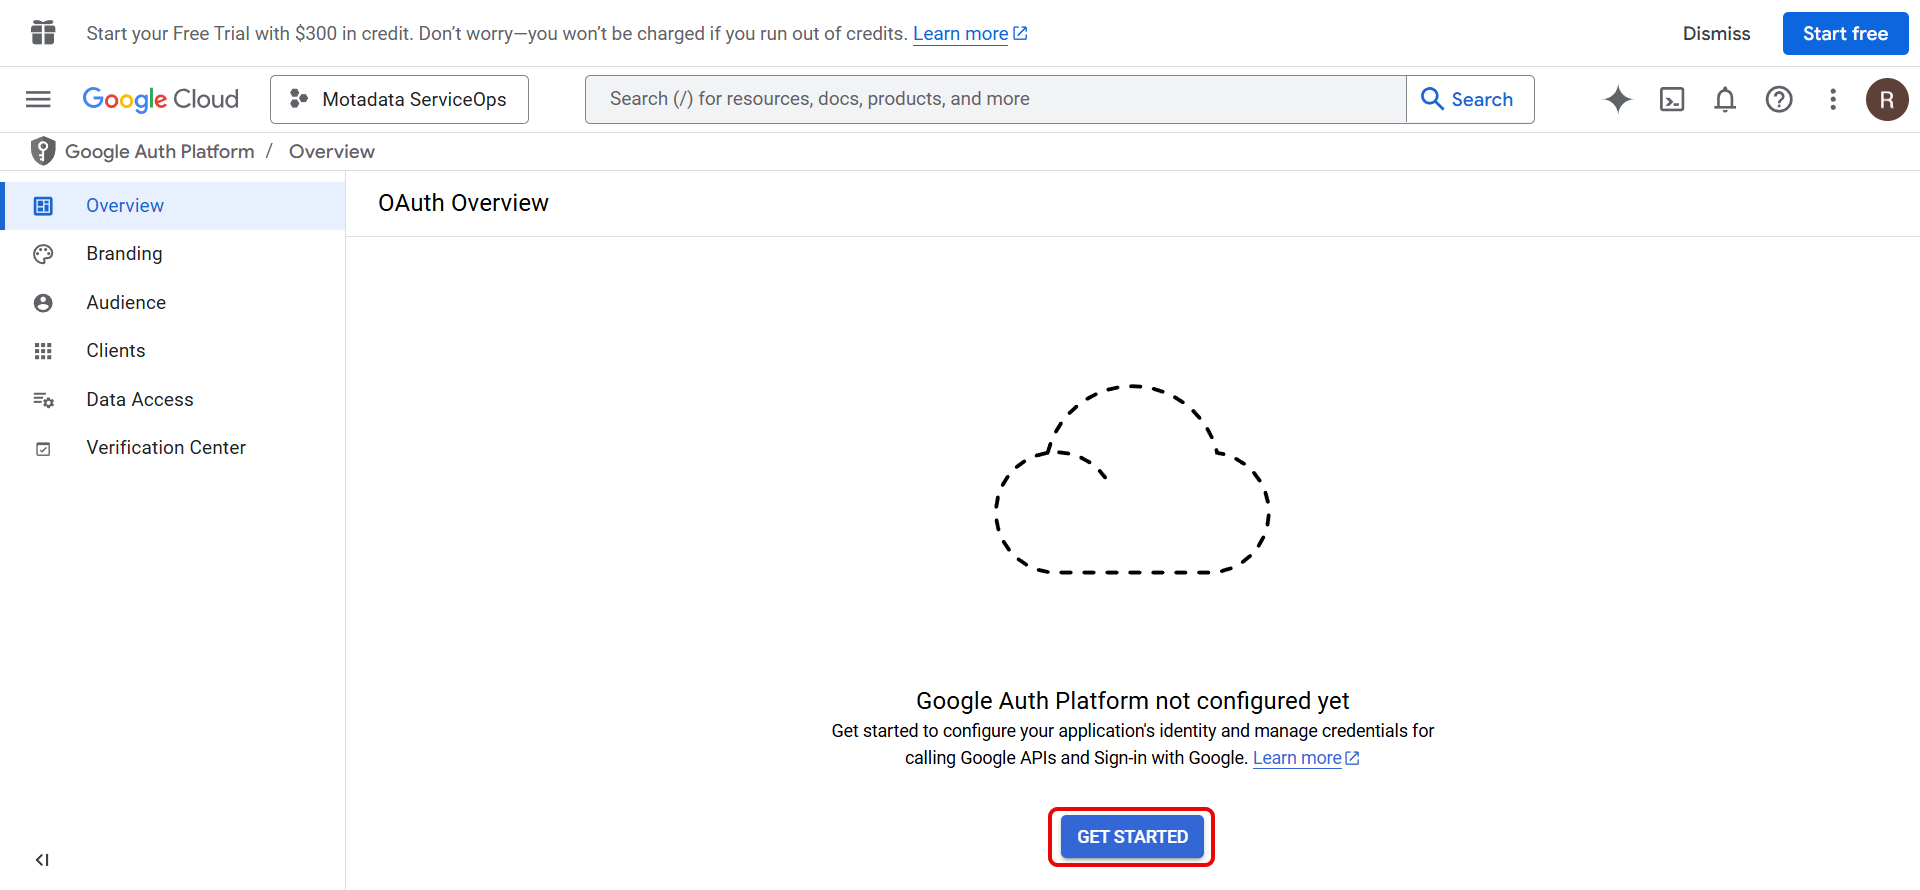
- In the Overview tab, configure the Project as shown below:
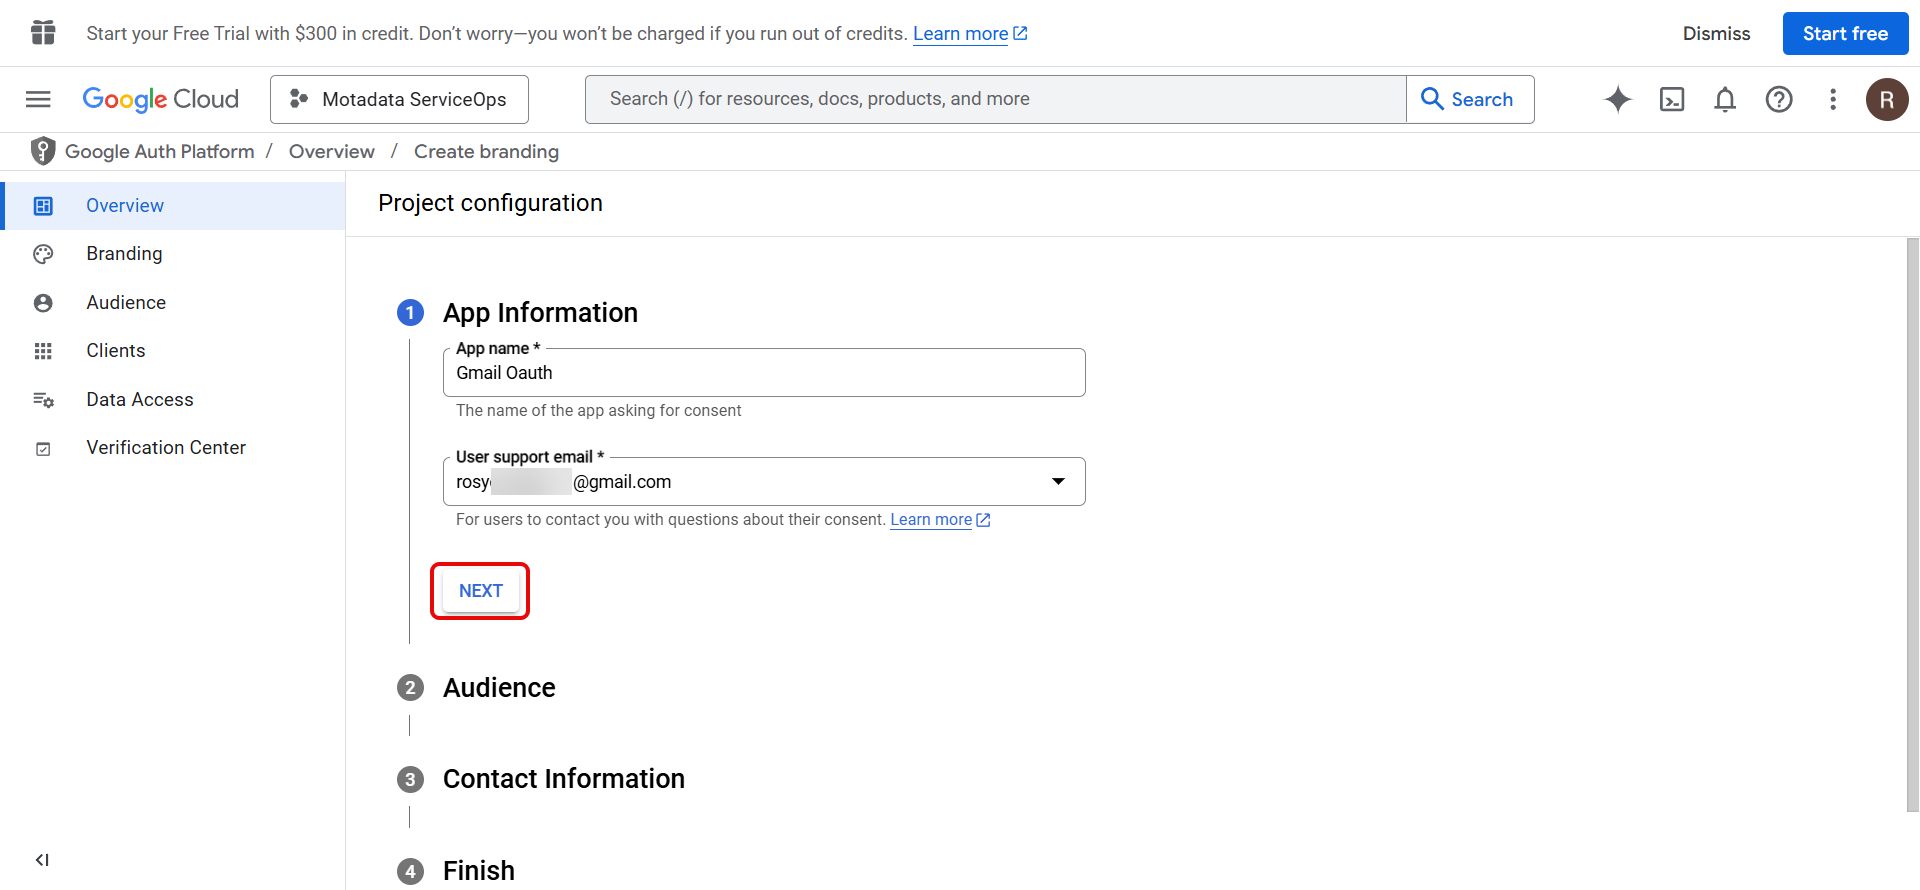
Enter the App name, User Support Email, and click Next.
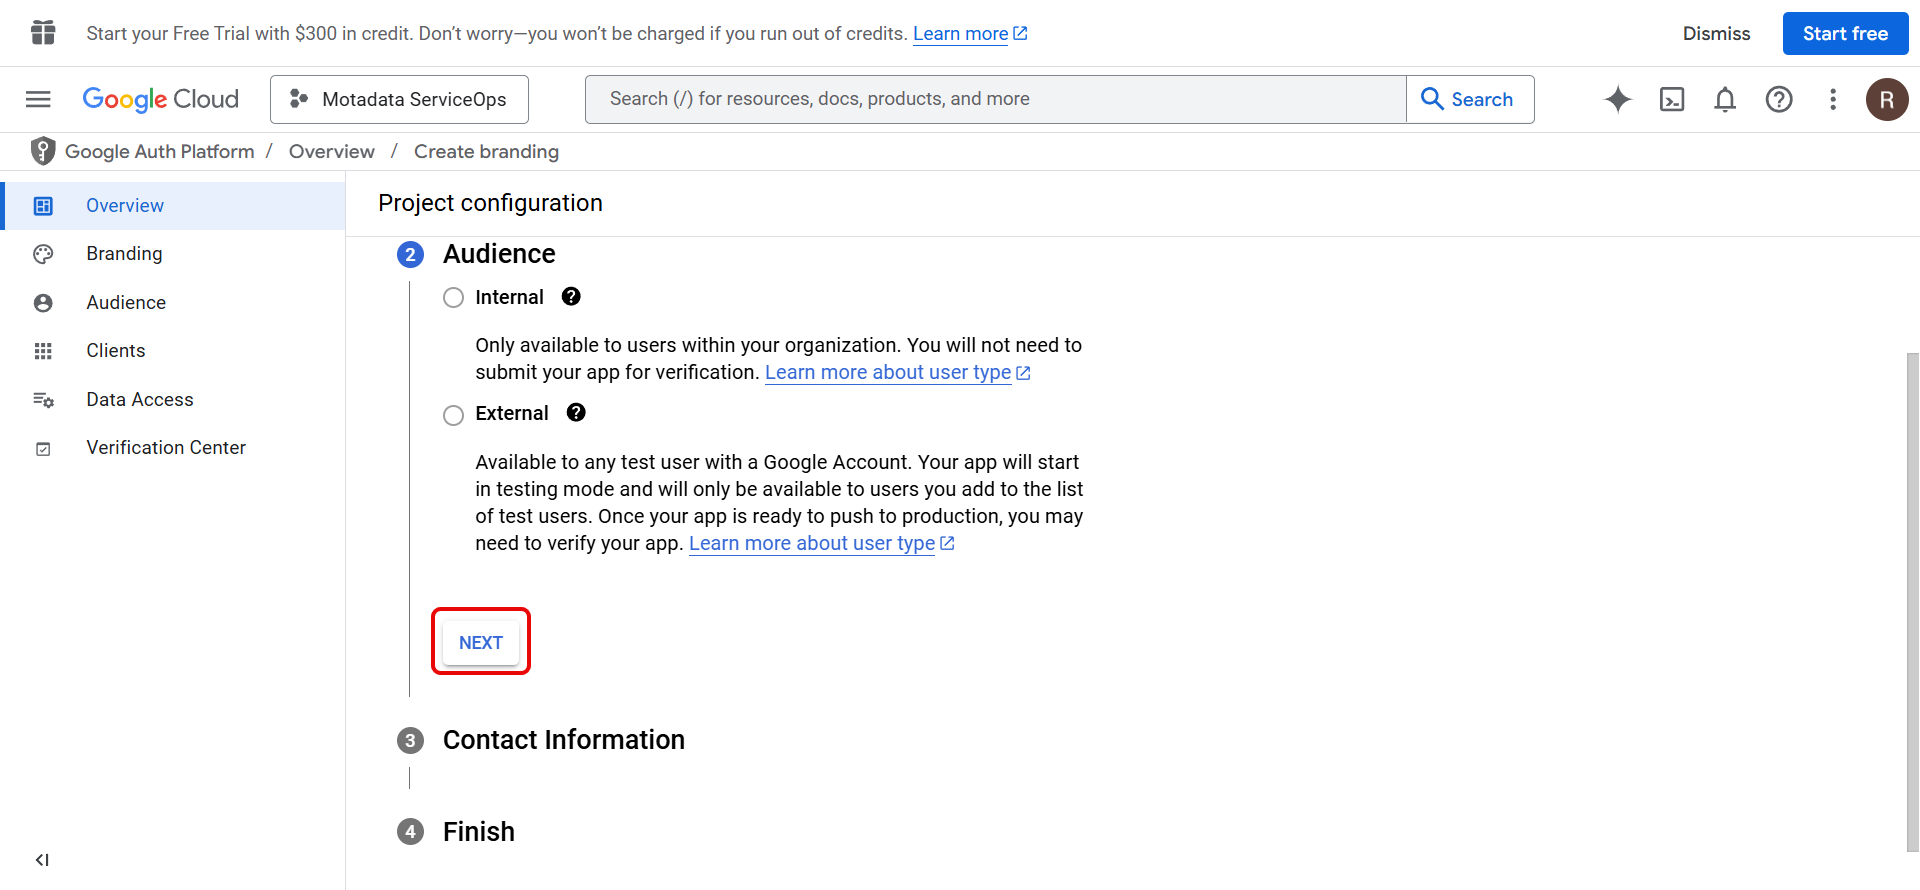
Select the Audience.
- Select Internal if you are creating an app for your organization.
- Select External if you are testing using a standalone Gmail account.
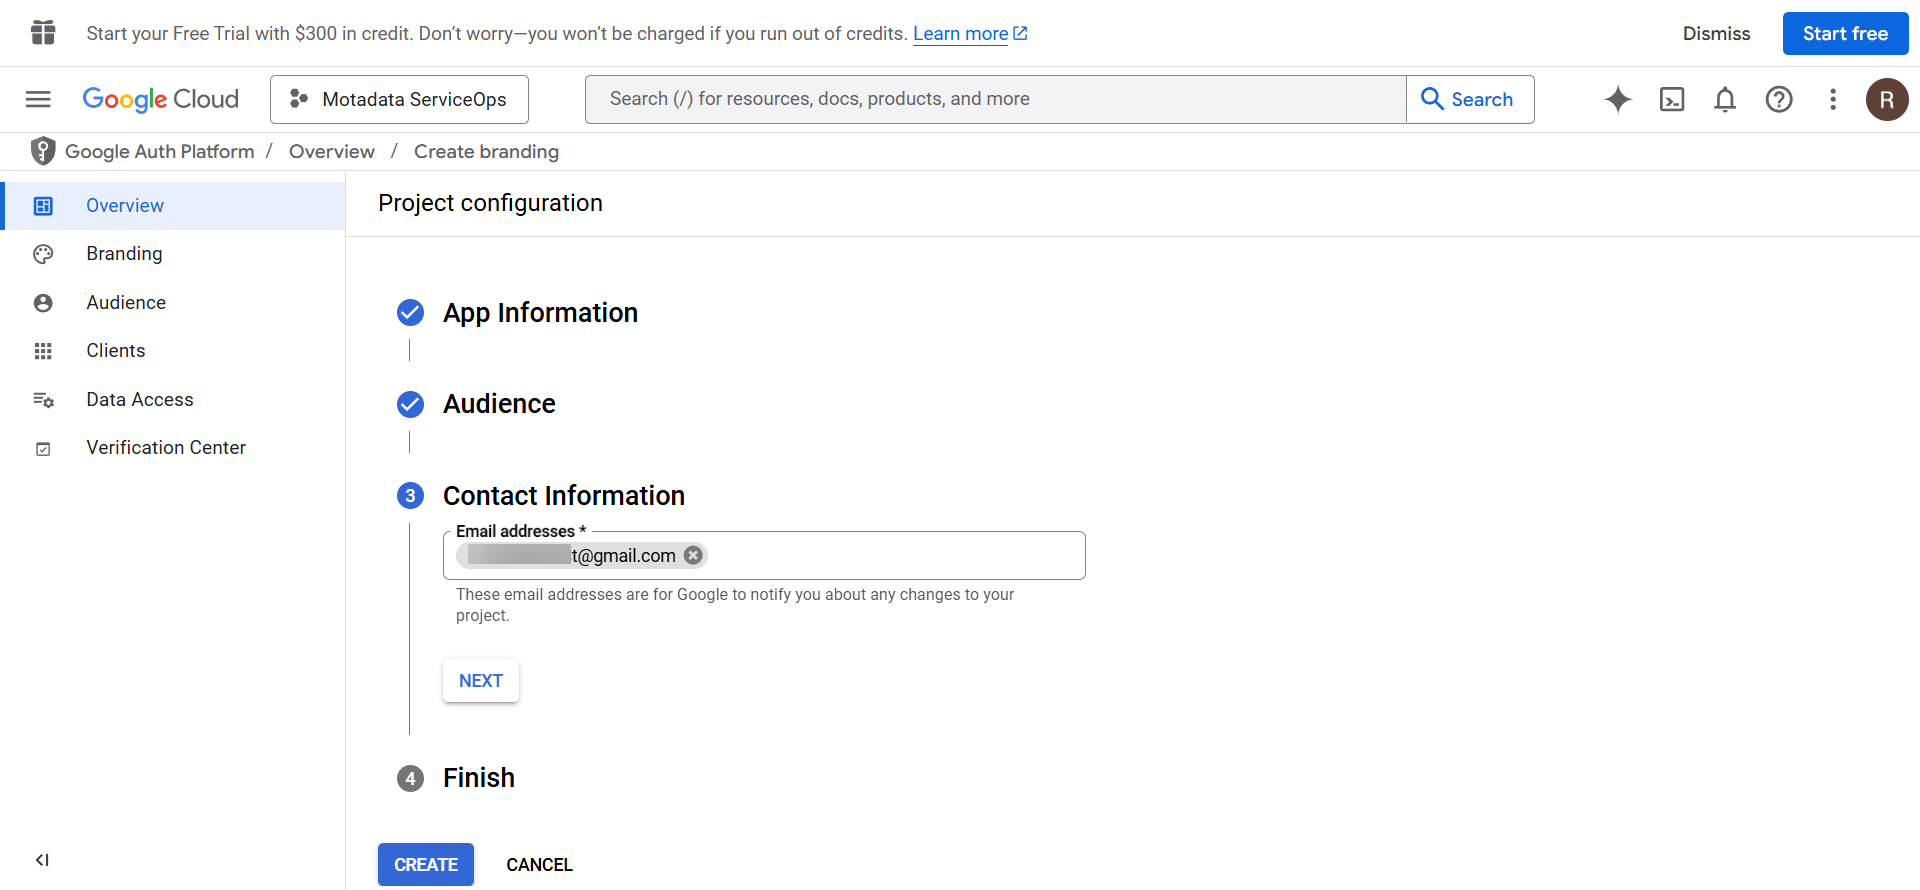
- Enter the Contact Information and click Next.
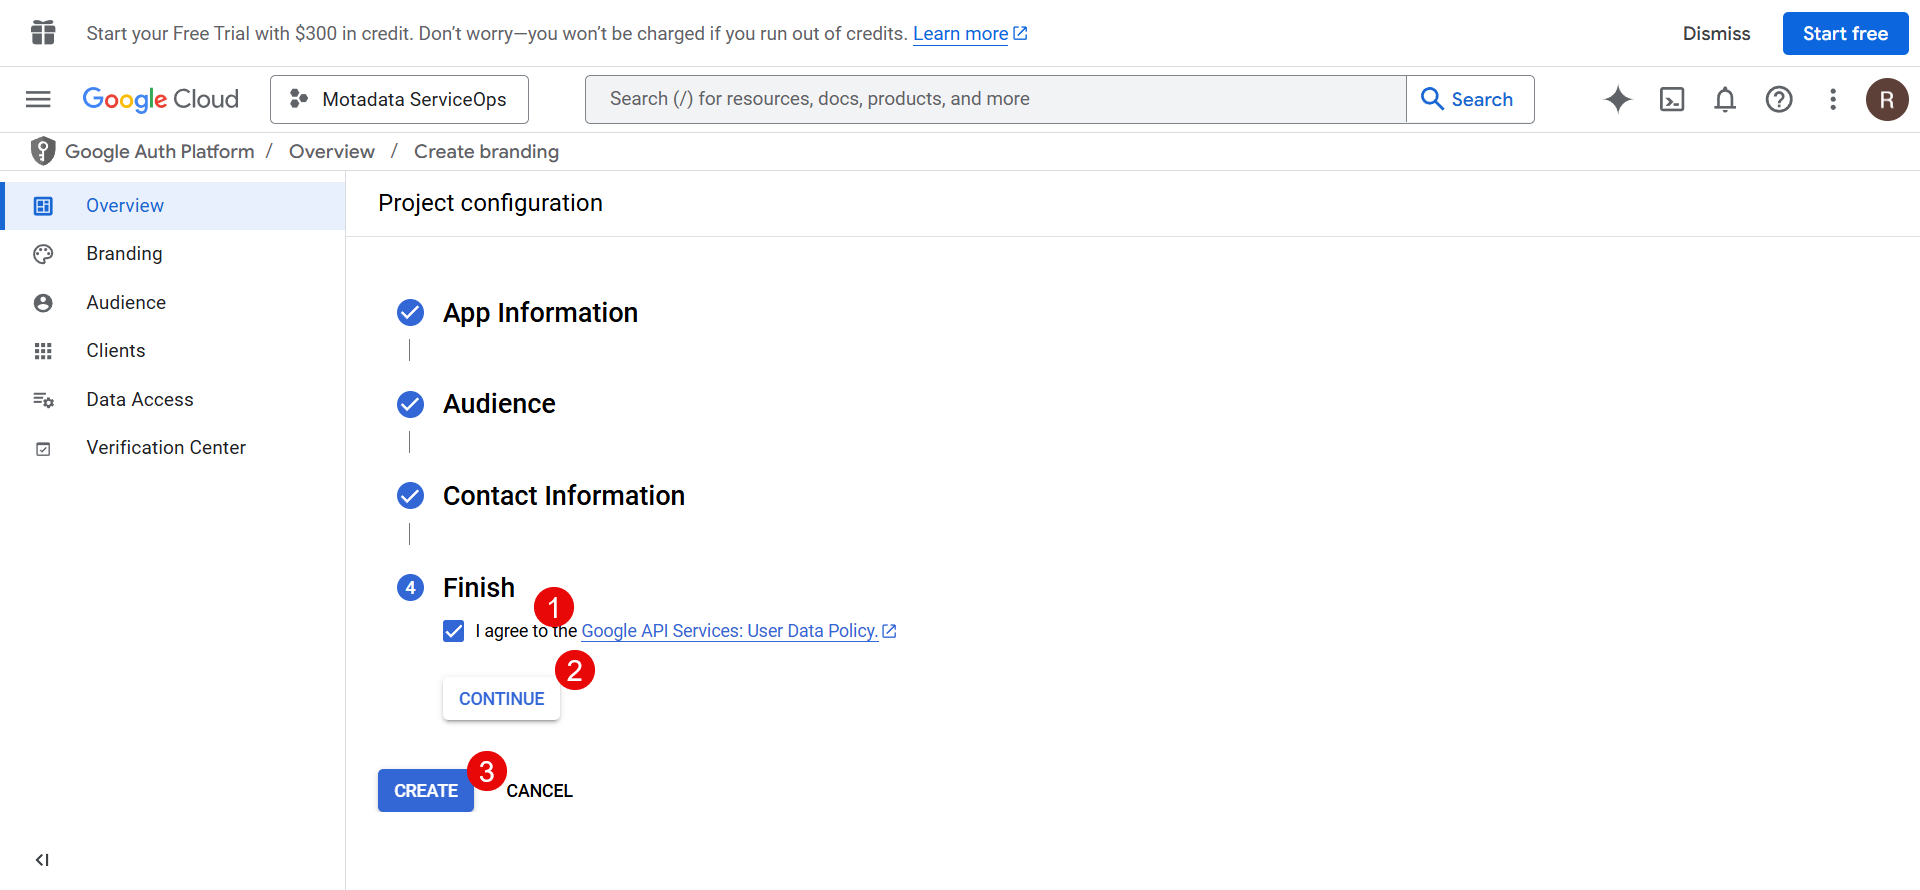
- In the Finish step, enable the I agree checkbox, click Continue, and last click Create.
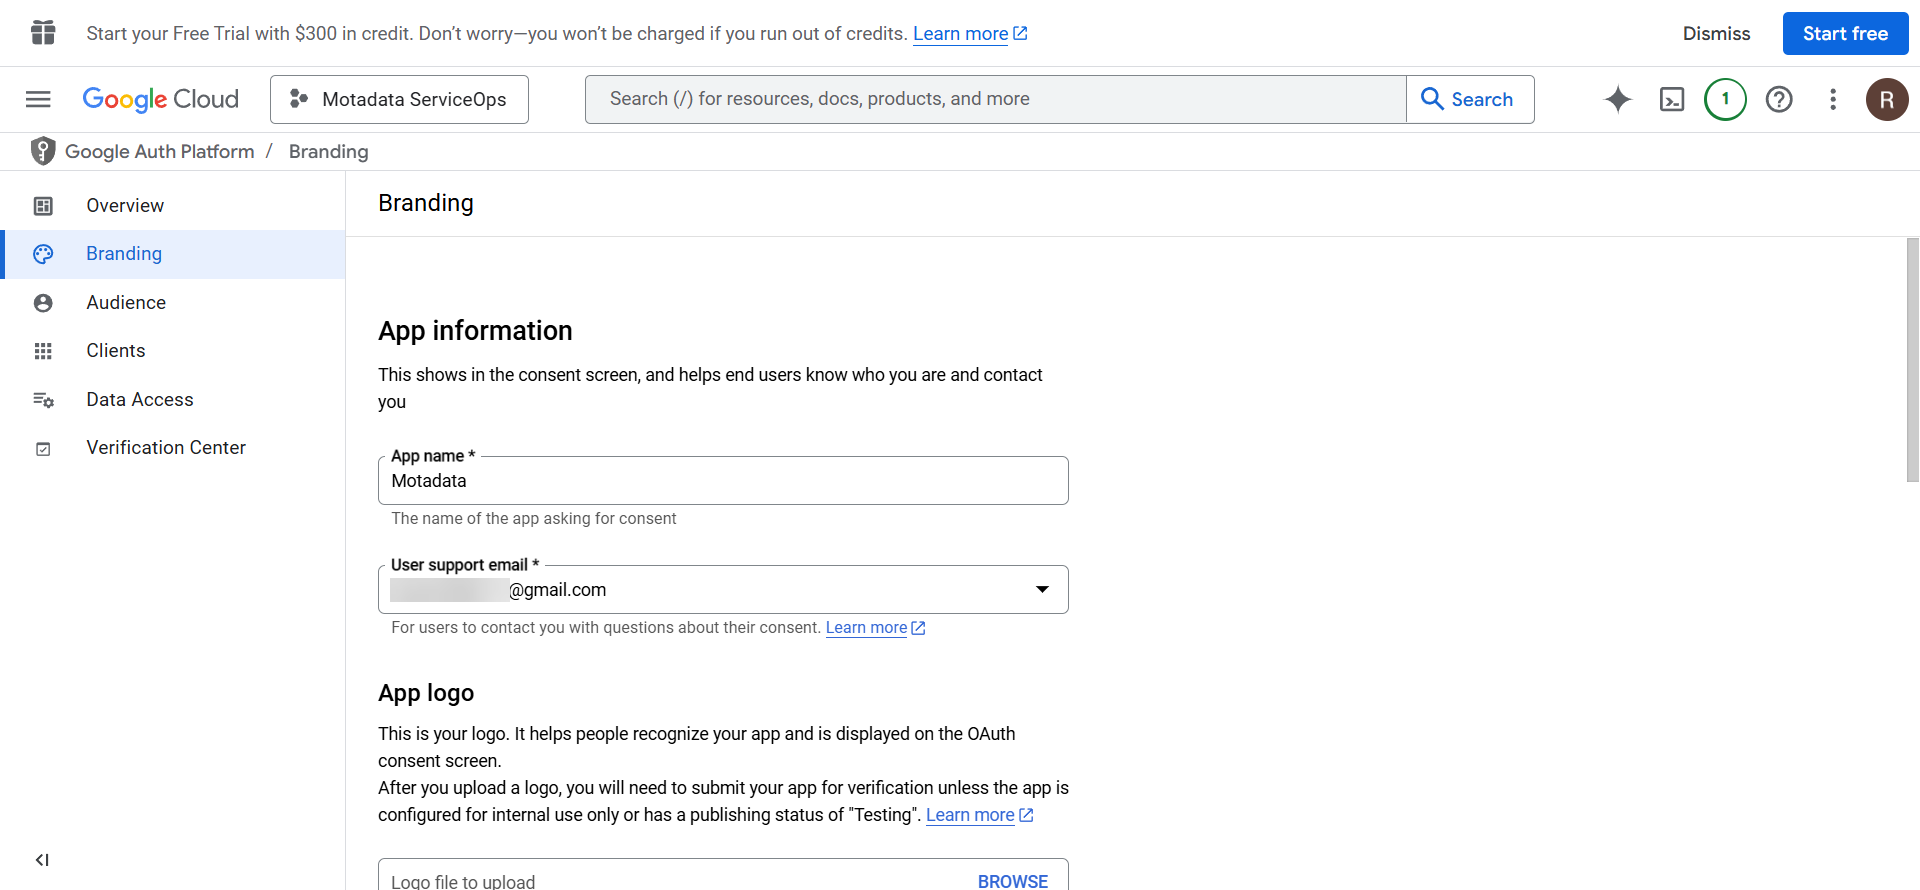
The App gets created.
- Next, go to the Branding tab and configure the reguired details like App Logo, App domain, and Authorized Domain. This step is optional.
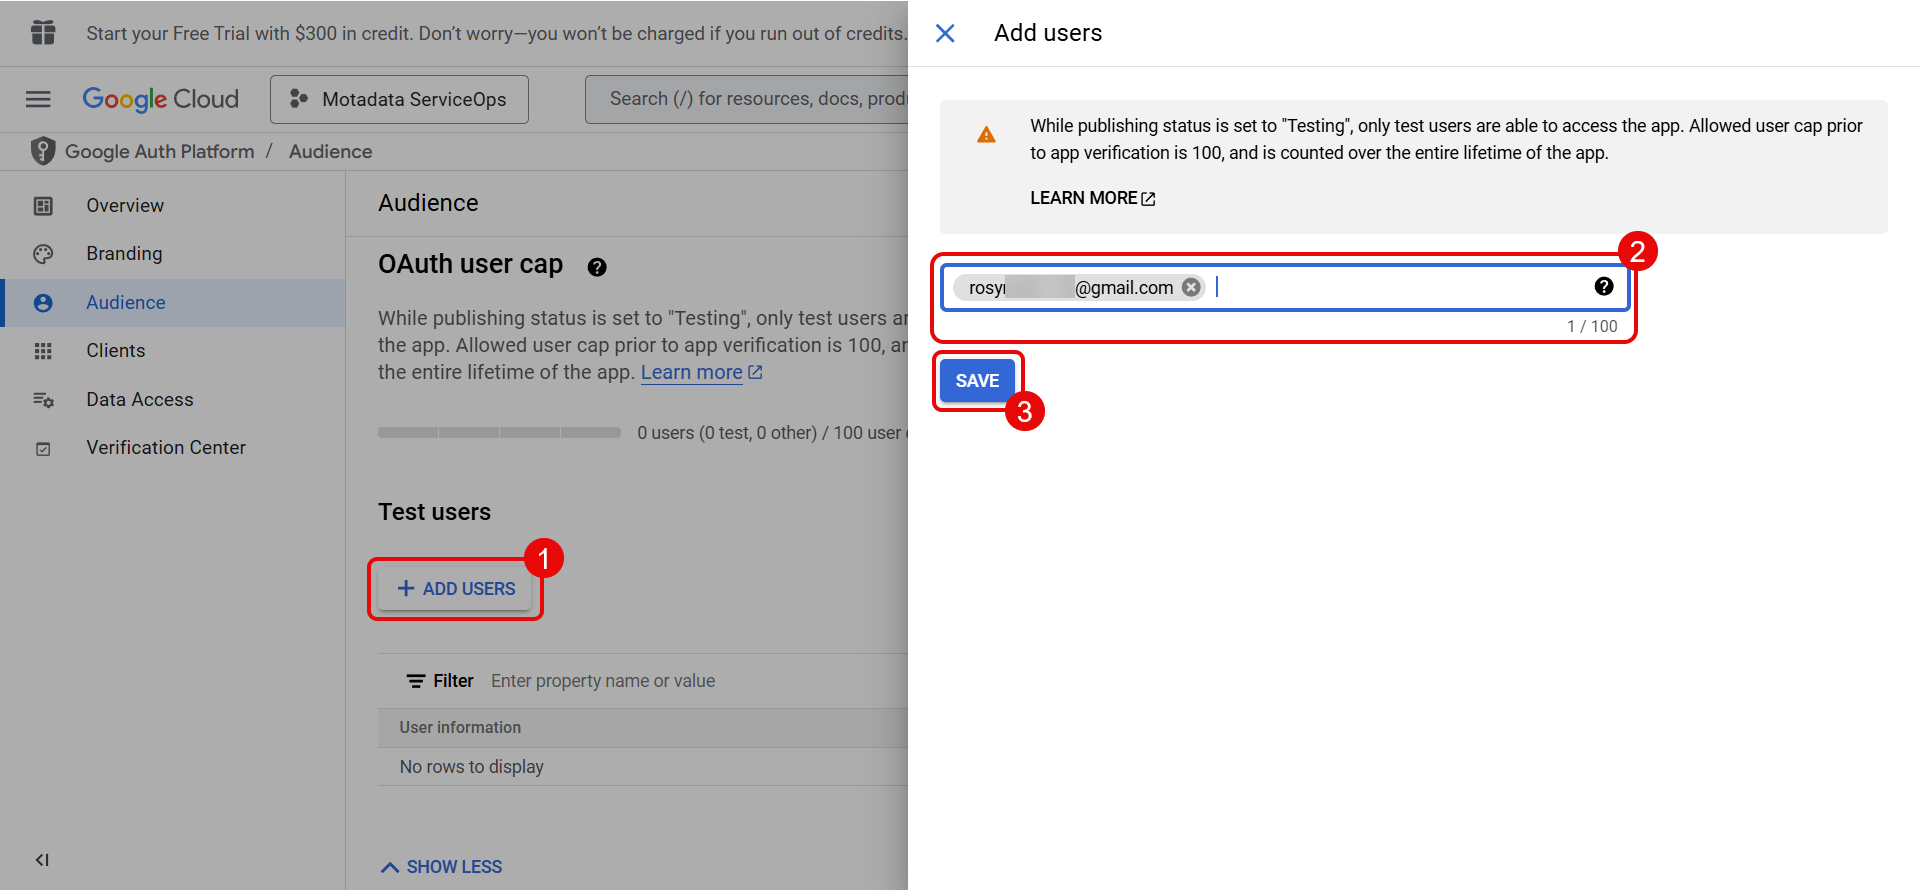
- Next, in the Audience tab, in case of testing, add the test users, and click Save. Ensure you add yourself as a Tester.
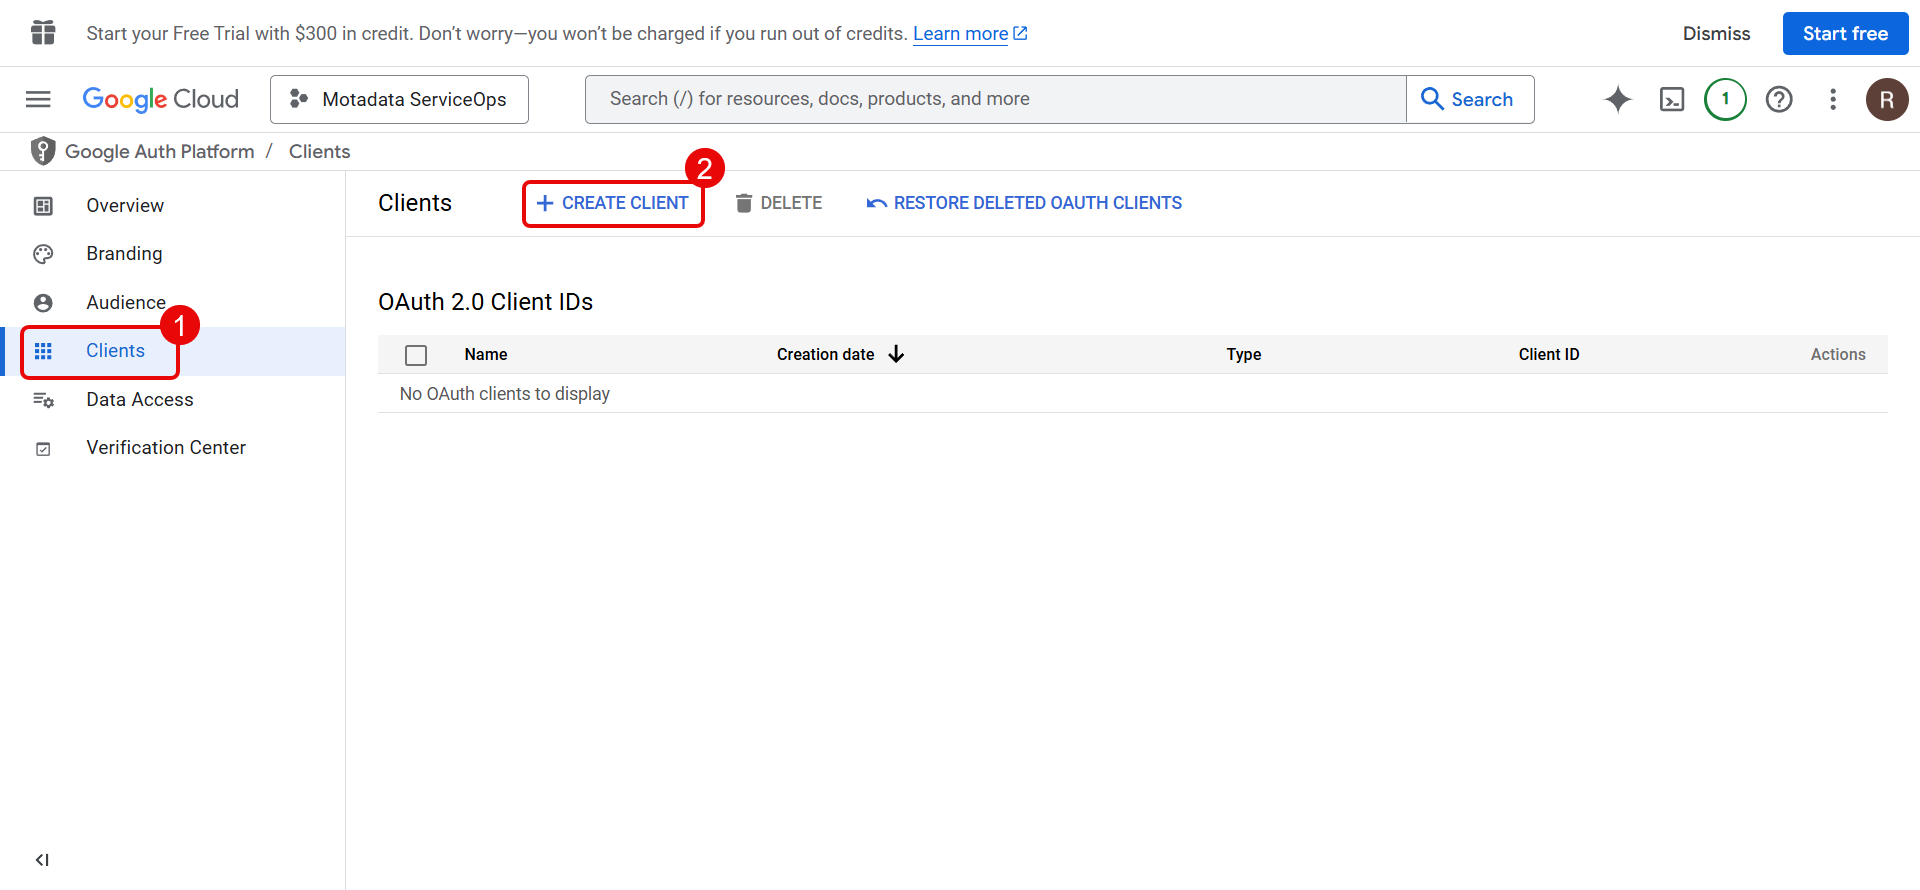
- Next, go to the Clients tab, and create an OAuth client by clicking the + Create Client link.
- Enter the required details:
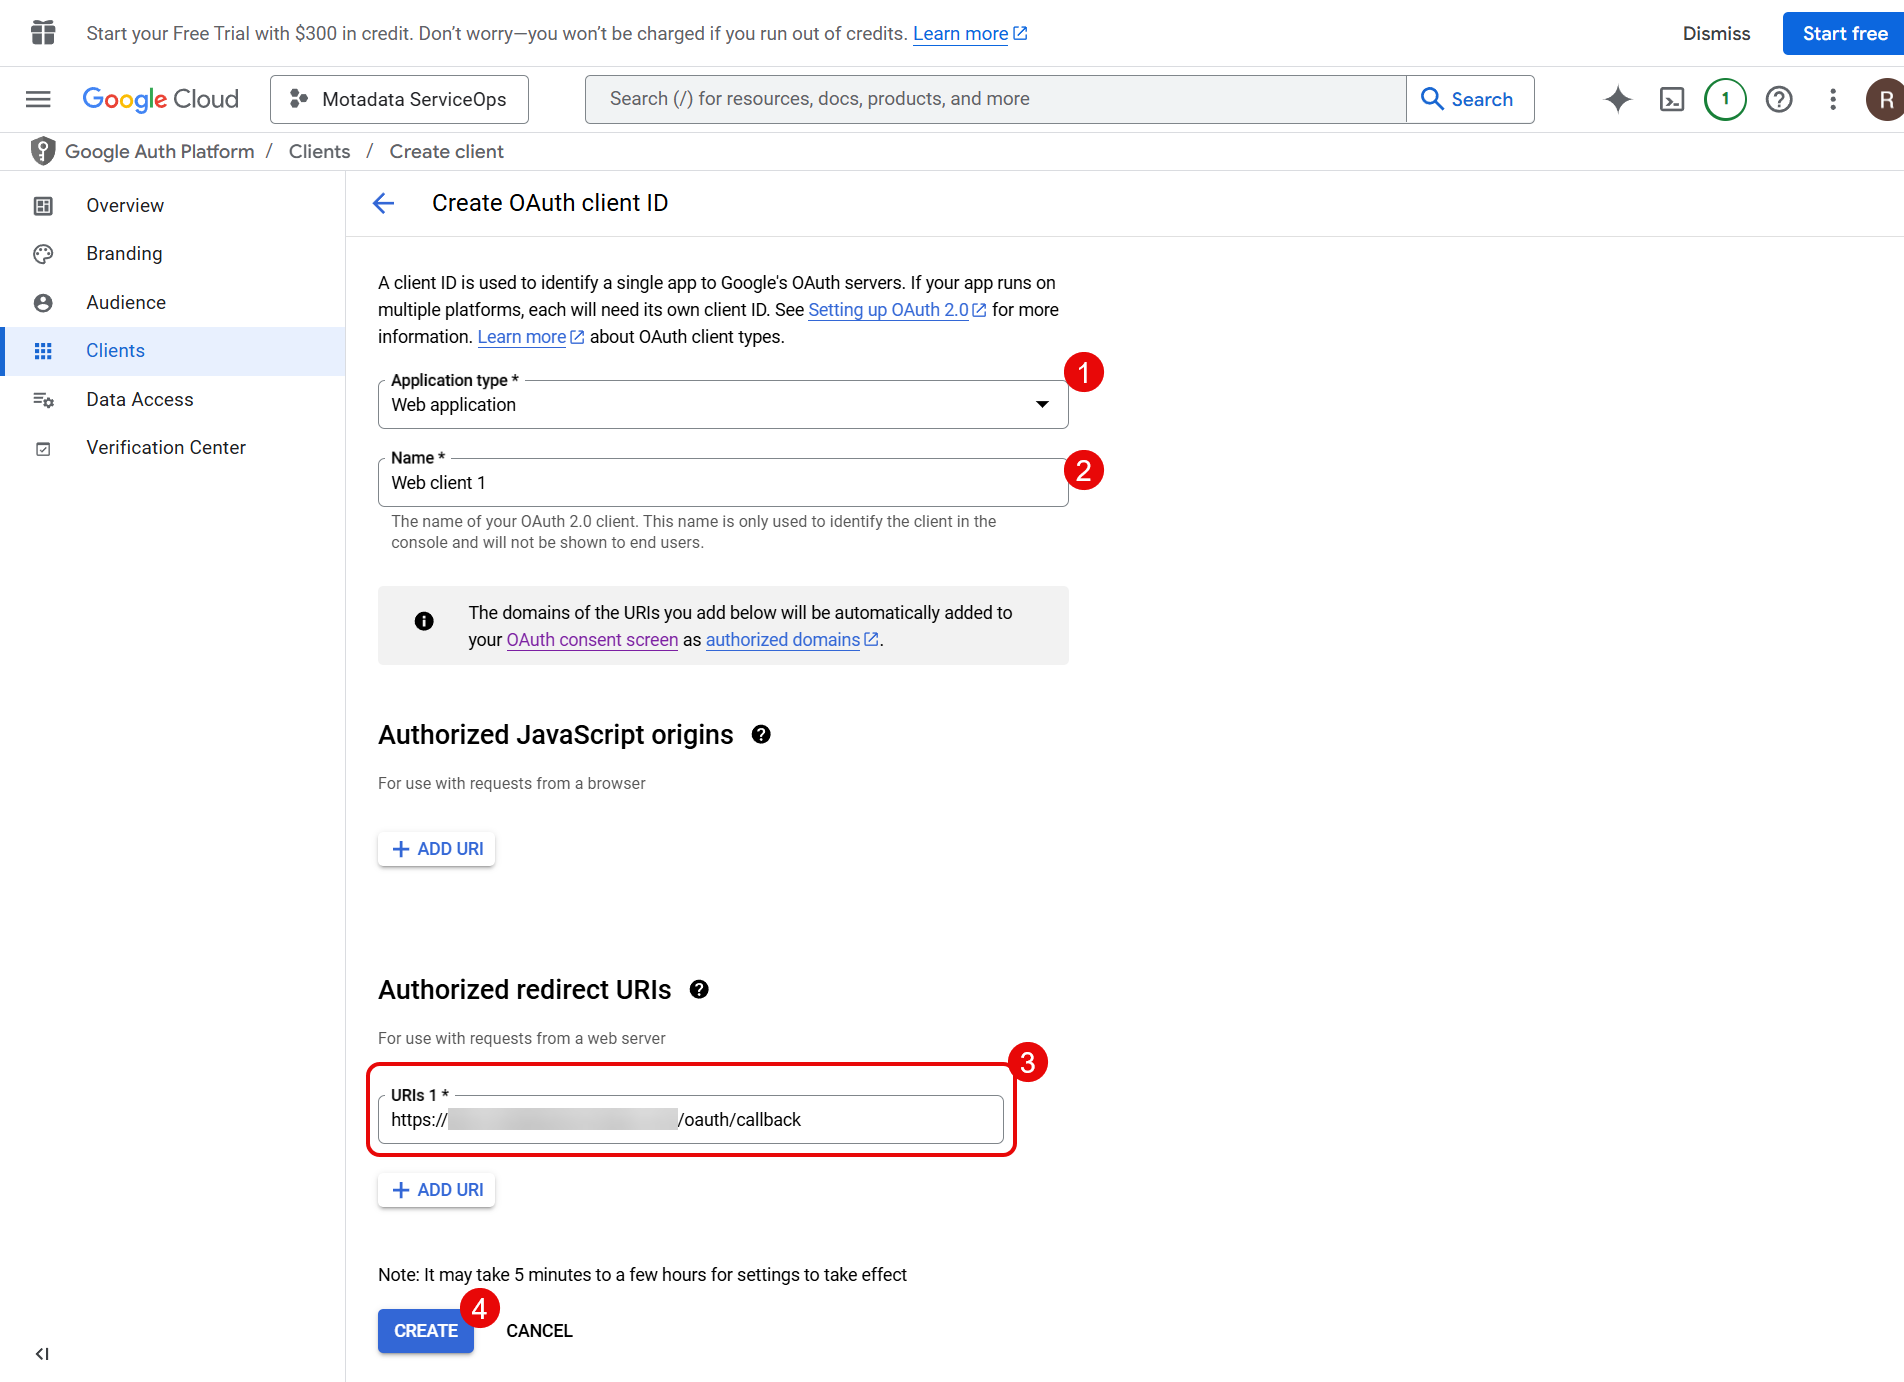
- Application Type: Select the application type as Web Application.
- Name: Enter the name of the web client.
- Authorised redirect URIs: Enter the URL to which the user will get redirected.
Syntax: https://{server URL}/oauth/callback
For example: https://dummy.com/oauth/callback
- Once done, click Create, and the OAuth client gets created. The following screen will display the Client ID and Client Secret details. Also, you can download the JSON file containing all the details.
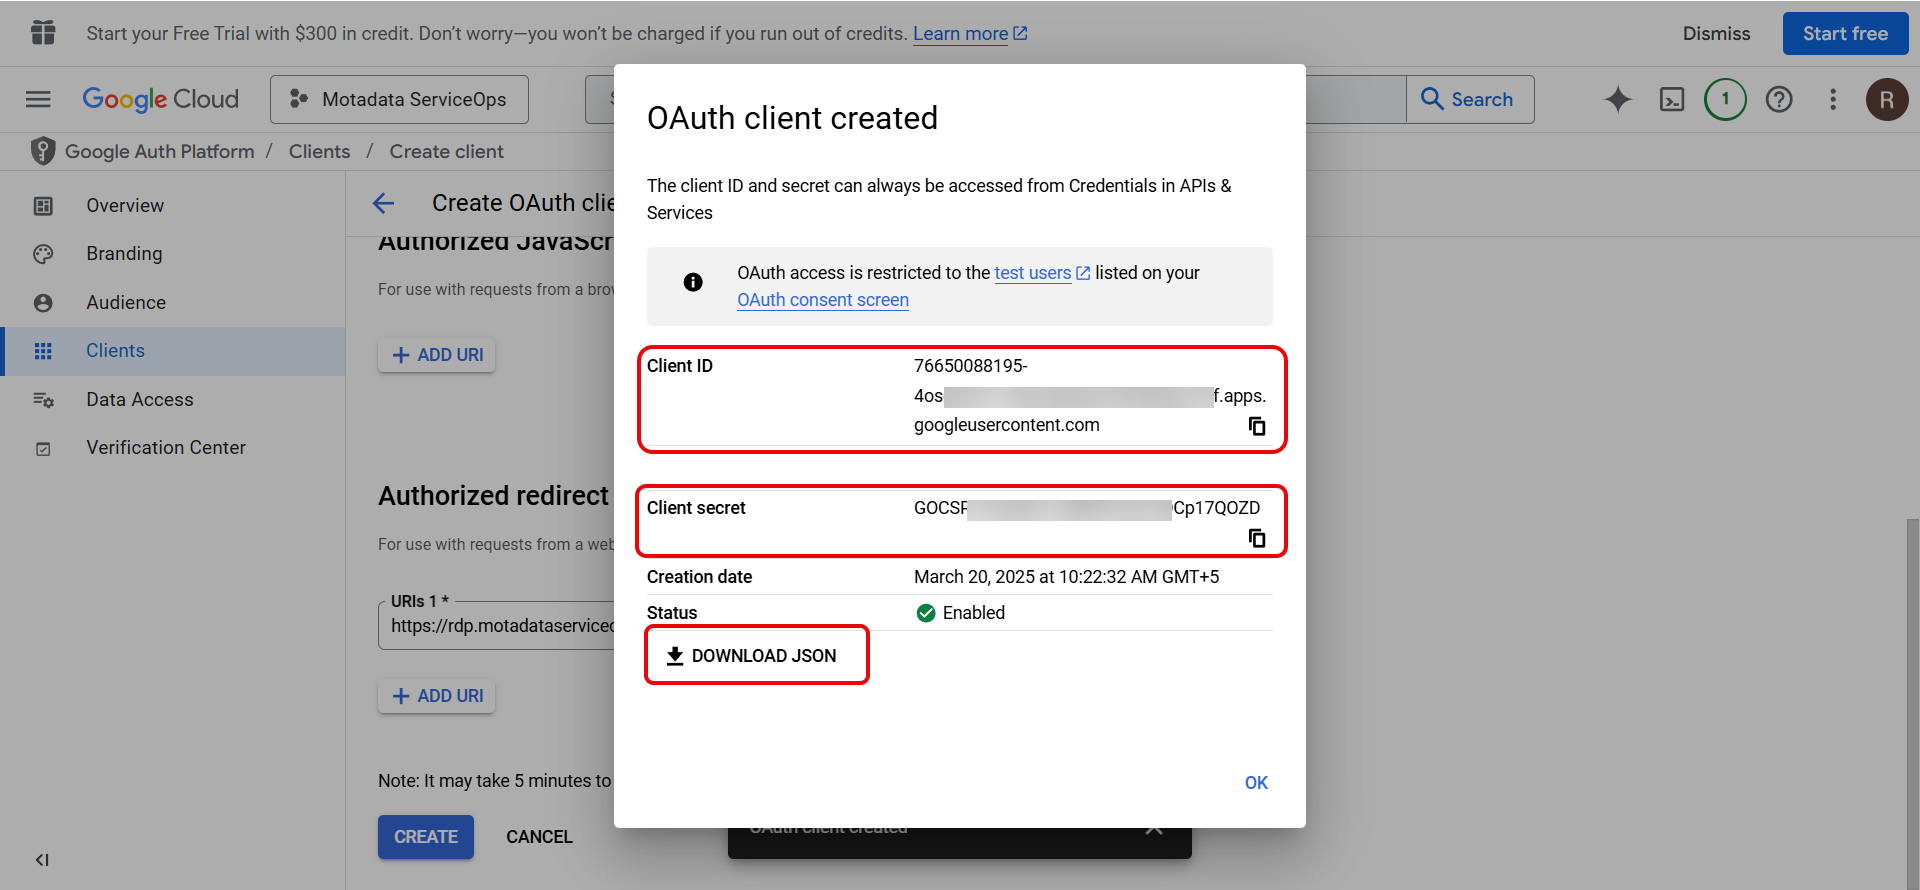
The downloaded JSON will appear like below:

You need to copy and paste these details into the ServiceOps portal.
- Next, go to the Data Access tab and click the Add OR Remove Scopes button, select the Gmail API from the list, and update it.
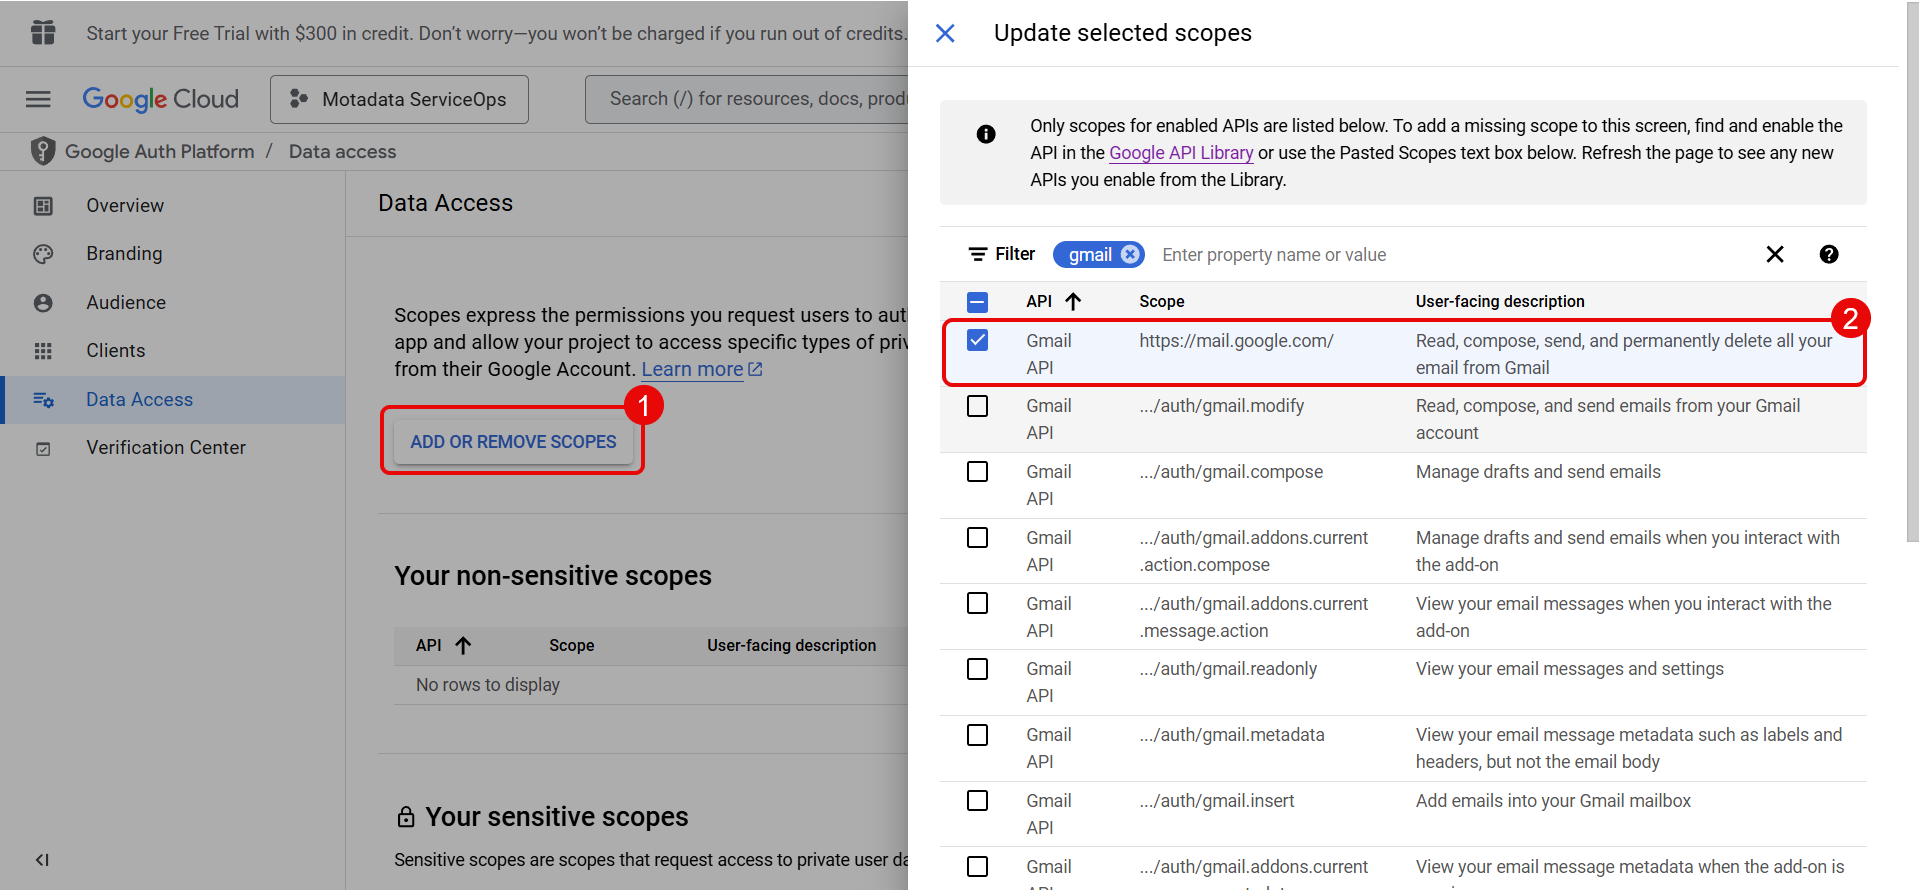
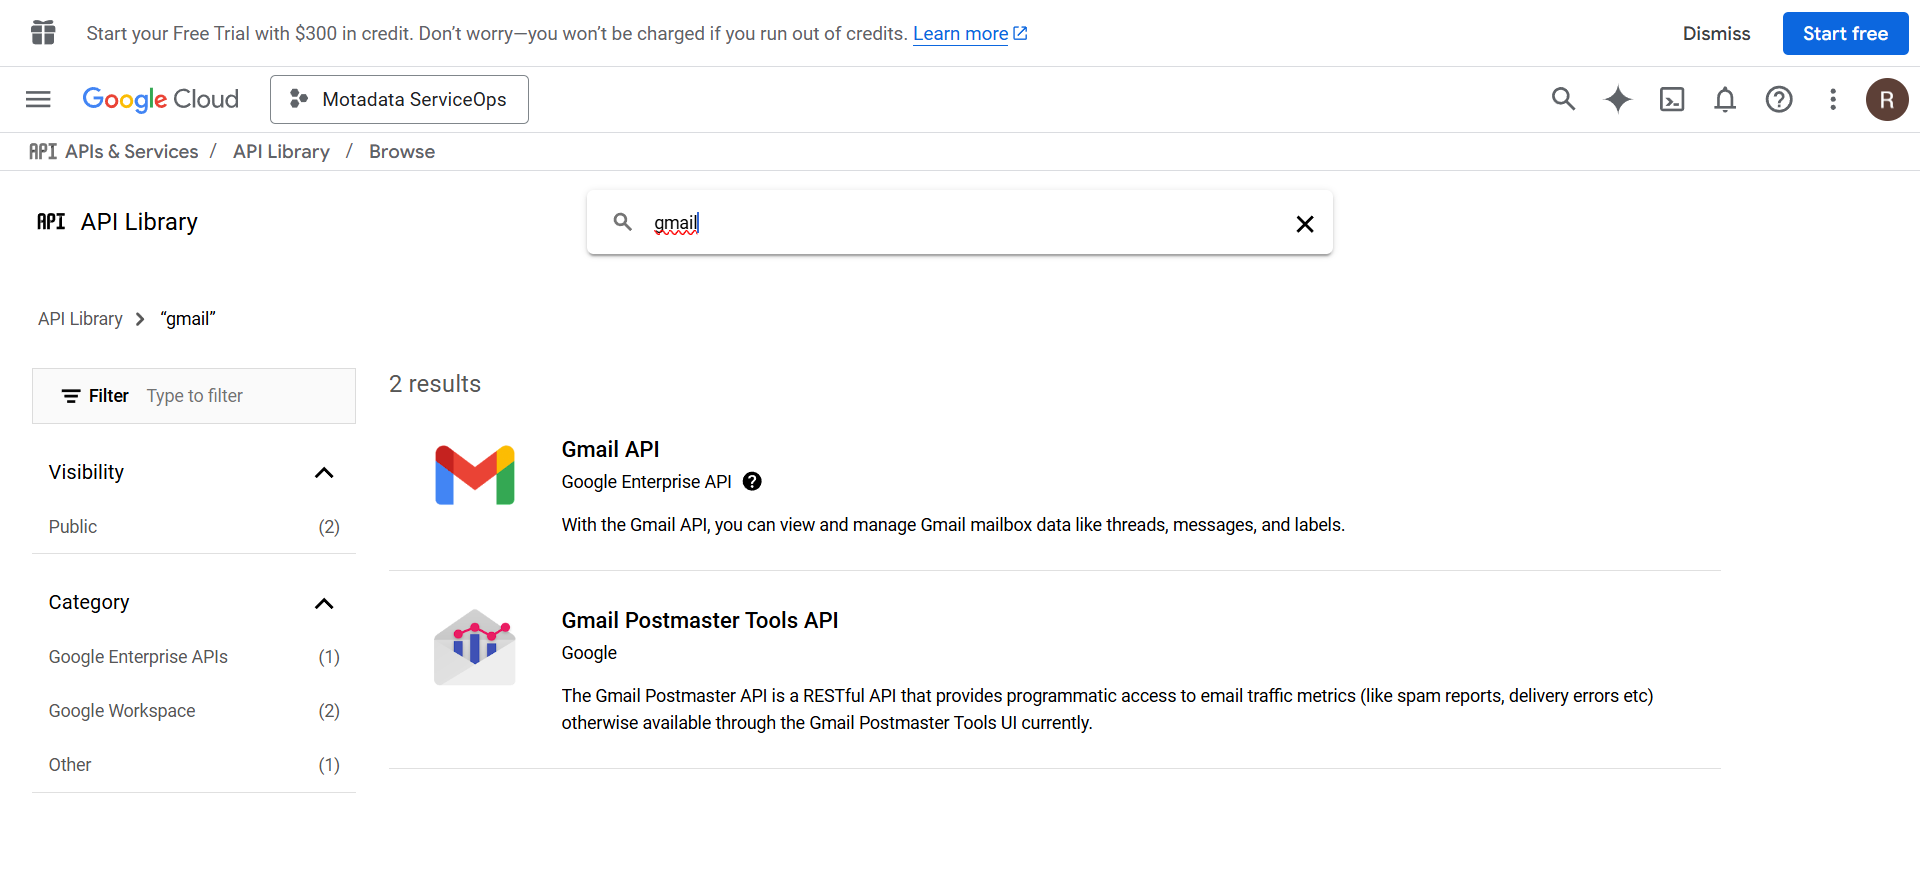
If the API is unavailable, click the Google API Library, search for Gmail API, and enable it. Once enabled, it will be available in the list.
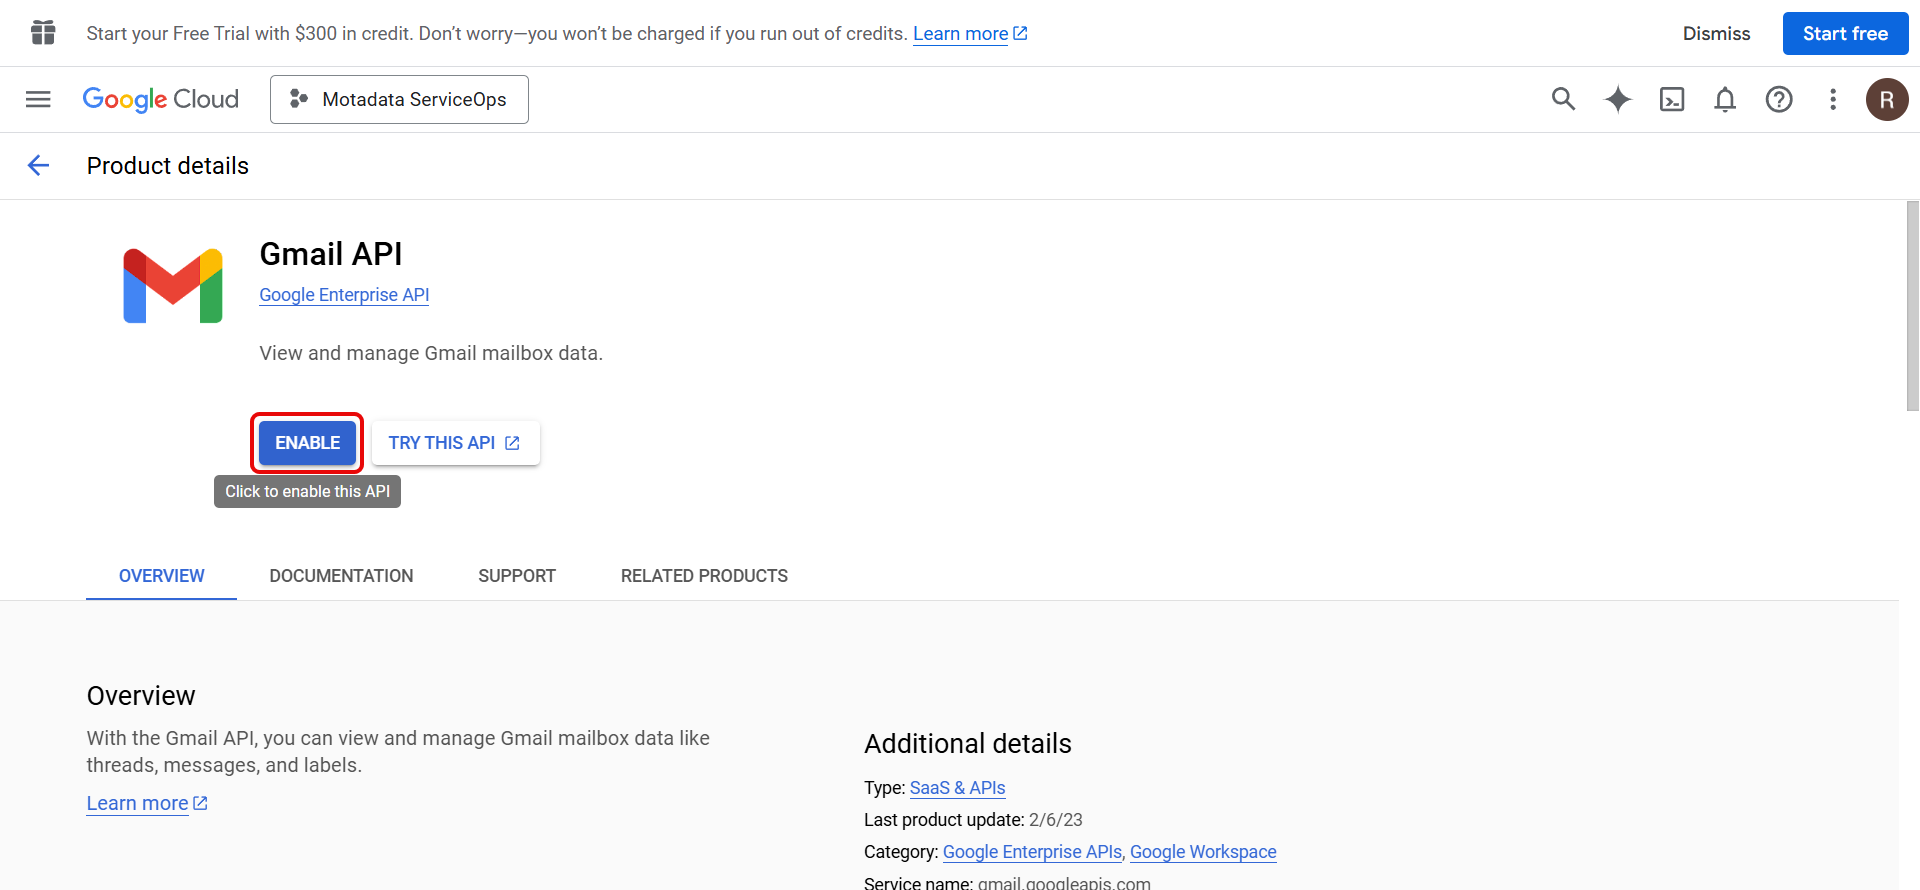
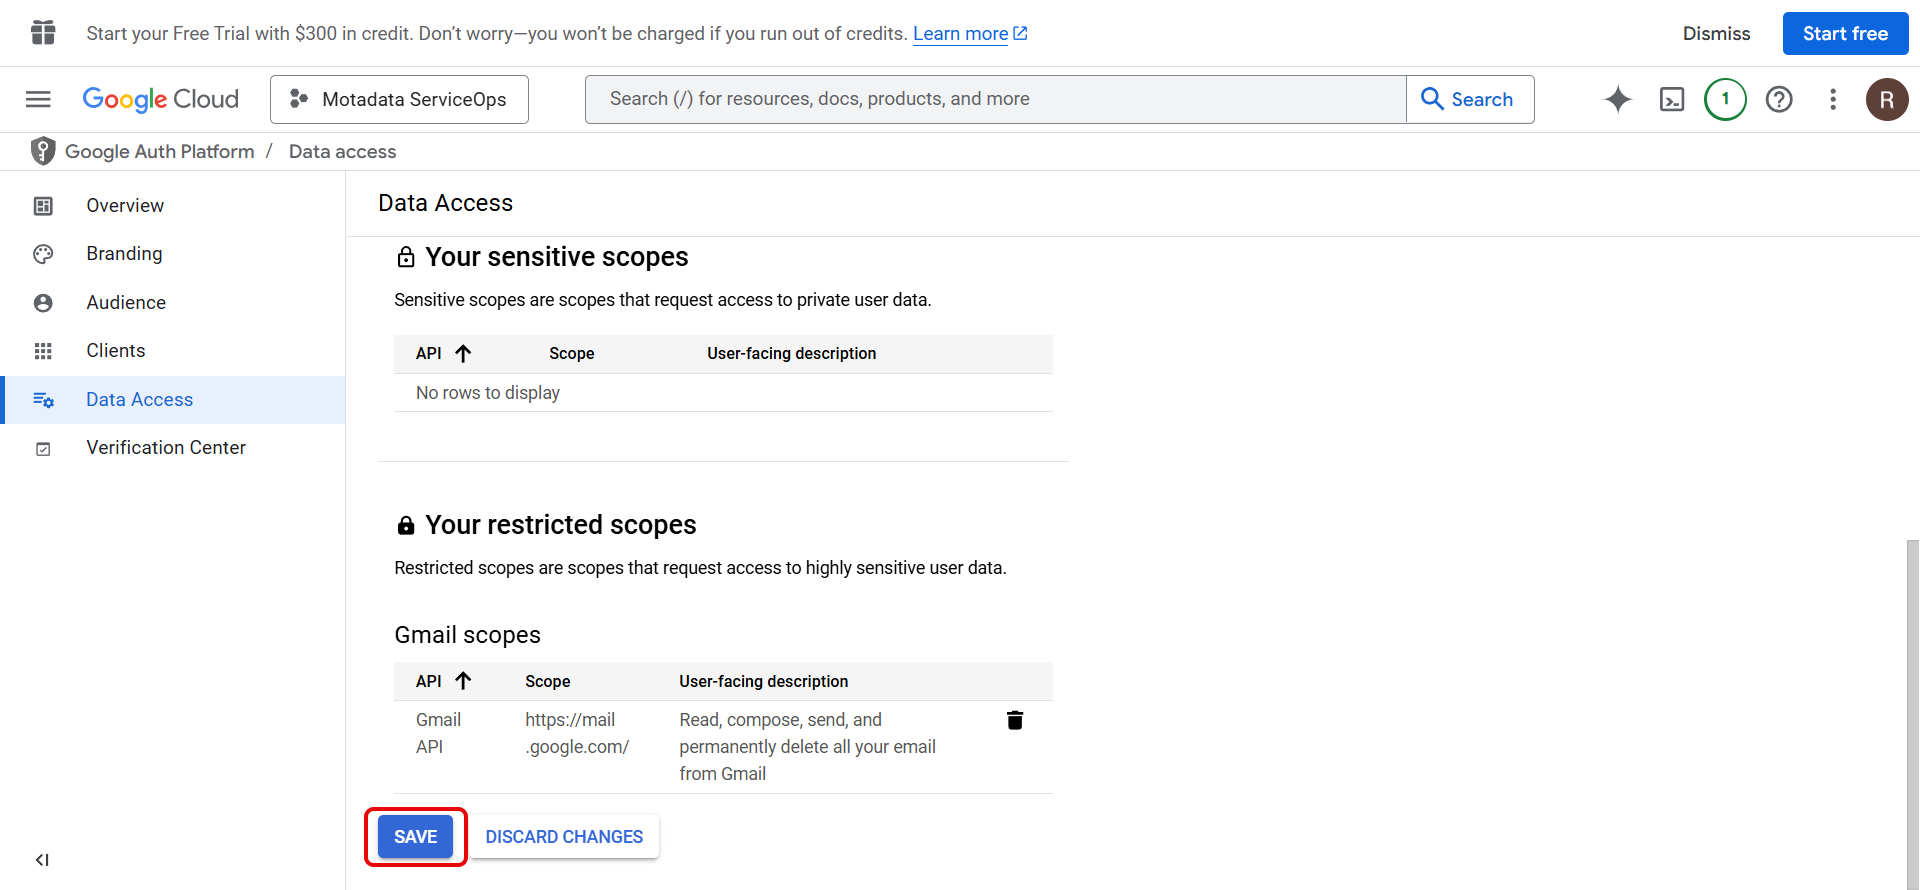
Once done, Save the added scope.
Configuring Gmail in ServiceOps
Now, login to the ServiceOps Portal, and go to the Admin > Support Channel > Emails > Incoming Email Servers tab. Click the Add Incoming Email Server button, and the below popup appears.
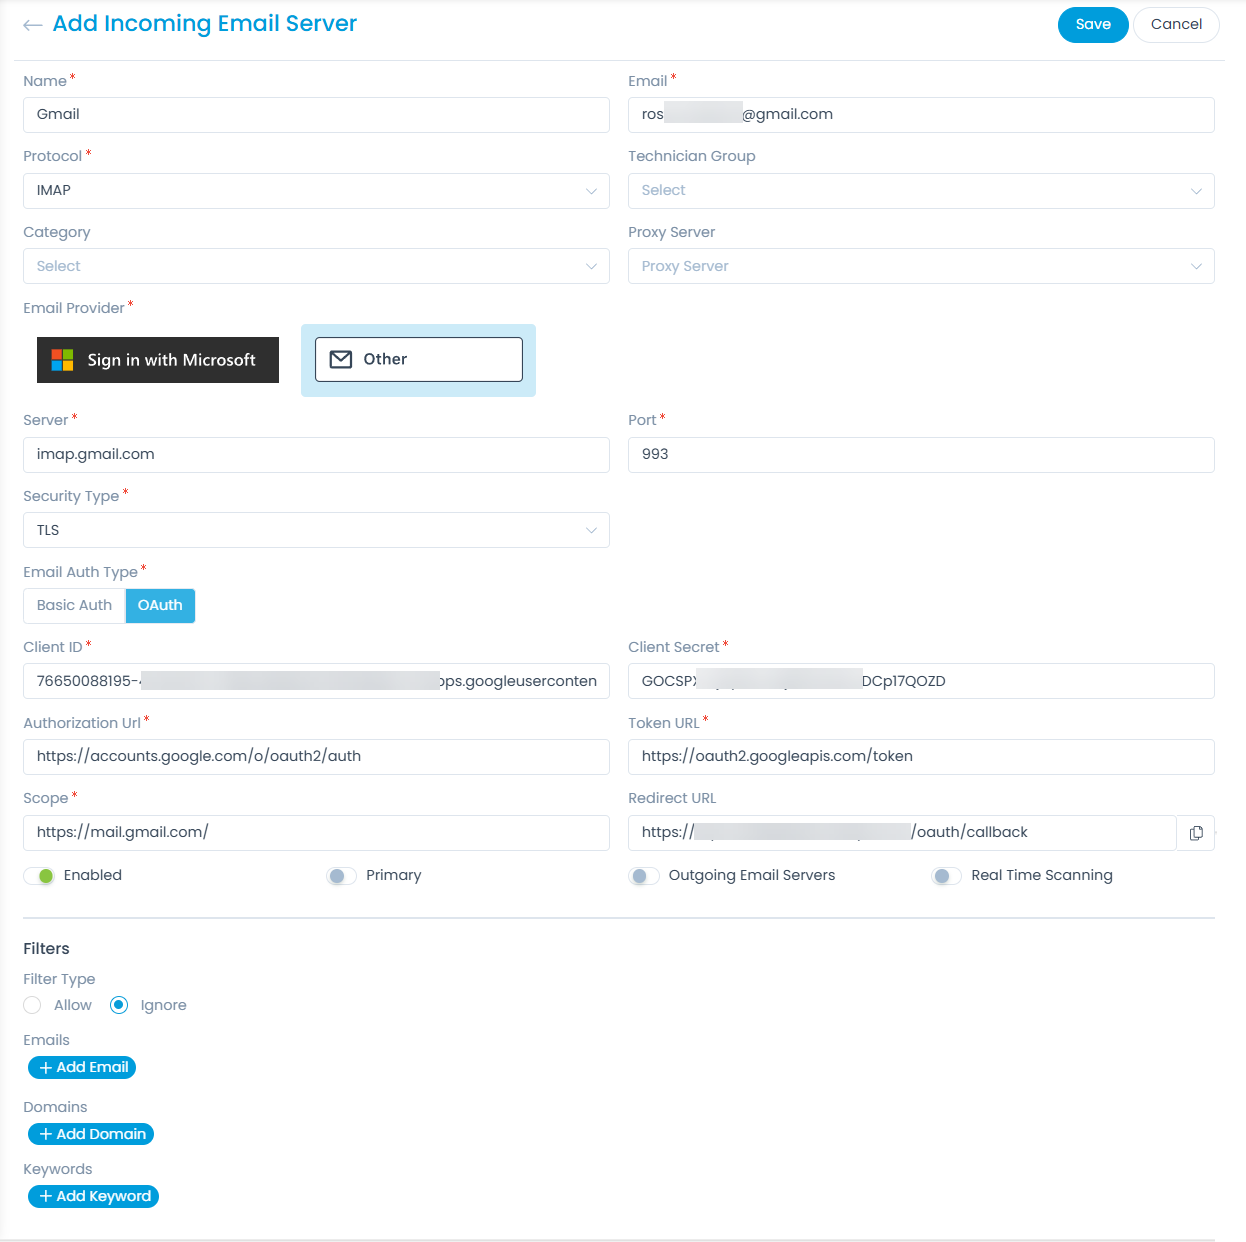
Enter the required details,
- Paste the copied Client ID and Client Secret from the Google Developers Console.
- For Gmail users:
- Authorization Url: https://accounts.google.com/o/oauth2/v2/auth
- Token Url: https://oauth2.googleapis.com/token
- For Non-Gmail users:
- Authorization Url: https://login.live.com/oauth20_authorize.srf
- Token Url: https://login.live.com/oauth20_token.srf
- Scope: https://mail.google.com/
Once entered, click Save. you will be redirected to Google Sign in page where you need to select the required account.
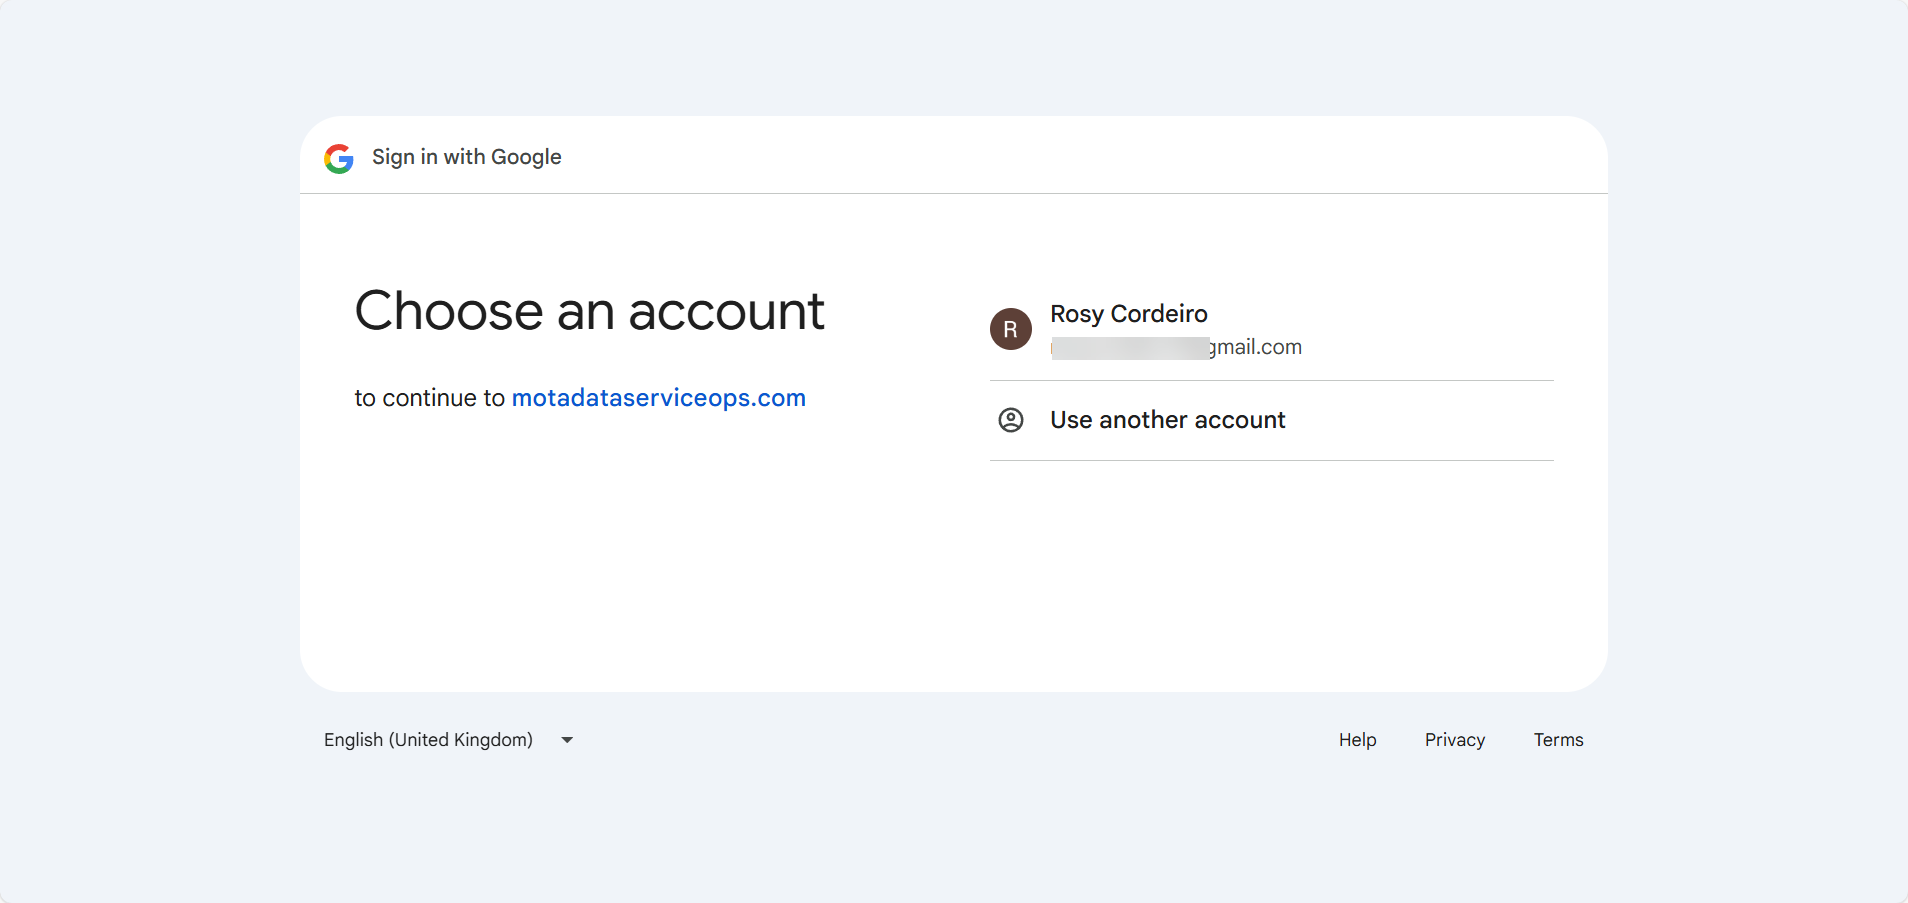
Click Continue and the following page will appear. Again click Continue.
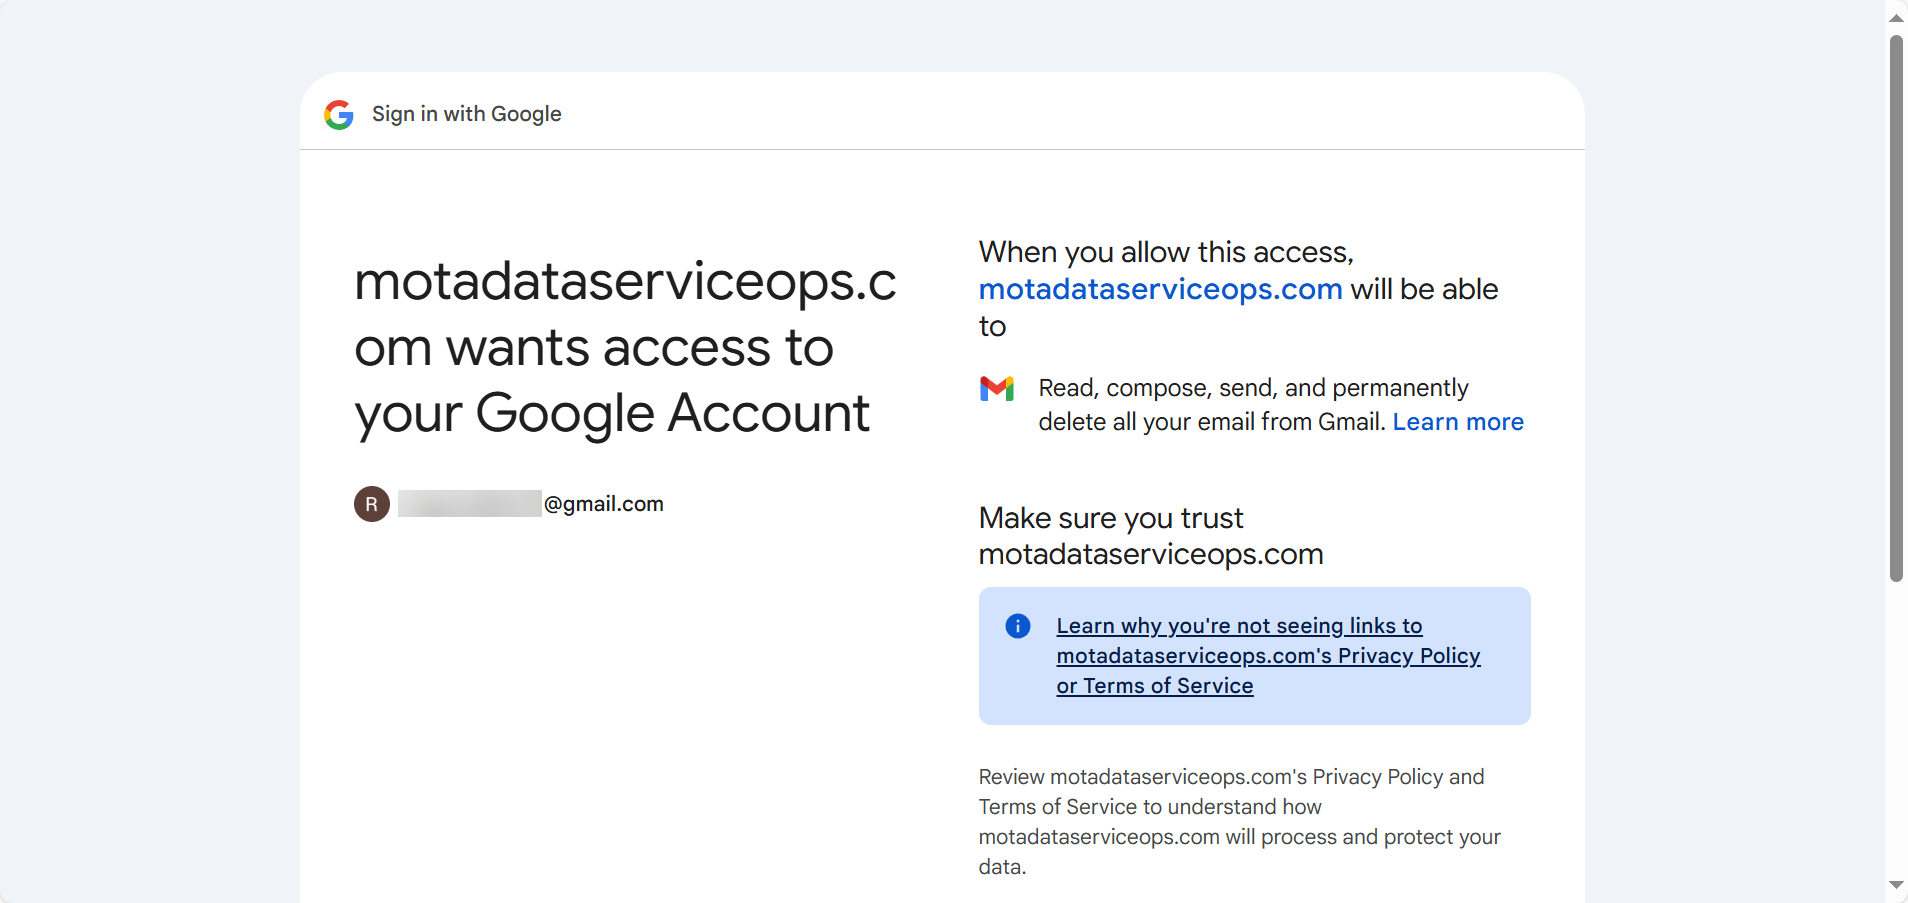
You will be redirected to the Incoming Email Servers page with the configured email server.
Gmail is now configured as an email server for ServiceOps. Similarly, you can also configure the Outgoing Email Server.
FAQs
How to resolve the "Access Blocked: Authorization Error"?
A: If you have entered an improper scope you may get this error. To resolve, please verify the scope configured in the Data Access section of the Google Developers Console.
What does the "**Error 400: invalid_scope**" error code mean?
A: It means you have entered an invalid scope in the ServiceOps Email configuration. To resolve, please verify the scope configured in the Data Access section of the Google Developers Console.
How to resolve the "Access blocked: motadataserviceops.com has not completed the Google verification process" error?
A: If you have created a gmail app for testing purpose and not added yourself as a tester, you may get this error. To resolve this issue, please add yourself as a tester in the Audience section.