Chat
The Chat support allows immediate and extended support on live basis. If any user needs an urgent solution to a problem, the chat support becomes a benefit. For example, if a requester needs help or guidance for some queries, one can use chat for instant help. This feature is disabled by default and user needs to enable it.
In the SaaS application the Chat feature is available only if the Chat license is enabled.
To view the Chat page, navigate to Admin > Support Channel > Chat.

The page provides the following options:
- Allow Chat Support: Enable or disable the flag to start using the Chat Support. Once the chat engine is enabled, it will get reflected on the Panel.
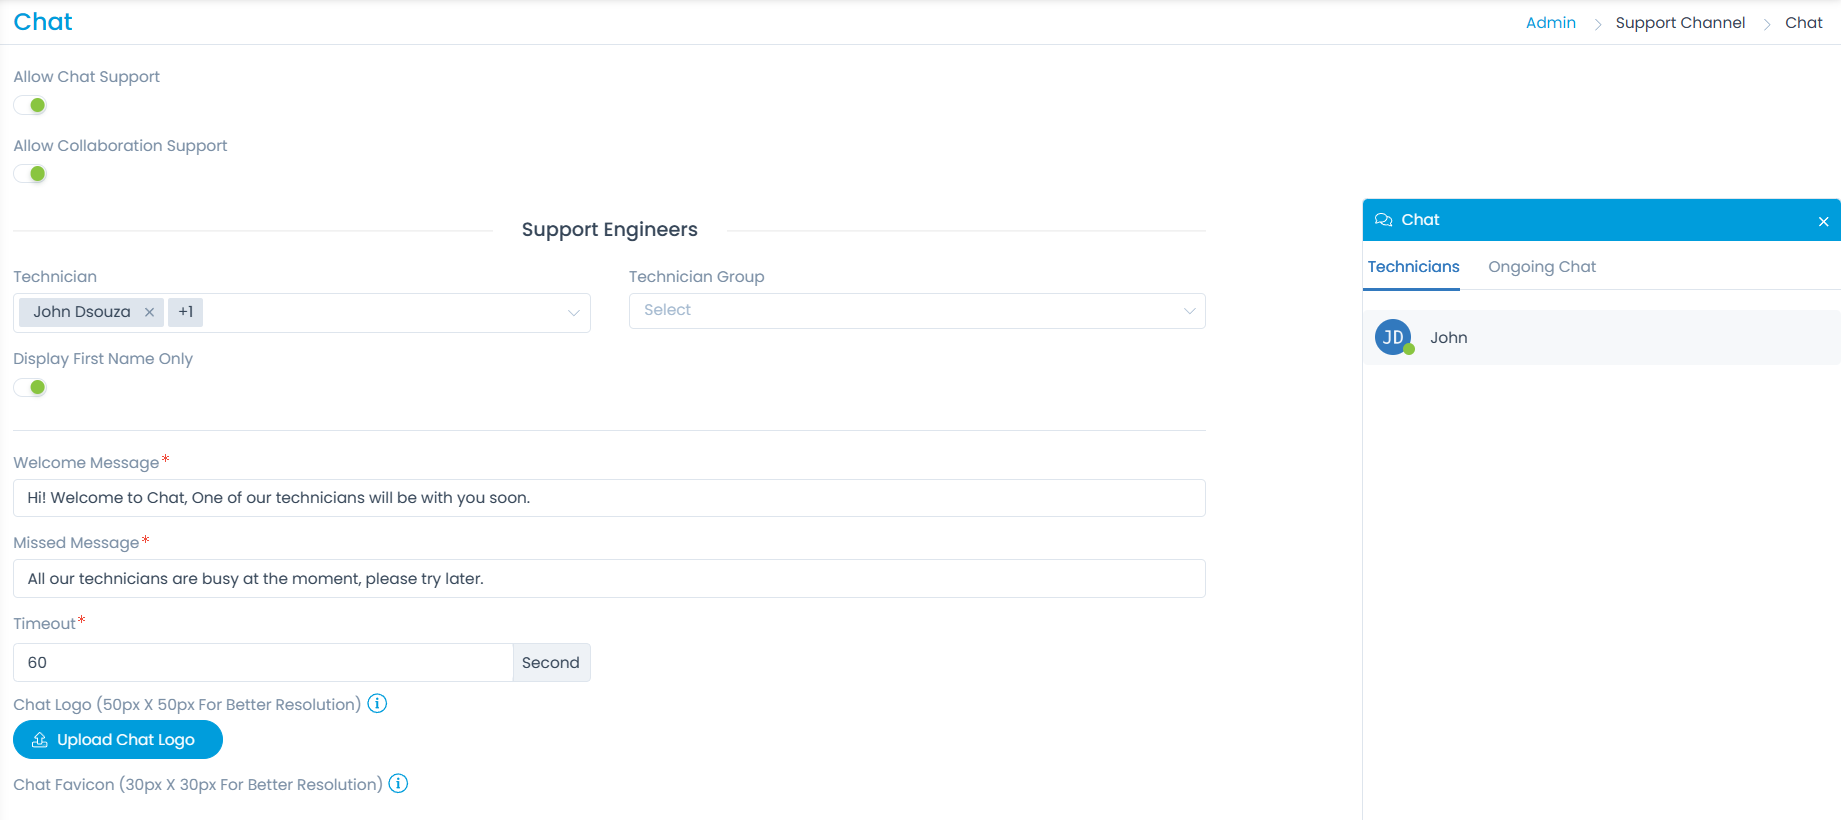
- Allow Collaboration Support: Enable or disable the flag to allow technician to technician conversation. If this flag is disabled,
- Enable: Technicians can have a conversation with Requesters as well as peer Technicians.
- Disable: Technicians cannot chat with other technician. Only Requester to technician will work.
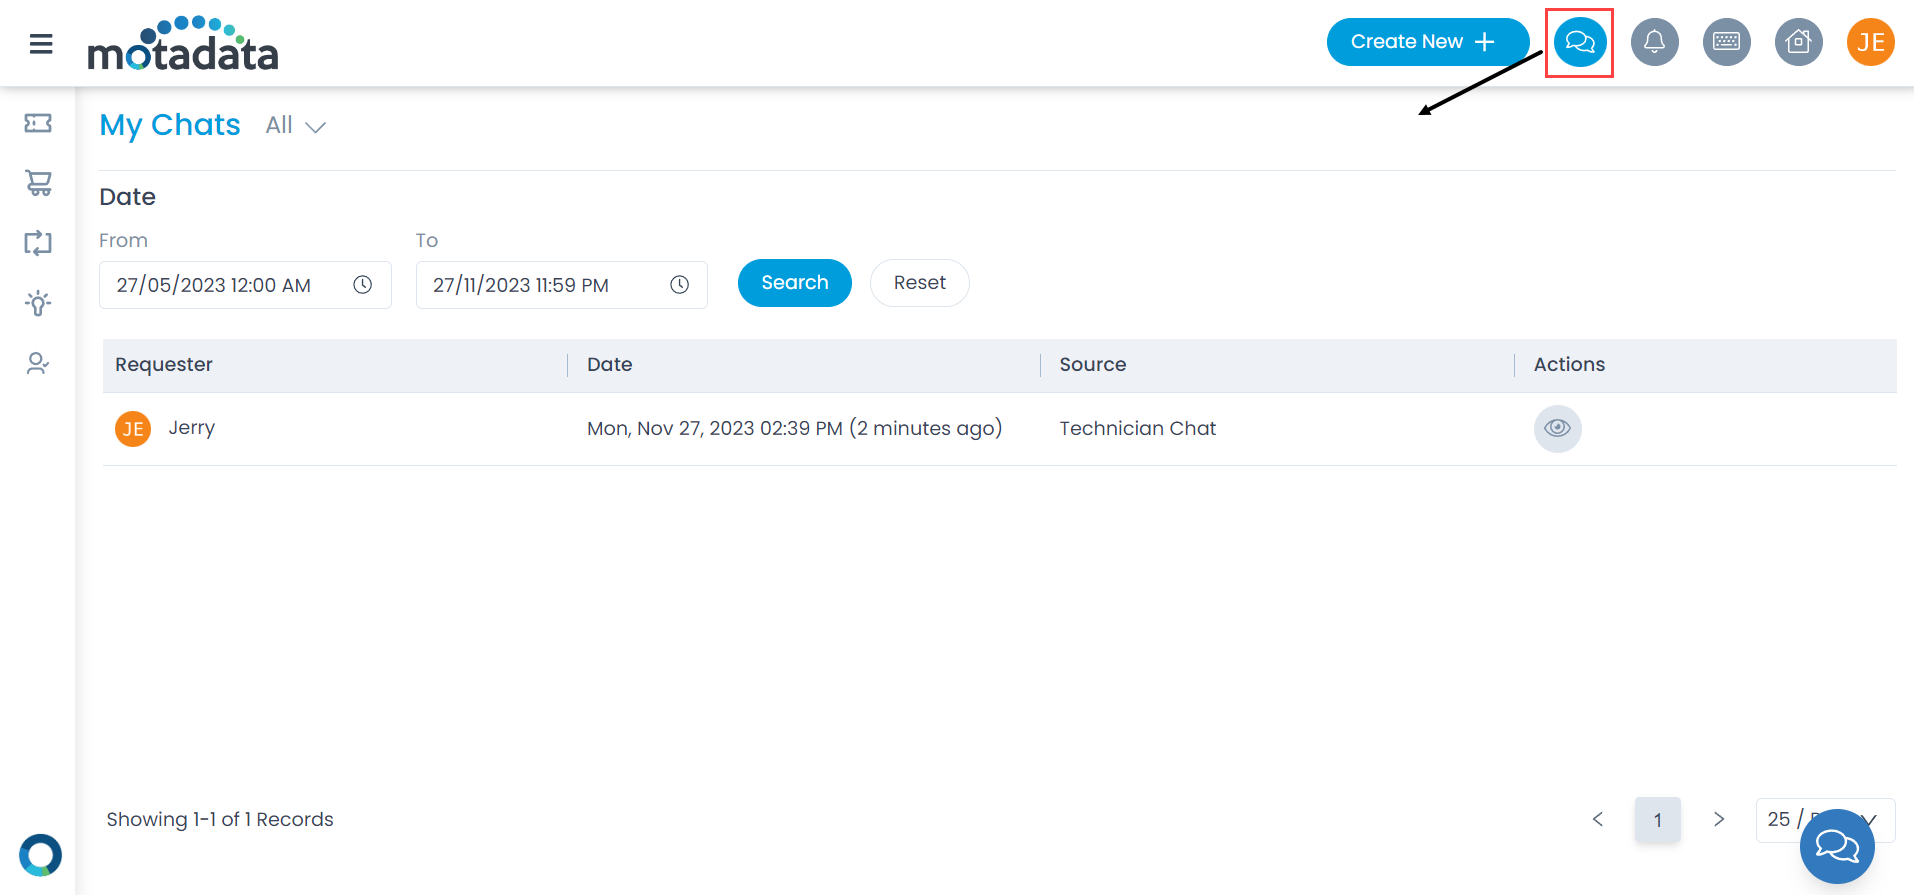
- Allow Requester to view My Chats: Enable to allow the requester to view the chats. If enabled, the Chat Console icon will appear on the Support Portal. By default it is disabled.
- Technician: Select the desired technician you wish to add for the live support. You can add multiple technicians.
- Technician Group: Select the desired Technician Group you wish to add from the dropdown list.
- Display First Name Only: Enable to view the Technician’s first name in the Chat window. If disabled, the full name will appear. By default, it is disabled.
- Welcome Message: Enter the message you want the Requester to view when a chat is started in the form of a Welcome Message.
- Missed Message: Enter the message you want the Requester to view when a chat is missed.
- Font Family: Select the font to use in the chatbot.
- Timeout: Enter the time duration within which if a chat is not answered then it will be marked as Missed. Timeout must be 30 seconds or more.
- Chat Logo: You can upload the logo for the chat window. Once uploaded and updated, the logo will appear at the bottom-right corner of the Support Portal.
- Chat Favicon: You can upload the favicon for the chat window. Once uploaded and updated, it will appear at the left corner of the Chat Window as shown below.

Once you have configured the above parameters, click Update to make the changes live.
Chat Console
The Chat Console consists of mainly 4 tabs:
- Requester Chat: Displays the pending, ongoing, missed, and completed chats of the requesters.
- Collaborations: Displays the technicians with whom the chat is collaborated.
- Virtual Agent: Displays the requester chats via virtual agent.
- Unanswered Bot Response: Displays the messages and their count which the bot was unable to answer.
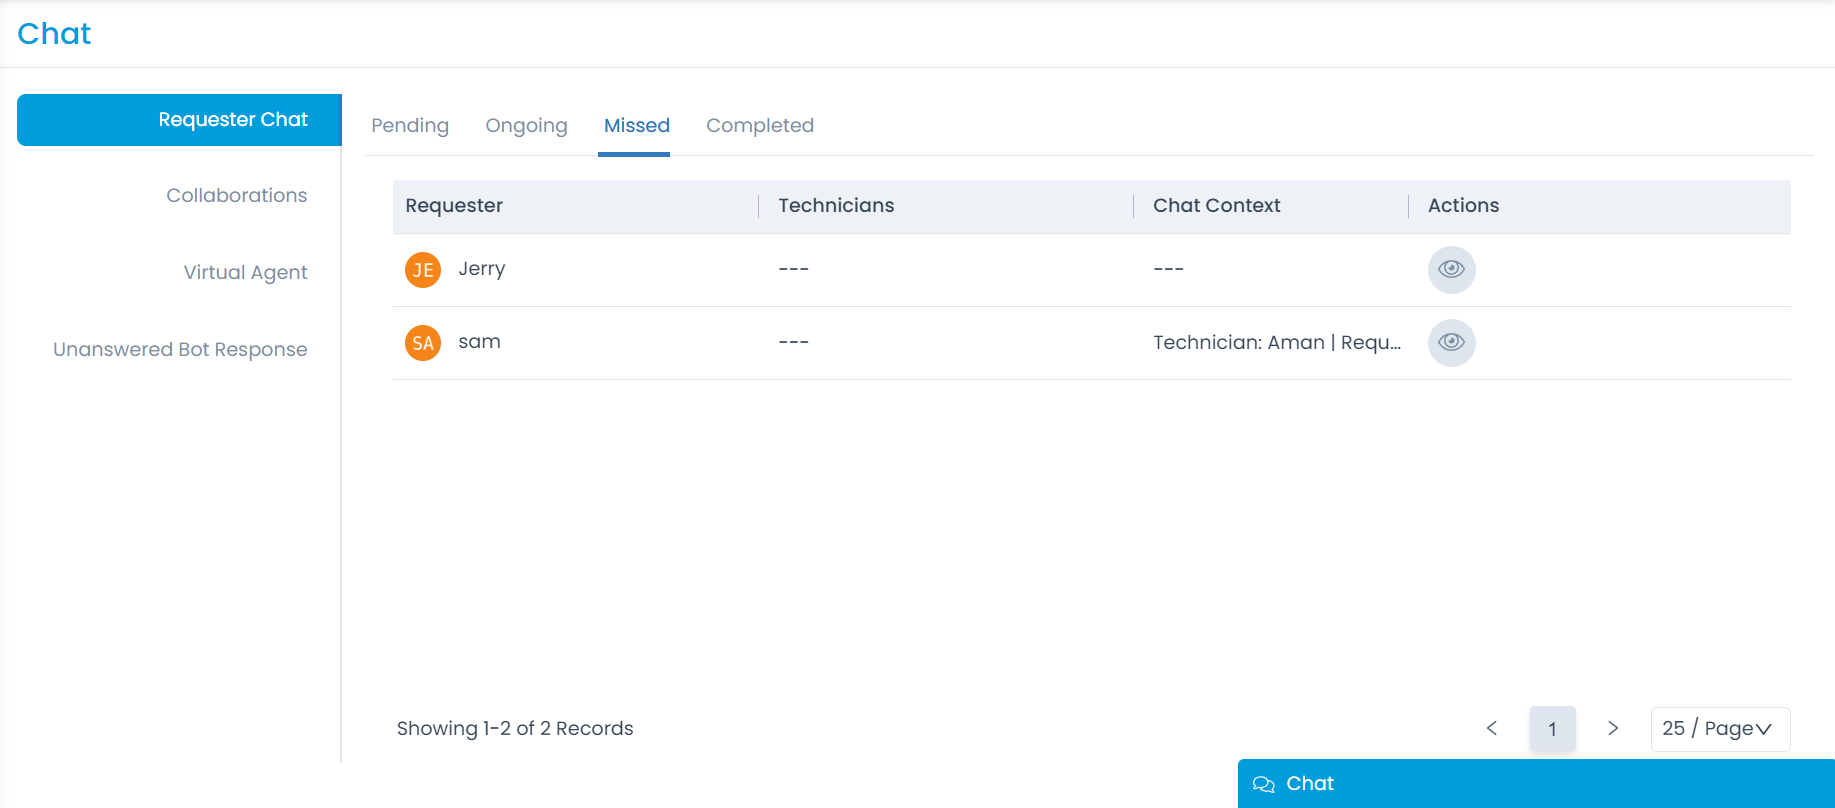
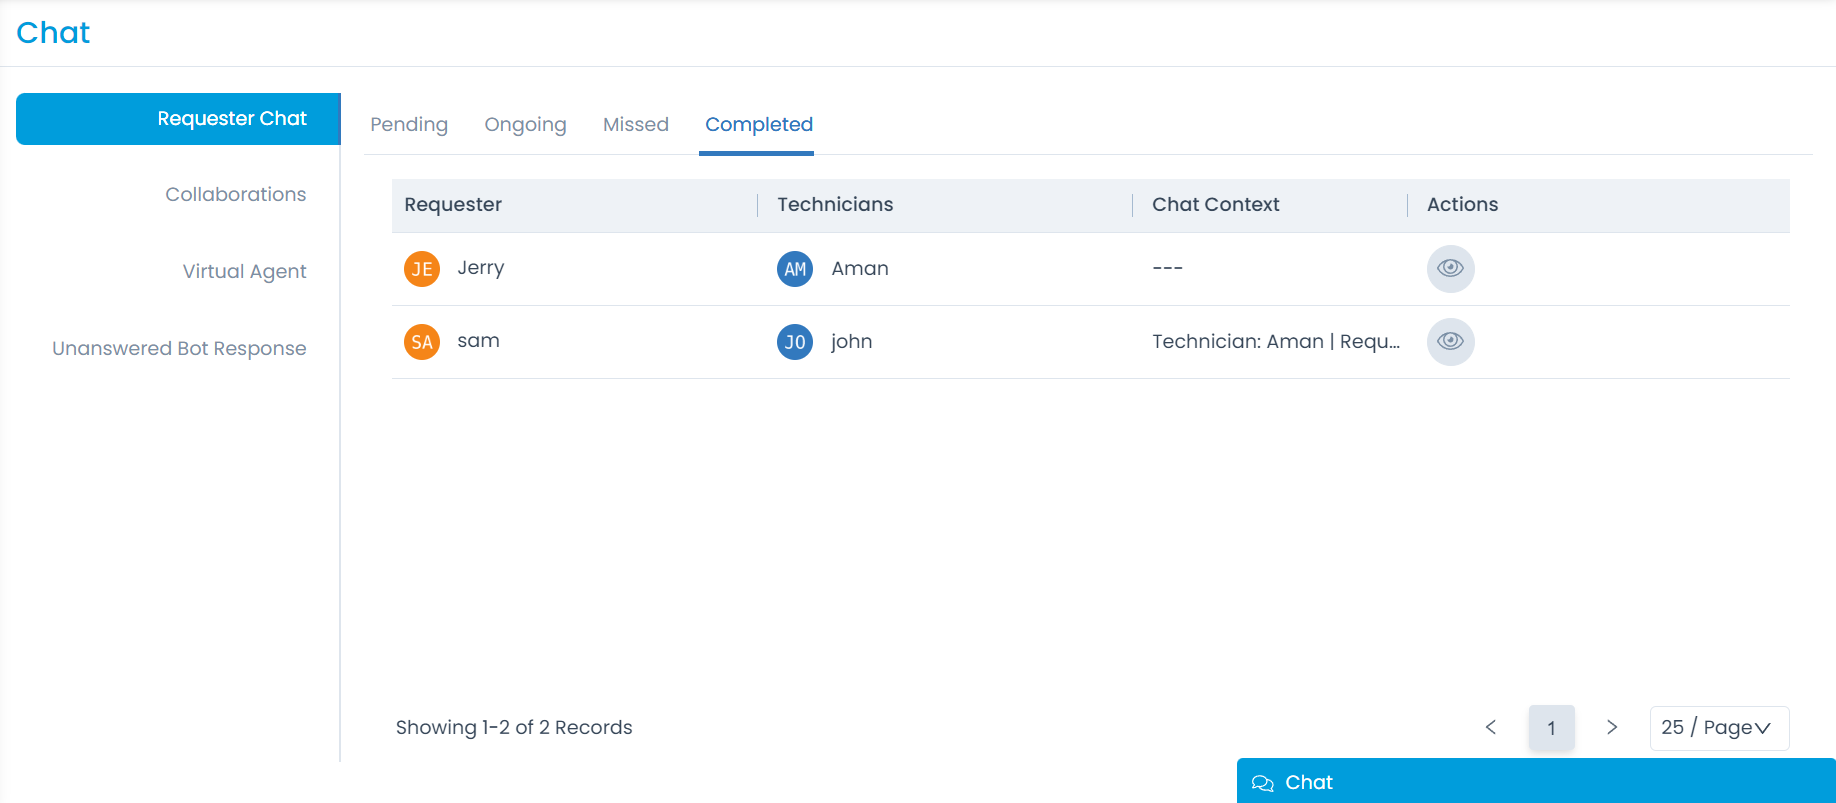
Requester Chat
This tab displays the chats of the requesters according to their status like pending, ongoing, missed, and completed.
- Pending: Here, the pending messages will show up for responding.
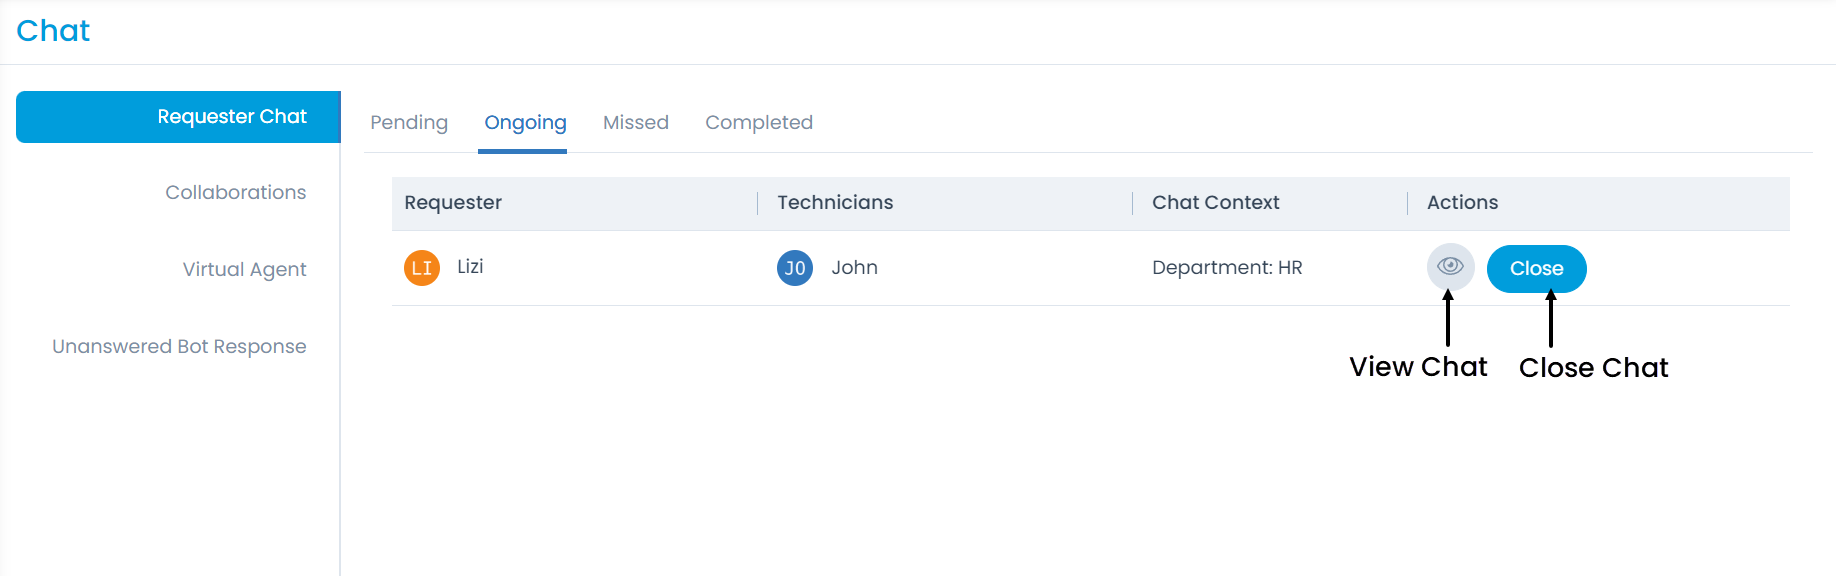
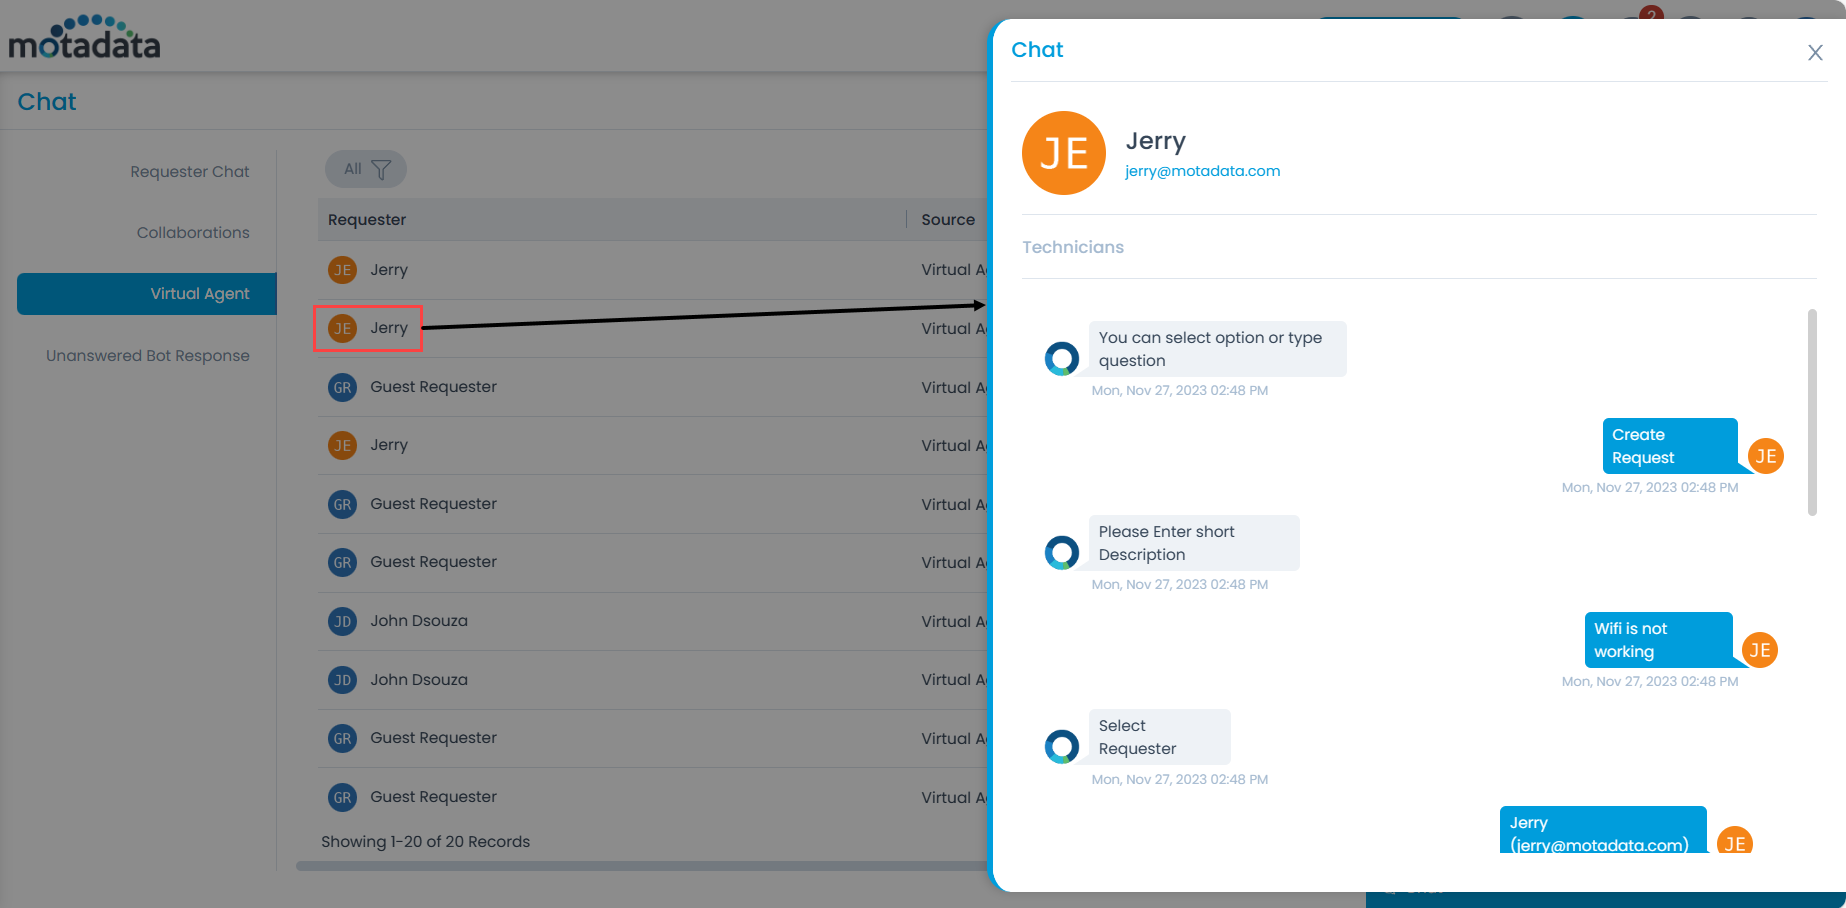
- Ongoing: Here, the ongoing chats with Technicians/Requesters show up chronologically. You can close the chat using the Close button. Also, you can view the chat history using the View icon (eye).
- Missed: Here, the missed chats from Technicians/Requesters show up. You can view the missed messages using the View Icon (Eye).
- Completed: Here, all the completed chats can be viewed.
Collaborations
This tab displays the technician with whom the collaboration took place for resolving the requests. Here, you can also view their chat history using the View icon (eye).


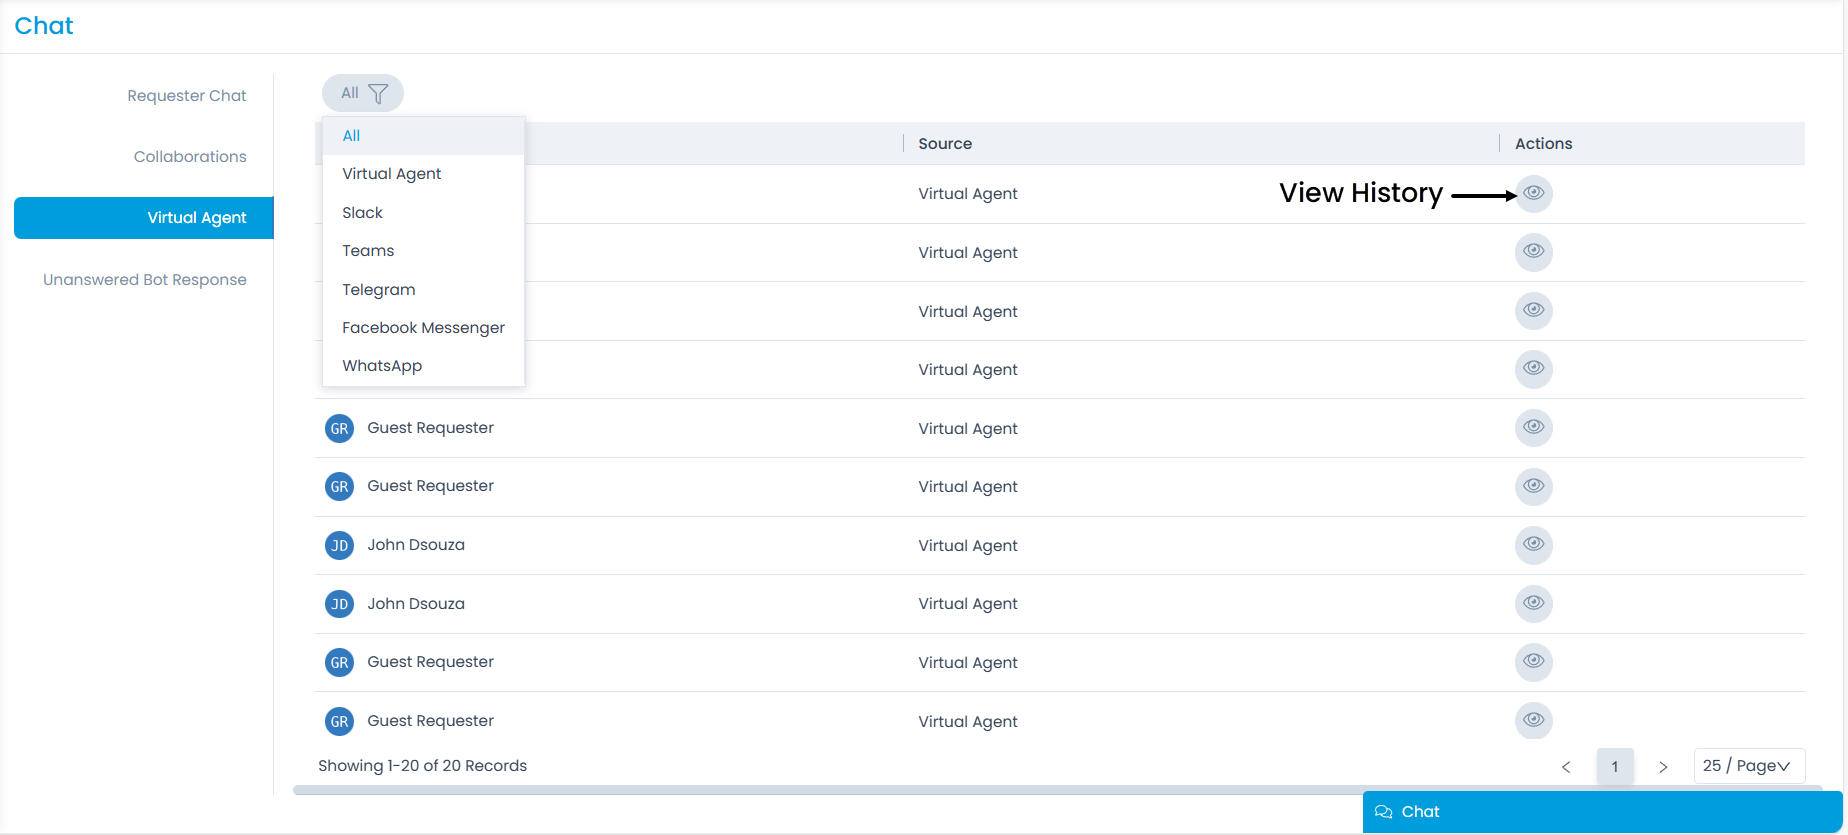
Virtual Agent
This tab displays the requesters who have raised their requests via the Virtual Agent. You can also view their chats using the View icon (eye).
Unanswered Bot Response
This tab displays a list of responses that the bot could not answer along with their count.
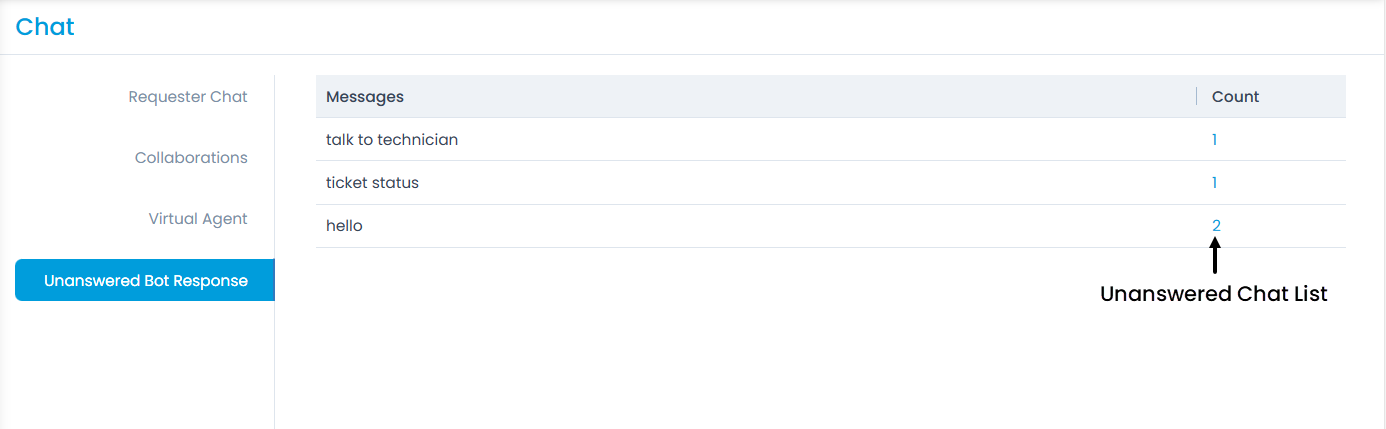
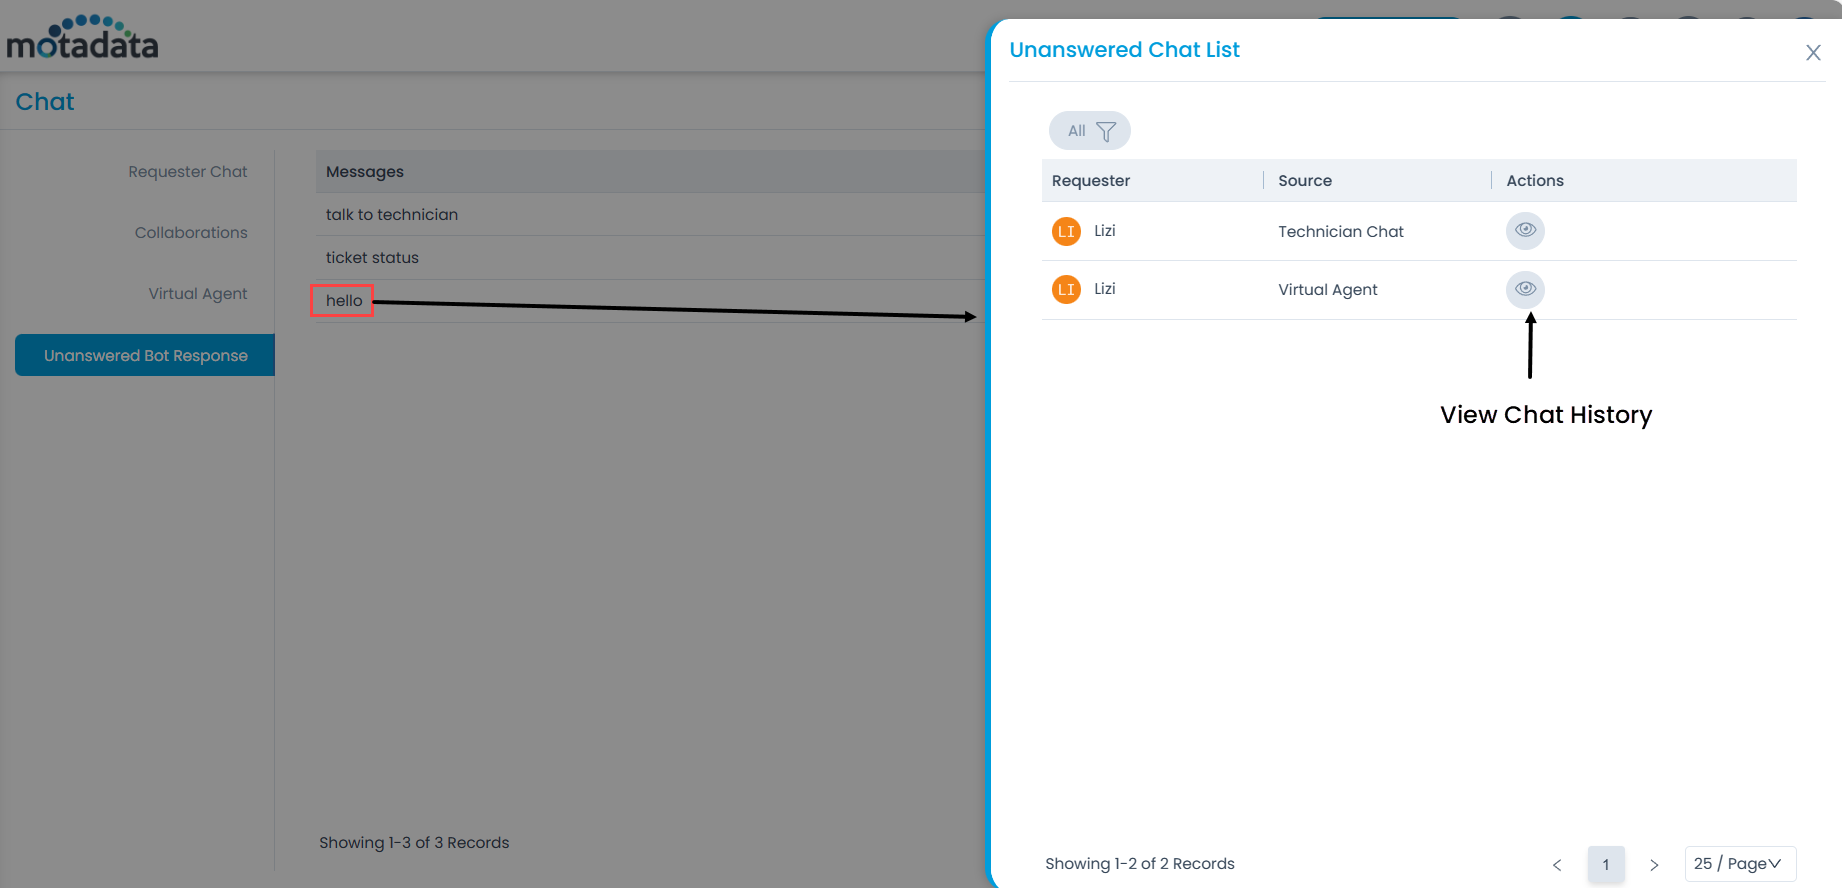
On clicking the count, a list of unanswered chat appears as shown below. Here, you can view the list based on the selected filter. The options are: All, Technician Chat, Virtual Agent, Slack, Teams, Telegram, Facebook Messenger, and WhatsApp. Also, you can you can click the Eye icon to view the history of the respective chat.
Chat Window Options
There are few features which can directly be used from the Chat Window itself.
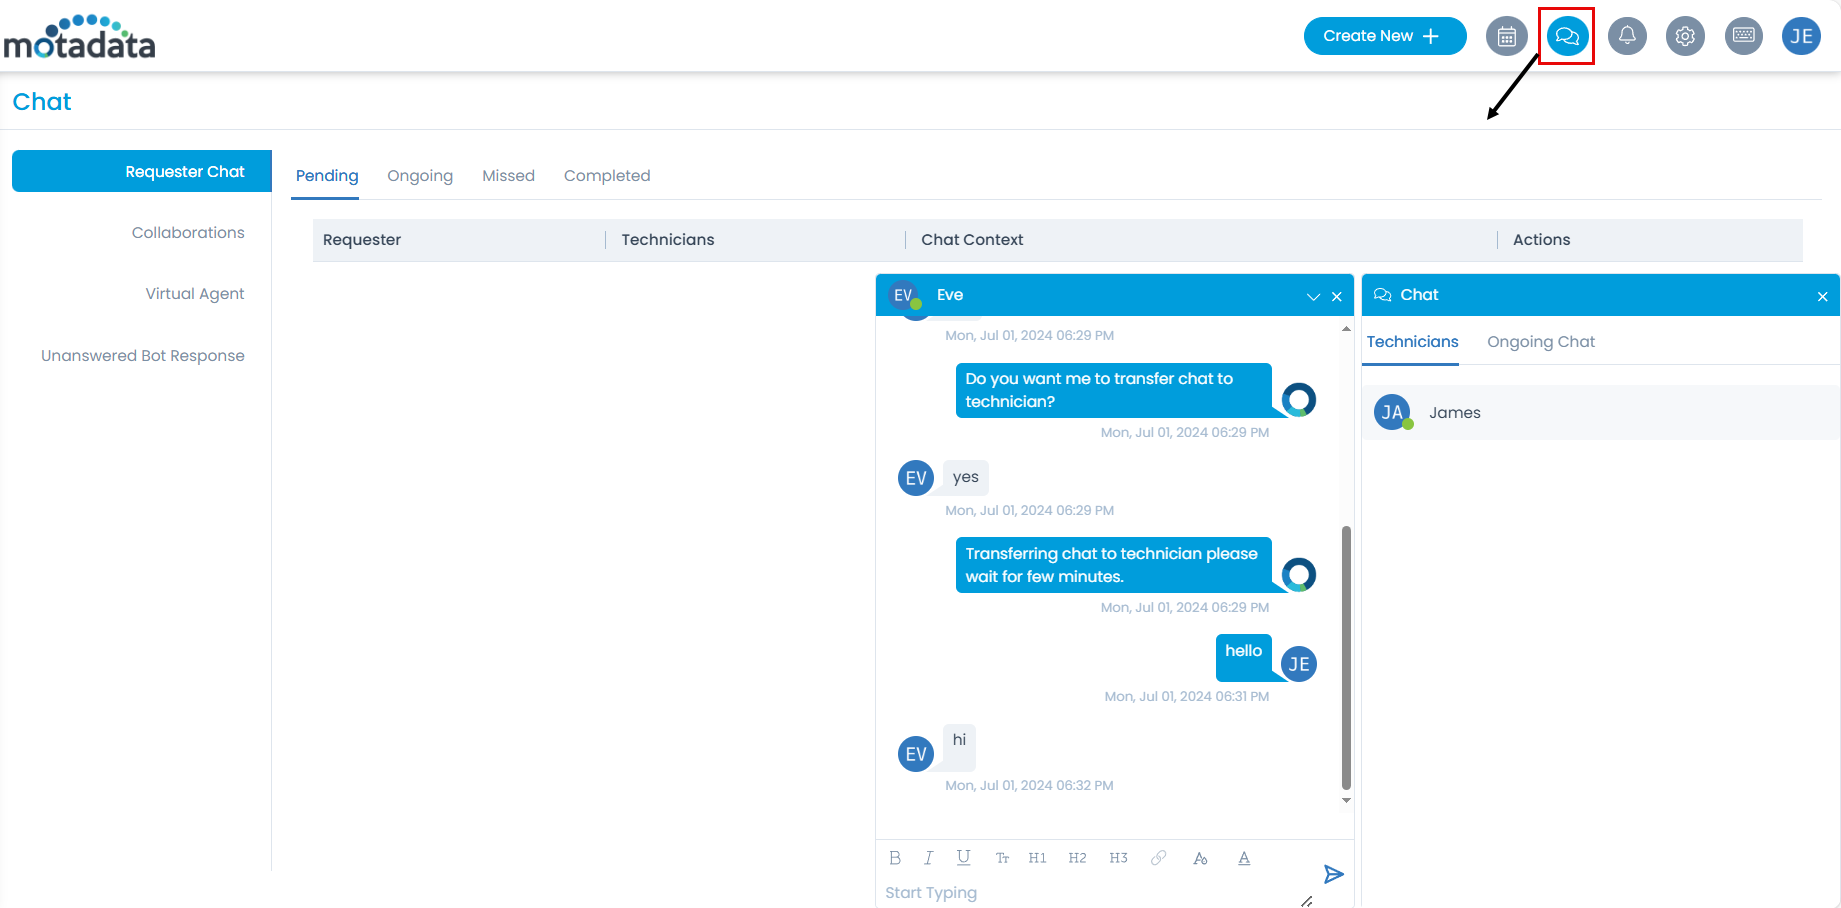
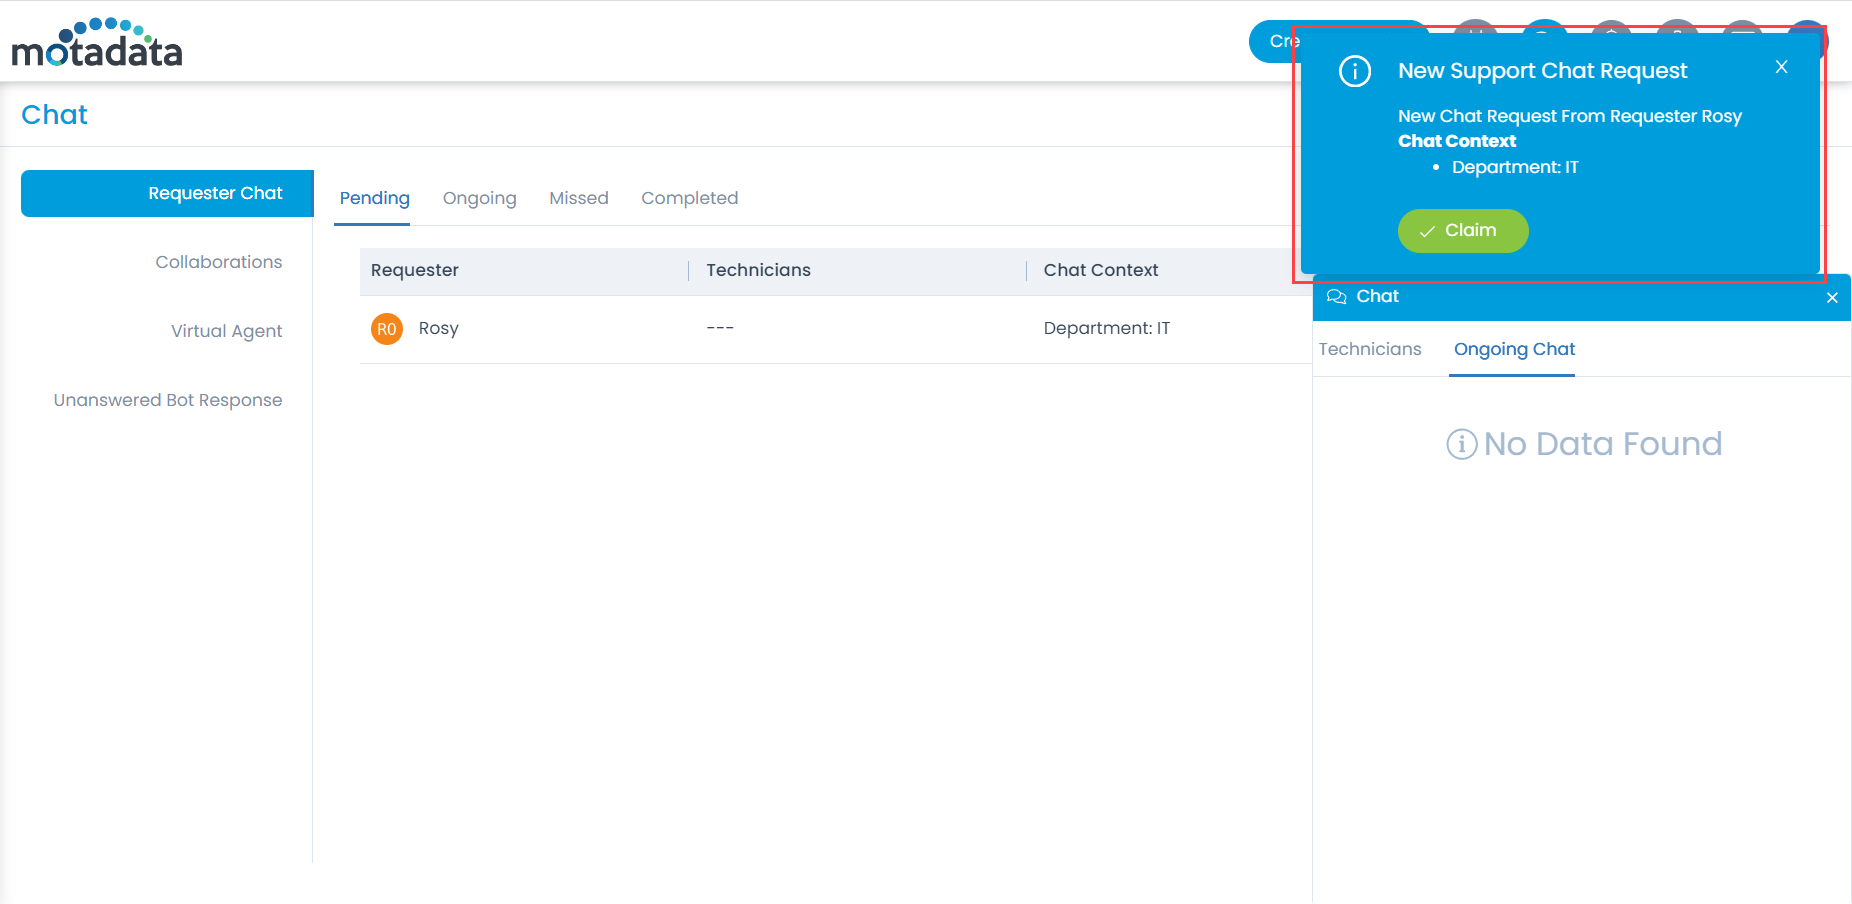
- Claim Chats: This feature allows the selection of Technician to respond to the Chat Request. As soon as a chat request is received, a pop up notification appears on the top of the page. Any technician that is Online and available can claim the chat request.
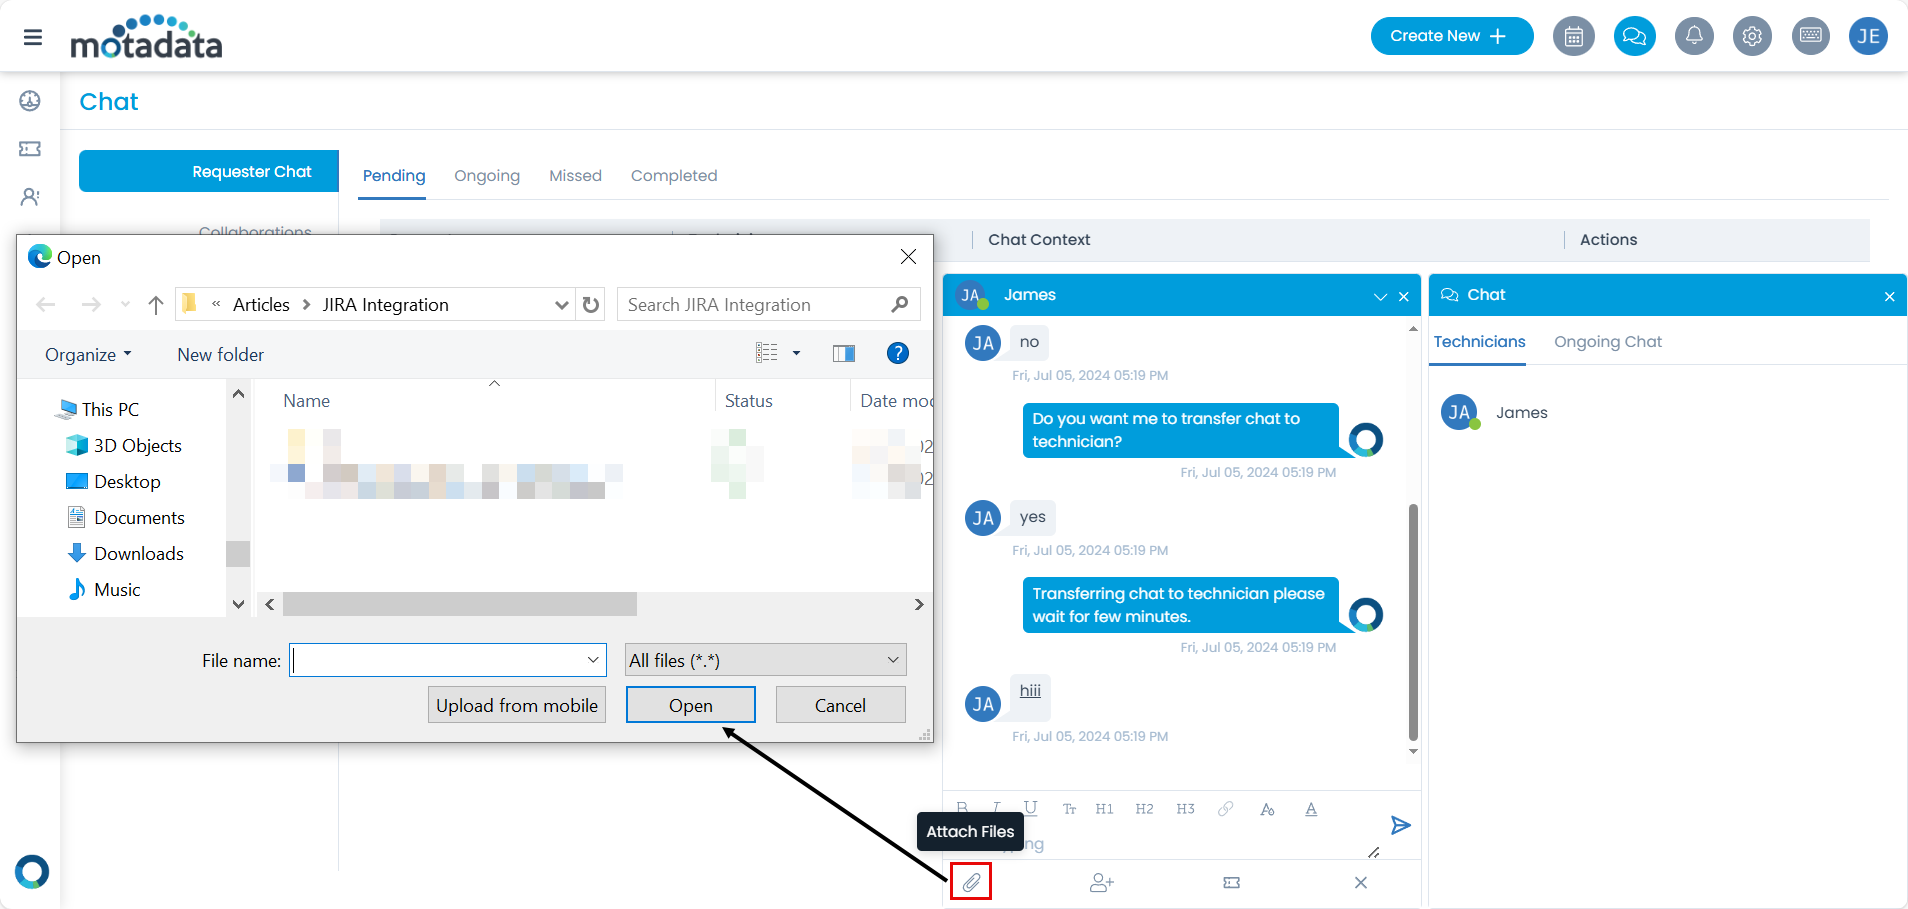
- Attach Files: This feature allows to send images, documents, or SOP for a particular request to the requester or technicians while the chat is ongoing for the smooth and better understanding. Technician can choose the file from the computer and attach it.
- Transfer Chat: This feature allows the transferring of the ongoing chat to another technician. From the chat window itself the technician can select the desired person to transfer the chat.

- Create Request: This feature allows creating a request while the chat is ongoing.


- Format the text: You can also format the text in the chat and add links to the selected text as shown below.
