Support Portal
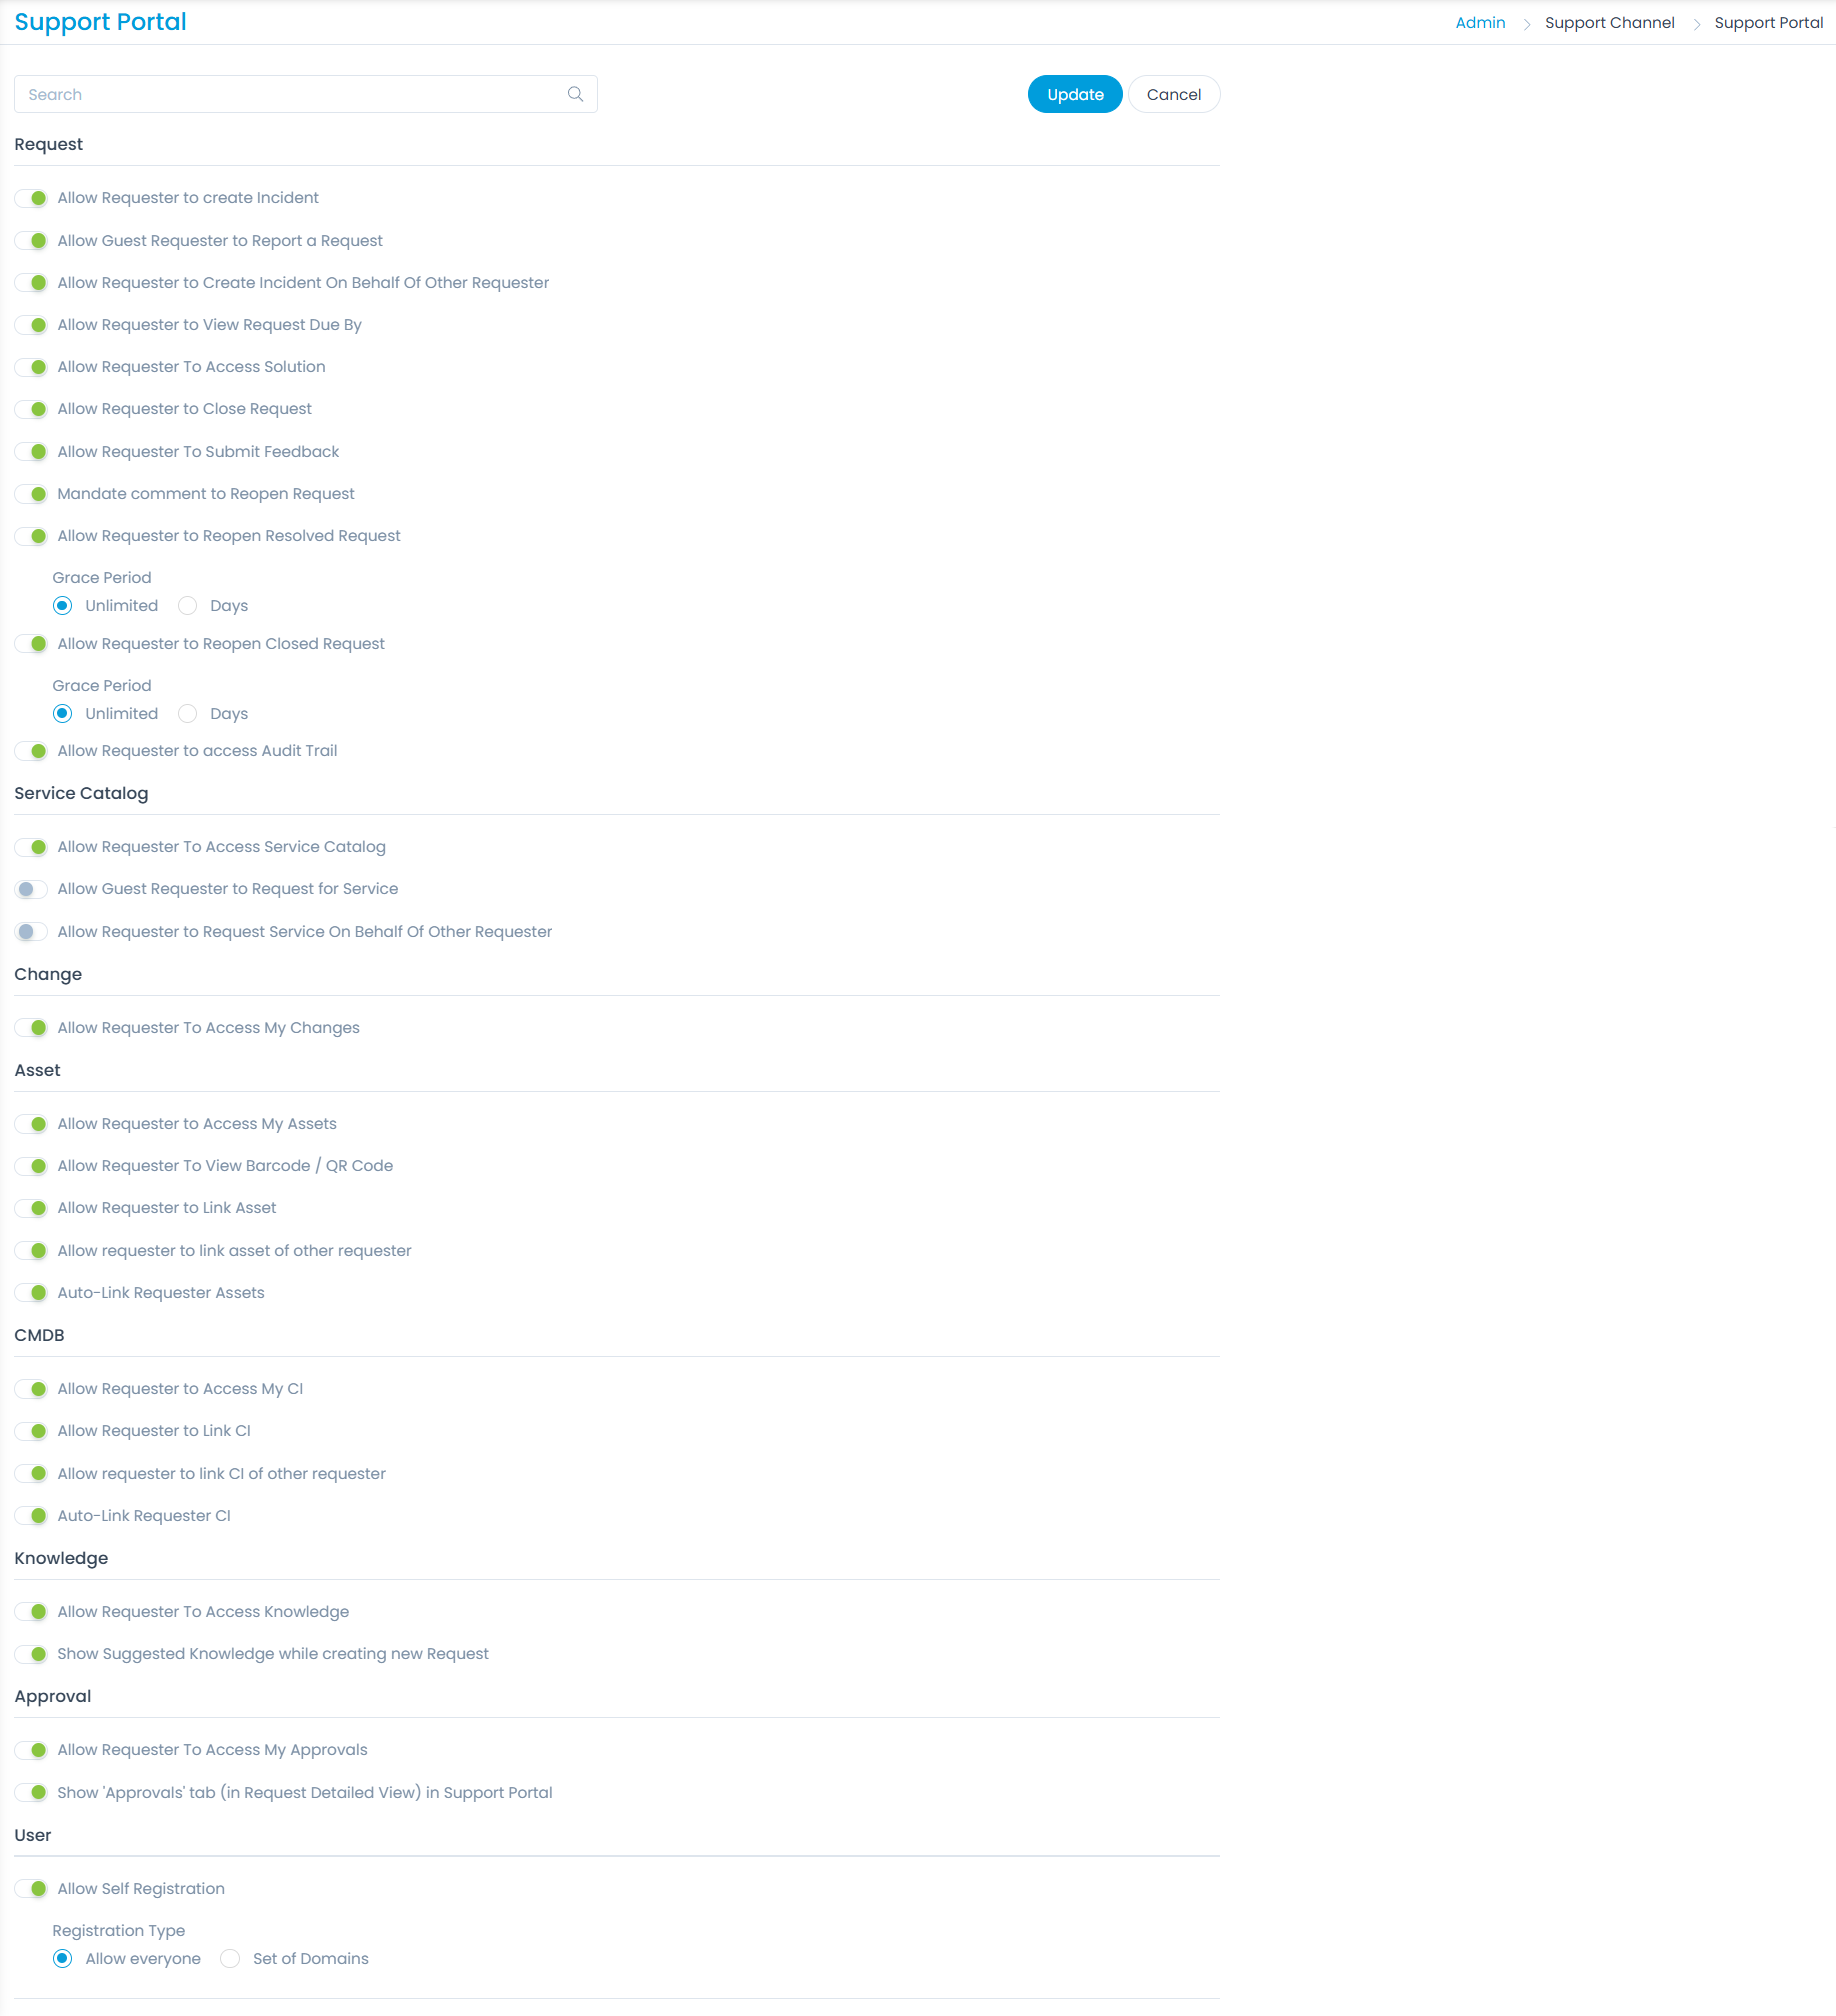
This sub-menu enables you to manage and control the behavior what requesters can do. The changes applied here will be reflected in the Support Portal.
To view the Support Portal page, navigate to Admin > Support Channels > Support Portal.

The various settings include:
Request
- Allow Requester to create Incident: Enable to allow the requester to create an Incident request from the Support Portal. If disabled, the "Create Incident" option will be unavailable on the Support Portal, thereby restricting the requester from creating an Incident request.
- Allow Guest Requester to Report a Request: This option is available only if the "Allow Requester to create Incident" field is enabled. Once available, enable to allow the guest requester to create an Incident request from the Support Portal. If disabled, the "Report an Incident" option will be unavailable on the Support Portal, thereby restricting the guest requester from creating an Incident request.
- Allow Requester to Create Incident on Behalf of Other Requester: Enable to allow the requester to create an incident on behalf of another requester. By default, it is disabled. If enabled, the field Requester becomes editable while creating an Incident.
- Allow Requester to View Request Due By: Enable to allow requesters to see the exact date and time when their requests are due. Once enabled, the 'Due By' field will be visible in the following locations:
- Request Detail Page > Other Info Section
- Request List Page > Column Selection
- Request List Page > Search Bar for Condition
- Request List Page > Export Column Selection List
- Allow Requester to Access Solution: Enable to allow requesters to view solutions to their requests. This feature allows users to access resolutions quickly, improving efficiency and reducing the need for additional support interactions.

- Allow Requester to Close Request: Enable to allow the requester to close the request.
- Allow Requester To Submit Feedback: Enable to allow the requester to submit a feedback once the request is closed or resolved. If enabled the Feedback button will appear on the Request Details page. The feedback can be given based on the Feedback Setting.
- Mandate comment to Reopen Request: Enable to mandate the user for adding a comment when reopening the Request from the Support Portal. By default, it is disabled.
- Allow Requester to Reopen Resolved Request: Enable to allow the requester to reopen the resolved request. If enabled, select the Grace Period till which the resolved request can be reopened. Once the set period expires, the Reopen Request option will get disabled. You can set the Grace Period as Unlimited or Days. If Days is selected, enter the Number of Days till which the request can be reopened.
- Allow Requester to Reopen Closed Request: Enable to allow the requester to reopen the closed request. If enabled, select the Grace Period till which the closed request can be reopened. Once the set period expires, the Reopen Request option will get disabled. You can set the Grace Period as Unlimited or Days. If Days is selected, enter the Number of Days till which the request can be reopened.
- Allow Requester to access Audit Trail: Enable to allow the requester to view the audit details related to the Request on the Support Portal. Once enabled, the Audit Trail tab will appear on the Request Details page.
Service Catalog
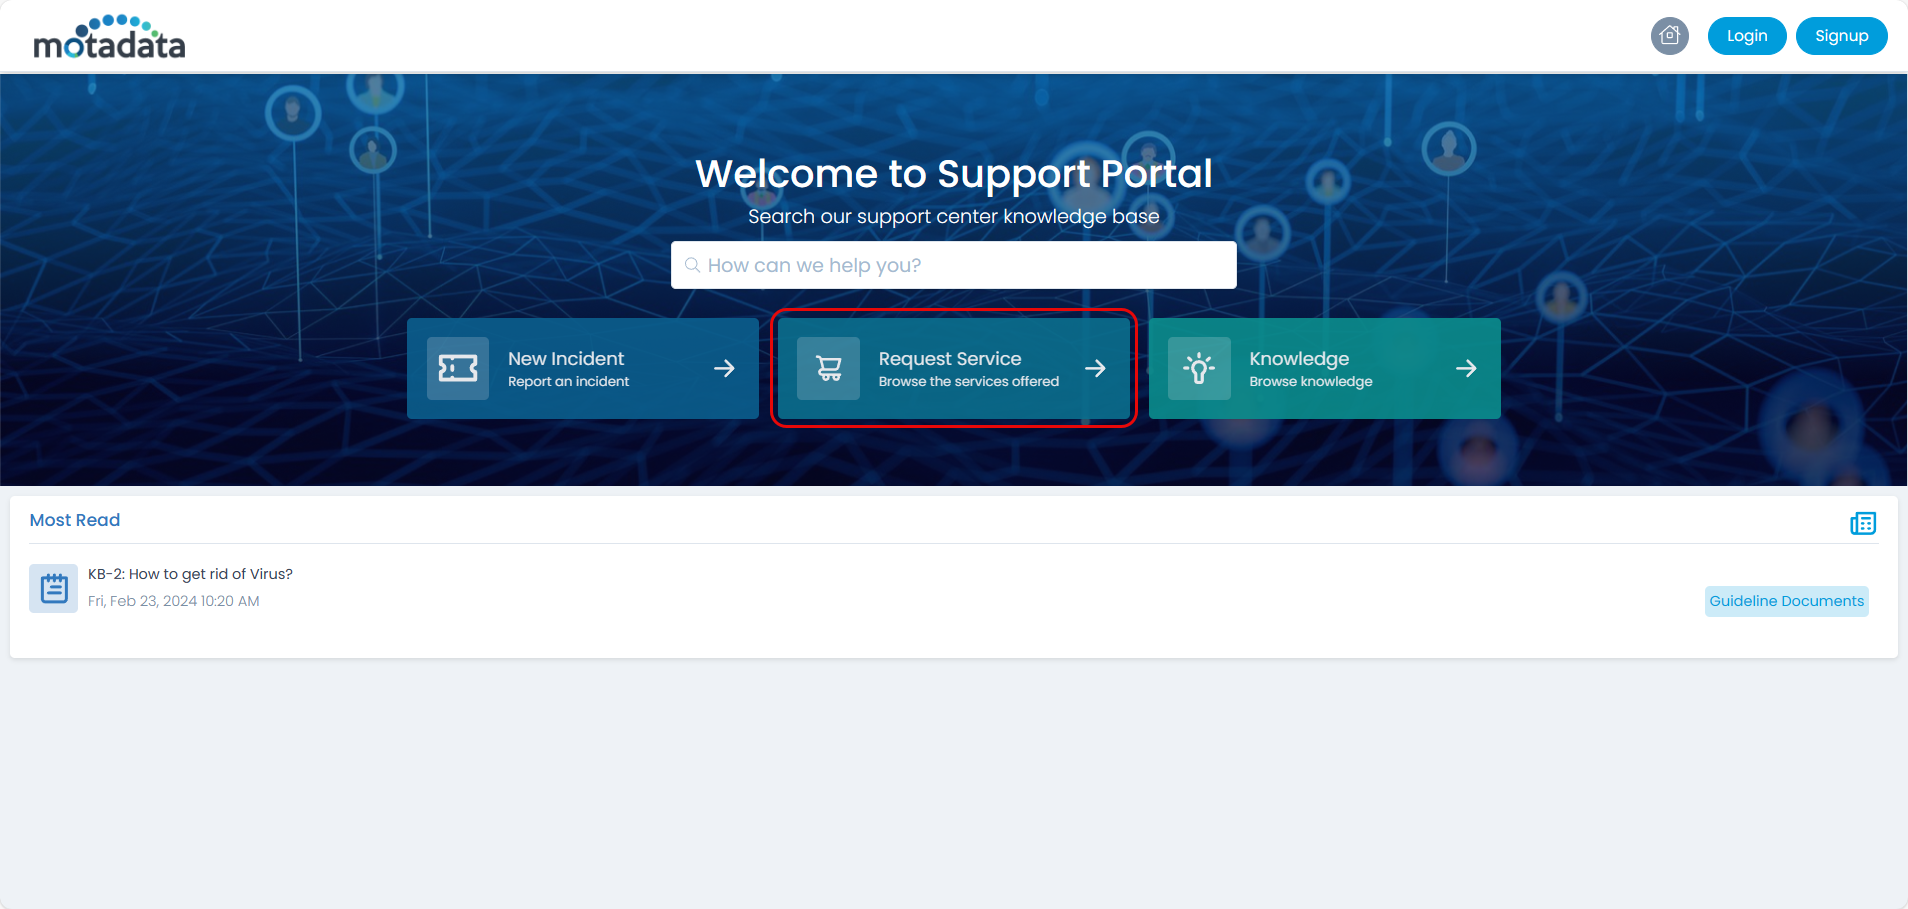
- Allow Requester to Access Service Catalog: Enable to allow the requester to create a Service Request from the Support Portal. If disabled, the "Request Service" option will be unavailable on the Support Portal, thereby restricting the requester from creating a Service Request.
- Allow Guest Requester to Request for Service: This option is available only if the "Allow Requester to Access Service Catalog" field is enabled. Once available, enable to allow the guest requester to create a service request from the Support Portal. Once enabled, the "Request Service" option will be available on the Support Portal for guest requesters. If disabled, the option will be unavailable. By default, it is disabled.

- Allow Requester to Request Service On Behalf Of Other Requester: Enable to allow the requester to create a service request on behalf of another requester.
Change
- Allow Requester To Access My Changes: Enable to allow the requester to access the My Changes module. If disabled, the module will be unavailable on the portal.
Asset
- Allow Requester to Access My Assets: Enable to allow the requester to access the My Assets module. If enabled, the below option will be available. If disabled, the My Assets module will be unavailable.
- Allow Requester To View Barcode / QR Code: Enable to allow the requester to view the barcode or QR code of the asset on the list page.
- Allow Requester to Link Asset: Enable to allow the requester to link assets with the request. The Link Assets button will be available in the Linked Assets tab of the Request Details page. Once enabled, the following two options will become available for configuration.
- Allow Requester to link asset of other Requester: If enabled requesters can link assets automatically for another requester.
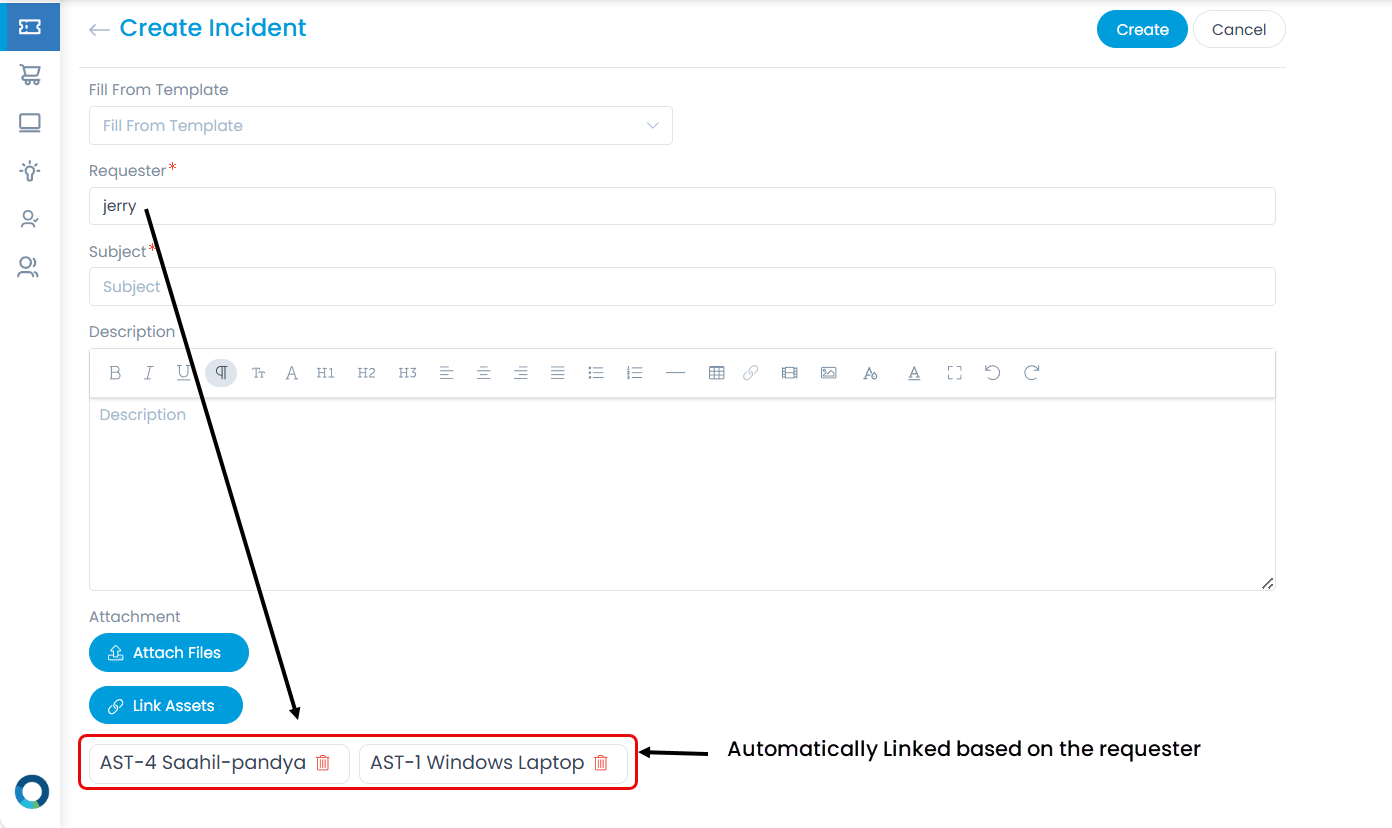
- Auto-Link Requester Assets: The asset can be automatically linked to the logged-in Requester if enabled. If multiple assets are linked, one can also delete the required one.
- These fields are available only if "Allow Requester to Link Asset" is enabled. By default, they are in disabled mode.
- In the Service Request module, these fields should be configured in the individual Service Catalogs. Only then will the assets be automatically linked.

CMDB
- Allow Requester to Access My CI: Enable to allow the requester to access the My CIs module. If enabled, the My CIs module will be available on the Support Portal.
- Allow Requester to Link CI: Enable to allow the requester to link CIs with the request. The Link CI button will be available in the Linked CI tab of the Request Details page.
- Allow request to link CI of other Requester: If enabled, requesters can link CIs automatically for another requester.
- Auto-Link Requester CI: If enabled, CI can be automatically linked to the logged-in Requester. If multiple CIs are linked, one can also delete the required one.
- These flags are available only if the "Allow Requester to Link CI" field is enabled. By default, they are in disabled mode.
- In the Service Request module, these fields should be configured in the individual Service Catalogs. Only then will the CIs be automatically linked.
Knowledge
Allow Requester To Access Knowledge: Enable to allow the requester to access the Knowledge module. If disabled, the menu will be unavailable.
Show Suggested Knowledge while creating new Request: Enable to view the the suggested knowledge while creating a new request. The knowledge will be listed as per the keywords entered in the subject of the request.
noteIf Managed Services Provider feature is enabled, the Suggested Knowledge will appear specific to the company in the Support Portal.
Approval
- Allow Requester To Access My Approvals: Enable to allow the requester to access the My Approvals menu. If disabled the menu will be unavailable.
- Show Approvals tab (in Request Detailed View) in Support Portal: Enable to allow the requester to access the Approvals module. If enabled, the Approval tab will be available in the Request Details page of the Support Portal. If disabled, the menu will be unavailable. By default, it is disabled.
User
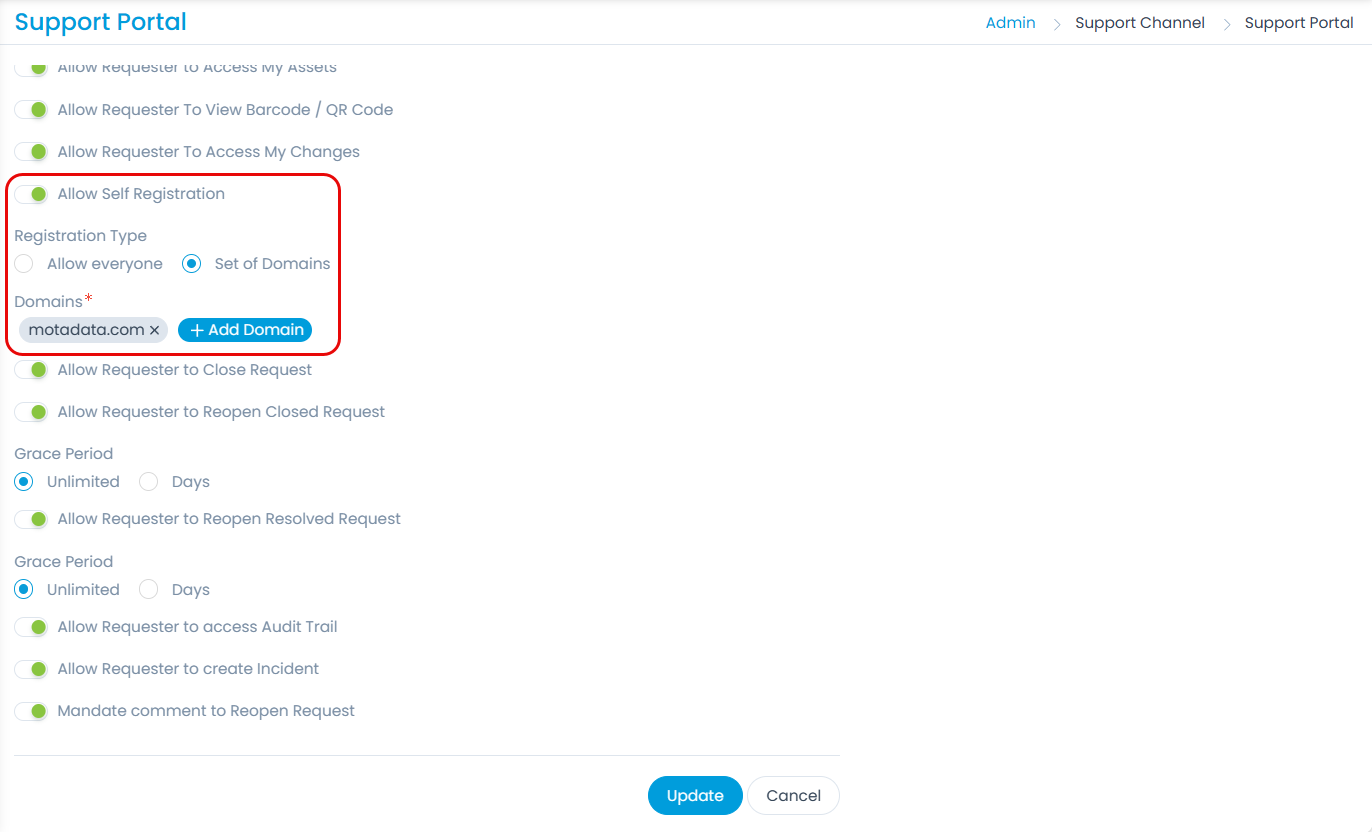
- Allow Self Registration: Enable to allow the requester to self register. If enabled, select the type of registration.
- Registration Type: Select the type of registration as Allow Everyone or Set of Domains.
- Allow Everyone: If selected, all the requesters will be allowed to do self registration.
- Set of Domains: If selected, add the domains whose requesters you want to allow to self register in the portal.
- Registration Type: Select the type of registration as Allow Everyone or Set of Domains.

Once done, click Update and the settings will get applied.