Application Maintenance
Maintenance in business premises comprises of front end as well as backend processes. It includes all, for example Logs, Database, Licensing, Indexing, etc.
To view the Application Maintenance page, navigate to Admin > Organization > Application Maintenance.
The page consists of the following tabs:
- Data Indexing
- Language Preference
- Database Backup (For On-Premise)
- Data Archiving
- Product License (For On-Premise)
- Log Configuration
- Log Download (For On-Premise)
- Network Diagnosis
- Application Monitoring (For On-Premise)
Data Indexing
Data indexing is a backend process and happens behind the GUI, i.e. in the Database part of the Application server. The arrangement of available modules is fixed when installed. But at a later stage when the application is upgraded or updated to a latest version, data Indexing is required for synchronizing the old and latest data.
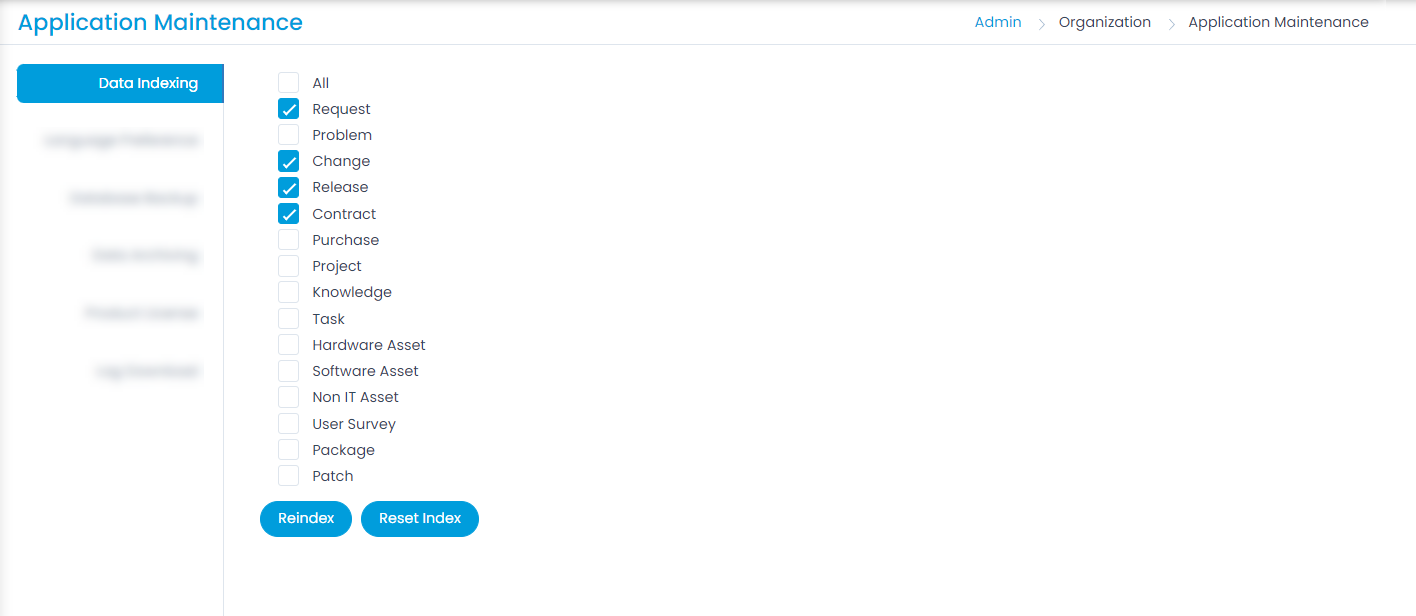
For example, after up-gradation, the total number of requests visible on the List page would not include the older requests, as they need the re-indexing in the backend. Thus, re-indexing would update the database and rearrange all the requests, including the newer as well as the older.
You can either select All Modules or Single Module for data indexing.
Language Preference
Language Preference allows you to select the preferred language of the portal.
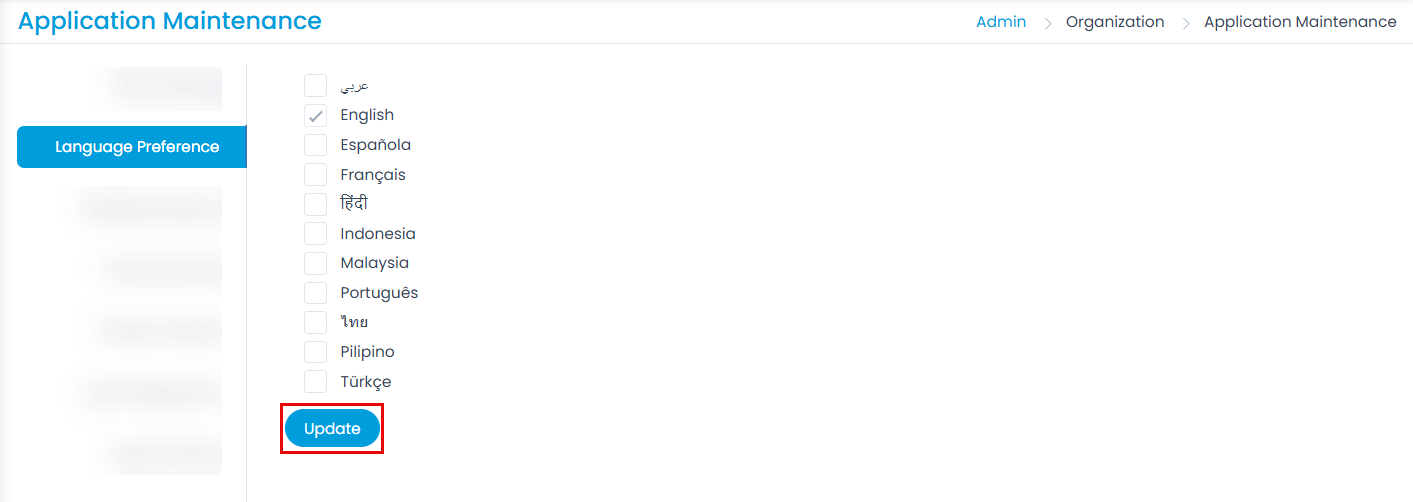
The page displays a list of all the languages that the application supports. Implementation/Support team member can select the particular language and update the form. By default, English Language is selected and not allowed to remove.
If previously selected language is removed, then existing data will not be impacted, but on the change of language preference list only enabled languages will be displayed.
Database Backup
Taking backup of the database is a good practice. It proves helpful when something goes wrong and you to need to restore the old data.
This tab is available only for On-Premise application.
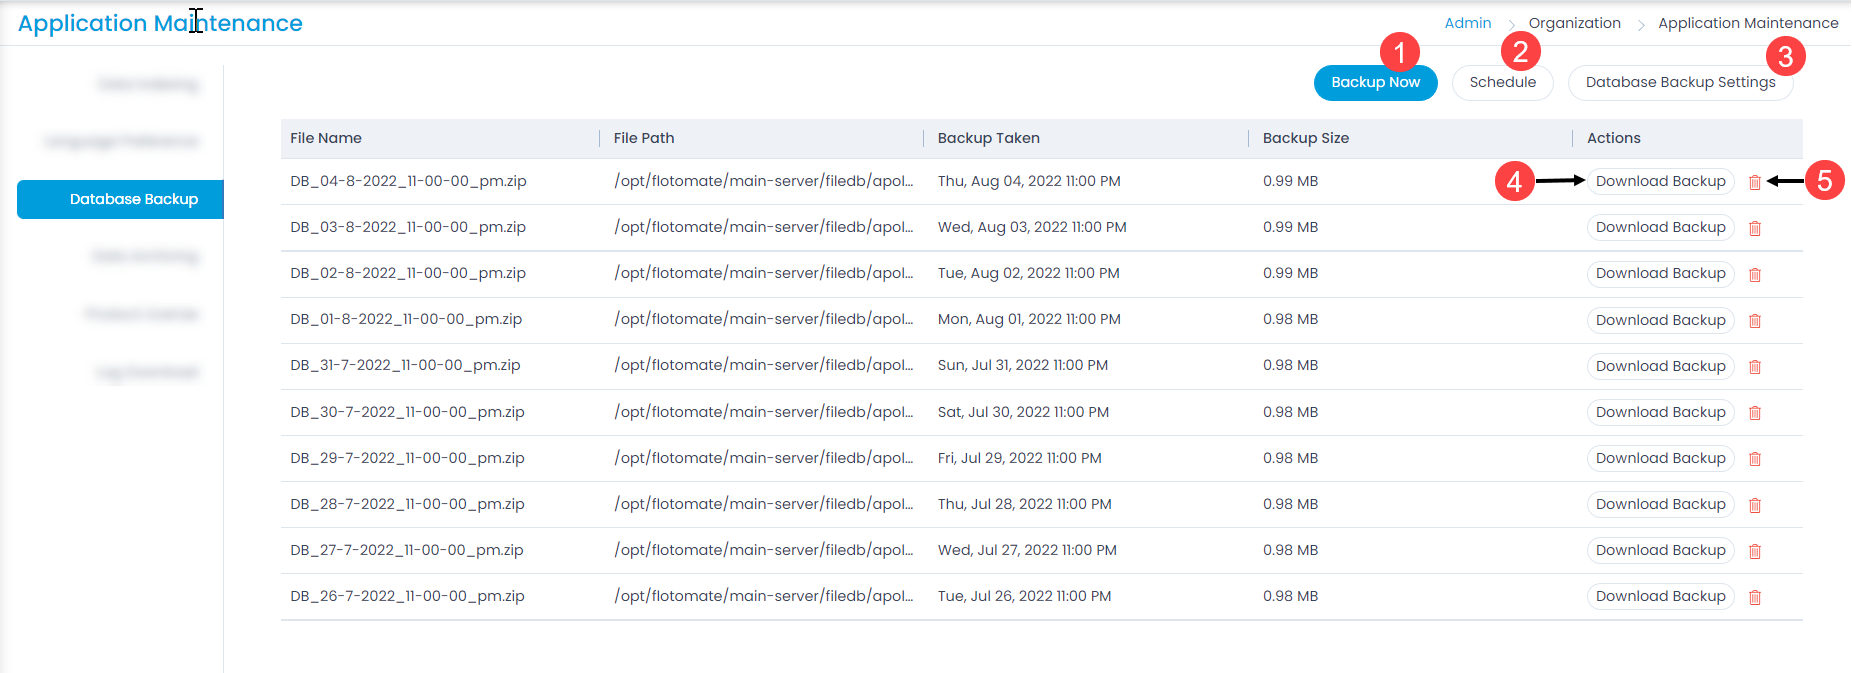
The tab provides the following options:
- Backup Now: You can take the backup of the database manually by clicking this button. Once clicked, it will get displayed in the table which you can later download if required.
- Schedule: You can schedule the time when the backup is to be taken.
- Database Backup Settings: You can configure the settings for taking backup.
- Download Backup: You can download the backup of the database. It gets downloaded as a zip file.
- Delete the Backup: You can delete the backup if not required.
Schedule Backup
A schedule automatically creates a backup after the specified interval and displays it in the list. To set the schedule,
- Click the Schedule button and a popup appears.

- Enter the following details:
Schedule type: Select the type of schedule:
- Once: Select to run the schedule only once. If selected, specify the date and time when the schedule should run in the Start At field.
- Daily: Select to run the schedule daily. If selected, specify the date and time when the schedule should start in the Start At field. Also, specify the Time at which the schedule should run.
- Weekly: Select to run the schedule weekly. If selected, specify the following:
- Start At: Select the date and time when the schedule should run.
- Day: Select the day on which the schedule should run.
- Time: Select the time at which the schedule should run.
- Monthly: Select to run the schedule monthly. If selected, specify the following:
- Start At: Select the date and time when the schedule should run.
- Date: Select the date of the month on which the schedule should run.
- Time: Select the time at which the schedule should run.
- Month: Select the month(s) when you want to run the schedule.
- Once done, click Update.
Database Backup Settings
This enables you to set the path for storing the database backup as well as its retention period. All the changes made here are captured in the Configuration Audit tab.

The settings are:
Database Backup Path: Select the option where you want to store the backup. The options are:
Local: If selected, specify the Folder Path where you want to the store the backup. Once configured, you can check whether the folder is accessible or not using the Check Access button. This is the default path.
FTP: If selected, specify the Host name, Username, Password, and Folder Path where the backup is to be stored. Once configured, you can test the connectivity to the FTP server using the Test Connection button.
noteFTP is applicable only for Linux machines.
Number of Backups to Retain: Enter the number of backups that you want to store. Once the limit exceeds the oldest backup will get deleted first. The default value is 10. The minimum limit is 5 and maximum 99 backups can be retained.
Once done, click Update.
Data Archiving
This tab enable you to set the auto purging and archiving rules for Request, Problem, Change, Release, Asset, Project, and Email modules. This helps to archive and delete redundant data automatically with the help of a scheduler.
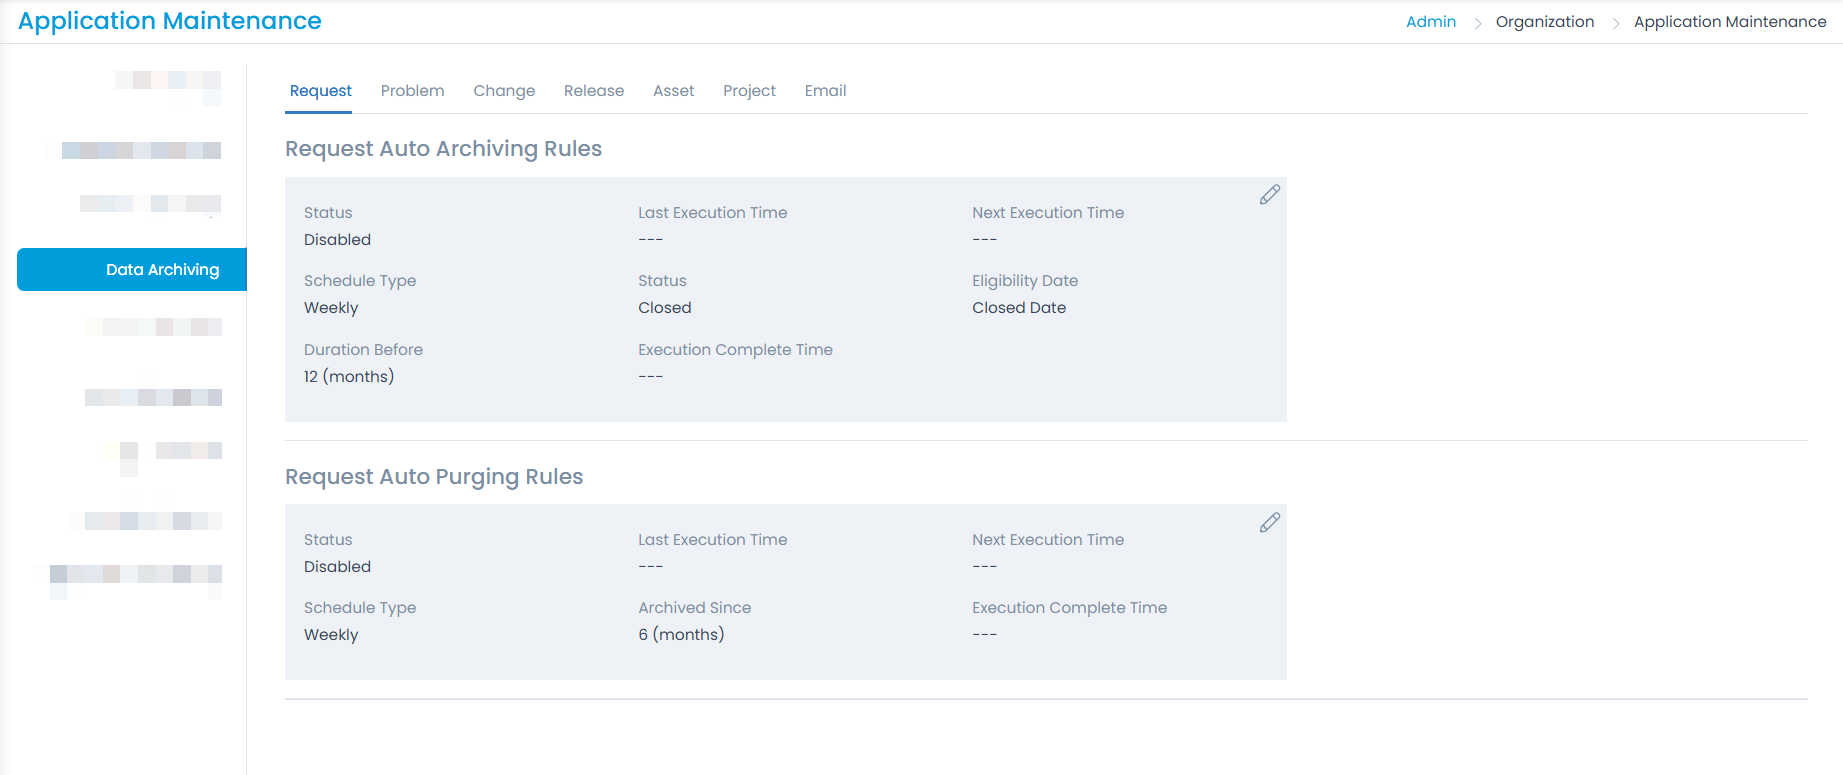
Auto Archiving Rules
In this section you can configure the rules for archiving the Request, Problem, Change, Release, and Project data. By default, the status is disabled. You need to enable it to work. Here, Auto Archiving Rules are set for the Request data.
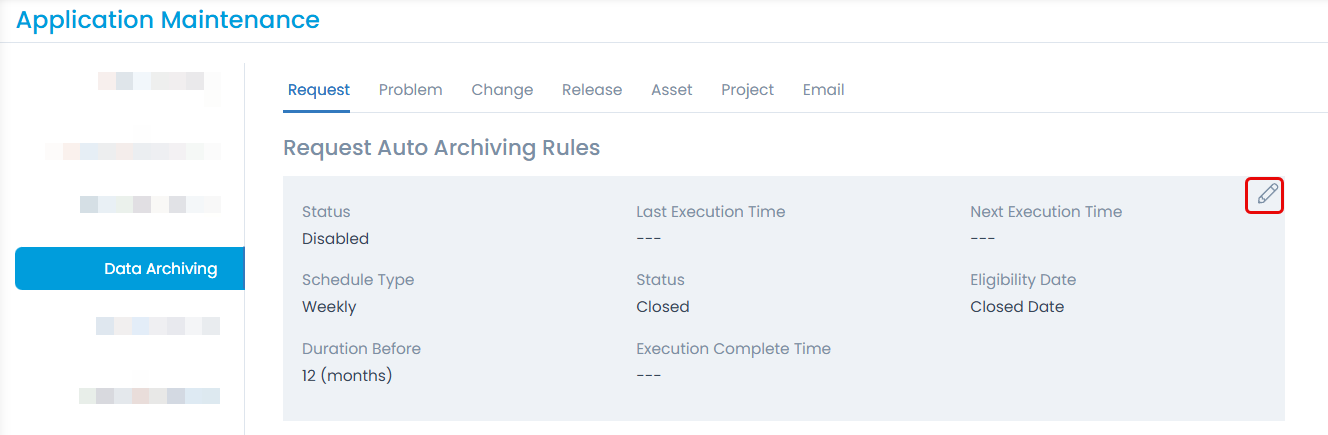
- You can schedule the archival Once, Daily, Weekly, or Monthly.
- You can view the status, Last, Next, and Completed Execution time of the archival.
- Using the Edit icon the desired settings can be changed.

The options vary based on the selection of the Schedule Type. The options are as below:
If Schedule Type is selected as Once, the below fields appear:
- Start At: It is the start date and time of the archival.
- Request Status: It shows the ticket status, which needs to be archived. For example, If closed request tickets needs to be archived or tickets with any status needs to be archived.
- Eligibility Date: It shows the date status to be considered for the archival. i.e. Closed Date or Created Date. For example, if the Closed Date status is selected then, all the archived requests will be archived according to their Closed Date and same applies for the Created Date.
- Duration Before: It shows the time duration of the request to be archived. For example, if 90 days is selected, then all the requests closed before 90 days will be archived. An option of "Months" is also available.

If Schedule Type is selected as Daily, the below fields appear:
- Start At: It is the start date and time of the archival.
- Time: It shows the time of the day for the archival, when it is to be performed.
- Request Status: It shows the ticket status, which needs to be archived. For example, If closed request tickets needs to be archived or tickets with any status needs to be archived.
- Eligibility Date: It shows the date status to be considered for the archival. i.e. Closed Date or Created Date. For example, if the Closed Date status is selected then, all the archived requests will be archived according to their Closed Date and same applies for the Created Date.
- Duration Before: It shows the time duration of the request to be archived. For example, if 90 days is selected, then all the requests closed before 90 days will be archived. An option of "Months" is also available.

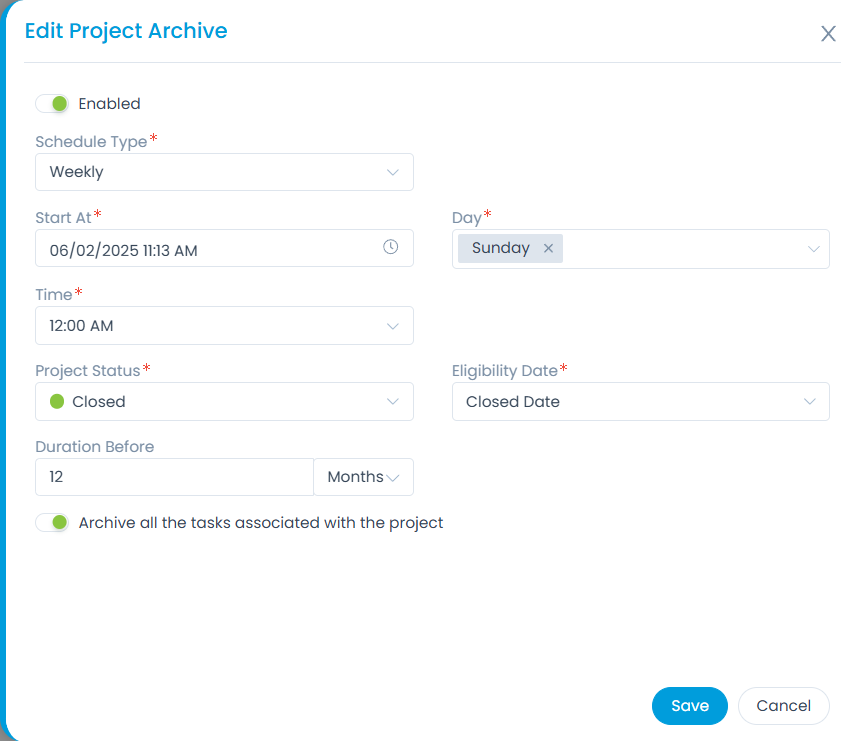
If Schedule Type is selected as Weekly, the below fields appear:
- Start At: It is the start date and time of the archival.
- Day: It is the day of the week when the archival is to be performed.
- Time: It shows the time of the day for the archival, when it is to be performed.
- Request Status: It shows the ticket status, which needs to be archived. For example: If closed request tickets needs to be archived or tickets with any status needs to be archived.
- Eligibility Date: It shows the date status to be considered for the archival. i.e. Closed Date or Created Date. For example: if the Closed Date status is selected then, all the archived requests will be archived according to their Closed Date and same applies for the Created Date.
- Duration Before: It shows the time duration of the request to be archived. For example: if 90 days is selected, then all the requests closed before 90 days will be archived. An option of "Months" is also available.
If Schedule Type is selected as Monthly, the below fields appear:
- Start At: It is the start date and time of the archival.
- Date: It is the date of the month when the archival will be performed.
- Time: It shows the time of the day for the archival to be performed.
- Month: It is the month of the year, when the archival will be performed.
- Request Status: It shows the ticket status, which needs to be archived. For example: If closed request tickets needs to be archived or tickets with any status needs to be archived.
- Eligibility Date: It shows the date status to be considered for the archival. i.e. Closed Date or Created Date. For example: if the Closed Date status is selected then, all the archived requests will be archived according to their Closed Date and same applies for the Created Date.
- Duration Before: It shows the time duration of the request to be archived. For example: if 90 days is selected, then all the requests closed before 90 Days will be archived. An option of "Months" is also available.

Once the rule is configured and saved, the request data will get archived automatically. Similarly, you can configure rules for the problem, change, release, and project data.
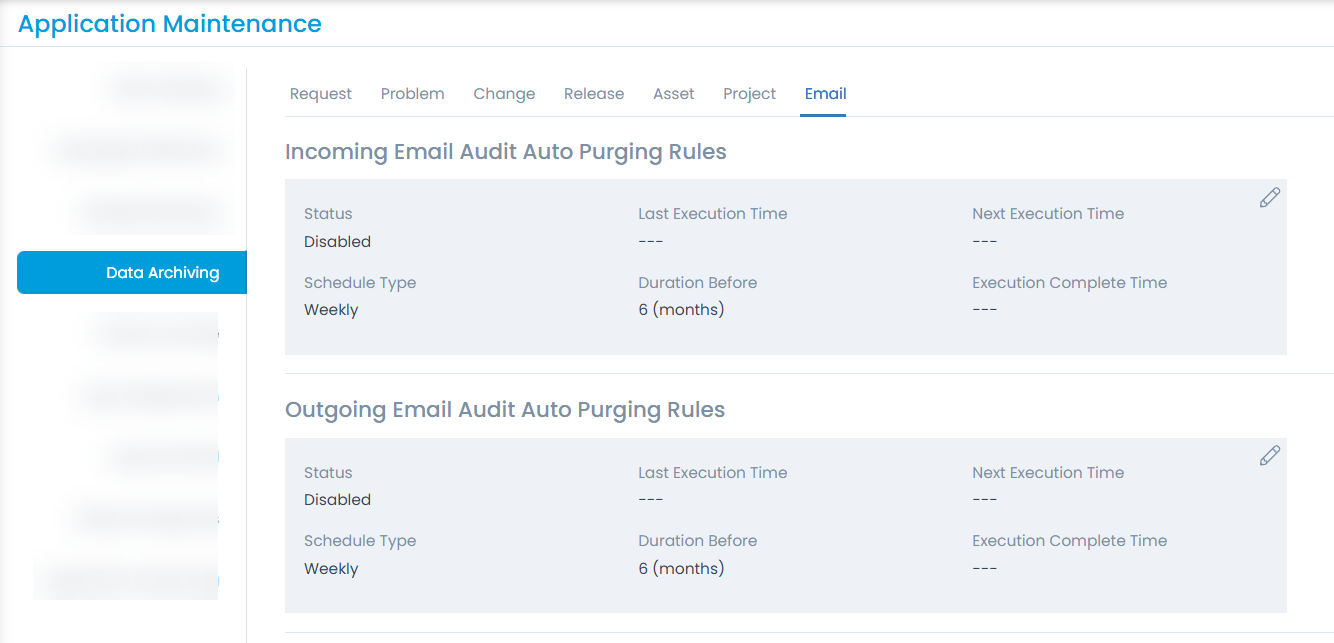
Auto Purging Rules
In this section you can configure the rules for Purging the Request, Problem, Change, Release, Asset, Project (system and custom field data), Incoming Email Audit, and Outgoing Email Audit data. By default the status is disabled. You need to enable it to work. Here, auto purging rule is set for the request data.
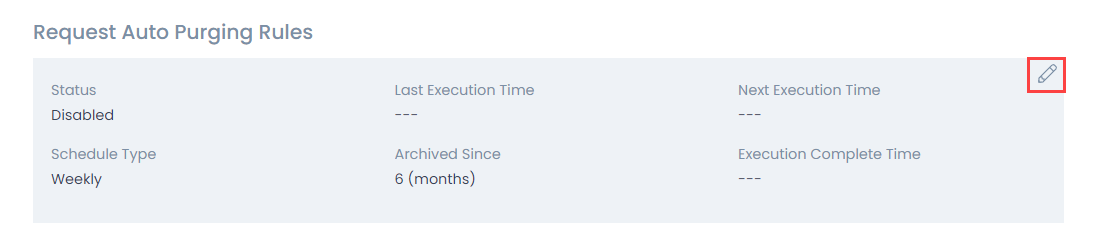
- You can schedule the purging Once, Daily, Weekly, or Monthly.
- You can view the Last, Next, or Completed Execution time for the purging.
- Using the Edit icon the desired settings can be changed.

The options vary based on the selection of the Schedule Type. The options are as below:
If Schedule Type is selected as Once, the below fields appear:
- Start At: It is the start date and time of the purging.
- Archived Since: It is the time of purging to be performed for requests archived since when (how much time). For example: If 6 months selected, the purging will be done for all the archived requests since 6 months.

If Schedule Type is selected as Daily, the below fields appear:
- Start At: It is the start date and time of purging.
- Time: It shows the time of the day for the purging to be performed.
- Archived Since: It is the time of purging to be performed for requests archived since when (how much time). For example: If 6 months selected, the purging will be done for all the archived requests since 6 months.

If Schedule Type is selected as Weekly, the below fields appear:
- Start At: It is the start date and time of purging.
- Day: It is the day of the week when the purging will be performed.
- Time: It shows the time of the day for the purging to be performed.
- Archived Since: It is the time of purging to be performed for requests archived since when (how much time). For example: If 6 months selected, the purging will be done for all the archived requests since 6 months.

If Schedule Type is selected as Monthly, the below fields appear:
- Start At: It is the start date and time of purging.
- Date: It is the date of the month when the purging will be performed.
- Time: It is the time of the day for the purging to be performed.
- Month: It is the month of the year, when the purging will be performed.
- Archived Since: It is the time of purging to be performed for requests archived since when (how much time). For example: If 6 months selected, the purging will be done for all the archived requests since 6 months.

Once the rule is configured and saved, the request data will get purged automatically. Similarly, you can configure rules for the problem, change, release, and project data.
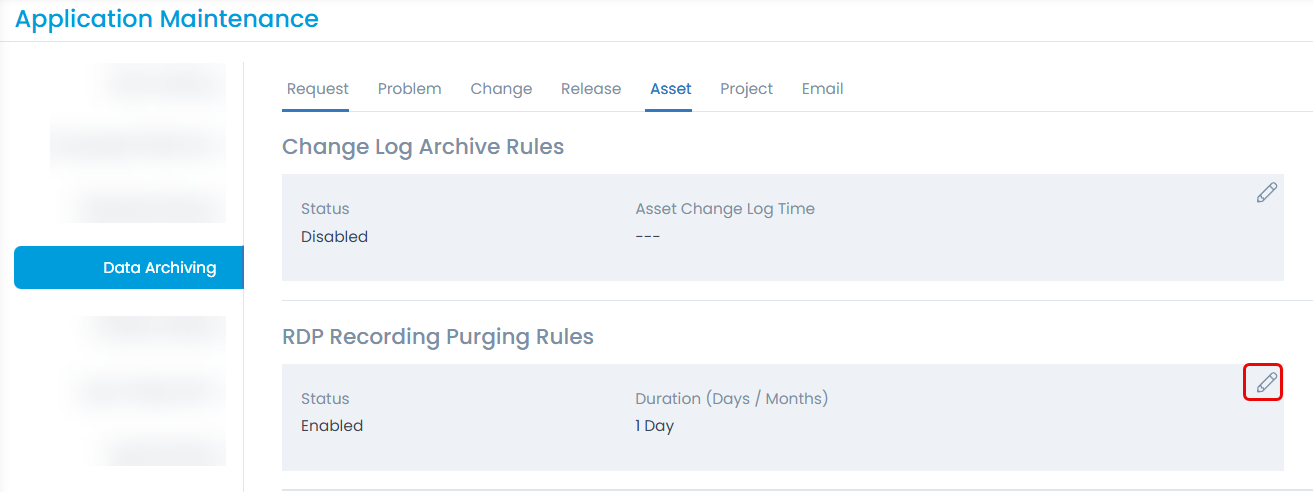
Asset Change Log Archive Rules
In this section you can configure the rules for archiving the change logs appearing under the History tab of the asset details page. By default, the status is disabled. You need to enable it to work.
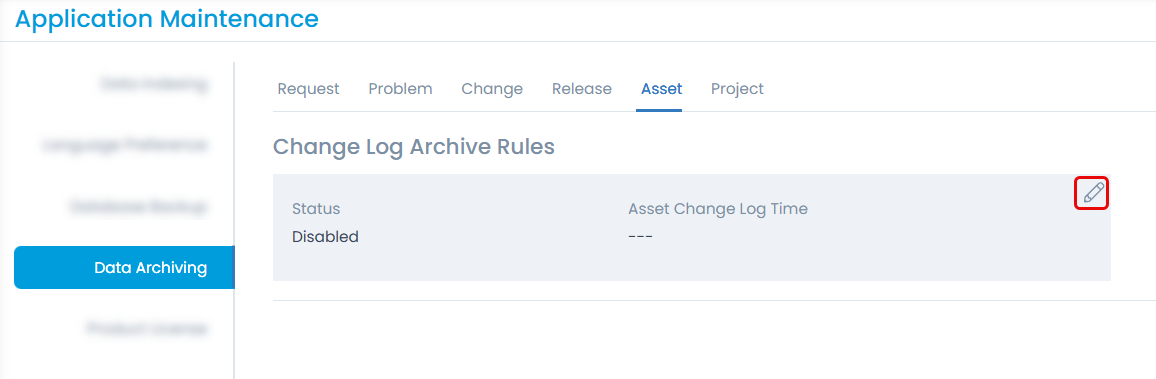
To configure the rule,
- Click the edit icon and the following popup appears.

- Enable the Change Log Archive flag.
- Set the Asset Change Log Time i.e. number of days or months based on which the asset change log data should be archived.
- If required, set the Excluded Conditions to exclude certain important logs from getting archived. You can add multiple conditions.
- Once done, click Save. The asset change logs will be automatically archived at midnight (12:00 AM) after the specified time has elapsed.
RDP Recording Purge Rules
In this section you can configure the rules for purging the RDP session recordings which are no longer required.

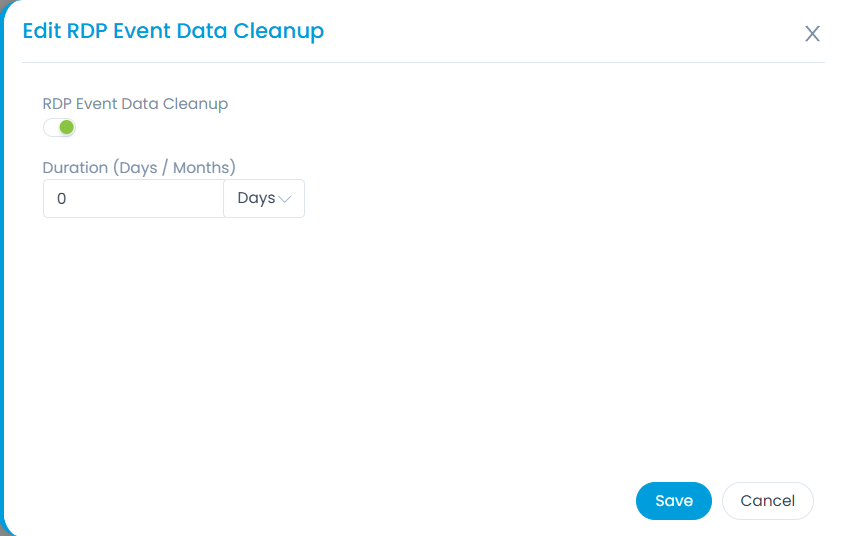
RDP Event Data Cleanup
The RDP Event Data Cleanup allows administrators to configure the retention period for RDP event data. Users can specify the number of days or months for which event data should be retained before being automatically cleared. This helps optimize database performance, manage storage efficiently, and ensure compliance with data retention policies. By setting an appropriate cleanup schedule, organizations can prevent unnecessary data accumulation while maintaining essential event logs for auditing and troubleshooting purposes.

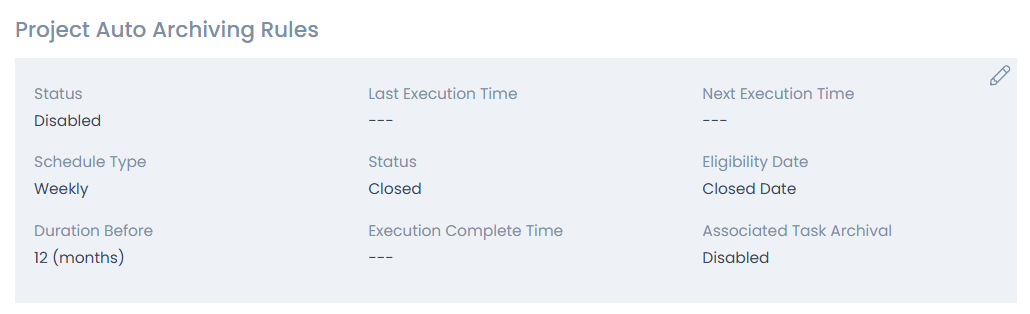
Project Auto Archiving Rules
In this section, you can set rules to automatically archive projects and their tasks based on a predefined schedule.
Email Purging Rules
In this section you can configure the rules for purging the incoming and outgoing email audit entries.
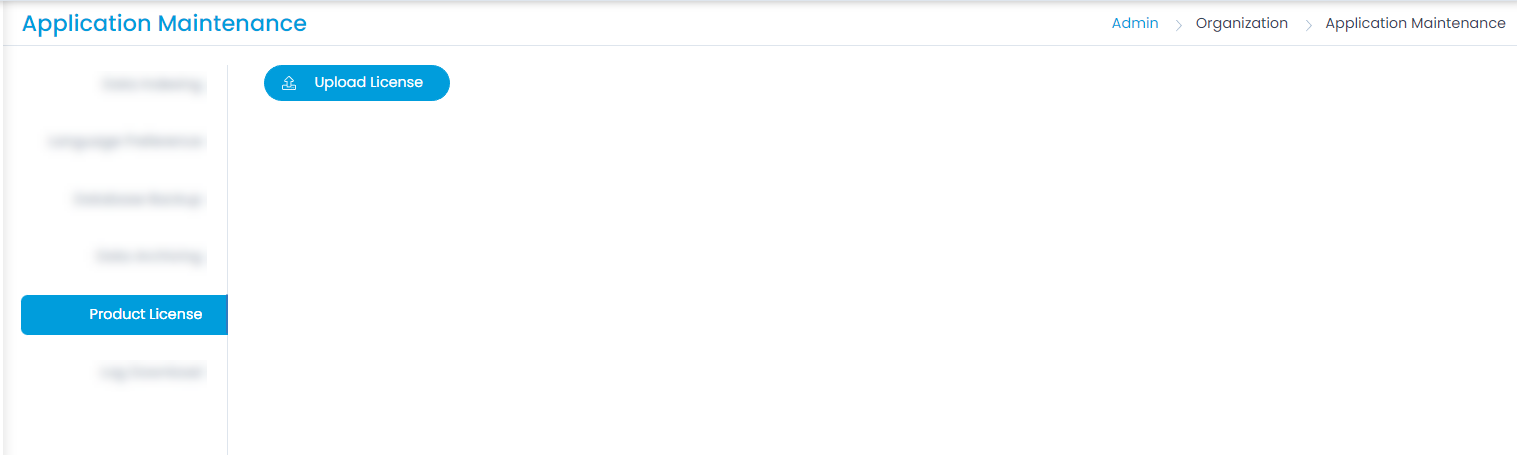
Product License
This feature allows to Upload the Product License via Portal.
This tab is available only for On-Premise application.
To upload a license,
- Click on the Upload License button, which prompts for the password.
- After the password is entered, it redirects to the local access selection of .lic or any .txt file.
- Successful selection activates the License.
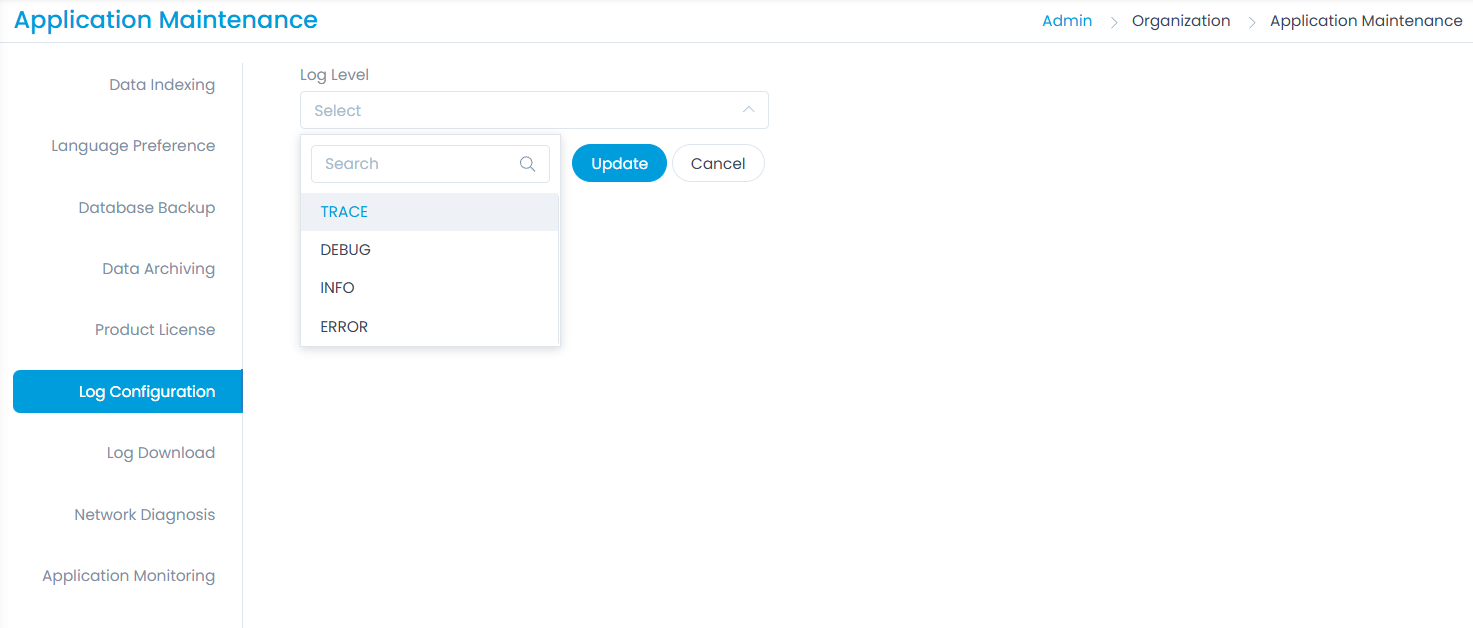
Log Configuration
This tab enables to configure the log levels. The options are: Trace, Debug, Info, and Error.
Log Download
This tab enables you to download the log data for a particular duration based on the selected start and end date. If no date is seleced, the current day’s log will be downloaded.. You can download the logs of various components by selecting and clicking the Download button.
- This tab is available only for On-Premise application.
- For Nginx logs, the date filter will not be applied if its default path is /var/log/nginx/.
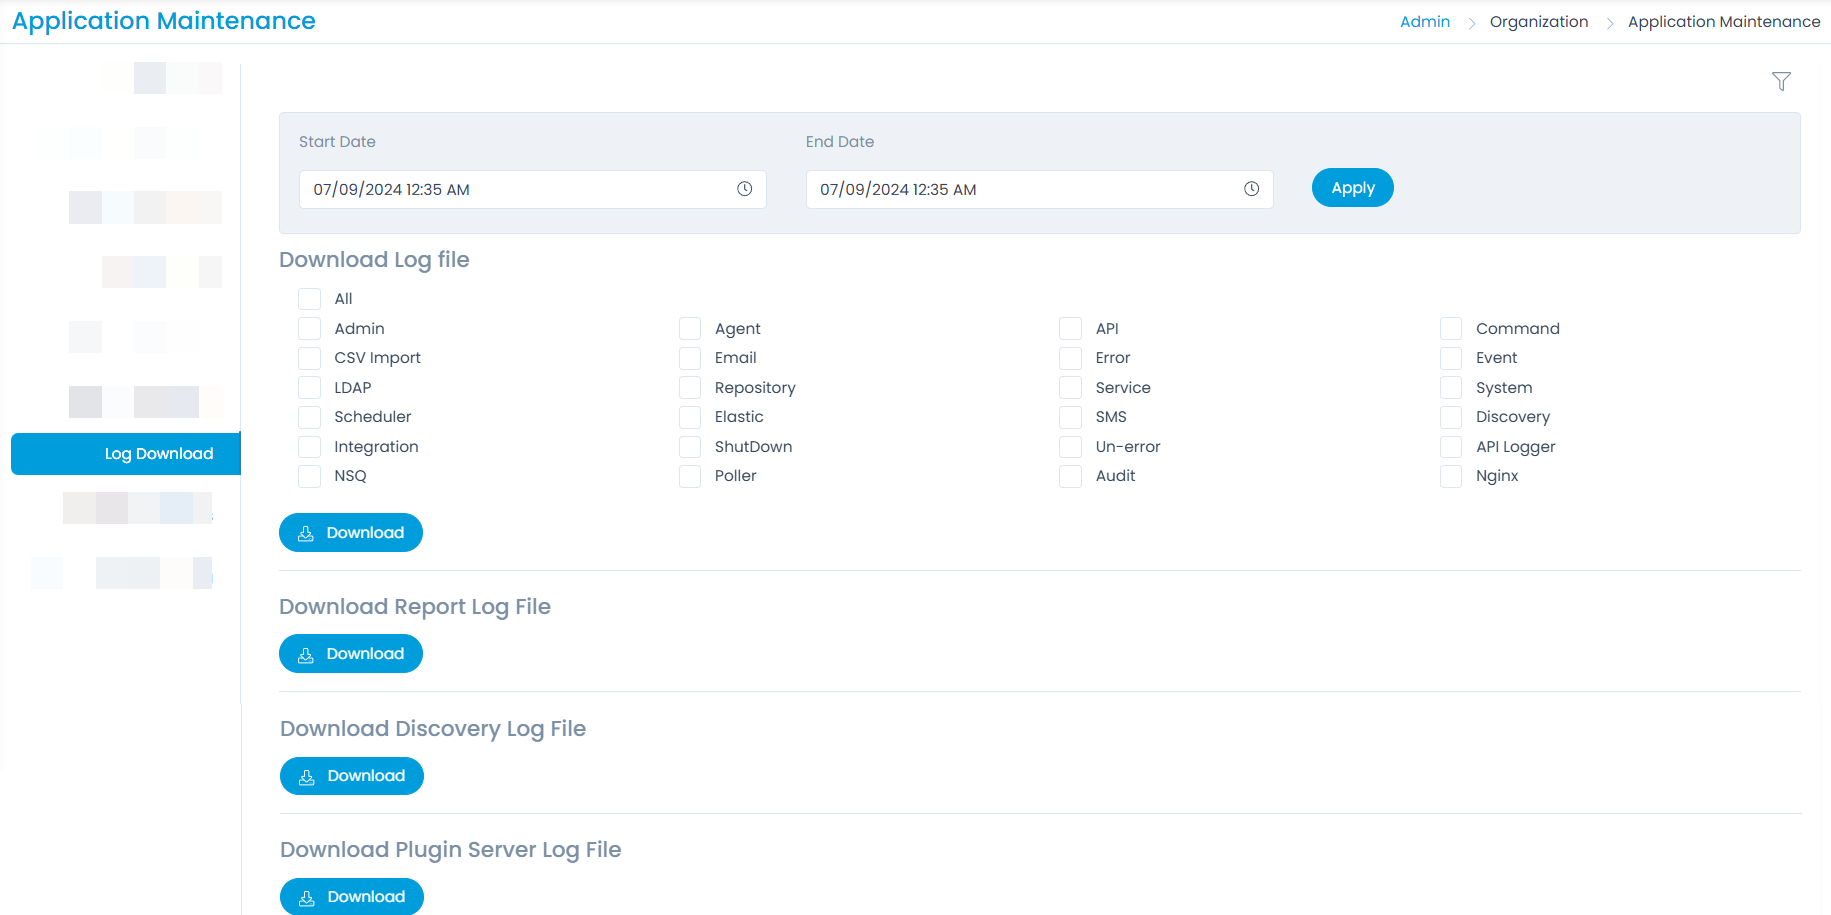
- Here, you can either download all the Log files using All option or only the particular selected event files.
- It also provides the options to download the Report Log File, Discovery Log File, and Plugin Server Log File individually.
Correct password is mandatory for downloading the Logs.
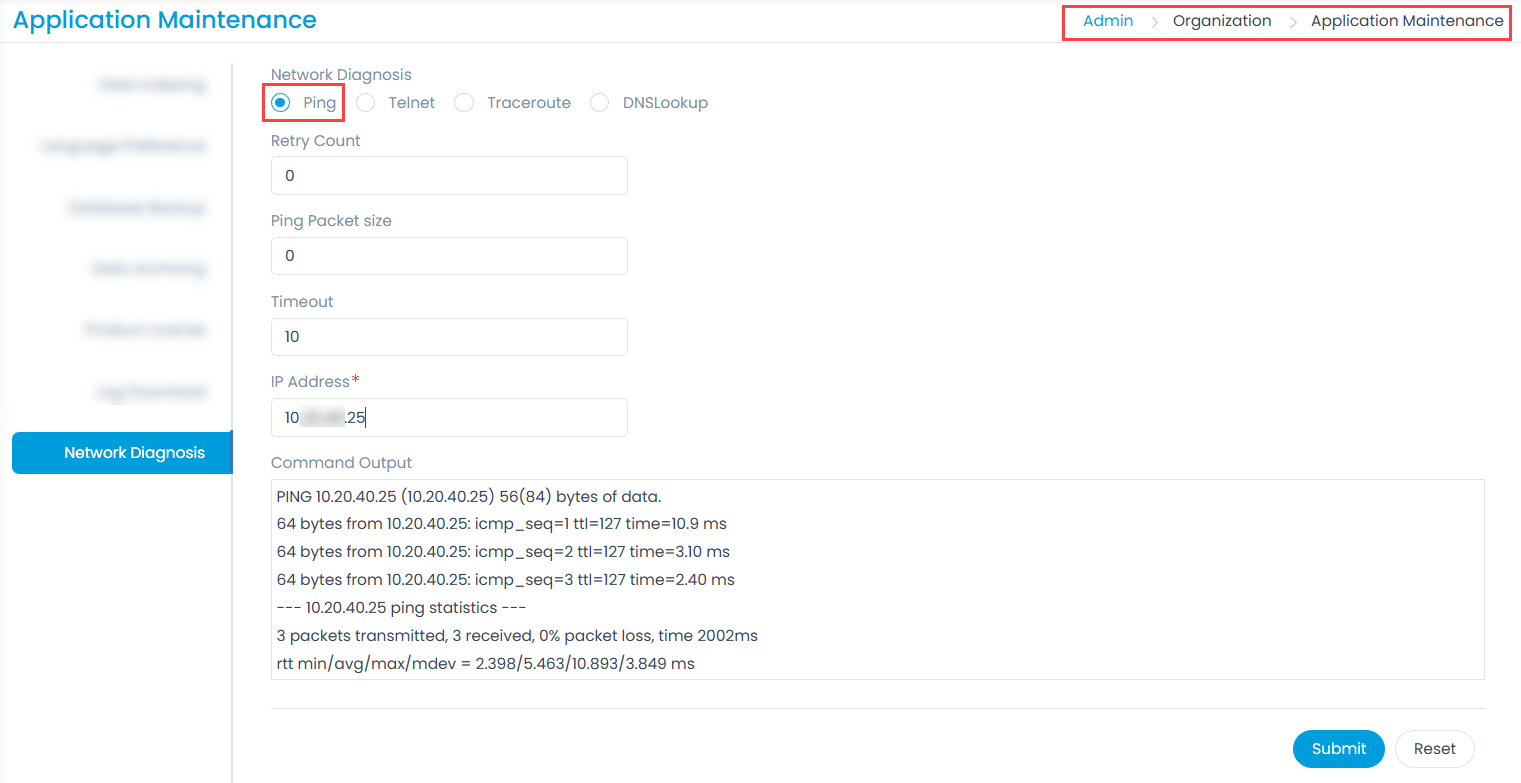
Network Diagnosis
Network diagnosis refers to the process of identifying and resolving issues within a network to ensure its optimal performance, reliability, and security. Networks can be complex, consisting of multiple hardware devices, software components, and communication protocols, so diagnosing problems can be challenging. Hence to diagnose the network, the commands like Ping, Telnet, Traceroute, and DNS Lookup can be used.
Before using the commands, ensure they are installed and enabled from the backend server.
Ping
This command is used to check the network availability of devices. You need to enter the following details:
- Retry Count: Enter the number of times ping will try to check the connectivity if no response is received on the first attempt. The maximum value is 3.
- Ping Packet Size: Enter the packet size. It is optional. If not given, it will take on its own.
- Timeout: Enter the timeout time in seconds. The maximum value is 10 seconds.
- IP Address: Enter the device's IP address whose availability you want to check.
- Command Output: Displays the command output once the details are entered, and the Submit button is clicked.
Once the details are filled, click Submit, and the result will appear in the Command Output field.
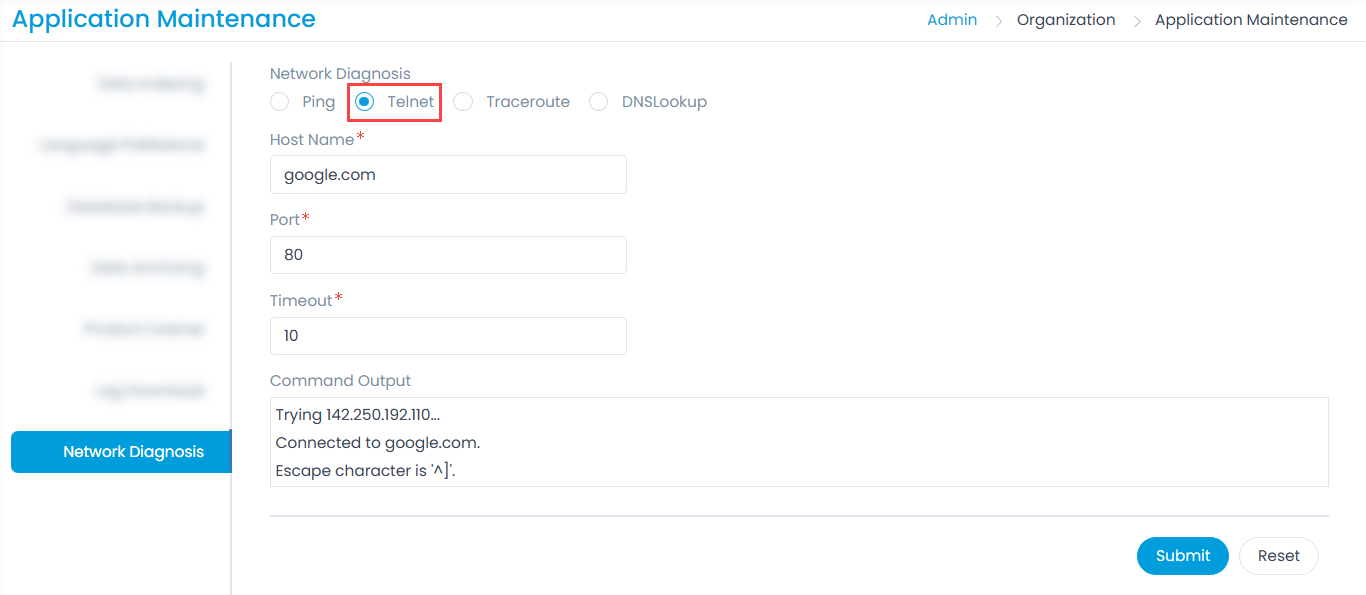
Telnet
This command establishes a connection with the remote device over the TCP/IP network. To establish a connection, enter the below details:
- Hostname: Enter the hostname of the device.
- Port: Enter the port number on which the connection is to be established. The default value is 80.
- Timeout: Enter the timeout time in seconds. The maximum value is 10 seconds.
- Command Output: Displays the command output once the details are entered, and the Submit button is clicked.
Once the details are filled, click Submit, and the result will appear in the Command Output field.
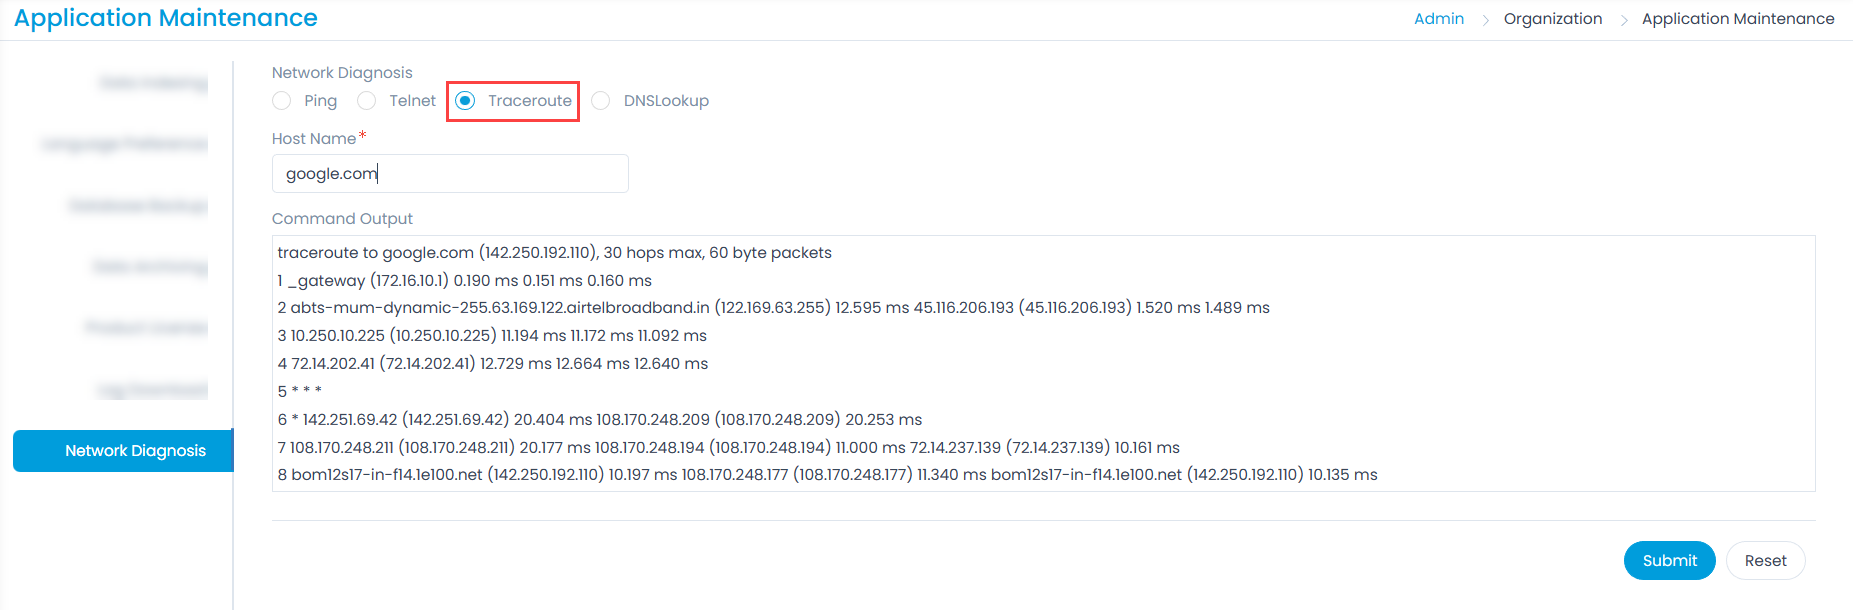
Traceroute
This command is used to view a packet's route to reach the destination host. To execute the command, the following details are required:
- Hostname: Enter the hostname whose route you want to view. For example google.com
- Command Output: Displays the command output once the details are entered, and the Submit button is clicked.
Once the details are filled, click Submit, and the result will appear in the Command Output field.
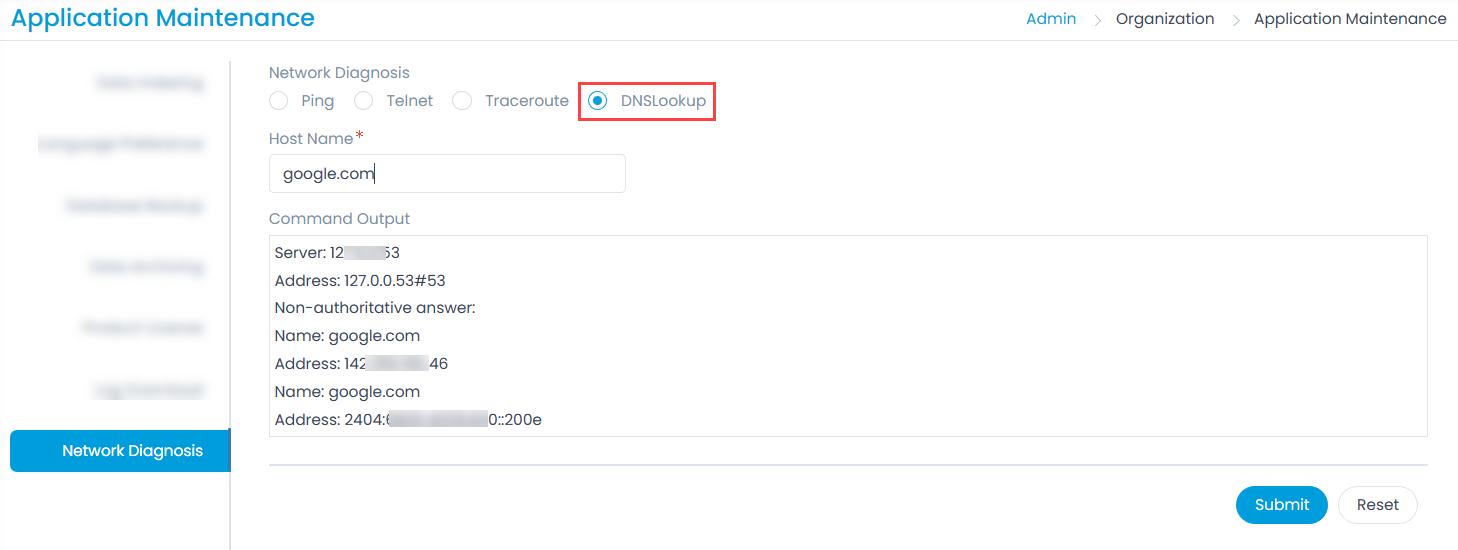
DNS Lookup
It is used to fetch the details of the required hostname.
- Hostname: Enter the hostname whose details you want to view. For example google.com
- Command Output: Displays the command output once the details are entered, and the Submit button is clicked.
Once the details are filled, click Submit, and the result will appear in the Command Output field.
Application Monitoring
This tab displays the HA cluster and DR health monitoring details. The details are available for the On-Premise version only.
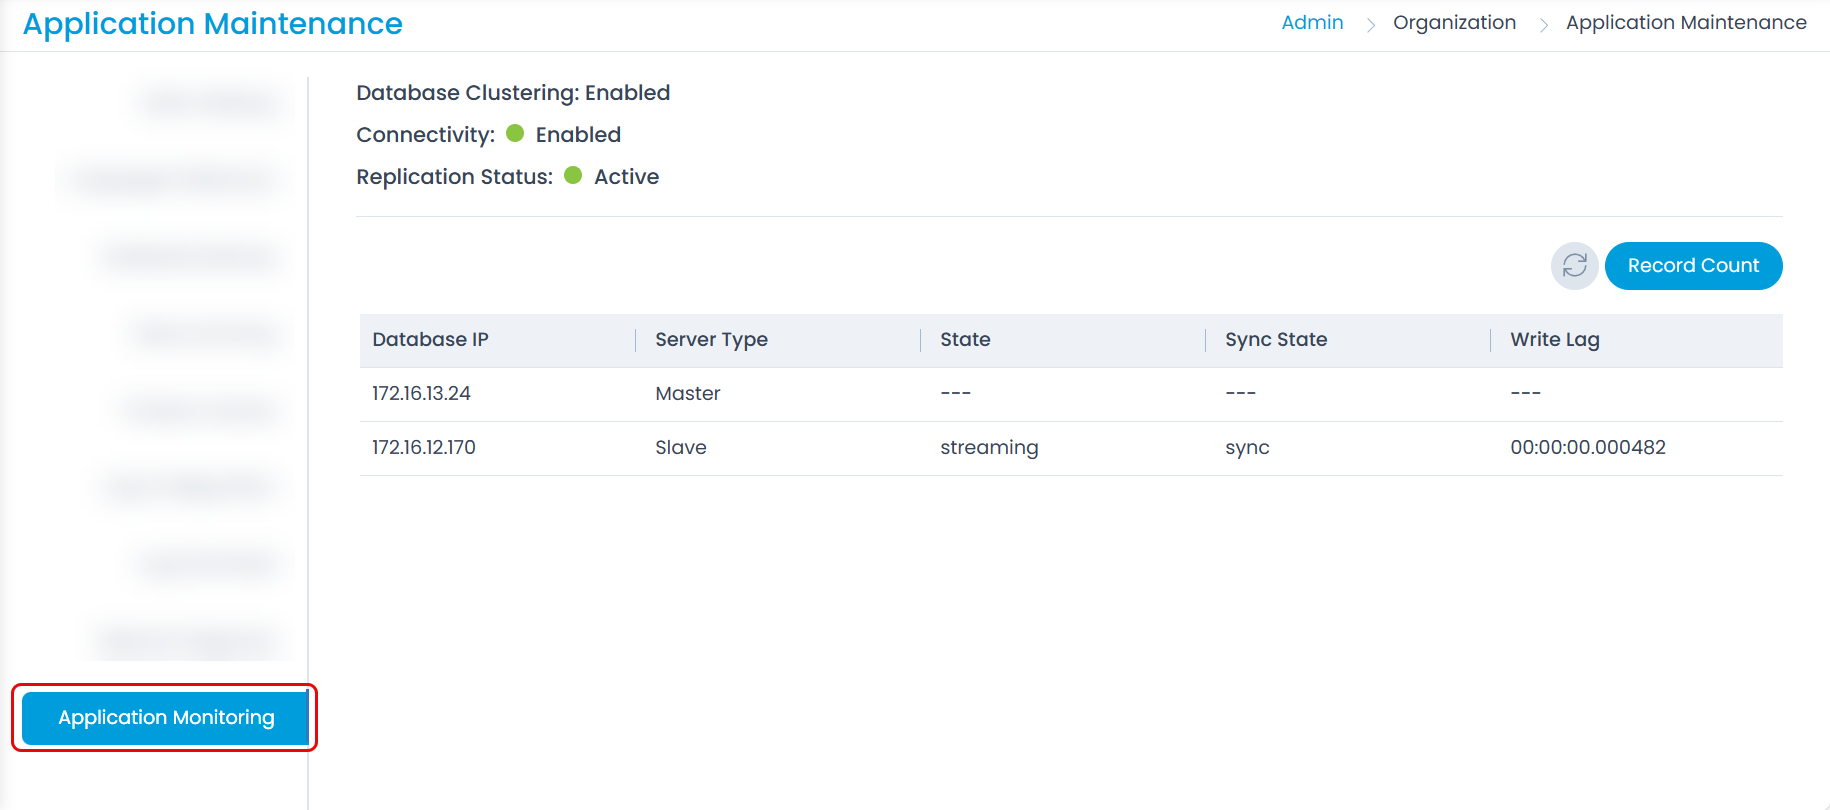
Also, you can view the record count. This displays the number of records synchronized between the DC and DR servers. In case there is a mismatch, it will appear in red.
