Business Hours
Business hour(s) are the working hours that determine the available response and resolution time of a Request (holidays are subtracted from the calculation). These calculations are done to check whether any SLA has been violated. The SLAs have to be configured to use the business hours. For more details, refer to the SLA section.
To view the Business Hours page, navigate to Admin > Organization > Business Hours.
This section enables you to configure the business hours based on which the response and resolution time of a request can be calculated. Also, separate working hours for each department can be added along with the holidays in a year.

Types of Business Hours
The business hours are classified in 2 broad categories:
- 24-7: Mainly used for the support team, this category does not consider breaks or weekly offs. This means that the office or team is operational all the time round the clock.
- Custom: Custom working hours are created for a typical office culture. It includes office shifts, breaks, and public holidays.
Add Business Hour
To add a business hour,
- Click the Add Business Hour button and the following page appears.
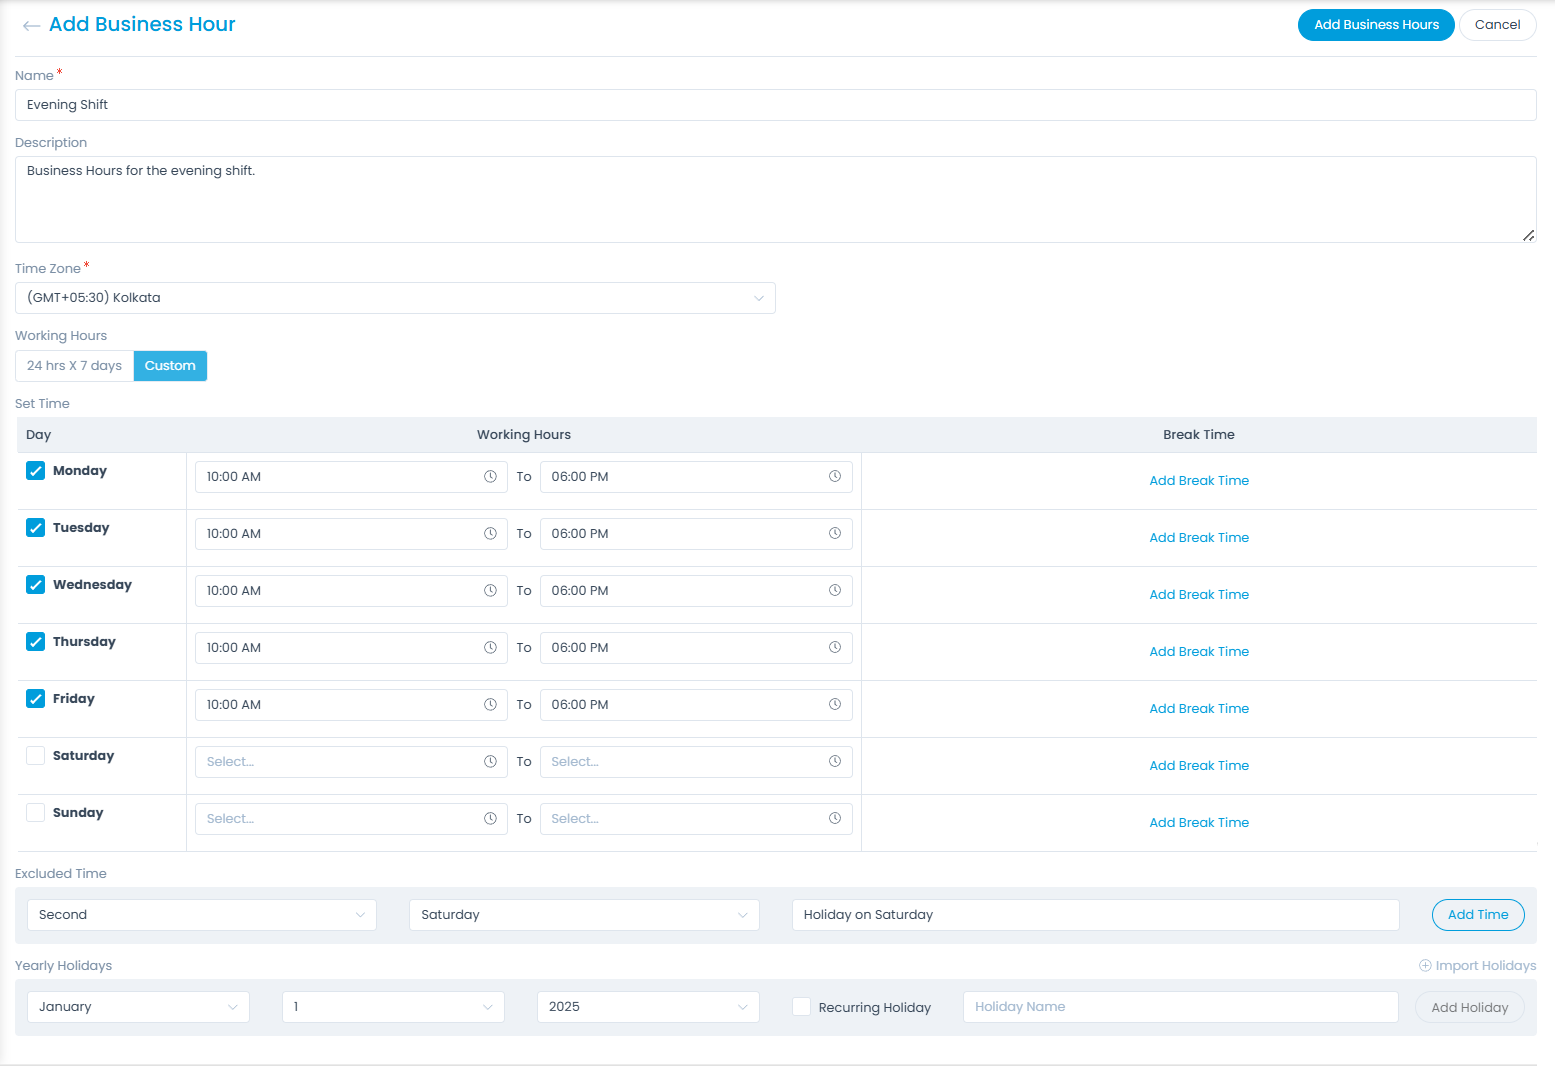
Enter the following details:
- Name: Enter the name of the business hour.
- Description: Enter a brief description of the business hour.
- Time Zone: Select the time zone.
- Working Hours: Select the type of working hours. The options are:
- 24 hrs X 7 days: If selected you can define the yearly holidays which will be excluded from the business hours.
- Custom: If selected, you can define the office hours, breaks, and also exclude certain day or time from the business hours calculation. For example: If 2nd and 4th Saturday is off, you can specify this in the Exclude Time field, and exclude it from the business hours calculation.
- Yearly Holidays: You can define holidays for a specific year, ensuring accurate SLA and penalty calculations, especially for past tickets. A "Recurring Holiday" checkbox is available—when checked, the holiday will recur annually and the year selection becomes disabled. By default, holidays are set as recurring after the upgrade to maintain compatibility with existing configurations.

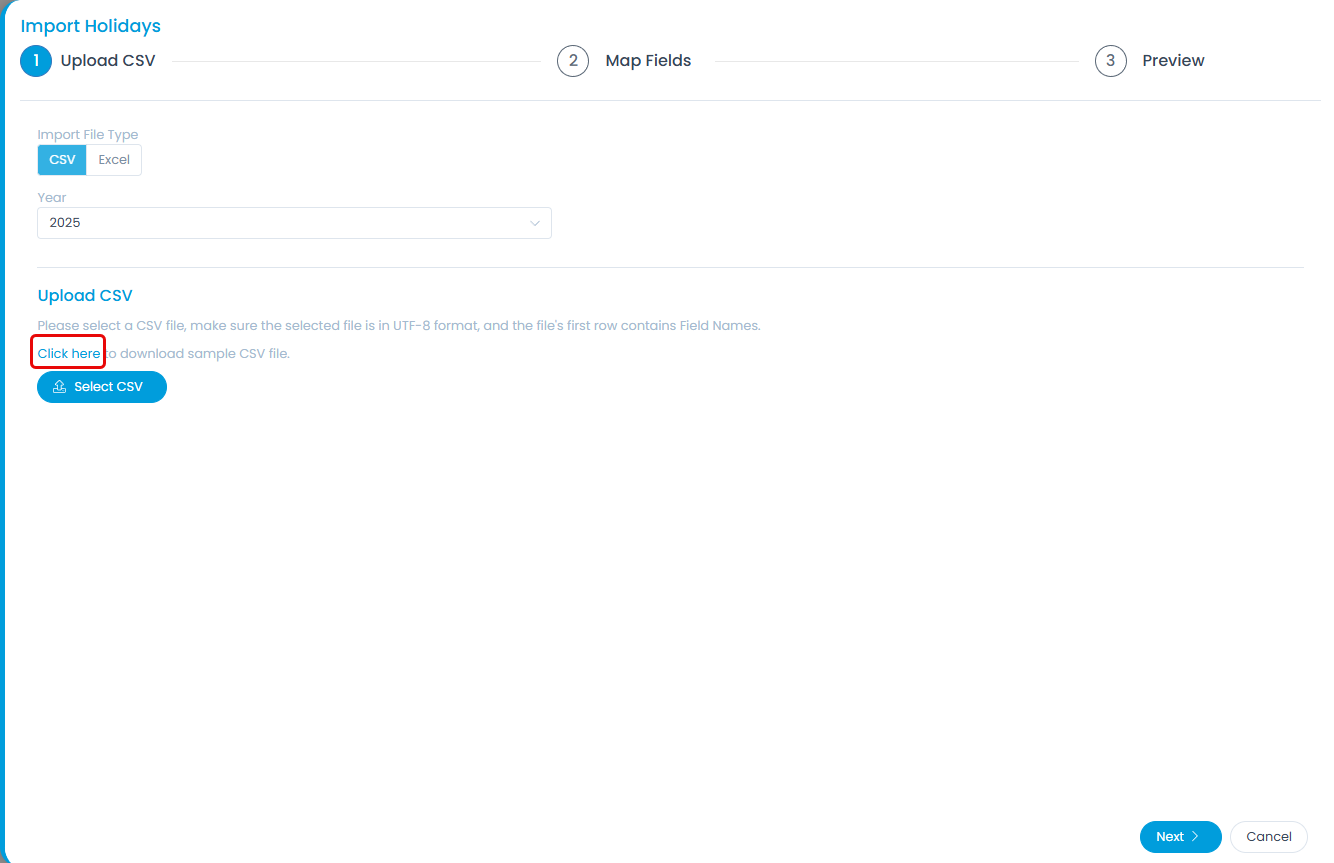
You can also import the list of holidays. To do so, follow the below steps:
- Click the Import Holidays link and a popup appears.
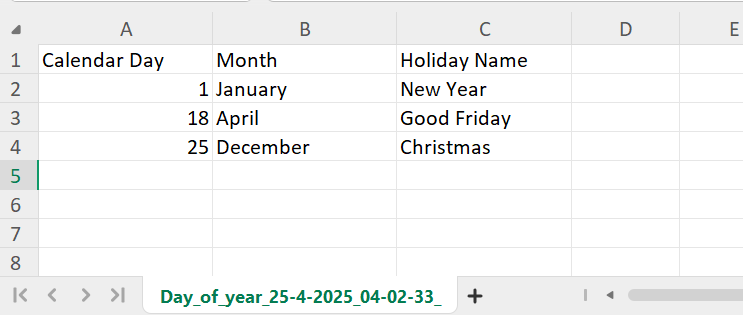
- Download the sample file as CSV or Excel.
- Enter the details in it as shown in the below sample file. Once done, save the file.
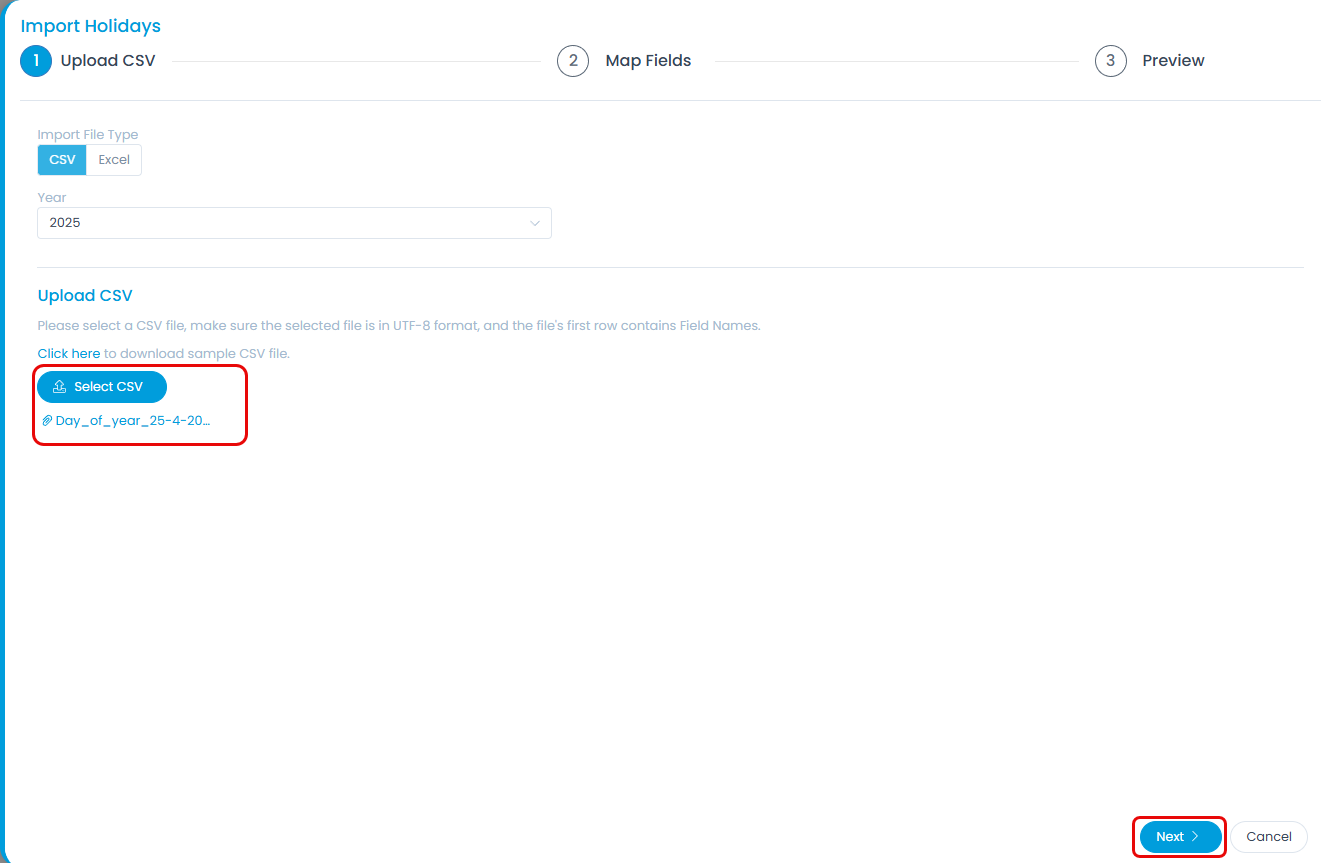
- Upload the file and click Next.
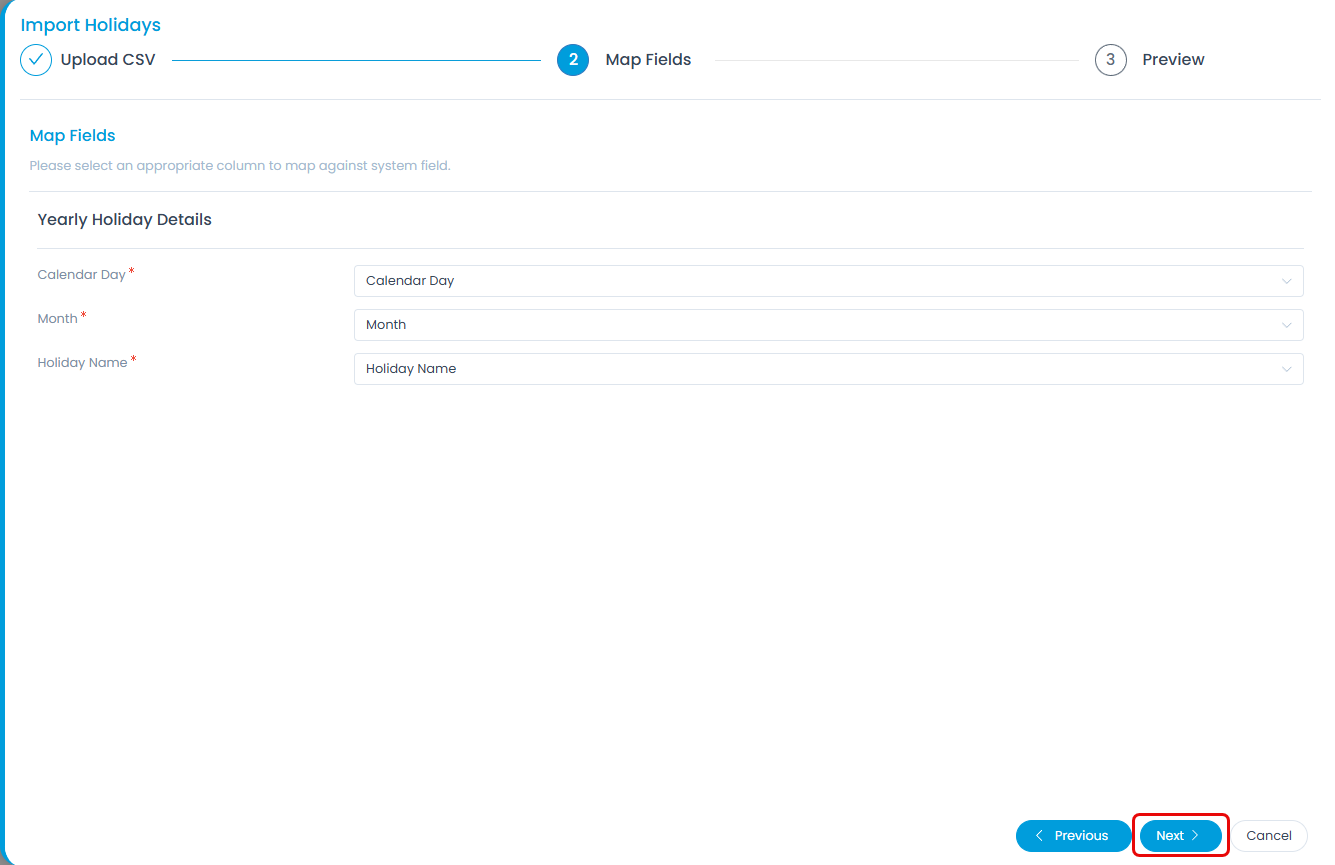
- Map the fields and click Next.
- Preview the import results with success/failure statuses.

- Once done, click Save, the holidays will appear on the Add Business Hours screen as shown below.

Once done, click Add Business Hour. Once added, you can assign the business hours to the Technician Group and thereby to its members. Moreover, when the Technician Group is assigned to the Request its "Due In" time will get updated as per the selected Business Hours.
You can edit the business hour by clicking the edit icon.
You can also delete it if required by clicking the delete icon. Once clicked, a confirmation message appears, click Yes to continue or Cancel to stop the process.