Installing the RDP Agent
RDP agents enable secure remote desktop access to your managed assets, allowing technicians to troubleshoot and resolve issues from anywhere.
This guide provides step-by-step instructions for installing the standalone RDP Agent on Windows, Linux, and macOS systems. This agent is designed to facilitate secure remote connections for your support teams.
Starting from Agent version 8.7.4, the Discovery and RDP Agents have been unified into a single agent. The separate Discovery Agent and RDP Agent guides are applicable only up to version 8.7.3. For agent installation instructions, refer to the Discovery Agent page.
Prerequisites
Before installing RDP agents, ensure your system meets the following requirements:
System Requirements
Windows Systems
- Operating System: Windows 8 and above versions
- Architecture: 32-bit and 64-bit supported
- Dependencies:
- .NET version 4 and above
- Microsoft Visual C++ 2015 and above
Linux Systems
- Supported Distributions: Ubuntu, RedHat, and other Linux distributions
- Permissions: Root access required
- Display Drivers: Wayland support may require additional configuration
macOS Systems
- Operating System: macOS 10.15 and above
- Permissions: Root access required
- SSL Certificate: Valid SSL certificate required
Required Information
You'll need the following information from your ServiceOps portal:
- ServiceOps Server URL: Your ServiceOps portal URL
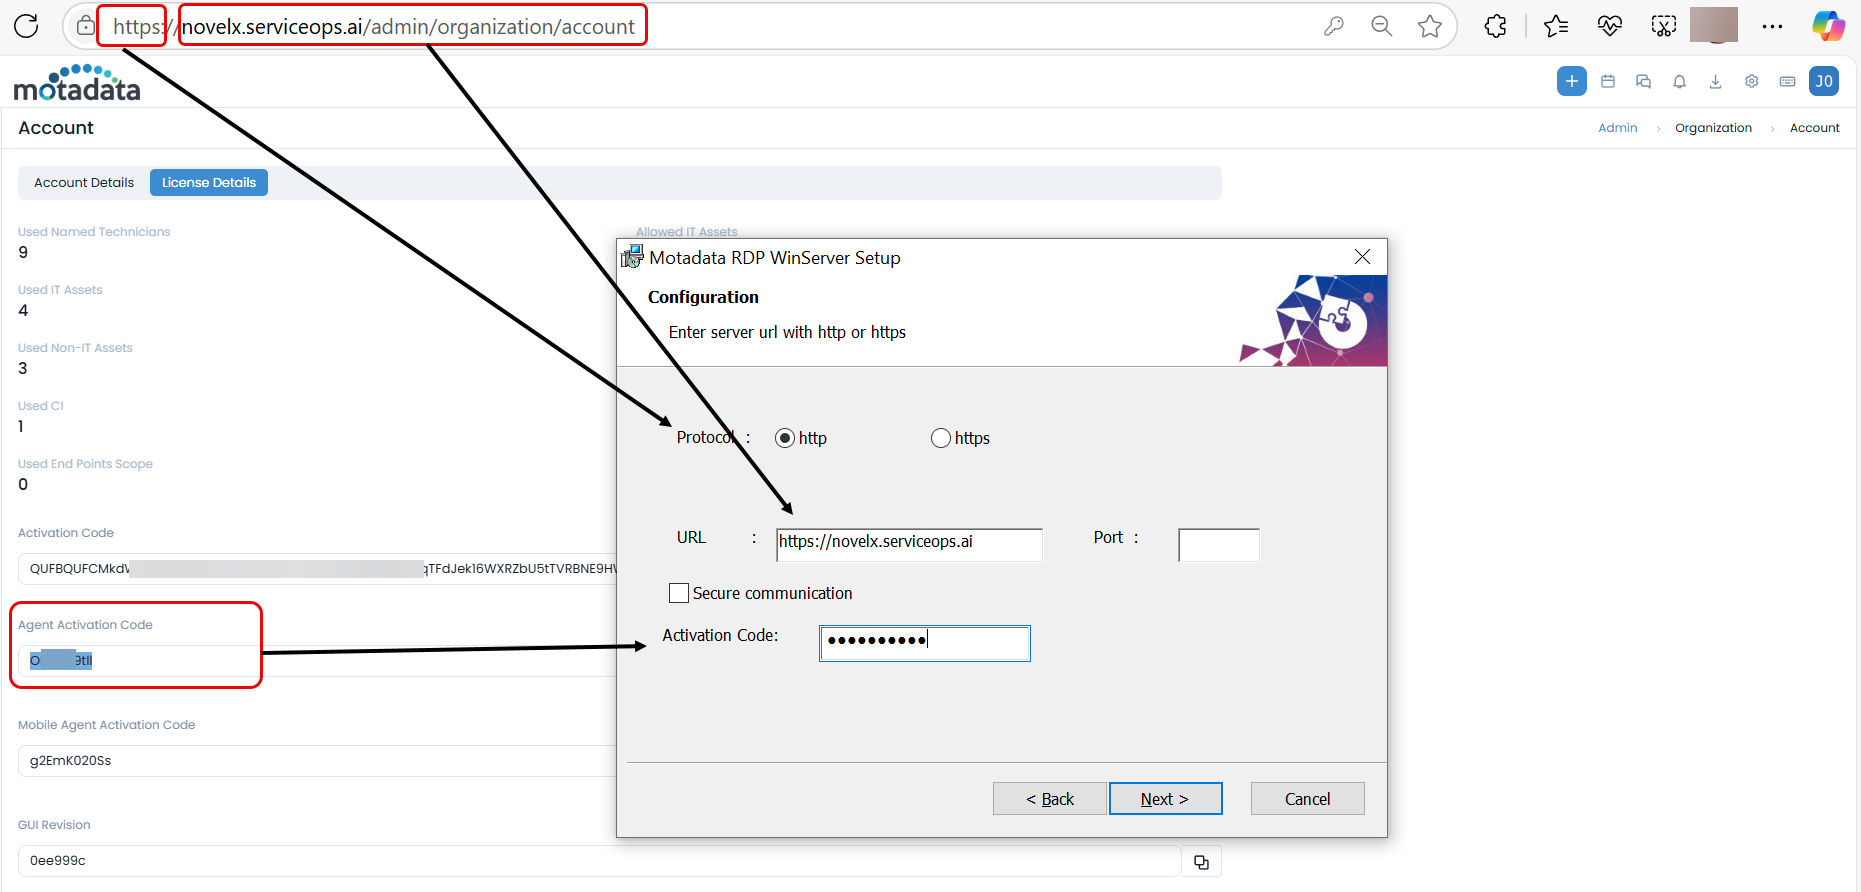
- Activation Code: Available in Admin > Organization > Account > License Details
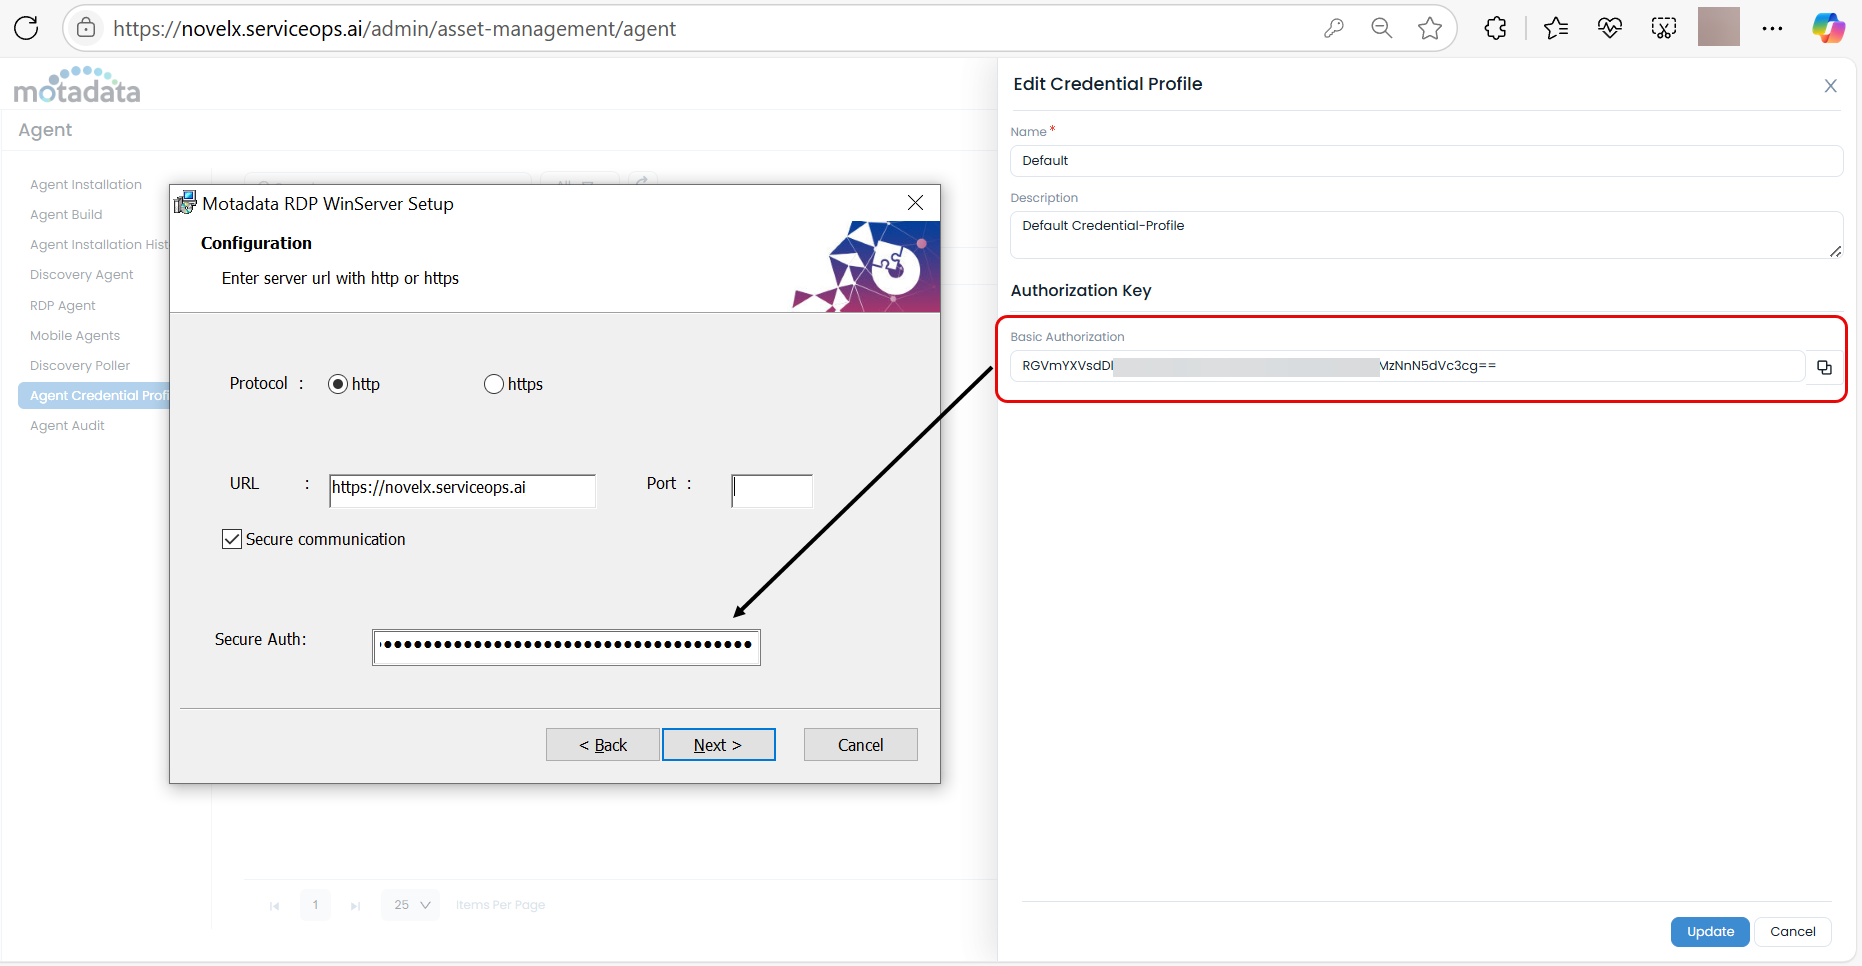
- Secure Auth Code: Available in Agent Credential Profile settings
- Protocol: HTTP or HTTPS (depending on your configuration)
Pre-Installation Requirements
Asset Discovery: The target asset must be discovered in ServiceOps (Agentless or Agent-based)
RDP Server Installation: The RDP server (MeshCentral) must be installed and configured
Network Access: Ensure the ServiceOps server domain is publicly accessible or add host entries. You can add the host entry at the below path:
Windows OS: c:\Windows\System32\Drivers\etc\hosts Syntax for host entry:
{Live IP Address} {ServiceOps Server Client Domain name}For Example:
172.16.12.134 demo.motadataserviceops.comLinux OS:
cat /etc/hostsMac OS:
cat /etc/hosts
Firewall Configuration: Configure appropriate firewall rules for RDP communication
- In SaaS application, only RDP config type is supported
- The following ports are required for installing an agent:
- HTTP - 80
- HTTPS - 443
- To ensure a successful RDP agent installation, download the MotadataRemote.exe file on the target machine and exclude it from the antivirus scan to avoid detection as malware. For example, if you're using Bitdefender Antivirus, refer to the document “How to Exclude ServiceOps Agent from Bitdefender Antivirus Scan".
- Add rdpapp and Remote folders at the specified locations for Windows installations"
- C:\Program Files (x86)\Motadata\Motadata RDP WinServer\rdpapp
- C:\ProgramData\Remote
Installation Methods
ServiceOps provides multiple options for installing RDP agents. Choose the method that best suits your environment:
- Windows
- Linux
- macOS
Windows RDP Agent Installation
Step 1: Download the Agent
- Navigate to the Download Links section in your ServiceOps documentation
- Download the latest Windows RDP agent (
.msi) file - Choose the appropriate version (32-bit or 64-bit) for your system
Step 2: Run the Installation
- Run the
.msifile with administrator rights - The User Access Control popup will appear - click Yes to continue
- Follow the installation wizard

Step 3: Configure Connection Settings
- Click Next to proceed with the installation
- Enter the following details:
- URL: Your ServiceOps server URL
- Port: Leave blank for default ports, or enter specific port (443 for HTTPS)
- Protocol: Select HTTP or HTTPS based on your configuration
Step 4: Enter Authentication
Choose one of the following authentication methods:
For Upgrade Scenarios
- Secure Communication: Enter the Secure Auth key from Agent Credential Profile
- Activation Code: Enter the activation code from License Details
For New Installations
- Secure Communication: Enter the Secure Auth key from Agent Credential Profile
- Activation code feature will not work for new installations
Step 5: Complete Installation
- Click Install to begin the installation process

- Wait for the installation to complete
- Click Finish when the wizard completes

Step 6: Verify Installation
- Check that the agent appears in Programs and Features
- Verify the agent appears in the RDP Agent tab of the RDP Configuration page
- Confirm the agent is listed in your ServiceOps portal.

Linux RDP Agent Installation
Prerequisites for Wayland Support
If your Linux system uses Wayland display drivers, perform these steps before installation:
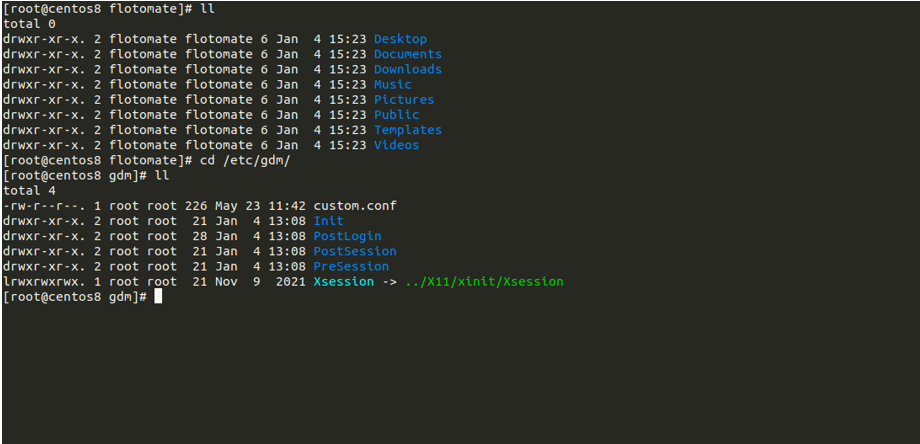
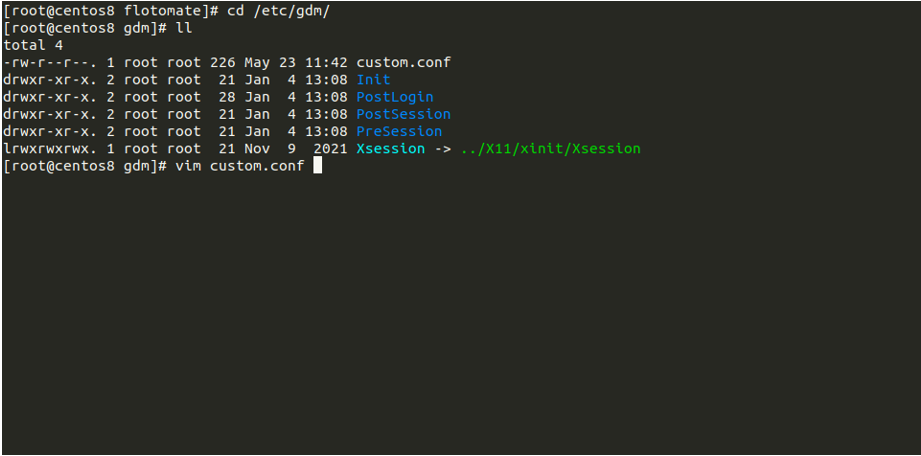
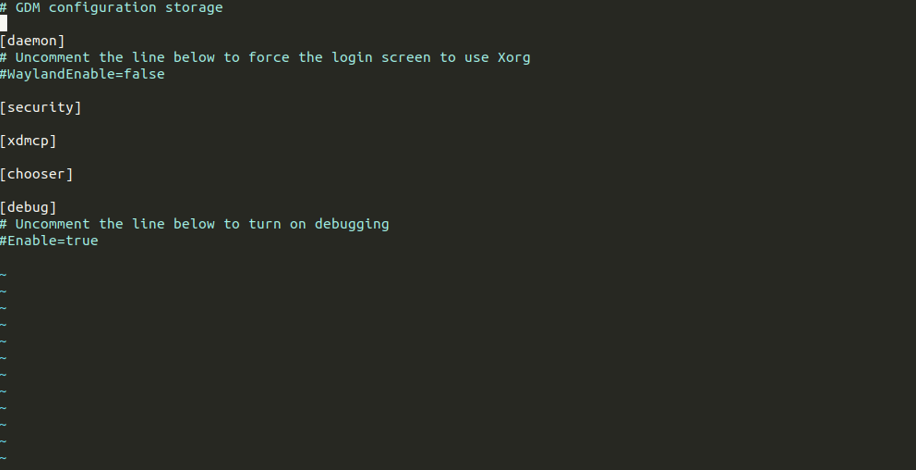
- Edit Display Configuration:
- Locate the custom.conf file at
/etc/gdmor/etc/gdm3 - Uncomment or enable
WaylandEnable=false
- Locate the custom.conf file at
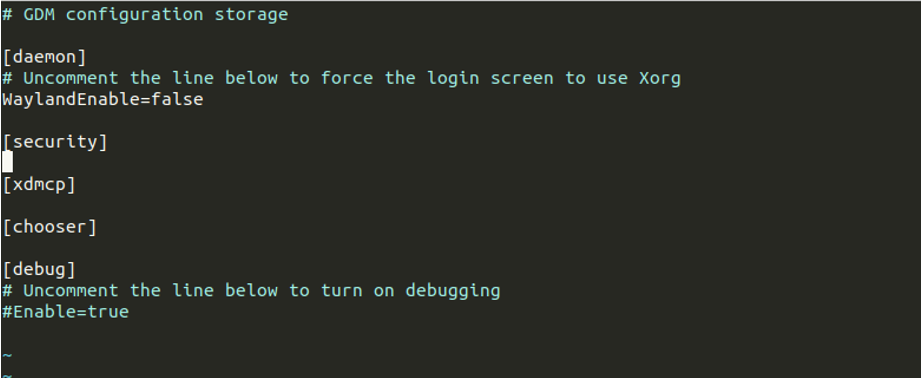
- Save the file and reboot the machine

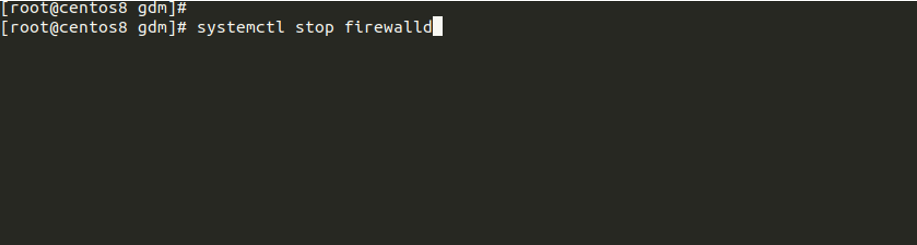
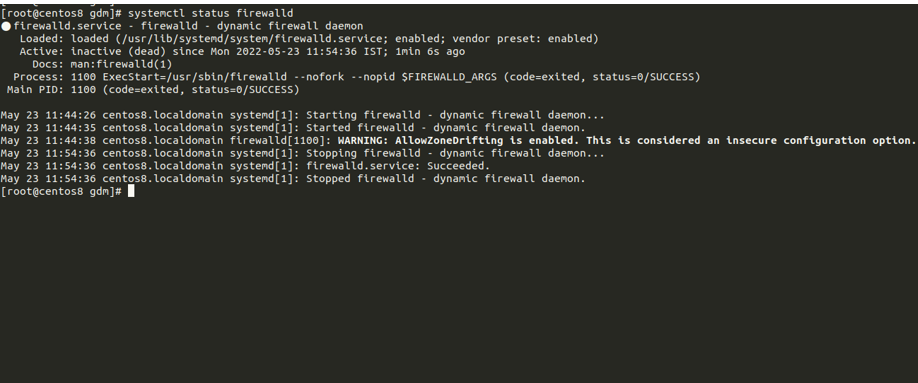
- Configure Firewall:
systemctl stop firewalld
systemctl disable firewalld
Step 1: Download the Agent
- Navigate to the Download Links section in your ServiceOps documentation
- Download the latest Linux RDP agent file
- Choose the appropriate version for your system
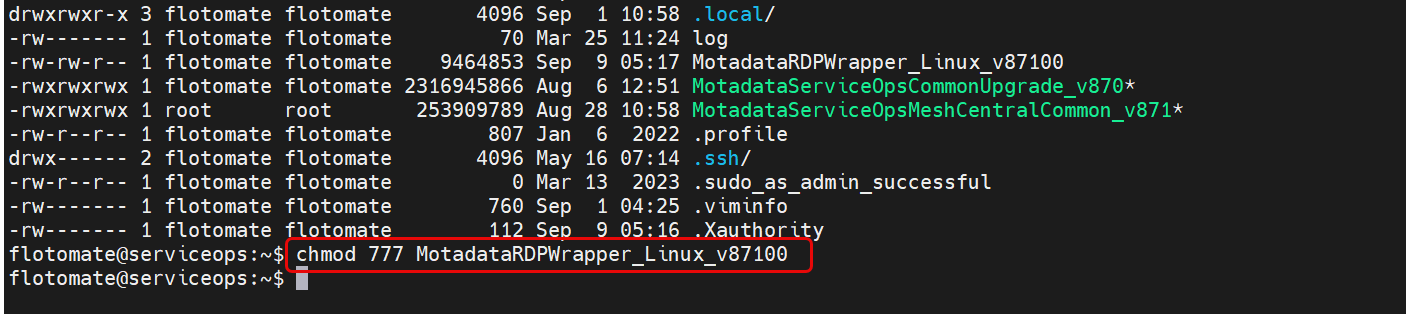
Step 2: Set File Permissions
- Grant execute permissions to the agent file:
chmod 777 MotadataRDPWrapper_Linux_v8x
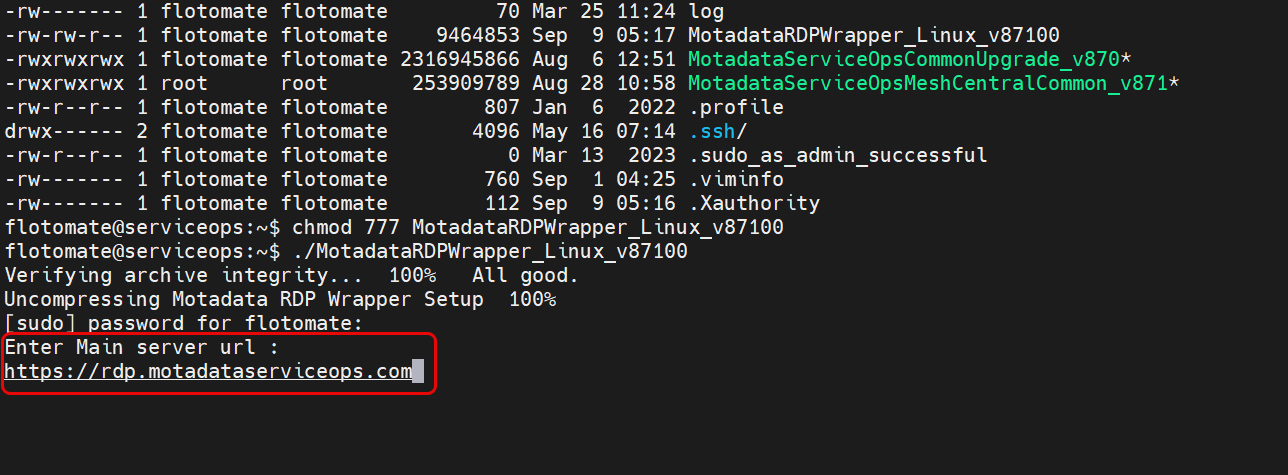
Step 3: Run the Installation
- Execute the agent file:
./MotadataRDPWrapper_Linux_v8x

Step 4: Configure Connection
- Enter the ServiceOps server URL when prompted
- Enter the secure code or activation code when prompted
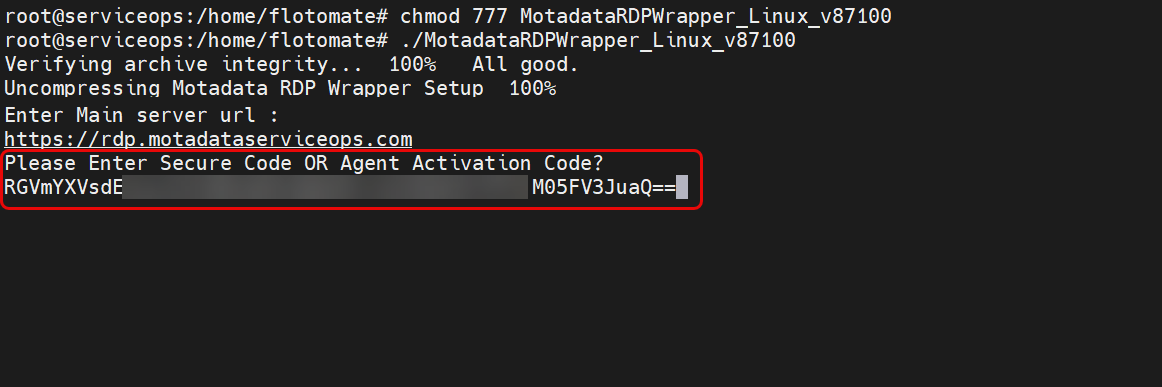
The agent will be installed successfully.
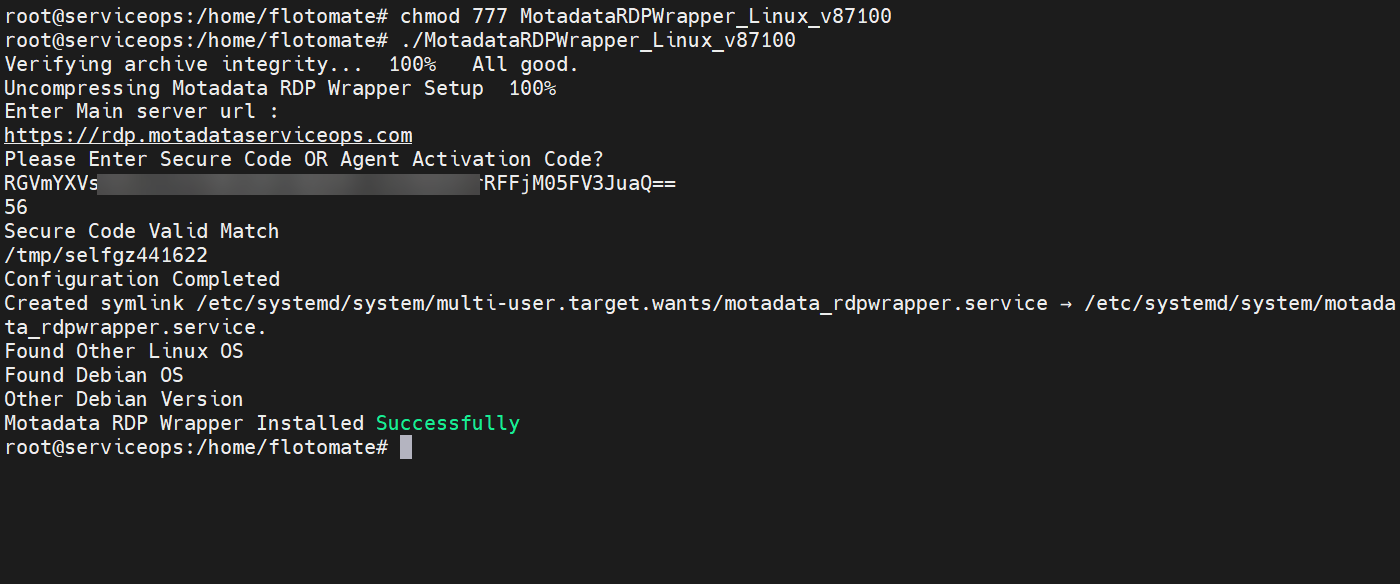
Step 5: Verify Installation
- Check the agent service status:
systemctl status motadata_rdpwrapper.service
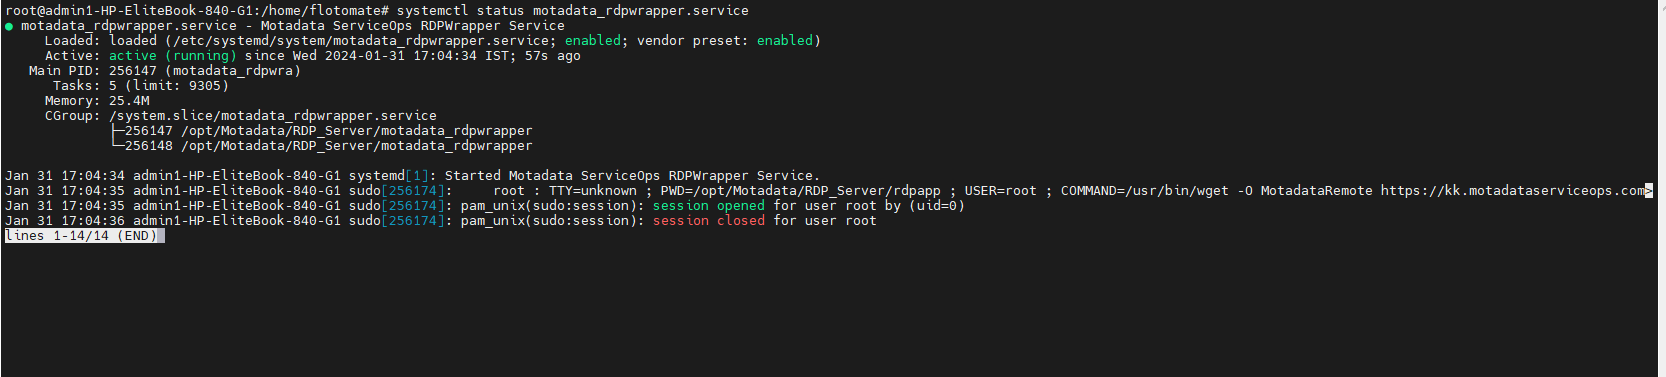
The MotadataRemote file will be available in the machine on the /opt/Motadata/RDP_Server/rdpapp path.
Steps to Uninstall RDP Agent (On Linux)
To uninstall the RDP Agent, follow the below steps:
1. Stop Agent Service:
sudo systemctl stop motadata_rdpwrapper.service
2. Disable Agent Service:
sudo systemctl disable motadata_rdpwrapper.service
3. Remove Agent Service:
sudo rm -rf /etc/systemd/system/motadata_rdpwrapper.service
4. Delete Agent dir:
sudo rm -rf /opt/Motadata/

macOS RDP Agent Installation
Prerequisites
- The user must have root permissions
- Valid SSL Certificate is required
Step 1: Download the Agent
- Navigate to the Download Links section in your ServiceOps documentation
- Download the latest macOS RDP agent file
Step 2: Set File Permissions
- Open terminal and navigate to the download directory
- Set execute permissions:
chmod 777 MotadataServiceOpsCommonMacMeshRDPAgent_v8x
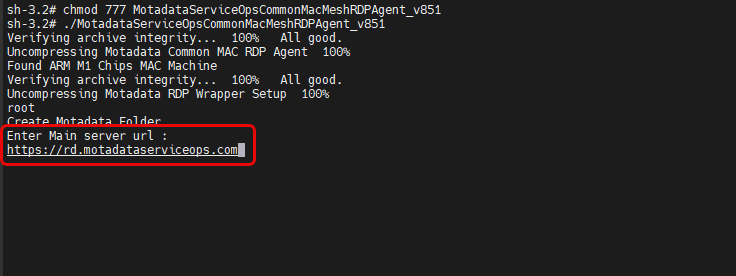
Step 3: Run the Installation
- Execute the agent file with sudo:
./MotadataServiceOpsCommonMacMeshRDPAgent_v8x

Step 4: Configure Connection
- Enter the ServiceOps server URL (IP address) when prompted
- Enter the secure code or activation code when prompted
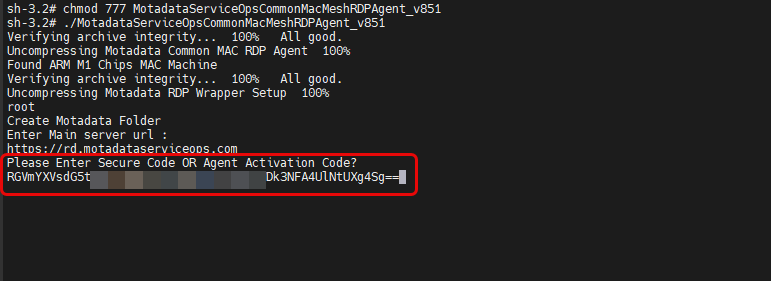
The agent will be installed successfully.
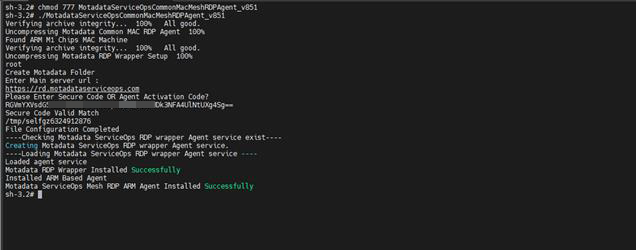
The MotadataRemote file will be available in the machine on the /opt/Motadata/RDP_Server/rdpapp path.
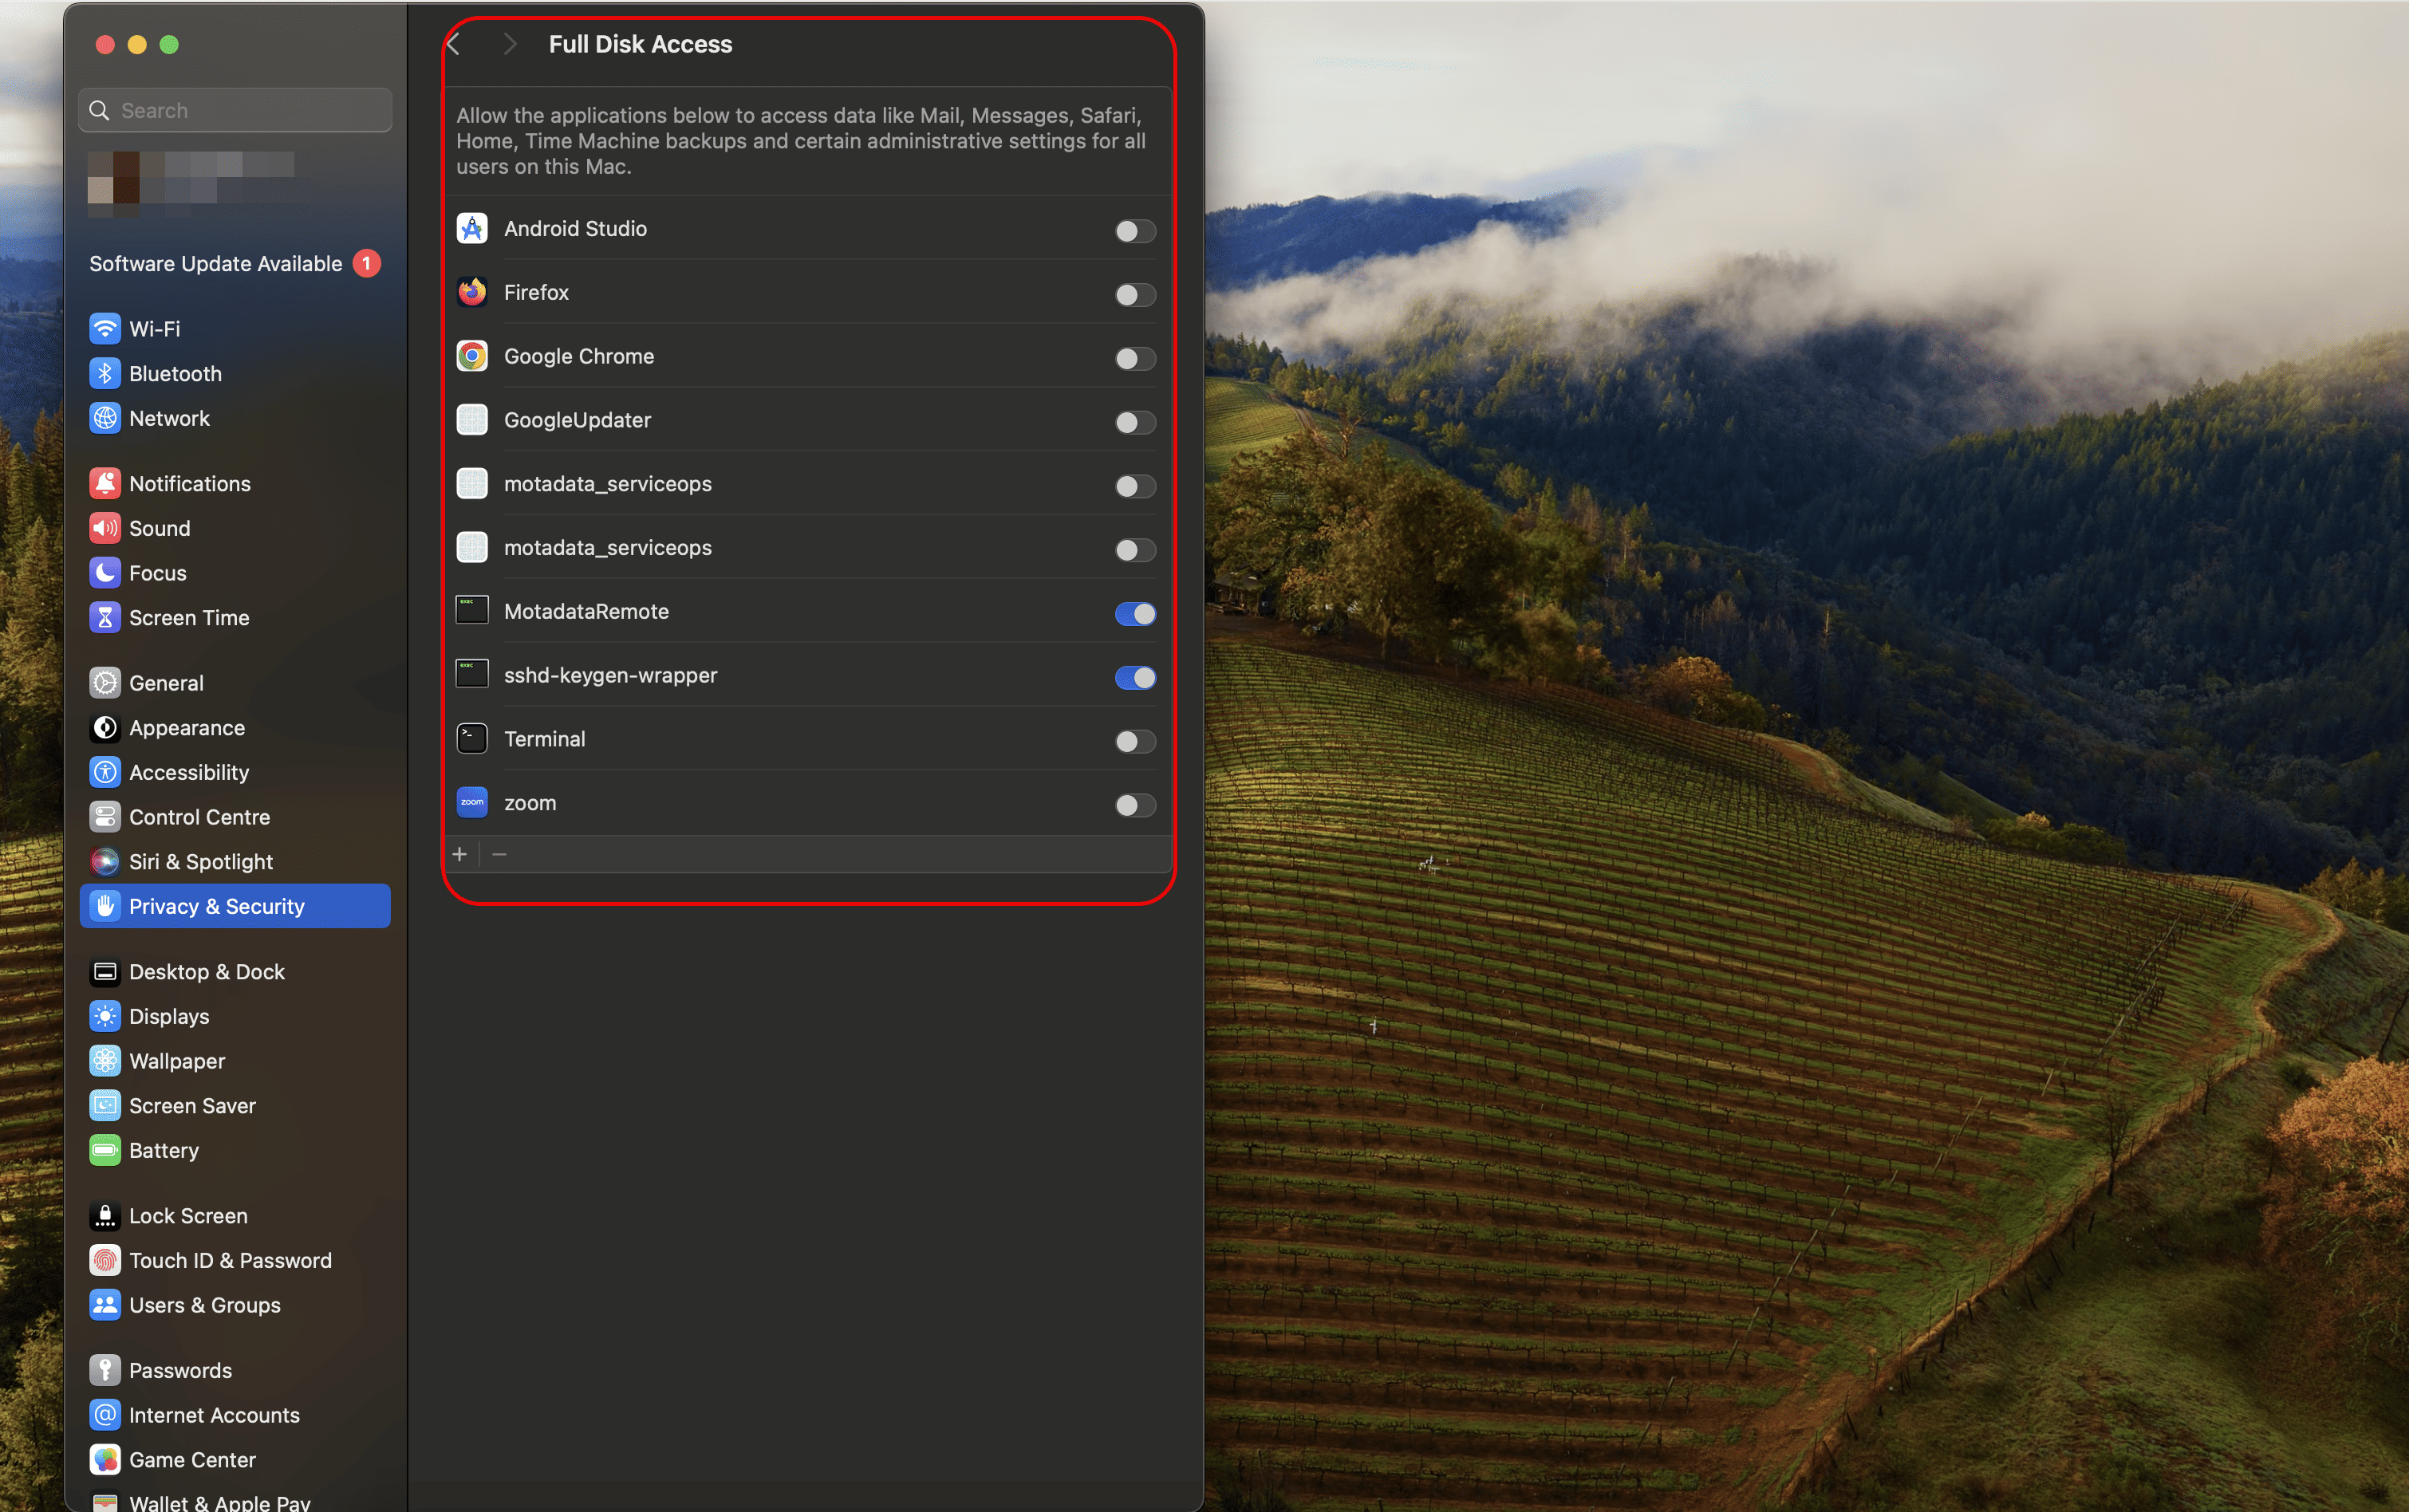
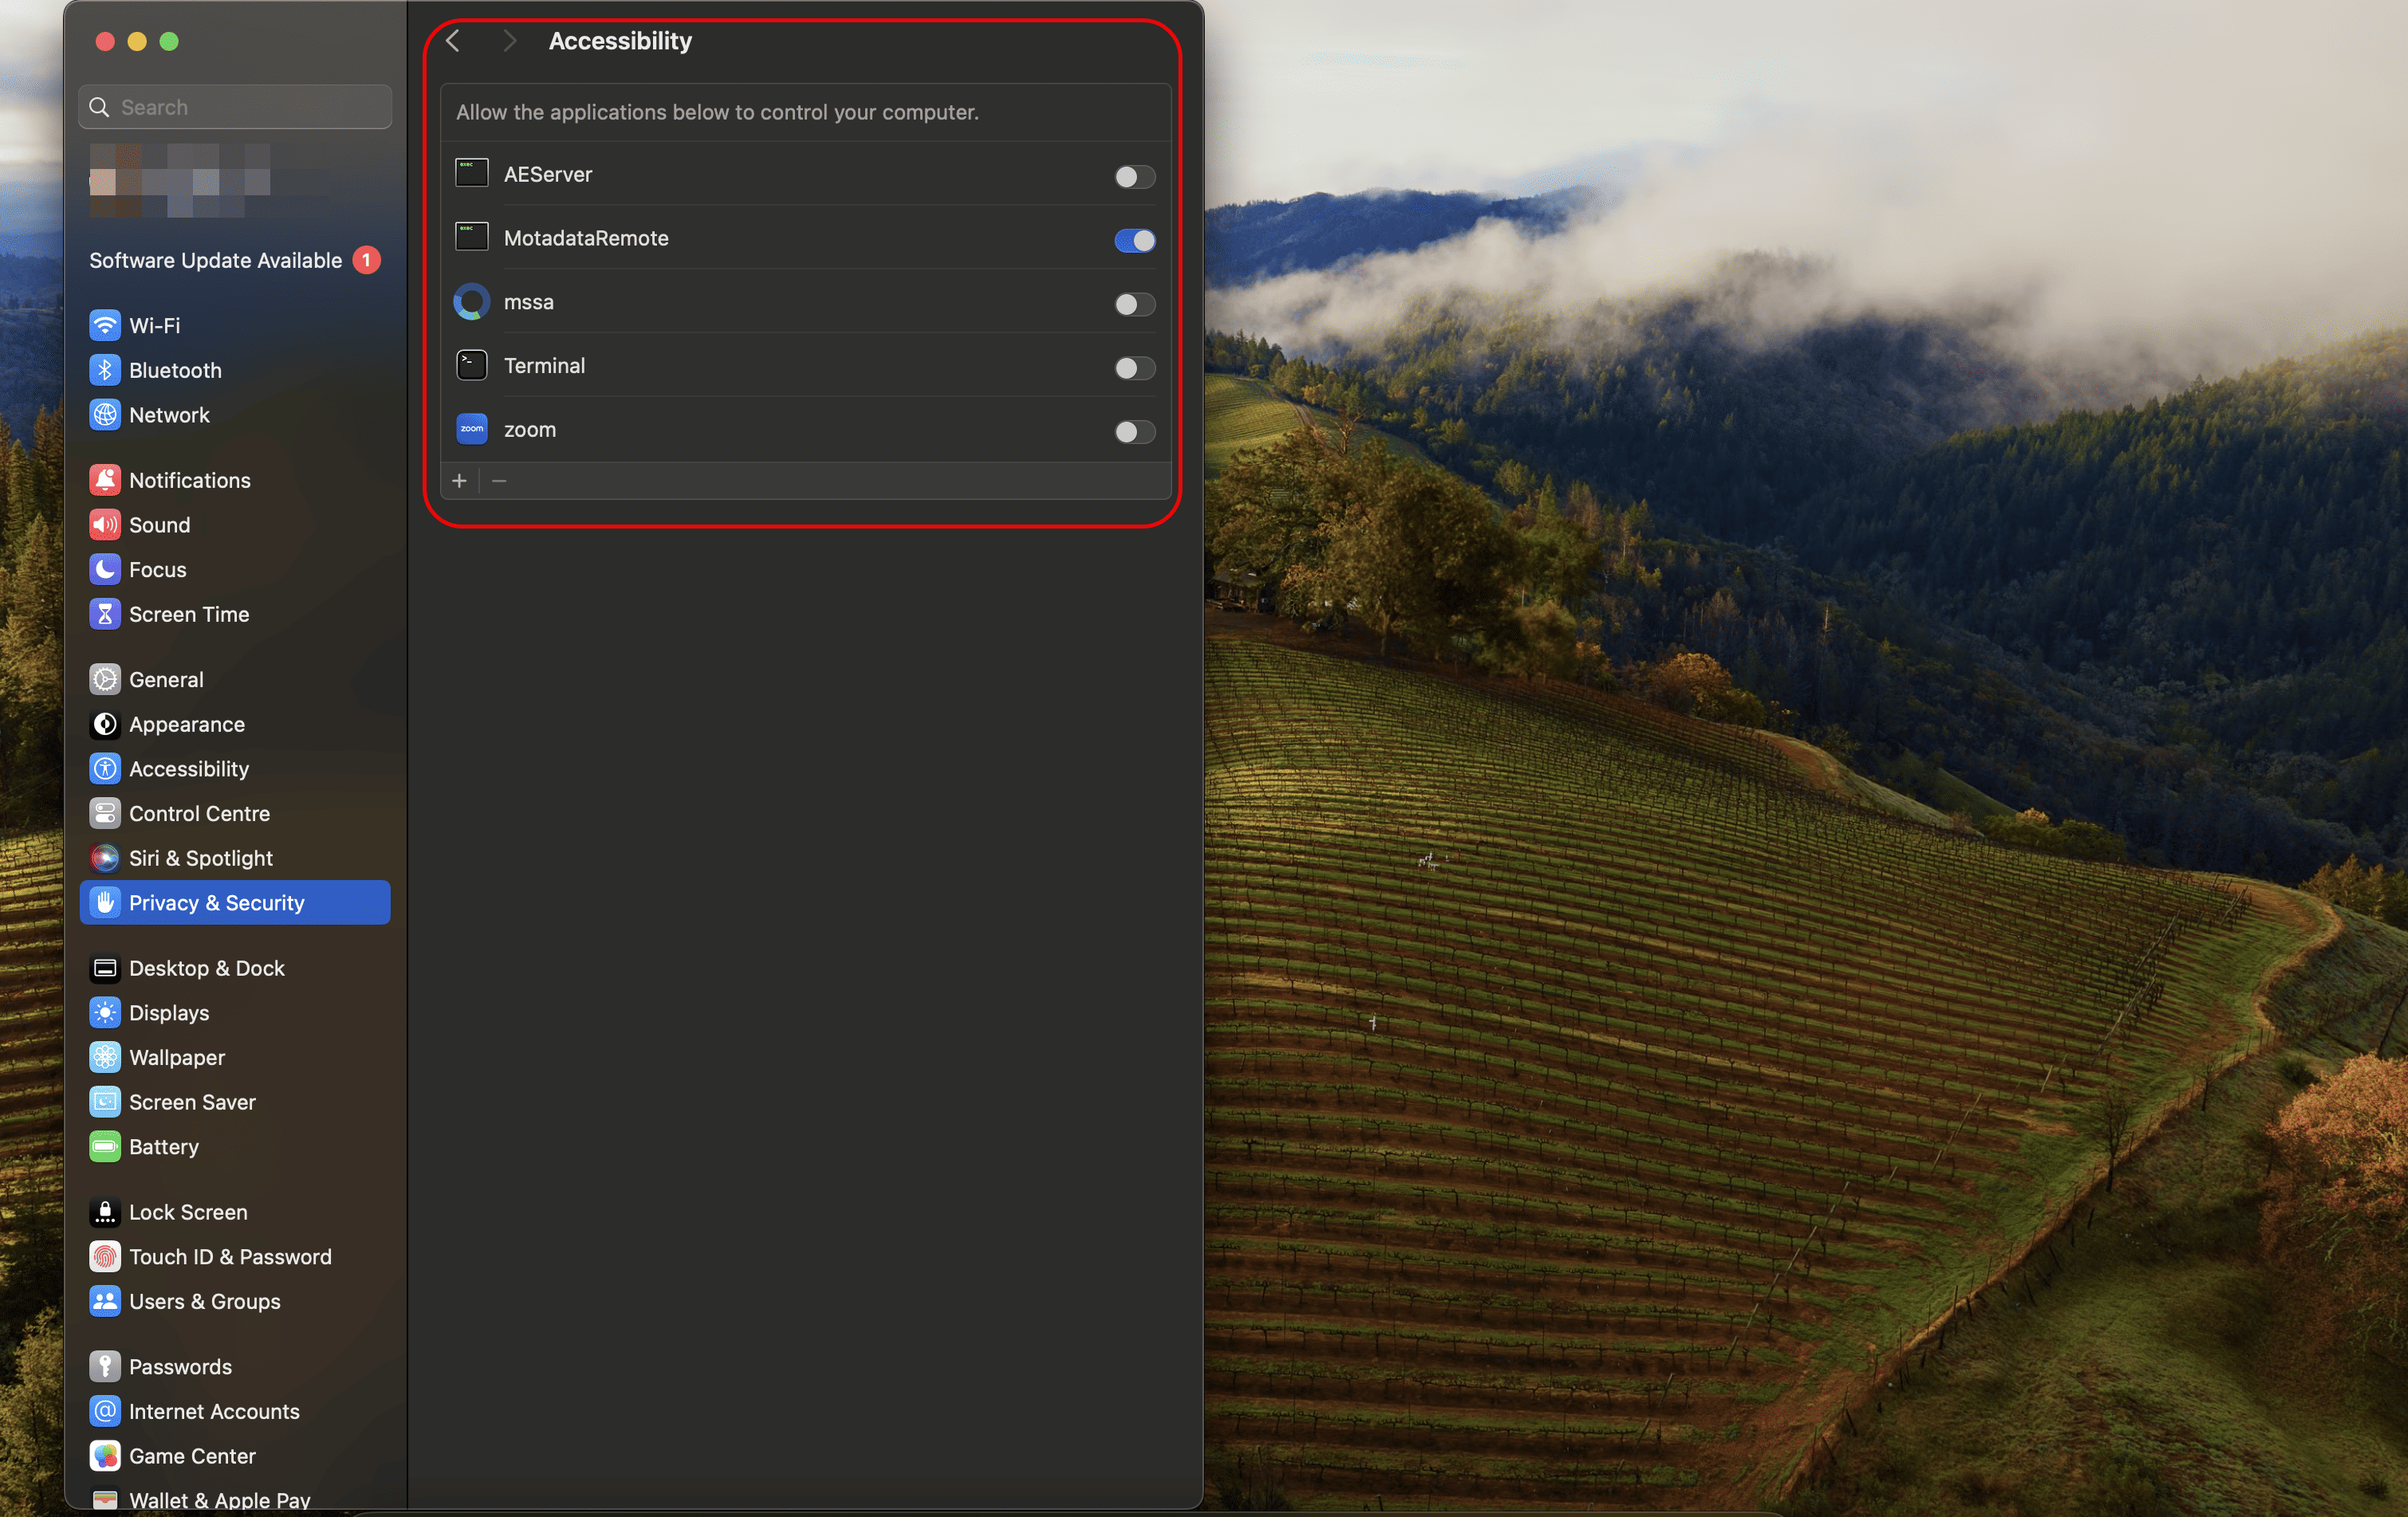
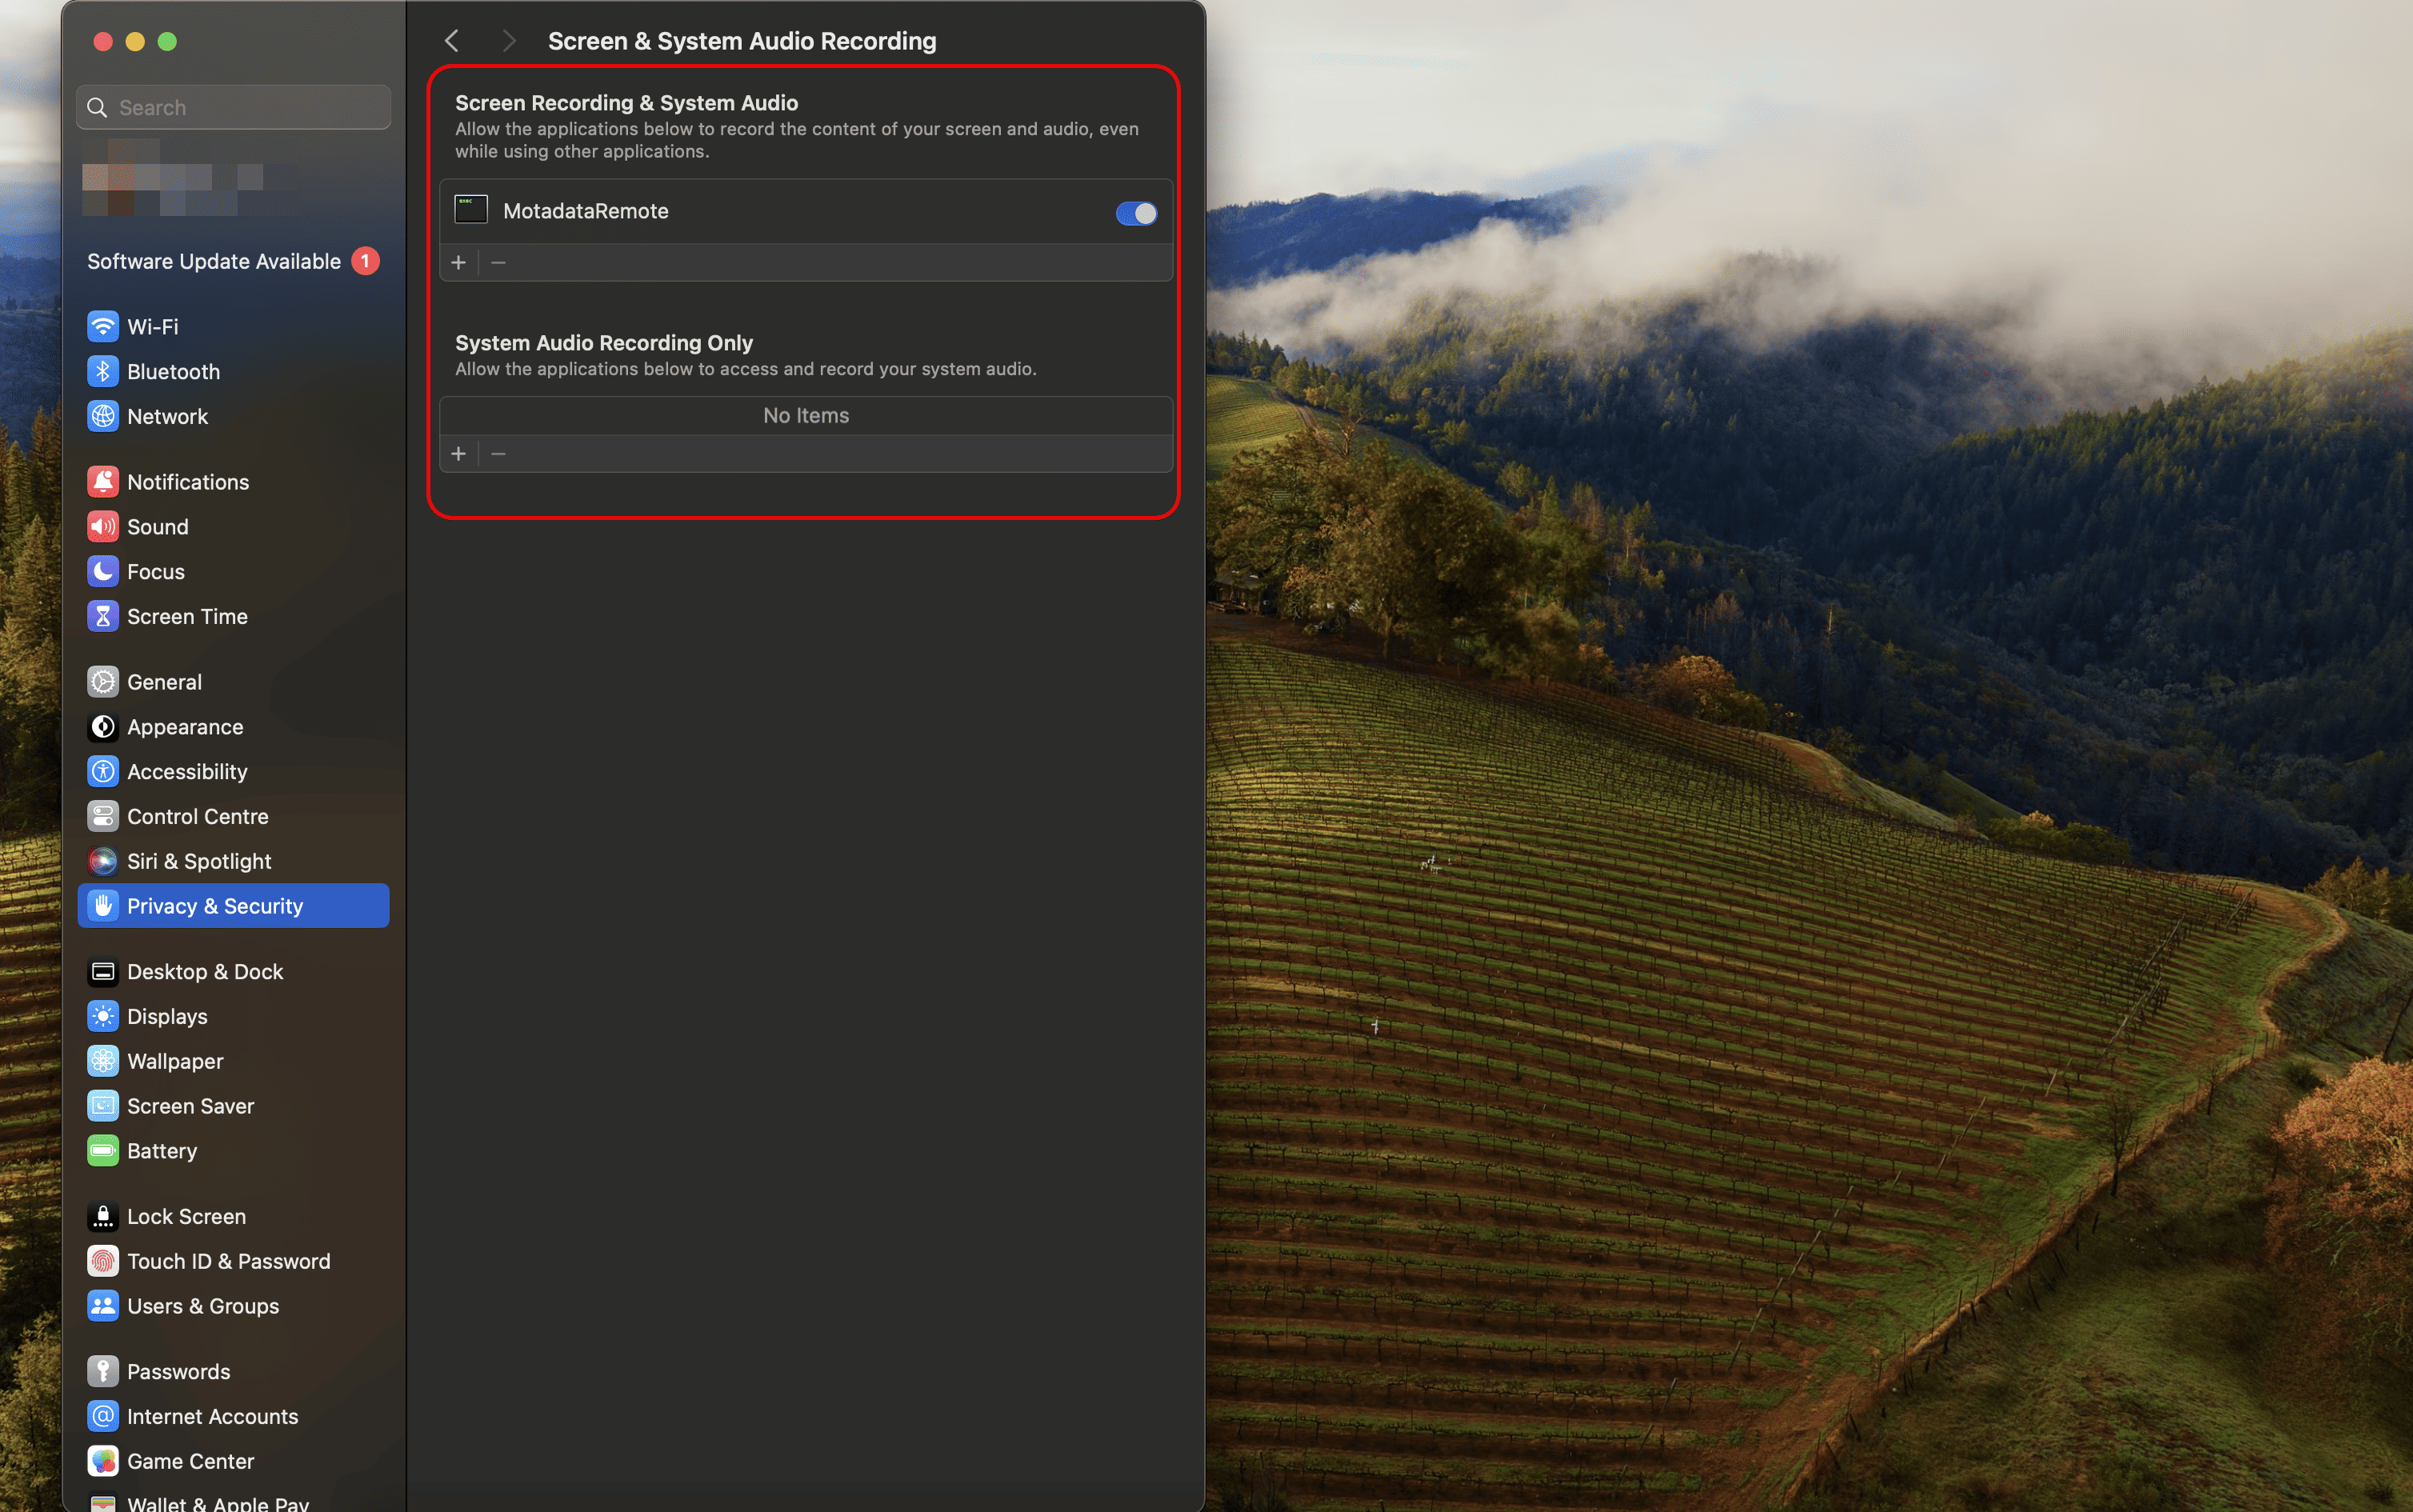
Step 5: Configure Permissions
After installation, allow the following permissions for the MotadataRemote application:
- Allow in the background
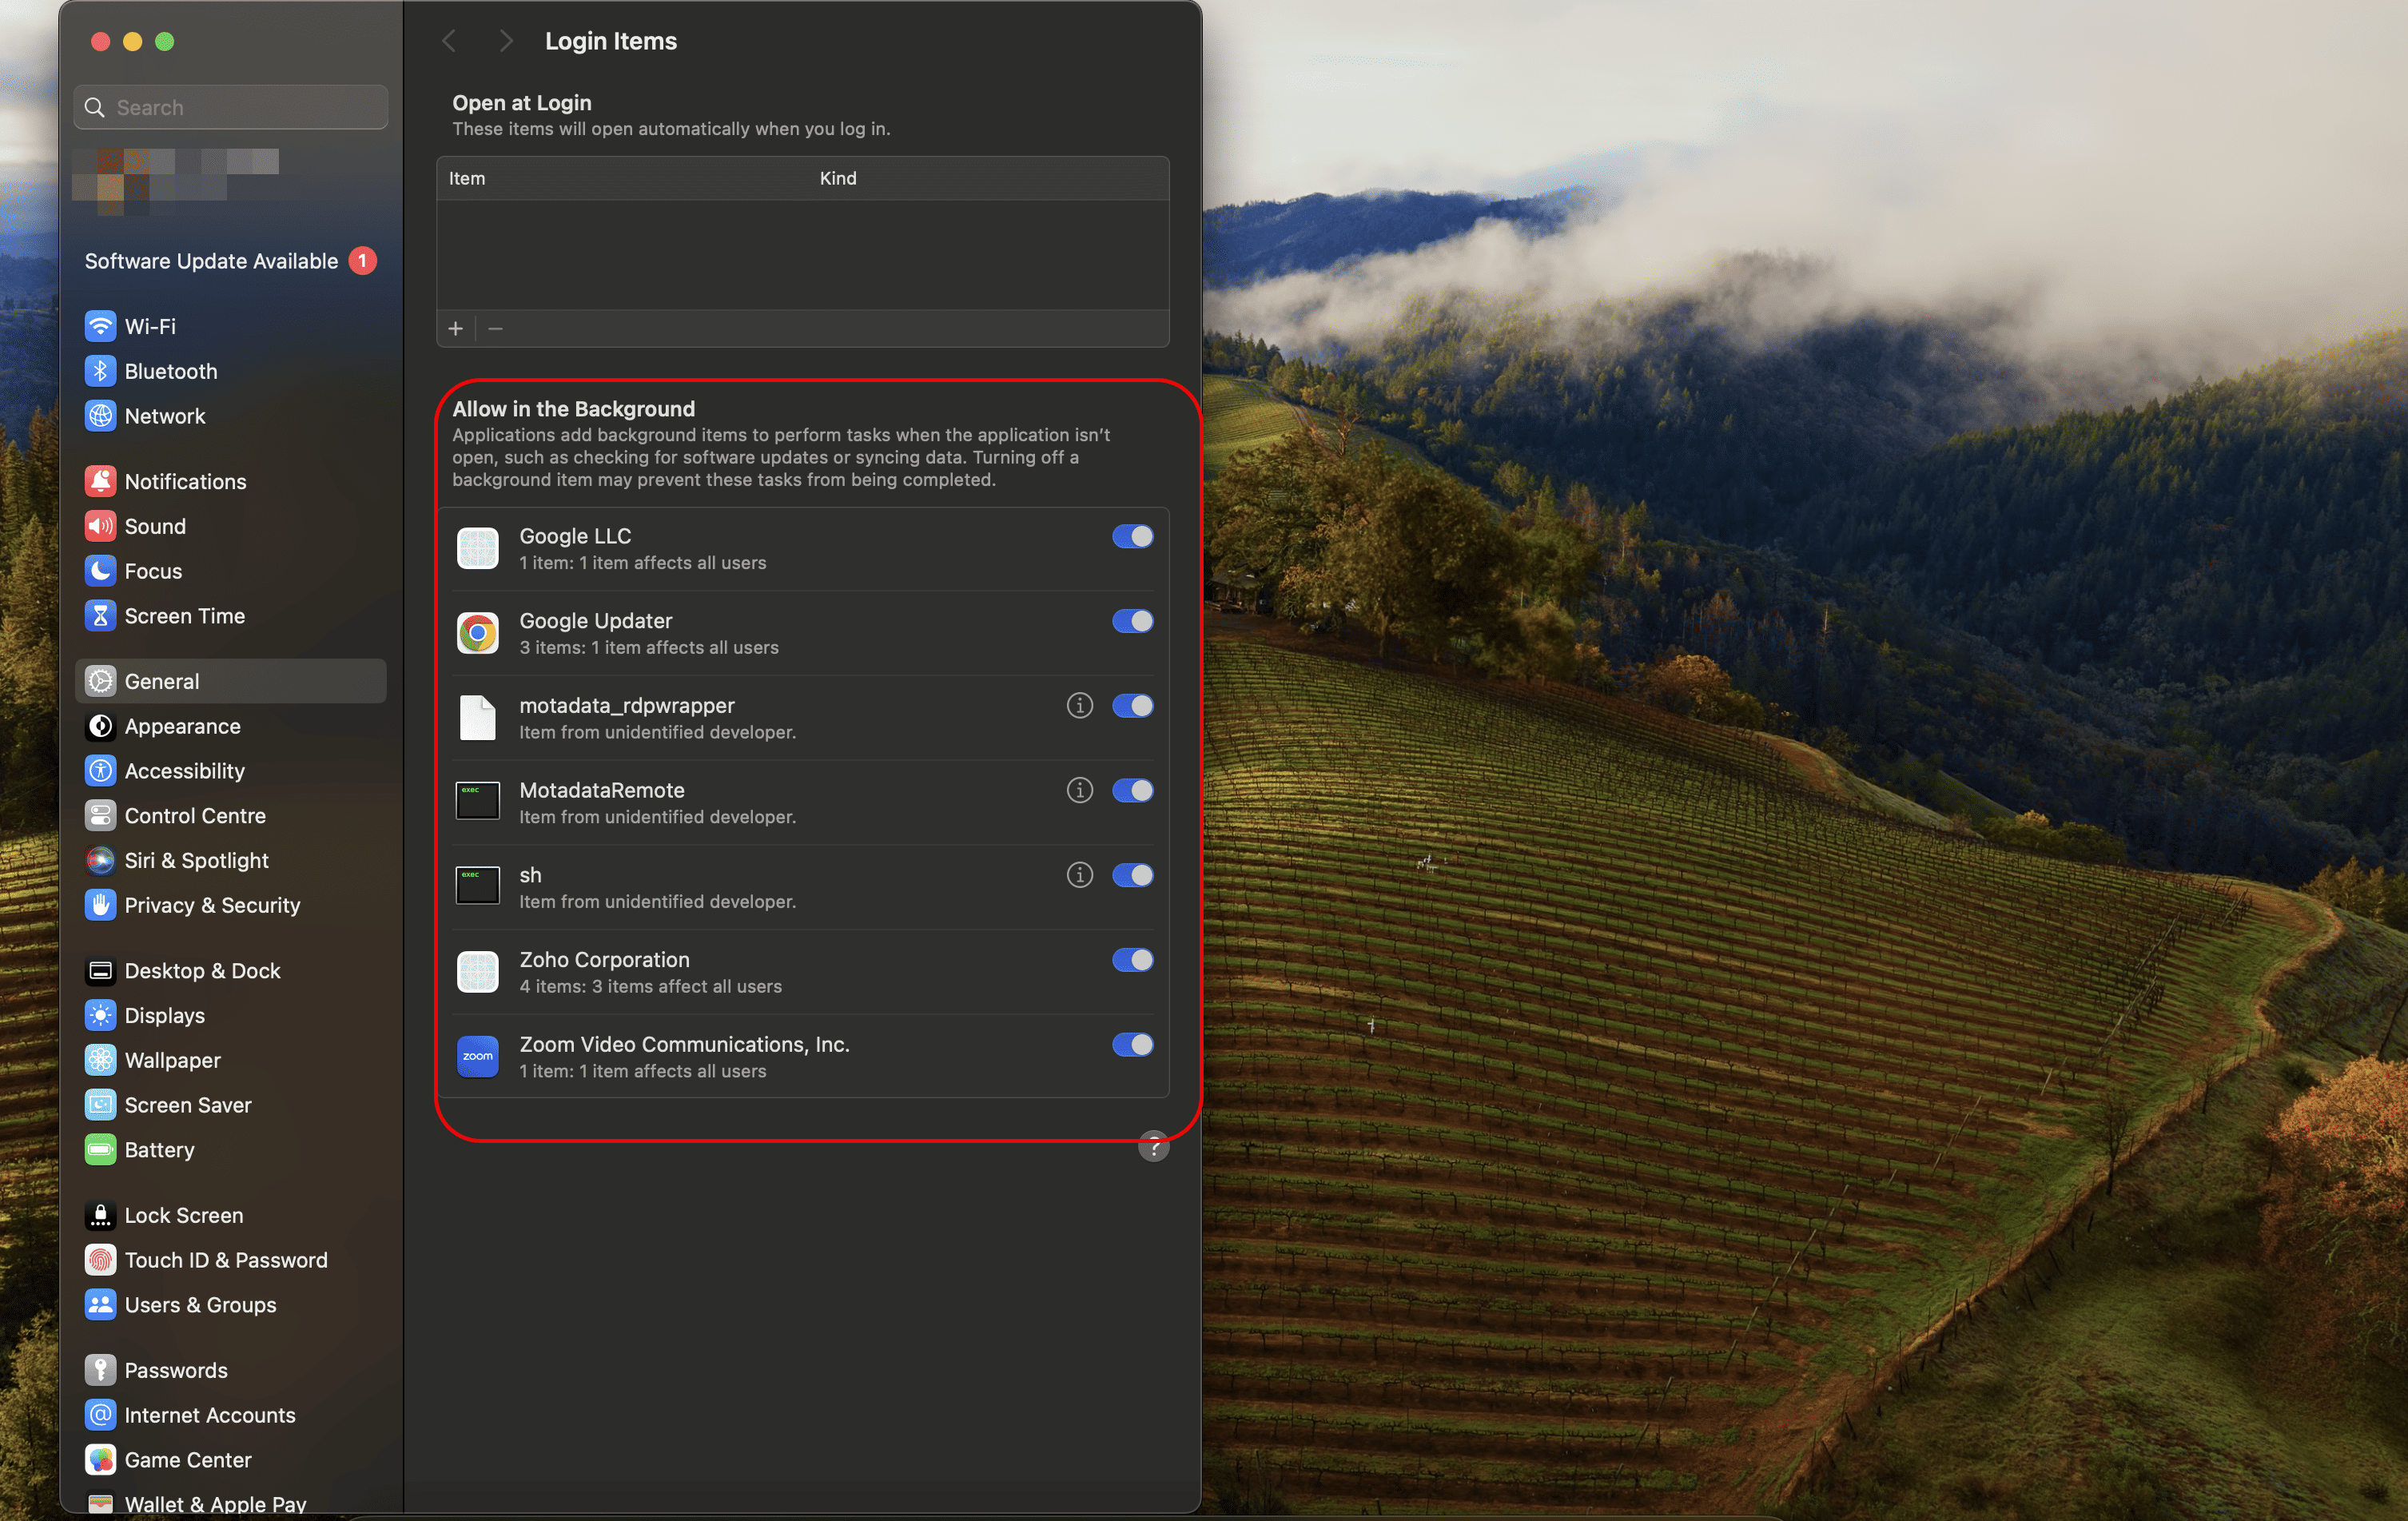
- Full Disk Access
- Accessibility
- Screen & System Audio Recording
Post-Installation Verification
Check Agent Status
- Windows: Check Services app for the RDP agent service
- Linux: Use
systemctl status motadata_rdpwrapper.service - macOS: Check LaunchDaemons for the RDP agent service
Verify Portal Registration
- Log into your ServiceOps portal
- Navigate to RDP Configuration > RDP Agents
- Verify your agent appears in the list
- Check that the agent status shows as "Online"
Test RDP Functionality
- Wait for Registration: Allow 5-7 minutes after installation before testing
- Establish Connection: Try to establish an RDP connection from the ServiceOps portal
- Verify Session: Ensure the RDP session connects successfully without errors
Troubleshooting Common Issues
Encountering issues during RDP agent setup? This section provides solutions to common problems to help you get back on track.
For a more detailed guide on resolving RDP-related problems, refer to the RDP Installation and Troubleshooting guide.
Installation Issues
- Problem: Permission denied during installation
- Solution: Ensure you're running with appropriate permissions (admin/root)
Connection Issues
- Problem: RDP agent cannot connect to ServiceOps server
- Solution: Verify URL, port, and network connectivity
Authentication Issues
- Problem: Invalid activation code or secure auth key
- Solution: Double-check the codes from your ServiceOps portal
RDP Session Issues
- Problem: RDP sessions fail to establish
- Solution: Verify RDP server is running and properly configured
Firewall Issues
- Problem: Communication blocked
- Solution: Configure firewall rules for required ports (80, 443, 8443)
Antivirus Issues
- Problem: Antivirus blocks RDP agent
- Solution: Exclude MotadataRemote.exe from antivirus scans
Configuration Best Practices
Follow these best practices to ensure a secure, stable, and optimized RDP agent configuration.
Network Configuration
- Ensure RDP agents can communicate with the ServiceOps server
- Configure appropriate firewall rules for RDP communication
- Use HTTPS for secure communication when possible
Security Considerations
- Keep activation codes and secure auth keys confidential
- Regularly update RDP agents to match your ServiceOps version
- Monitor RDP session logs for security issues
- Use strong authentication methods
Performance Optimization
- Deploy RDP agents during low-usage periods
- Monitor system resources during RDP sessions
- Configure appropriate session timeouts
RDP Server Integration
Proper integration with the RDP server is crucial for enabling remote access. This section outlines the key requirements and deployment options.
Prerequisites
- RDP Server Installation: Install the MeshCentral RDP server
- Configuration: Configure RDP settings in the ServiceOps portal
- Network Access: Ensure proper network connectivity between RDP server and agents
Deployment Options
- Local Deployment: RDP Server and ServiceOps Server on the same machine
- Remote Deployment: RDP Server and ServiceOps Server on different machines
Port Configuration
- Local Connection: Port 8443 must be enabled
- Remote Connection: Port 443 is used
- Database Access: Port 5432 for database connectivity
Next Steps
After successfully installing RDP agents:
- Configure RDP Settings: Set up connection types and security settings
- Test Remote Access: Verify RDP sessions work correctly
- Set Up Monitoring: Configure alerts for RDP session events
- Deploy Additional Agents: Install RDP agents on remaining target machines
For detailed configuration options and advanced settings, refer to the RDP Configuration guide in the Core Concepts section.
Related Topics
- RDP Server Installation: For installing the MeshCentral RDP server
- Discovery Agent Installation: For installing discovery agents