Installation Guide for Disaster Recovery (DR) Deployment
A Disaster Recovery (DR) plan ensures your ServiceOps platform remains available and resilient, protecting against data loss and minimizing downtime in the event of a catastrophic failure at your primary data center.
A Disaster Recovery (DR) strategy is crucial for ensuring business continuity in the event of a catastrophic failure at your primary Data Center (DC). This guide outlines the architecture and procedures for setting up a DR site for ServiceOps, enabling you to minimize downtime and data loss.
The primary objective of a DC-DR setup is to replicate your critical IT infrastructure, applications, and data to a secondary location. This ensures that essential services can be brought back online quickly after an incident.
Architecture Overview
The ServiceOps DR architecture relies on continuous data replication to a secondary, or DR, site.

Key components of this architecture include:
- Continuous Database Replication: The database is continuously replicated from the primary (DC) to the secondary (DR) site.
- Continuous File Storage Replication: All file attachments and other stored assets are replicated to the DR site.
In the event of a failure at the DC site, a manual switchover is required to activate the DR site and maintain business operations.
Prerequisites
Before proceeding with the DC-DR setup, ensure the System Requirements and Pre-Installation Checklist are met.
Phase 1: Replication Setup
This phase involves configuring the continuous replication of the database and file storage from the DC to the DR site.
On the DC Site Server
Download and Run Setup:
Log in as the
rootuser.Download the CommonDCDR.zip file, extract it, and move the
Motadata_DC_Setupscript to the/homedirectory.Assign execute permissions and run the script:
chmod 777 Motadata_DC_Setup
./Motadata_DC_Setup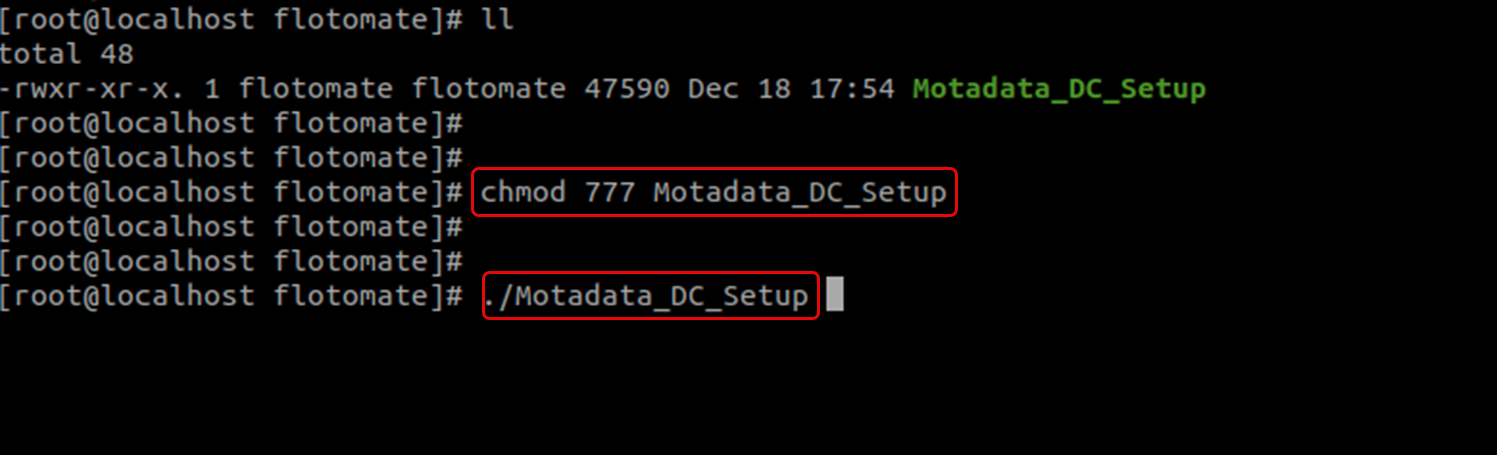
Configure Replication Scripts:
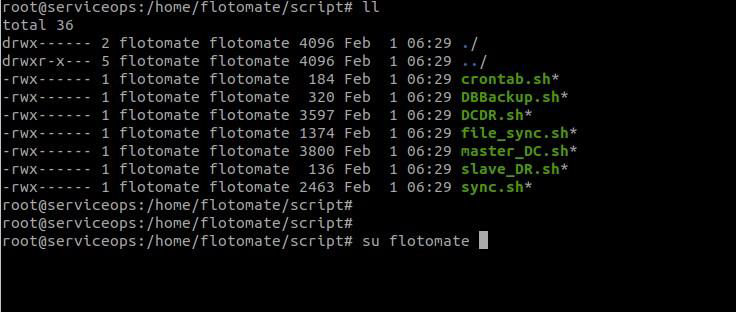
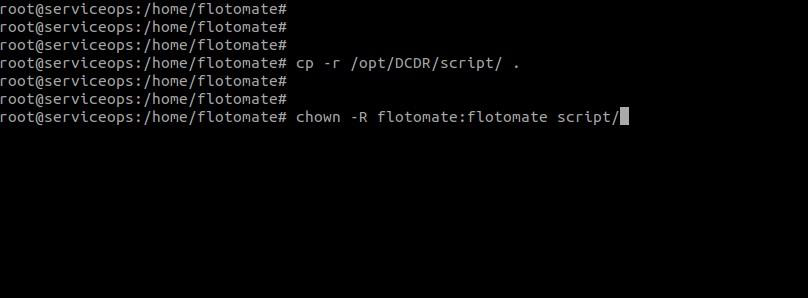
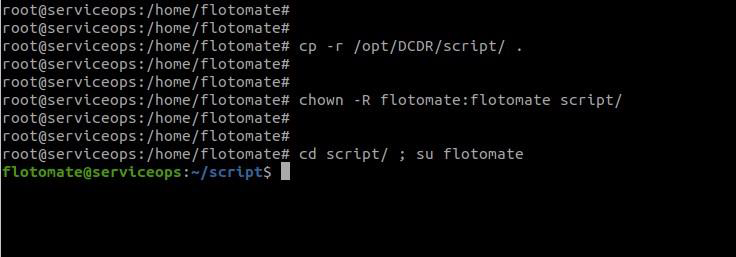
- Copy the
scriptfolder from/opt/DCDR/scriptto your user's home directory. - Change the ownership of the copied script folder:
# Syntax: chown -R {user}:{user} /home/{user}/script
chown -R flotomate:flotomate /home/flotomate/script
- Copy the

Edit Sync Configuration:
- Switch to your application user (e.g.,
flotomate).
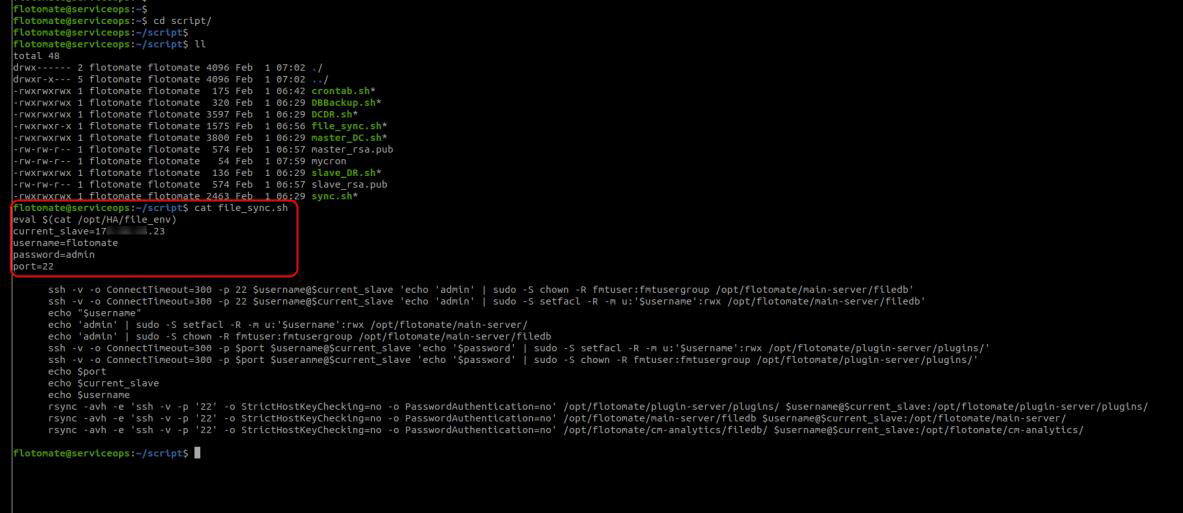
Edit the
file_sync.shscript located in/home/{user}/script/.Update the following parameters with your DR site details:
current_slave: DR_IP_ADDRESSusername: SSH_USERNAMEpassword: SSH_PASSWORDport: SSH_PORT
- Switch to your application user (e.g.,
Schedule Cronjobs:
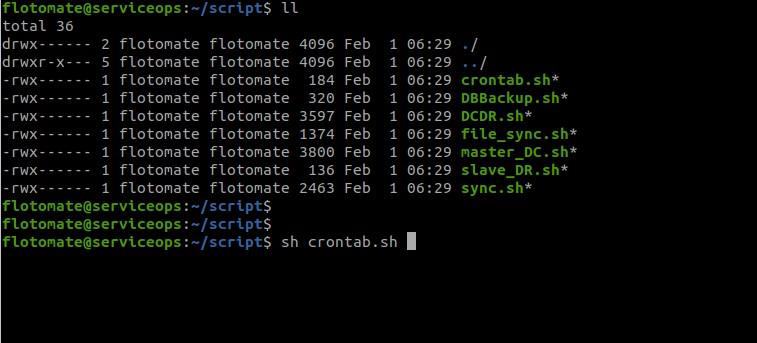
- Execute the
crontab.shscript to schedule the file sync job:sh crontab.sh
Return to the
rootuser.Navigate to the
/opt/DCDR/scriptfolder and executedcdr_crontab.shto schedule the database sync job.sh dcdr_crontab.shVerify that the cronjobs have been created successfully:
crontab -l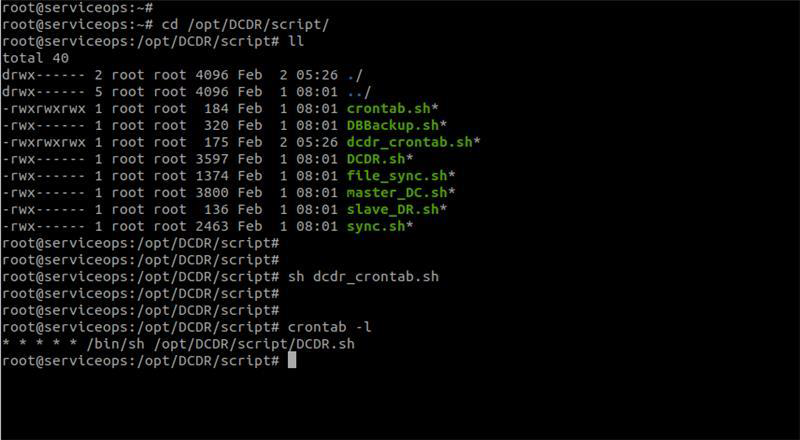
- Execute the
On the DR Site Server
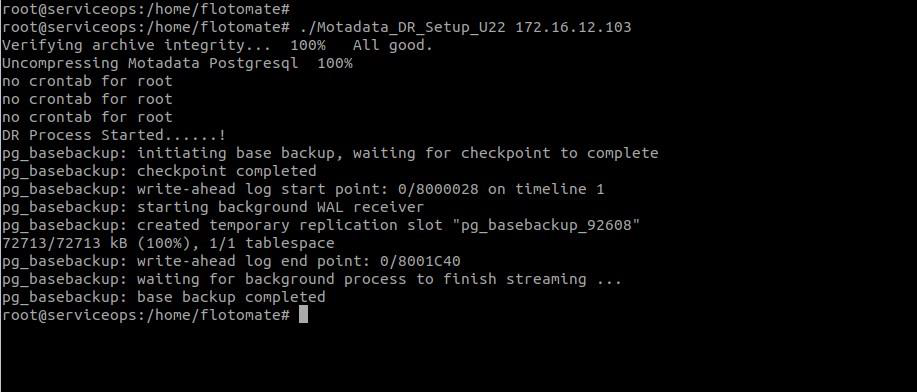
Download and Run Setup:
- Log in as the
rootuser. - Download the
CommonDCDR.zipfile, extract it, and move theMotadata_DR_Setupscript to the/homedirectory. - Assign execute permissions and run the script, providing the IP address of the Master (DC) Database Server:
chmod 777 Motadata_DR_Setup
./Motadata_DR_Setup {Master_Database_IP_Address}
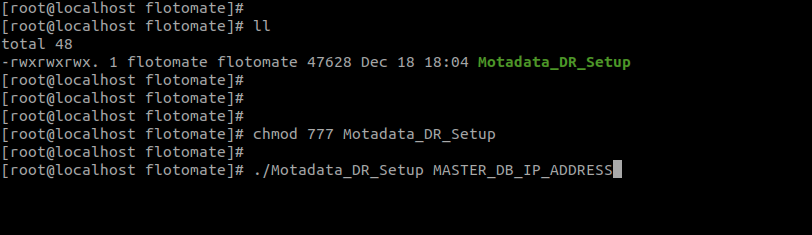
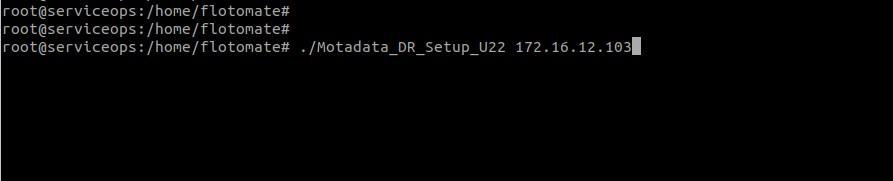
- Log in as the
Schedule Cronjobs:
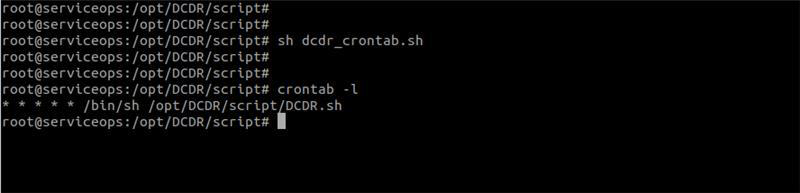
- Navigate to the
/opt/DCDR/scriptfolder and execute thedcdr_crontab.shscript.sh dcdr_crontab.sh - Verify that the cronjob has been created:
crontab -l
- Navigate to the
The cronjob setup for database replication (dcdr_crontab.sh) must be performed on both the DC and DR site machines.
For DC and DR servers (Optional, in Absence of HA)
To configure continuous replication for file attachments to the DR site, follow these steps on both the DC and DR application servers.
Download the Motadata_HA_Setup script and move it to the home directory of a common sudo user (e.g.,
/home/{user}).Log in as that common sudo user.
Assign execute permissions to the setup script:
chmod 777 Motadata_HA_SetupRun the setup script:
./Motadata_HA_Setup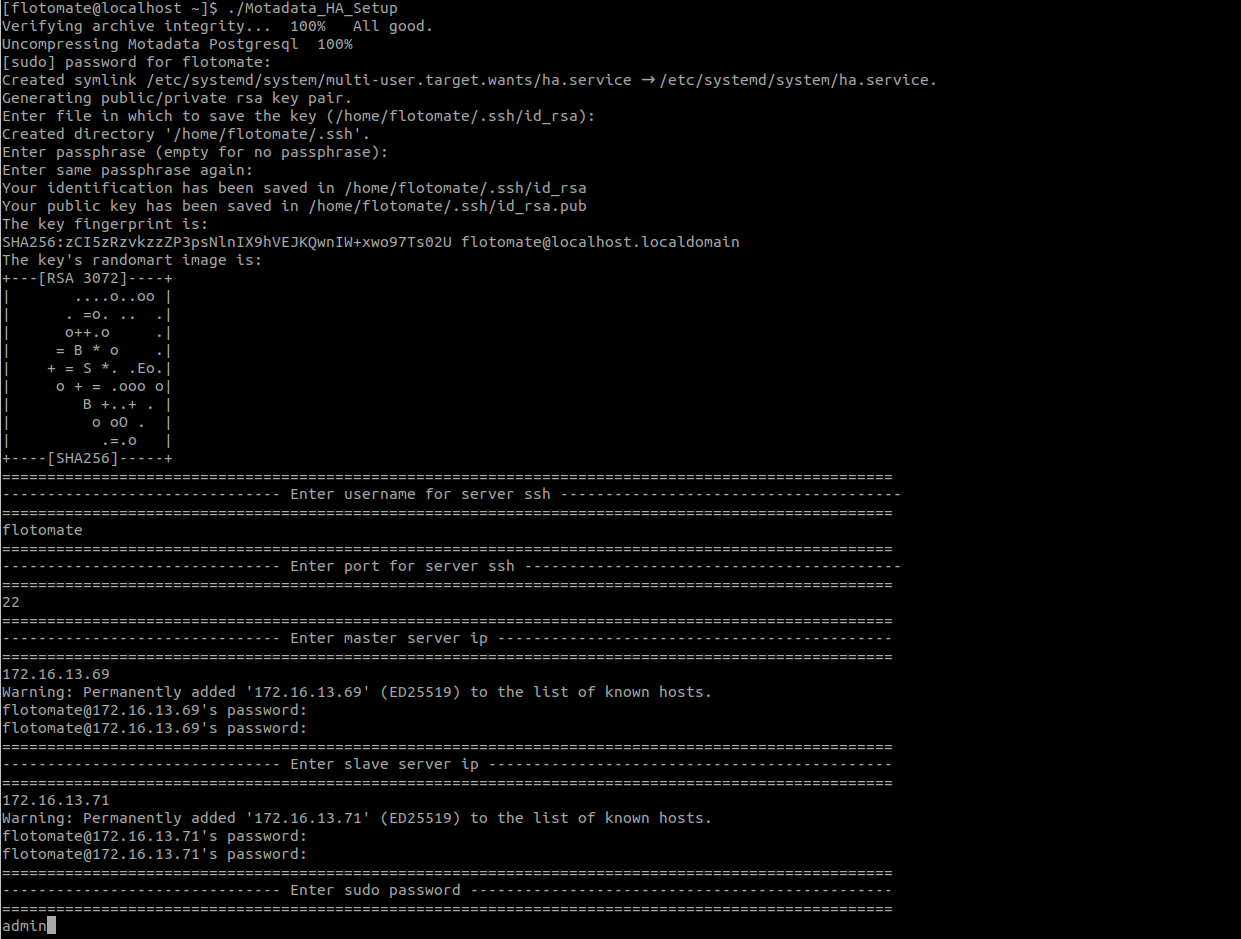
Phase 2: Perform Switchover and Switchback
For instructions on how to perform manual switchover (failover) to the DR site and switchback (failback) to the original DC, refer to the Disaster Recovery Operations Guide.
Related Topics
Next Steps
After completing the HA deployment, you may need to set up additional components depending on your requirements. Below are links to guides for other server components that you can deploy.
- Agent Deployment: To install agents on managed endpoints for monitoring, asset management, and remote control.- Distributed File Server Installation: For storing and managing attachments and other file-based assets.
- Plugin Server Installation: To extend ServiceOps functionality with custom or third-party integrations.
- DMZ Server Installation: For secure communication with agents and services in a demilitarized zone.
- Poller Installation: To discover assets behind a firewall.