Ubuntu Build
Ubuntu Build installation provides a streamlined approach to deploying ServiceOps on Ubuntu-based systems, offering IT administrators and implementation consultants a reliable method for setting up production-ready ServiceOps environments.
This guide walks you through the complete process of installing ServiceOps on Ubuntu systems using the build installer method. This approach is ideal for organizations using Ubuntu 22.04.1 or Ubuntu 24 as their preferred Linux distribution.
The Ubuntu Build installation method offers several advantages:
- Streamlined Process: Automated installation with minimal manual intervention
- Ubuntu Optimization: Specifically optimized for Ubuntu environments
- Production Ready: Includes all necessary components for production deployment
- Flexible Deployment: Supports both bare metal and virtual machine installations
Prerequisites
Before beginning the installation, ensure your system meets the System Requirements and Pre-Installation Checklist.
Installation Process
Step 1: Download OS and Product Installer
- Download Ubuntu:
- Ubuntu 24: Download Ubuntu 24
- Ubuntu 22.04.1: Download Ubuntu 22.04.1
- Download ServiceOps Installer:
- Download the appropriate installer for your Ubuntu version from our Latest Download Links.
Step 2: Run the Installer
Copy the installer to your target Ubuntu machine.
Set execute permissions:
chmod 777 service_desk_master_CI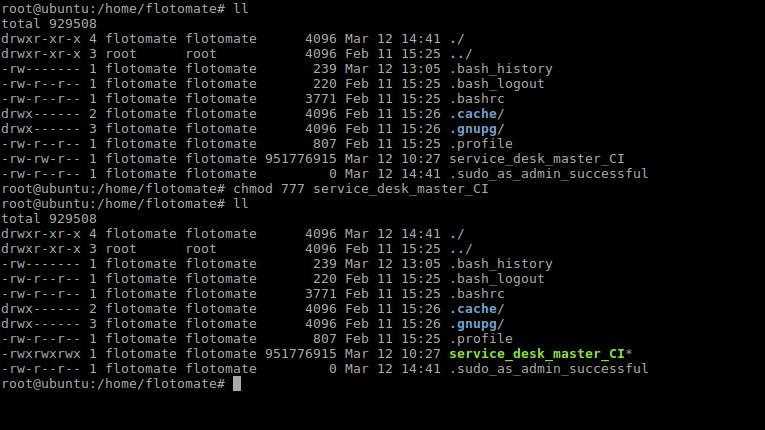
Execute the installer:
./service_desk_master_CI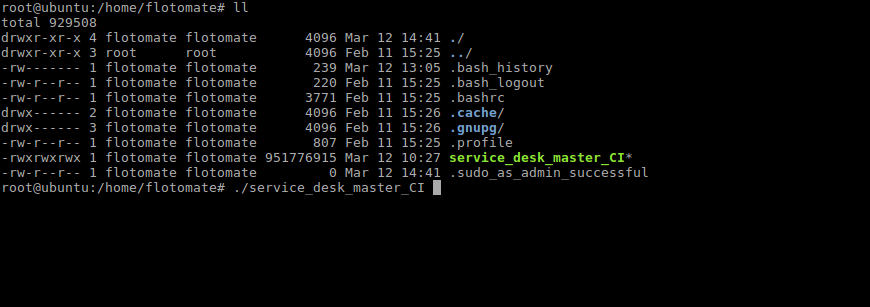
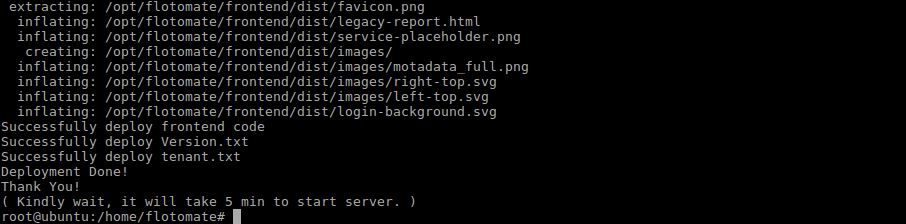
Once the below screen appears, that means you have successfully installed the product.
Step 3: Verify Installation and Login
After installation completes, verify the services are running and perform the initial login.
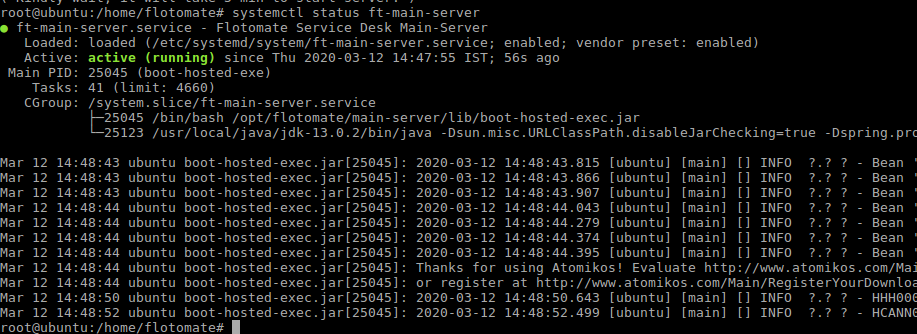
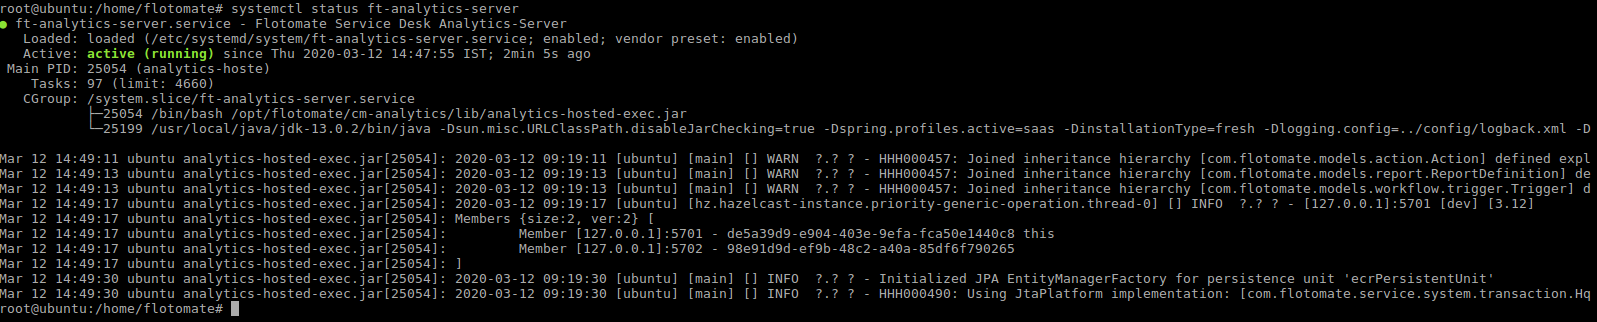
Check Services:
# Check Main Server service
systemctl status ft-main-server

# Check Analytics Server service
systemctl status ft-analytics-server
Both services should show as
active (running).
- Initial Setup:
After installation, wait for five minutes. Navigate to
http://{server_IP}/register, it will open the Registration form as below :
The registration form is for the first user, who is by default the Super Admin who has all the rights. Register the user, and use the credentials to login to the ServiceOps Portal.
Click on ‘Register’ once the form is filled. It will redirect you to the Login Page.
First Login:
After registration, access the portal at
http://{server_IP}/login.Use the tabs to switch between the Support and Technician portals.

Operations and Maintenance
This section covers post-installation configuration and maintenance tasks.
Port Configuration
| Service | Port | Description |
|---|---|---|
| HTTP/HTTPS | 80/443 | Web interface access |
| Main Server | 8080-8082 | Core application services |
| Analytics Server | 8080-8082 | Reporting and analytics |
| Plugin Server | 5050 | Plugin functionality |
| Mesh RDP Server | 8443 | Remote desktop access |
| Internal Mesh RDP | 4430 | Internal RDP communication |
| SSH | 22 | Secure shell access |
| SMTP | 25/465/587 | Email communication |
| LDAP/LDAPS | 389/636 | Directory services |
Advanced Configuration
Configure API rate limits by editing /opt/flotomate/main-server/config/flotomate_rate_limit.yaml.
:::note API rate limits can only be configured from the backend and are not adjustable through the user interface. :::
Service Management
Manage ServiceOps services using systemctl (start, stop, restart, enable).
# Example: Restart services
sudo systemctl restart ft-main-server
sudo systemctl restart ft-analytics-server
Security Considerations
Configure Ubuntu firewall (ufw) to allow necessary ports:
# Enable firewall and allow common ports
sudo ufw enable
sudo ufw allow ssh
sudo ufw allow http
sudo ufw allow https
# Allow ServiceOps ports
sudo ufw allow 8080:8082/tcp
sudo ufw allow 5050/tcp
# Check status
sudo ufw status
SSL Configuration
For production deployments, configure SSL certificates. For more details, refer to the SSL Certificate Configuration page.
Performance Optimization
Optimize Ubuntu by tuning kernel parameters in /etc/sysctl.conf.
Backup and Recovery
Implement regular backups by creating a script that uses pg_dump for the database and tar for configuration files. Schedule this script as a cron job.
Recovery Procedures
Document and test your recovery steps, which should include restoring the database from a dump and extracting configuration files from your backup.
Monitoring and Maintenance
Health Checks
Implement regular health checks using a script to monitor service status, disk space, memory usage, and log file sizes.
Scheduled Maintenance
Set up automated maintenance tasks (health checks, backups, log rotation) using crontab.
Troubleshooting
Installation Fails
Problem: Installer fails to execute.
Solution: Ensure the installer script has execute permissions (chmod 777) and that all software prerequisites were installed successfully.
Services Not Starting
Problem: Main Server or Analytics Server services fail to start.
Solution: Check the service logs for errors using journalctl -u <service-name> -f and verify all dependencies are met.
Registration Page Not Accessible
Problem: Cannot access the registration page after installation.
Solution: Verify that both ft-main-server and ft-analytics-server are active (running) and wait at least 5 minutes for them to initialize fully before trying to access the page.
Log Files
  - /opt/flotomate/main-server/logs/main-server.log
  - /opt/flotomate/analytics-server/logs/analytics-server.log
  - /var/log/serviceops-installation.log
Use tail -f <log-file-path> to monitor logs in real-time.
Related Topics
Next Steps
After the initial setup, you can further configure and secure your ServiceOps installation. Below are some recommended next steps:
- SSL Certificate Configuration: Secure your installation with SSL/TLS certificates.
- Change Ports: Modify the default ports for the main and Nginx servers.
- Configure API Rate Limit: Set limits on API usage to prevent abuse.
- Configure Memory and Connection Pool: Optimize performance by adjusting memory and database connection settings.
- Enable HTTPS: Enforce secure connections by enabling HTTPS.
- Increase Connection Limit: Adjust the maximum number of concurrent connections.