Overview
This page enables you to add and manage multiple identity providers. Motadata ServiceOps supports SAML based SSO integration that includes the following services:
To view the list, navigate to Admin > Users > SSO Configuration > Identity Providers tab and the following page appears.

Adding Identity Provider
To add an identity provider,
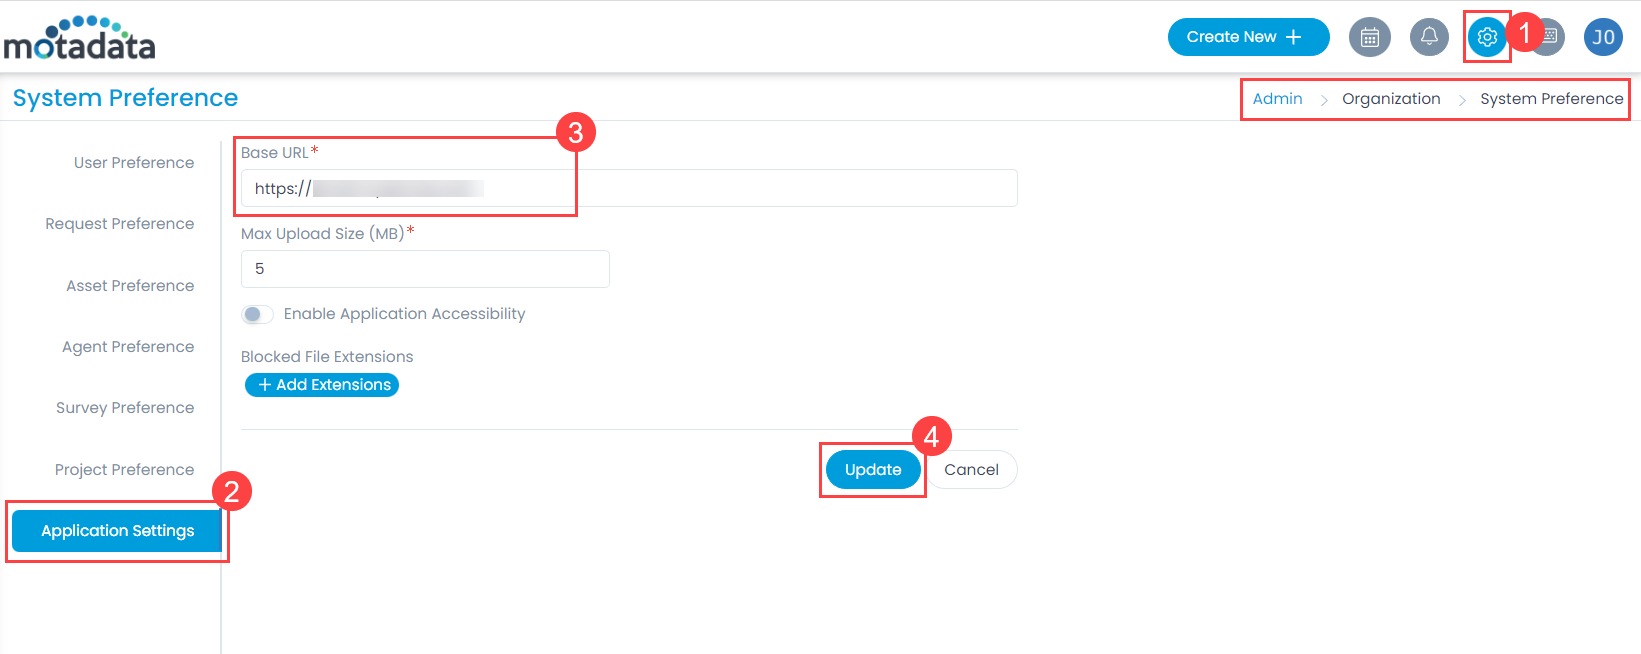
Before you begin,
Verify that the Base URL is the same as the portal URL. If it has a default IP Address, update it, and click Update (4) as shown below.

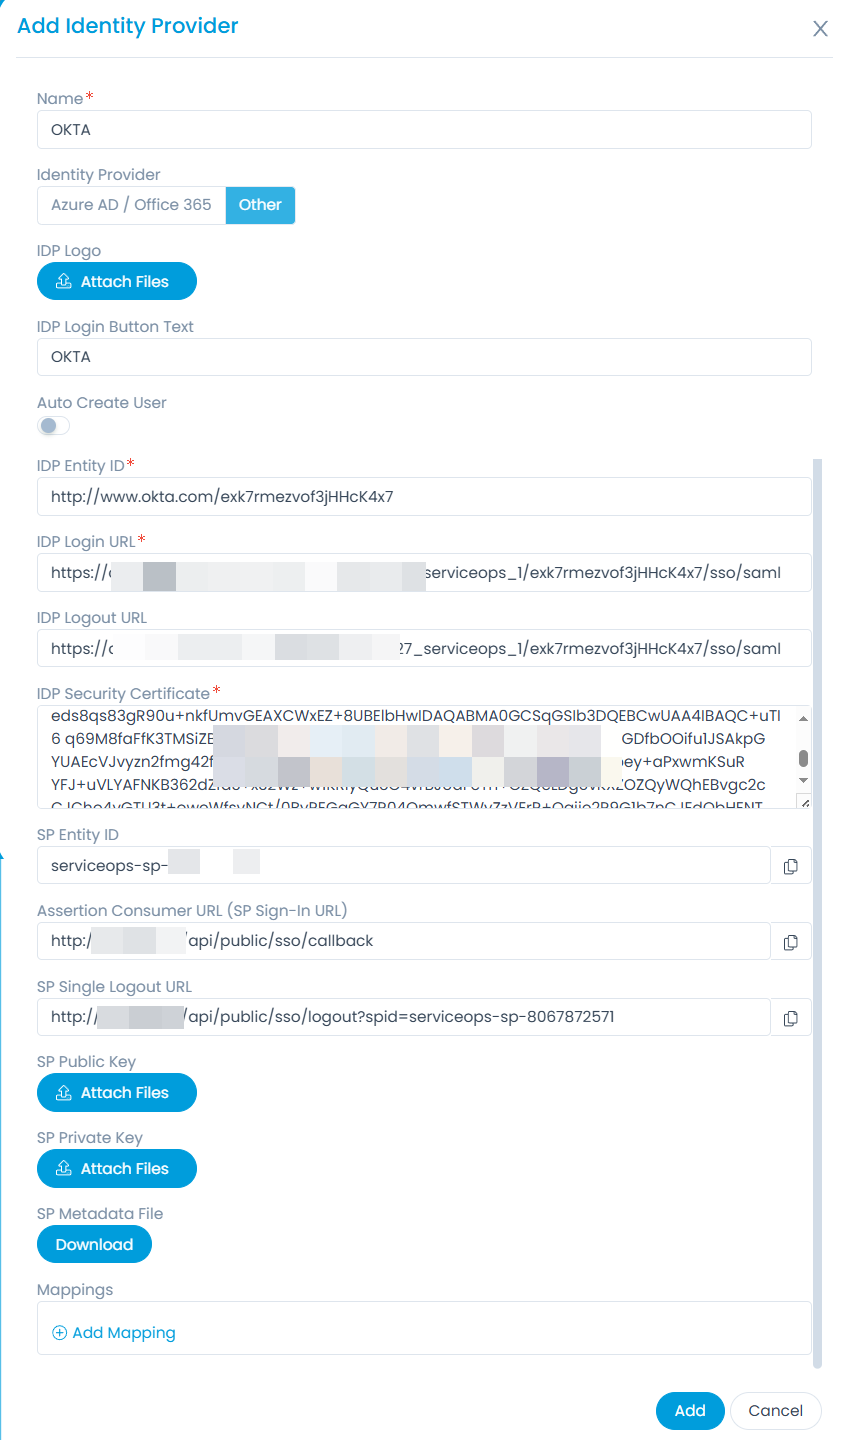
- Now, click the Add Identity Provider button and the below popup appears.

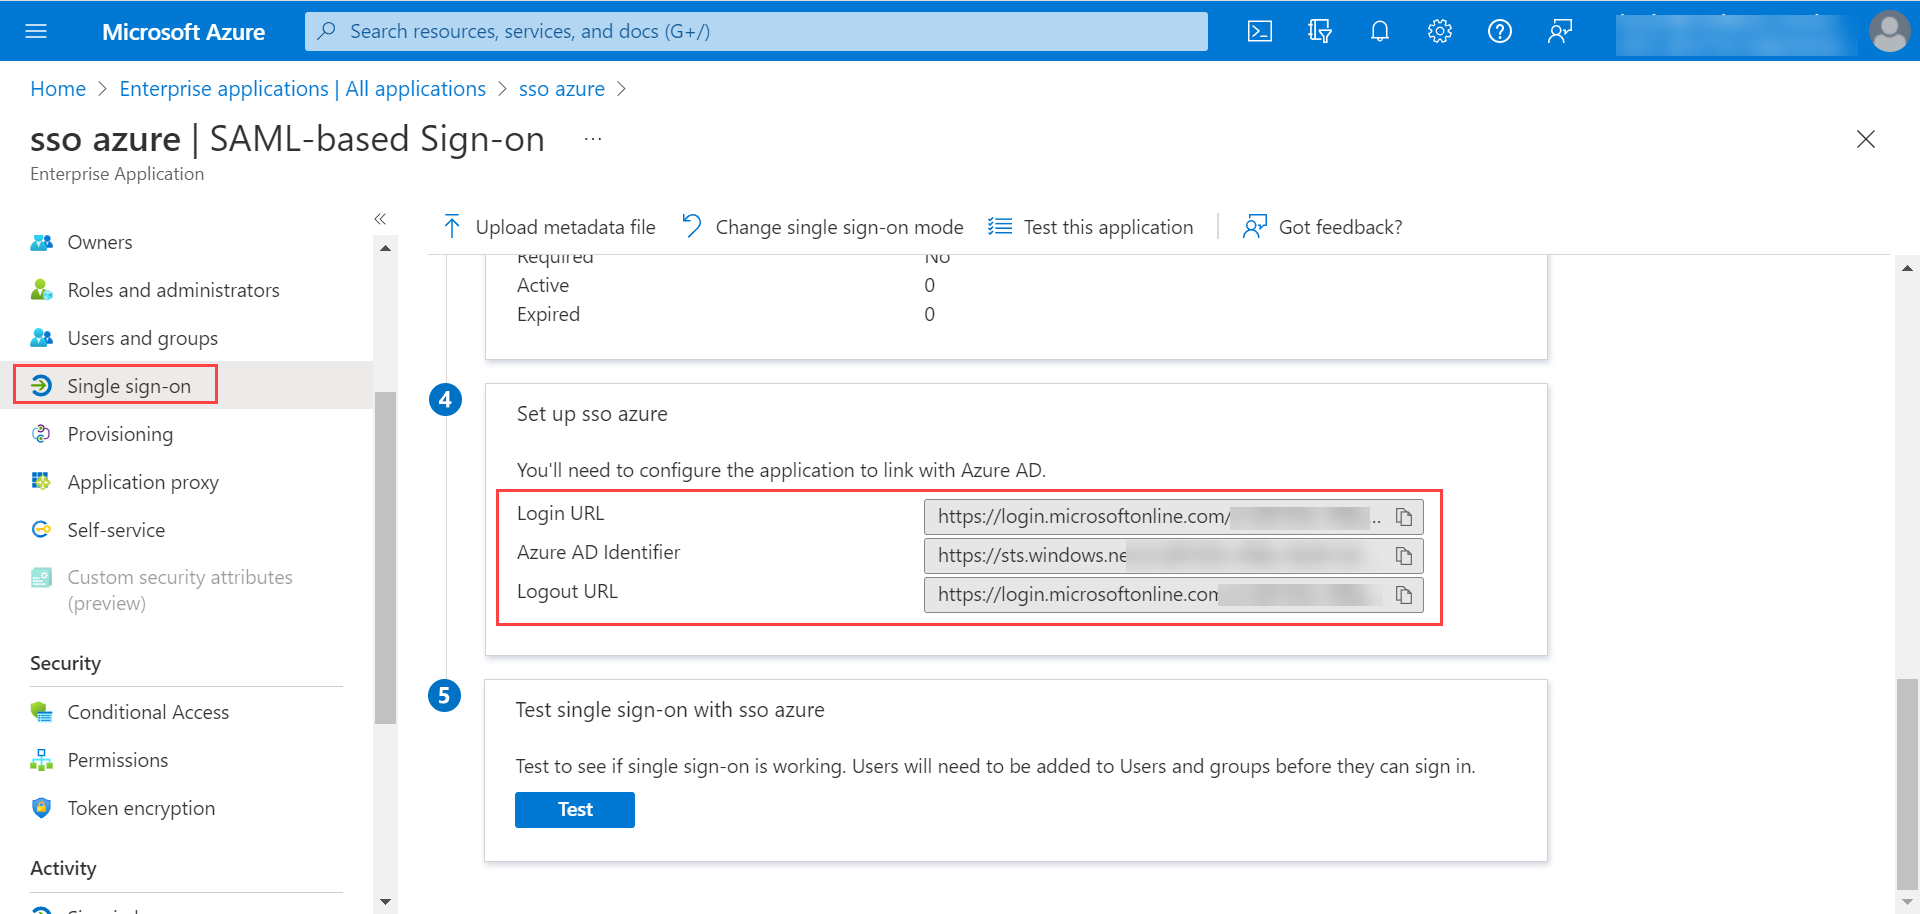
- Enter the following details. In this, the IDP details of the client portal are to be configured in the ServiceOps while the SP details in the client. Here, Azure AD is used as an example.
| Parameter | Description |
|---|---|
| Name | Enter the name of the identity provider. |
| Identity Provider | Select the Identity Provider as Azure AD/Office 365 or Other. If Other is selected, you can set the IDP Logo and IDP Login Button Text. Once configured, the respective login button will appear on the Login page. |
| Auto Create User | Enable if the user is to be created automatically, if not available in the system. By default, disabled. |
| IDP Entity ID | Enter the Entity ID of the IDP. It is a mandatory field. |
| IDP Login URL | Enter the login URL of the IDP on which the user will get redirected. It is a mandatory field. |
| IDP Logout URL | Enter the logout URL of the IDP on which the user will be redirected once signing-out from the ServiceOps portal. If not provided, the user will remain on the same page. This field is optional. |
| IDP Security Certificate | Enter the certificate that IDP provides for integration. The response sent by the IDP is validated using it. |

| SP Entity ID | It displays the entity ID of the Service Provider. |
| Assertion Consumer URL | It displays the endpoint of the ServiceOps application where the IDP posts the SAML responses. |
| SP Single Logout URL | It displays the URL to which the user gets redirected after sign-out. |
| SP Public Key | It is provided by the Service Provider. |
| SP Private Key | It is provided by the Service Provider. |
| SP Metadata File | Download the metadata file provided by the Service Provider. It contains all the details about the interaction of the Service Provider and the SAML enabled entity. |
- Once done, click Add, and it will appear on the list page as shown below. Similarly, you can add other providers also.

From here, you can search, enable/disable, edit, or delete the required provider.
note
If the Identity Provider is mapped with the user import configuration, then it cannot be deleted. To delete, first you need to either change the mapping or delete the user import.