Google Workspace
Overview
What is Single Sign-On (SSO)?
Single Sign-On (SSO) is an authentication method that enables users to securely authenticate with multiple applications and websites using just one set of credentials. Many protocols and standards are available when identifying and working with the SSO. These include: SAML, OAuth, OIDC, Kerberos, and Smart Card Authentication.
The feature applies to versions 8.5.4 and above.
Security Assertion Markup Language (SAML)
SAML is an open standard that encodes text into machine language and enables the exchange of identification information. It has become one of the core standards for SSO and is used to help application providers ensure their authentication requests are appropriate. In addition, SAML 2.0 is specifically optimized for use in web applications, enabling information to be transmitted through a web browser.
Motadata ServiceOps supports SAML-based SSO integration that includes the following services:
- Google Workspace
- JumpCloud
- OKTA
- Azure AD
- ADFS
- One-Login
- WSO2
- Keycloak
Here, the Identity and Service Provider plays a vital role as they are the central management system for authentication:
Identity Provider (IDP) – A centralized management system or repository responsible for authenticating the user and passing the details to the service provider.
Service Provider (SP) - The owner of the Applications whose services the user will use. It trusts IDP and uses it to authenticate.
SSO Flow
Initially, the user requests a SAML SSO to access the Service Provider's (SP) service. Next, the SP requests the IDP for authentication. Here, the IDP checks the user's existence and replies to the SP. Communication between the SP and IDP takes place using SAML data format.
Authentication Flow
- The Service Provider (SP) initiates the sign-in flow when the user tries to access or sign-in directly on the service provider's site. If the user has an inactive session with the SP, the user will get redirected to the IDP for authentication. Thus, the user will get redirected to the SP on successful login.
- The Identity Provider (IDP) initiates the sign-in flow when the user goes to the IDP and views a list of SPs he has to access. Thus, when choosing an SP from that list, the user will be redirected to that SP.
Prerequisites
- Google Workspace admin account
- Internet connectivity
- Valid SSL Certificate
SSO Configuration
To configure SSO, follow the below steps:
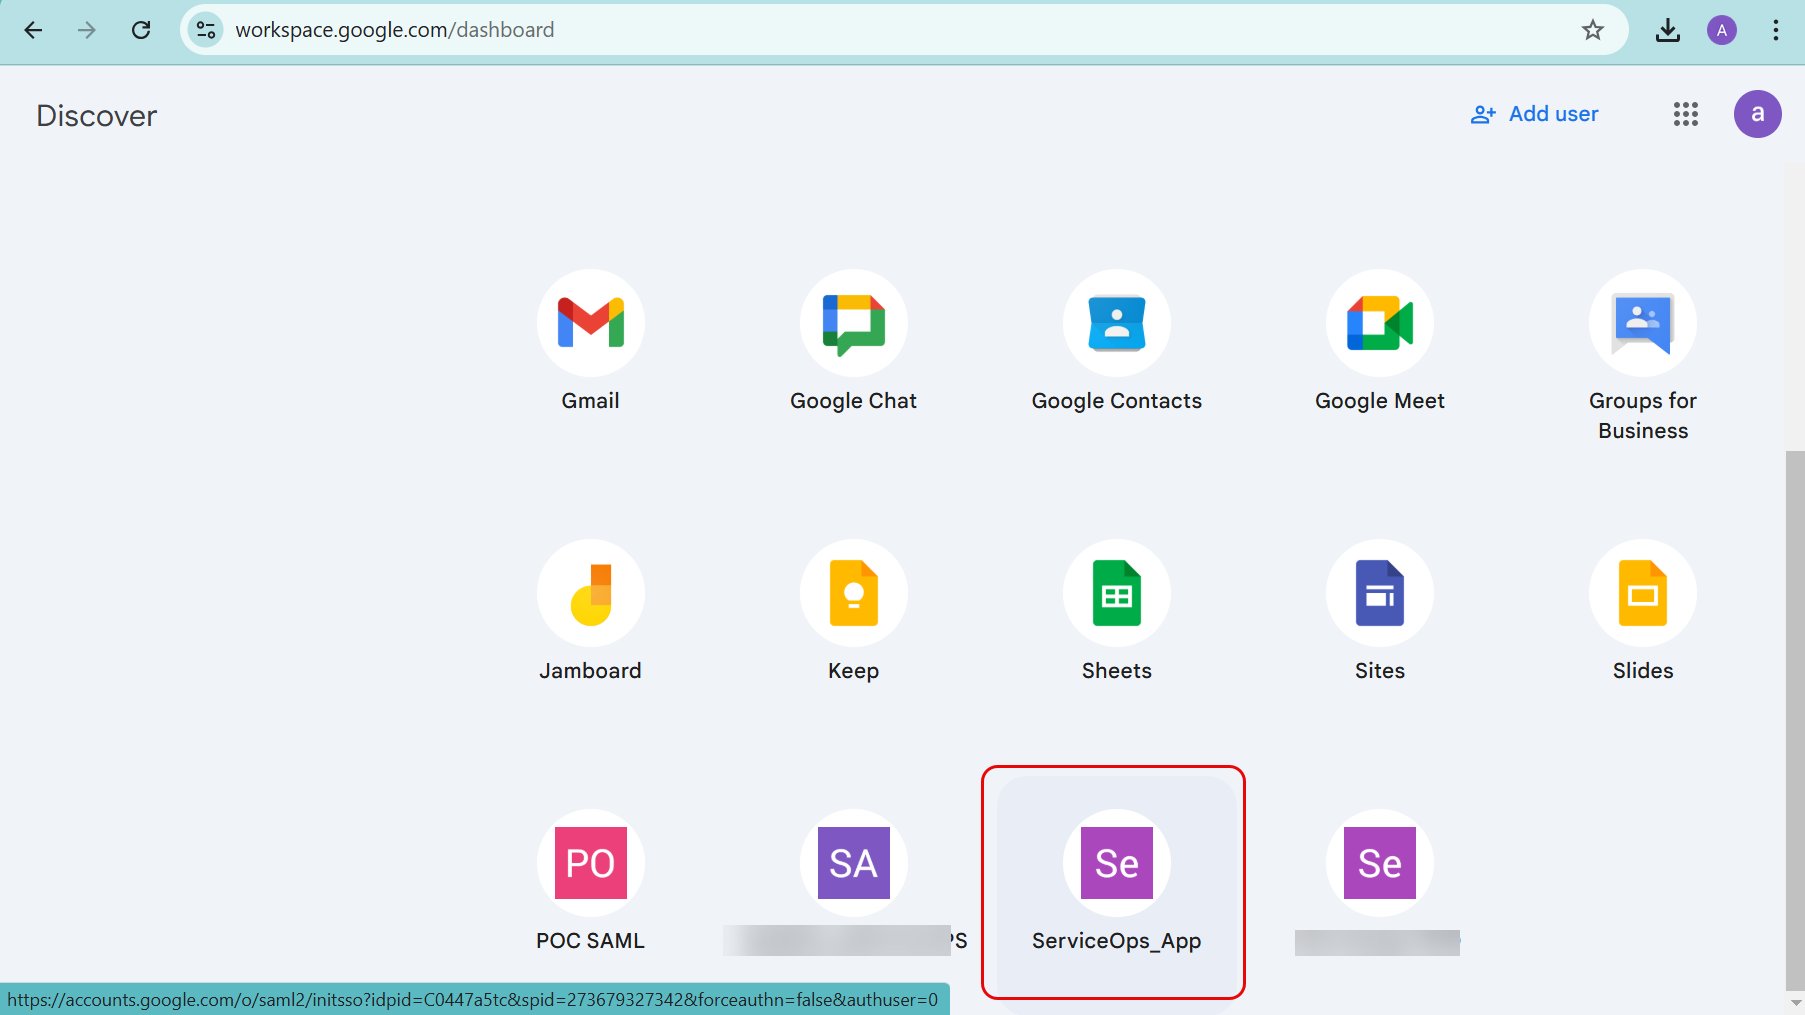
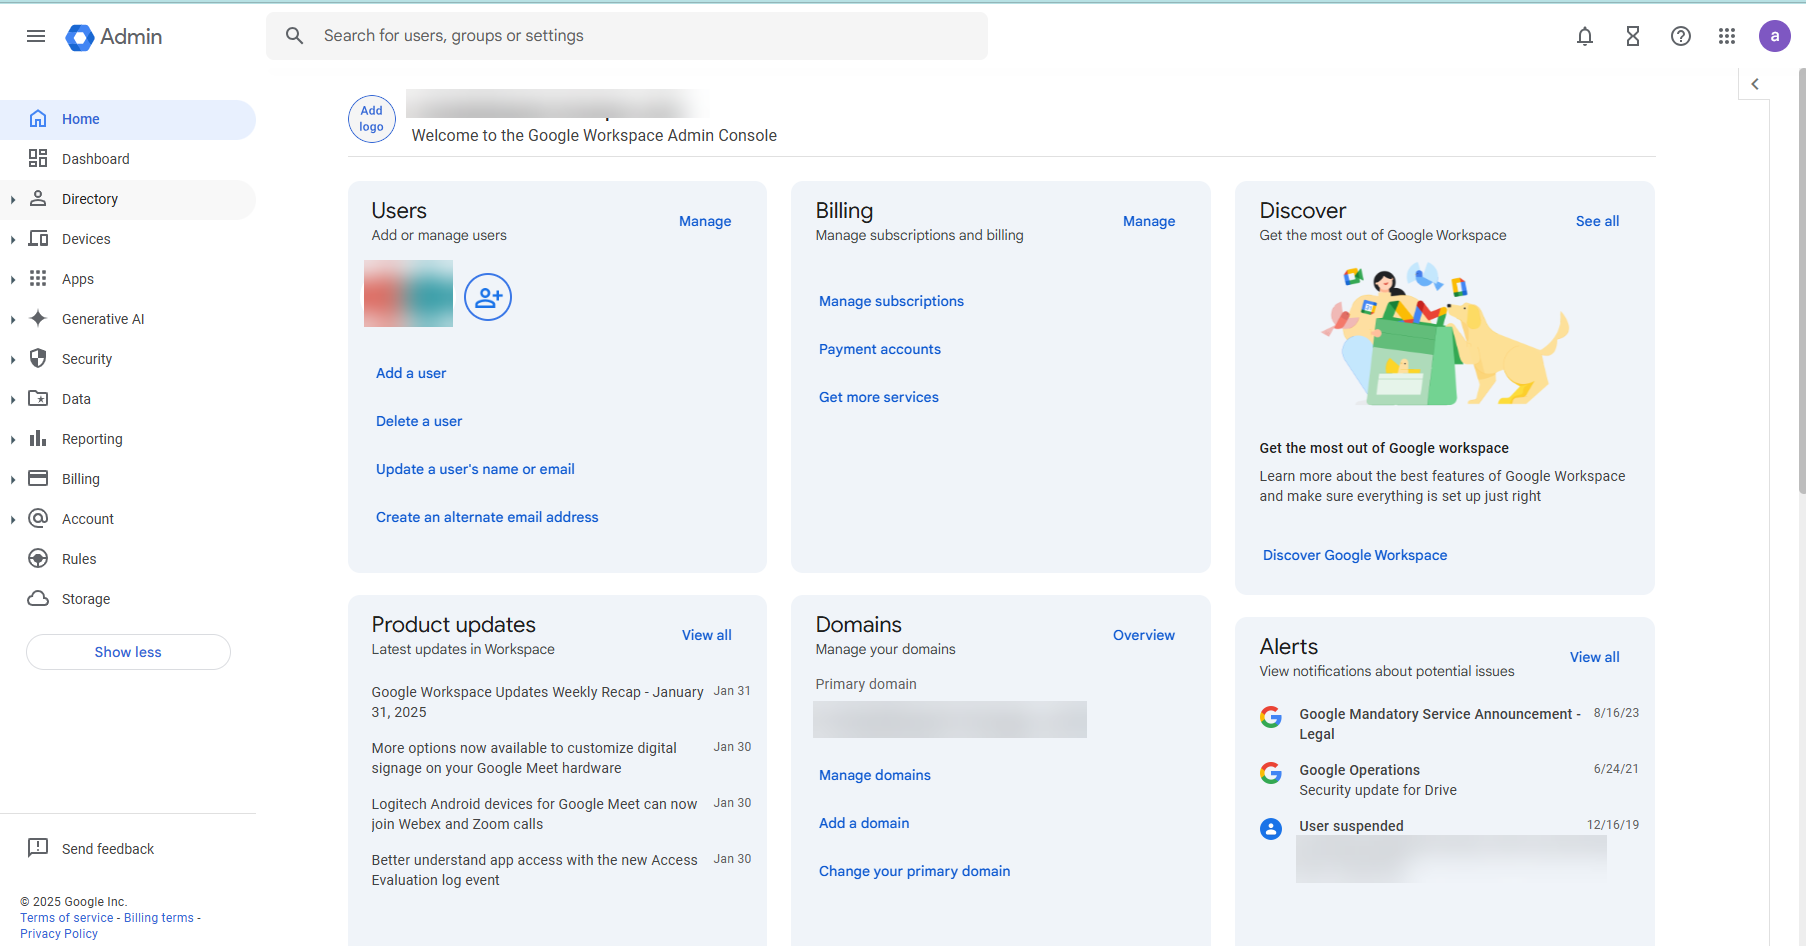
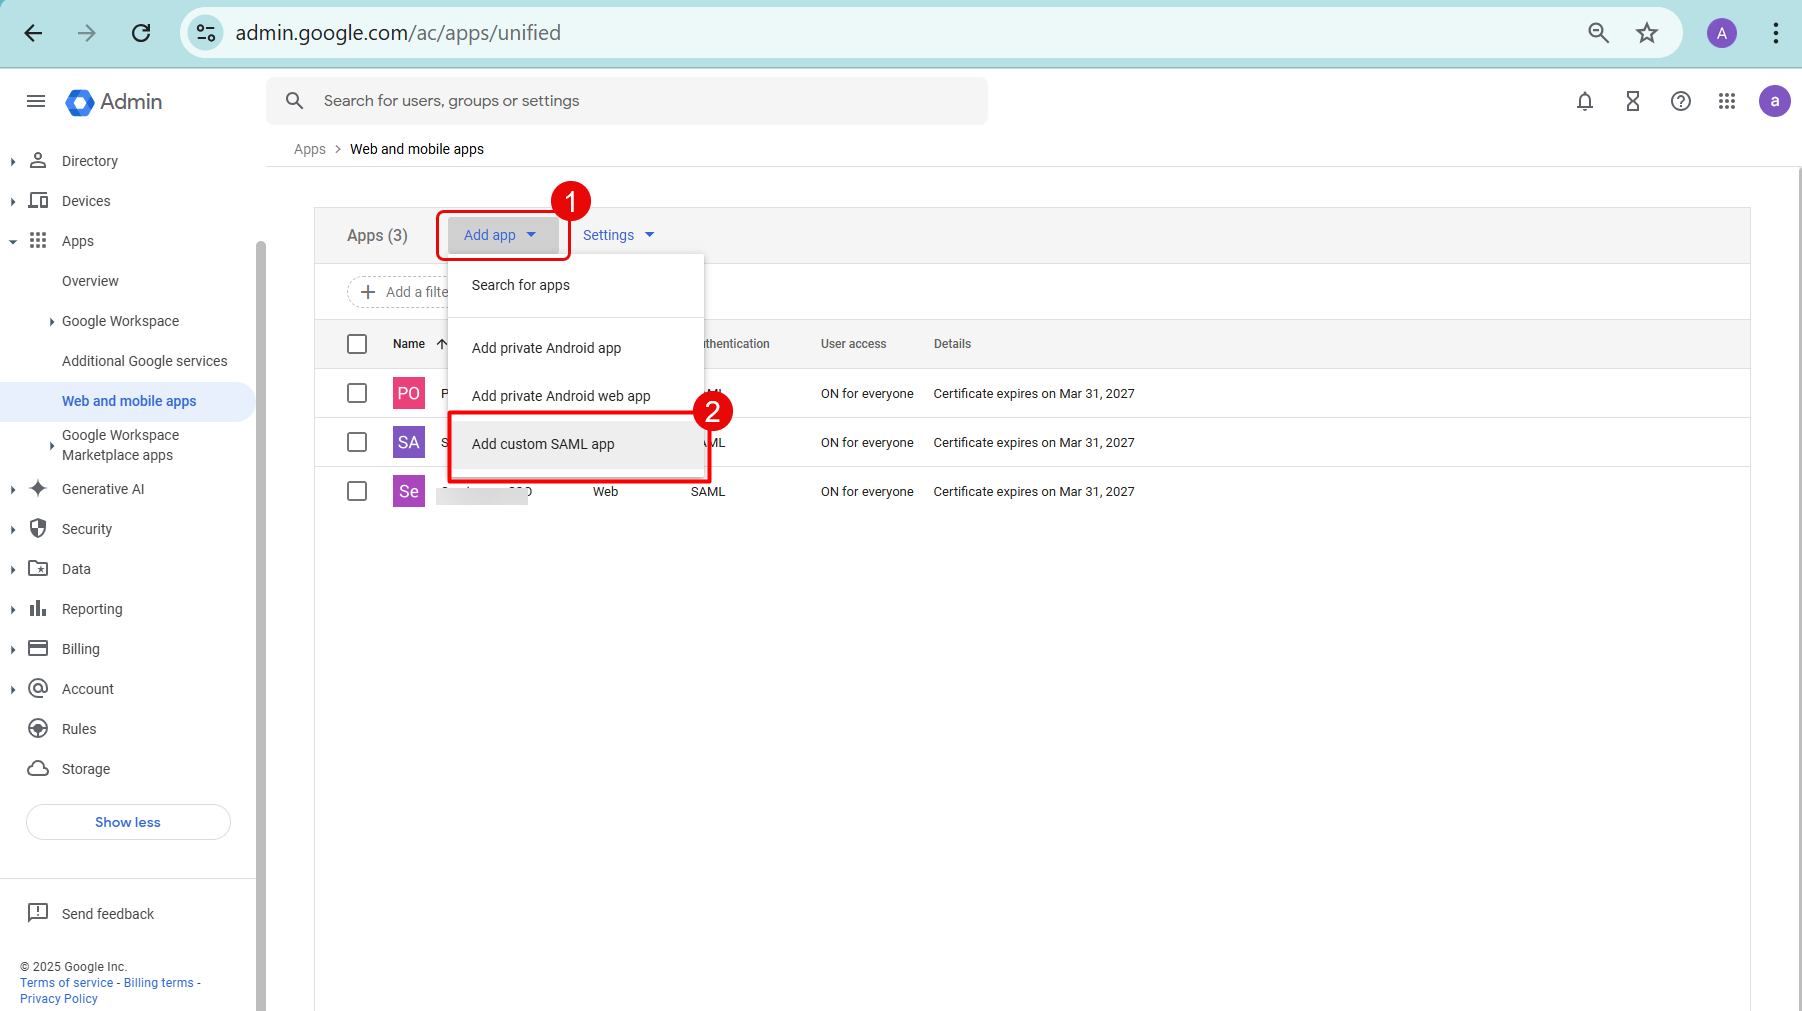
- Log in to the Google admin console using the http://admin.google.com URL. The following home page appears.
- From the left panel, select Apps > Web and mobile apps.
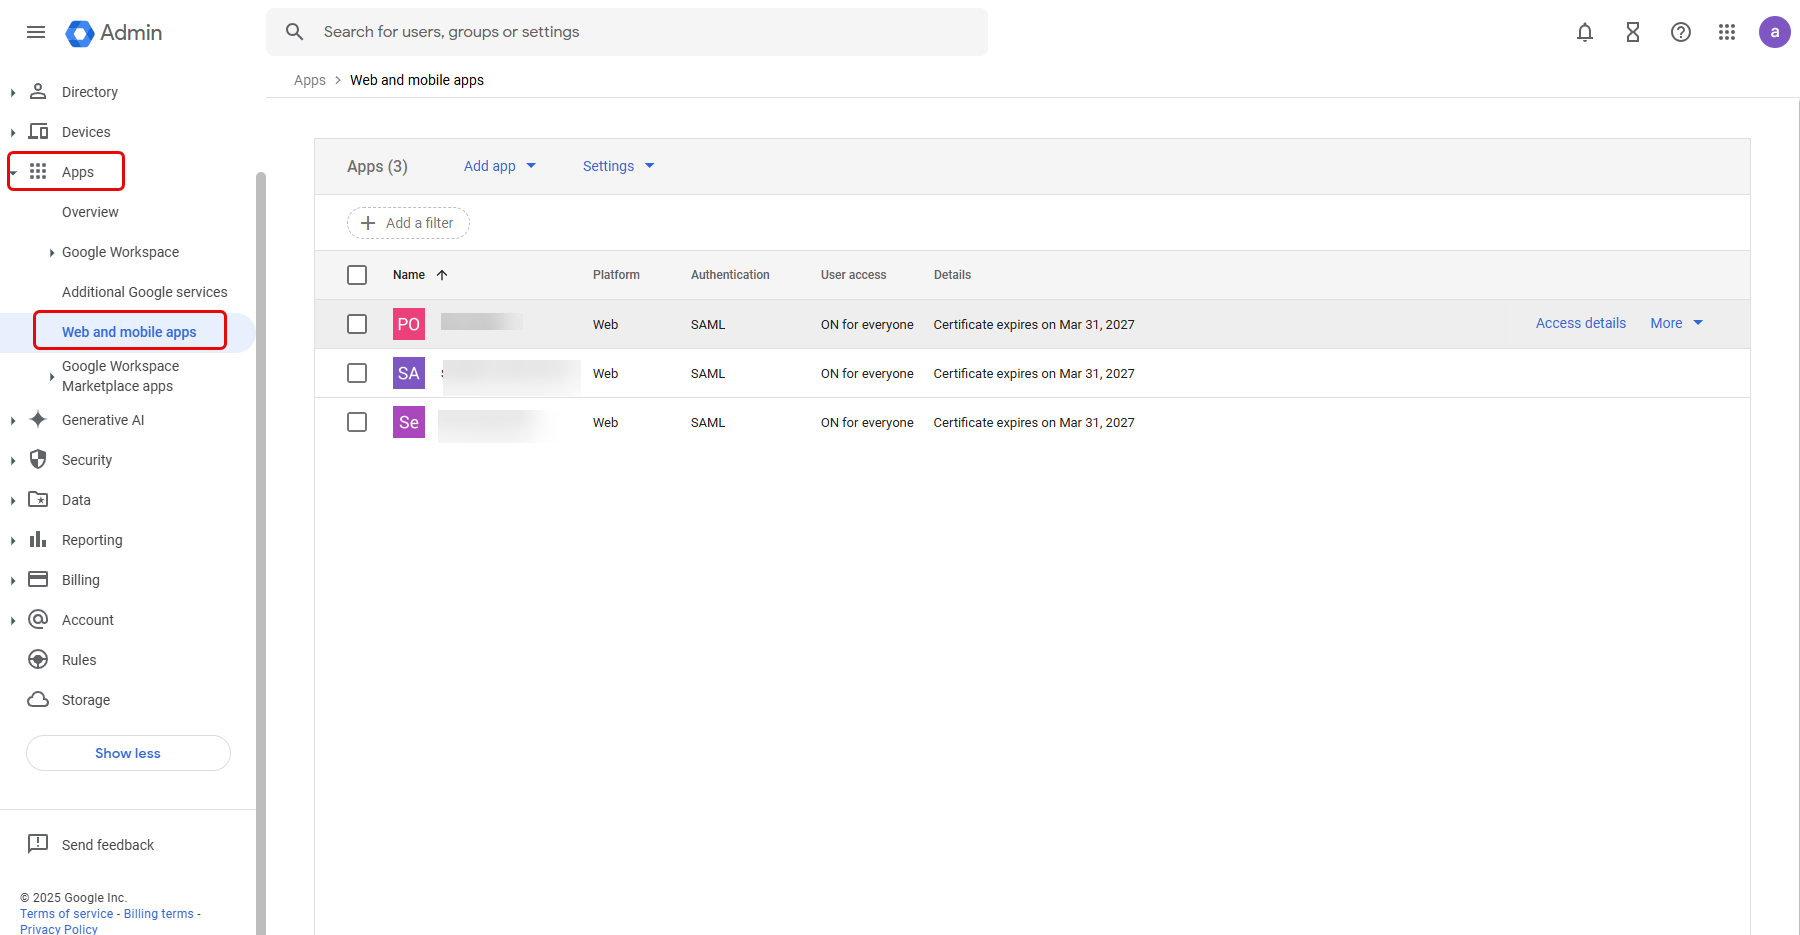
- Click the Add app dropdown and select the Add custom SAML app option.
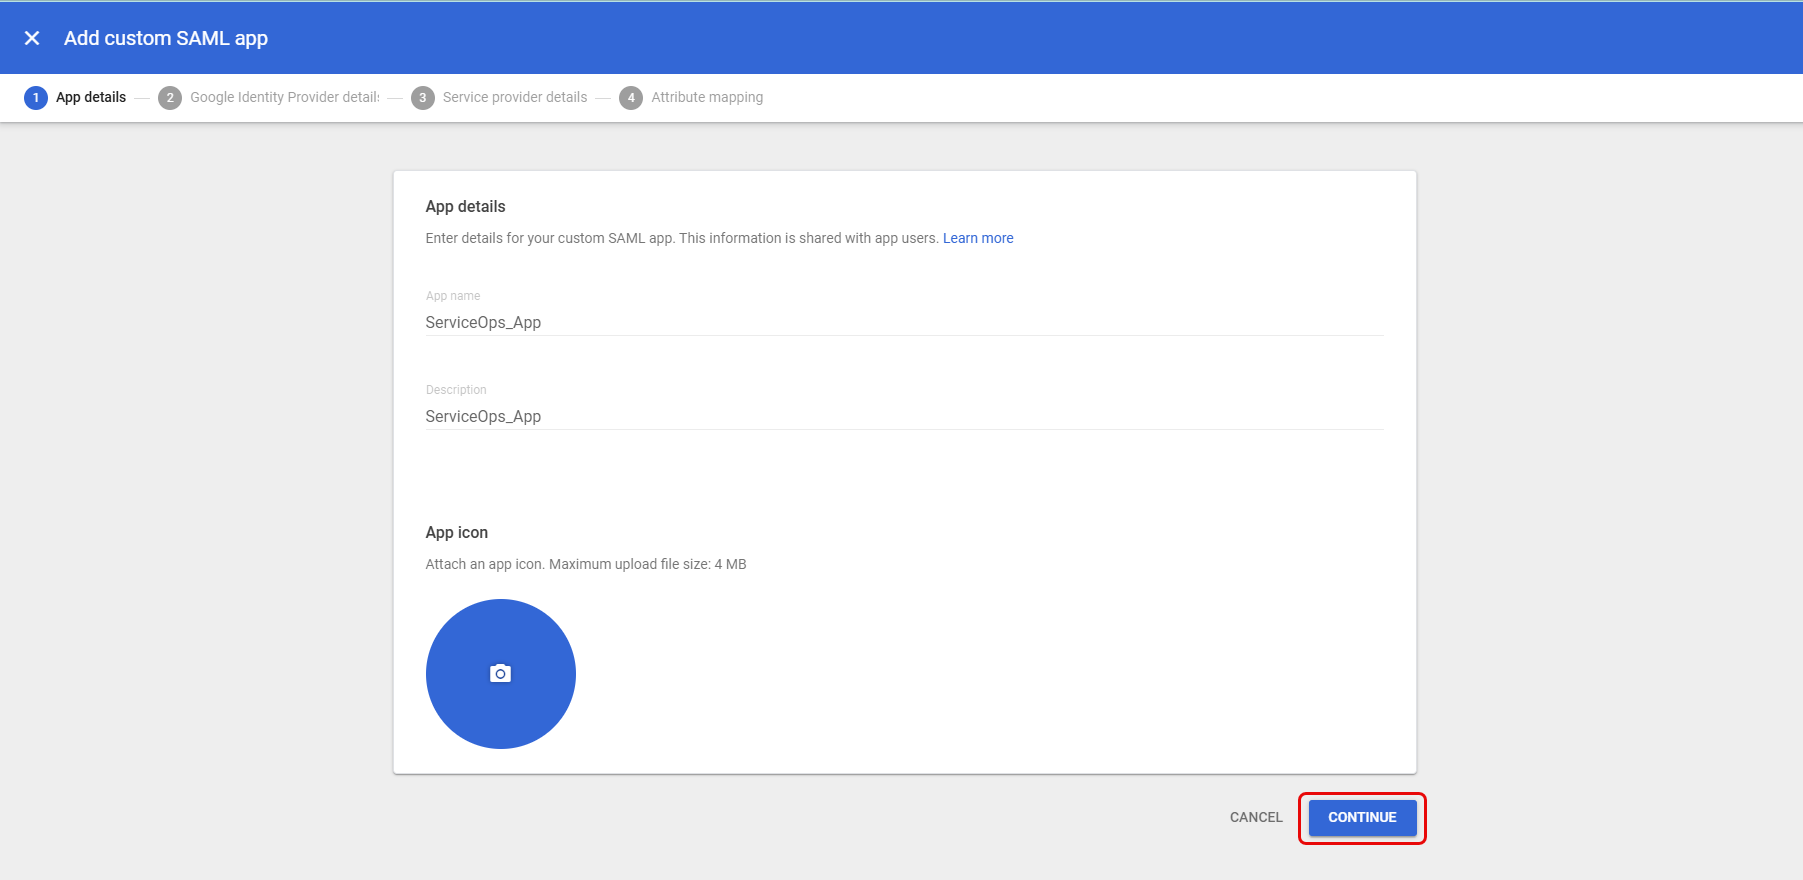
- On the App details page, provide the below details:
- App name: Enter the Application name.
- Description: Provide a brief description of the App. Once done, click Continue.
- The Google Identity Provider details page appears.
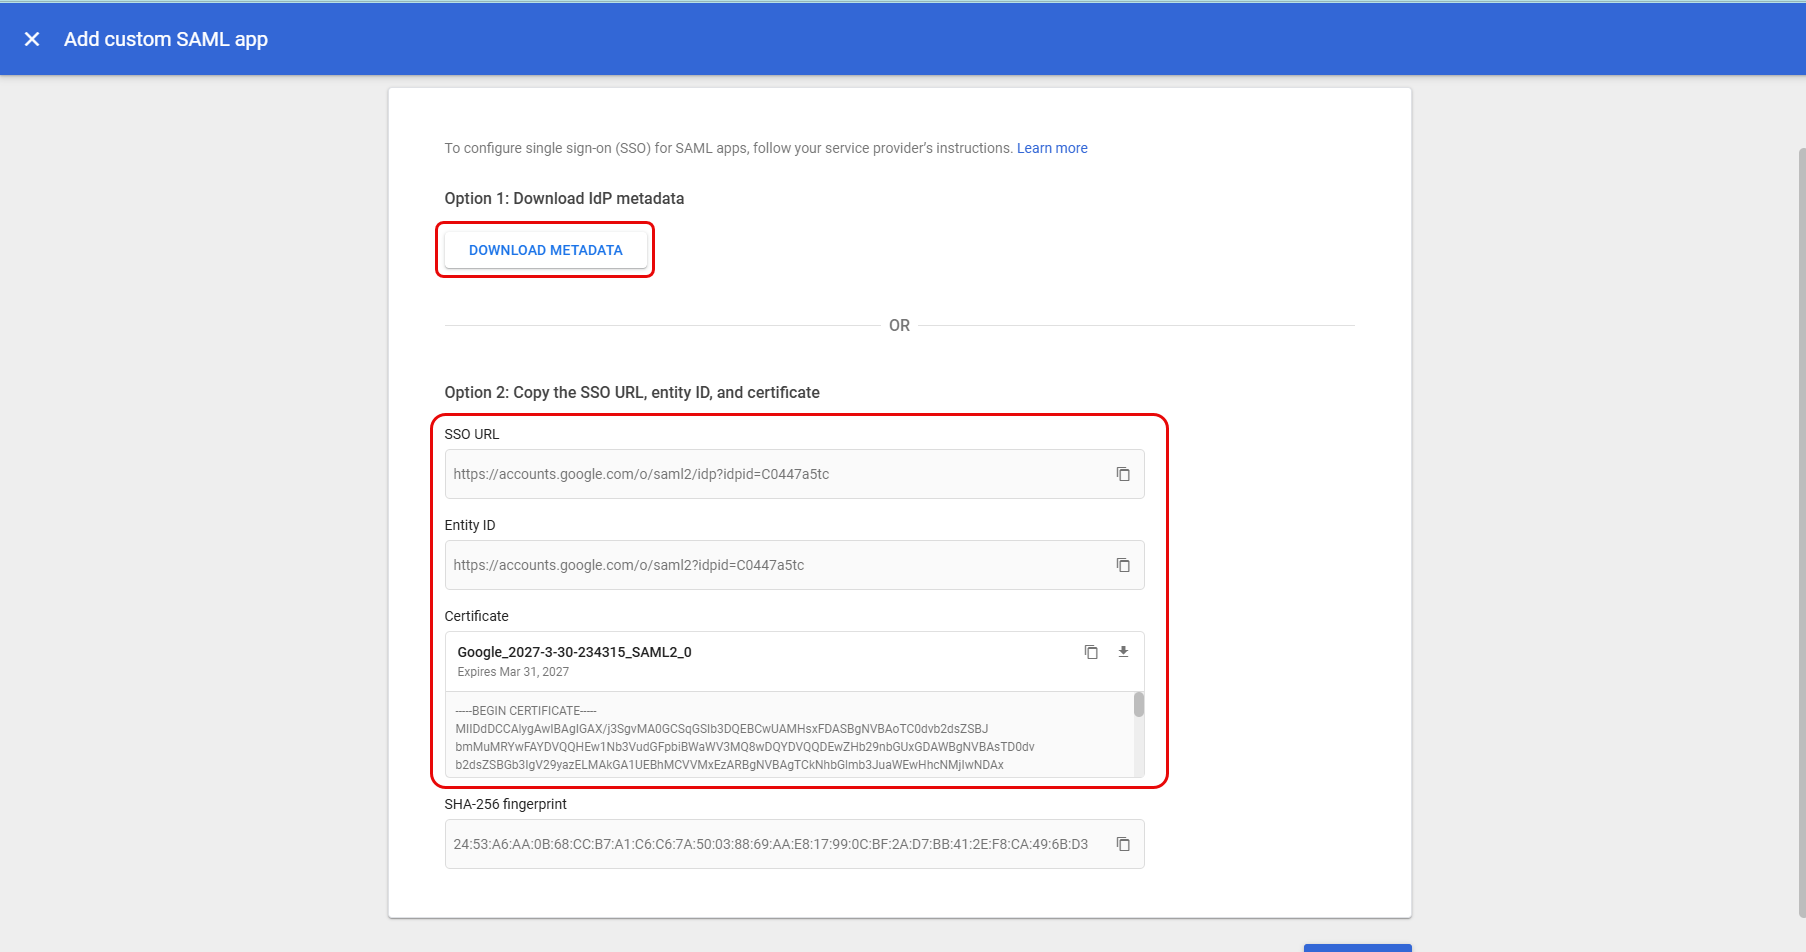
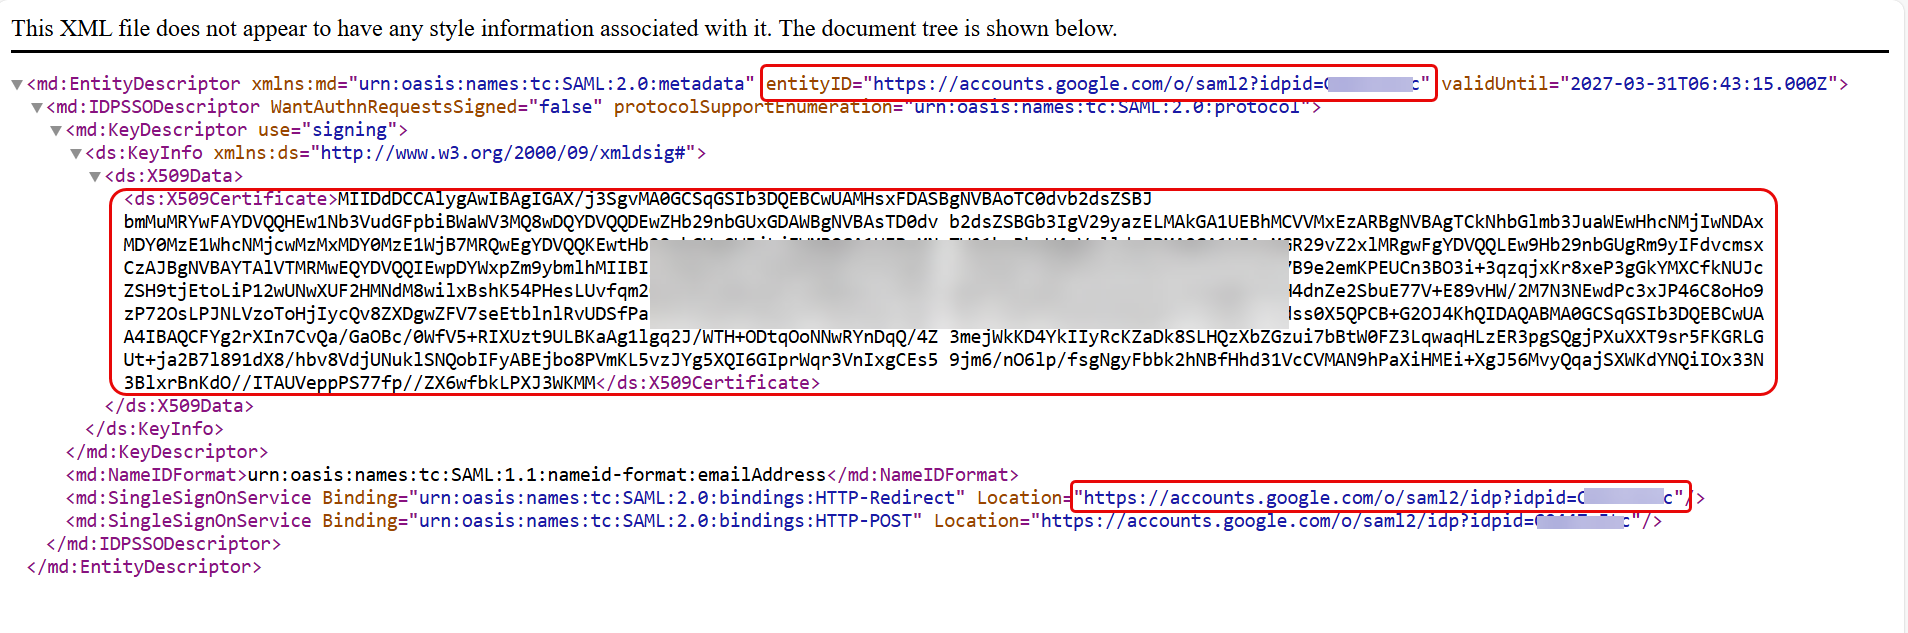
- Copy the SSO URL, Entity ID, and Certificate from here and paste them into the ServiceOps portal. You can also get the details by clicking the DOWNLOAD METADATA button and using the XML file.

- Click Continue, and the following Service provider details page will open.

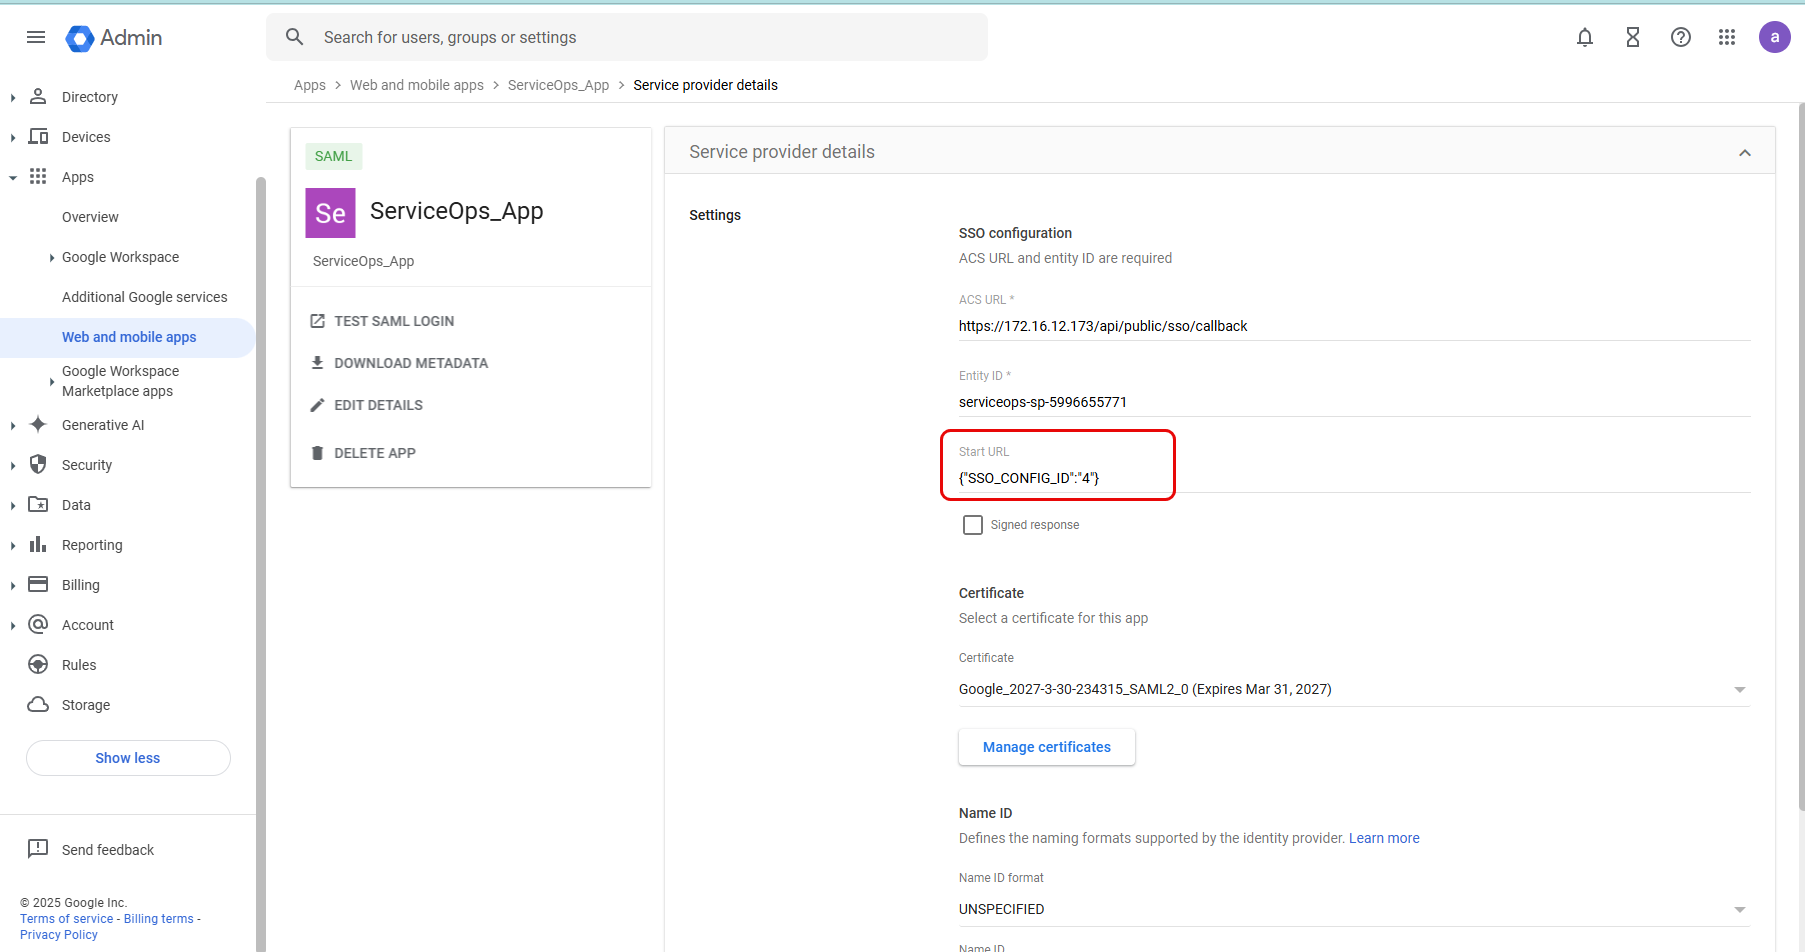
Enter the ACS URL and Entity ID copied from the ServiceOps portal, as shown below.
Google does not support a Single Logout URL (SLO). If needed, you can use https://accounts.google.com/logout, which will log you out of all active Google sessions.

- Click Continue, and the Attribute Mapping page will appear. If required, map the Google attributes with the ServiceOps app fields.


- Once done, click Save and Finish. The App will be created, and the following page will appear.
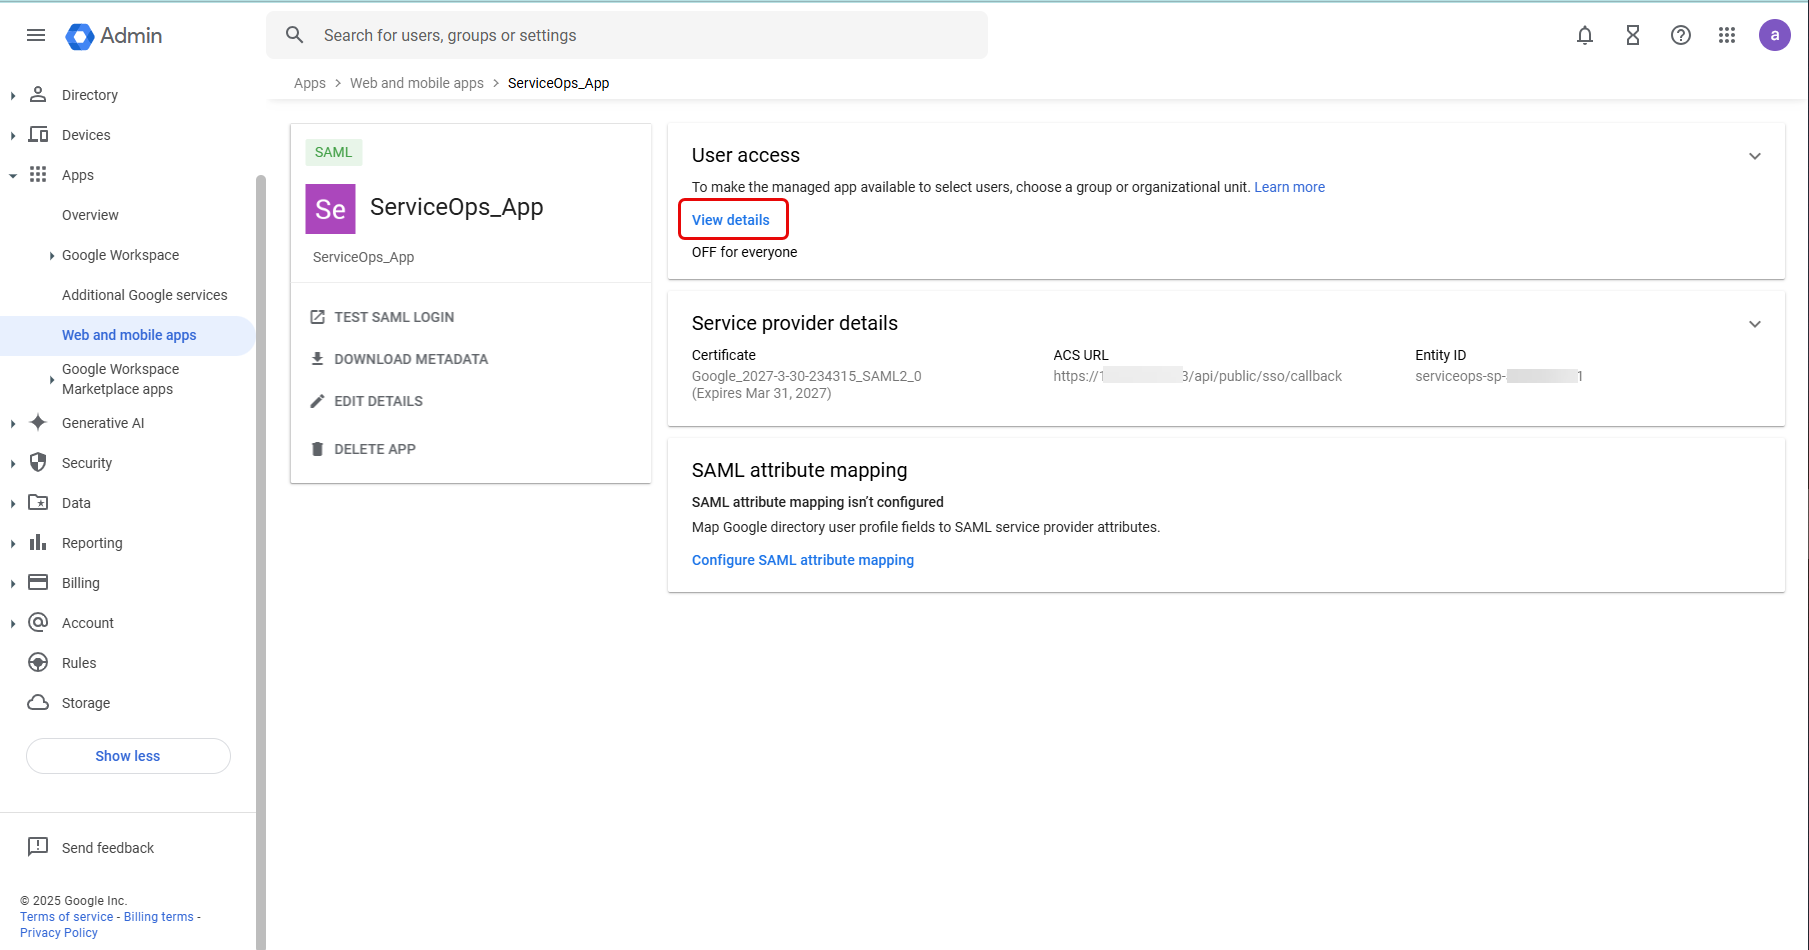
- In the User access section, click View details, and select the Service status as ON for everyone, as shown below.
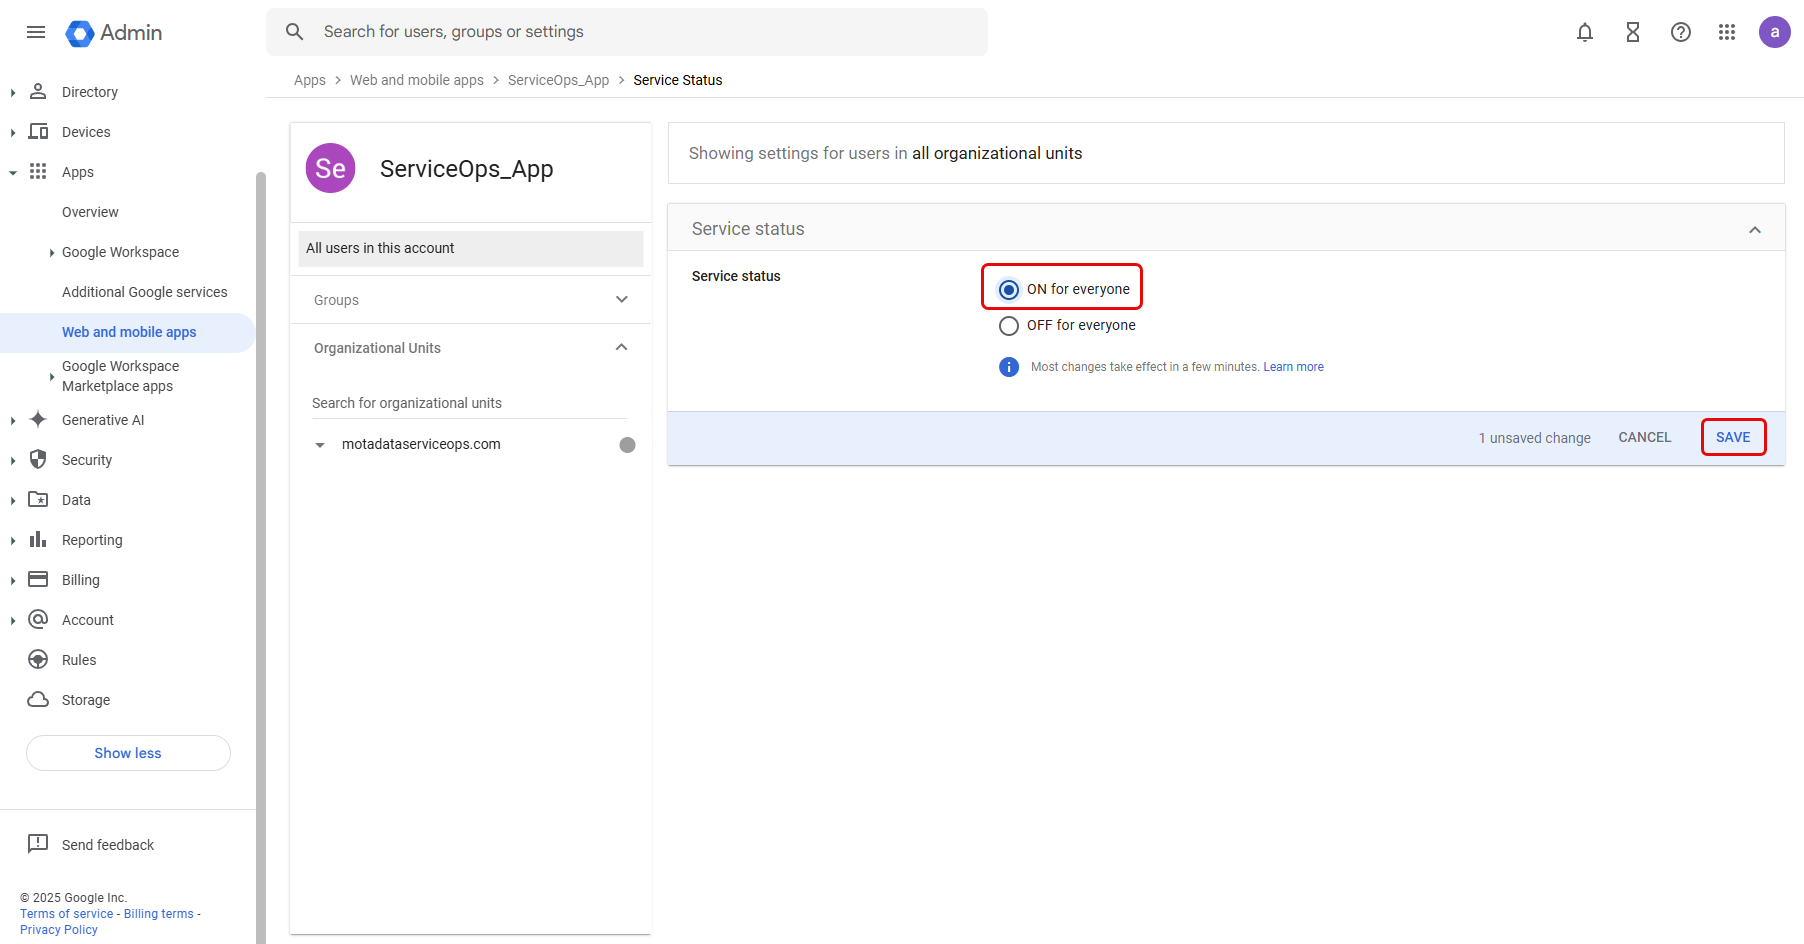
Once done, save the setting.
Now, in the ServiceOps portal, go to Admin > Users > SSO Configuration > Identity Providers page and click Add Identity Provider. Enter the details.
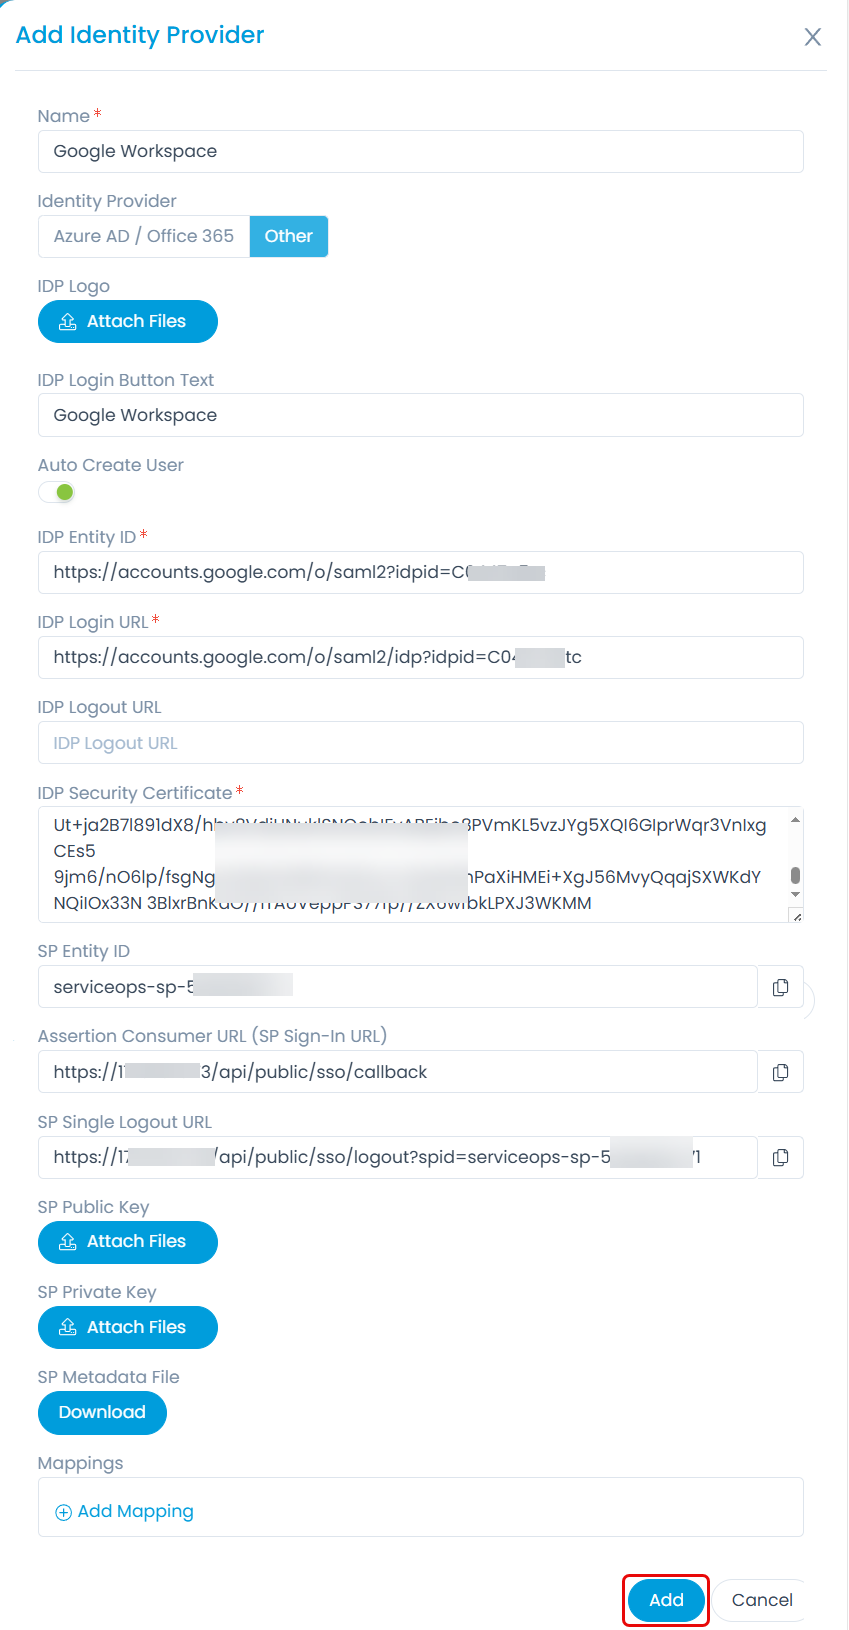
- Name: Enter the name of the identity provider.
- Identity Provider: Select Other.
- IDP Logo: Set the logo of Google Workspace.
- IDP Login Button Text: Enter the name of the IDP login button.
- Auto Create User: Activate the toggle button to create the user in ServiceOps automatically.
- IDP Entity ID: Enter the Entity ID copied from the Google Workspace app (Point 5).
- IDP Login URL: Paste the login URL from the Google Workspace app (Point 5).
- IDP Security Certificate: Paste the certificate from the Google Workspace app (Point 5).
- SP Entity ID: Copy and paste the entity ID into the Google Workspace app (Point 7).
- Assertion Consumer URL: Copy and paste the ACS URL into the Google Workspace app (Point 7).
- Click Add, and the IDP will appear on the list page. Once done, select the IDP, right-click, and select Inspect Element. Here, in the Network > Fetch/XHR > Response tab, view the ID of the IDP. Use this ID in the Start URL.
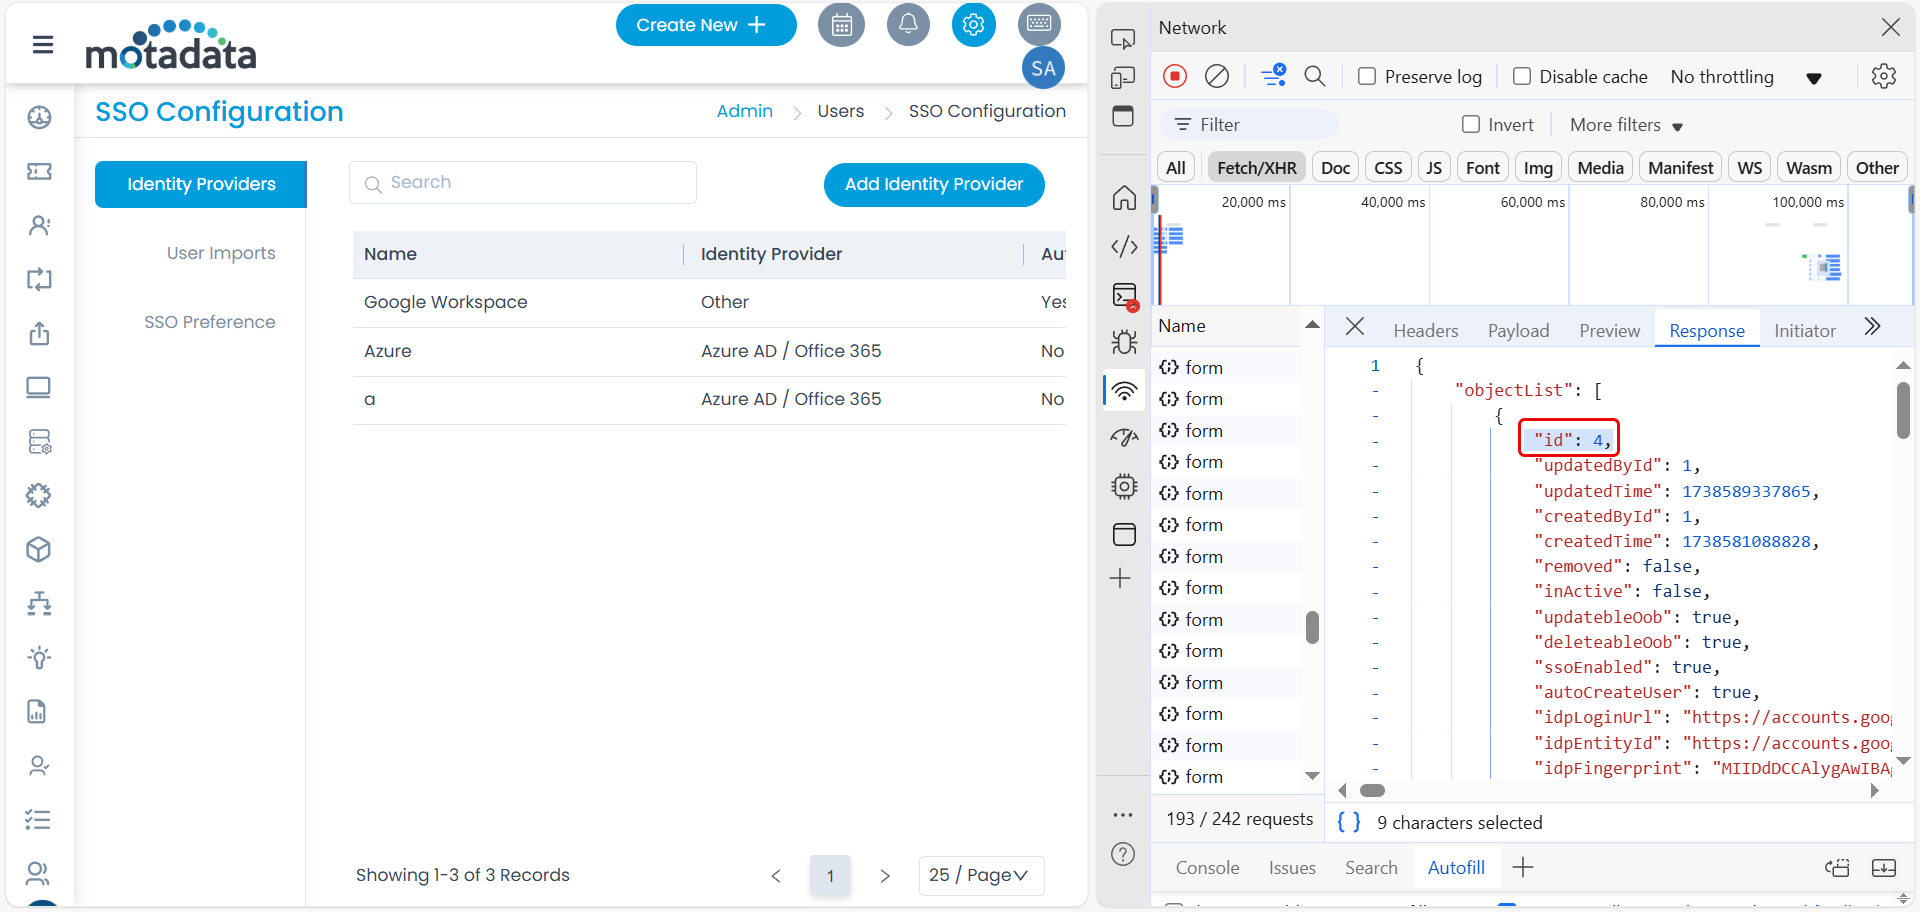
- In the Google Workspace, edit the created ServiceOps App, add the Start URL, and save. Syntax: {“SSO_CONFIG_ID”:”APP_ID”}
Example: {“SSO_CONFIG_ID”:”4”}
- The SSO is now configured.
After creating or updating a custom SAML app in Google Workspace, please allow 5-10 minutes for the changes to take effect.
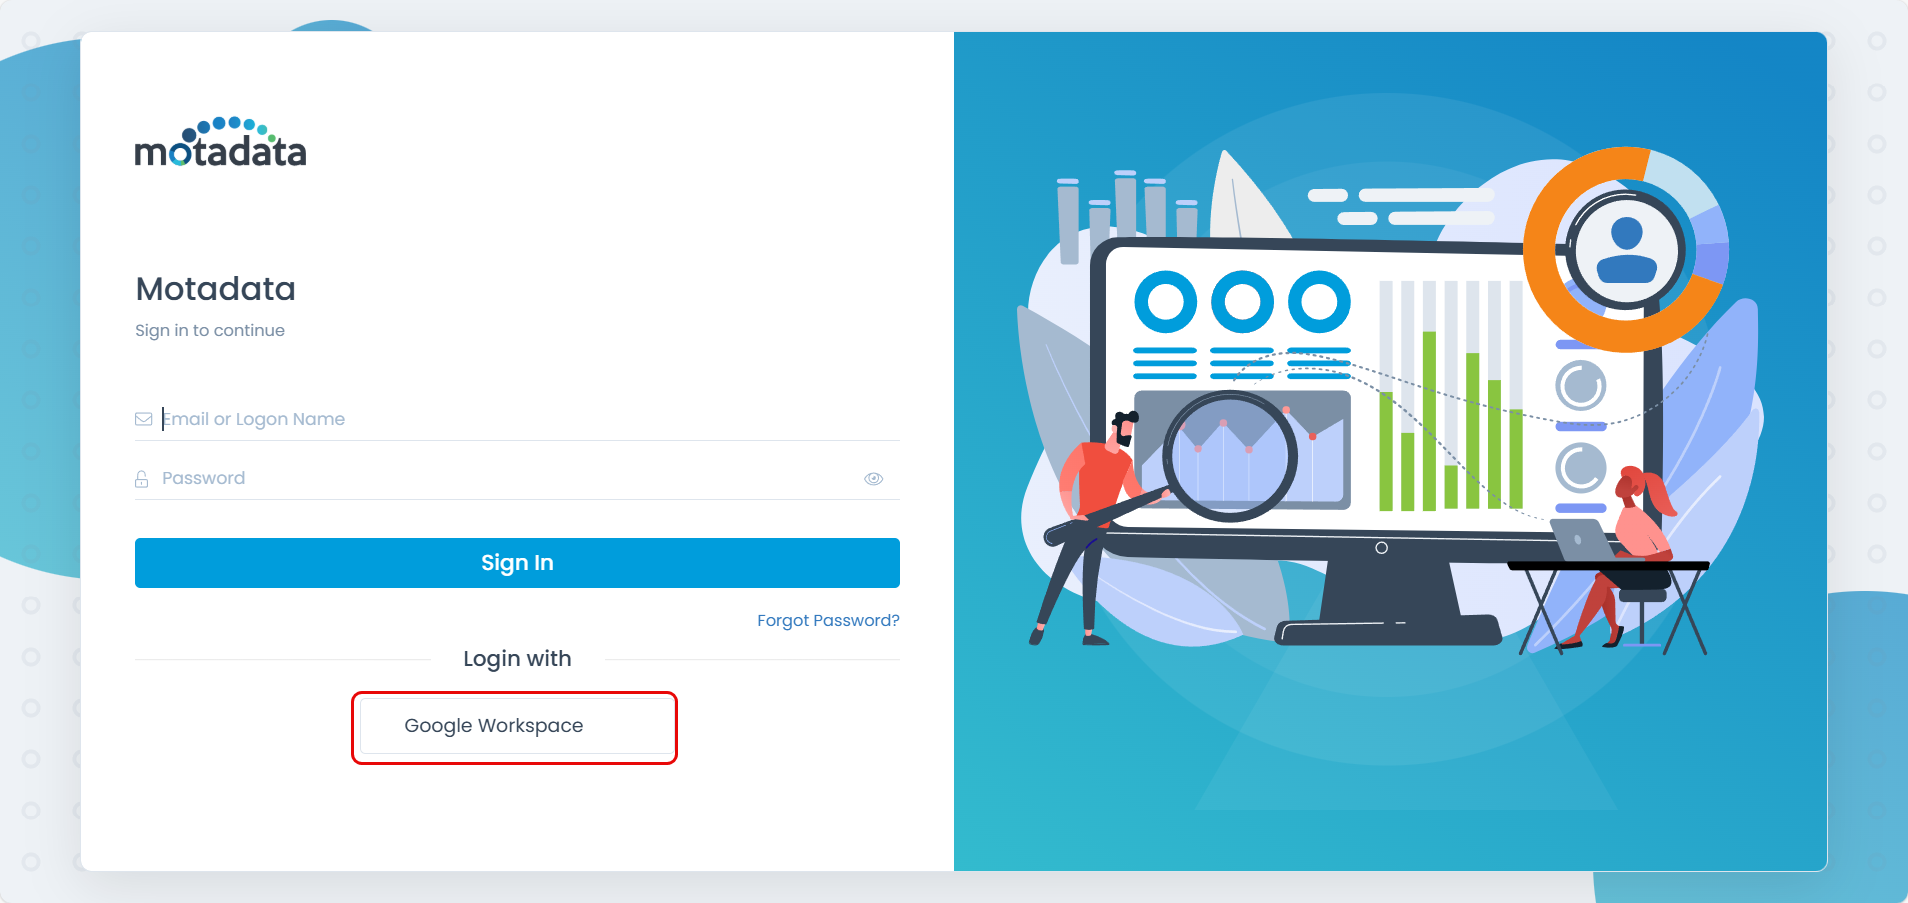
- Now, you can login to the ServiceOps portal either from the Google Workspace dashboard by clicking the App or from the ServiceOps login page using the Google Workspace login button.