One Login
ServiceOps offers support for SAML 2.0, which facilitates integration for Single Sign-On. ServiceOps acts as the Service Provider (SP) and it integrates with Identity Providers (IdP) using SAML 2.0. The integration basically involves supplying details about SP to IdP and vice-versa. Once you integrate ServiceOps with an IdP, the users simply have to sign-in to IdP and then, they can automatically sign-in to ServiceOps from the respective identity provider’s GUI without having to provide credentials again. ServiceOps supports integration with One Login.
To configure SSO with the One Login service, follow the below steps:
Step 1: Sign-in to the ServiceOps portal as a Technician.
Step 2: Navigate to Settings > Admin > Organization > System Preference > Application Settings tab. Verify that the Base URL is the same as the portal URL. If it has the default IP Address, update it.
Step 3: Navigate to Settings > Admin > Users > SSO Configuration > Identity Providers and click Add Identity Provider. The following popup appears.

Step 4: Provide the following details. In this, the IDP details of the One Login are to be configured in the ServiceOps while the SP details in One Login.
| Parameter | Description |
|---|---|
| Name | Enter the name of the identity provider. |
| Identity Provider | To set the OneLogin login button, select the Identity Provider as Other. If Other is selected, you can set the IDP Logo and IDP Login Button Text. Once configured, the respective login button will appear on the Login page. |
| Auto Create User | Enable if the user is to be created automatically, if not available in the system. By default, disabled. |
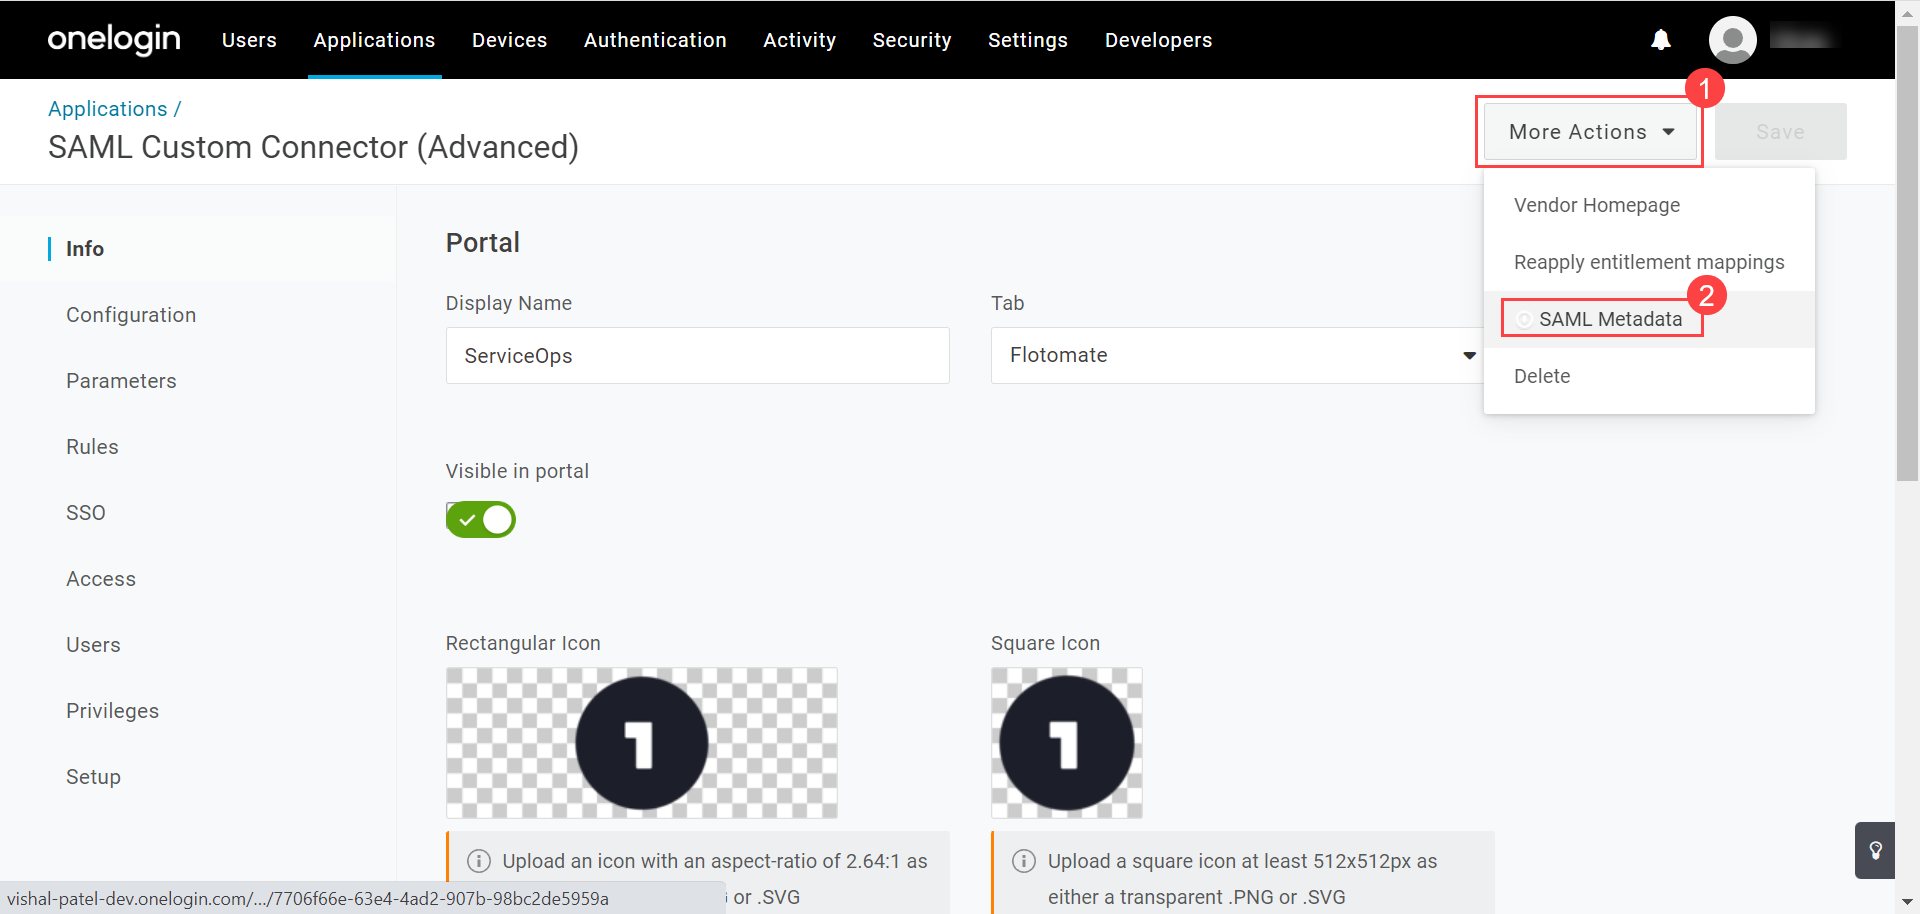
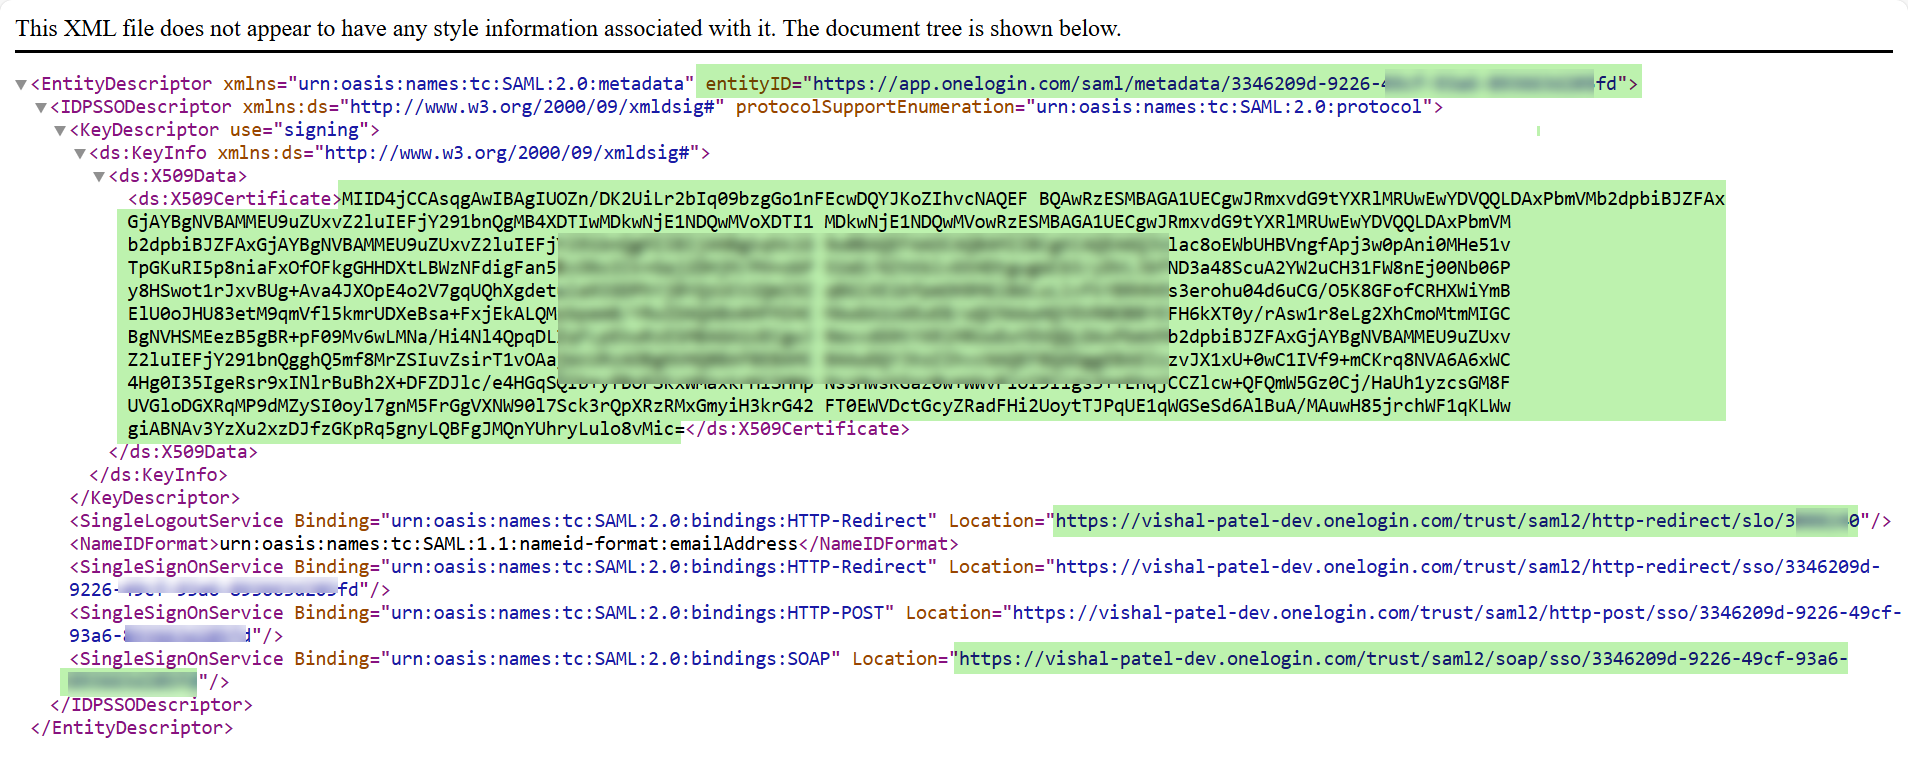
| IDP Entity ID | Enter the Entity ID (Issuer URL in the OneLogin Portal) of the IDP from the One Login portal. It is a mandatory field. You can get these details from One Login portal > Applications > SAML Custom Connector (Advanced) > SSO tab OR One Login portal > App details > More Actions > SAML Metadata file as shown in the figure below. |
| IDP Login URL | Enter the login URL (SAML 2.0 Endpoint (HTTP) in the OneLogin Portal) of the IDP on which the user will get redirected. It is a mandatory field. You can get this from the Okta portal. |
| IDP Logout URL | Enter the logout URL (SLO Endpoint (HTTP) in the OneLogin Portal) of the IDP on which the user will be redirected once signing-out from the ServiceOps portal. If not provided, the user will remain on the same page. This field is optional. |
| IDP Security Certificate | Enter the certificate that IDP provides for integration. The response sent by the IDP is validated using it. |

OR
SAML Metadata File
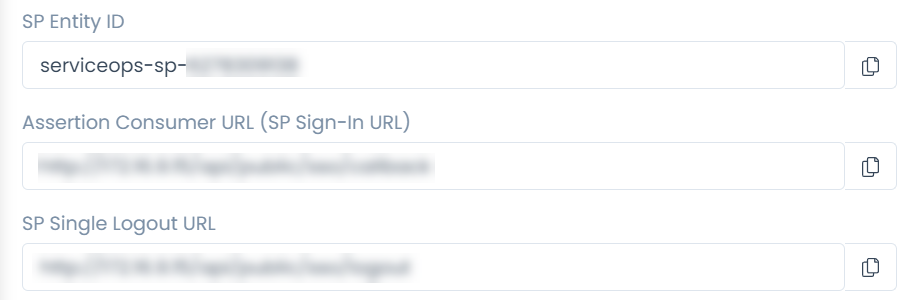
| SP Entity ID | It displays the entity ID of the Service Provider. You have to configure this in the One Login portal. |
| Assertion Consumer URL | It displays the endpoint of the ServiceOps application where the IDP posts the SAML responses. You have to configure this in the One Login portal. |
| SP Single Logout URL | It displays the URL to which the user gets redirected after sign-out. You have to configure this in the One Login portal. |
| SP Public Key | It is provided by the Service Provider. |
| SP Private Key | It is provided by the Service Provider. |
| Mappings | Map additional fields required for more details. Using this, whenever the values of the mapped fields are changed in the respective provider, they will automatically get updated in ServiceOps. Note: Field Mapping is unsupported for Multi-Select Drop Down, Checkbox, Date Field, and Dependent (Custom Type) field types. |
Step 5: Click Add, and the provider will be displayed on the list page.
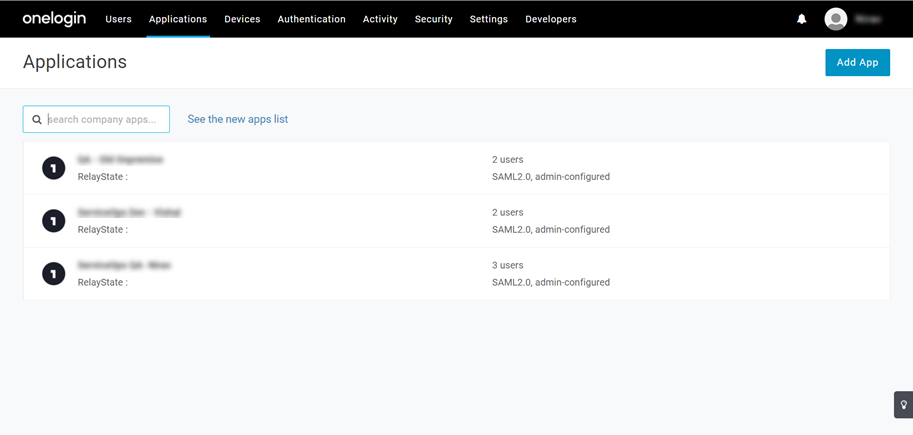
Step 6: In One Login, navigate to Administration > Applications > Applications tab, and the following page appears. The page displays a list of applications already created. You can also create a new one using the Add App option if required.
Step 7: Select the required application and its details will appear.
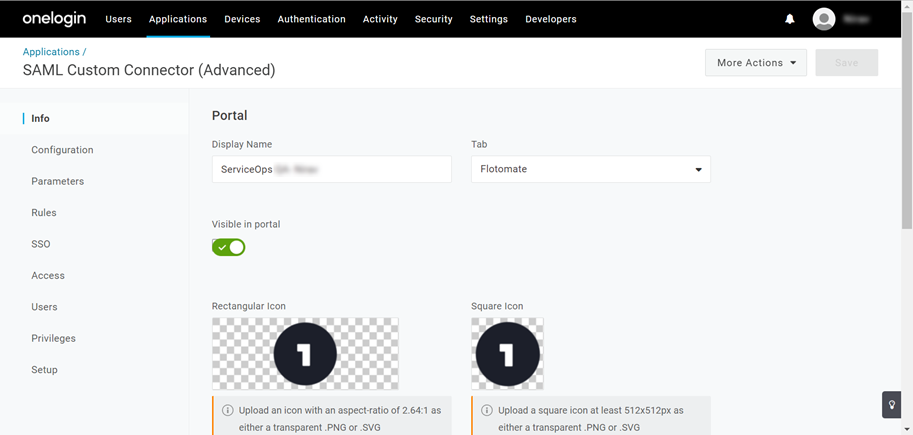
Step 8: Navigate to the Configuration tab, as shown below.
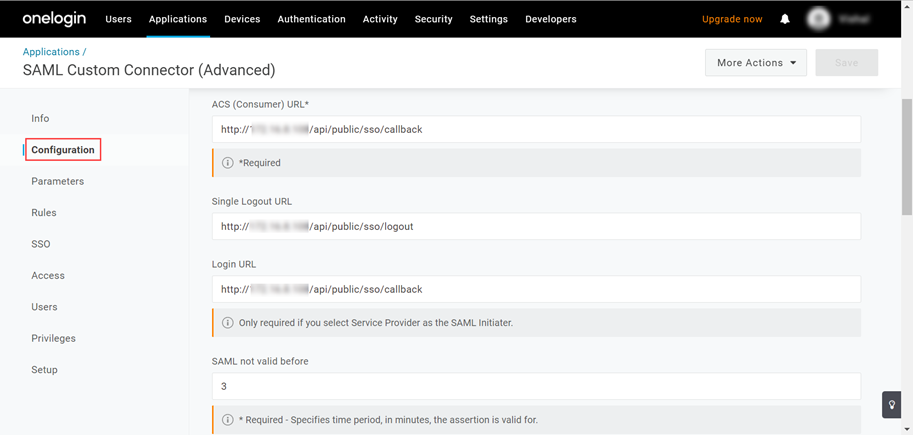
Configure the following details:
- ACS (Consumer) URL
- Single Logout URL
- Login URL
You can access these details from ServiceOps Home page > Admin > Users > SSO Configuration page.
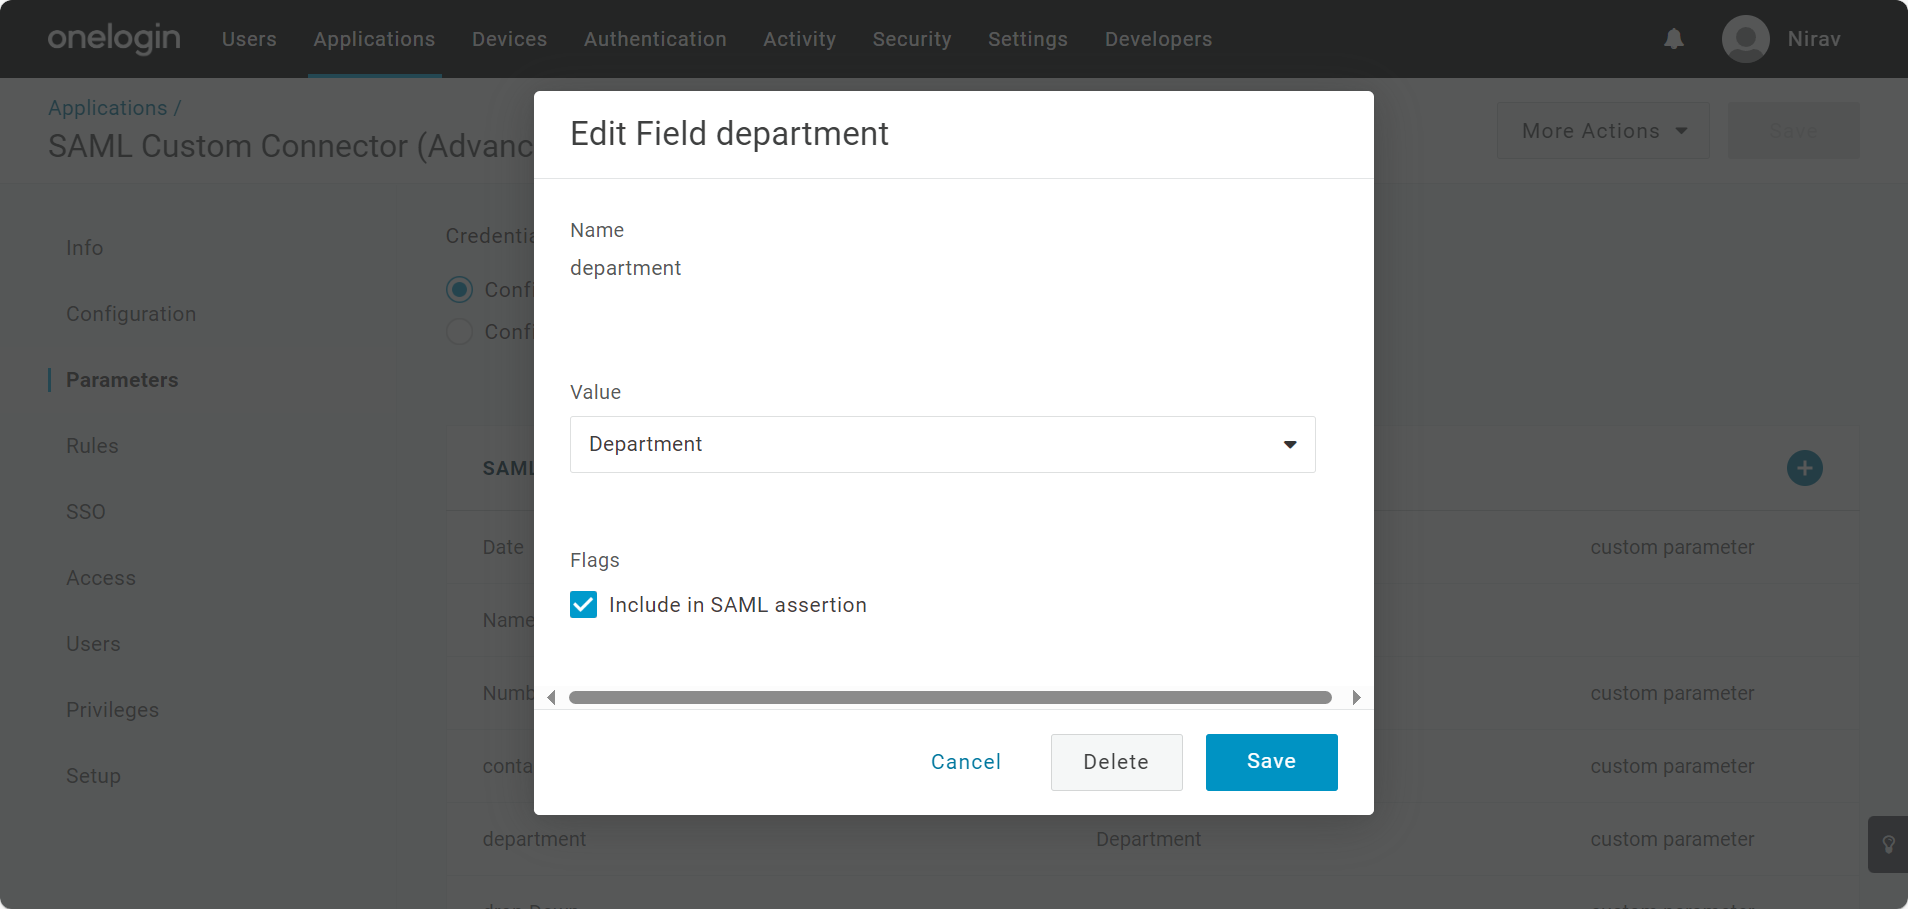
Step 9: Navigate to the Parameters tab and add the fields to be mapped with the fields of ServiceOps using the Plus icon.
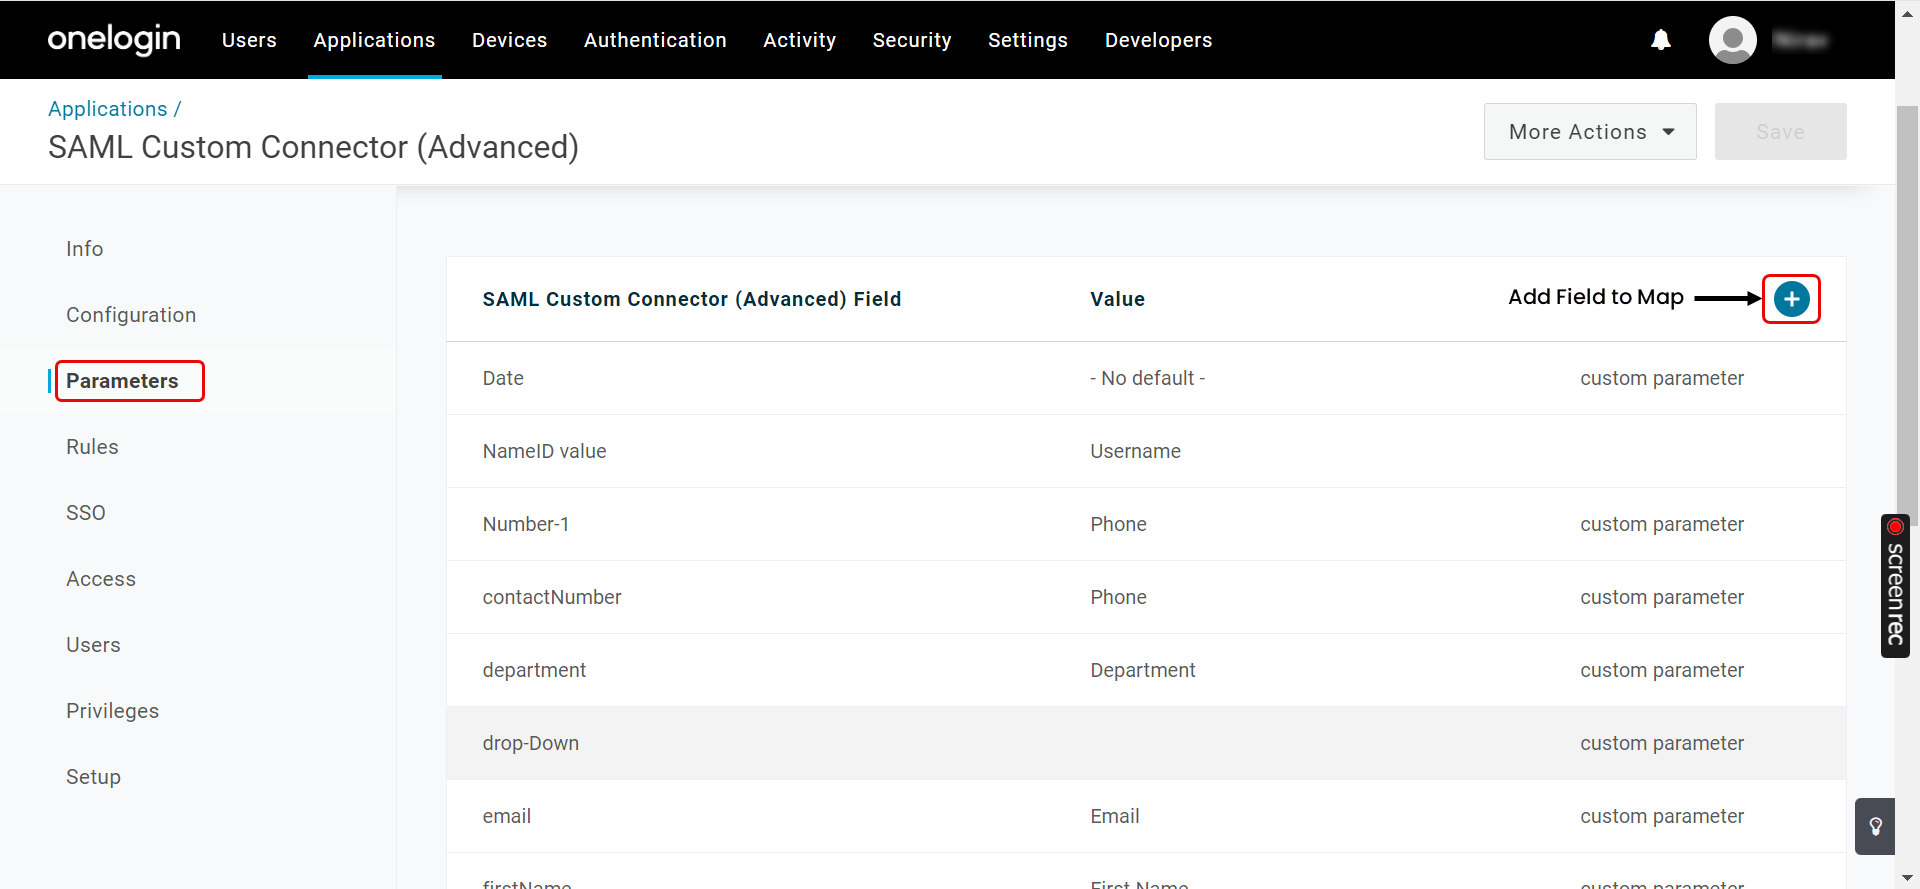
Enter the Name and Value of the field. Also, select the flag Include in SAML assertion.
Once done, click Save. The SSO is now configured.
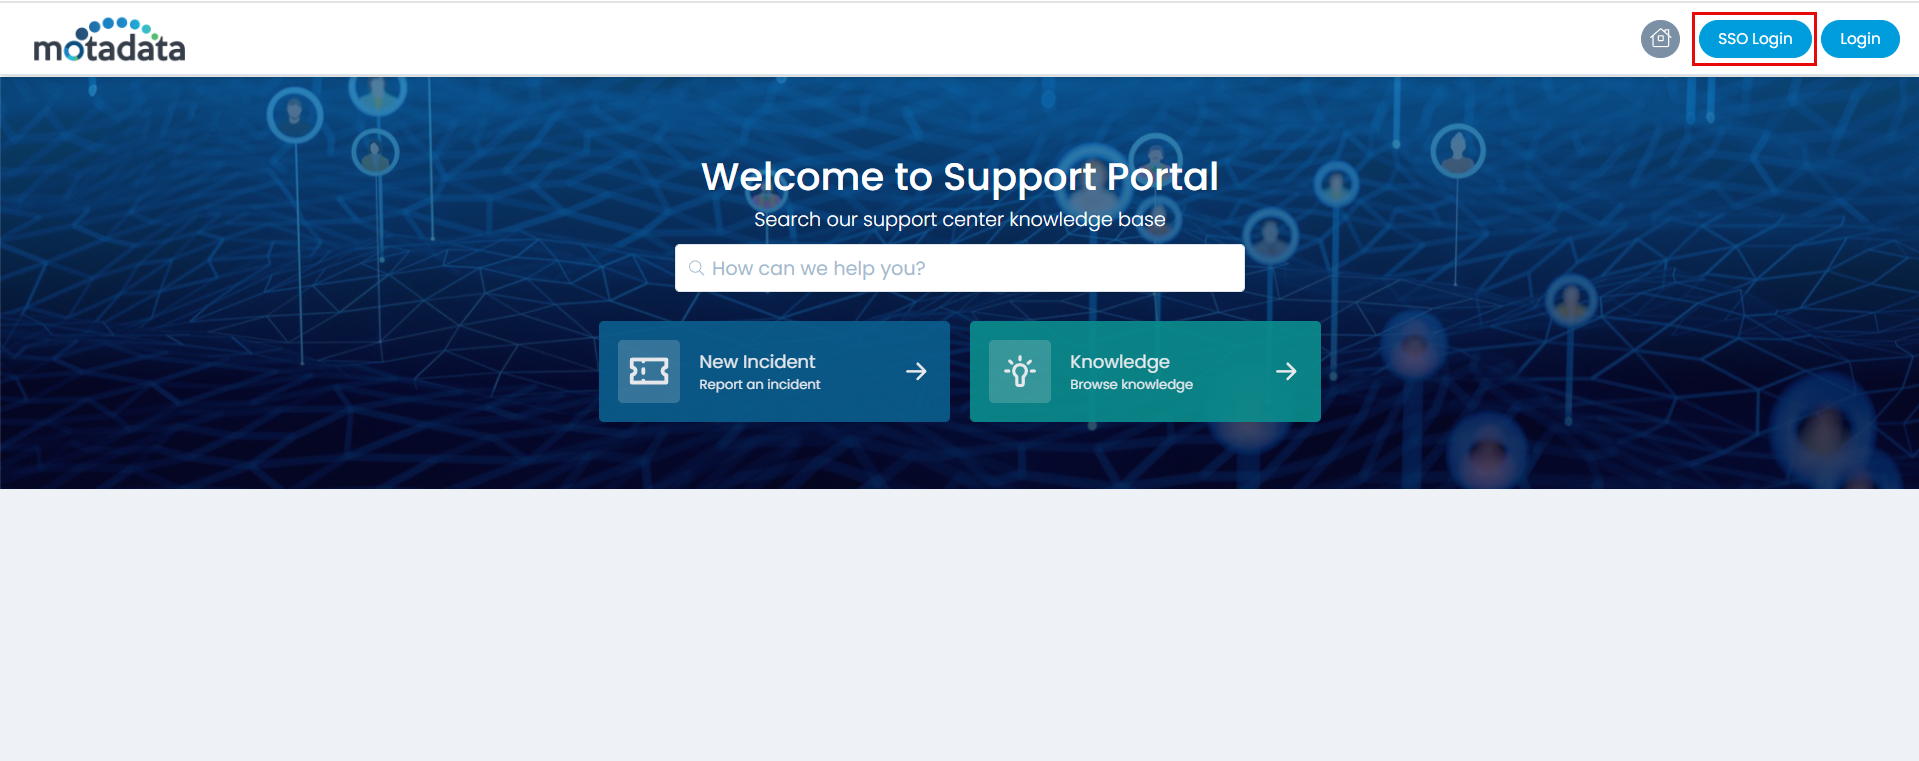
Step 10: You can verify this, by opening the ServiceOps Portal, and signing-in using the SSO Login button as shown below.
Step 11: You will be redirected to the One Login sign-in page, as shown below.
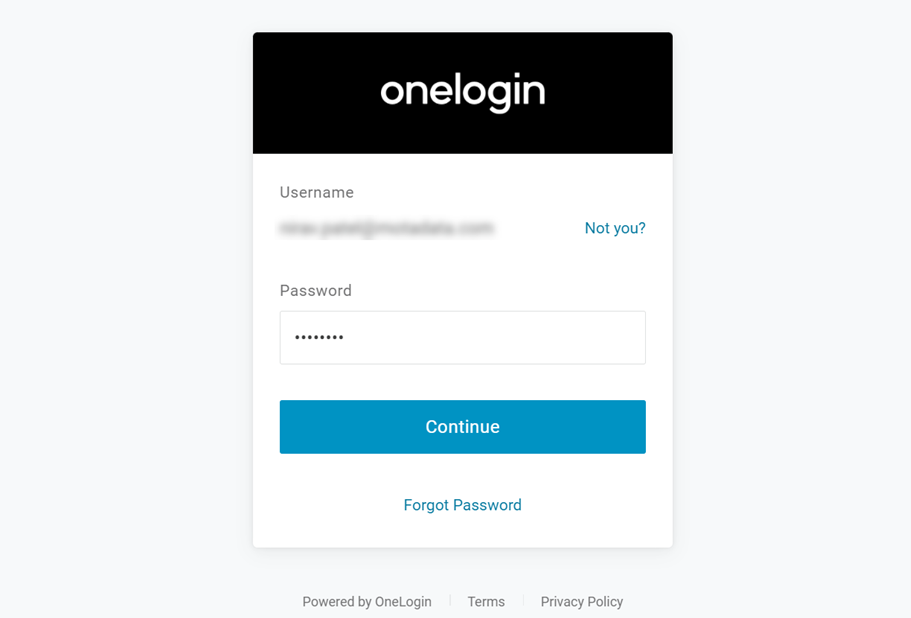
onelogin Sign-in Page
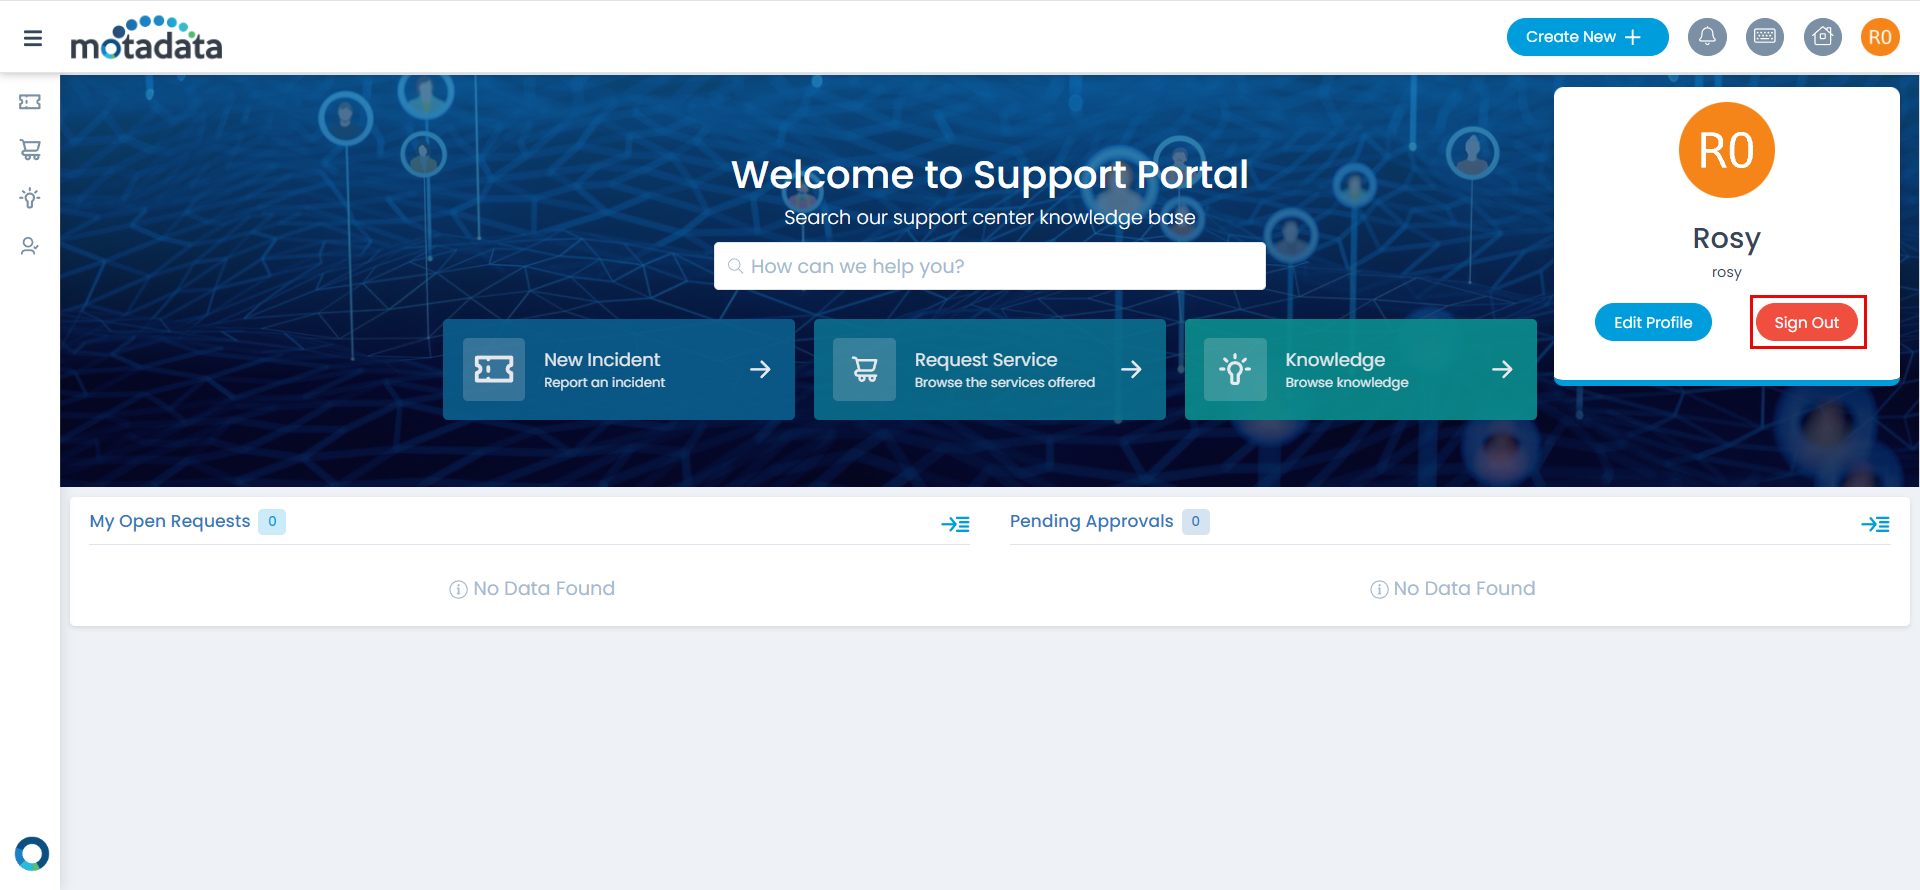
Step 12: Sign-in to One Login, and you will be redirected to the ServiceOps Portal. For Signing out, go to username, and click Sign-Out. You will be redirected to the One Login page again or remain on the portal as per the configured SAML logout URL.
Once the SSO is configured, you can now proceed to import users from the OneLogin directory into ServiceOps, enabling OneLogin users to authenticate via SSO.