ADFS
ServiceOps offers support for SAML 2.0, which facilitates integration for Single Sign-On. ServiceOps acts as the Service Provider (SP) and it integrates with Identity Providers (IdP) using SAML 2.0. The integration basically involves supplying details about SP to IdP and vice-versa. Once you integrate ServiceOps with an IdP, the users simply have to sign-in to IdP and then, they can automatically sign-in to ServiceOps from the respective identity provider’s GUI without having to provide credentials again. ServiceOps supports integration with ADFS.
Prerequisites
- Valid SSL Certificate
- Ensure ADFS service is in running state
- Host entry of the AD Server must be made in the machine where the ServiceOps Server is installed.
Steps for Windows Server 2022
To configure SSO with the ADFS service, follow the below steps:
Step 1: Sign-in to the ServiceOps portal as a Technician.
Step 2: Navigate to Settings > Admin > Organization > System Preference > Application Settings tab. Verify that the Base URL is the same as the portal URL. If it has the default IP Address, update it.
Step 3: Navigate to Settings > Admin > Users > SSO Configuration > Identity Providers and click Add Identity Provider. The following popup appears.
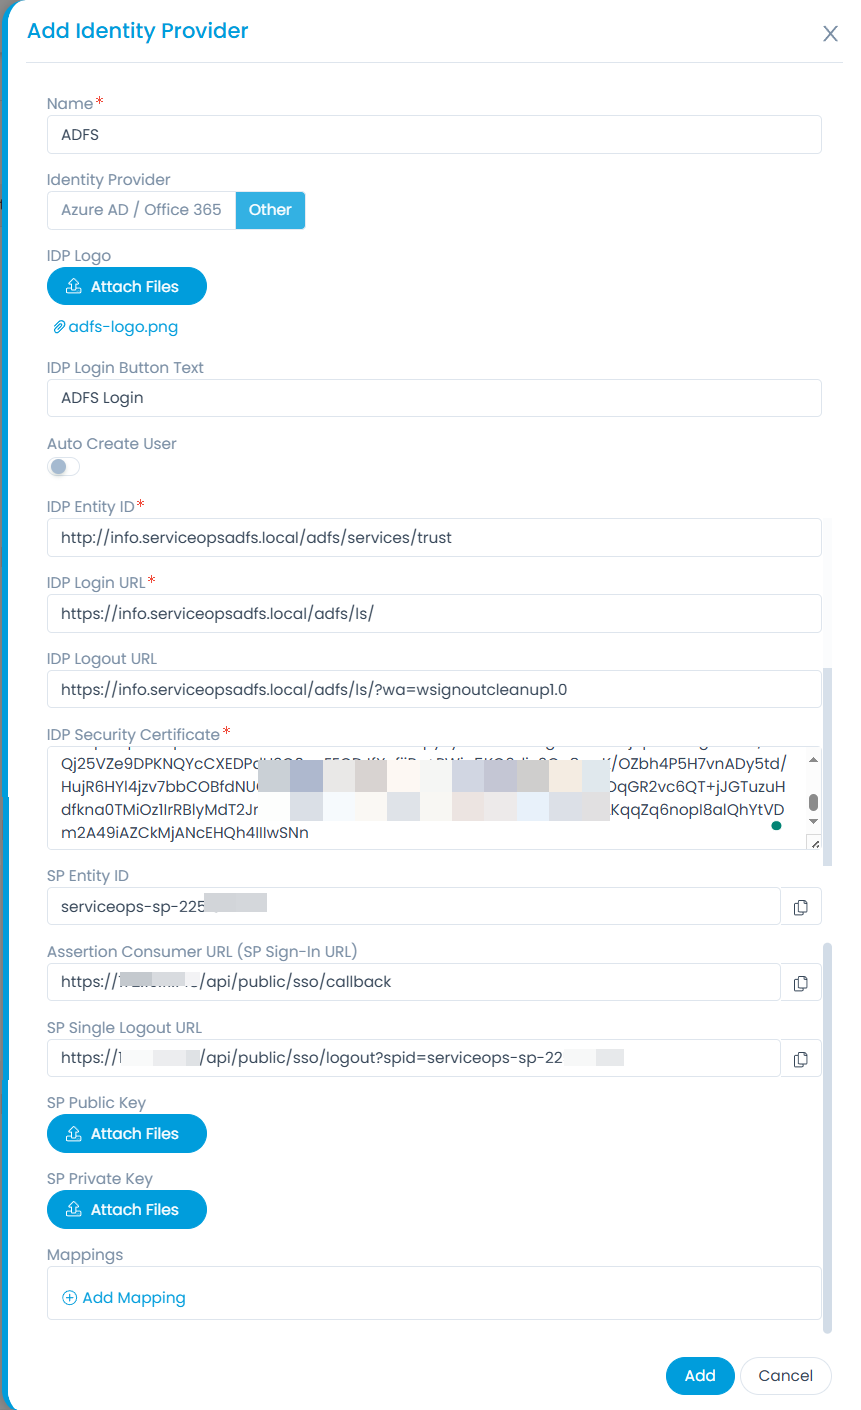
Step 4: Provide the following details. In this, the IDP details of the ADFS server are to be configured in the ServiceOps while the SP details in the ADFS.
| Parameter | Description |
|---|---|
| Name | Enter the name of the identity provider. |
| Identity Provider | To set the ADFS login button, select the Identity Provider as Other. If Other is selected, you can set the IDP Logo and IDP Login Button Text. Once configured, the respective login button will appear on the Login page. |
| Auto Create User | Enable if the user is to be created automatically, if not available in the system. By default, disabled. |
| IDP Entity ID | Enter the Entity ID of the IDP from the AD FS server. It is a mandatory field. You can get these details from the AD FS server. |
| IDP Login URL | Enter the login URL of the IDP on which the user will get redirected. It is a mandatory field. You can get this from the AD FS server. |
| IDP Logout URL | Enter the logout URL of the IDP on which the user will be redirected once signing-out from the ServiceOps portal. If not provided, the user will remain on the same page. This field is optional. Syntax: https://{domain}/adfs/ls/?wa=wsignoutcleanup1.0 For example: https://info.serviceopsadfs.local/adfs/ls/?wa=wsignoutcleanup1.0 |
| IDP Security Certificate | Enter the certificate that IDP provides for integration. The response sent by the IDP is validated using it. |
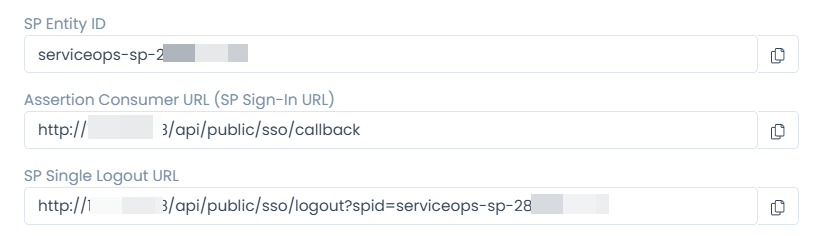
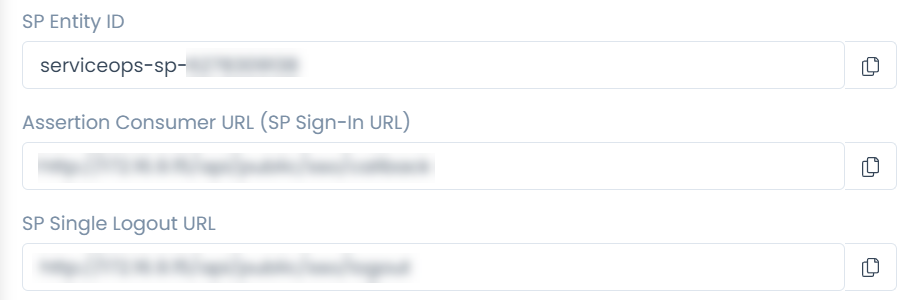
| SP Entity ID | It displays the entity ID of the Service Provider. You have to configure this in the AD FS server. |
| Assertion Consumer URL | It displays the endpoint of the ServiceOps application where the IDP posts the SAML responses. You have to configure this in the AD FS server. |
| SP Single Logout URL | It displays the URL to which the user gets redirected after sign-out. You have to configure this in the AD FS server. |
| SP Public Key | It is provided by the Service Provider. |
| SP Private Key | It is provided by the Service Provider. |
| Mappings | Map additional fields required for more details. Using this, whenever the values of the mapped fields are changed in the respective provider, they will automatically get updated in ServiceOps. Note: Field Mapping is unsupported for Multi-Select Drop Down, Checkbox, Date Field, and Dependent (Custom Type) field types. |
Step 5: Click Add, and the provider will be displayed on the list page.
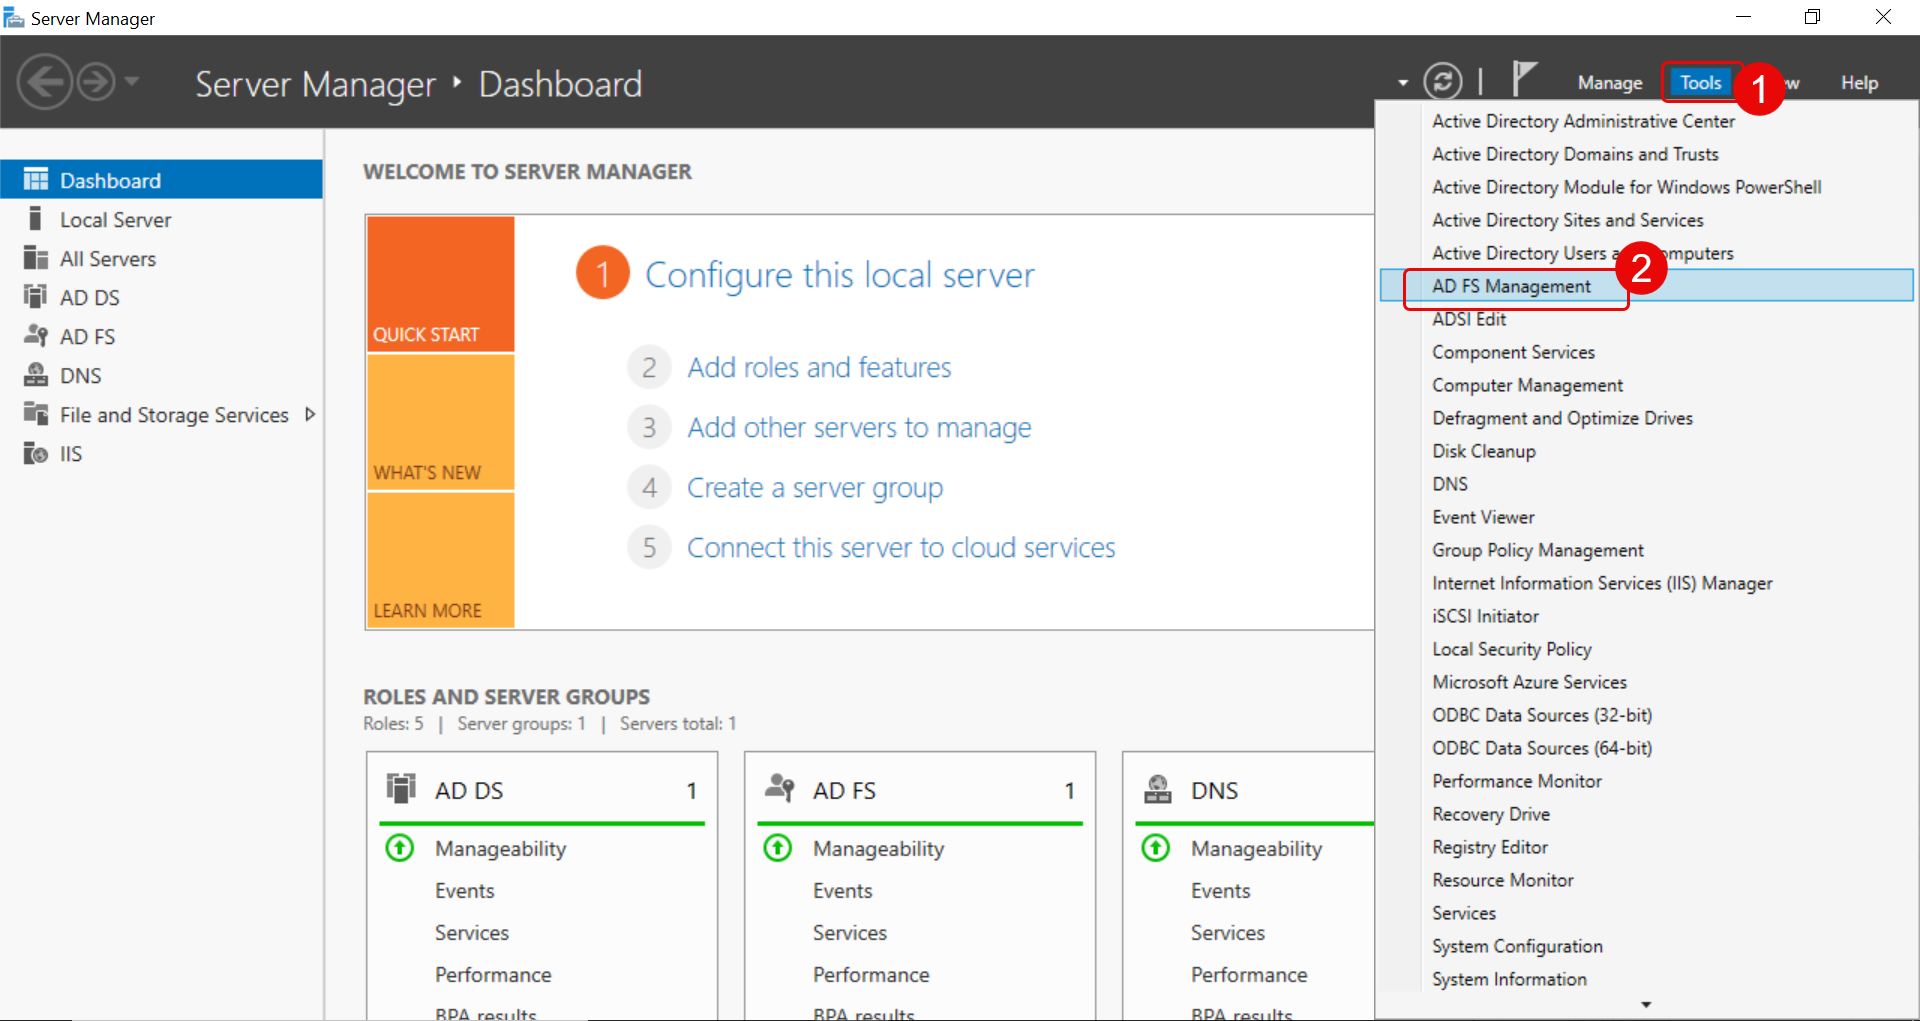
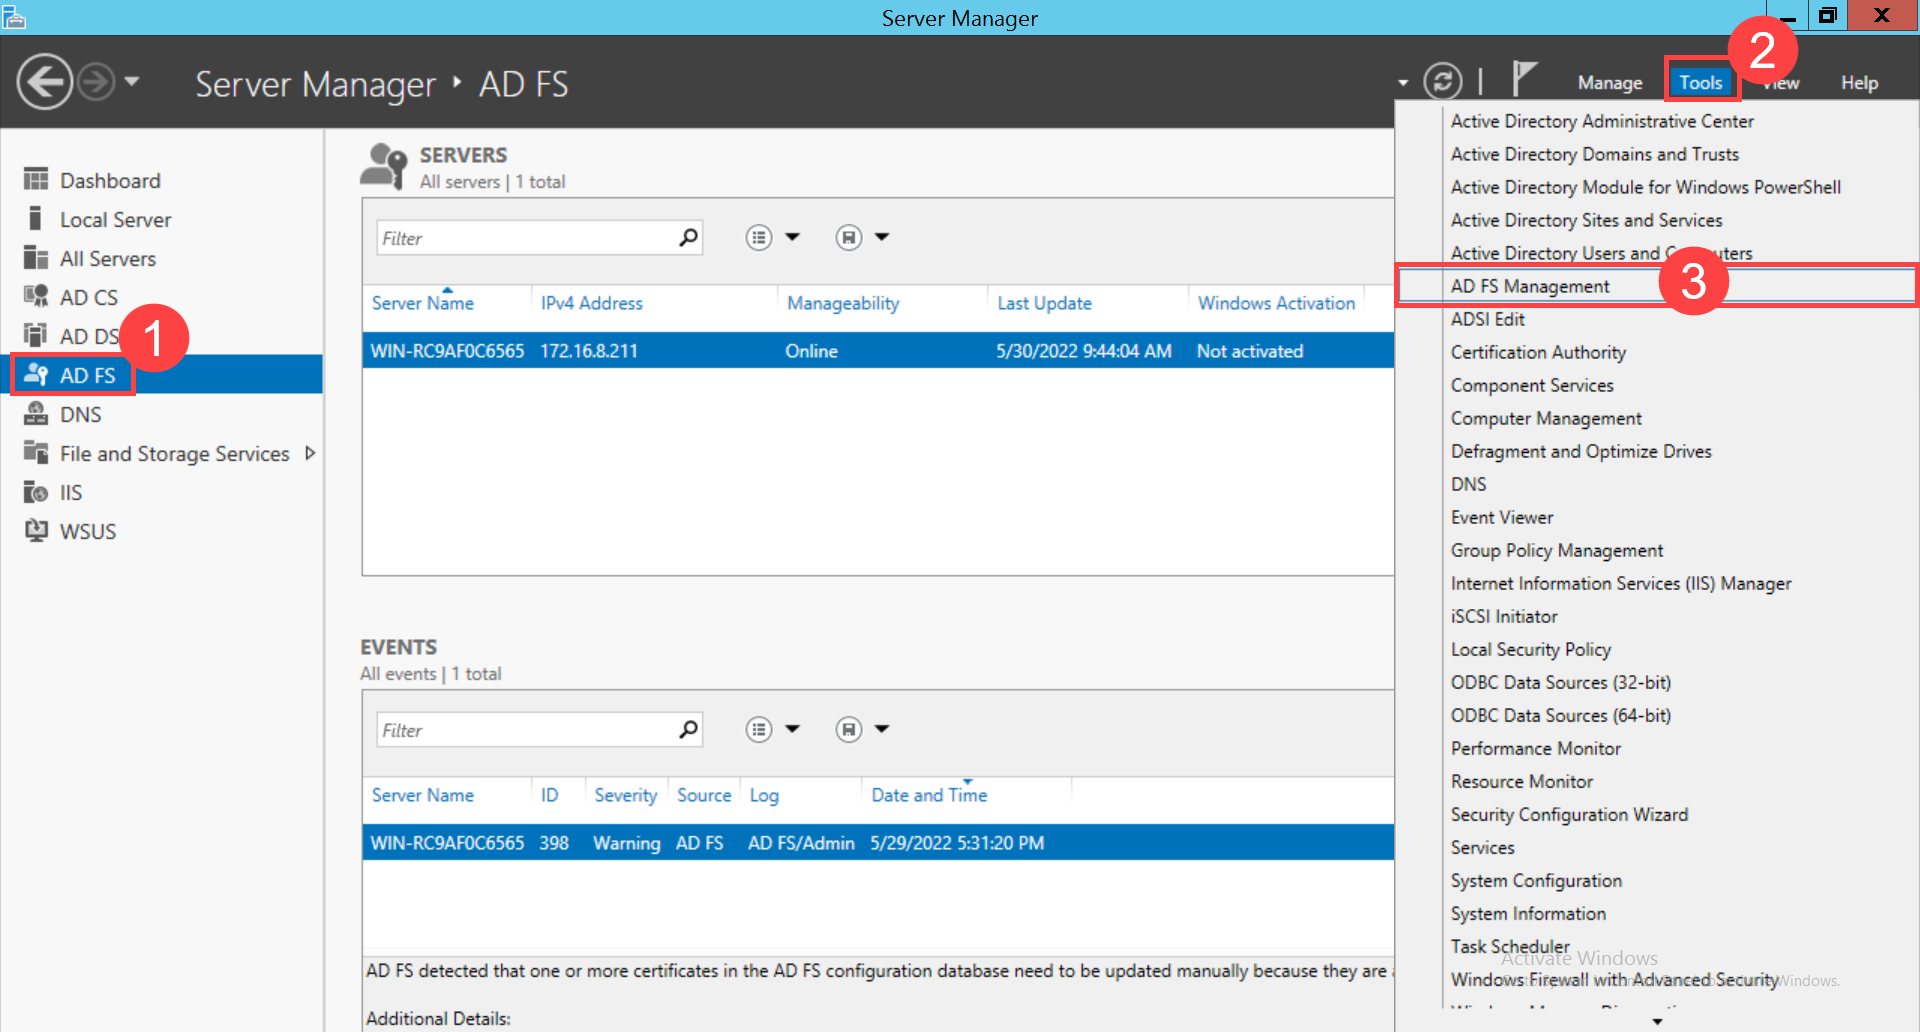
Step 6: In the ADFS server, open the Server Manager application in your machine and navigate to the Tools > AD FS Management tab. The following page appears.
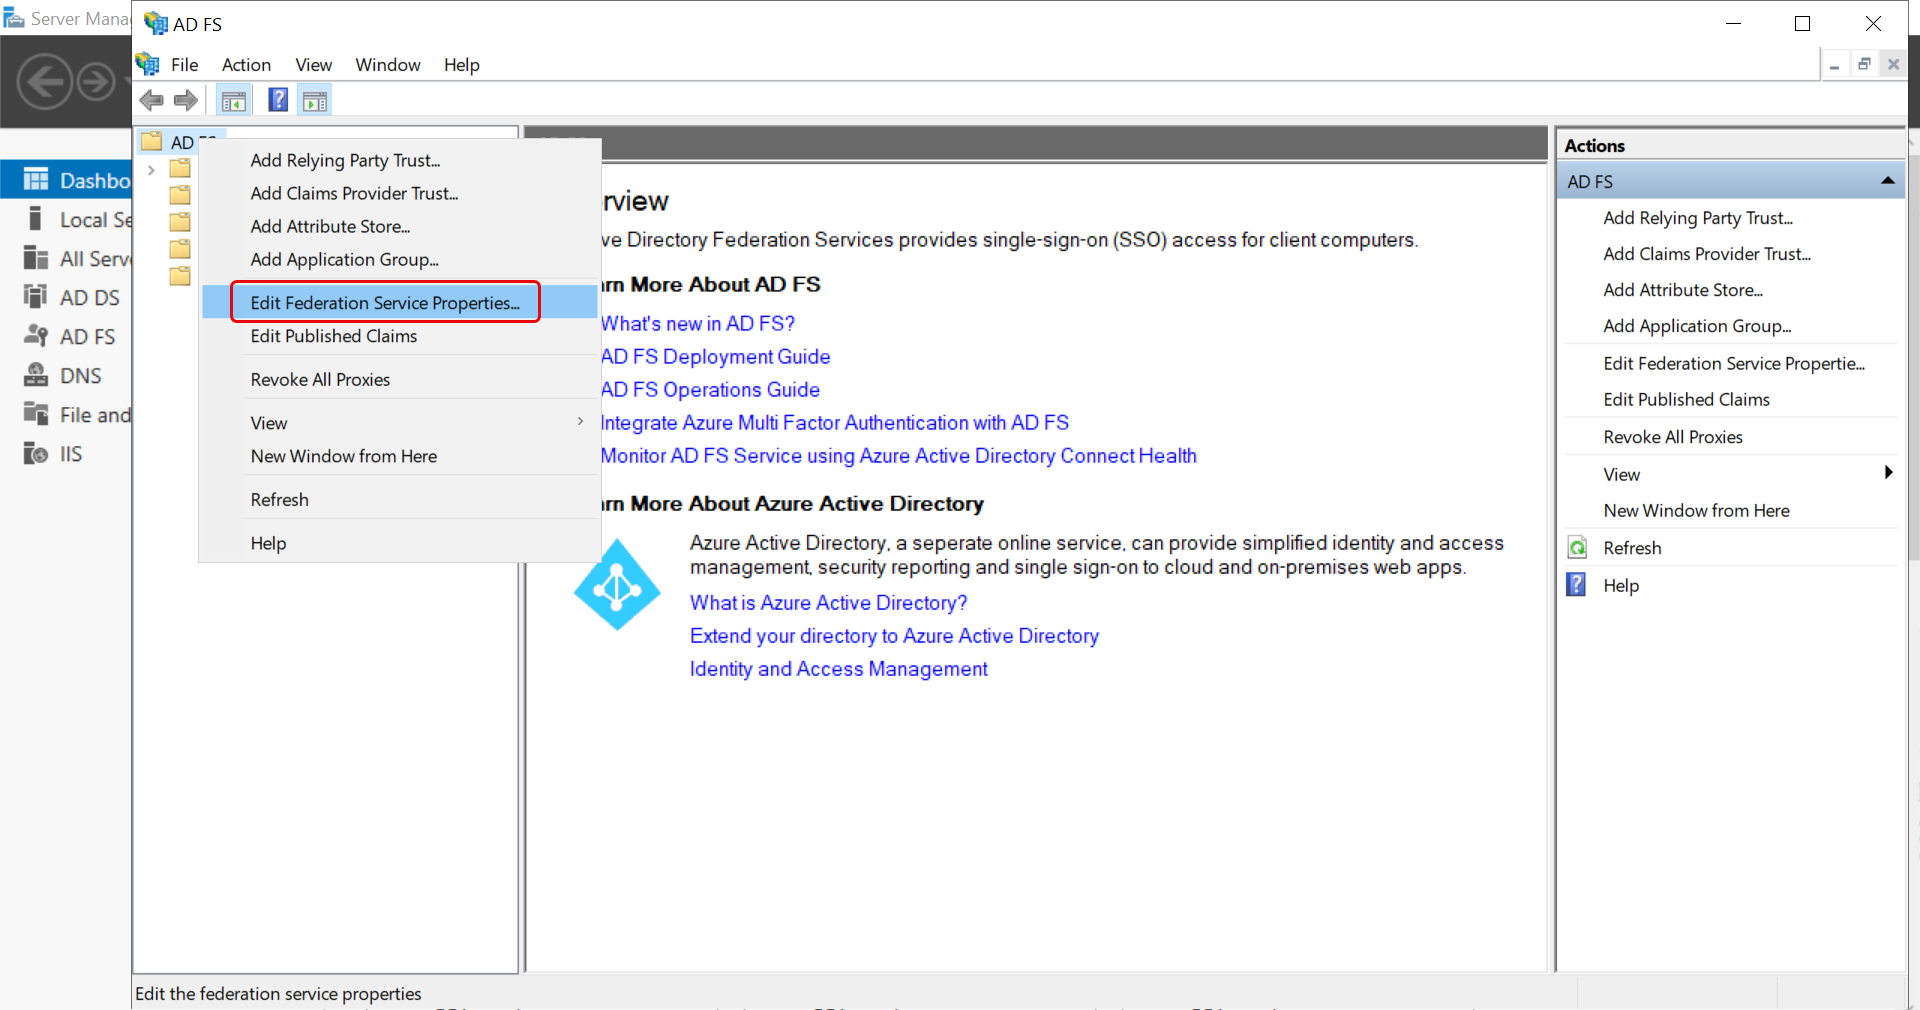
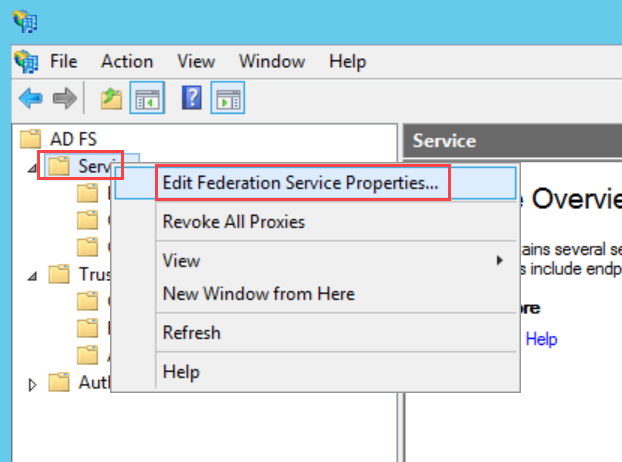
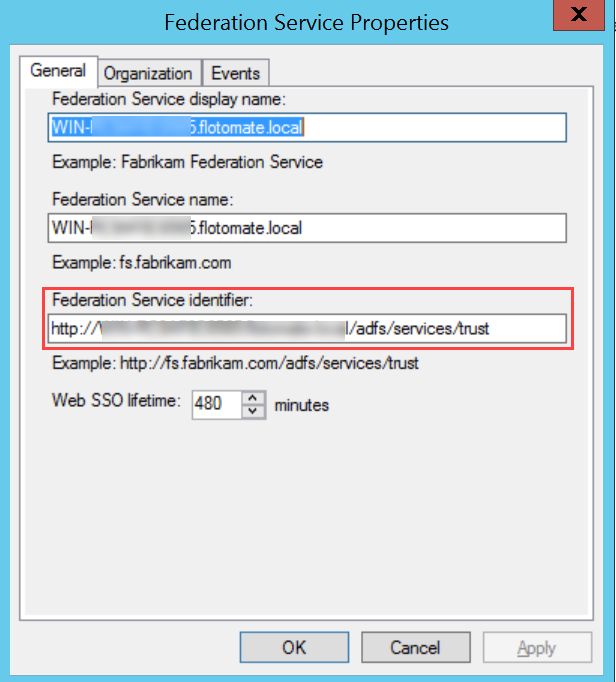
Step 7: Right-click the AD FS folder and choose the Edit Federation Service Properties option. The following window appears. Copy the Federation Service identifier and paste it into the IDP Entity ID field of ServiceOps.
Ensure the ADFC service is in running state.

Step 8: Click the Endpoints folder and search for FederationMetadata.xml in the Metadata section below:
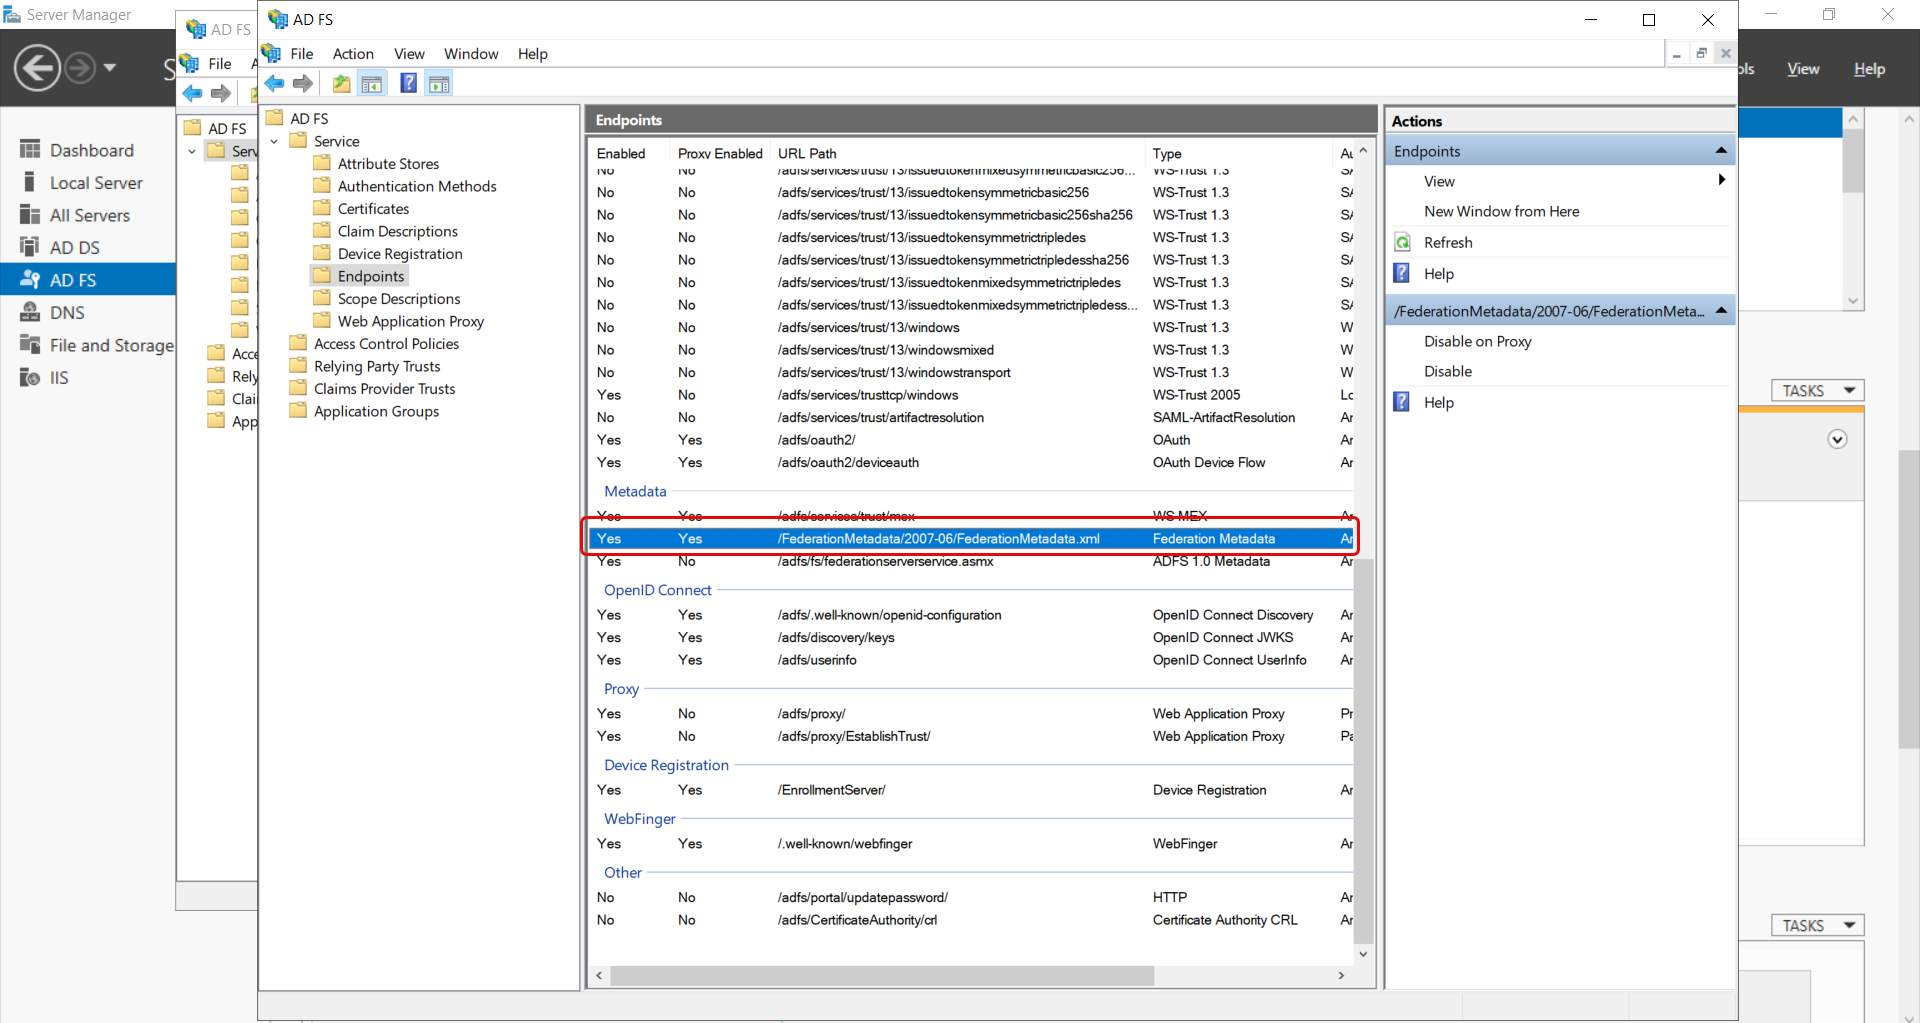
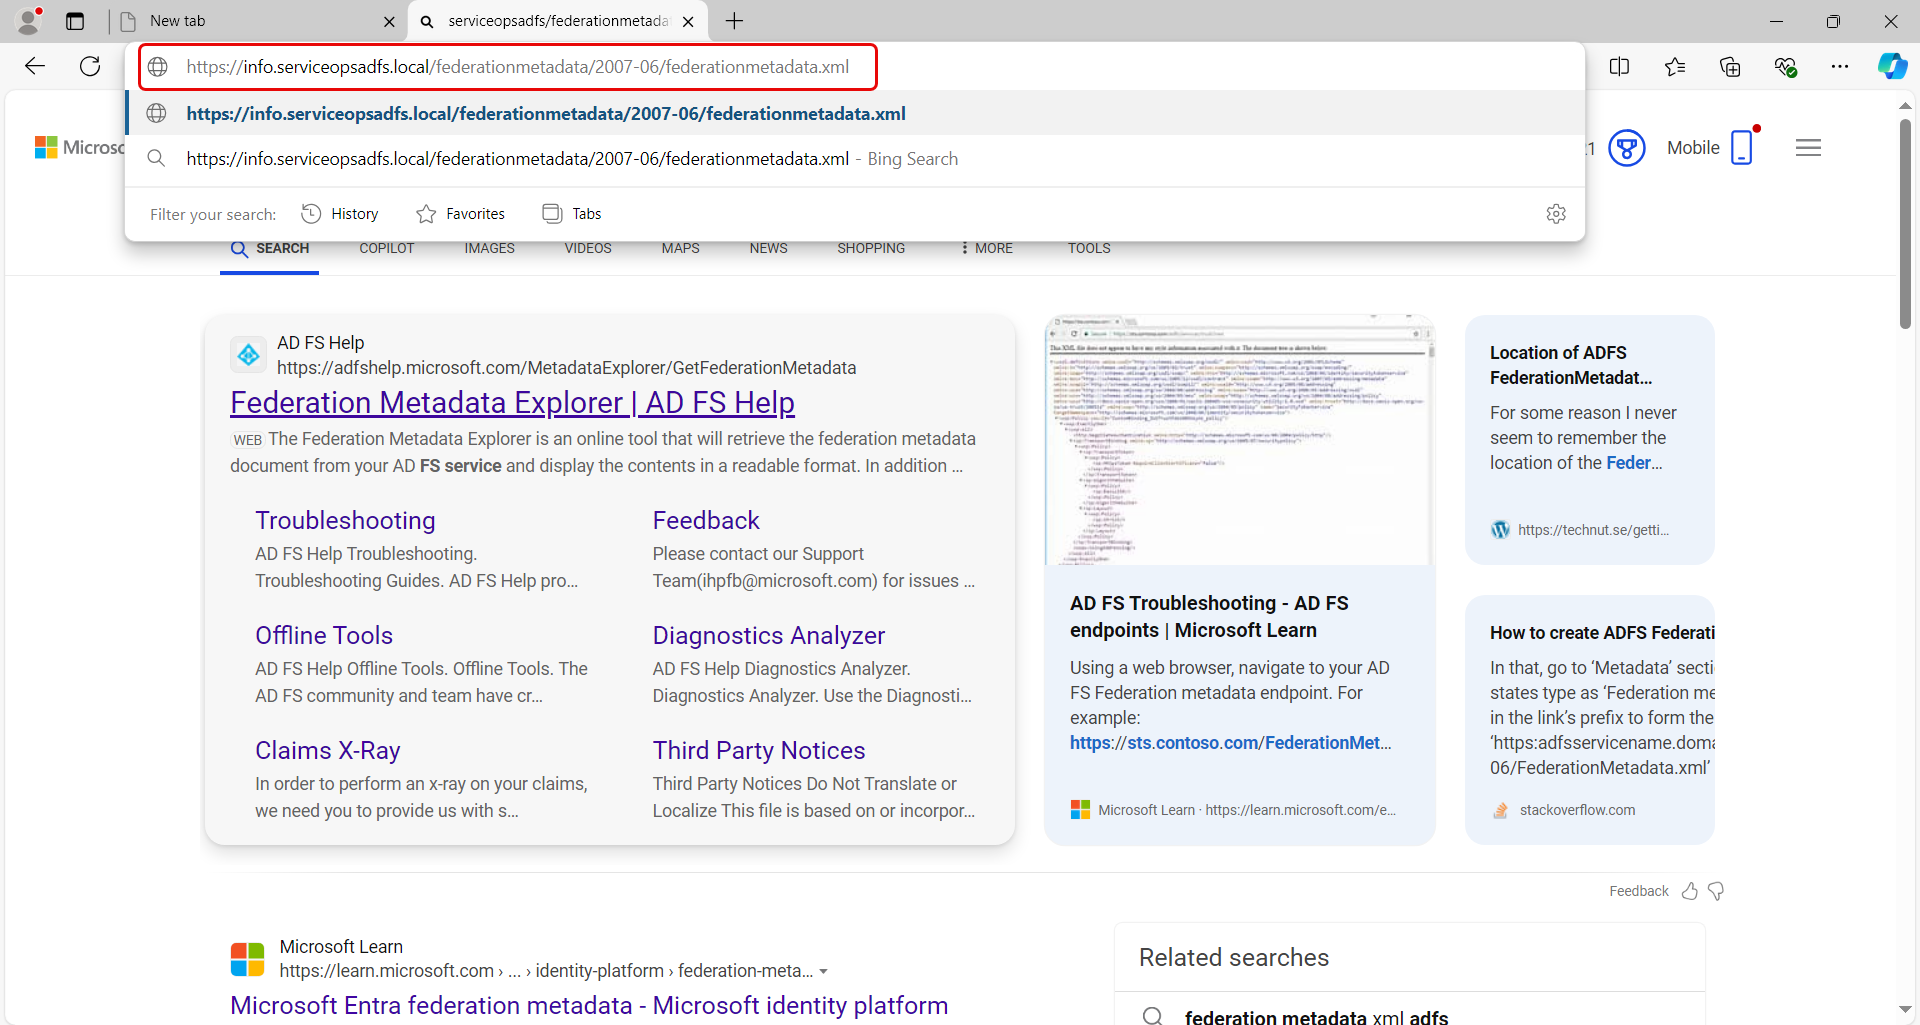
Now, go to the URL path and open the XML file in any browser as shown below. The URL's format is:
Syntax: https://{server}/federationmetadata/2007-06/federationmetadata.xml
Example: https://info.serviceopsadfs.local/federationmetadata/2007-06/federationmetadata.xml
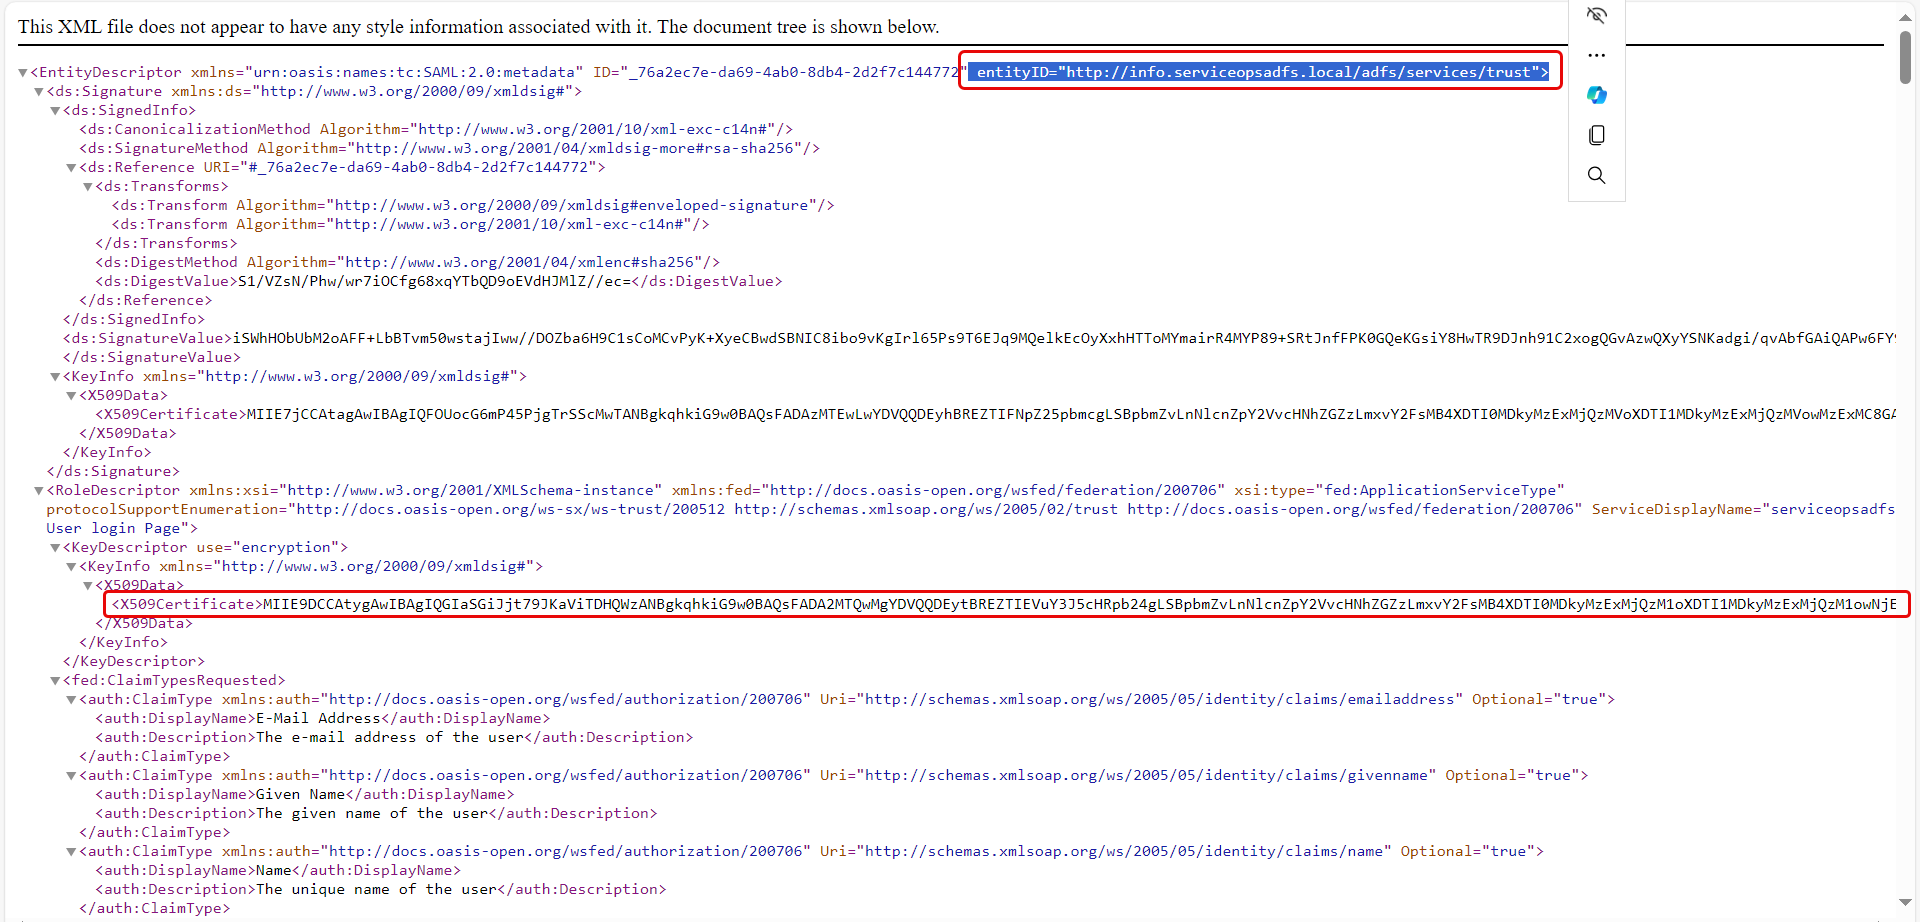
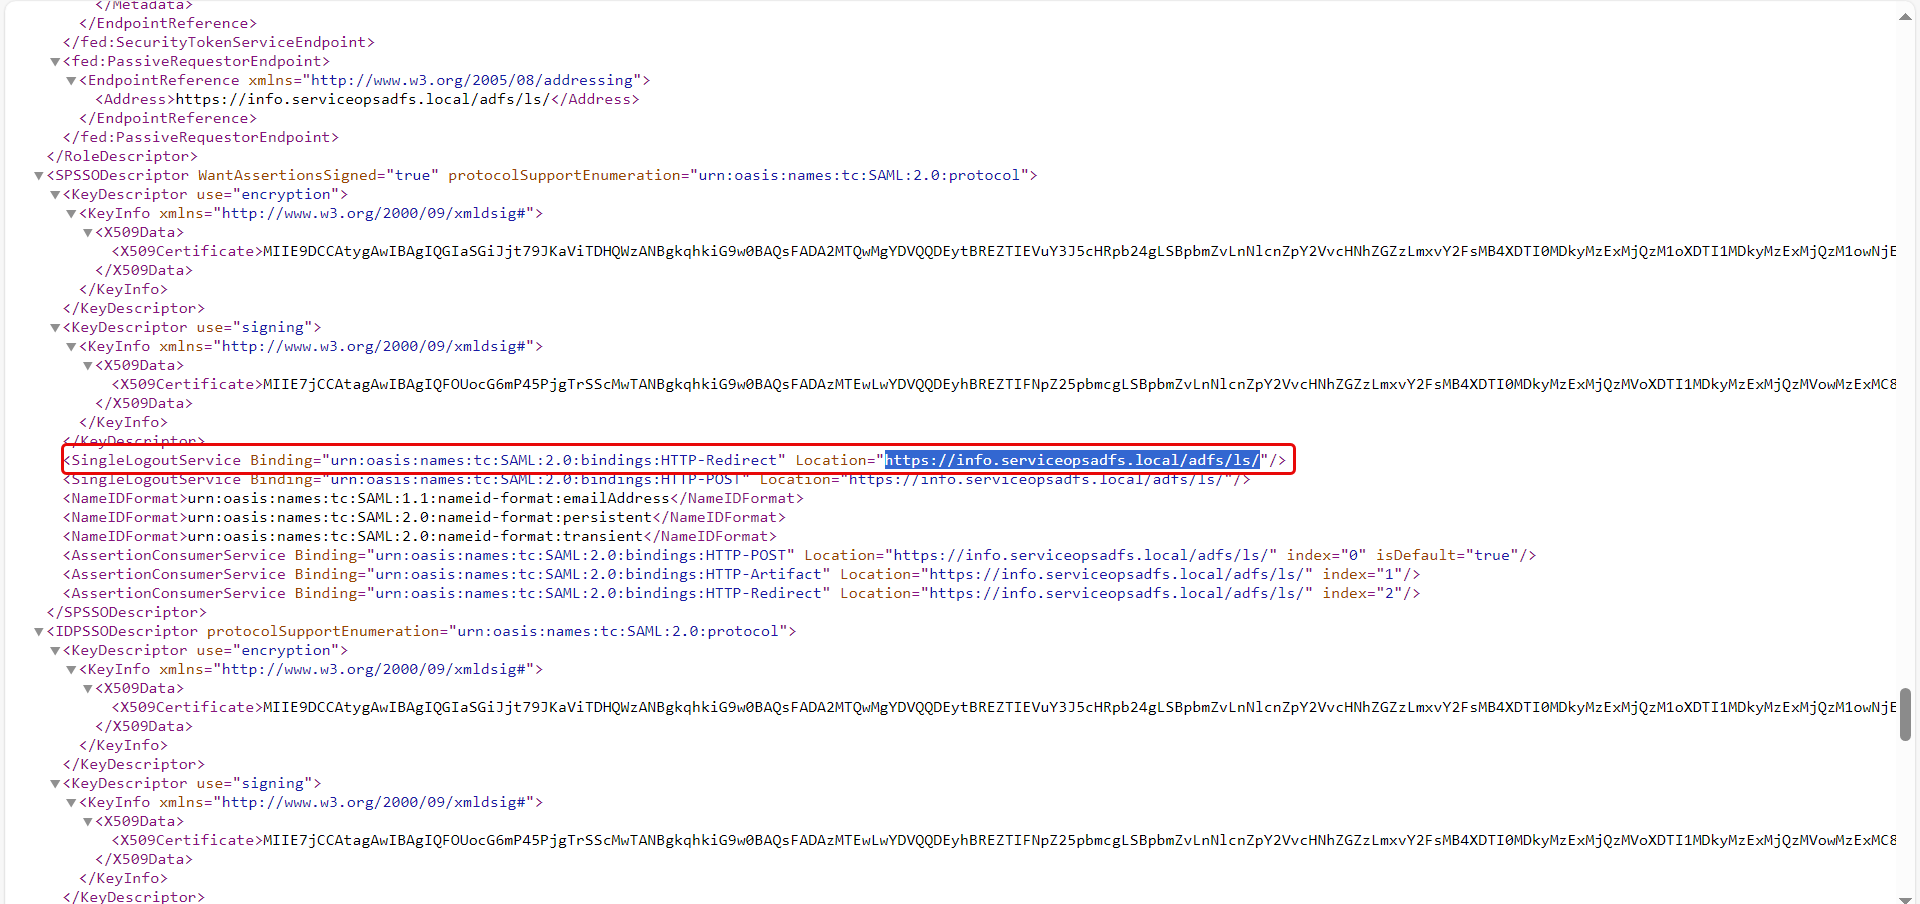
Copy the highlighted Entity ID, Certificate, and Single Logout URL from here and use them in the ServiceOps.
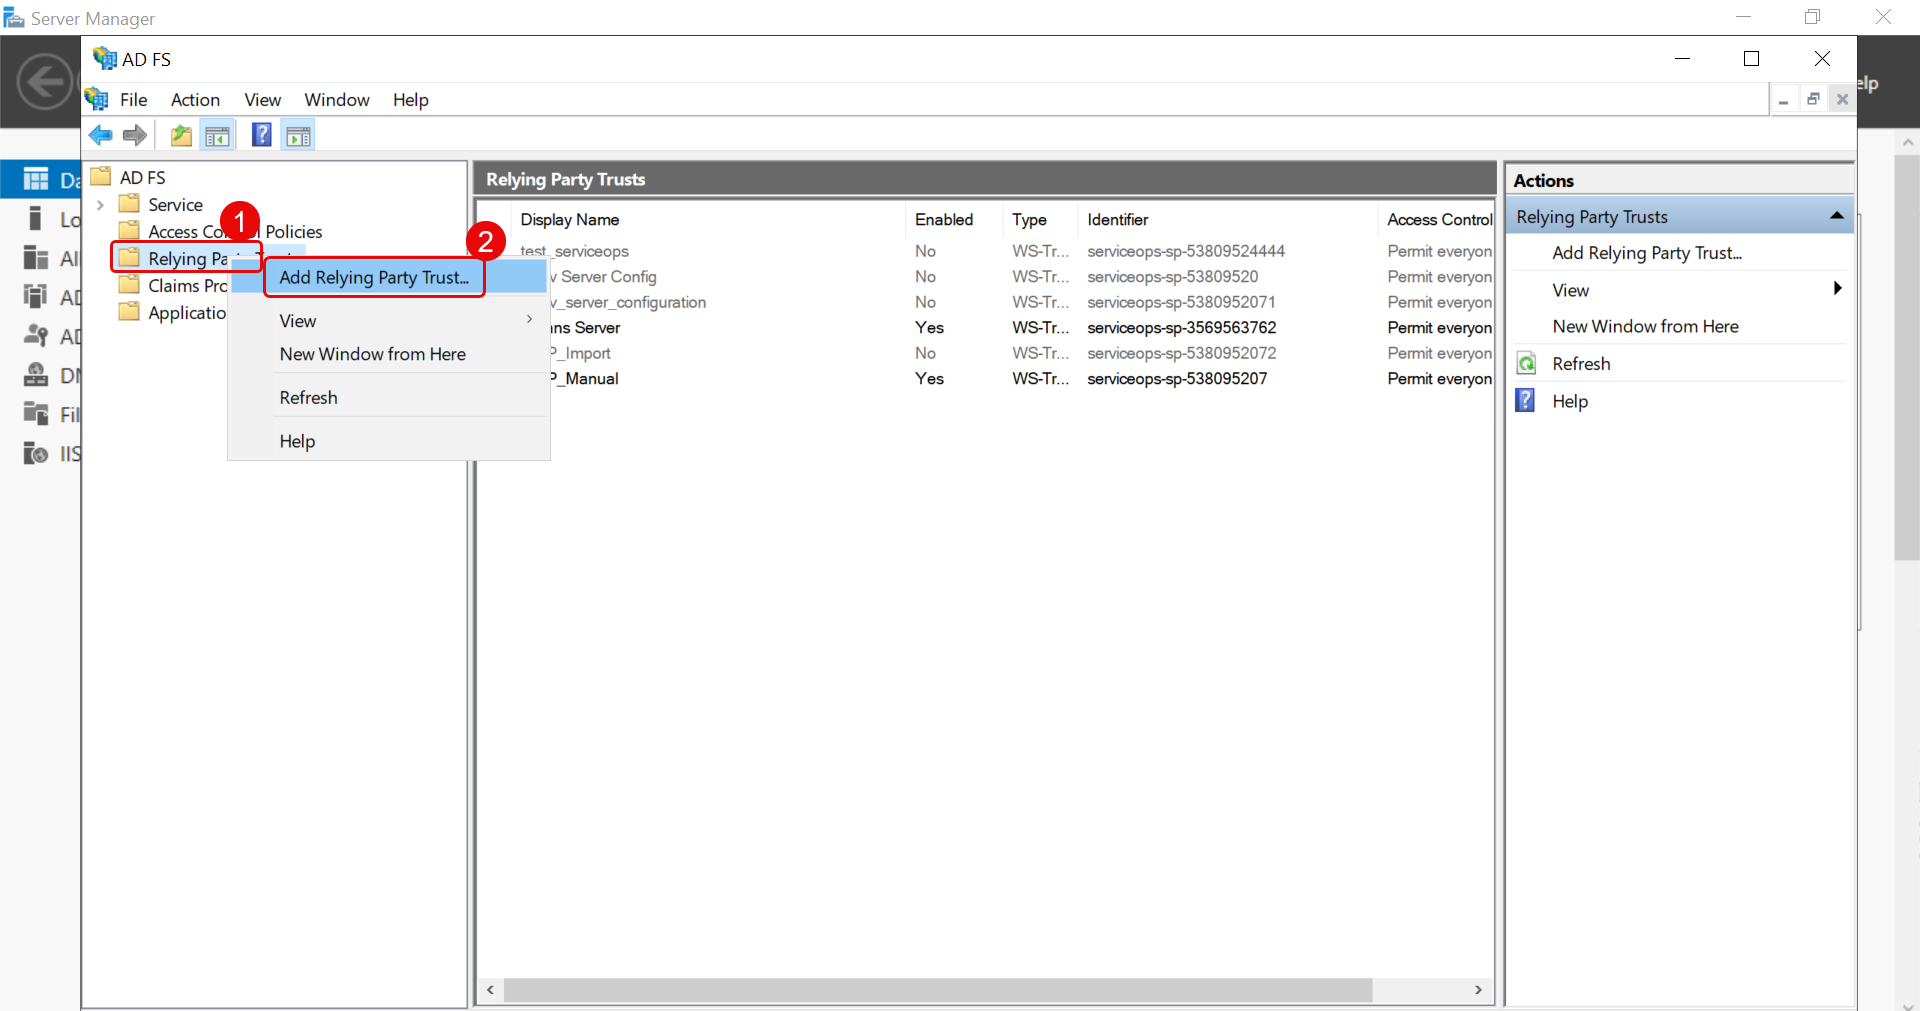
SAML Settings Step 9: Add Relying Party Trusts
- Navigate to Relying Party Trusts > Add Relying Party Trust, and a wizard opens.
- Select Claims Aware option and click Start.

- Select Data Source. Here, the manual option is selected, as shown below. Click Next.

- Enter the display name and click Next.

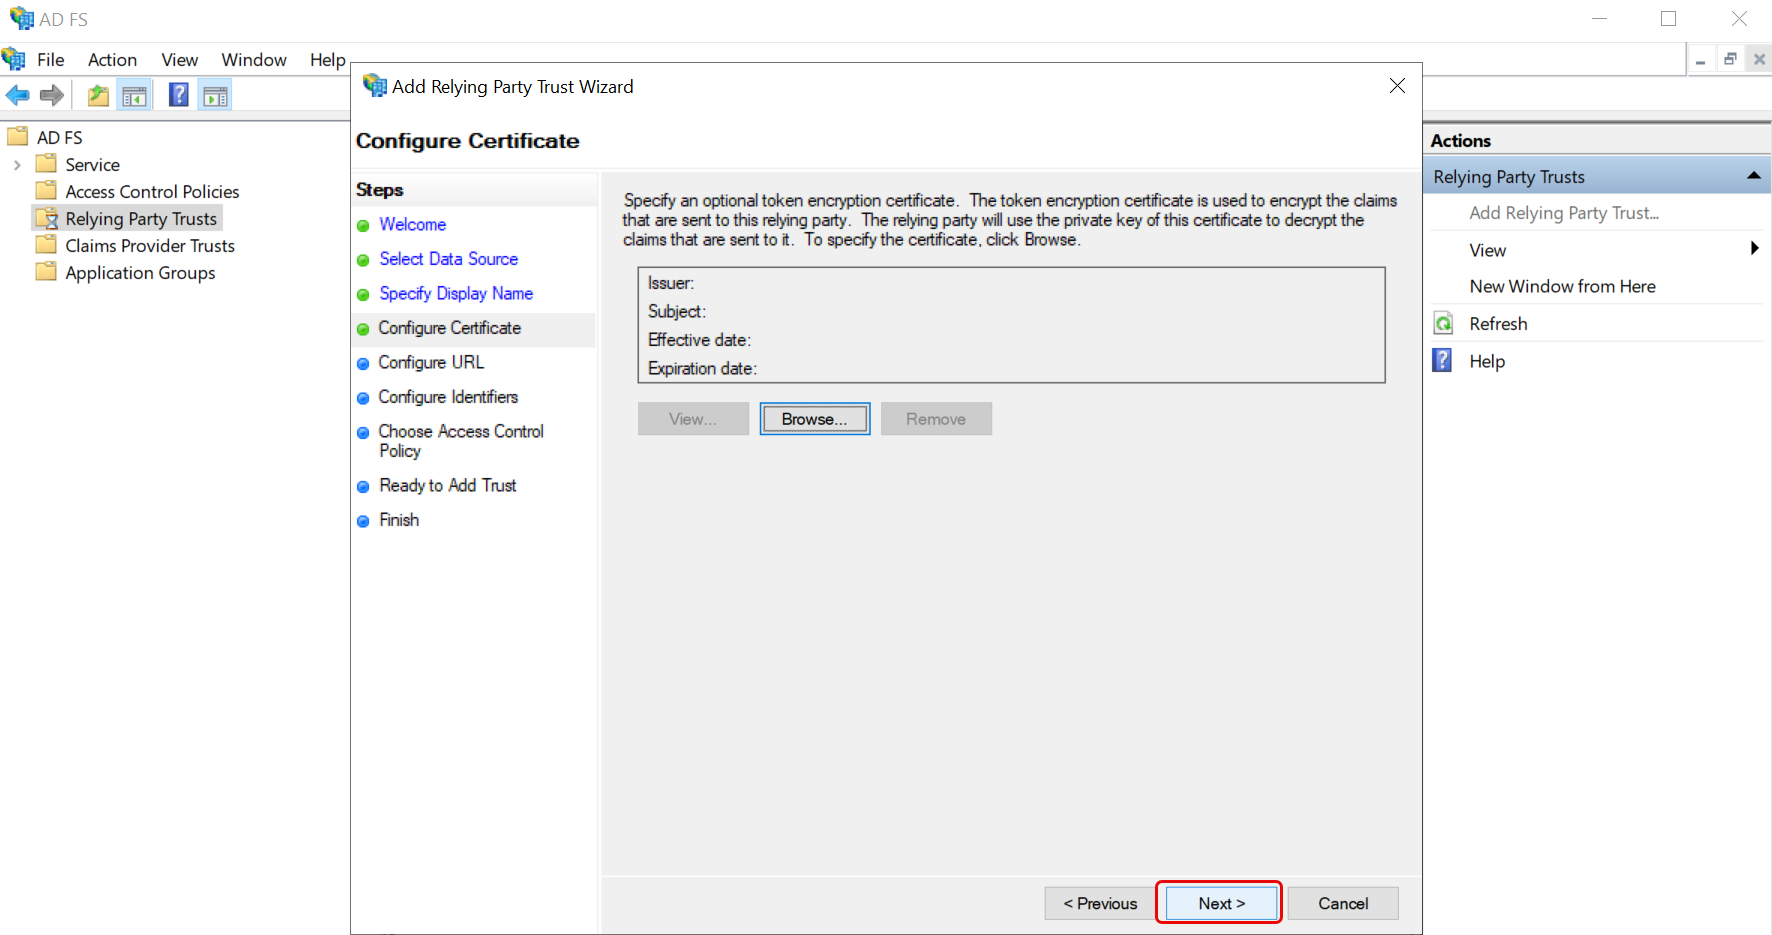
- in Configure Certificate click Next.
- Configure the URL. Enable the option Enable Support for the SAML 2.0 Web SSO Protocol. Enter the Relying Party SAML 2.0 SSO service URL.

You can get the Relying party SAML 2.0 SSO service URL and Relying party trust identifier (SP Entity ID) details from the ServiceOps Home page > Admin > Users > SSO Configuration page.
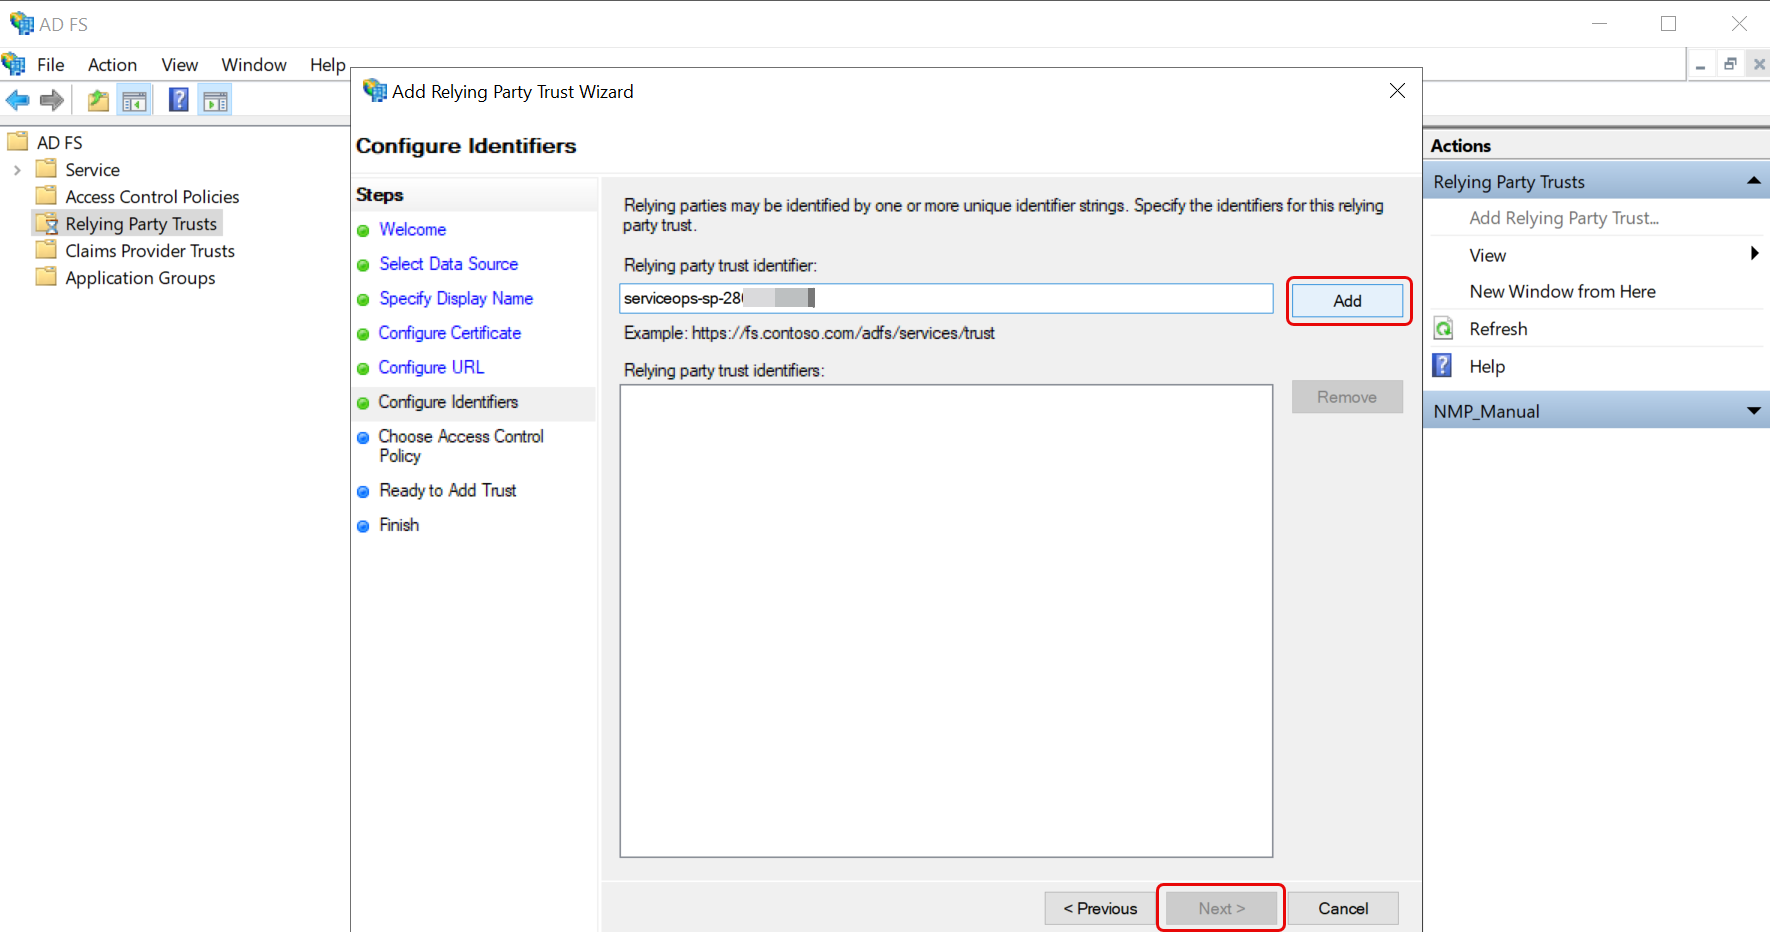
- Configure the identifiers. Enter the SP Entity ID of ServiceOps and click Add. Once done, the Next button will get enabled. Click on it.
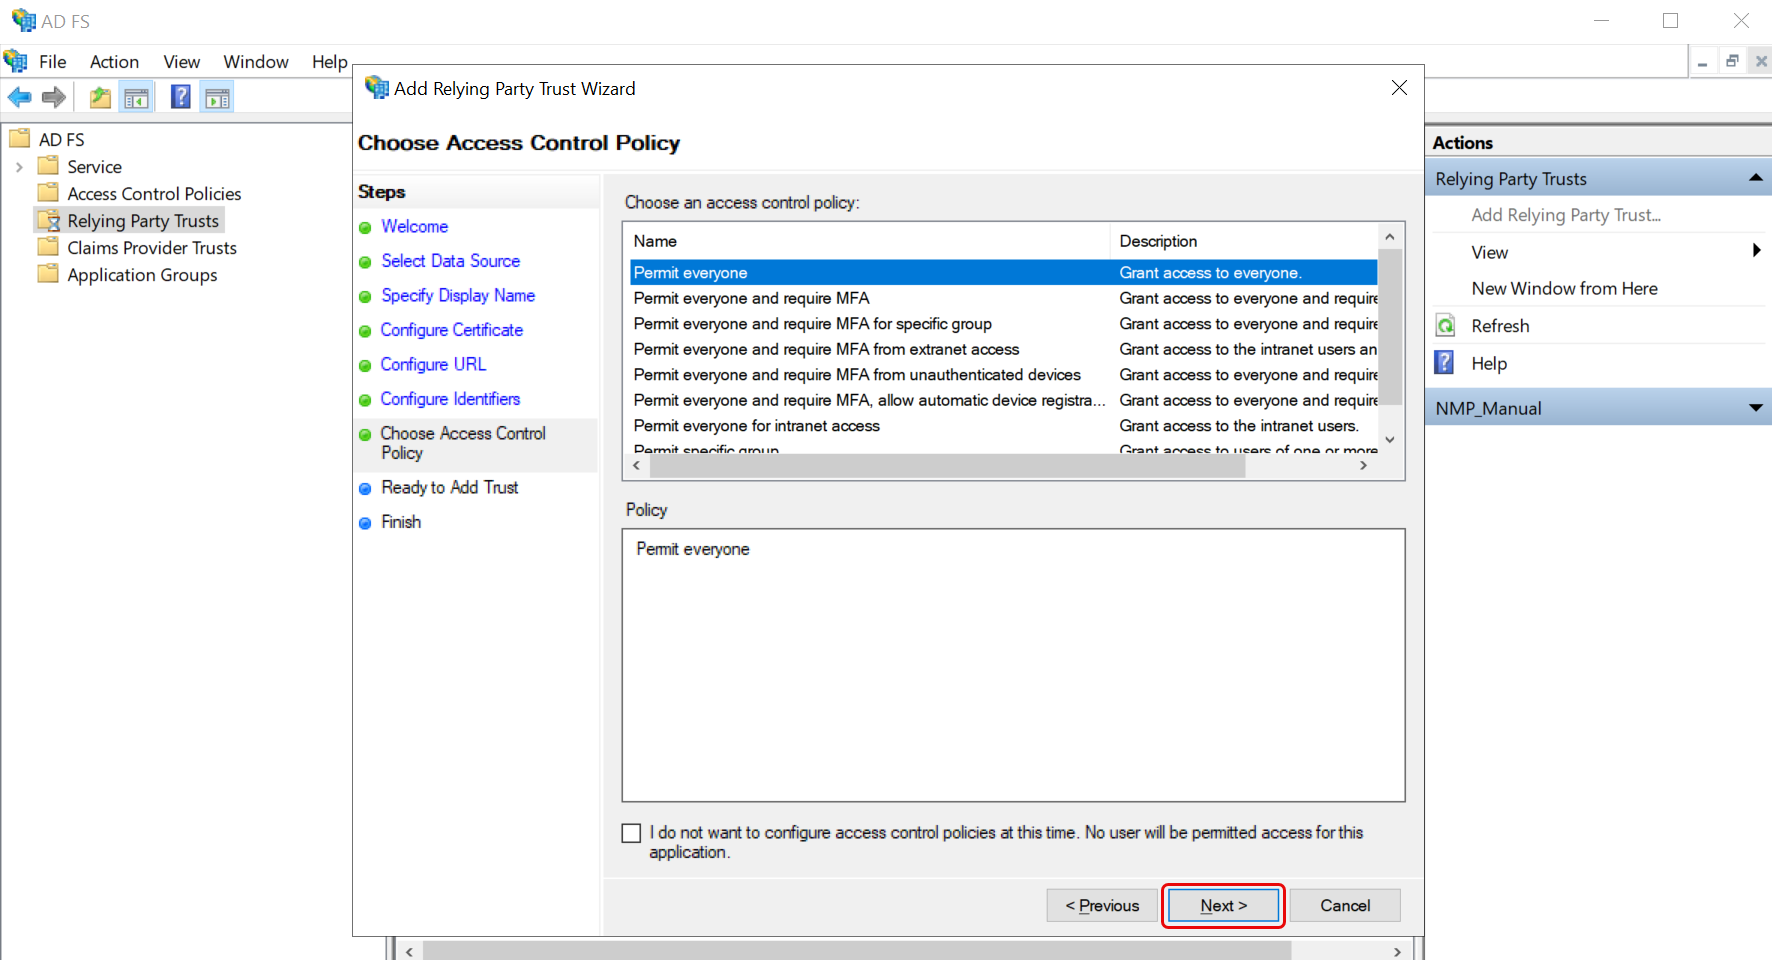
- Choose Access Control Policy as Permit Everyone and click Next.
- Review the settings and click Next. If any changes are required, click Previous and make the editions.
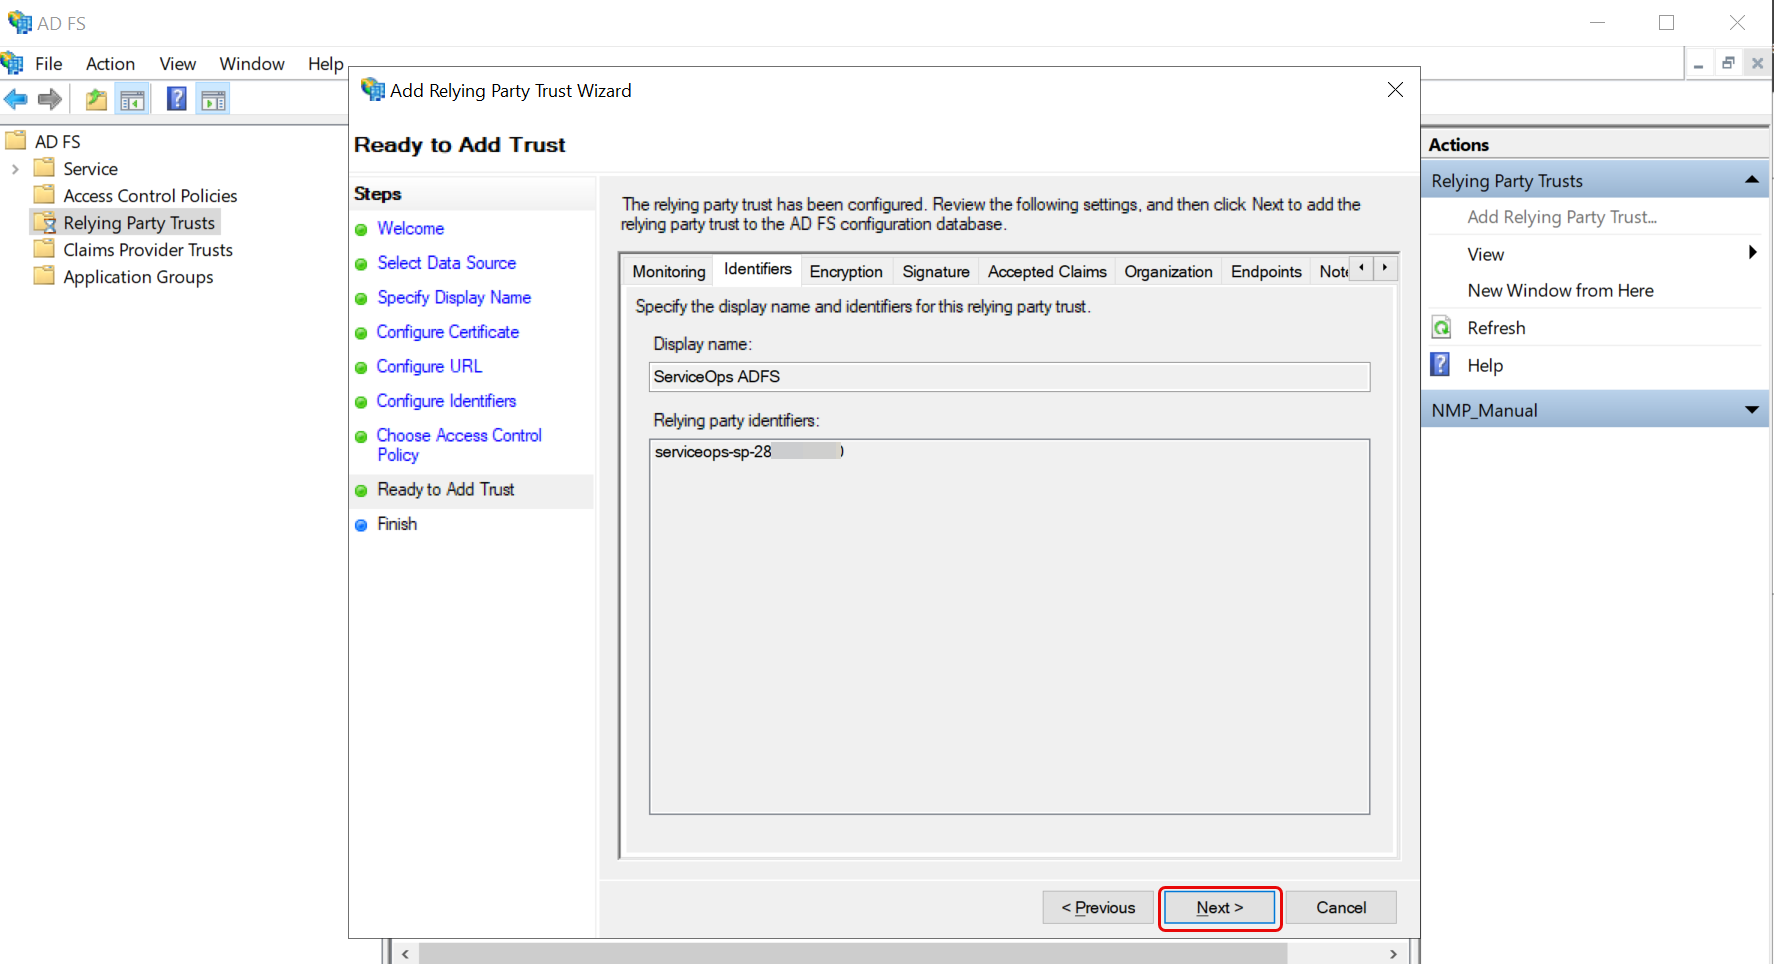
- Once done, click Close, and the relying party trust gets successfully added to the AD FS database.
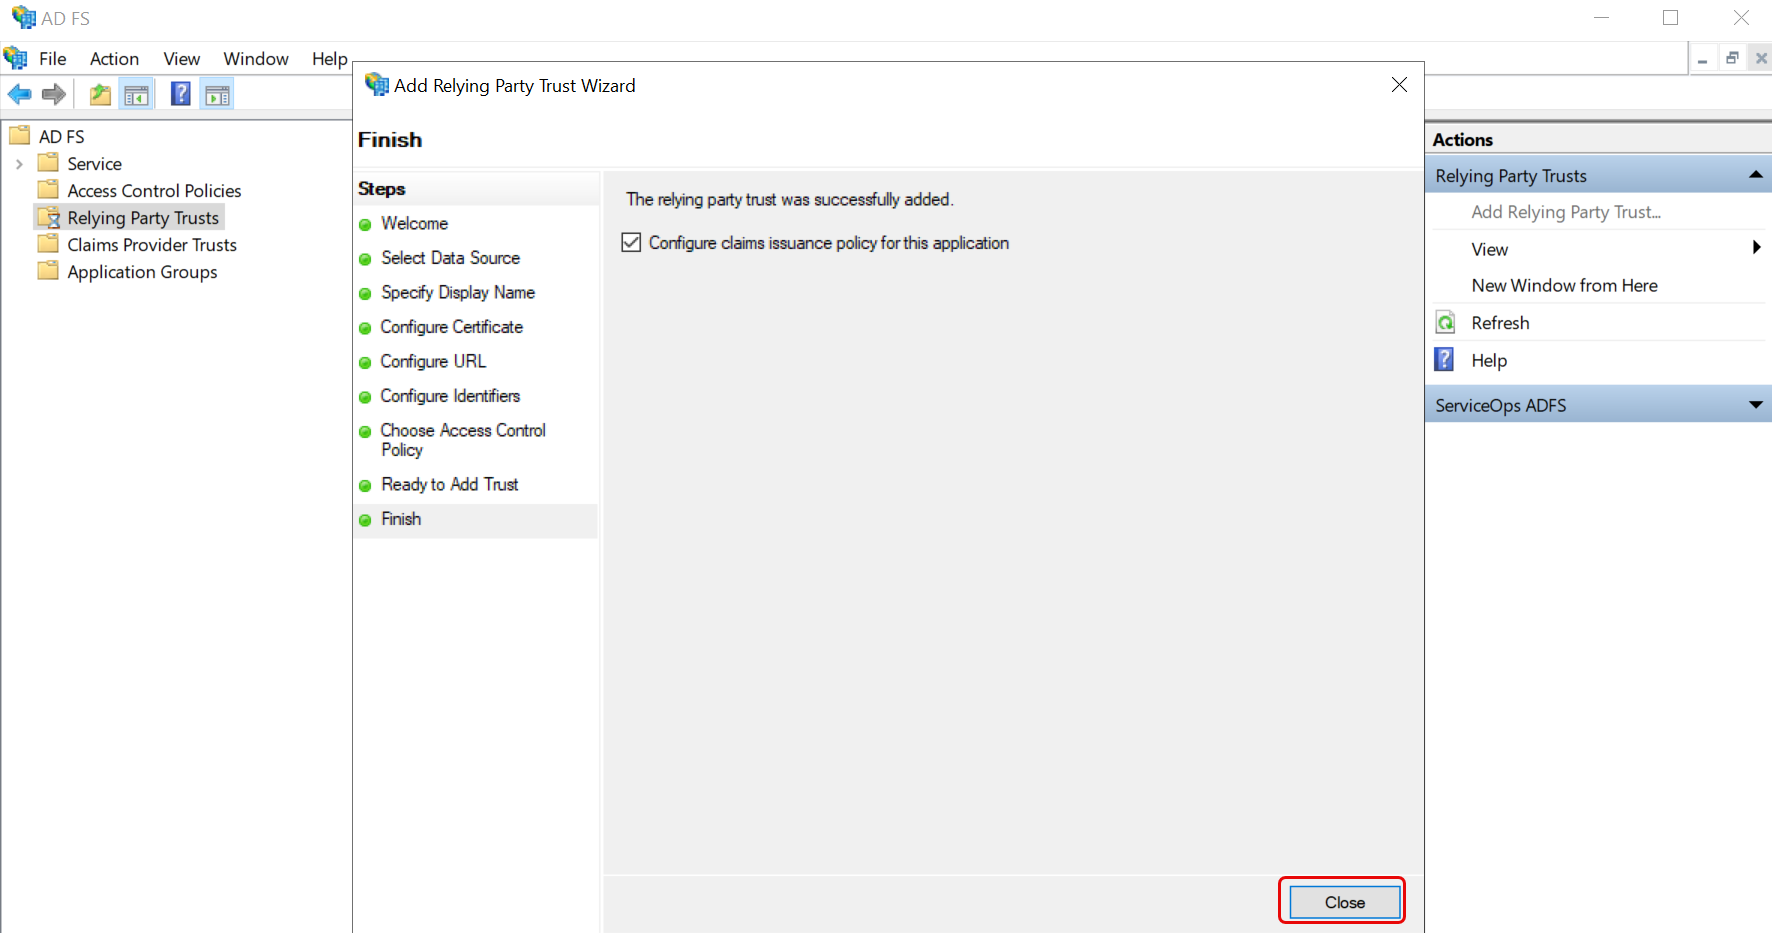
Step 10: Edit Claim Issuance Policy. If the option to open the Edit Claim Issuance Policy dialog is enabled, the Edit Claim Issuance Policy window will appear as shown below. You can also open this later by right-clicking on the Relying Party Trusts instance. You can edit the policy to enable proper communication with the ServiceOps ADFS instance. To edit,
- In the Issuance Transform Rules tab, click the Add Rule button below:

- Select the Claim rule template as Send LDAP Attributes as Claims and click Next.

- Configure Rule.
- Configure the Claim rule name.
- Set the Attribute store to Active Directory.
- Map the LDAP attributes to outgoing claim types using the dropdown list. Here, E-Mail Addresses and Given Name are set as LDAP Attributes. While E-Mail Address and Name are set as Outgoing Claim Type. You can configure other fields as well.

- Once done, click Finish, and the rule gets created.
- Now, again click Add Rules to add another rule.
- Select the Claim rule template as Transform an Incoming Claim and click Next.

- Enter the Claim rule name.
- Set the Incoming claim type to the Outgoing Claim Type in the previous rule. For example: E-Mail Address.
- Set the Outgoing claim type to Name ID and the Outgoing name ID format to Email.
These values must match the Name ID policy you define during SAML 2.0 configuration.
- Select Pass through all claim values.

- Click Apply and OK.
Step 11: Configure the SAML Logout Endpoint.
- Right-click on the Relying Party Trusts and select Properties.
- Select the Endpoints tab.
- In the SAML Assertion Consumer Endpoints section, edit the URL, and set its index as 1.

- Add another SAML URL using the Add SAML button and the window appears.

- Select the Endpoint type as SAML Logout and Binding as Redirect. Next, specify the Trusted and Response URL. Again, you can get these details from ServiceOps.

- Once done, click OK, and the following screen appears.

- Click Apply and OK to bring the changes into effect. The SSO is now configured.
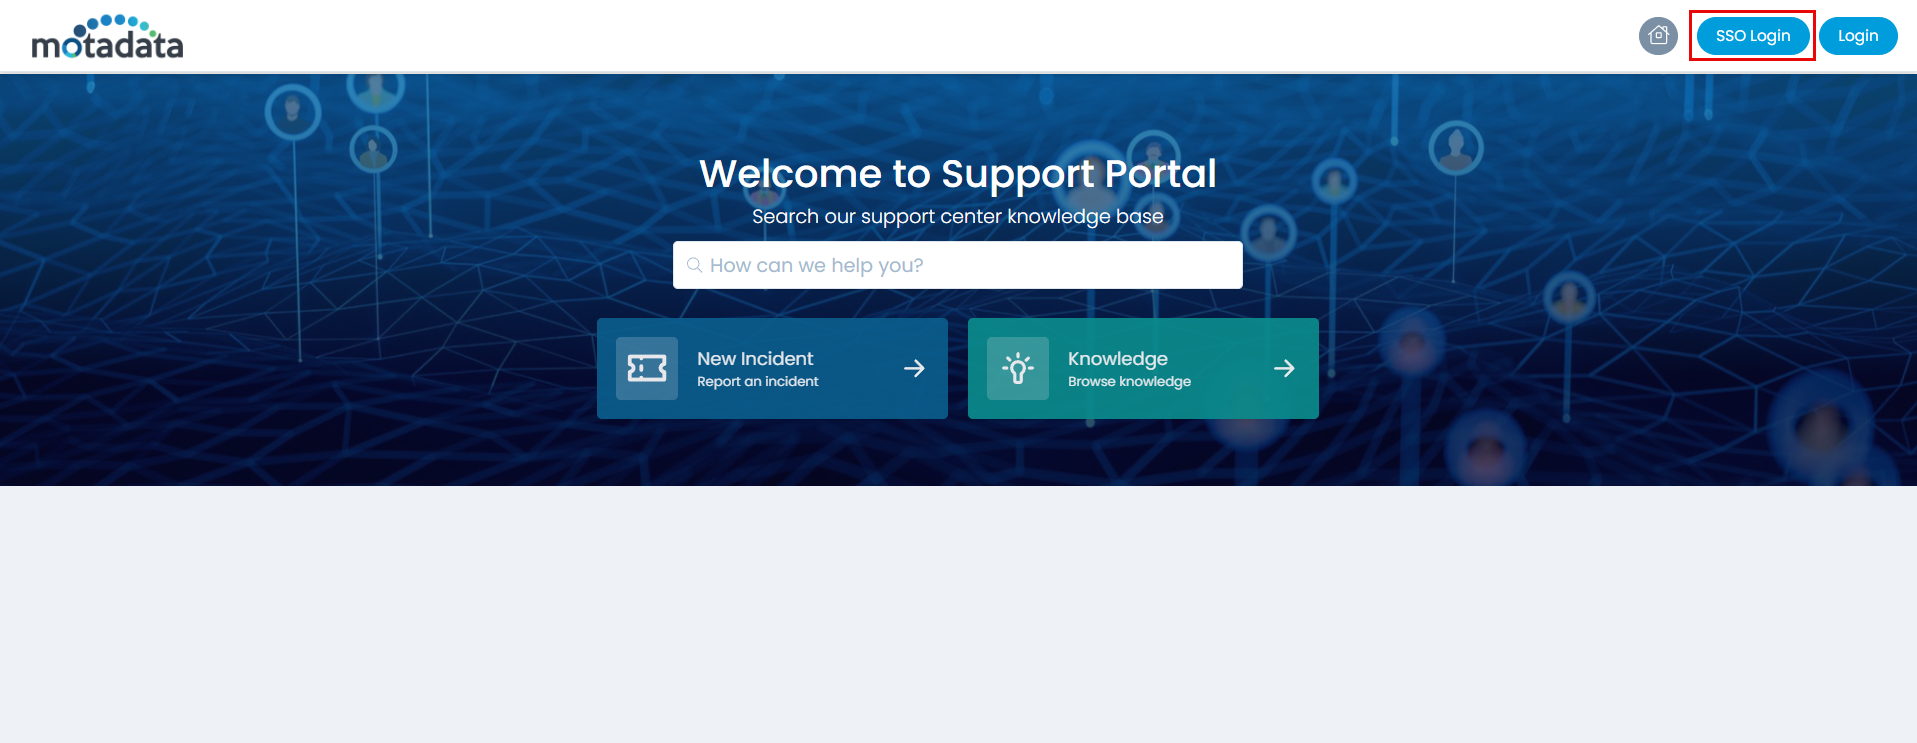
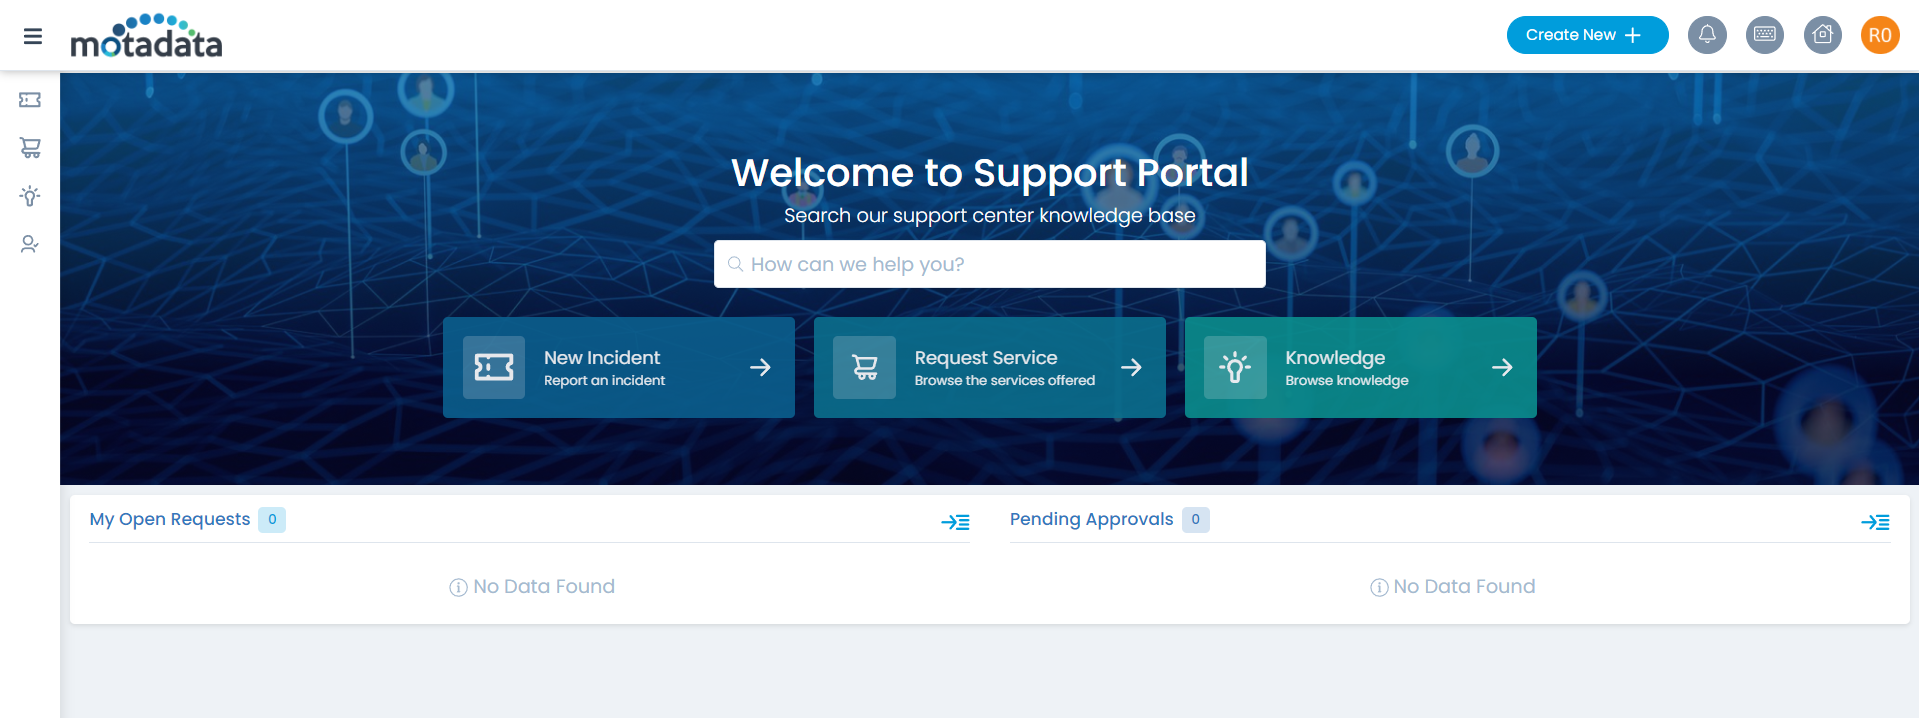
Step 12: You can verify this, by opening the ServiceOps Portal, and signing-in using the SSO Login button as shown below.
Step 13: You will be redirected to the AD FS Server Sign-in page, as shown below.
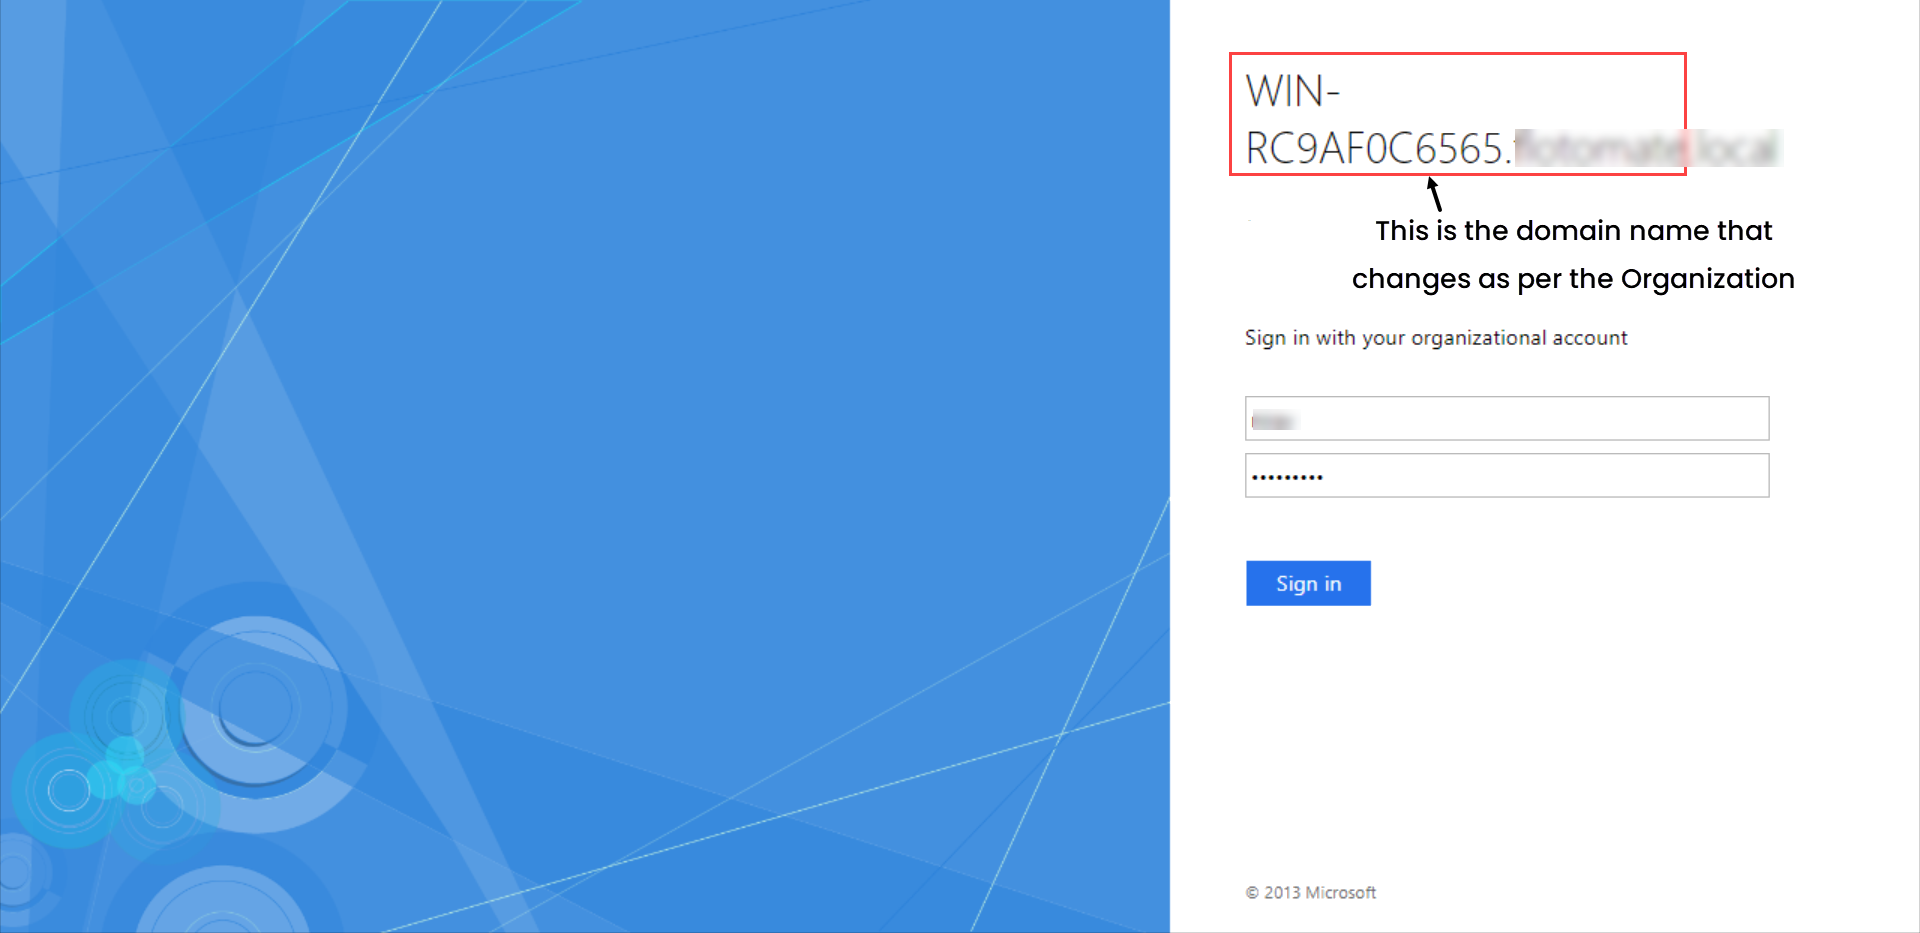
Step 14: Sign-in to the AD FS Server, and you will be redirected to the ServiceOps portal as shown below:
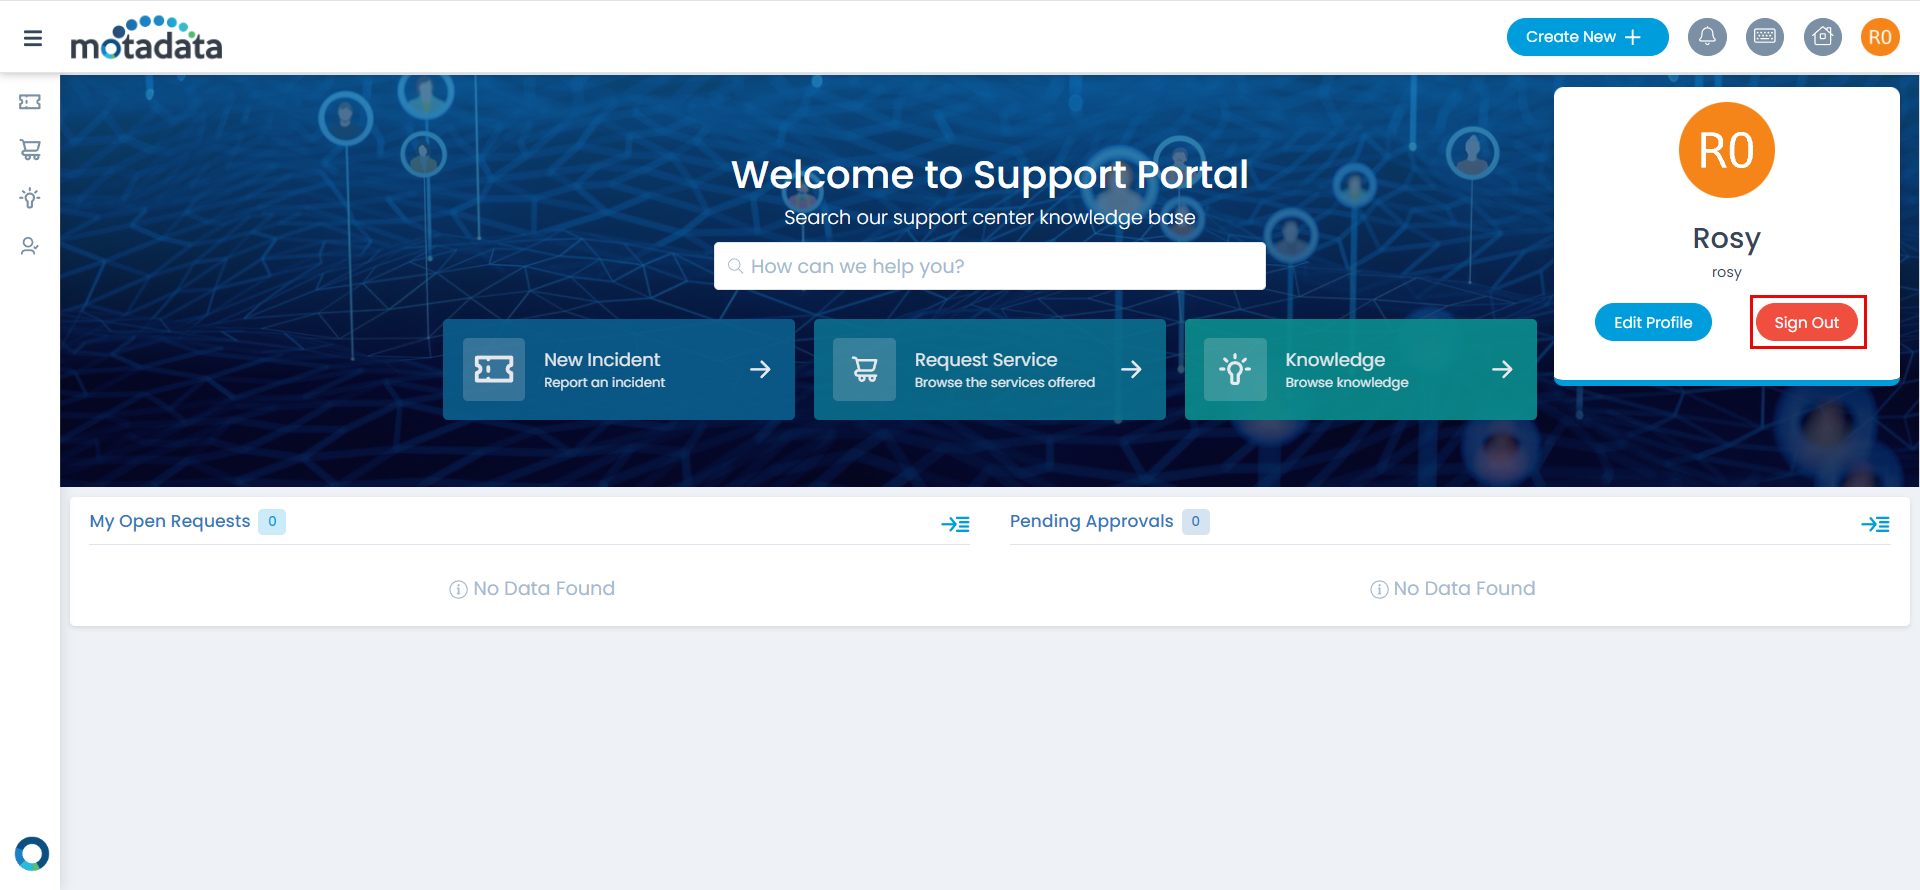
Step 15: To sign-out, click on the username, and click Sign-Out. You will be redirected to the AD FS Server page again or remain on the portal as per the configured SAML logout URL.
Steps for Windows Server 2012
To configure SSO with the ADFS service, follow the below steps:
Step 1: Sign-in to the ServiceOps portal as a Technician.
Step 2: Navigate to Settings > Admin > Organization > System Preference > Application Settings tab. Verify that the Base URL is the same as the portal URL. If it has the default IP Address, update it.
Step 3: Navigate to Settings > Admin > Users > SSO Configuration > Identity Providers and click Add Identity Provider. The popup appears.
Step 4: Provide the details as shown in the above Windows Server 2022 section. In this, the IDP details of the ADFS server are to be configured in the ServiceOps while the SP details in the ADFS.
Step 5: Click Add, and the provider will be displayed on the list page.
Step 6: In the ADFS server, open the Server Manager application in your machine and navigate to the Tools > AD FS Management tab. The following page appears.
Here, Server Manager v6.3.9600.16384 and Windows Server v2012 R2 is used.
Step 7: Right-click Service and choose the Edit Federation Service Properties option. The following window appears. Copy the Federation Service identifier and paste it into the IDP Entity ID field of ServiceOps.
Step 8: Click the Endpoints folder and search for FederationMetadata.xml in the Metadata section below:

Now, go to the URL path and open the XML file in any browser as shown below. The URL's format is:
Syntax: https://{server}/federationmetadata/2007-06/federationmetadata.xml
Example: https://info.serviceopsadfs.local/federationmetadata/2007-06/federationmetadata.xml
Copy the highlighted Entity ID, Certificate, and Single Logout URL from here and use them in the ServiceOps.
SAML Settings
Step 9: Add Relying Party Trusts
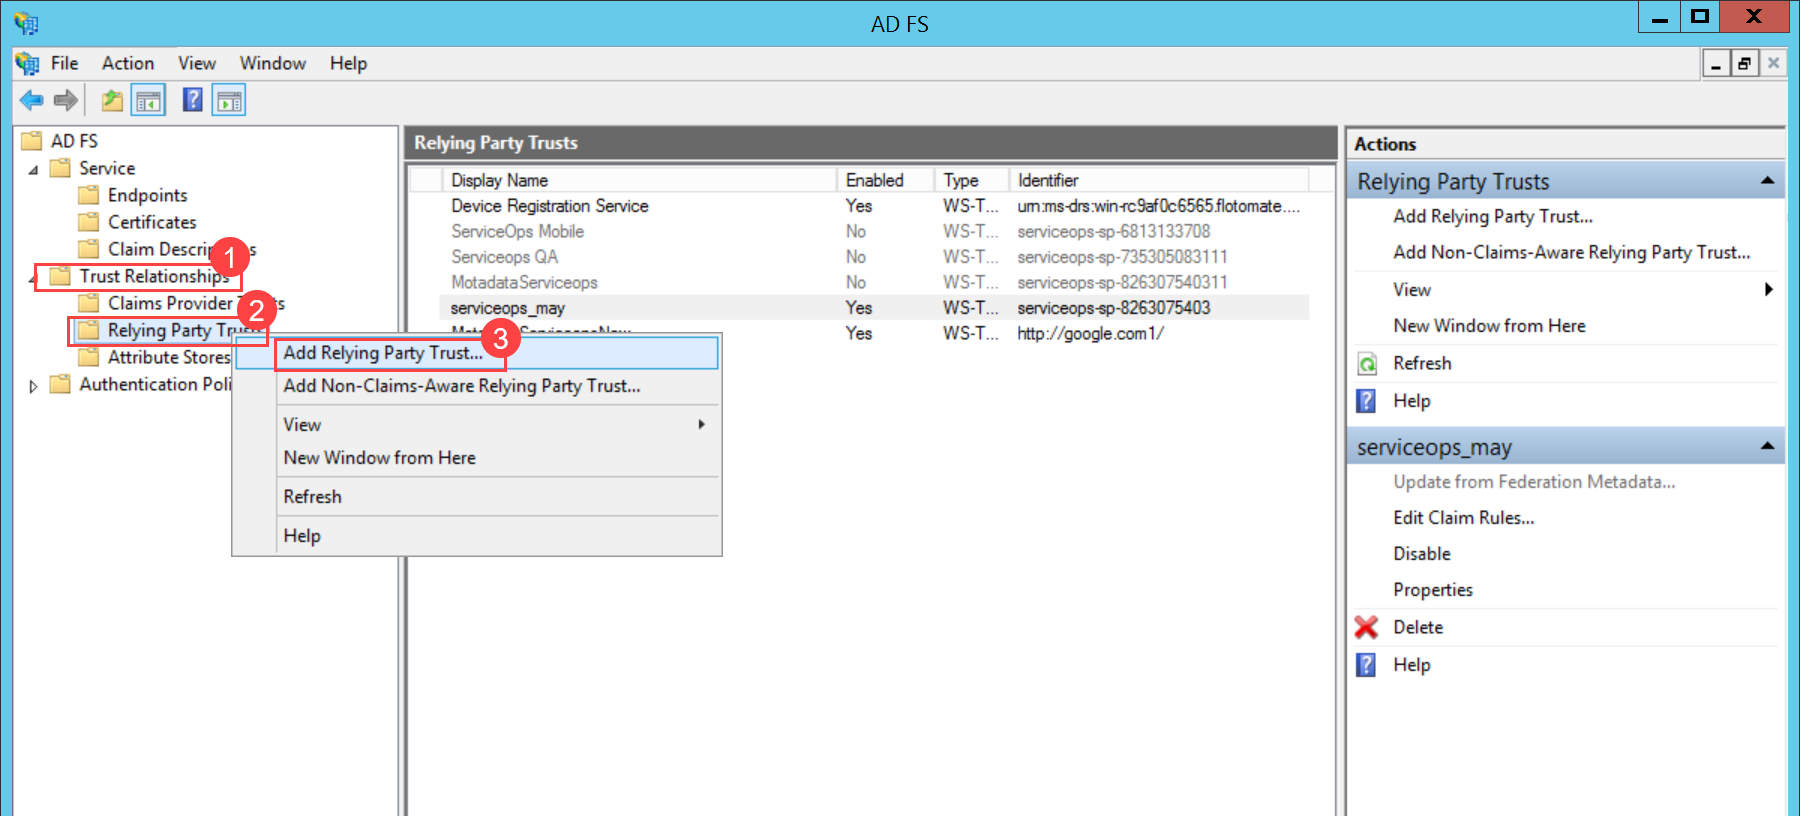
- Navigate to Trust Relationships > Relying Party Trusts > Add Relying Party Trust, and a wizard opens.
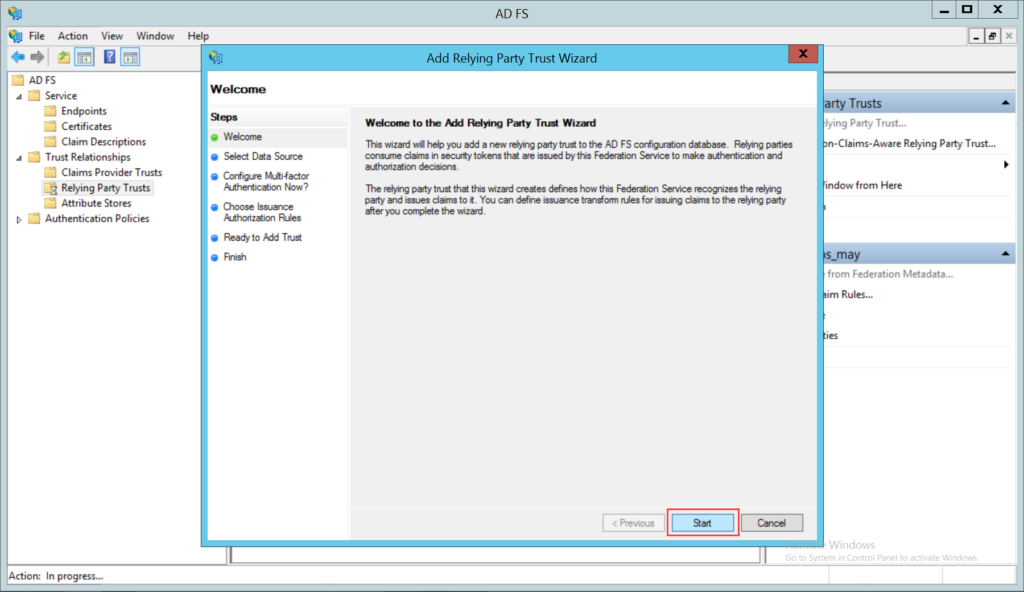
- Click Start.
- Select Data Source. Here, the manual option is selected, as shown below. Click Next.

- Enter the display name and click Next.

- Choose the profile and click Next.

- Configure Certificate using the Browse button and click Next.

- Configure the URL. Enable the option Enable Support for the SAML 2.0 Web SSO Protocol. Enter the Relying Party SAML 2.0 SSO service URL. The URL format should be as per the example provided below.

You can get the Relying party SAML 2.0 SSO service URL and Relying party trust identifier (SP Entity ID) details from the ServiceOps Home page > Admin > Users > SSO Configuration page.
- Configure the identifiers. Enter the SP Entity ID of ServiceOps and click Add. Once done, click Next.

- Configure Multi-factor Authentication (optional). Click Next.

- Choose Issuance Authorization Rules and click Next.

- Review the settings and click Next. If any changes are required, click Previous and make the editions.

- Once done, click Close, and the relying party trust gets successfully added to the AD FS database.

Step 10: Edit Claim Rules. If the option to open the Edit Claim Rules dialog is enabled, the Edit Claim Rules window will appear as shown below. You can also open this later by right-clicking on the Relying Party Trusts instance. You can edit the claim rules to enable proper communication with the Motadata instance. To edit,
- In the Issuance Transform Rules tab, click the Add Rule button below:

- Select the Claim rule template as Send LDAP Attributes as Claims and click Next.

- Configure Rule.
- Configure the Claim rule name.
- Set the Attribute store to Active Directory.
- Map the LDAP attributes to outgoing claim types using the dropdown list. Here, E-Mail Addresses and Given Name are set as LDAP Attributes. While E-Mail Address and Name are set as Outgoing Claim Type. You can configure other fields as well.

- Once done, click Finish, and the rule gets created.
- Now, again click Add Rules to add another rule.
- Select the Claim rule template as Transform an Incoming Claim and click Next.

- Enter the Claim rule name.
- Set the Incoming claim type to the Outgoing Claim Type in the previous rule. For example: E-Mail Address.
- Set the Outgoing claim type to Name ID and the Outgoing name ID format to Email.
These values must match the Name ID policy you define during SAML 2.0 configuration.
- Select Pass through all claim values.

Step 11: Configure the SAML Logout Endpoint.
- Right-click on the Relying Party Trusts and select Properties.
- Select the Endpoints tab and click Add SAML.

- Select the Endpoint type as SAML Logout. Next, specify the Trusted and Response URL. Again, you can get these details from ServiceOps.

- Once done, click OK, and the following screen appears.

- Click Apply and OK to bring the changes into effect. The SSO is now configured.
Step 12: You can verify this, by opening the ServiceOps Portal, and signing-in using the SSO Login button as shown below.
Step 13: You will be redirected to the AD FS Server Sign-in page, as shown below.
Step 14: Sign-in to the AD FS Server, and you will be redirected to the ServiceOps portal as shown below:
Step 15: To sign-out, click on the username, and click Sign-Out. You will be redirected to the AD FS Server page again or remain on the portal as per the configured SAML logout URL.