Custom Scope Configuration
Admin users can create attribute-based custom scopes from here to control what technicians can view and update across tickets, enhancing security, streamlining workflows, and supporting compliance. It allows to configure View Access, defining which records a technician can see, and Update Access, restricting modifications to only the records within their View Access. This feature improves security by limiting access to sensitive data, increases efficiency by displaying only relevant information, and provides flexible permissions to support complex access needs. The custom scope can be configured for Request, Problem, Change, and Release modules.
This sub-module is available only if the Admin Manage Custom Scope Configuration permission is granted.
To configure,
- Navigate to Admin > Users > Custom Scope Configuration and the following page appears.
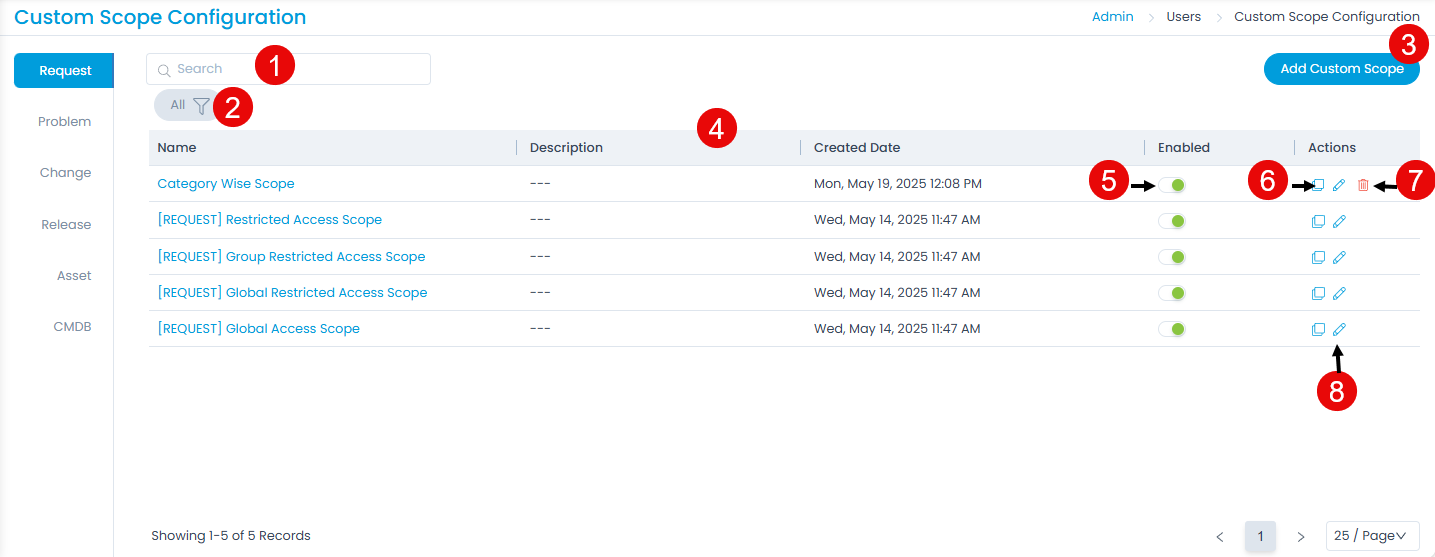
It has the following options:
- Search: Search for the required scope based on name.
- Filter: Filter the list of scopes by clicking the desired option. The options are All, Enabled, and Disabled.
- Add Custom Scope: Add a new custom scope.
- Grid: Displays the details of the default and custom scopes configured.
- Enable/Disable: Enable or disable the scopes that you want to use. By default, a new scope is always in enabled state.
- Duplicate: Use the existing scope to create a new one. It helps in modifying the existing scope without breaking it.
- Delete: Delete the scope if not required. Only custom scopes can be deleted.
- Edit: Edit the existing scope to make changes in it. The page is exactly similar to the create page.
Add Custom Scope
To add a custom scope,
- Click the Add Custom Scope button and the below page appears.
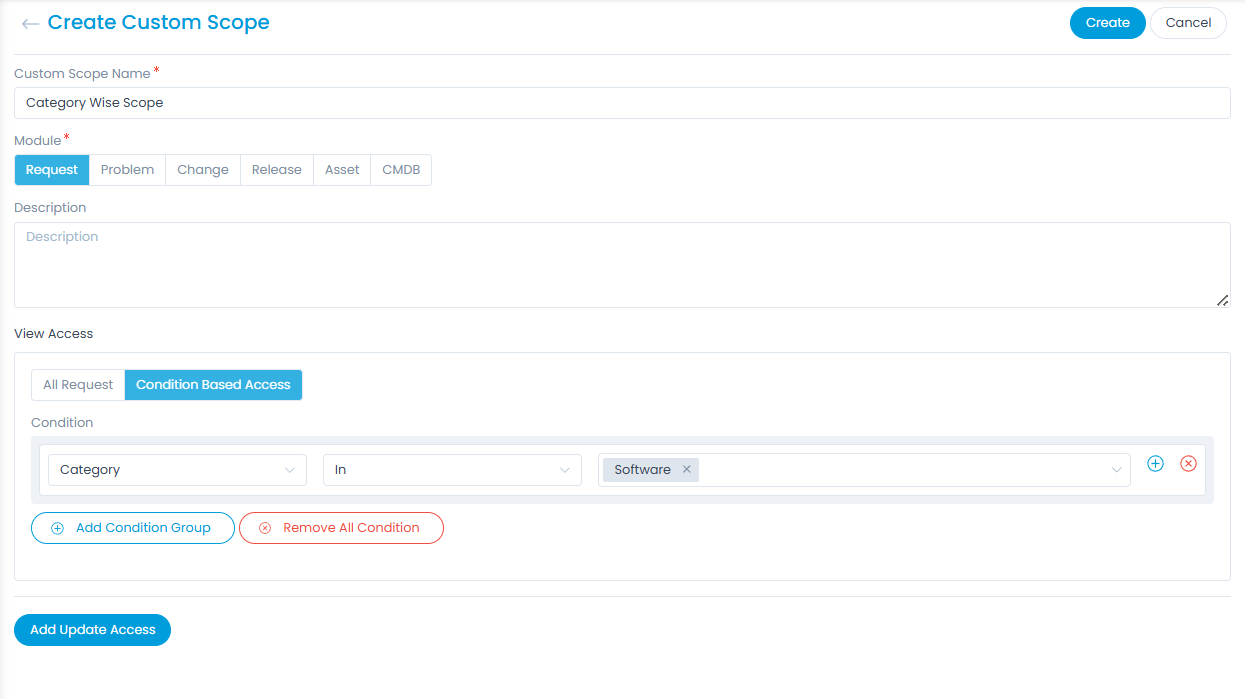
- Enter the below details:
- Custom Scope Name: Enter a unique custom scope name.
- Module: Select the module for which you want to create the custom scope. The supported modules are Request, Problem, Change, and Release. Here, Request module is selected.
- Description: Provide a brief description about the custom scope.
- View Access: Select whether you want to apply the view access for all requests or based on conditions.
- If All Request is selected, the technicians to whom this scope will be applied will have only Request view access rights.
- If Condition Based Access is selected, select the condition based on which the scope will be applied. You can add multiple conditions or remove using the respective icons.
- Add Update Access: Click to allow technicians to update records within their viewable scope, based on the defined conditions. This ensures that technicians can update only the records they are permitted to view.
- Once done, click Create. You can now apply this scope to the required technicians whose access you want to control. You can apply either at the time of creating or editing a technician.
- Similarly, you can create custom scope for the Problem, Change, Release, Asset, and CMDB modules separately.