User Imports
Motadata allows you to import the users belonging to different servers. For example AD users, Okta user, etc.
Motadata ServiceOps establishes a connection with the services using the provided information and fetches the employee details from the server into the Motadata ServiceOps.
To view the User Imports page, navigate to the Admin > Users > Custom SSO Configuration > User Imports tab, and the page appears. The page enables seamless user import using a dedicated plugin developed by the Motadata team, streamlining user provisioning and access management.

The page provides the following features:
- Search: You can search for the required service using the keywords.
- Add User Import: You can import users.
- Grid: Displays the details of the import.
Add User Import
To configure user import,
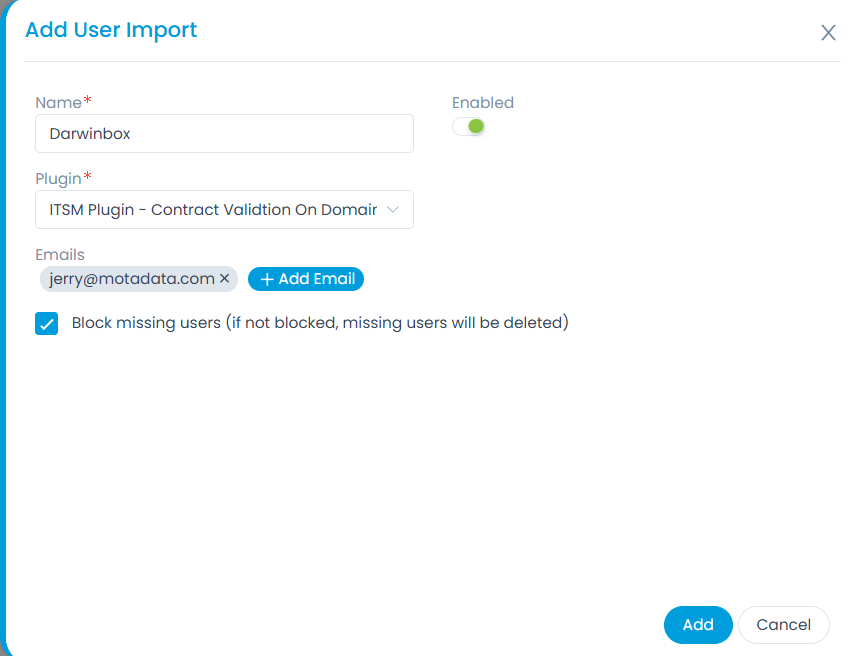
- Click the Add User Import button and the following popup appears.


- Enter the following details:
- Name: Enter a name for the user import.
- Enabled: Enable the user import functionality. By default, enabled.
- Plugin: Select the plugin using which the users will be imported from the client side. Plugin can be added from the Plugin page.
- Emails: Add the email address to whom the notification must be sent related to the user import.
- Block missing users (If not blocked, missing users will be deleted): If enabled, the missing users will be blocked. If disabled they will get archived.
- Once done, click Add. It will appear on the list page as shown below.

Now, you can perform the following operations:
- Schedule Enabled: You can enable or disable the schedule.
- Show History: You can view the user import history for each login provider individually.
- Import Users: You can import the users of the desired login provider into ServiceOps.
- Scheduler: You can create a schedule for each Login Provider individually, based on which the users will get synchronized.
- Edit: You can edit the configurations.
- Delete: You can delete the configuration if required.
Show History
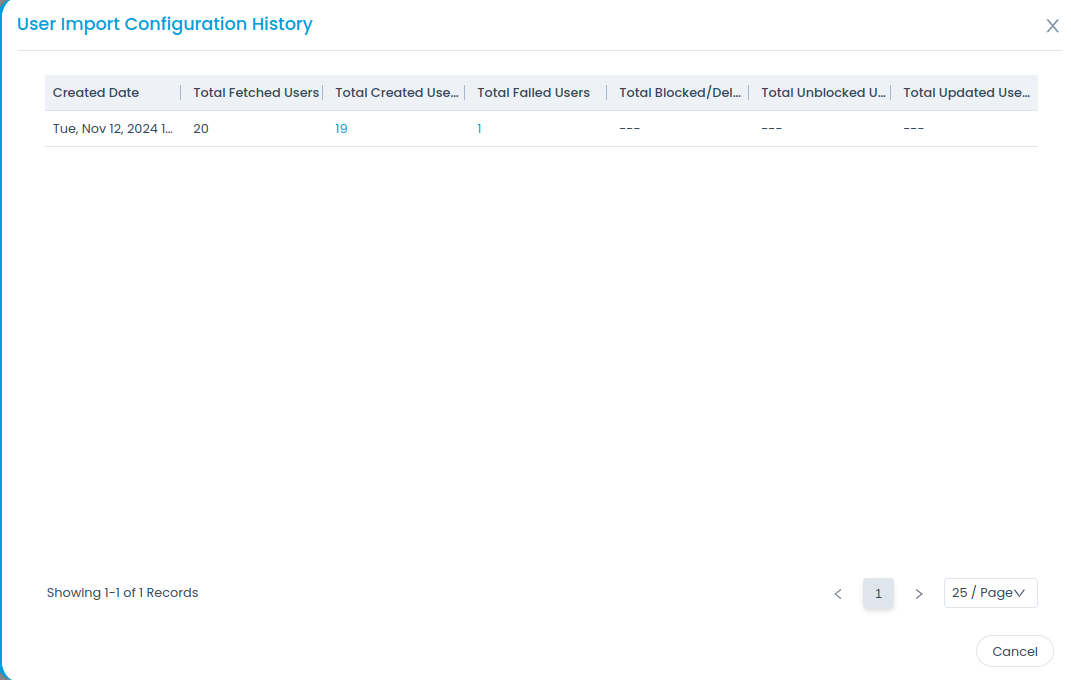
Once the users are imported, you can view its history by clicking the Show History icon in the Actions column next to the created import. It displays the details like Created Date, Total Fetched Users, Total Created Users, Total Failed Users, Total Blocked/Deleted Users, Total Unblocked Users, and Total Updated Users.

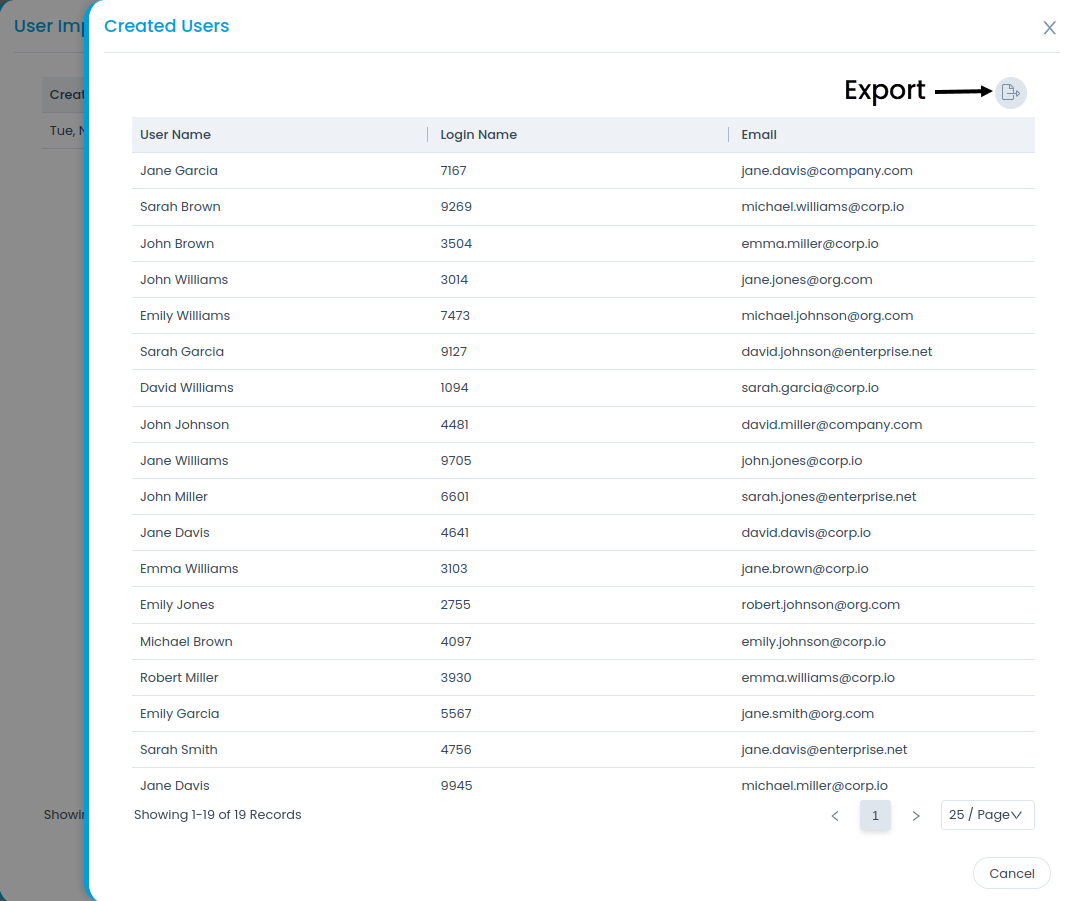
Additionally, you can view the list of users created, failed, blocked, and unblocked by clicking on the count link as shown below.

Also, you can export the list of users in CSV and Excel Format. Moreover, the excel file can be password-protected.
Import Users
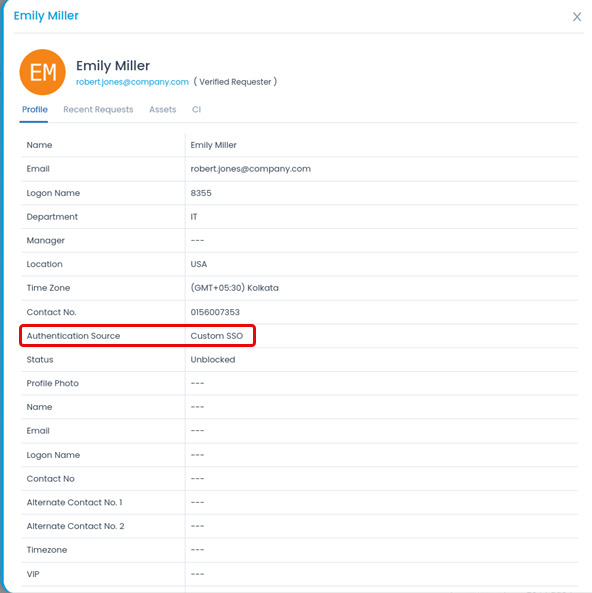
Click the Import Users icon in the Actions column to import the users from the desired server to ServiceOps. Once clicked, the imported users get added as requesters in the ServiceOps as shown below.

Create Schedule
Scheduling allows you to periodically import employee details from the server. This feature helps you to keep the Requesters list up to date.
To create a schedule,
- From the list page, click the Scheduler icon in the Actions column. A popup appears.

- Enable the scheduler.
- Select the Schedule Type. The options are:
- Once: If selected the schedule will run only once as per the start date selected in the Start At field.
- Daily: If selected the schedule will run daily as per the Start At and Time selected. The Start At field depicts the date and time when the schedule should start.
- Weekly: If selected the schedule will run weekly as per the Start At, Day, and Time selected. The Start At field depicts the date when the schedule should start. Day depicts the day on which the schedule should run.
- Monthly: If selected the schedule will run once in a month as per the Start At, Date, Time, and Month(s) selected. The Start At field depicts the date when the schedule should start. Date is the date of the month on which the schedule should run.
- Once done, click Update to save the schedule.