Asset Movement
Assets may be required to send out of the premise for repairing, replacement, trial, and later its replacement also needs to be collected. Thus, to keep track of such asset movements in and out of the organization, the Asset Movement Tracking functionality is added. Asset movements in such scenarios also require Approval from the respective department head in some cases and also a valid Asset Gate Pass as a proof to clear the security checks of the organization.
Asset Movement functionality is currently implemented for the below asset movement types:
For Send to Repair and Return from Repair, the asset conditions include the assets to be declared or marked as Faulty before requesting for a movement.
To view the Asset Movement page, navigate to Admin > Asset Management > Asset Movement and the list page appears. Initially, the list page will appear as shown below.
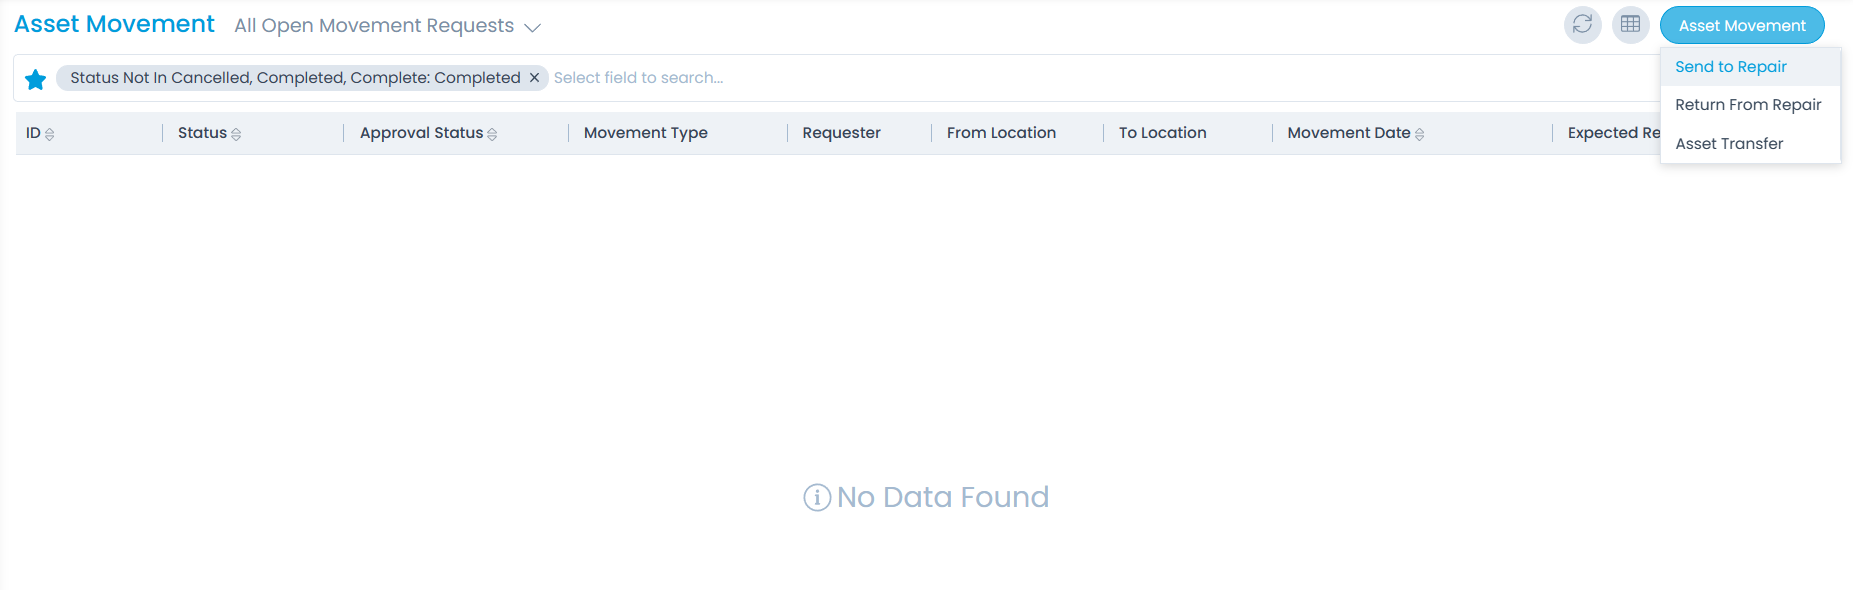
List Page
The list page displays a list of asset movements along with their details. You can also perform various tasks from here.
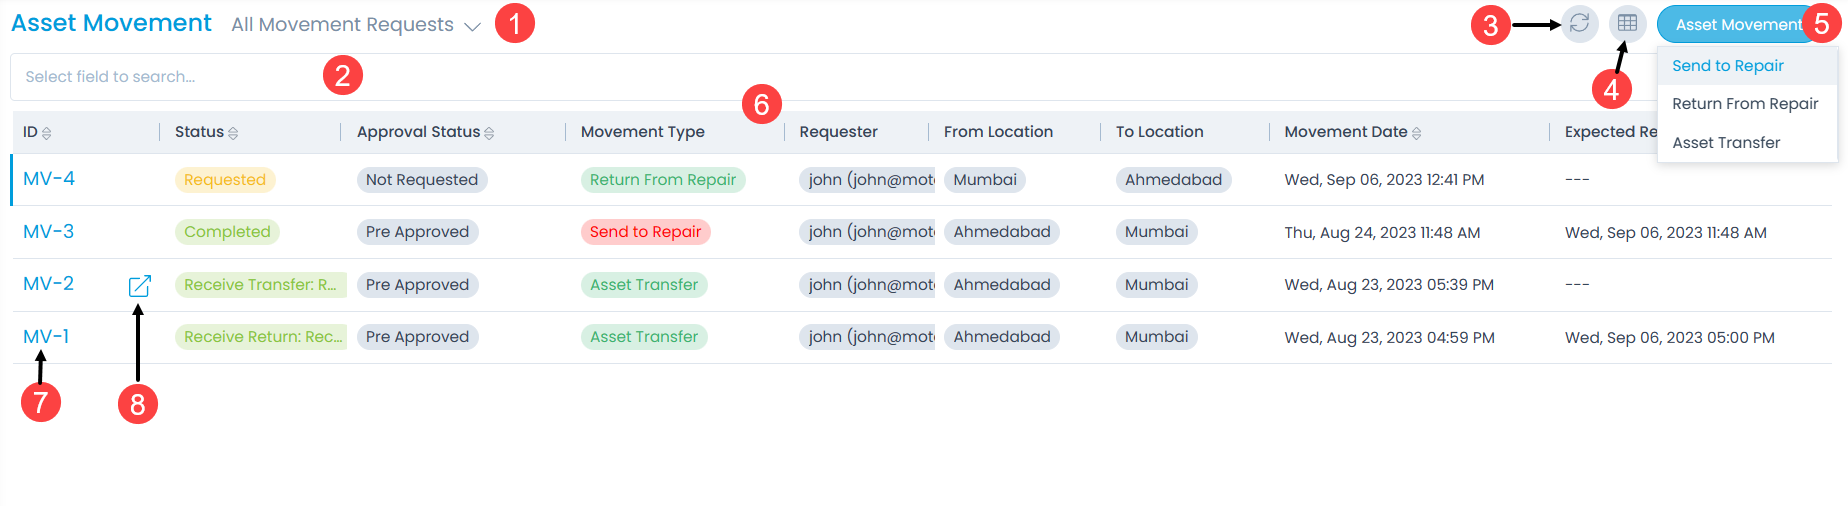
The page provides the following features:
- Filter: You can filter the assets by clicking the desired option. For example: If All Open Movement Requests is selected, the grid displays all the open movements with requested status.
- Search: You can look for specific asset movement by searching them. The search is a faceted search and allows you to find with specific criteria. You can find more details in the search section.
- Refresh: You can refresh the asset movement list. This is useful when multiple people are working on the asset movement and contents are updated frequently.
- Column Selection: You can select the columns that you want to view in the grid table as shown below. You can select maximum 10 columns.

- Asset Movement: You can create an asset movement request of type "Send to Repair", "Return From Repair", and "Asset Transfer".
- Grid: The grid displays the details of the asset movement as per the selected columns. By default, it displays the first 8 columns. Also, the data is displayed in the descending order of Created Date by default.
- View Details Page: You can click the Asset Movement ID to view the Asset Movement Details page.
- View Details Page in a new tab: You can click the arrow icon next to the ID to view the details page in a new tab.
Details Page
On the Details page, you can view the complete details of the asset movement and perform the desired activity. To view the Asset Movement Details page, on the List page click on the desired ID or the arrow next to it, and the below page appears.
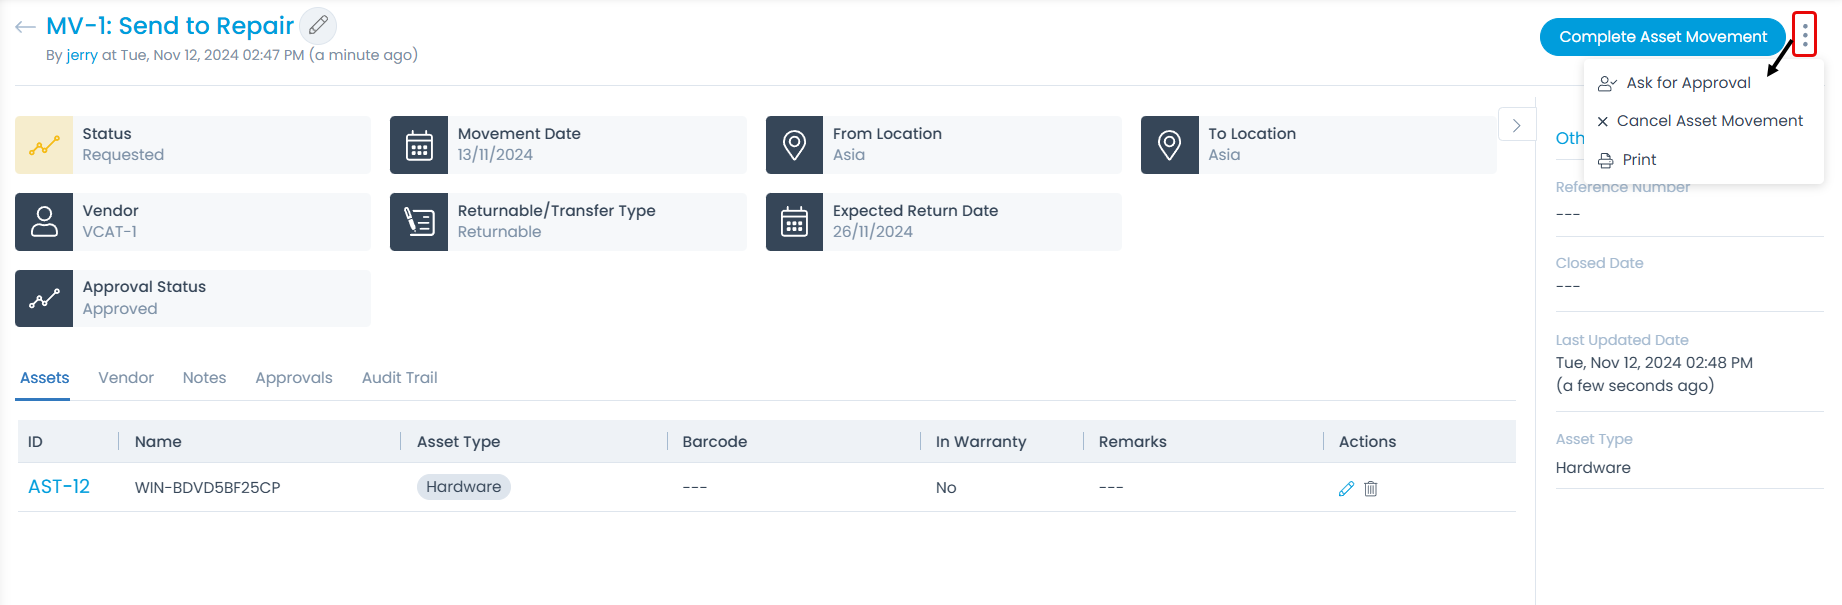
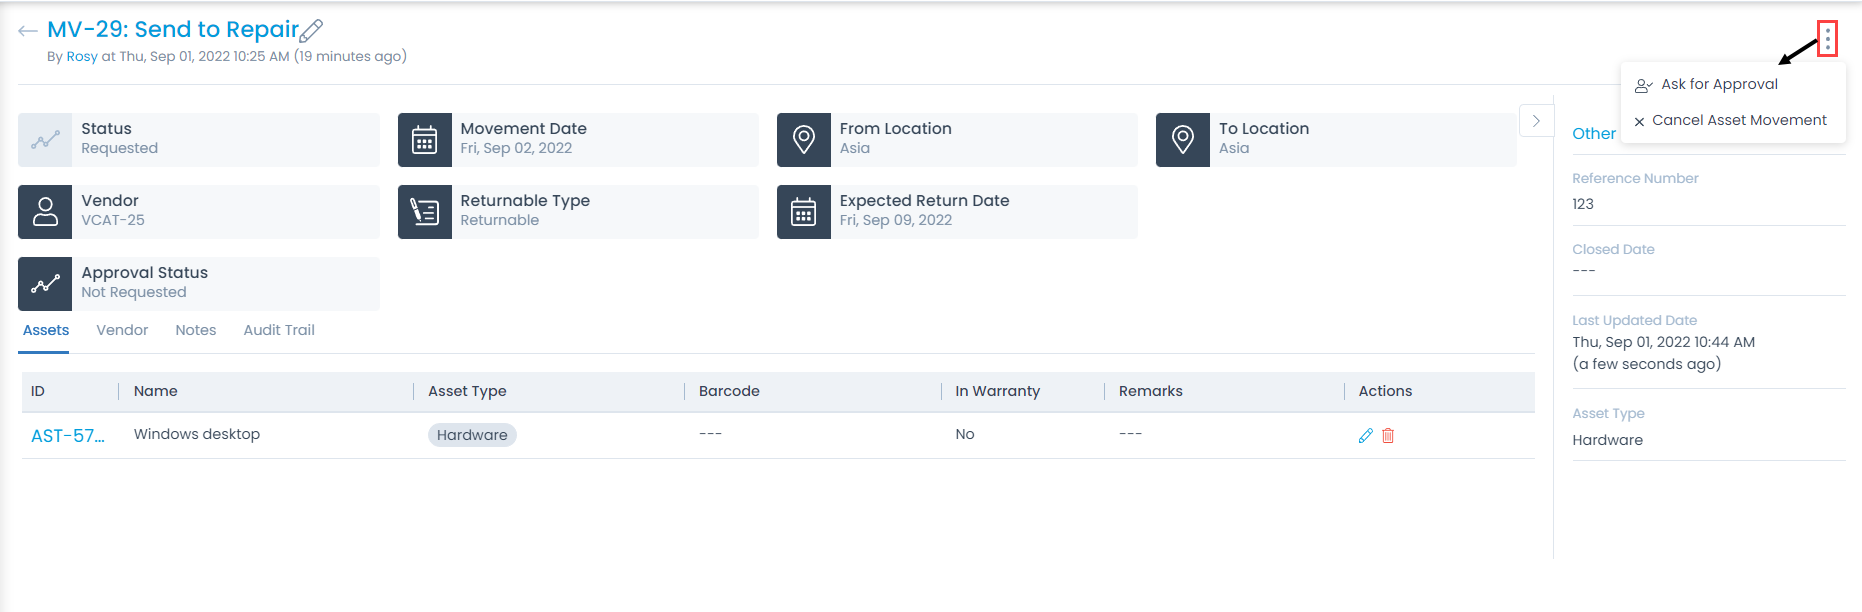
Classifiers of Asset Movement
These properties tell you the current statistics of the asset movement and help you to classify them under different labels. When someone works on asset movement, the person updates the labels accordingly. For example: If the status is closed, it means you have nothing to do with the asset movement.

| Parameter | Description |
|---|---|
| Status | This label classifies the asset movement based on the status. The default status are: Requested, Completed, and Cancelled. |
| Movement Date | This displays the date of the asset movement. |
| From Location | This displays the location from where the asset is to be moved. |
| To Location | This displays the destination location of the asset. You can change it if required. |
| Vendor | This displays the vendor of the asset. |
| Returnable Type | This displays whether the asset is Returnable or Not Returnable. You can change it if required. |
| Expected Return Date | This displays the date when the asset is expected to return after repair. |
| Approval Status | This displays the approval status of the asset movement. |
Associated Actions for Asset Movement
You can create or update different actions and activities as a part of communication, collaboration, and resolution in the asset movement. The available types of actions are:
- Assets
- Vendor
- Notes
- Approvals
- Audit Trail
You can view the number and exact name of the Asset which is in movement. You can either edit or delete the asset from this tab.

You can view the vendor details.

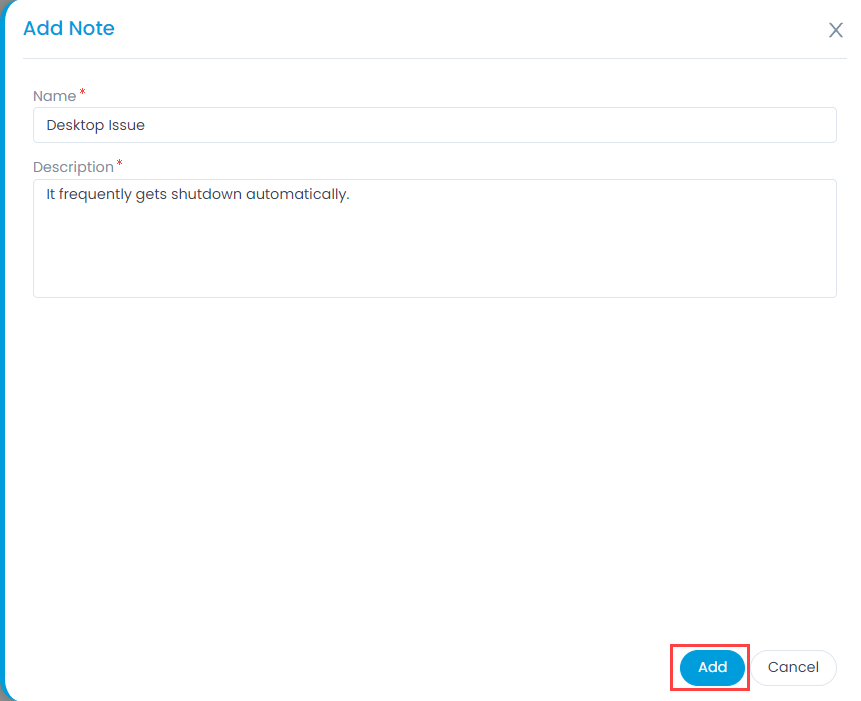
You can view the list of notes if made during the movement. Also, here you can create new notes using the Add Note button.
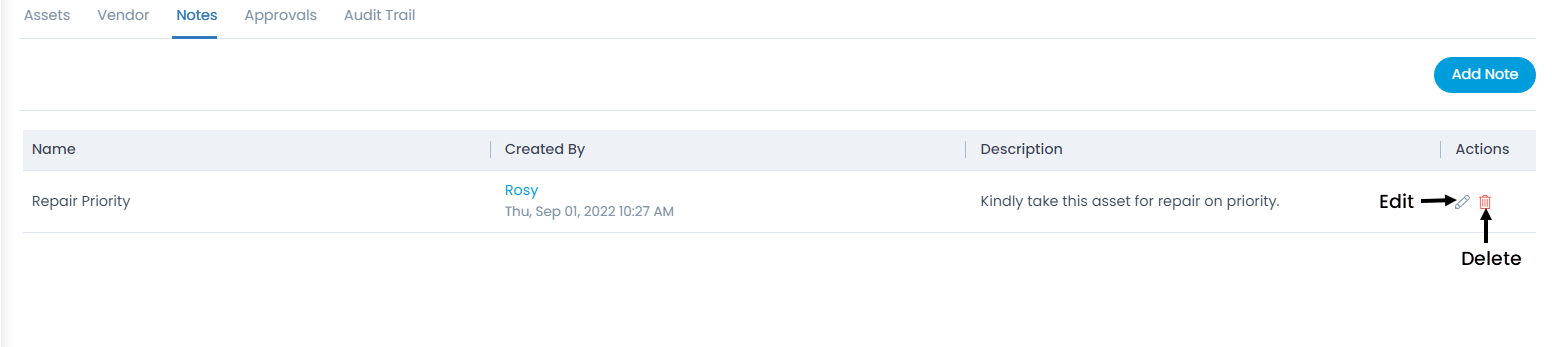
To add a note,
- Click the Add Note button and a popup appears.
- 1. Enter the Name and Description.
- 1. Click Add and the note gets added.
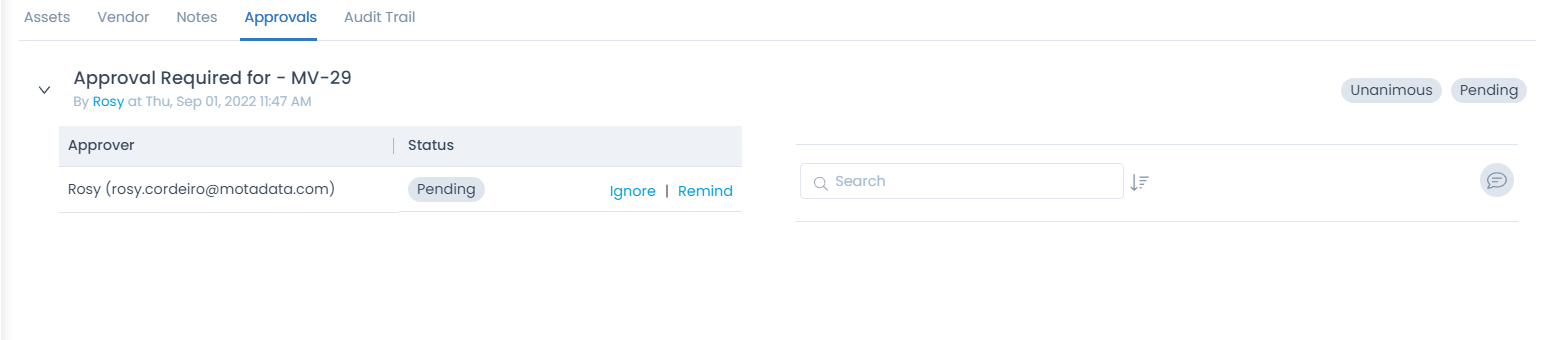
You can view the pending and approved approvals of the asset movement and remind the concerned technician about it.
The Approvals tab is visible only when there is a pending approval for the asset movement.
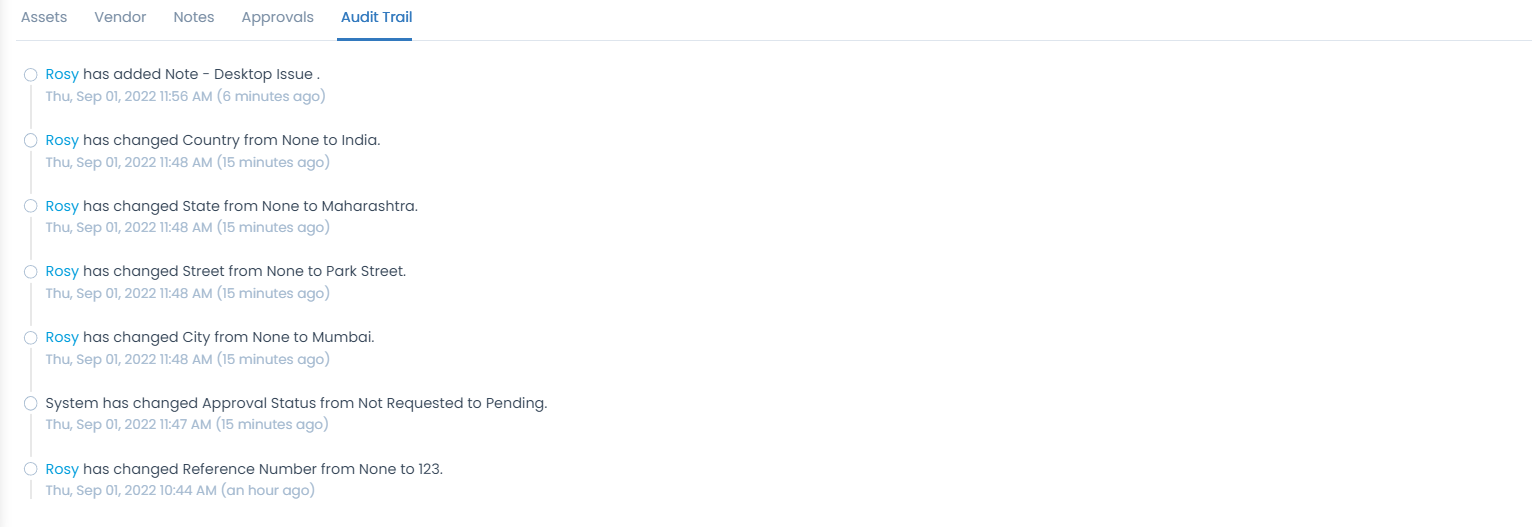
You can view the overall activities performed for the particular asset's movement.
Along with the above, you can Ask for Approval or directly even Cancel Asset Movement.
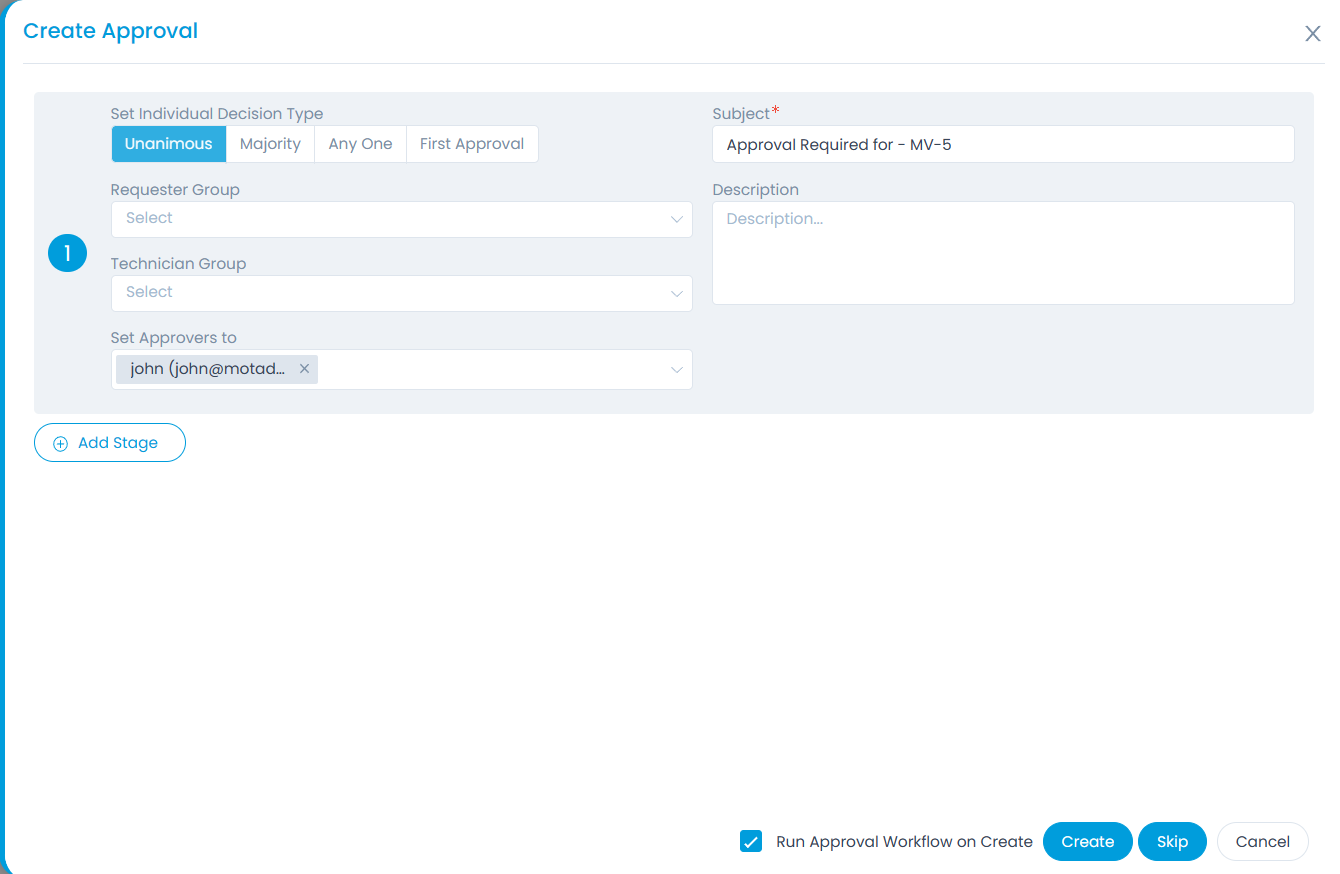
Ask For Approval
An approval process makes sure that there are no unauthorized actions. You can ask for an approval if a technician is assigned to the movement. You can initiate an approval from the asset movement details page. To do this:
- Click the More Options icon on the top-right corner of the details page. It will open a dropdown menu.
- Select Ask for Approval and a popup appears. Fill in the details.
| Parameter | Description |
|---|---|
| Set Individual Decision Type | Select the type of decision. - Unanimous: Everybody selected as approver has to approve the request. - Majority: Majority of approvers should approve the request. - Any One: Any one approver can approve the request. - First Approval: If selected, the first approval received (Approved or Reject) will be considered and the rest will be ignored. For example, If 3 approvers are set and if the first approval received is Approved, then this is considered. The approvals from the rest of the approvers will be Ignored, though rejection is received later from other approvers. |
| Subject | Default subject is ‘Approval Required for – Request ID’. You can replace it with your own subject. |
| Requester Group | Select the requester group whose members can give the approval. |
| Technician Group | Select the technician group whose members can give the approval. |
| Set Approvers to | Select the approvers if you want specific people to approve. |
| Description | Type the description so approvers can gain sufficient information about the approval required. |
| Add Stage | If the approval process is a multi-level process, click on Add Stage to add another approval form. For example: When someone needs a new laptop, first the manager should approve. Secondly, IT department should approve, and then the hardware shop should approve as the 3rd level approver. |
Once all the details are provided, click Create. The manual approval created will run based on the "Run Approval Workflow on Create" option. If enabled, the manual and Approval Workflow will run on clicking Create. If disabled, only manual approval will get created. The Approval Setting "Allow User to Create Manual Approval" should be enabled from the Approval Workflow page.
If Skip is clicked, the request gets pre-approved and the status is updated in the Approval Status classifier. Also, its entry will appear in the Audit Trail.
The asset transfer request will get pre-approved only if there is no active Approval Workflow whose conditions match the request. If the Approval Workflow exists, the request will not get pre-approved, and the Approval Workflow with matching conditions will get executed.
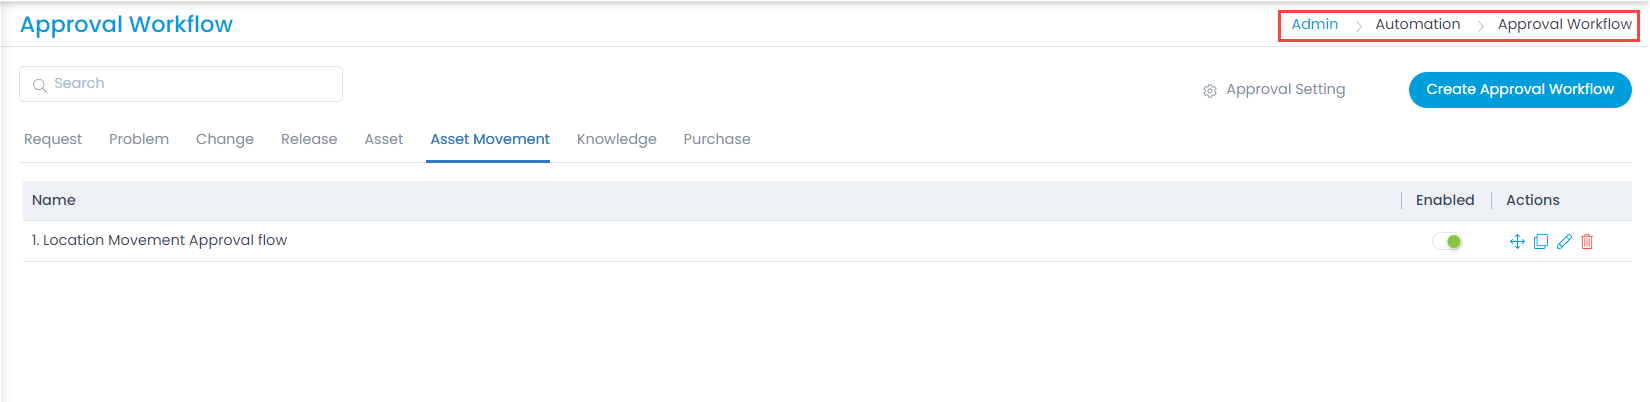
- The Approval Workflow can be created from the Admin Section as shown below:
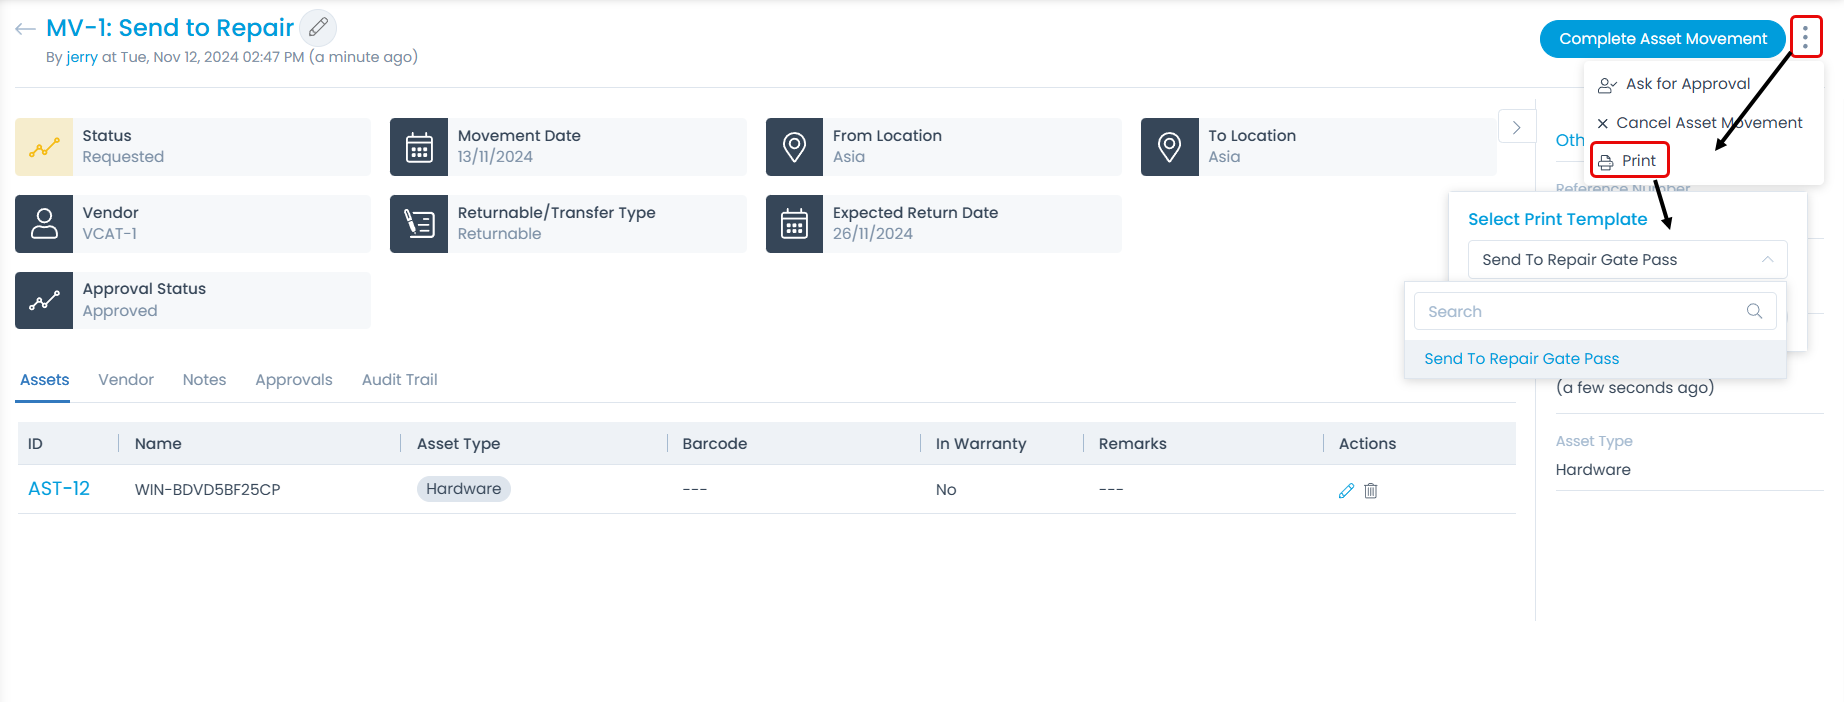
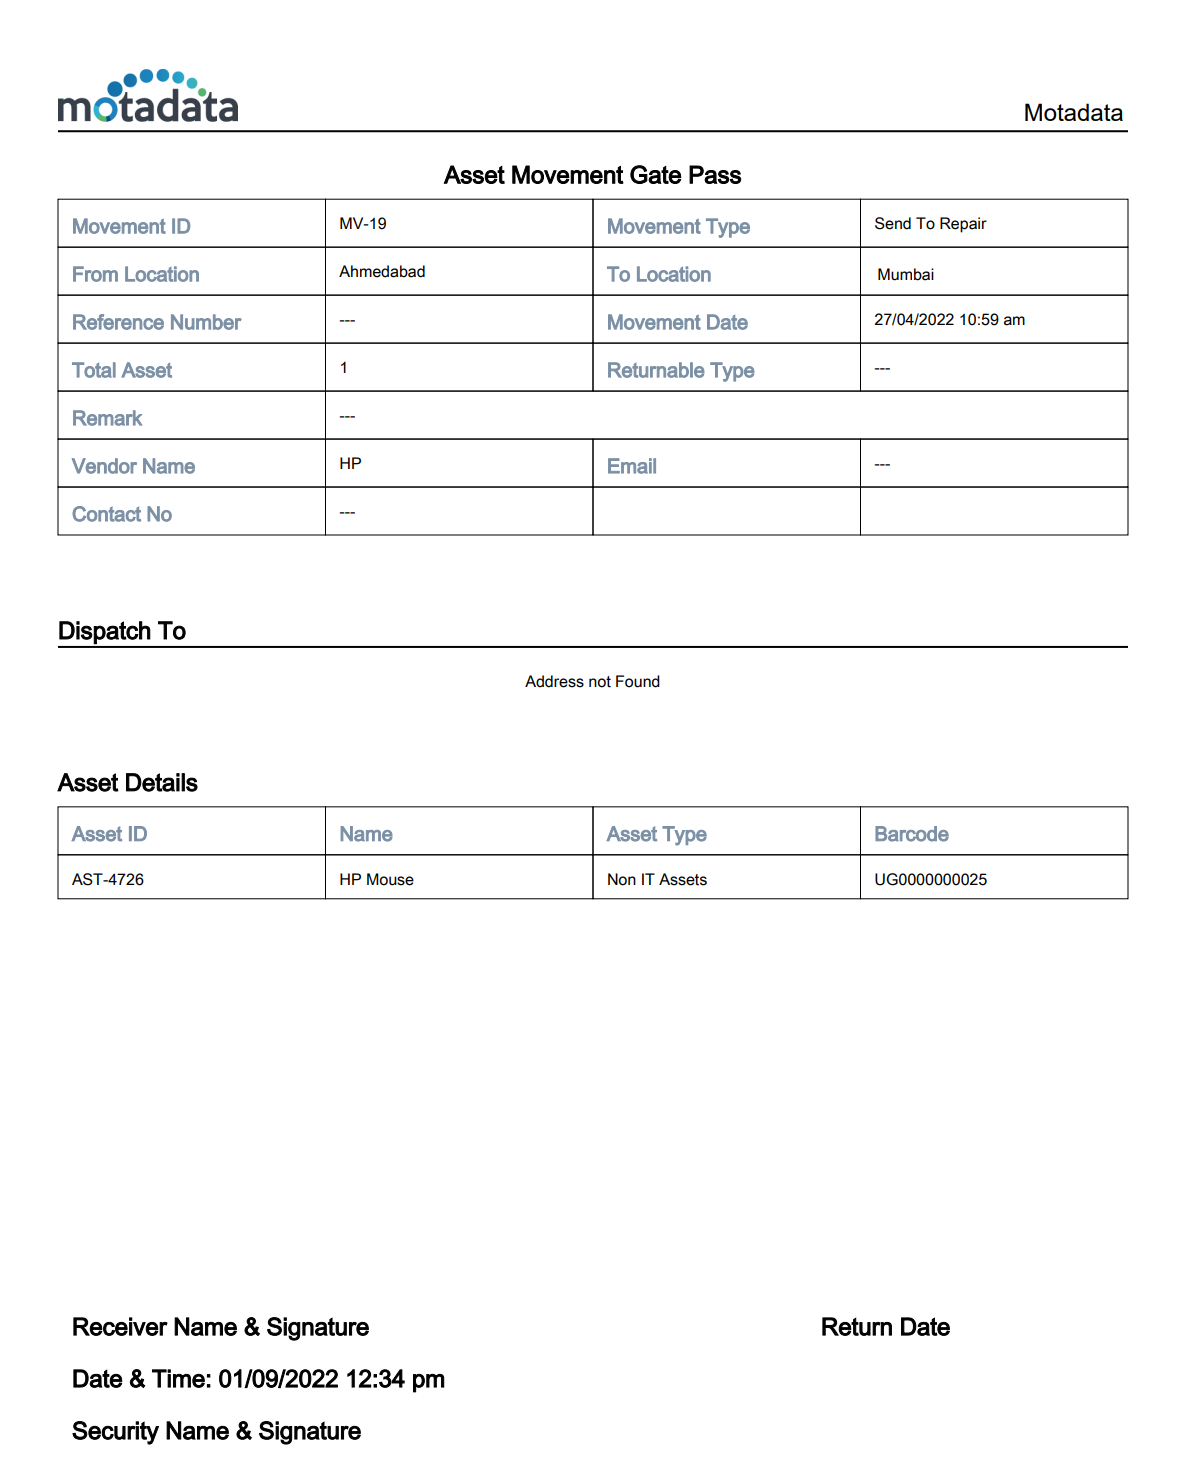
Gate Pass for Asset Movement
A gate pass can be generated by selecting the required template using the Print option from the More Options icon available on the top-right corner, as shown below. This option is available once the Asset Movement is approved and completed.
- A single Asset Movement Gate Pass will be generated in case of Permanent Transfer.
- 2 Asset Movement Gate Passes will be generated in case of a Temporary Transfer.
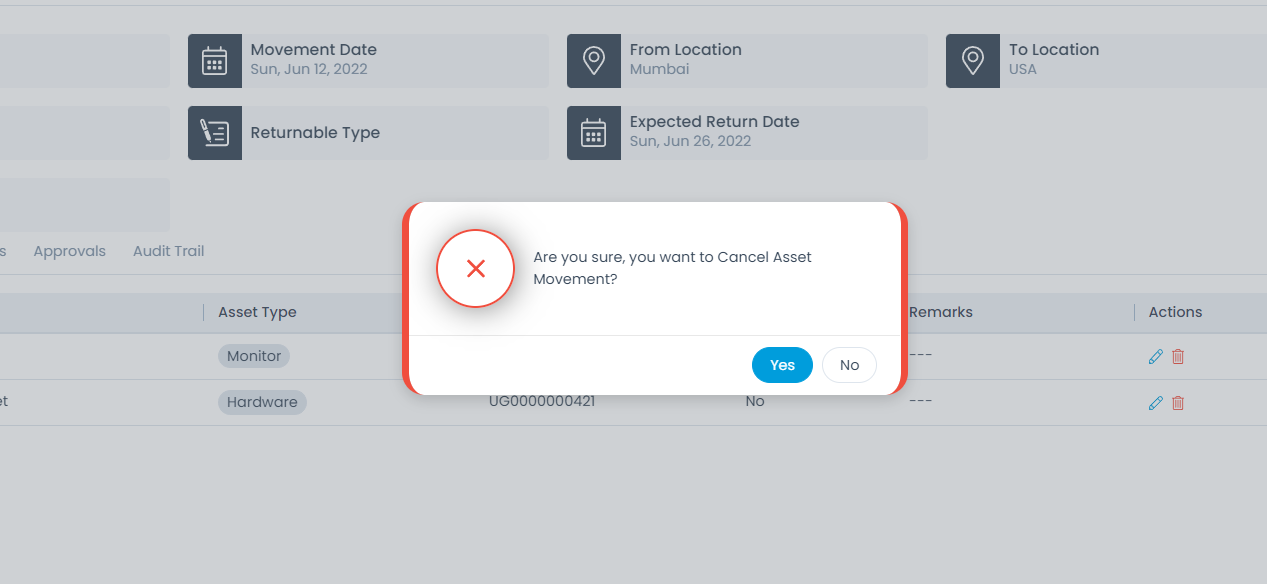
Cancel Asset Movement
Whenever you try to cancel a movement, the system will ask for confirmation.
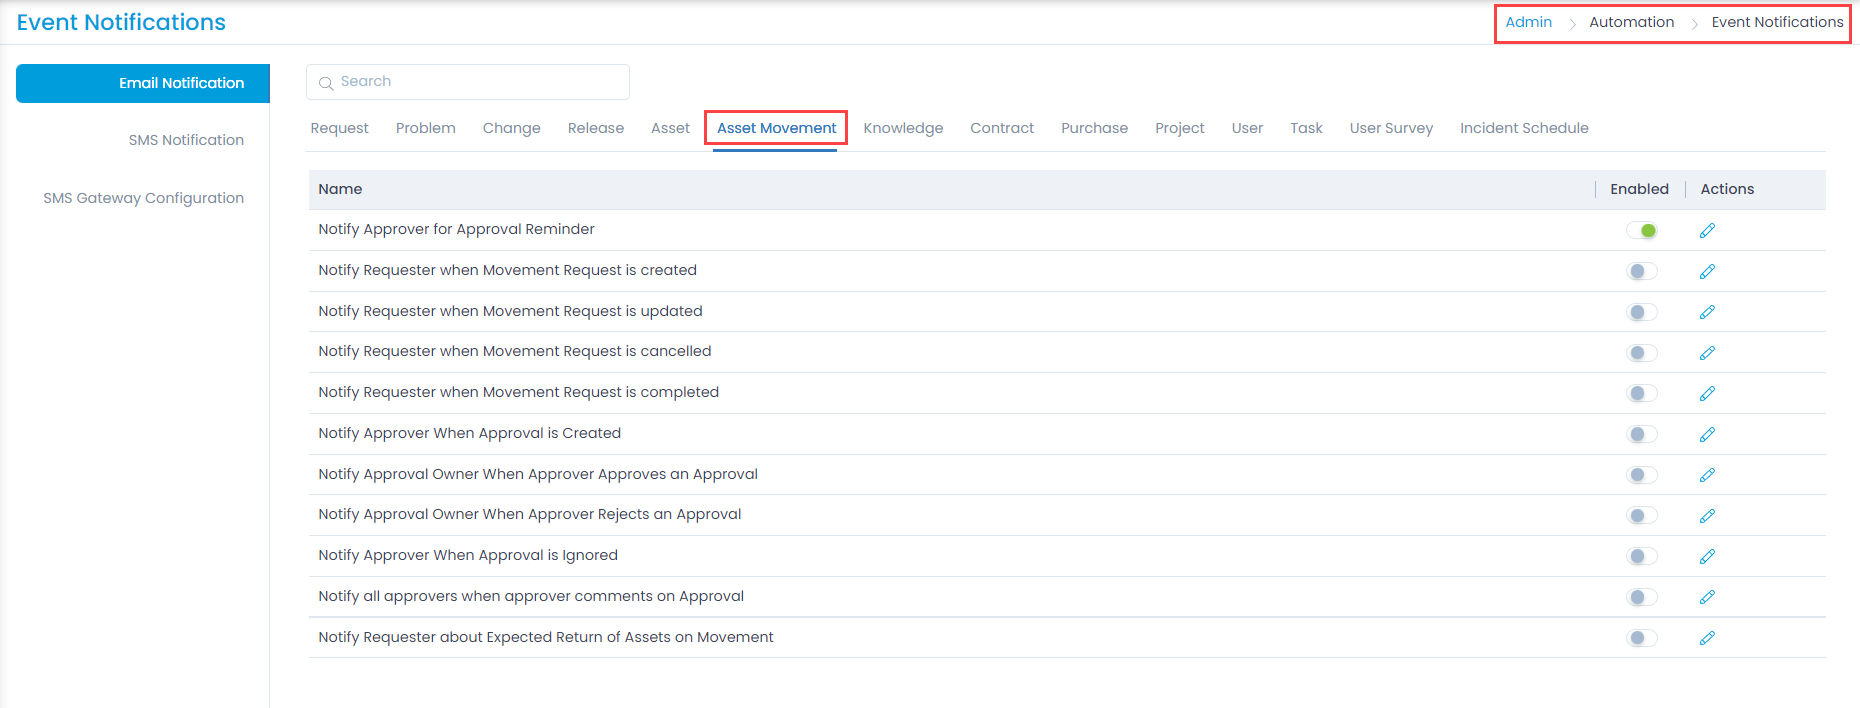
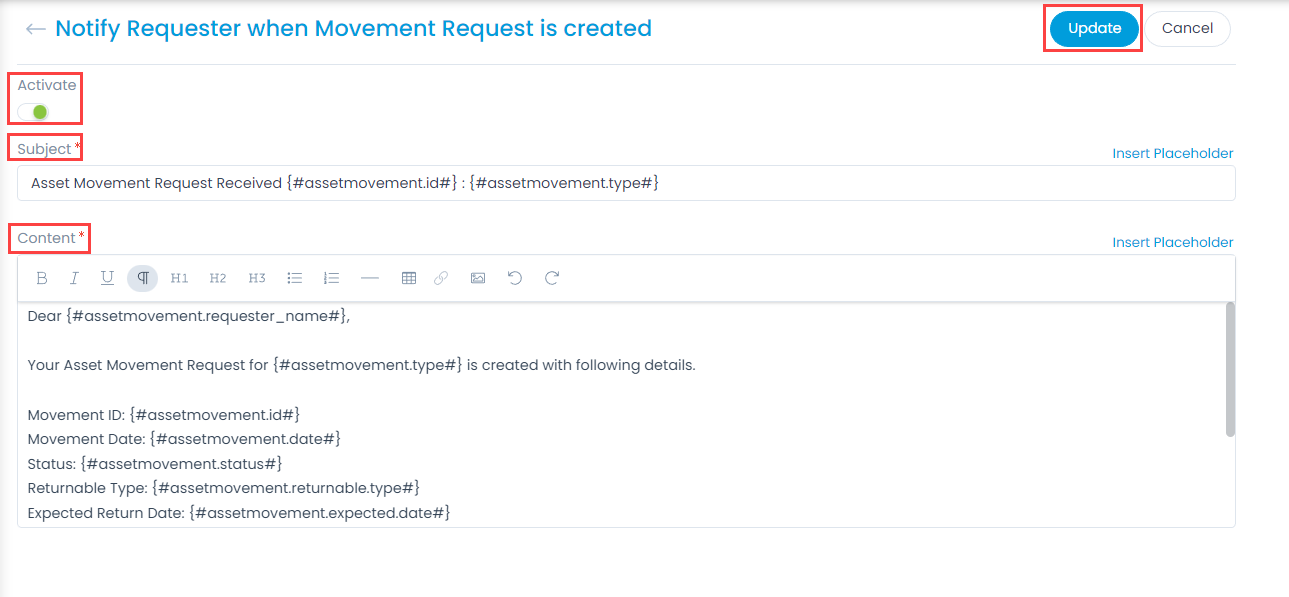
Notifications
The Asset Movement module offers variations of notifications to be notified to the user as shown below:
Other Info
The other information displays additional details about the Asset Movement. You can also change them if required.
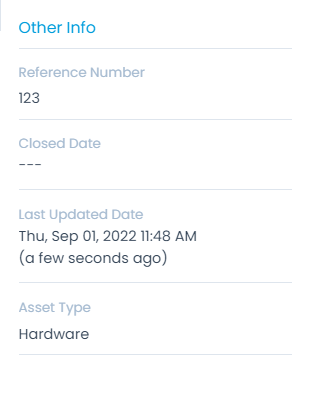
- Reference Number: Displays the reference number of Asset Movement.
- Closed Date: Displays the closed date of the Asset Movement.
- Last Updated Time: Displays the date and timestamp of the last activity on the Asset Movement.
- Asset Type: Displays the type of asset which is in movement.