QR Code
QR Codes (Quick Response Codes) are two-dimensional barcodes that store information such as URLs, text, or contact details. They can be scanned using smartphones, QR scanners, or other digital devices. QR codes enhance asset tracking and management by providing quick and easy access to asset details. When scanned, they display asset information, track location and status, and streamline inventory management.
QR codes make asset management more efficient, accurate, and scalable, improving overall operational workflow.
This page enables you to activate the QR code. Select the parameters that can be used in the QR code, and create label templates.
To activate the QR Code,
- Navigate to Admin > Asset Management > QR Code and the following page appears.
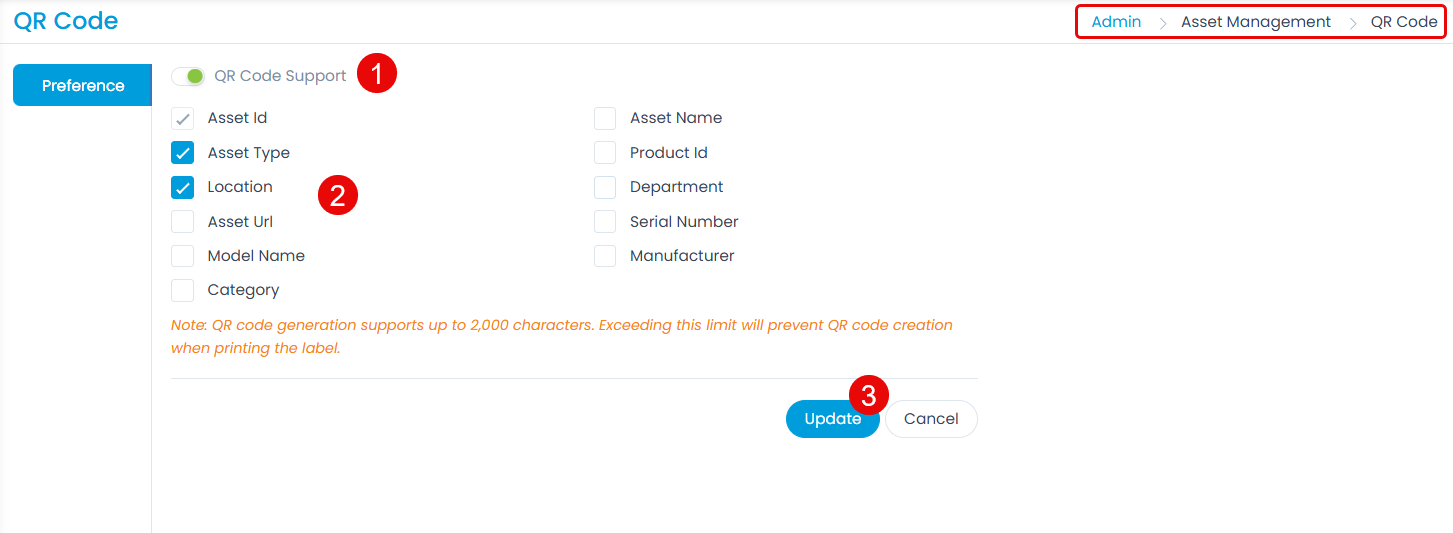
- Here, enable the QR Code Support and select the parameters that you want to use.
- Once done Update the preference and a new tab Label Templates will appear.
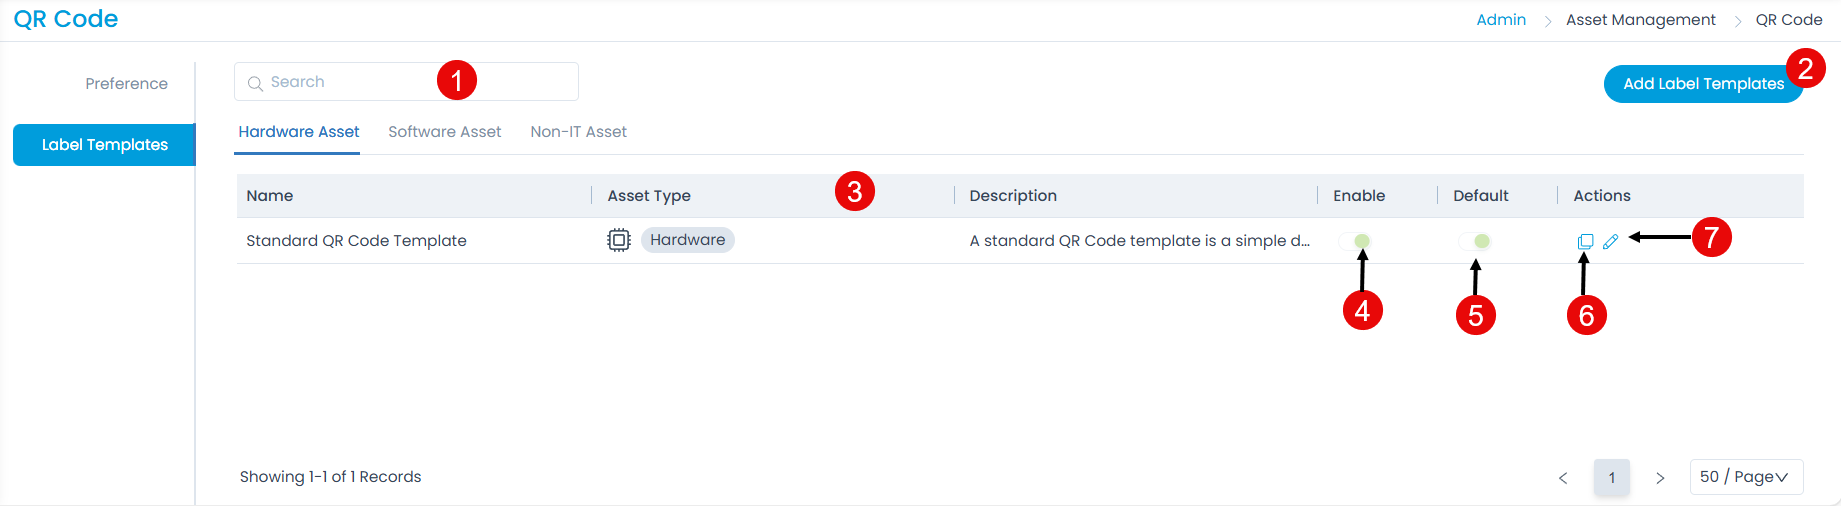
Here, you have the below options:
- Search: You can search for the required template based on name.
- Add Label Templates: Click to add new label template.
- Grid: Displays the template details based on the selected tab (Hardware, Software, and Non-IT Assets).
- Enable/Disable: Enable or disable the required templates. A newly created template will be in enabled state by default.
- Default: You can set the required template as default. At a time only one template can be marked as default.
- Duplicate: You can create a duplicate copy of the existing template if required.
- Edit: You can edit the template.
Add Label Templates
To add a new label template,
- Select the Asset Type as Hardware, Software, or Non-IT. Here, Hardware Asset is selected.
- Click the Add Label Template button. The following popup appears.

- Enter the below details:
- Name: Enter a unique name for the label template.
- Asset Type: Select the asset type for which you want to create the template.
- Label Width (inch): Enter the width of the label in inches.
- Label Height (inch): Enter the height of the label in inches.
- No. of Labels per row: Enter the number of labels that you want view per row.
- Gap between labels in a row (mm): Enter the amount of space that you want to keep between the labels in a single row.
- Description: Enter a brief description about the template.
- QR Code Design: Design the layout of the QR Code as per your requirement. To add asset parameters, copy them and paste in the Paragraph textbox of the design editor. You can change the size of the textbox as per needed. Also, you can format the text using options like Bold, Italics, Underline, Font Size, Font Family, Text Color, and Image.
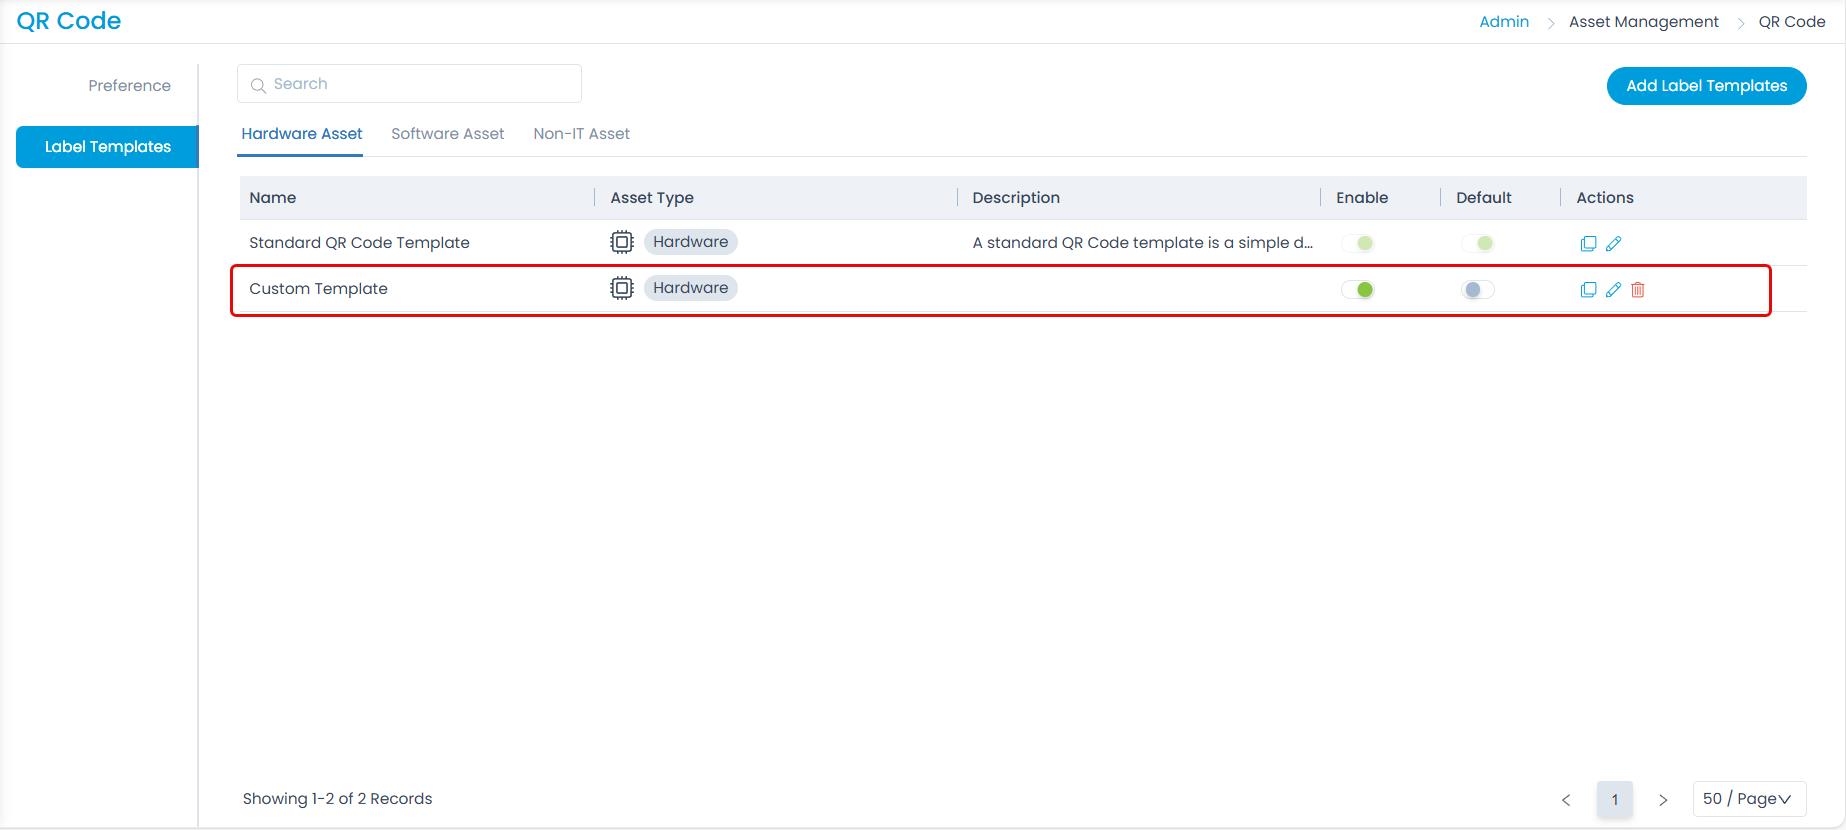
- Once done, click Add and the template will appear in the grid as shown below.
- You can now use this template when printing the QR code from the Hardware Asset Details page as shown below.
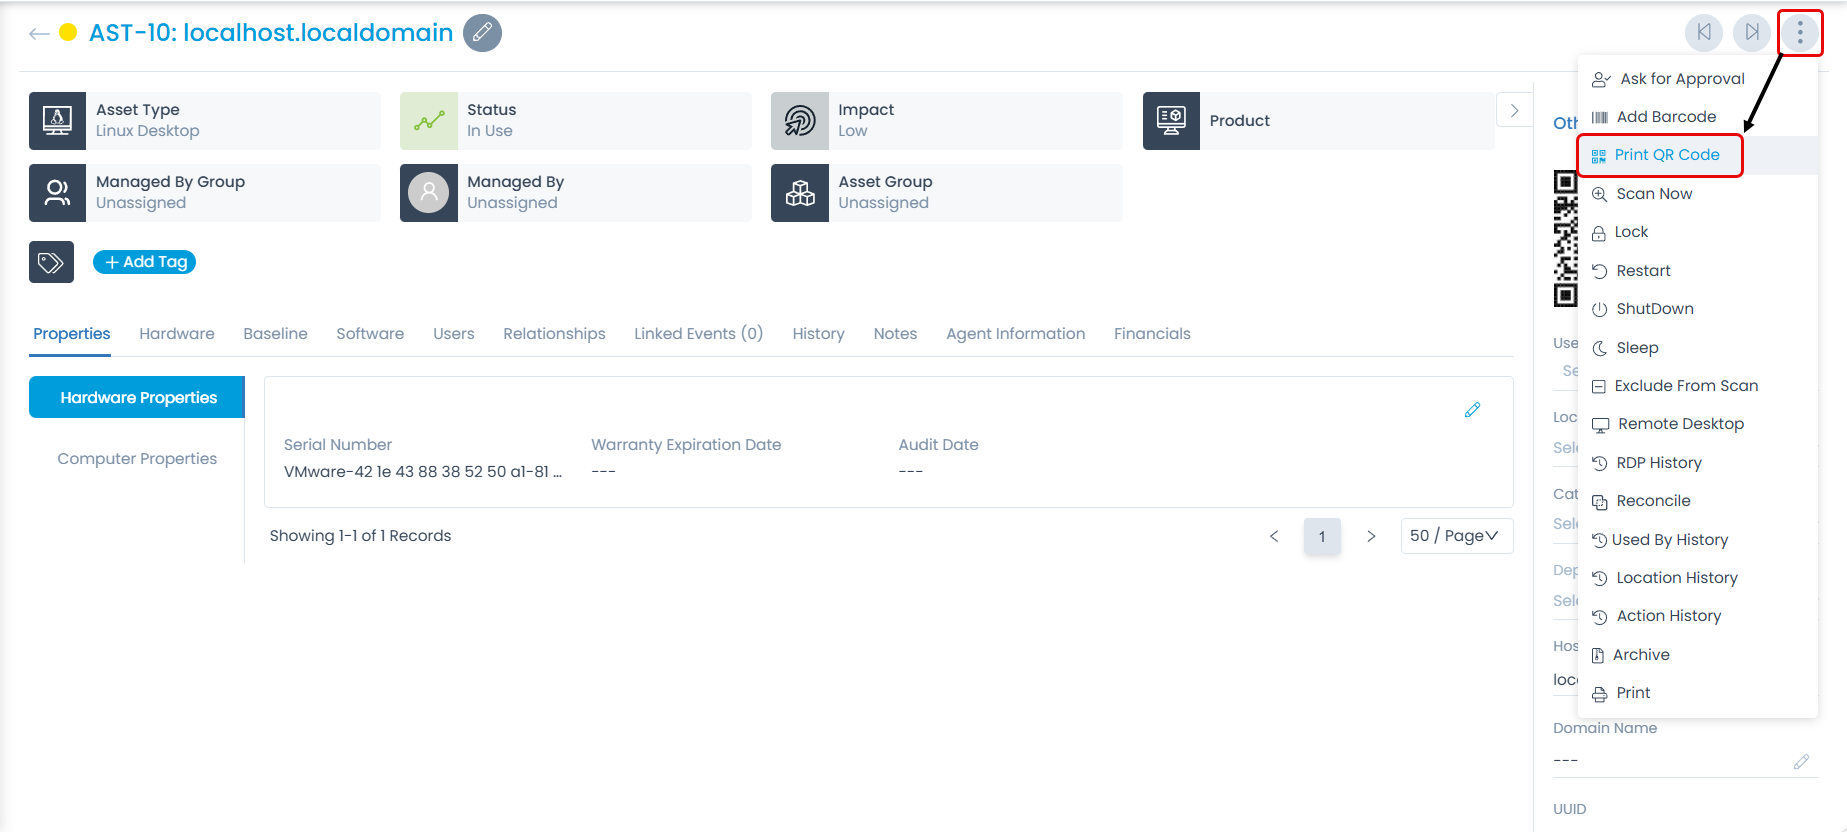
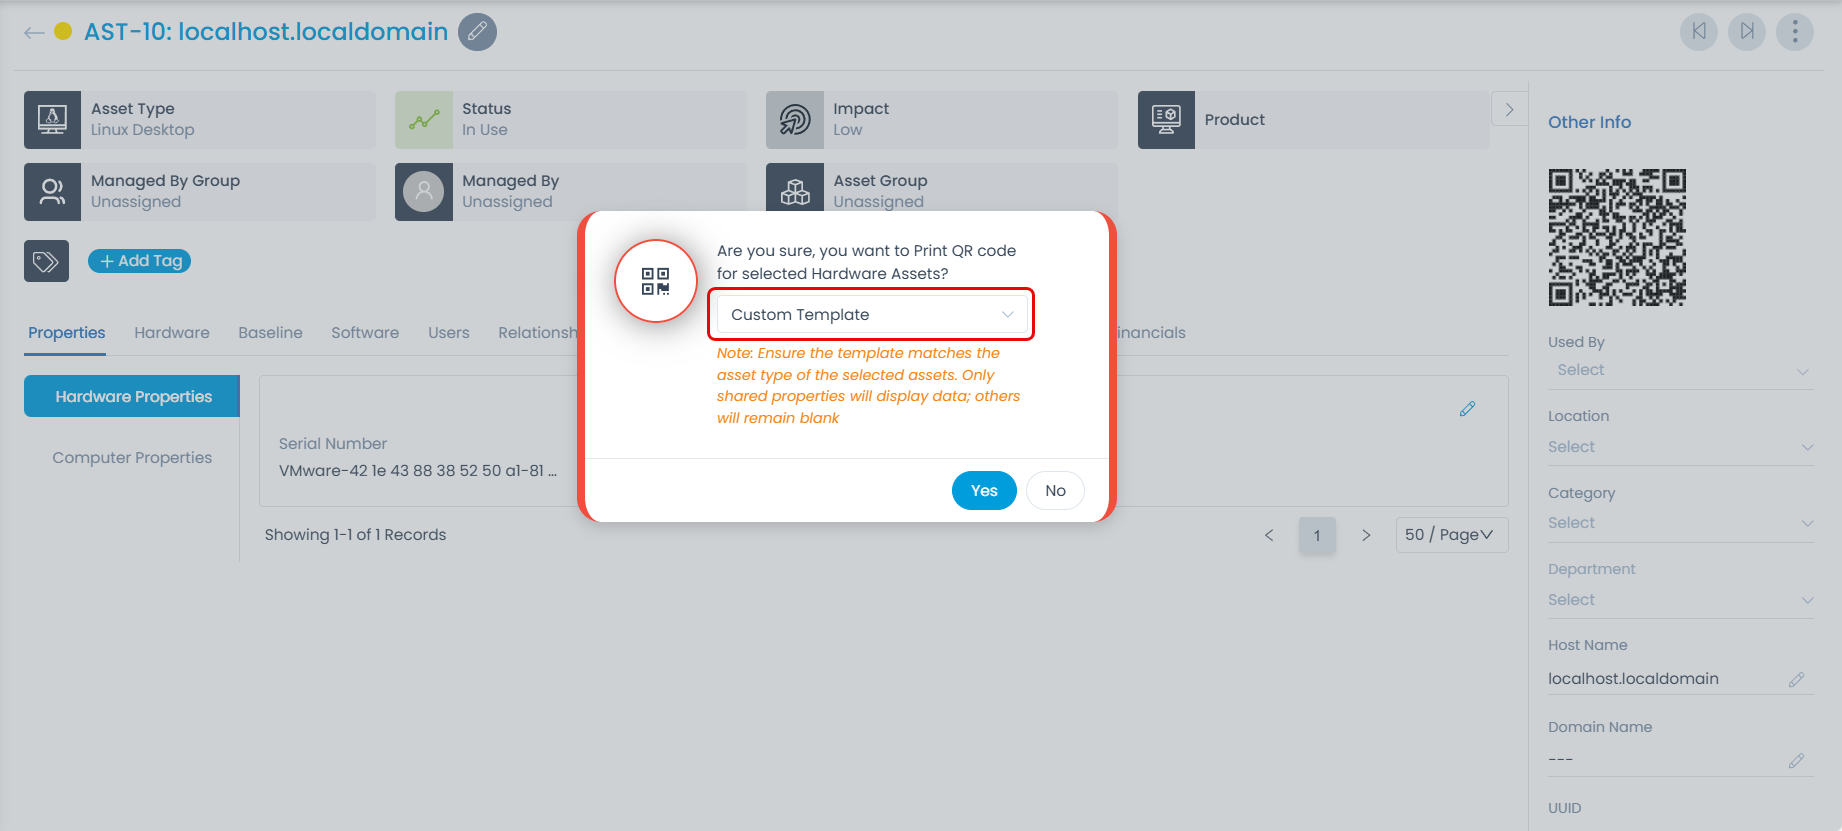
Ensure the template matches the asset type of the selected assets. Only shared properties will display data; others will remain blank