Asset Custom Rules
The custom rules help you to enforce the organization’s compliance while processing an asset. Using these rules you can ensure that any change in the asset attributes is supported by proper comments or notes. For example, any Hardware or Software changes should not be applied by any user.
To view the Asset Custom Rules page, navigate to Admin > Asset Management > Asset Custom Rules > Asset/CI tab.
The below are the pre-defined Manual Update rules which would be violated in case of enabled and performed a manual update in the below mentioned components:

- Update Hardware Component: Whether to allow manual updating of Hardware components.
- Update Software Component: Whether to allow manual updating of Software components.
- Update User: Whether to allow manual updating of Users.
- Ask Approval for Hardware Asset (Only for Assets): Whether to allow manual updating of Hardware Asset fields only after receiving approval from the approver. For more details, refer to the Maker Checker functionality.
- Ask Approval for Non-IT Asset (Only for Assets): Whether to allow manual updating of Non-IT Asset fields only after receiving approval from the approver. For more details, refer to the Maker Checker functionality.
Maker Checker Functionality
Maker Checker is a functionality ensuring that no changes initiated by the maker (the person initiating a change/update) in the Hardware and Non-IT assets are implemented without the approver's approval (the checker). This process adds an essential layer of validation, aligning with organizational processes and effectively preventing errors or unauthorized changes by mandating approval verification before implementation.
- This functionaltiy is supported in Asset Management module only.
- To use this functionality, a user must have access rights to the "Asset Custom Rules".
- Approval will be sent only for manual updates from the Asset Details page.
- The functionality does not apply to Baseline, Software, Users, Relationships, Linked Events, Notes, Agent Info, Financials, and Geolocation sections.
To enable the functionality for Hardware and Non-IT Assets,
- Select the fields "Ask Approval for Non-IT Asset" and "Ask Approval for Hardware Asset" from the Admin > Asset Management > Custom Rules > Asset > Manual Update tab and click Update.

Once checked, an approval will be sent only if the asset is updated manually. If unchecked, an approval will not be sent even if the Approval workflow is enabled.
- Create an Approval Workflow in the "Asset Update" tab that will run when any manual update is done in Hardware or Non-IT Assets. Here, an Approval Workflow is created for the Non-IT Asset.
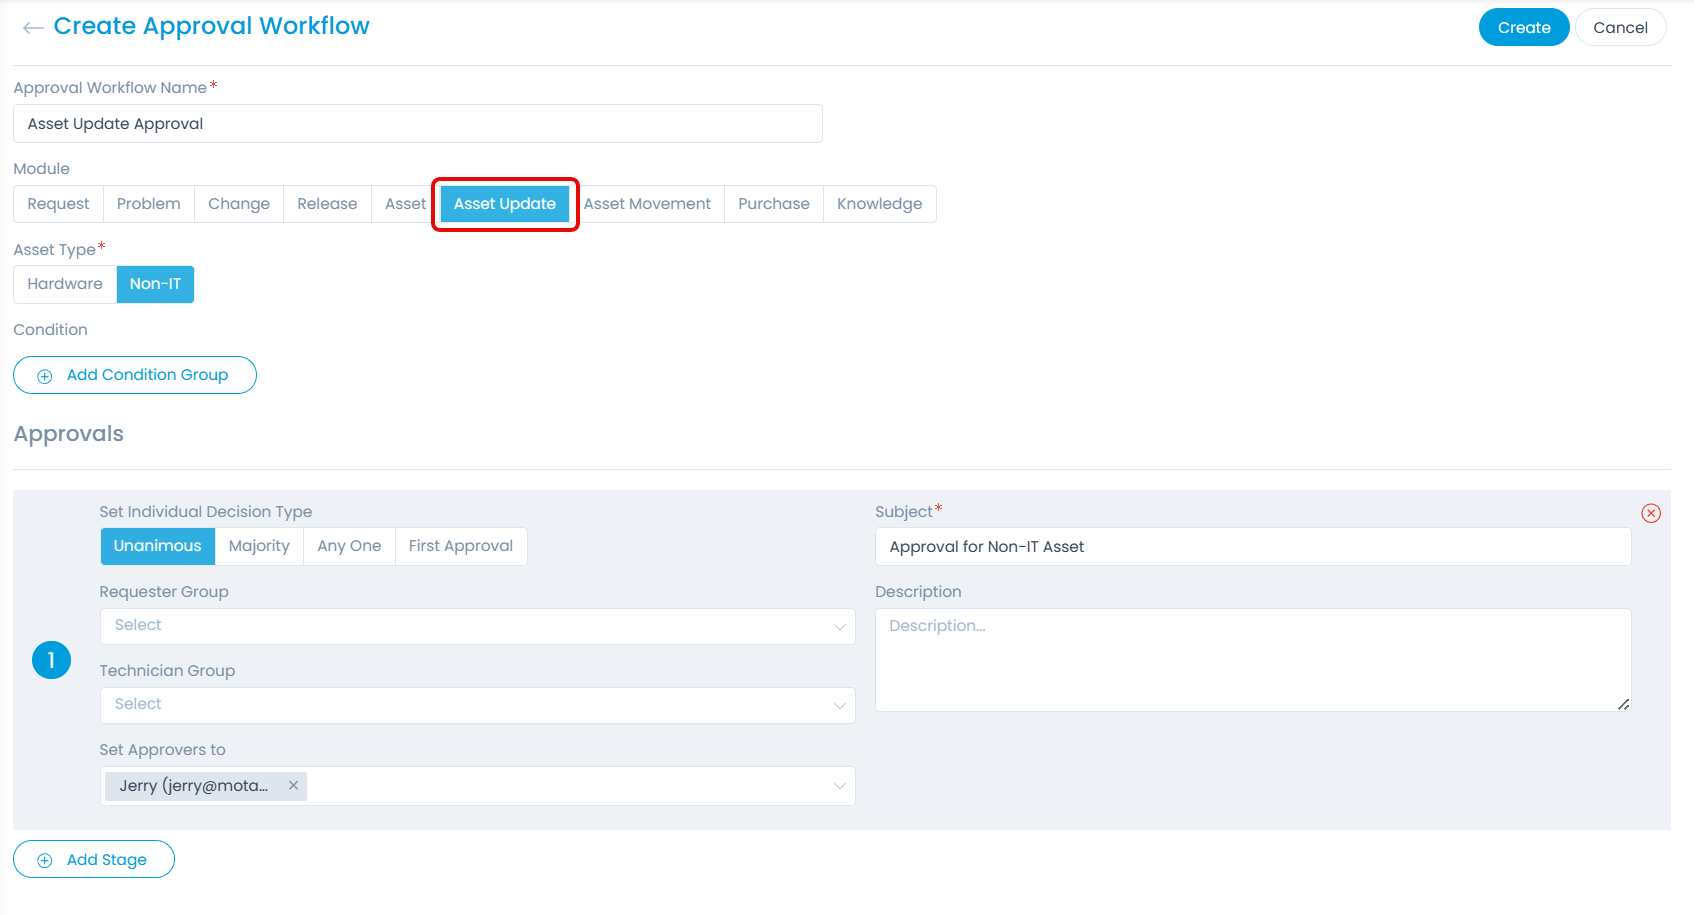
When the user tries to update any field (For example, the "Status" field from "Missing" to "In Use") on the Non-IT Asset Details page, the message "Your Request is Submitted for Approval" will appear. The updated value will be set only after the approval is received, and the system runs the Approval Workflow based on the defined conditions. If no Approval Workflow is configured or all the workflows are disabled, the value will be updated, and the approval status will be pre-approved.
- Approvals sent for asset change will be listed in the Approvals tab on the details page.
- If there are multiple Approval Workflows, the "Approval Type" in the Approval Settings will be excluded for these Approvals, and the latest Approval will be considered.
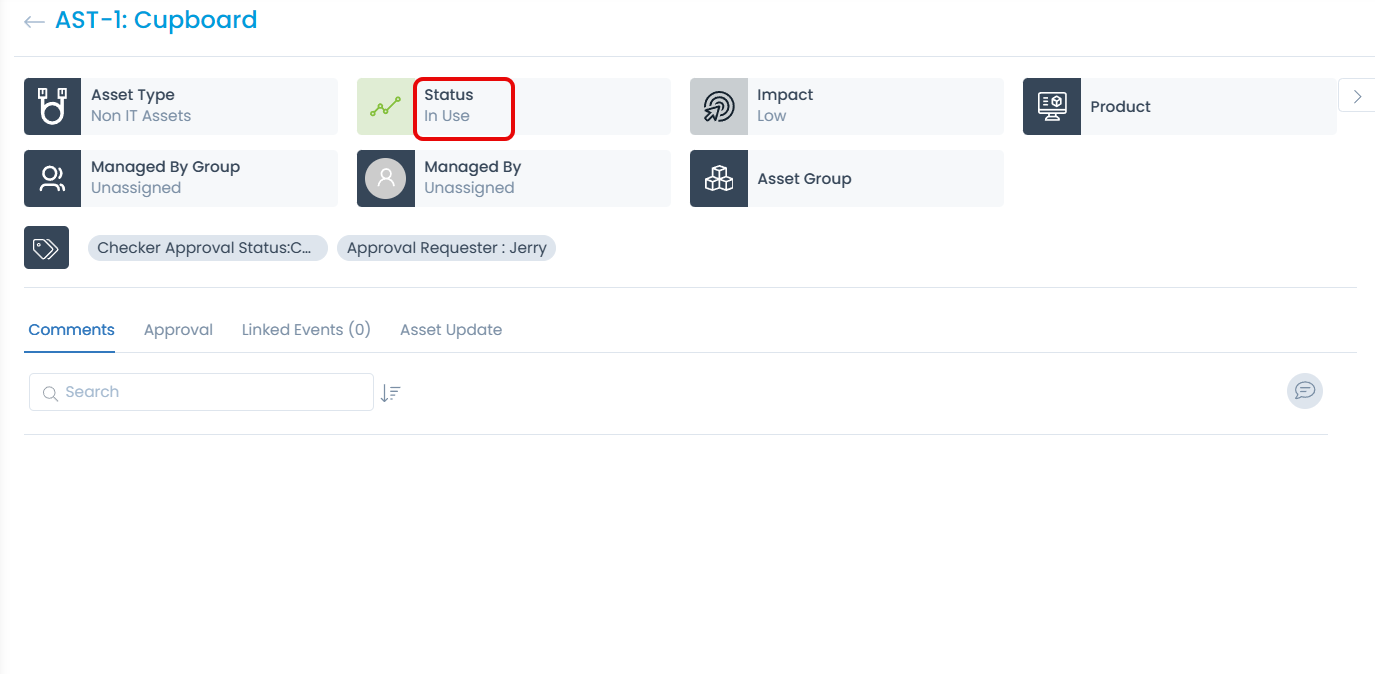
- Once the approval is sent, its status will appear as "Checker Approval Status: Pending" on the Details page next to the tag button.
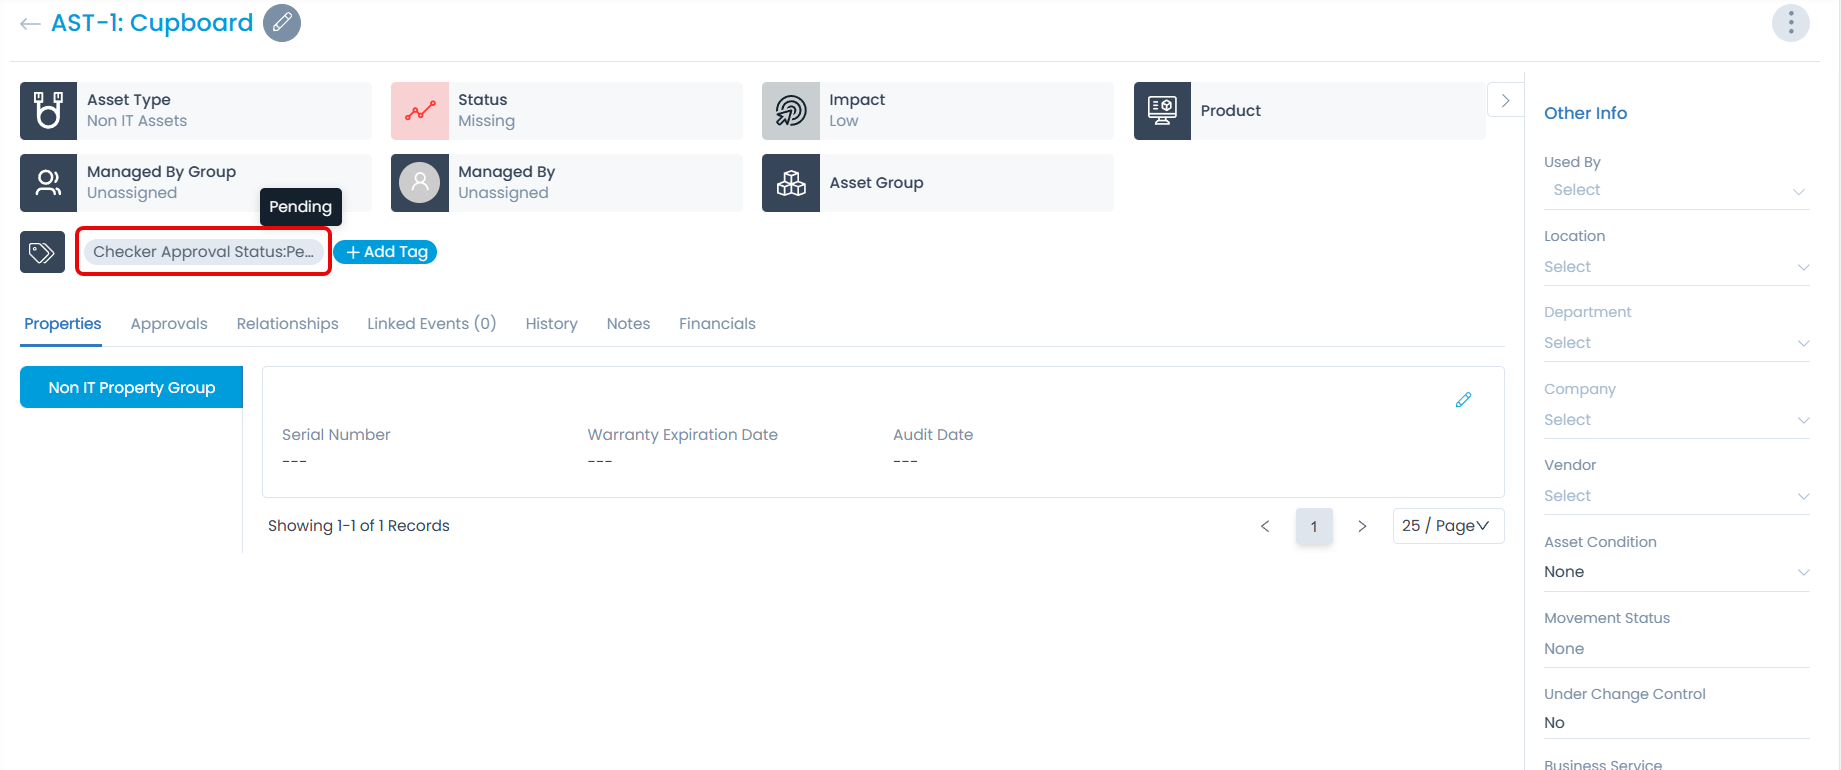
Initially, its status will be pending. It will become Completed when approved, deleted, or ignored.
Suppose approval is sent for multiple parameters before approval. In that case, another approval is sent for one of the parameters with a different value, and only those fields will not get updated if a new approval is approved. The previous approval will be considered for those fields.
- Also, the Asset Update approval list can be viewed on the My Approvals page by clicking the "Asset Update" icon.

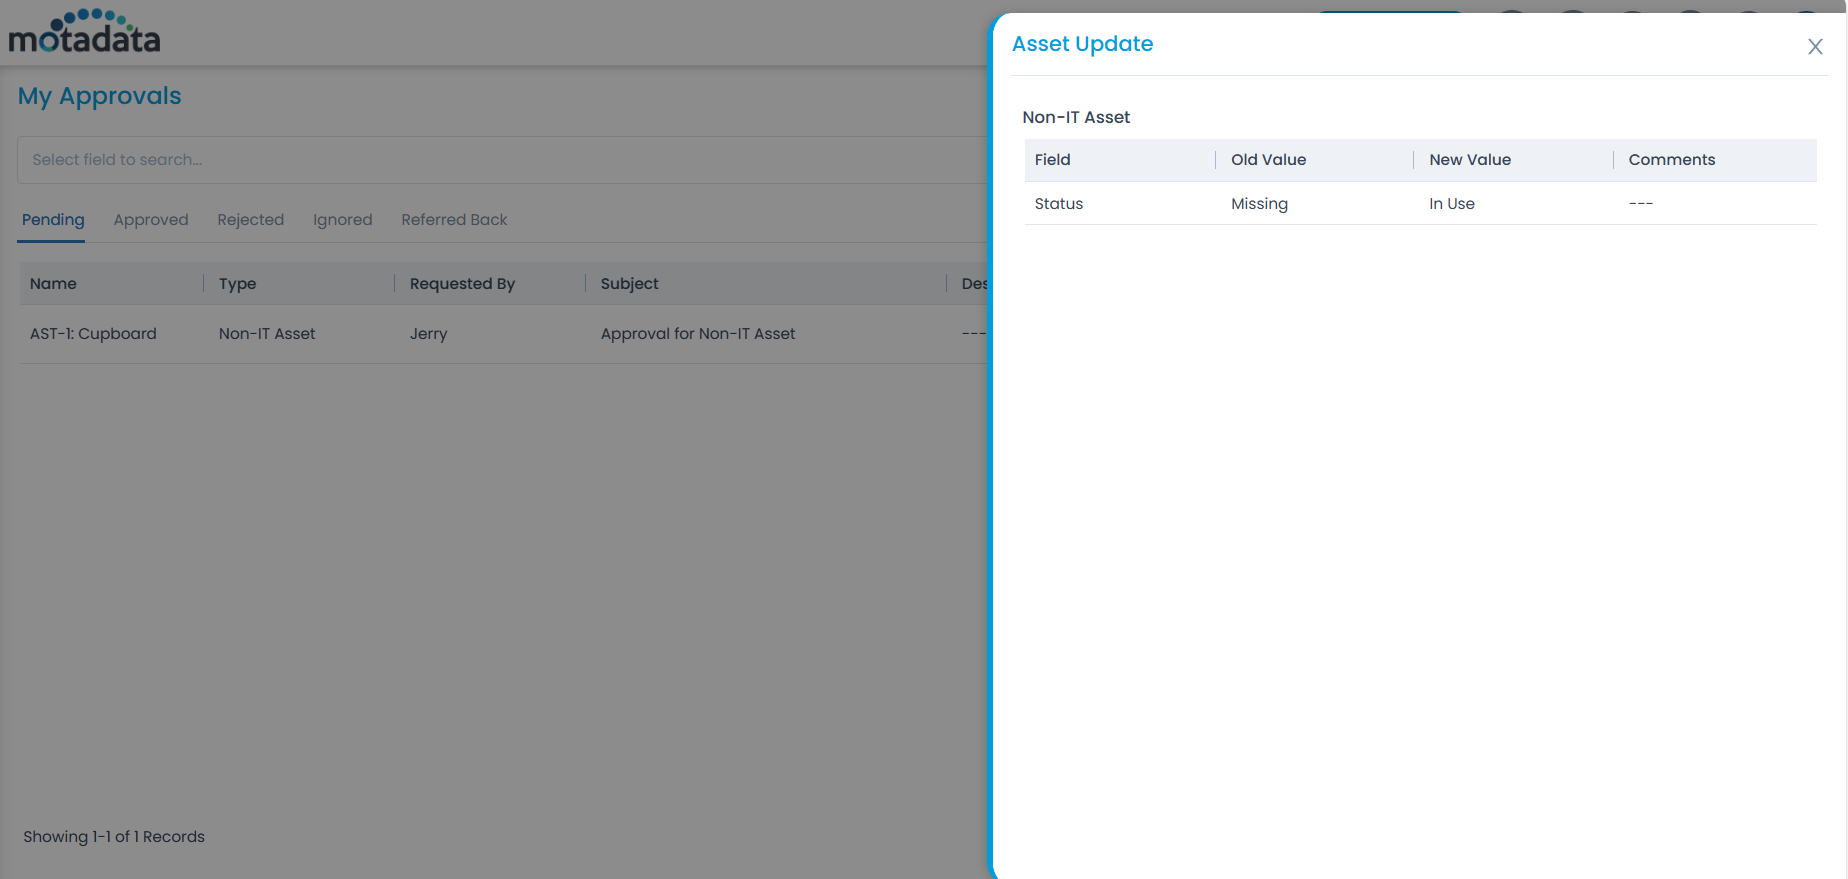
- The Asset Update approval details will also appear on the View Approval page, as shown below.
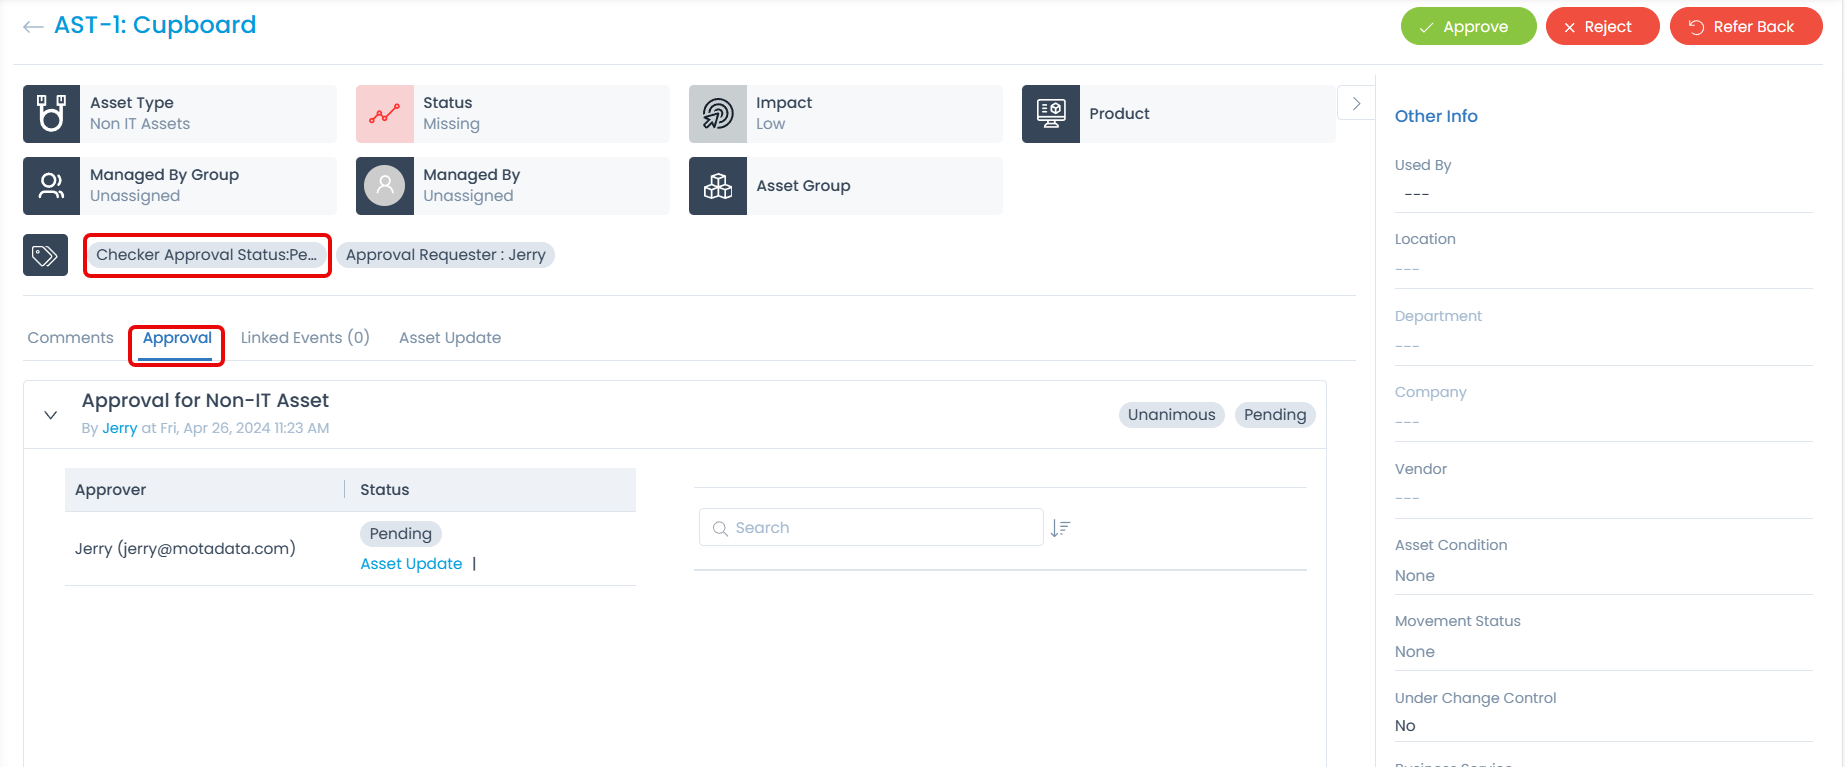
Once the approval is approved, the Checker Approval Status will change from "Pending" to "Completed", and also the "Status" field value will change to "In Use" from "Missing".
Moreover, audit for enabling/disabling Asset Custom Rules and Workflow will be available on the Configuration Audit page.
