Viewing and Searching Workflows
Quickly locate, monitor, and gain insights into your automated processes, ensuring efficient oversight and streamlined management of all configured workflows.
The Workflow List page provides a centralized hub for managing and overseeing all automated processes configured within ServiceOps. This page allows you to quickly locate, review, and understand the status and details of your workflows, ensuring efficient automation management.
Accessing the Workflow List Page
To view your workflows:
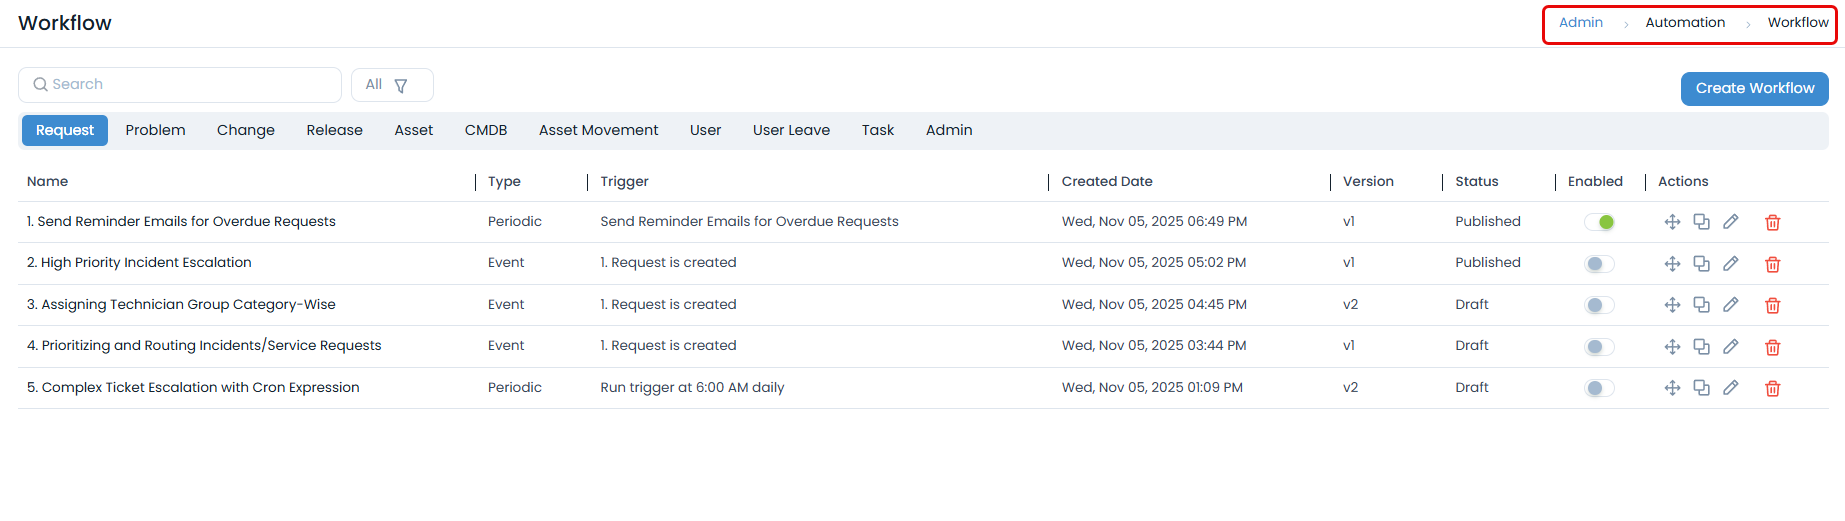
- Navigate to Admin > Automation > Workflow.
- The Workflow List page will display all configured workflows in a comprehensive table format.
Understanding the Workflow List Page
The Workflow List page is designed for clarity and ease of navigation, presenting key information about each workflow.
1. Workflow Grid
The main section of the page is a table that lists all workflows with the following columns:
- Name: The user-defined name of the workflow. Click on the name to open the Workflow Builder for detailed editing and viewing.
- Type: Indicates how the workflow is initiated (e.g.,
Eventfor event-based triggers,Periodicfor scheduled triggers). - Trigger: Describes the specific event or schedule that starts the workflow (e.g.,
1. Request is created,Run trigger at 8:00 AM daily). - Created Date: The date and time when the workflow was initially created.
- Version: The current version of the workflow (e.g.,
v1,v2). This is crucial for tracking changes and managing workflow history. - Status: Shows the current state of the workflow (
PublishedorDraft). Only published workflows are active and execute. - Enabled: A toggle switch indicating whether the workflow is currently enabled or disabled.
- Green Toggle: Workflow is enabled and active.
- Grey Toggle: Workflow is disabled and inactive.
- Actions: A set of icons that allow you to perform various operations on the workflow:
- Reorder Icon: This icon enables you to set the execution order of your workflows. The workflow positioned highest in the list receives the highest priority and is executed first. In cases where workflows have same conditions, their sequential order in the list determines their execution.
- Duplicate Icon: Creates a copy of the existing workflow.
- Edit Icon: Opens the workflow in the Workflow Builder for modifications.
- Delete Icon: Permanently removes the workflow.
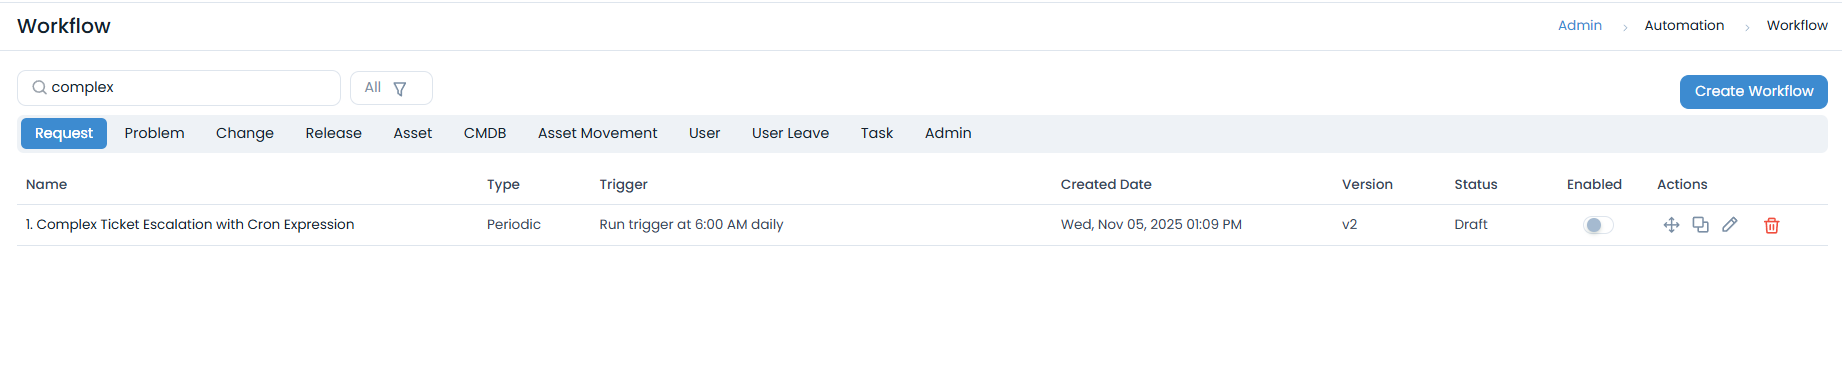
2. Search Functionality
To quickly find specific workflows:
- Locate the Search bar at the top-left of the Workflow List page.
- Enter keywords related to the workflow's name to filter the list. The results will dynamically update as you type.
3. Filtering Workflows
The page also includes filtering options to narrow down the displayed workflows based on their status:
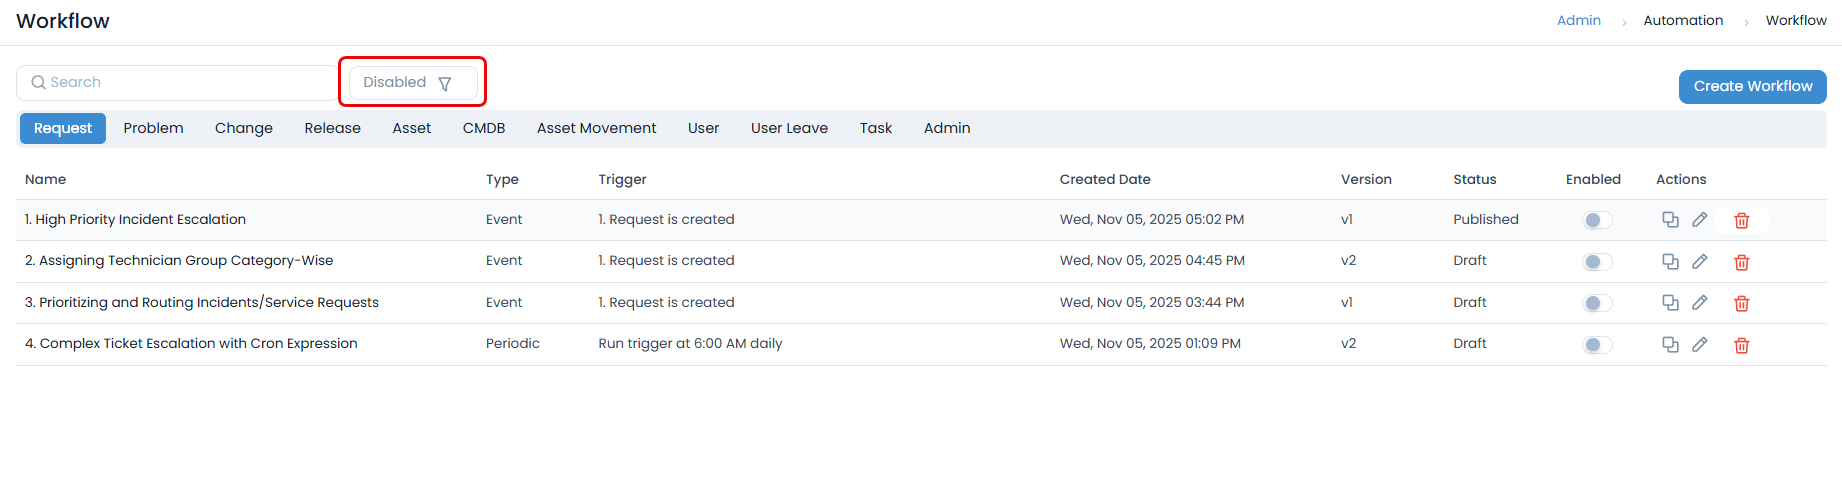
- Click on the All dropdown menu next to the search bar.
- Select one of the following options:
- All: Displays all workflows, regardless of their enabled/disabled status.
- Enabled: Shows only workflows that are currently active.
- Disabled: Shows only workflows that are currently inactive.
4. Creating New Workflows
To initiate a new automated process:
- Click the Create Workflow button, typically located at the top-right of the Workflow List page.
- You will be redirected to the Workflow Builder interface, where you can design and configure your new workflow from scratch.