Editing and Publishing Workflows
Efficiently manage and deploy your automated IT processes by understanding how to edit and publish existing workflows.
ServiceOps workflows are powerful automation tools that streamline your IT operations. This guide will walk you through the process of editing an existing workflow, navigating the workflow builder interface, and publishing your changes. This is crucial for IT Admins and Technicians who need to adapt workflows to evolving business requirements or fix existing issues.
Editing an Existing Workflow
To modify an existing workflow, follow these steps:
- Navigate to Admin > Automation > Workflow.
- On the Workflow listing page, you will see a list of all configured workflows.
- Locate the workflow you wish to edit. You can use the search bar or filters to quickly find it.
- In the Actions column for the desired workflow, click the Edit icon (represented by a pencil, as shown in the image below).
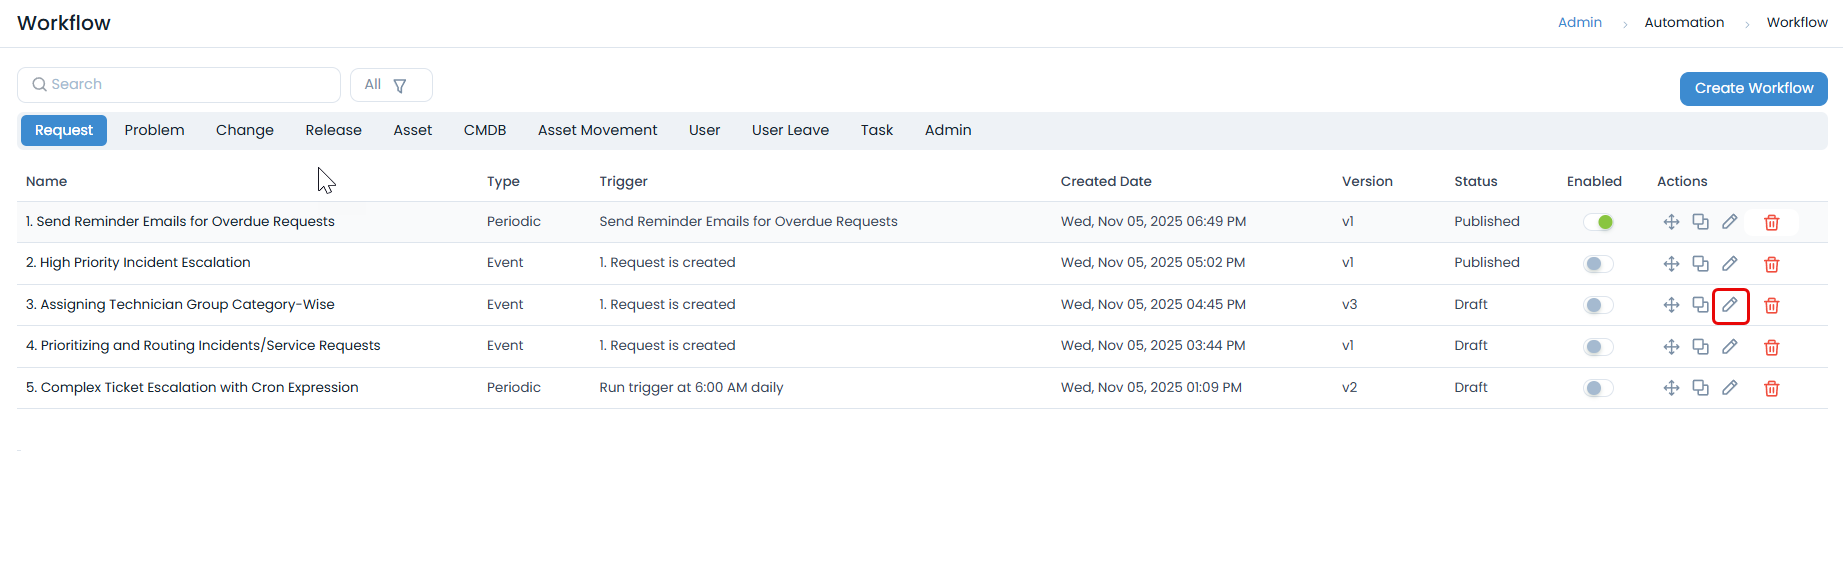
- Clicking the Edit icon will open the Edit Workflow builder interface.
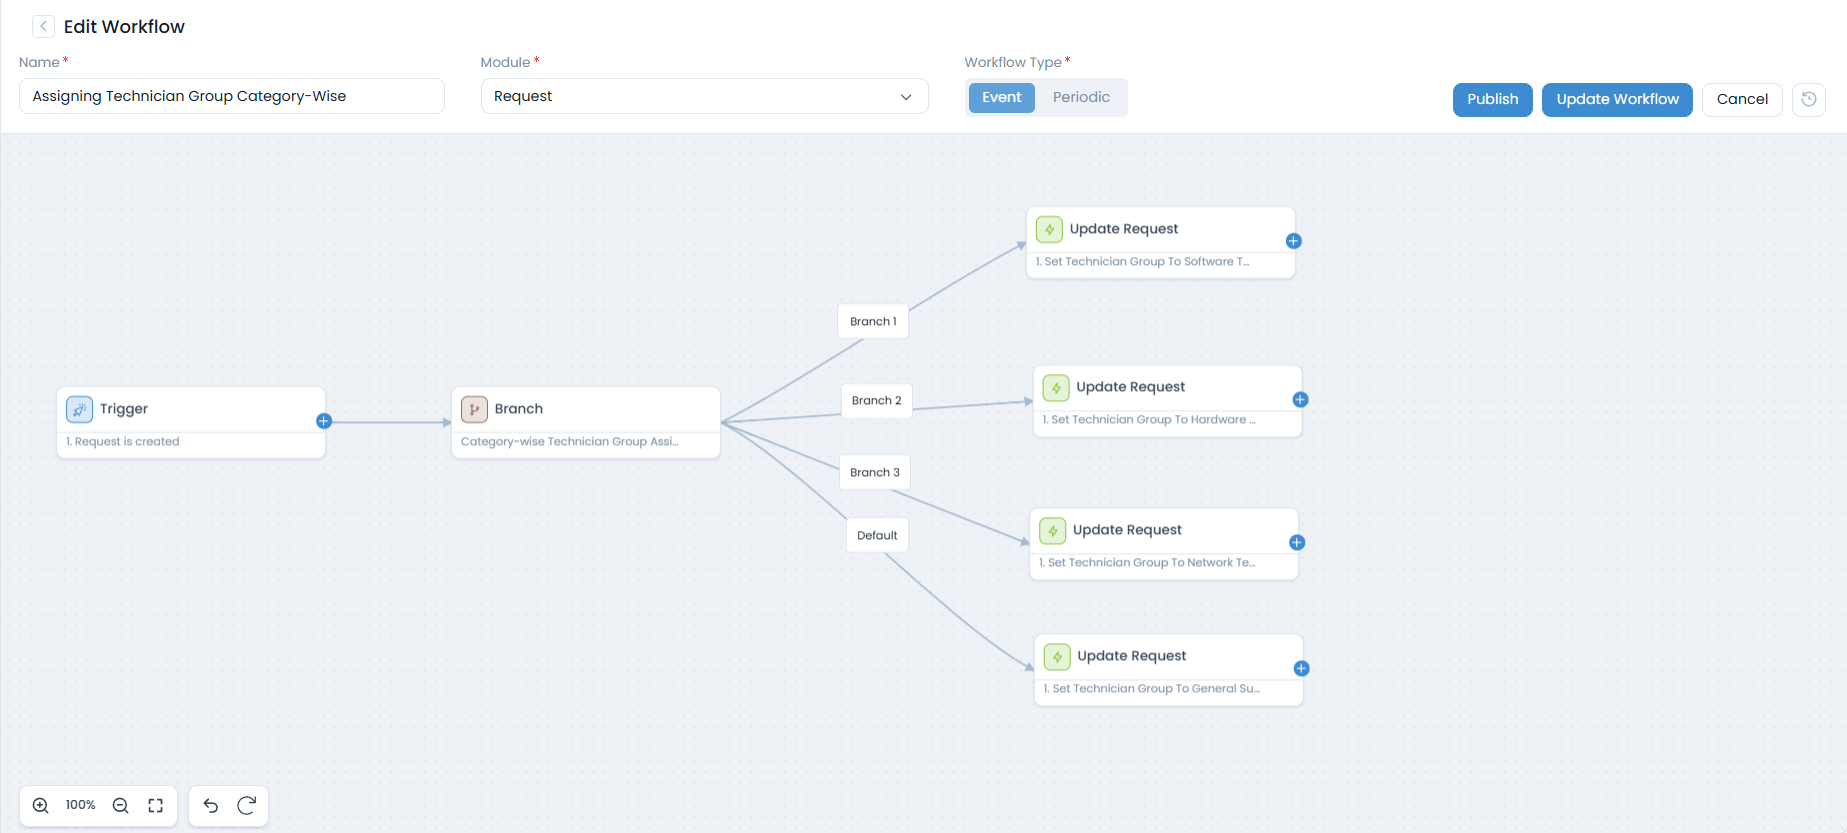
The workflow builder interface is where you will design and modify your automation logic. For a comprehensive overview of its design and features, refer to The Workflow Builder - Design and Interface.
Publishing and Updating Workflows
After making your desired changes in the workflow builder, you have two main options:
Publishing a New Workflow or Major Changes:
- If you are creating a new workflow or have made significant changes to an existing draft, click the Publish button. This action makes the workflow active immediately.
- A newly published workflow will transition from a 'Draft' status to 'Published' on the workflow listing page.
Updating an Existing Published Workflow:
- If you are making minor adjustments to an already published workflow and want to save them without immediately activating them (perhaps for further testing or review), click the Update Workflow button.
- This saves your changes, but the workflow changes to 'Draft' state. To activate these saved changes, you must then click Publish.
Always ensure your changes are thoroughly tested before publishing to avoid unintended impacts on your IT processes.