Distributed HA Deployment (5 Machines)
Configure Patroni-based HA on 5 machines to isolate application and database workloads while maintaining automatic failover across both tiers.
In this layout, the application and database tiers run on separate dedicated machines. This model combines automatic failover with independent tier scaling. Use it for large enterprises where application and database workloads must be isolated.
Prerequisites
Before starting, confirm the following:
- Operating System: Ubuntu and RHEL
- PostgreSQL Version: 16 or 17
- 5 machines provisioned and reachable over the network
- ServiceOps installed on both APP 1 and APP 2 (follow the Standalone Installation Guide)
- Back up your database before starting any HA configuration step if you are working on an existing production environment. See the ServiceOps Application and Database Backup Procedure.
- Root or sudo access on all 5 machines
- Setup scripts extracted on their respective machines:
MotadataETCDSetupU24on the Observer machineMotadataPatroniSetupU24on both DB machinesMotadataAppHASetupon the Observer machine
- Firewall ports open on each machine:
| Machine | Open Ports |
|---|---|
| Observer | 80 (Optional), 443, 2379, 2380, 5000, 7000 |
| APP 1 and APP 2 | 80 (Optional), 443 |
| DB 1 and DB 2 | 5432, 8008 |
Architecture Overview
The 5-machine distributed HA setup assigns a dedicated role to each machine:
| Role | Machine | Example IP | Ports |
|---|---|---|---|
| Observer / HAProxy / ETCD | 1 machine | 172.16.13.42 | 80, 443, 2379, 2380, 5000, 7000 |
| APP 1 (Master Application) | 1 machine | 172.16.12.171 | 80, 443 |
| APP 2 (Slave Application) | 1 machine | 172.16.12.177 | 80, 443 |
| DB 1 (Master Database) | 1 machine | 172.16.12.202 | 5432, 8008 |
| DB 2 (Slave Database) | 1 machine | 172.16.12.216 | 5432, 8008 |
HAProxy load-balances application traffic across APP 1 and APP 2 on ports 80 and 443, and routes database connections to the Patroni Leader on port 5000 and 7000. ETCD manages distributed consensus on ports 2379 and 2380. The Observer detects APP 1 failure and triggers master.sh and slave.sh failover scripts.
Procedure
Step 1: Download Setup Files
Download the zip file containing all setup files from the Download Links page and extract it on each machine before proceeding.
Step 2: Set Up the Observer (ETCD and HAProxy)
Run the following steps on the Observer machine (172.16.13.42).
Give
MotadataETCDSetupU24execute permissions and run it:chmod 777 MotadataETCDSetupU24
./MotadataETCDSetupU24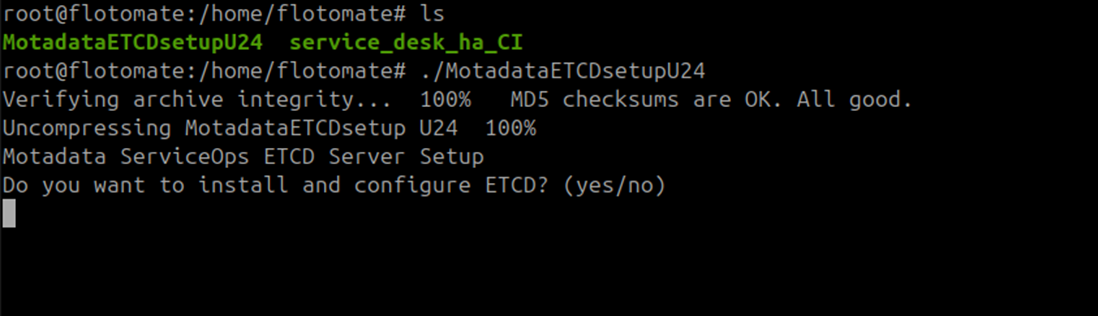
Type
yeswhen asked whether to install and configure ETCD.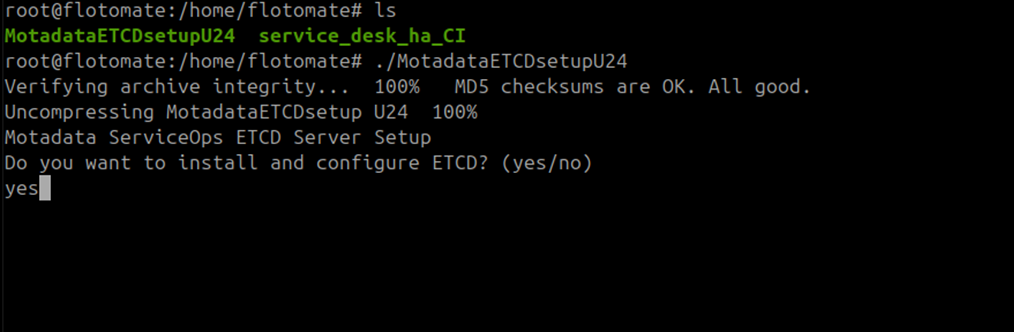
Enter
1when asked for the ETCD node number. This setup uses a single ETCD node.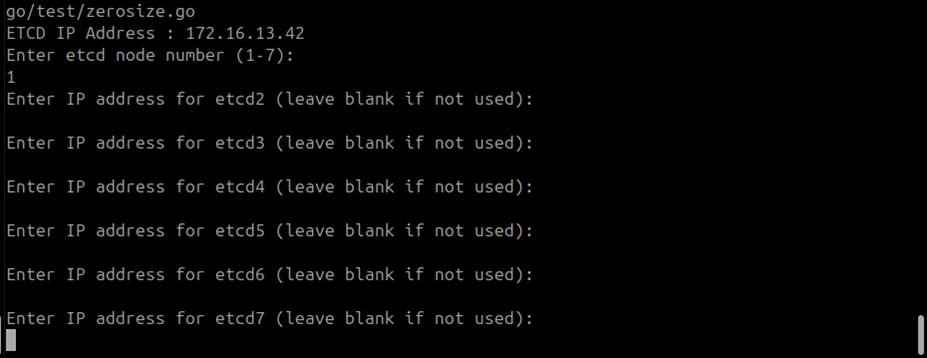 Maximum ETCD Cluster Nodes
This setup supports a maximum of 7 ETCD cluster nodes. Leave all additional node prompts blank for a single-node setup.
Leave all additional ETCD node prompts blank and press Enter.

Type
yeswhen asked whether to install and configure HAProxy.
Enter the DB Node 1 (Master DB) IP address, for example
172.16.12.202. Then enter the DB Node 2 (Slave DB) IP address, for example172.16.12.216.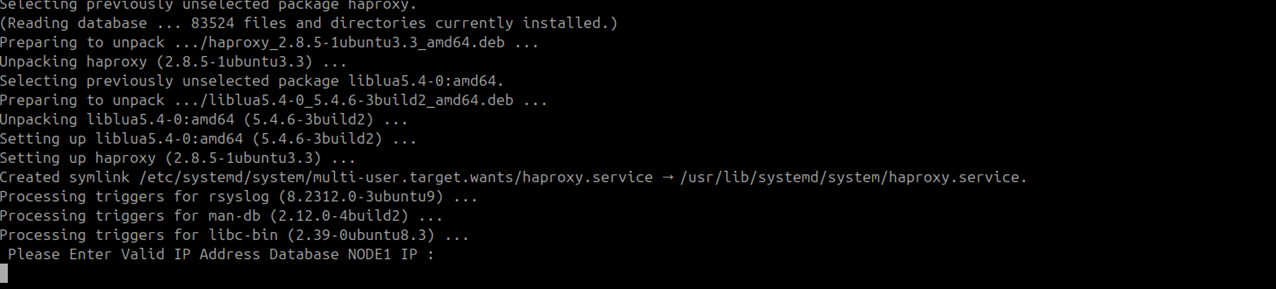
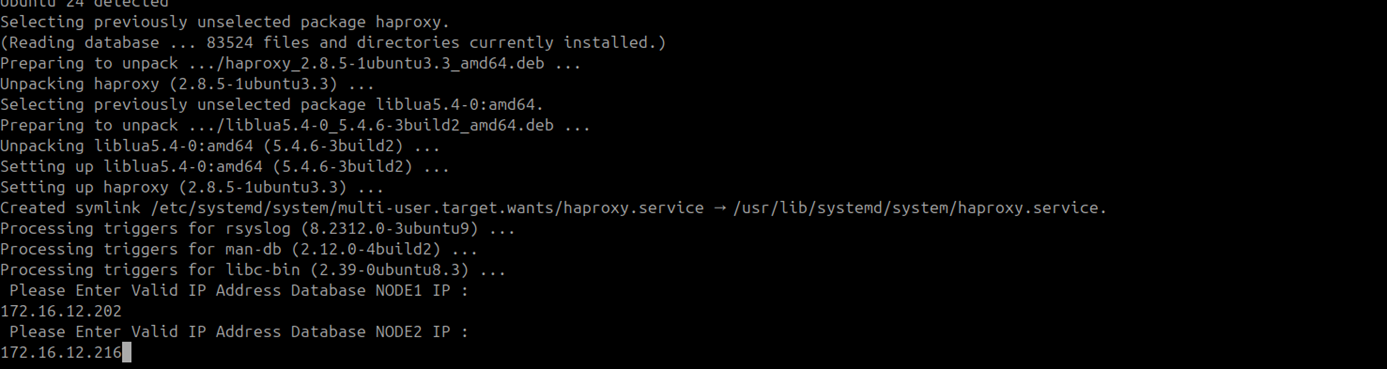 DB Node Roles
DB Node 1 = Master DB. DB Node 2 = Slave DB.
Enter the APP Node 1 (Master APP) IP address, for example
172.16.12.171. Then enter the APP Node 2 (Slave APP) IP address, for example172.16.12.177.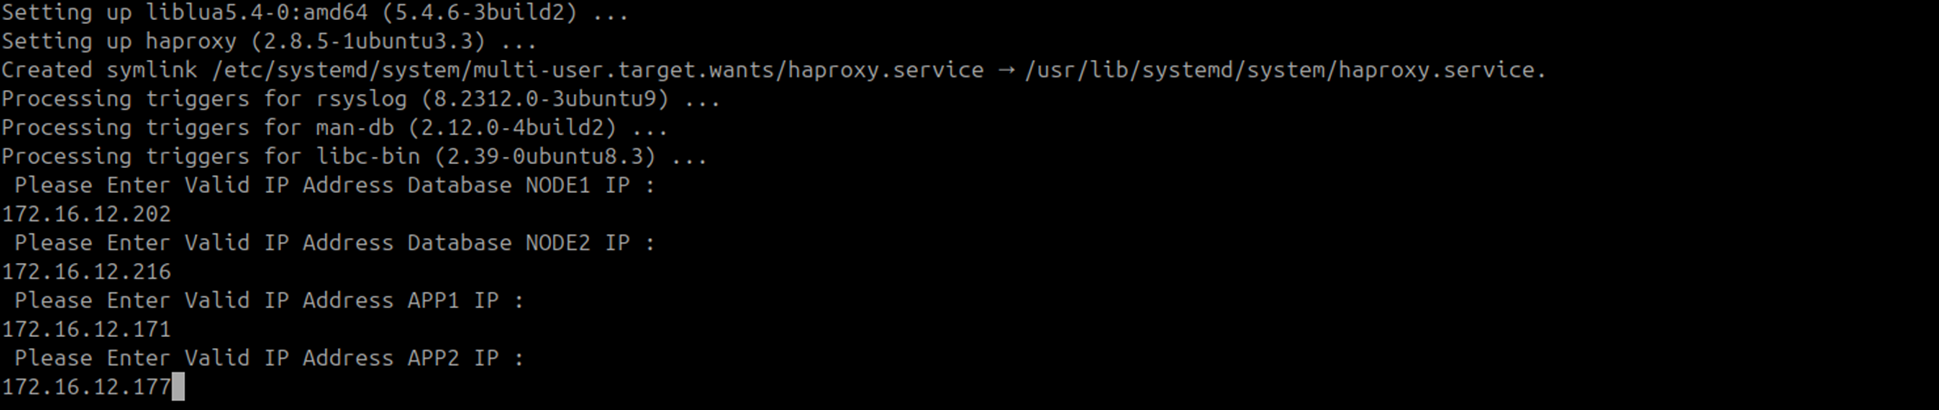 APP Node Roles
APP Node 1 = Master APP. APP Node 2 = Slave APP.
ETCD and HAProxy setup is complete.
Verify the HAProxy Configuration
Open /etc/haproxy/haproxy.cfg and confirm it matches this structure:
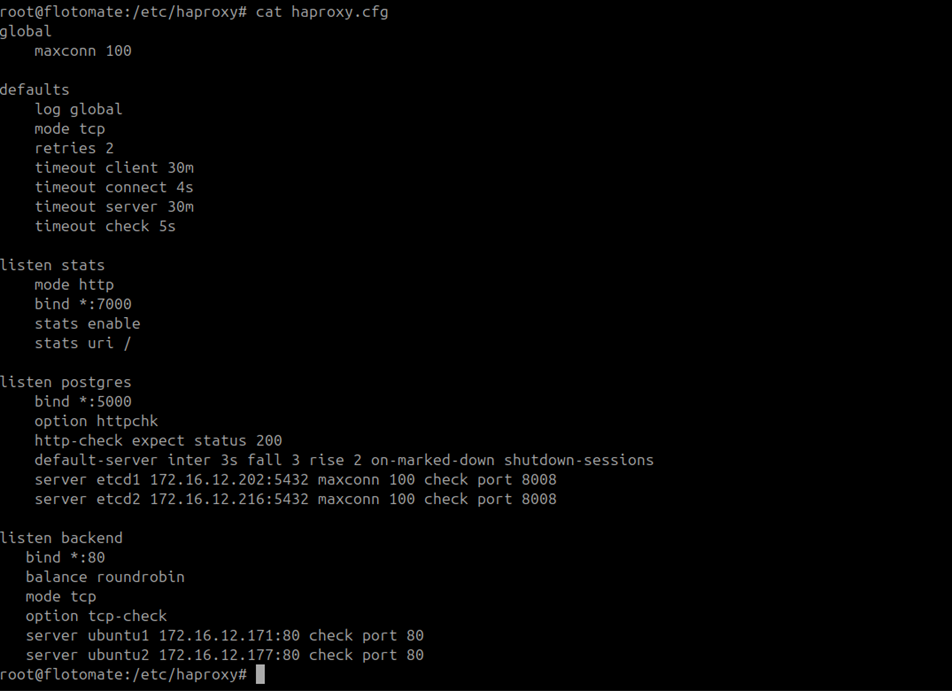
global
    maxconn 100

defaults
    log global
    mode tcp
    retries 2
    timeout client 30m
    timeout connect 4s
    timeout server 30m
    timeout check 5s

listen stats
    mode http
    bind *:7000
    stats enable
    stats uri /

listen postgres
    bind *:5000
    option httpchk
    http-check expect status 200
    default-server inter 3s fall 3 rise 2 on-marked-down shutdown-sessions
    server etcd1 172.16.12.202:5432 maxconn 100 check port 8008
    server etcd2 172.16.12.216:5432 maxconn 100 check port 8008

listen backend
    bind *:80
    balance roundrobin
    mode tcp
    option tcp-check
    server ubuntu1 172.16.12.171:80 check port 80
    server ubuntu2 172.16.12.177:80 check port 80
Confirm the following ports are open before continuing: 80 and 443 on the Observer and both APP machines; 2379, 2380, and 5000 on the Observer; 5432, 7000, and 8008 on both DB machines.
Verify ETCD Service Status
Check that the ETCD service is running:
systemctl status motadata_etcd
If the service is inactive, start it:
systemctl start motadata_etcd
Step 3: Configure Master DB with Patroni
Run the following steps on DB 1 (Master DB) (172.16.12.202).
Give
MotadataPatroniSetupU24execute permissions and run it:chmod 777 MotadataPatroniSetupU24
./MotadataPatroniSetupU24Enter
1when asked whether this machine is Node 1 or Node 2. Then enter the Slave DB IP address:172.16.12.216.
Enter the ETCD IP address when prompted:
172.16.13.42.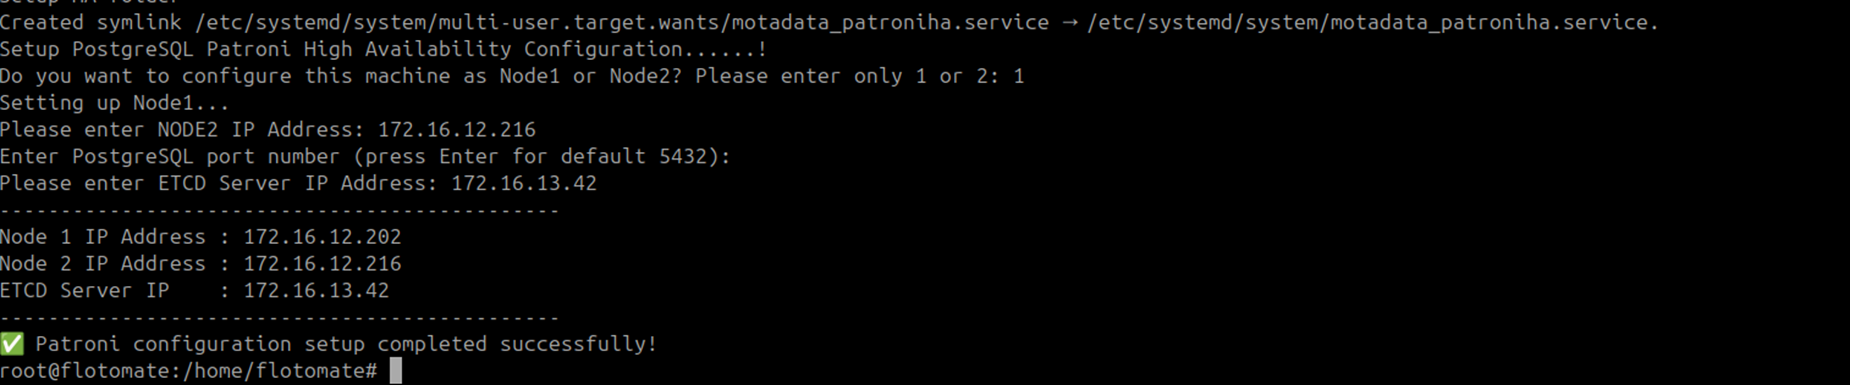
Patroni setup on the Master DB is complete.
Step 4: Configure Slave DB with Patroni
Run the following steps on DB 2 (Slave DB) (172.16.12.216).
Give
MotadataPatroniSetupU24execute permissions and run it:chmod 777 MotadataPatroniSetupU24
./MotadataPatroniSetupU24Enter
2when asked whether this machine is Node 1 or Node 2. Enter the Master DB IP address and the ETCD IP address when prompted.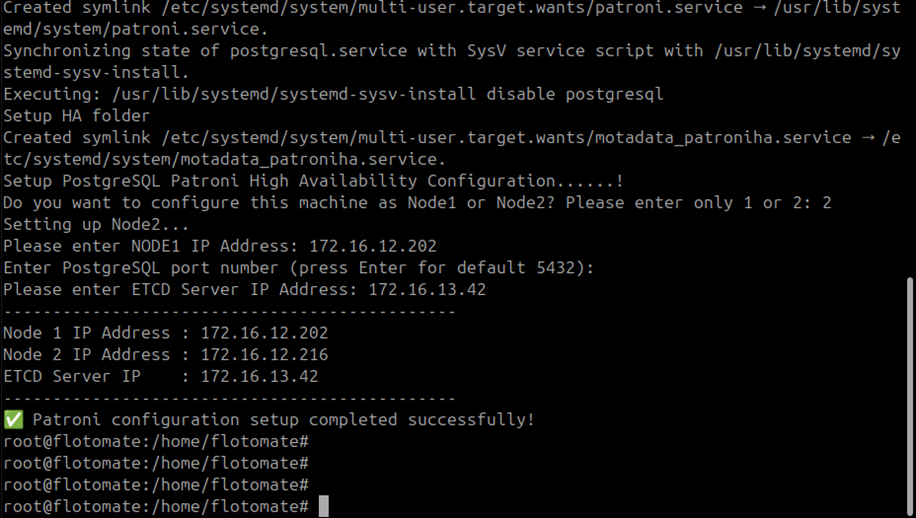
Verify that the Patroni service on the Slave DB is inactive after setup:
systemctl status patroni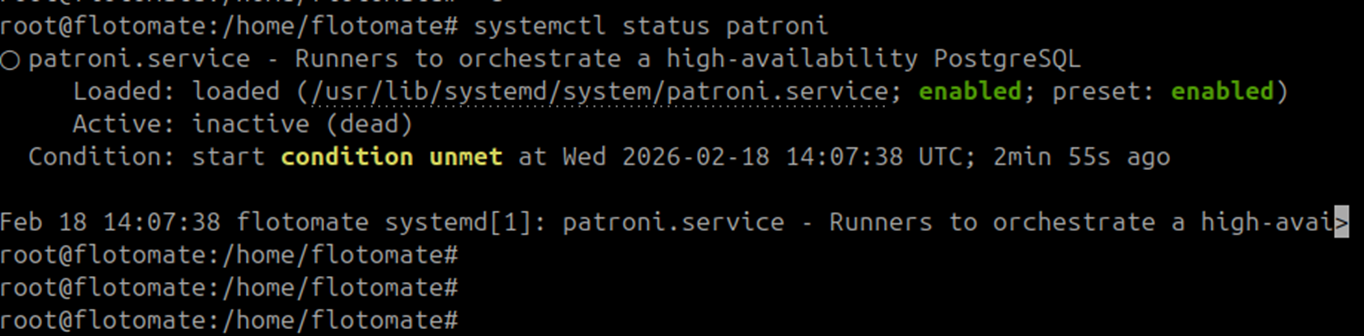
If it shows
runningoractive, stop it:systemctl stop patroni
Patroni on the Slave DB starts automatically during Step 5 DB configuration. Starting it early causes split-brain issues.
Step 5: Run DB Configuration on the Master DB
Run the following steps on DB 1 (Master DB) (172.16.12.202).
Retrieve the application DB password from the Master APP machine:
cat /opt/flotomate/main-server/lib/boot-hosted-exec.conf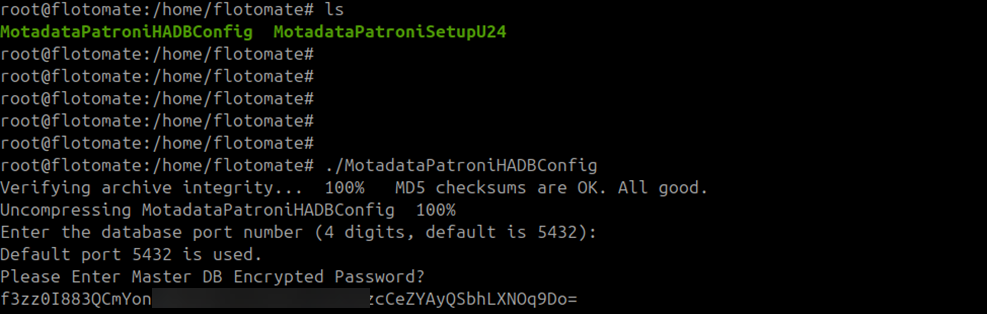
Copy
MotadataPatroniHADBConfigfrom/opt/HAto the home directory. Give it execute permissions and run it:chmod 777 MotadataPatroniHADBConfig
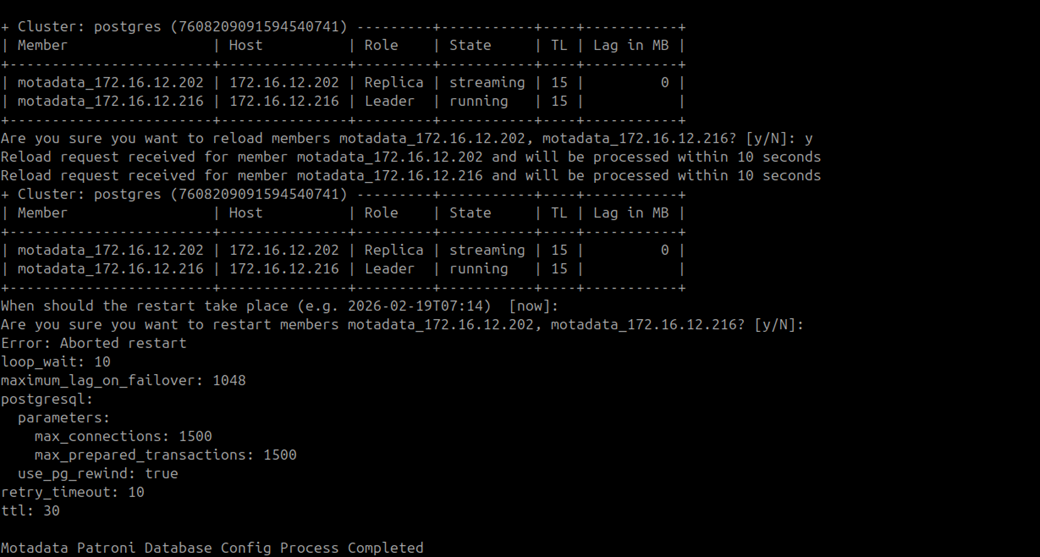
./MotadataPatroniHADBConfigEnter the DB password you retrieved in step 1.
Enter
ywhen asked to reload and restart Patroni members. Perform this twice and if the version is given then press enter.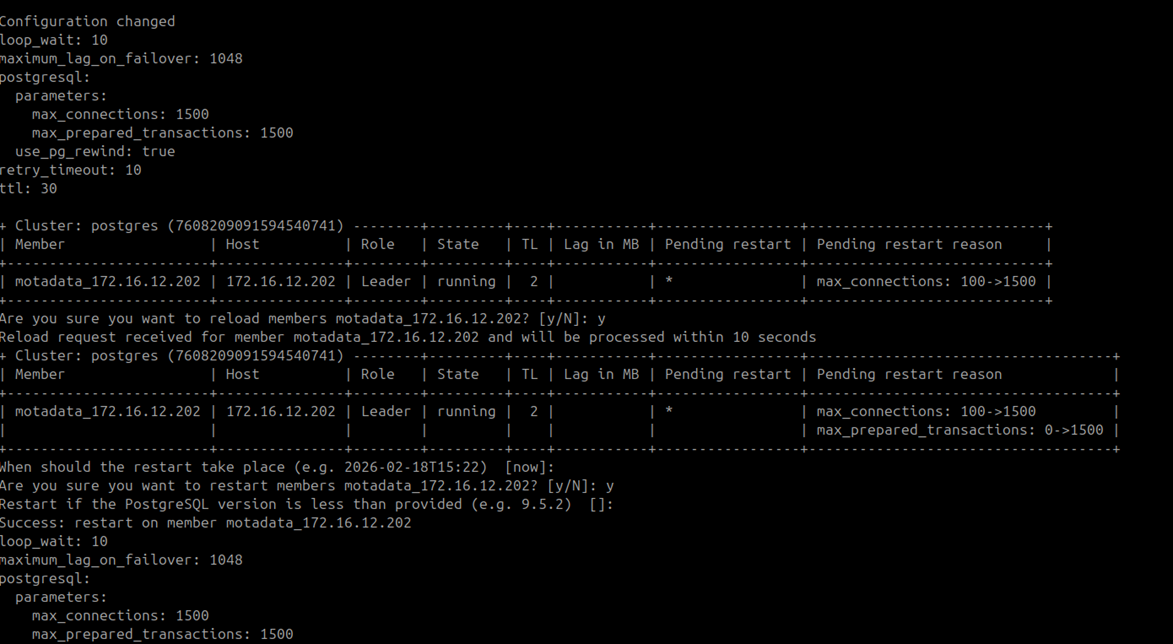
Master DB configuration is complete.
Step 6: Run DB Configuration on the Slave DB
Run the following steps on DB 2 (Slave DB) (172.16.12.216).
Run
MotadataPatroniHADBConfig:./MotadataPatroniHADBConfigEnter the same DB password you used on the Master DB.
Slave DB configuration is complete.
If an old HA configuration already exists, remove it after taking a backup:
rm -rf /opt/HA
Step 7: Configure the Master Application
Run the following steps on APP 1 (Master APP) (172.16.12.171).
Copy MotadataPatroniHAMasterSlaveAppConfig from the Master DB /opt/HA folder to the Master APP machine. Give it execute permissions and run it:
chmod 777 MotadataPatroniHAMasterSlaveAppConfig
./MotadataPatroniHAMasterSlaveAppConfig
Enter the Observer IP address when prompted:
172.16.13.42.
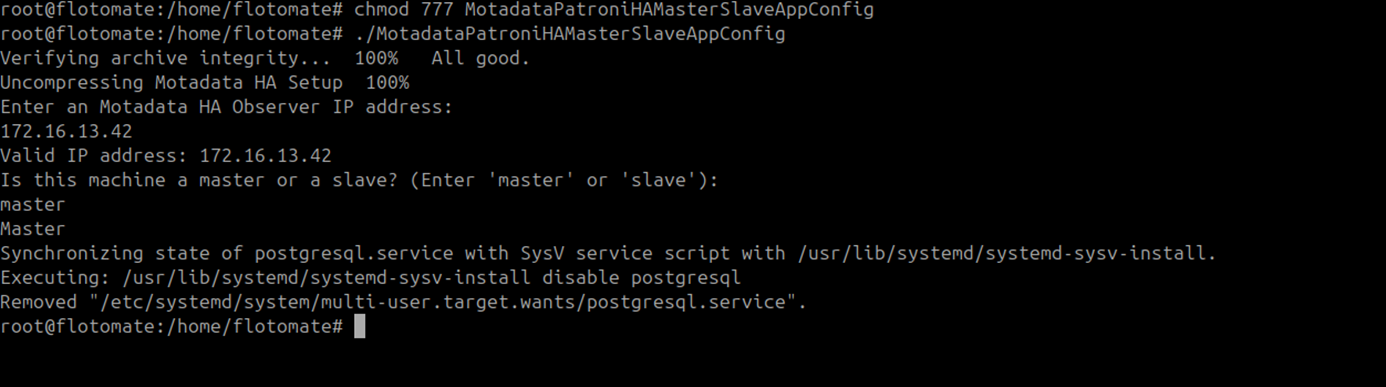
Enter
masterwhen asked for the machine role.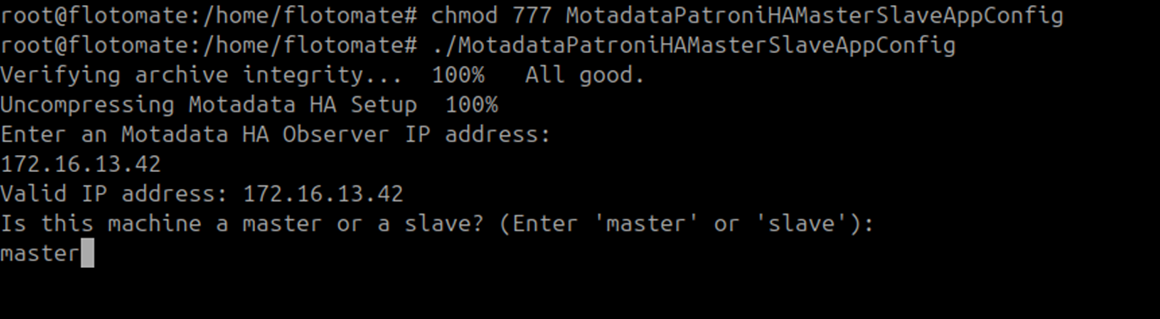
Master application configuration completes.
Step 8: Configure the Slave Application
Run the following steps on APP 2 (Slave APP) (172.16.12.177).
Copy MotadataPatroniHAMasterSlaveAppConfig to the Slave APP machine. Give it execute permissions and run it:
chmod 777 MotadataPatroniHAMasterSlaveAppConfig
./MotadataPatroniHAMasterSlaveAppConfig
Enter the Observer IP address when prompted:
172.16.13.42.Enter
slavewhen asked for the machine role.
Enter the Master APP DB password when prompted.
Use the Master APP DB PasswordRetrieve the DB password from the Master APP configuration file. The password must be identical on all machines.

Slave application configuration is complete.
Step 9: Configure HA Observer for Application Failover
Run the following steps on the Observer machine (172.16.13.42).
Run this script as a normal user. Do not use root or sudo. The script will fail if run as root.
Give
service_desk_ha_CIexecute permissions and run it:chmod 777 service_desk_ha_CI
./service_desk_ha_CI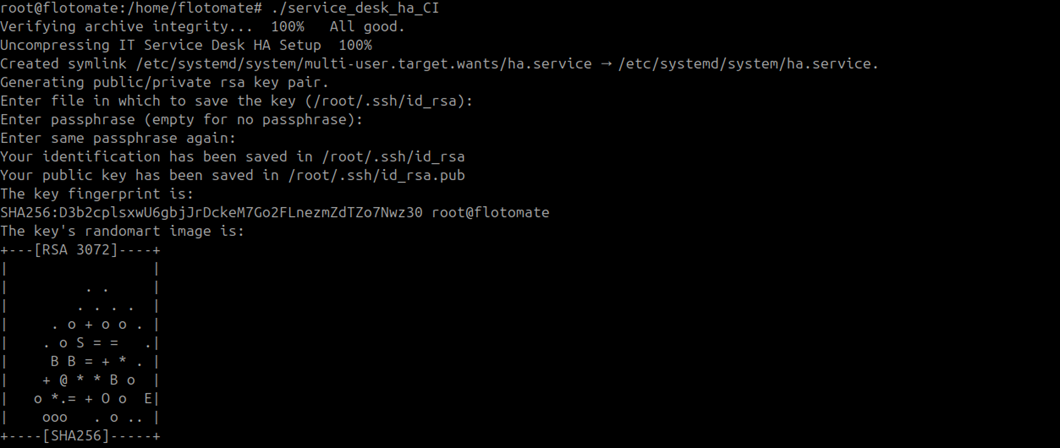
Press Enter repeatedly at each key-pair generation prompt until generation completes.
Enter the following values when prompted:
Prompt Value SSH username OS username on both APP machines SSH port Default is 22Master APP IP 172.16.12.171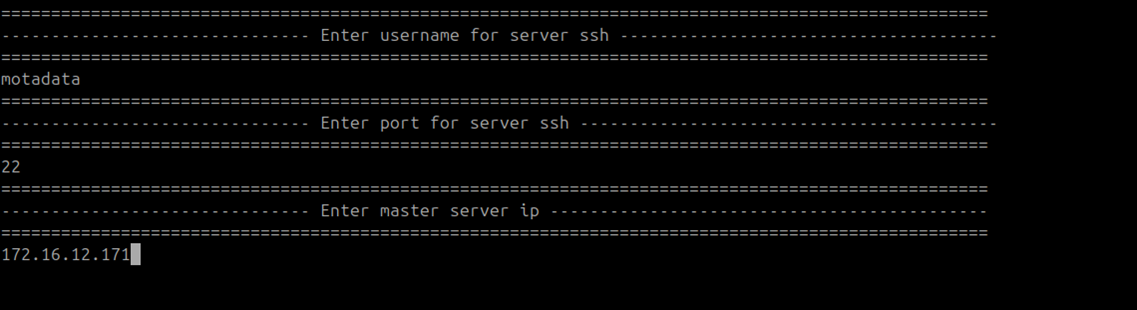
Enter the Master APP password twice when prompted.
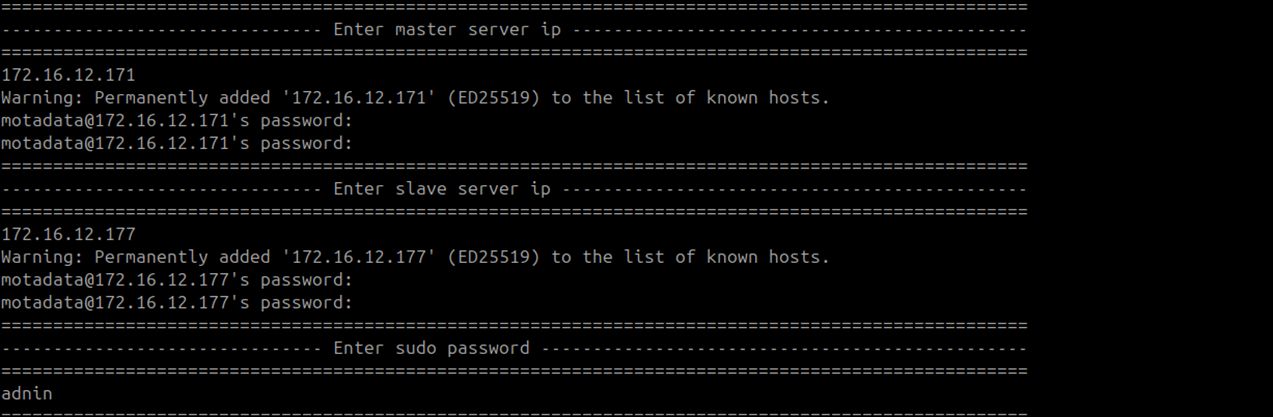
Enter the Slave APP IP address (
172.16.12.177). Enter the Slave APP password twice when prompted.Enter
testwhen asked for email configuration.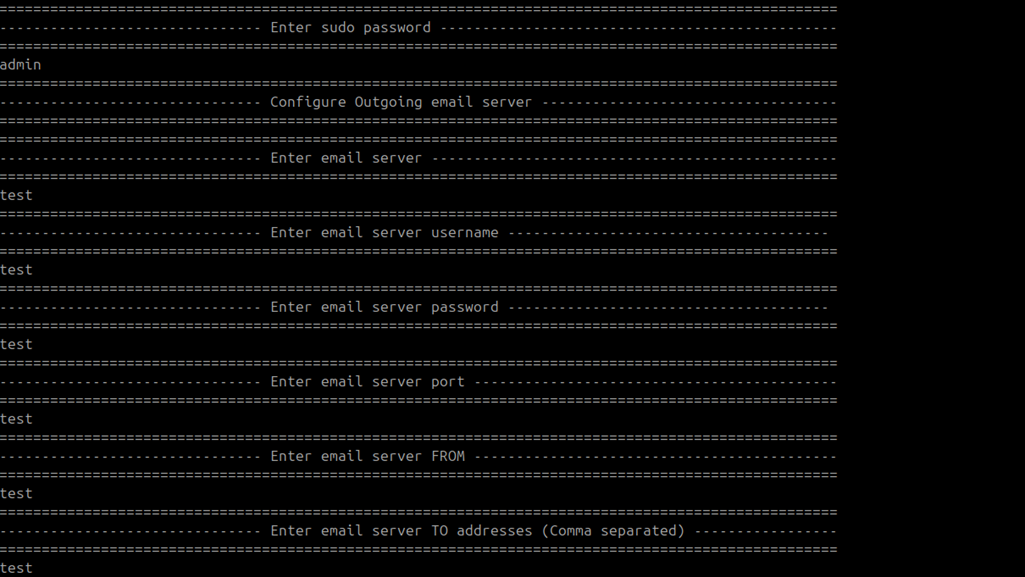
Press Enter at the second key-pair generation prompt.

Observer configuration for application HA is complete. Verify the setup by checking logs:
cat /opt/HA/logs
Troubleshooting
Use this section to diagnose common issues after completing the 5-machine distributed setup.
Nginx is running on the Slave APP after setup
Cause: Nginx started automatically on APP 2 during installation. An active Nginx service on the Slave APP causes routing conflicts with the Observer.
Fix: Stop and disable Nginx on APP 2:
systemctl stop nginx
systemctl disable nginx
/opt/HA has incorrect ownership
Cause: The /opt/HA directory is owned by a different user than the one used during configuration. Failover scripts fail when they cannot write to this directory.
Fix: Correct the ownership on both Master and Slave APP machines:
chown -R motadata:motadata /opt/HA
Machines cannot communicate with each other
Cause: One or more required firewall ports are blocked between machines.
Fix: Confirm the following ports are open between each machine pair:
| Source | Destination | Ports |
|---|---|---|
| Observer | Master APP and Slave APP | 80 (optional), 443 |
| Observer | Master DB and Slave DB | 5432, 8008 |
| Master DB | Observer | 2379, 2380, 5000 |
| Slave DB | Observer | 2379, 2380, 5000 |
| Master DB | Slave DB | 5432, 8008 |
Check both OS-level and network-level firewall rules on each machine.
Patroni on Slave DB is active before Step 5
Cause: Patroni started automatically during the Slave DB Patroni setup in Step 4. Starting it before DB configuration causes split-brain issues.
Fix: Stop Patroni on the Slave DB before running Step 6:
systemctl stop patroni
HTTPS port not listening after restart
Cause: The CertificateFilePath or KeyFilePath in appsettings.json still has a leading underscore, or the file path is incorrect for the OS.
Fix: Open appsettings.json and confirm the leading underscore is removed from both CertificateFilePath and KeyFilePath. Verify the file paths exist and use the correct path separator for the OS. Restart the poller service and re-run the verification commands.