Restoring DB in HA & DC-DR Environments
Ensure business continuity and rapid recovery by mastering database restoration procedures for your High Availability and Disaster Recovery environments.
This guide provides step-by-step instructions for advanced database restoration scenarios. It covers the specific commands and workflows required for both High Availability (HA) and Disaster Recovery (DR) environments, which differ significantly from a standard single-server restore. This document is intended for administrators and support specialists responsible for system maintenance and recovery.
Prerequisites
Before starting the restore process, ensure that the environment is properly prepared to avoid data loss or service disruption.
Confirm Backup Availability:
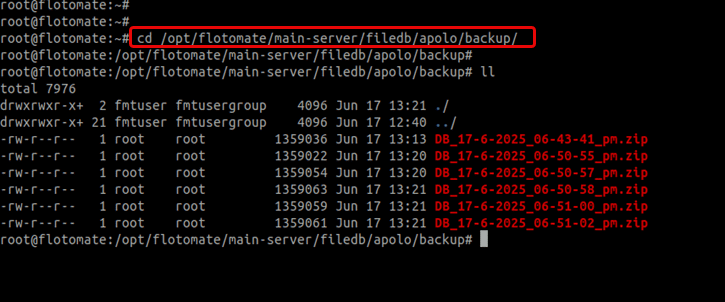
Verify that you have a valid and up-to-date database backup file. In High Availability (HA) setups, backups are typically stored at:
/opt/flotomate/main-server/filedb/apolo/backupStop High Availability Services
To prevent conflicts during the restore process, stop the
ha-observerandhaproxyservices on both nodes.Check the status of the services:
systemctl status ha
systemctl status haproxy

Stop the services:
systemctl stop ha
systemctl stop haproxynoteThe
haservice will only stop after its process counter ends.
Database Restoration Methods
Method 1: Restoring from a Database Dump File (pg_restore)
This is the most common method for restoring the database from a backup file.
Step 1: Prepare the Backup File
Move your database backup file to the
/tmpdirectory and unzip it.Syntax:
mv DB_DATE_BACKUP.zip /tmp/
cd /tmp
unzip DB_DATE_BACKUP.zip
Example:
mv DB_22-03-2024_11-00-00_pm.zip /tmp/
cd /tmp
unzip DB_22-03-2024_11-00-00_pm.zip
Step 2: Stop Core Application Services
Stop the main server and analytics server to release any connections to the database.
systemctl stop ft-main-server
systemctl stop ft-analytics-server
Step 3: Recreate the PostgreSQL Database
Log in to the PostgreSQL console as the
postgresuser.su postgres
psqlDrop the existing database to ensure a clean restore.
drop database flotoitsmdb;Create a new, empty database.
create database flotoitsmdb;Verify the database was created successfully and then quit the console using the below commands.
\l
\q
Step 4: Execute the Restore Command
Use pg_restore to import the data from your backup file.
Syntax:
pg_restore -U postgres -d flotoitsmdb {DB_BACKUP_FILENAME}
Example:
pg_restore -U postgres -d flotoitsmdb DB_22-03-2024_11-00-00_pm
Method 2: Restoring from the PostgreSQL Data Directory
Use this method if you have a file-level backup of the PostgreSQL data directory.
Navigate to the PostgreSQL data directory (version may vary).
cd /var/lib/postgresql/16/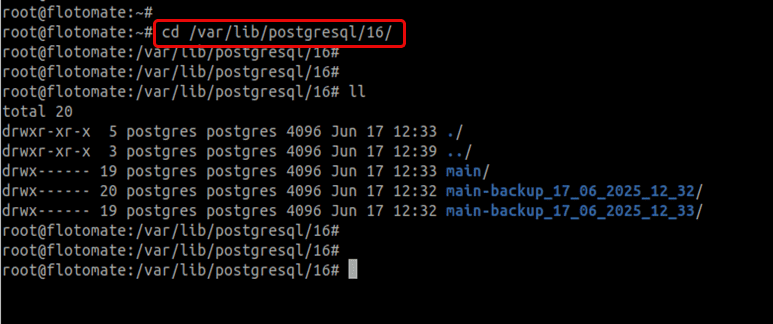
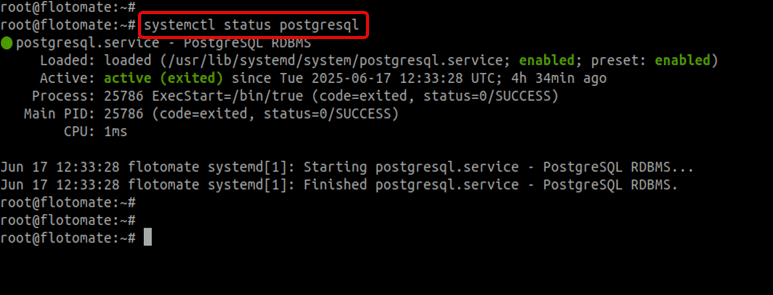
Check the status of the PostgreSQL and stop its service if running using the below command.
systemctl status postgresql
Stop the PostgreSQL service.
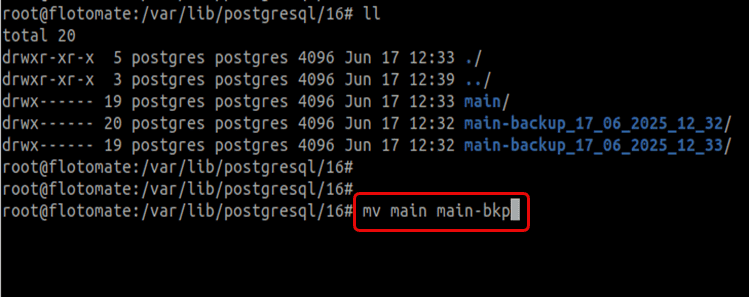
systemctl stop postgresqlRename the existing main data folder.
mv main main_old
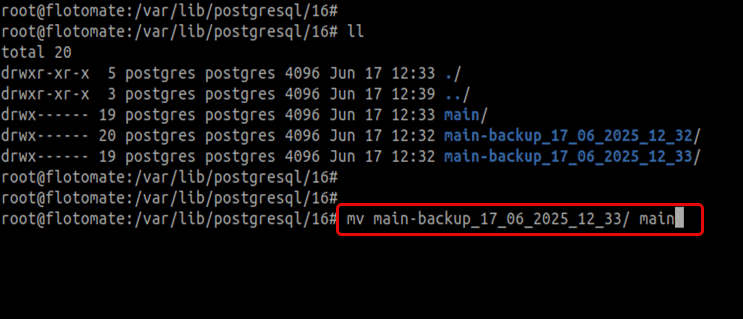
Copy your backup folder here.
Ensure the
postgresuser owns the directory.chown -R postgres:postgres main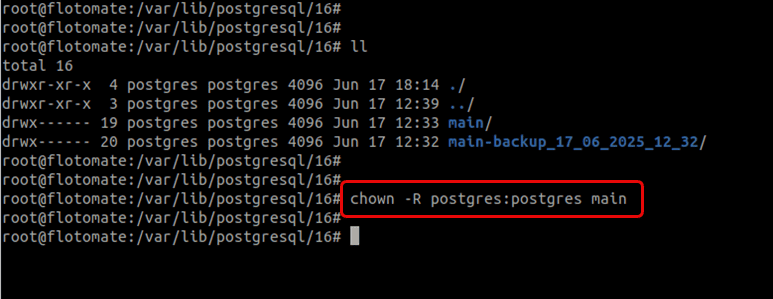
Before proceeding, carefully verify the size, date, and time of the backup folder on both HA nodes to ensure you're restoring the correct and most recent data. Restoring incorrect data may lead to configuration inconsistencies.
Method 3: Re-synchronizing a Slave or DR Node
Use this method to synchronize a secondary node when the primary node's data is correct, but the secondary (Slave or DR) is out of sync.
For HA Slave Nodes
Use this if the Master node has correct data, but the Slave node is out of sync.
- Log in to the Slave node.
- Run the
slave.shscript with the Master IP.
Syntax:
sh slave.sh MASTER_IP_ADDRESS
Example:
sh slave.sh 172.16.12.207
Before running, double-check that the data on the master node is complete and correct.
For DC-DR Environments
The restoration process in a Disaster Recovery environment is similar, with one key difference.
Database Restore: Use the
pg_restoremethod (Method 1).Manual Sync: If the Disaster Recovery (DR) site is not in sync with the primary Data Center (DC), you can initiate a manual synchronization by running the Motadata_DR_Setup executable on the DR server using the below command.
Syntax:
./Motadata_DR_Setup MASTER_DC_SERVER_IPExample:
./Motadata_DR_Setup 172.16.12.207noteThe
ha-observerservice is not present in a DC-DR environment.
Post-Restore Operations and Troubleshooting
Verification and Resuming Operations
How to Verify Data
Find the latest created request.
select createdtime from apolo.request order by createdtime desc limit 1 offset 0;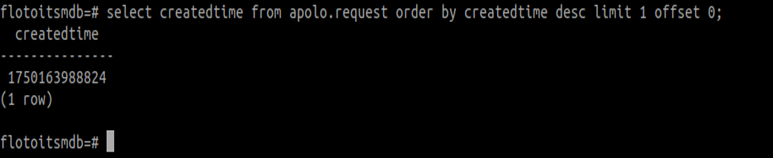
This will return a value in Epoch time format. You can convert it to a human-readable date using an online tool such as epochconverter.com.
Check record counts on both nodes.
select count(*) from apolo.request;Create a new test ticket on the master node. Verify the count increases on both nodes after sync.
Restart HA Services
Once you’ve verified that both the database and filedb are fully synchronized, you can safely restart the ha-observer and haproxy services using the below command:
systemctl start ha
systemctl start haproxy
Critical Pre-Sync Checklist and Troubleshooting Points
If you encounter issues with data synchronization, verify:
✅ Port Accessibility:
PostgreSQL database port (5432) must be open between Master/Slave and DC/DR nodes.
✅ Sufficient Resources: Ensure adequate storage, CPU cores, and memory are allocated for database operations.
✅ Network Performance: Require high-speed, low-latency connections for efficient data transfer.
✅ Permissions and Ownership:
Do not use custom permissions. Ensure postgres user owns the data directories and default permissions are intact.