Backup Procedure
Safeguard your ServiceOps environment and ensure business continuity by implementing robust application and database backup procedures.
Effective application and database backup procedures are critical for ensuring business continuity, data integrity, and security in ServiceOps environments. This guide provides comprehensive procedures for backing up both the ServiceOps application components and the PostgreSQL database to safeguard against data loss, corruption, and system failures.
Regular backups enable quick recovery and minimize downtime in case of disasters, system upgrades, or migration scenarios. ServiceOps supports both manual backup procedures and automated scheduled backups through the application interface.
Prerequisites
Before performing backup procedures, ensure you have:
- Administrative access to the ServiceOps server
- Sufficient disk space for backup storage (typically 2-3x the current application size)
- Network access to backup storage locations (if using remote storage)
- Service status knowledge - verify which components are currently running
Application Backup
The ServiceOps application backup includes all critical components, configuration files, and data directories. Follow these steps to create a complete application backup:
View Step-by-Step Instructions for Application Backup
Step 1: Prepare Backup Environment
Login to the ServiceOps server via SSH or terminal access
Navigate to the home directory:
cd /home/motadataCreate a backup directory with current date:
Syntax:
mkdir backupApp_DD-MM-YYYYExample:
mkdir backupApp_12-03-2025Navigate to the backup directory:
Syntax:
cd backupApp_DD-MM-YYYY/Example:
cd backupApp_12-03-2025
Step 2: Create Component Directories
Create sub-directories under the “backupApp_12-03-2025” directory for the different servers and components as shown below:
mkdir main-server
mkdir analytics-server
mkdir fileserver
mkdir chat_server
mkdir plugin-server
mkdir discovery-service
mkdir otherfiles
Step 3: Backup Main Server
The main server contains core application logic, configurations, and data:
Navigate to main server directory:
cd main-serverCopy critical directories:
cp -pr /opt/flotomate/main-server/lib .
cp -pr /opt/flotomate/main-server/dbs .
cp -pr /opt/flotomate/main-server/config .
cp -pr /opt/flotomate/main-server/filedb .
cp -pr /opt/flotomate/main-server/elastic .
Step 4: Backup Analytics Server
Navigate to analytics server directory:
cd ../analytics-serverCopy analytics components:
cp -pr /opt/flotomate/cm-analytics/lib .
cp -pr /opt/flotomate/cm-analytics/config .
cp -pr /opt/flotomate/cm-analytics/filedb .
Step 5: Backup File Server
Navigate to file server directory:
cd ../fileserverCopy file server components:
cp -pr /opt/flotomate/fileserver/lib .
cp -pr /opt/flotomate/fileserver/config .
Step 6: Backup Chat Server
Navigate to chat server directory:
cd ../chat_serverCopy chat server files:
cp -pr /opt/flotomate/chat_server/*.* .
Step 7: Backup Plugin Server
Navigate to plugin server directory:
cd ../plugin-serverCopy plugin server directory:
cp -pr /opt/flotomate/plugin-server/ .
Step 8: Backup Discovery Service
Navigate to discovery service directory:
cd ../discovery-serviceCopy discovery service components:
cp -pr /opt/flotomate/discovery/discovery .
cp -pr /opt/flotomate/discovery/pattern-executor .
cp -pr /opt/flotomate/discovery/app.config .
Step 9: Backup System Files
Navigate to other files directory:
cd ../otherfilesCopy frontend application:
cp -pr /opt/flotomate/frontend .Copy Nginx configuration:
cp -pr /etc/nginx .Copy SSL certificates and keys:
cp -pr /etc/ssl .Copy PostgreSQL configuration:
cp -pr /etc/postgresql .Copy PostgreSQL data files:
cp -pr /var/lib/postgresql/16/main .
Database Backup
The PostgreSQL database contains all ServiceOps data including incidents, changes, assets, and configurations. Follow these steps for database backup:
View Step-by-Step Instructions for Database Backup
Step 1: Prepare Database Backup
Navigate to home directory:
cd /home/motadataCreate database backup directory:
Syntax:
mkdir backupDB_DD-MM-YYYYExample:
mkdir backupDB_12-03-2025Navigate to temporary directory:
cd /tmp
Step 2: Create Database Dump
Execute the PostgreSQL dump command to create a complete database backup:
sudo -u postgres pg_dump -U postgres -d flotoitsmdb -F c -b -v -f /tmp/flotoitsmdb_dump -d flotoitsmdb
Command Parameters Explained:
-U postgres: Use postgres user-d flotoitsmdb: Target database name-F c: Custom format (compressed)-b: Include large objects-v: Verbose output-f /tmp/flotoitsmdb_dump: Output file location
Step 3: Move Database Backup
Copy the database dump to the backup directory:
cp flotoitsmdb_dump /home/motadata/backupDB_DD-MM-YYYY
Step 4: Backup PostgreSQL Data Directory (Optional)
For additional safety, backup the PostgreSQL data directory:
For Ubuntu OS:
cd /var/lib/postgresql/16
cp -r main /home/motadata/backupDB_DD-MM-YYYY
For RedHat OS:
cd /var/lib/pgsql/16
cp -r data /home/motadata/backupDB_DD-MM-YYYY
Automated Backup Configuration
ServiceOps provides automated backup scheduling through the application interface:
View Instructions for Automated Backup Configuration
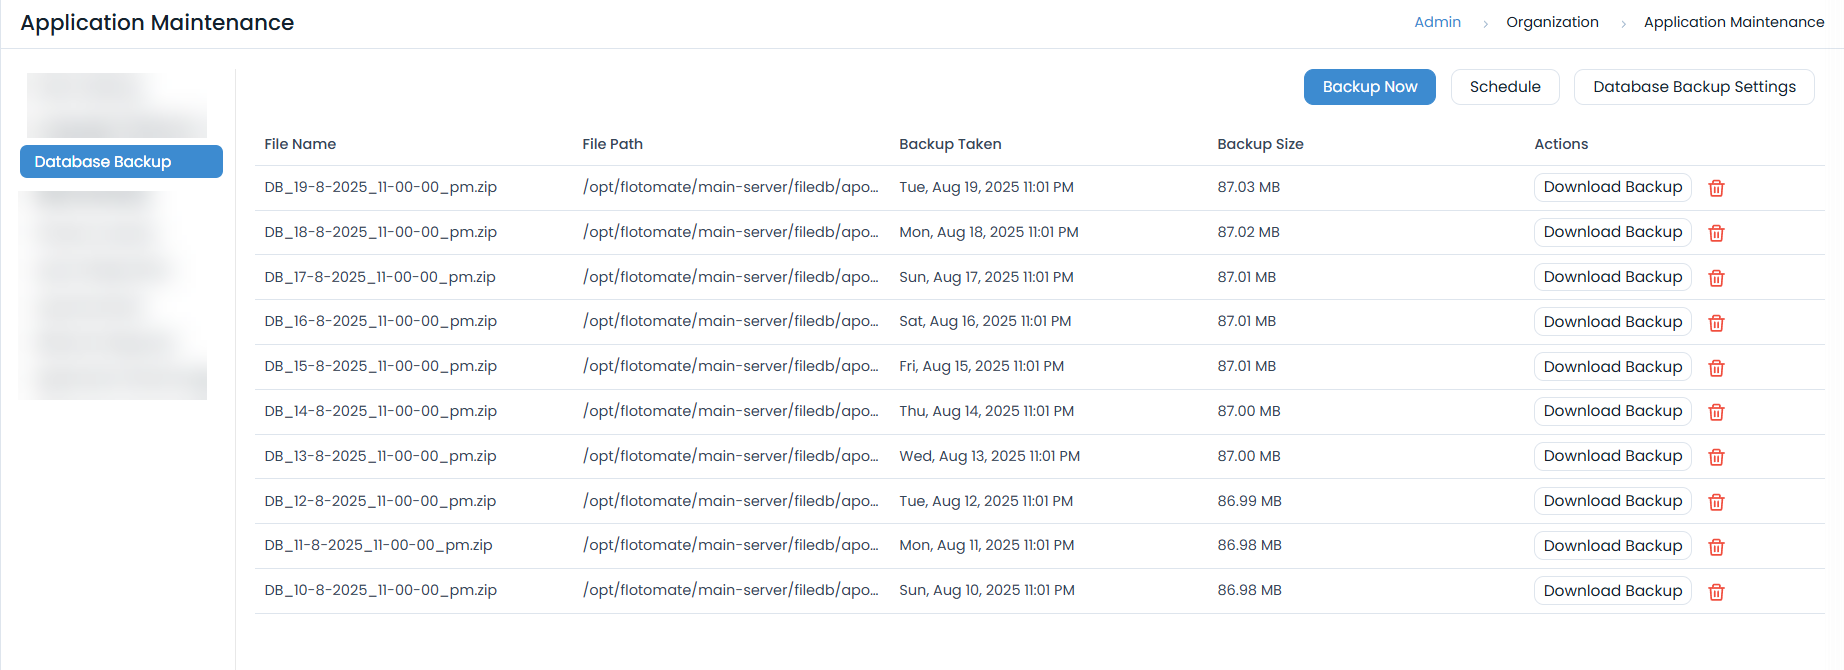
Configure Automated Database Backup
- Login to the ServiceOps application.
- Navigate to Admin > Organization > Application Maintenance menu and click on the Database Backup tab.
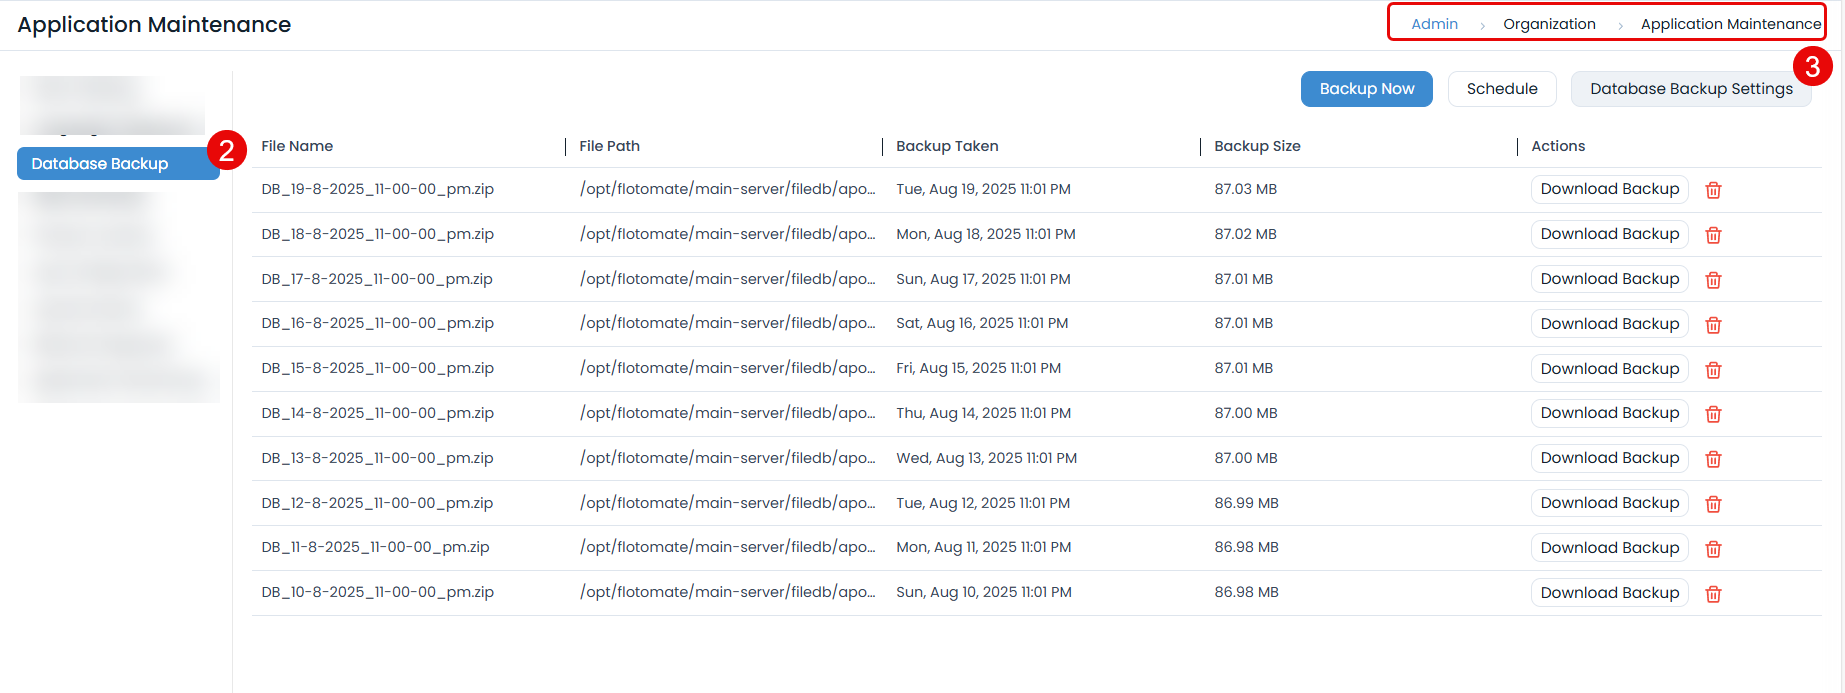
- Configure Database Backup Settings to export the database backup to a specific FTP location (FTP applies only to Linux machines).

- Configure FTP Settings (for Linux machines):
- Host: Enter FTP server hostname
- Username: FTP server username
- Password: FTP server password
- Folder Path: Backup storage location
- Test Connection: Verify FTP connectivity
- Set Backup Retention: Configure number of backups to retain (5-99, default: 10)
- Once done, click Update.
Schedule Database Backup: Set the database backup schedule as daily. Also, specify the date and time when the schedule should start in the Start At field. Additionally, specify the Time at which the schedule should run.

Test the Backup Process by clicking on Backup Now. Upon successful backup process completion, a history record will be created and displayed on the database backup listing page.
Backup Verification
View Backup Verification Steps
After completing backup procedures, verify the backup integrity:
Verify Application Backup
Check backup directory structure:
ls -la /home/motadata/backupApp_DD-MM-YYYY/Verify critical files exist:
- Main server configuration files
- Database configuration
- SSL certificates
- Nginx configuration
Verify Database Backup
Check database dump file:
ls -la /home/motadata/backupDB_DD-MM-YYYY/flotoitsmdb_dumpVerify dump file integrity:
pg_restore --list /home/motadata/backupDB_DD-MM-YYYY/flotoitsmdb_dump | head -10
Backup Storage Best Practices
View Backup Storage Best Practices
Local Storage
- Store backups on separate physical disks
- Use RAID configurations for redundancy
- Implement regular backup rotation
Remote Storage
- Use secure FTP/SFTP for remote backup
- Implement encryption for sensitive data
- Test restore procedures regularly
Backup Retention
- Daily backups: Retain for 7 days
- Weekly backups: Retain for 4 weeks
- Monthly backups: Retain for 12 months
- Yearly backups: Retain for 7 years
Troubleshooting
View Common Issues and Troubleshooting Steps
Common Backup Issues
Insufficient Disk Space:
df -h
du -sh /home/motadata/backupApp_DD-MM-YYYY/
Permission Denied Errors:
sudo chown -R motadata:motadata /home/motadata/backupApp_DD-MM-YYYY/
Database Connection Issues:
sudo systemctl status postgresql
sudo -u postgres psql -c "\l"
Backup Size Optimization
- Exclude unnecessary files: Skip log files and temporary data
- Compress backups: Use gzip or tar compression
- Incremental backups: Consider differential backup strategies
Related Topics
Next Steps
After completing the backup procedure:
- Document backup details: Record backup date, size, and location
- Test restore procedures: Verify backup integrity through restore testing
- Schedule regular backups: Implement automated backup scheduling
- Monitor backup success: Set up alerts for backup failures
- Review backup strategy: Periodically assess and update backup procedures