WhatsApp Config
WhatsApp is a chat application to communicate on the go. Using WhatsApp for incident creation and management will become easier if you integrate the ServiceOps with WhatsApp. Once combined, you can generate or review requests from WhatsApp without signing in to the Support Portal or accessing the chat agent from the portal. In this case, WhatsApp Business Account is used for integrating WhatsApp with ServiceOps.
Such integrations provide programmable communication tools for sending and receiving messages, and performing other communication functions using its web service APIs.
WhatsApp for Business Integration
Using Facebook
Prerequisites
- ServiceOps hosted on a public URL
- SSL Certificate enabled
- The Base URL in ServiceOps should be the same as the portal URL
- Chat support should be enabled in the ServiceOps Portal
- WhatsApp account created.
- Valid Facebook Account
- Verified Meta Business Account. To check the verification status, refer to the FAQ section.
Applicable Version
This functionality is applicable from version 7.9 and above.
Create App
To create a WhatsApp Virtual Agent using Facebook, follow the below steps:
Step 1: Install WhatsApp from the Google Play Store and create an account.
Step 2: Login to Meta for Developers using the existing Facebook account.
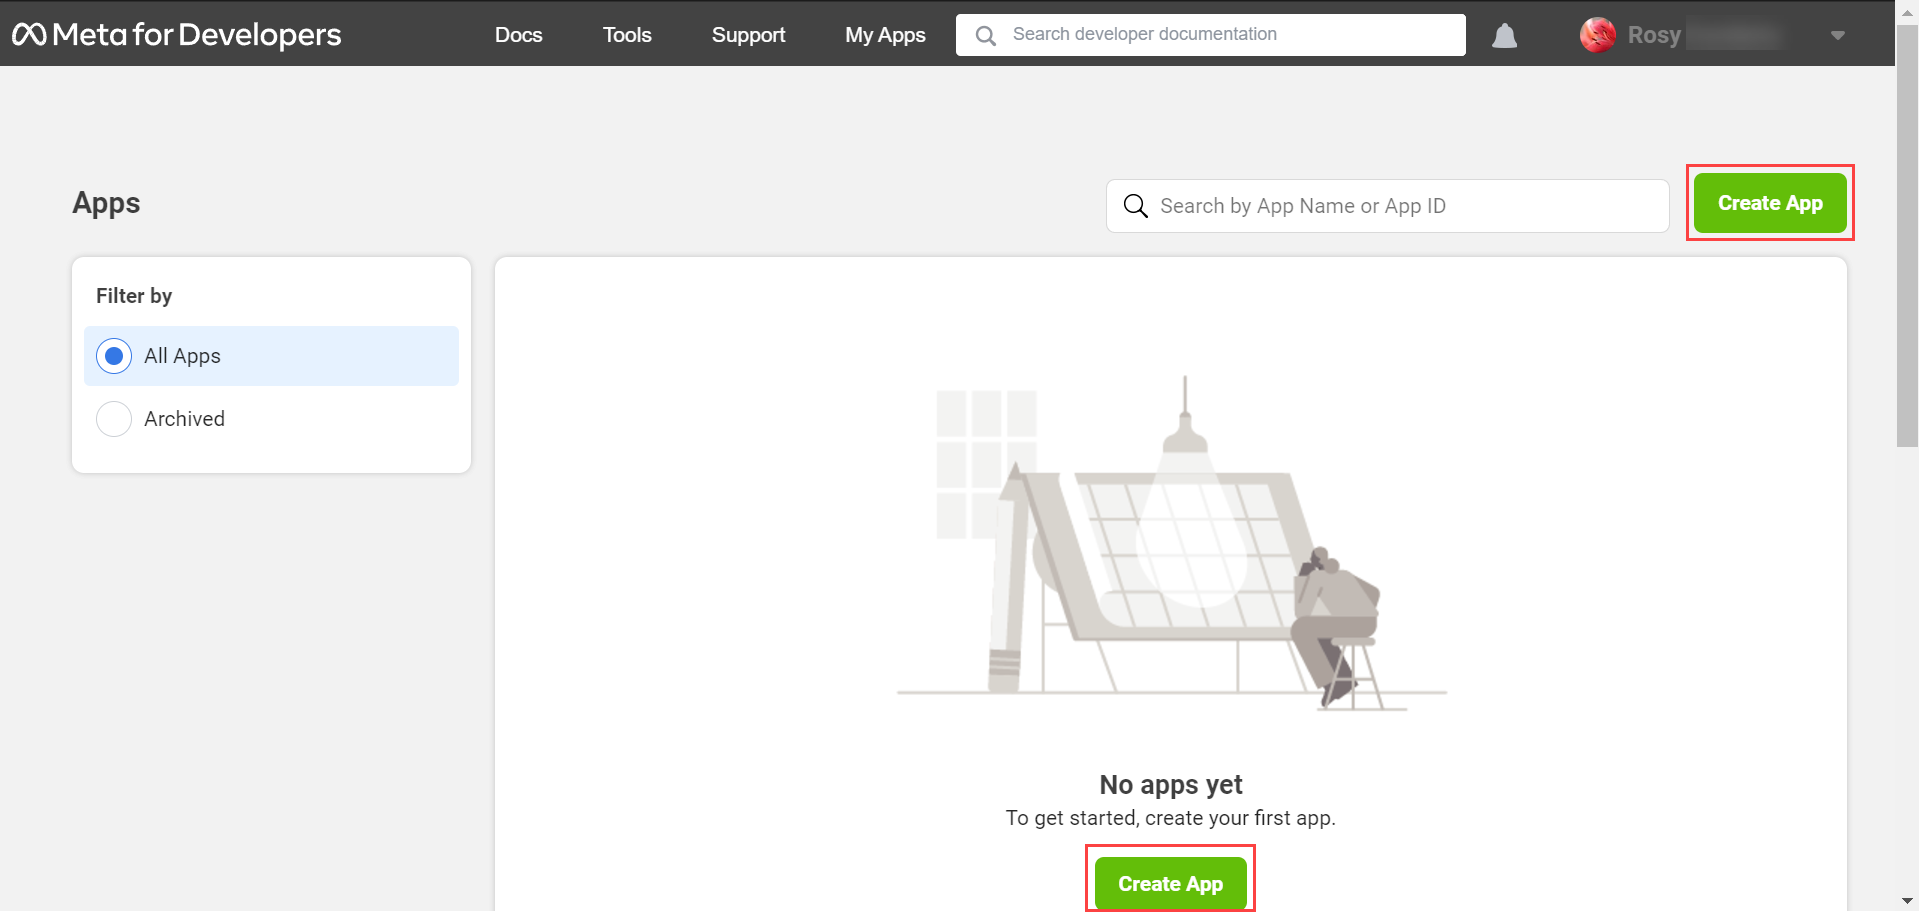
Step 3: Click My Apps > Create App.
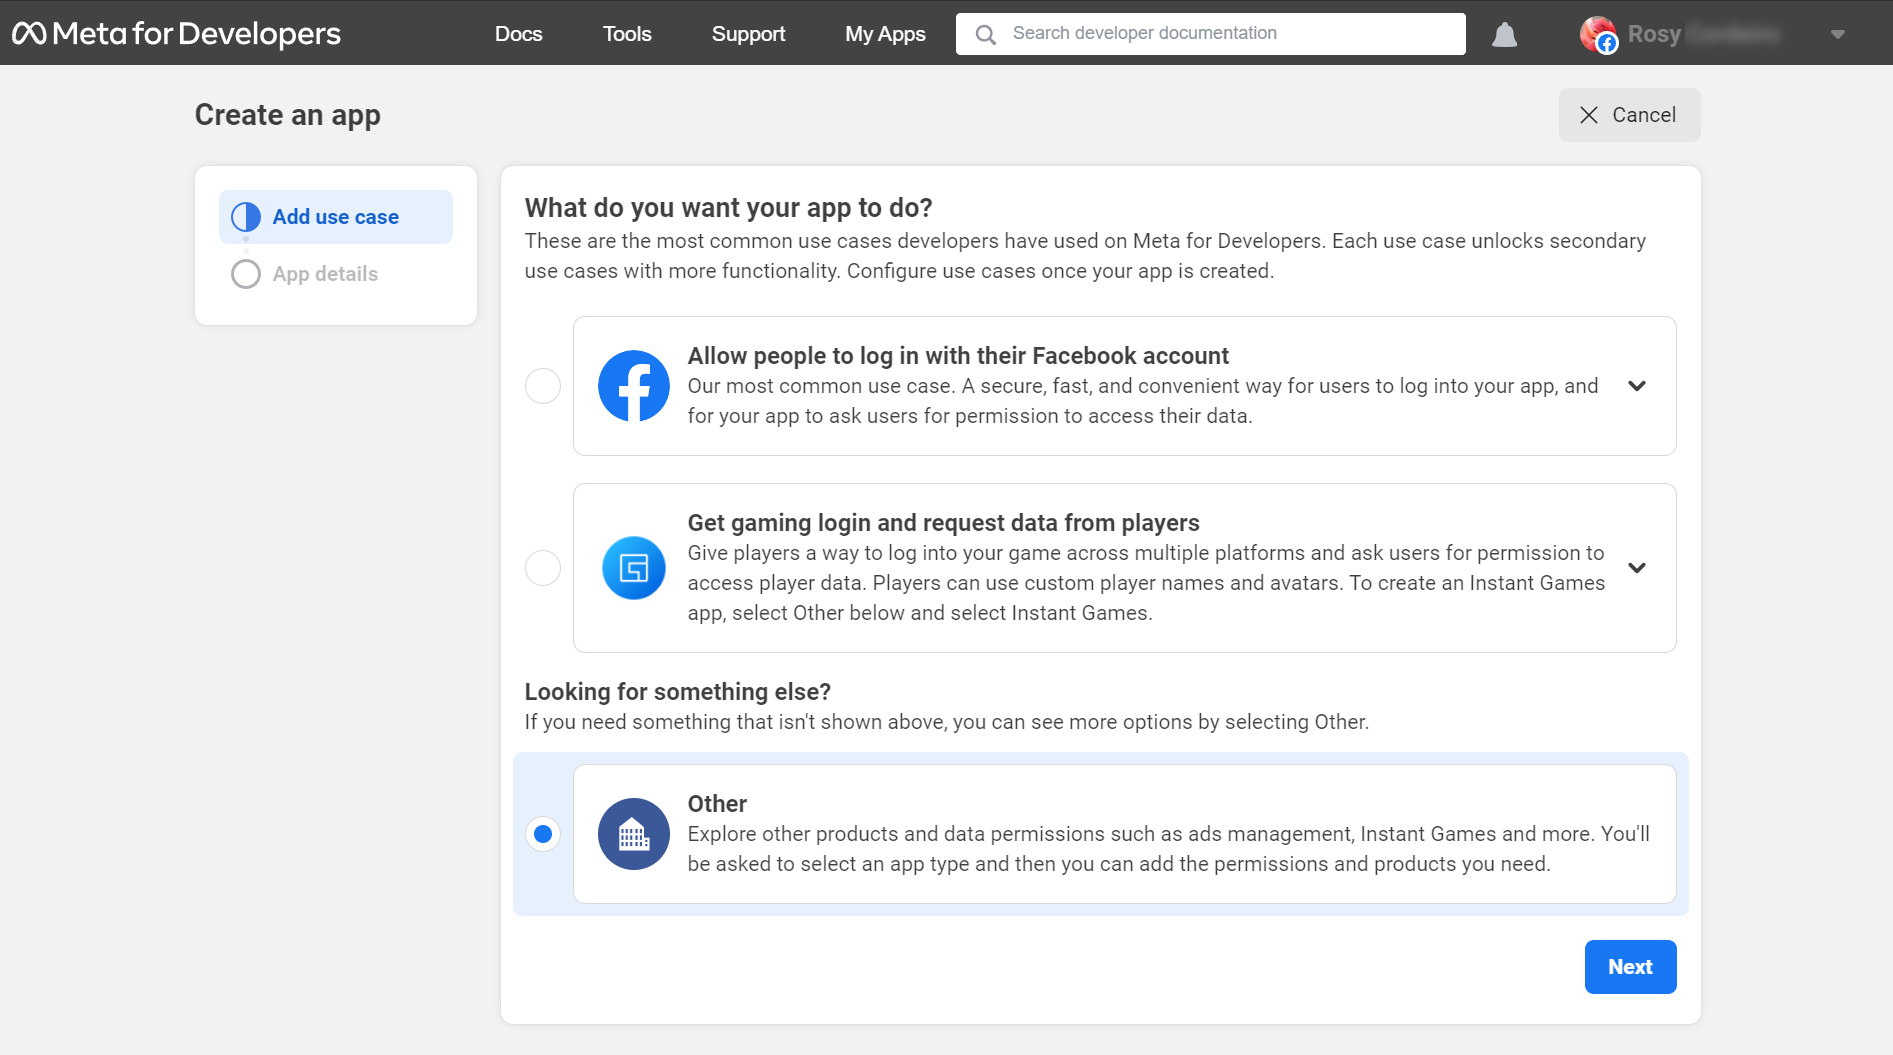
Step 4: On the Add Use Case page, select the Other option, and click Next.
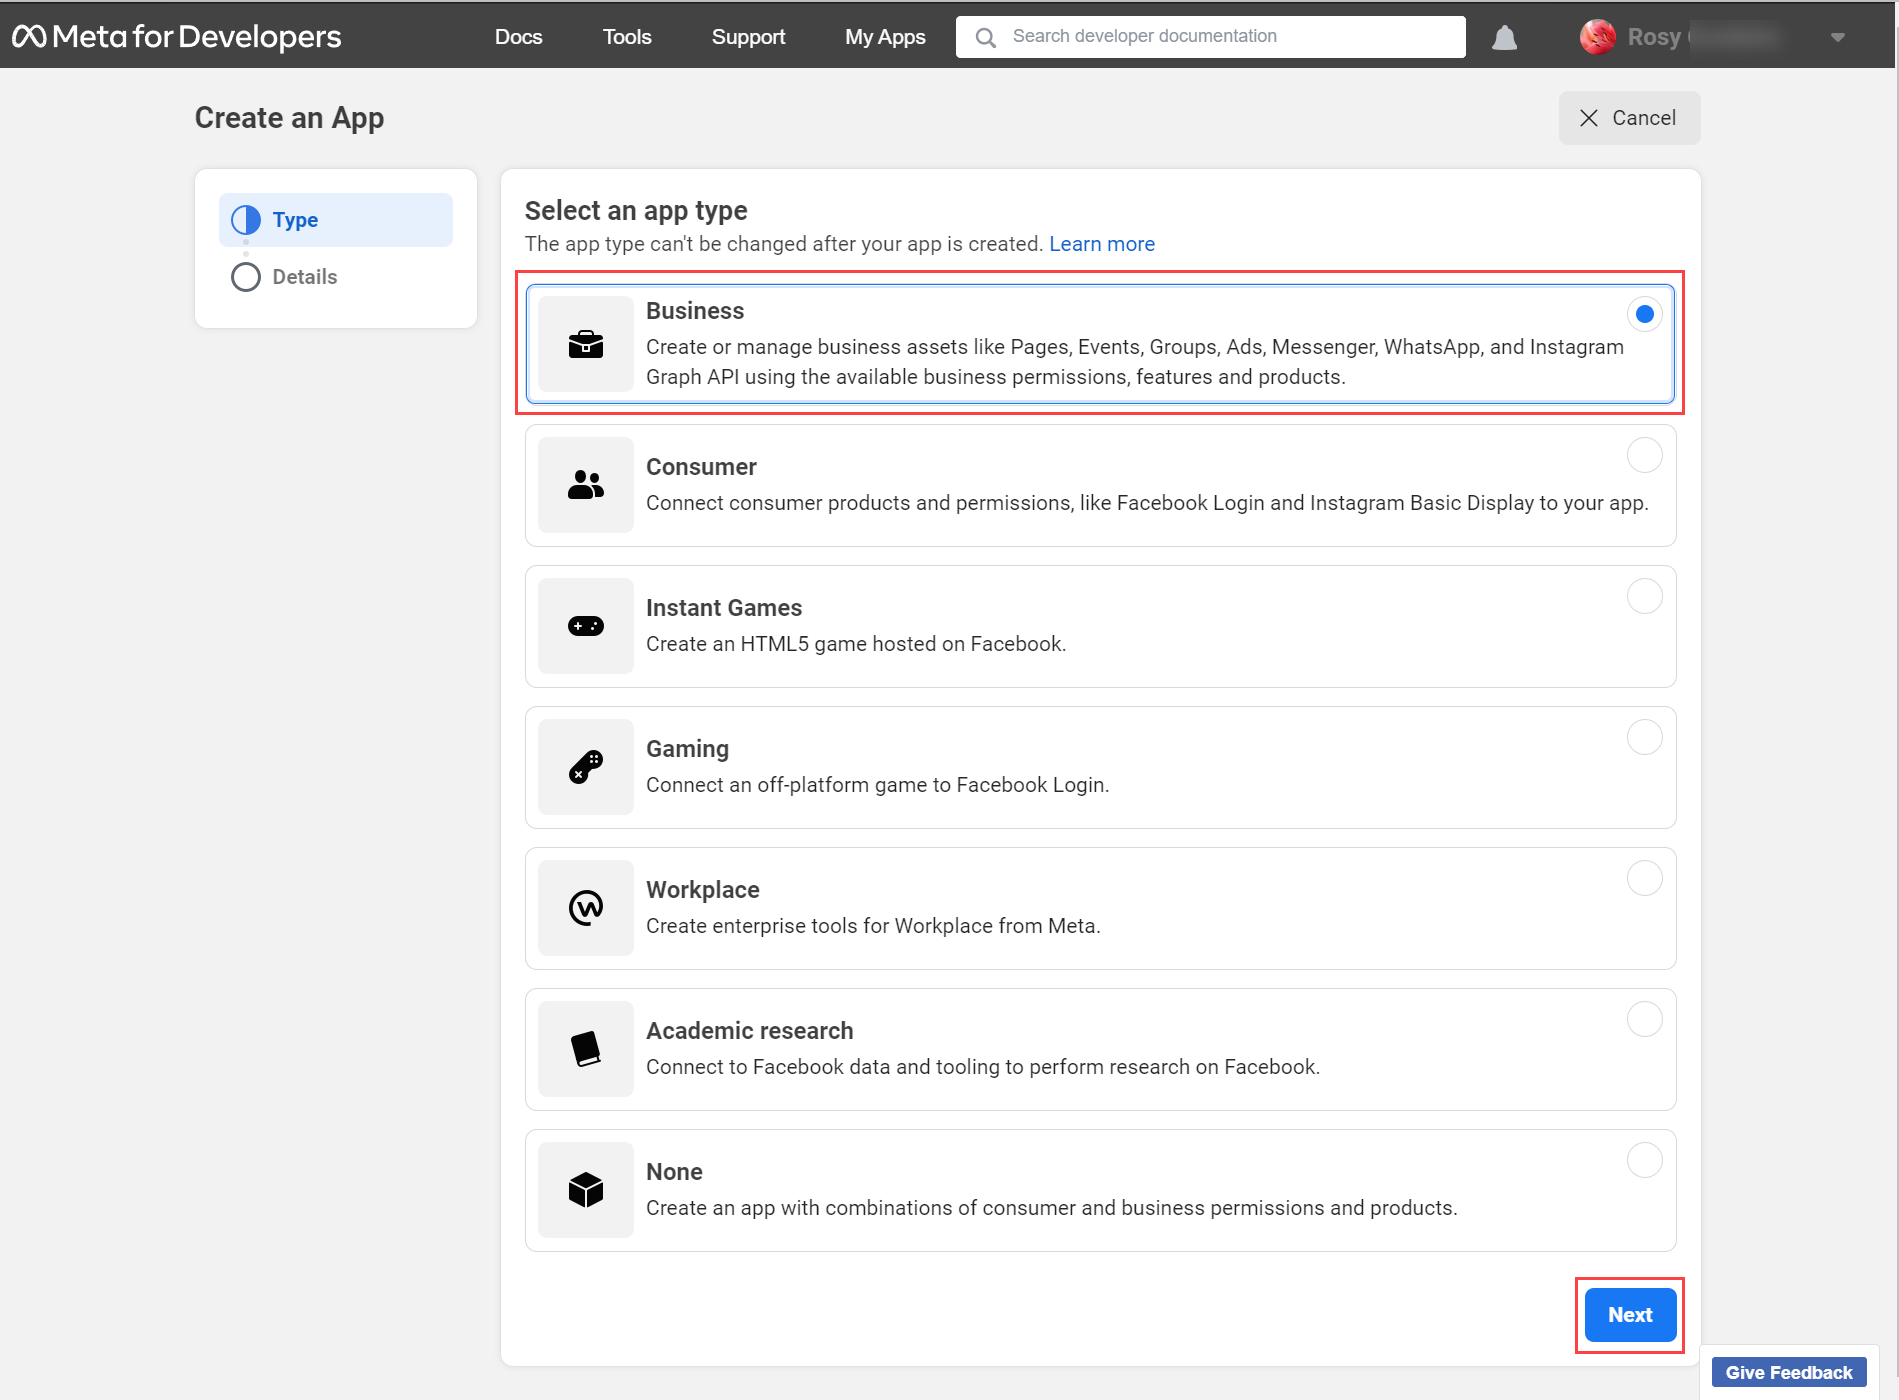
Step 5: Select an app type as “Business” and click Next.
Step 6: Enter the basic details like the app name, App contact email, business portfolio, and click Create app. The business portfolio must be verified.

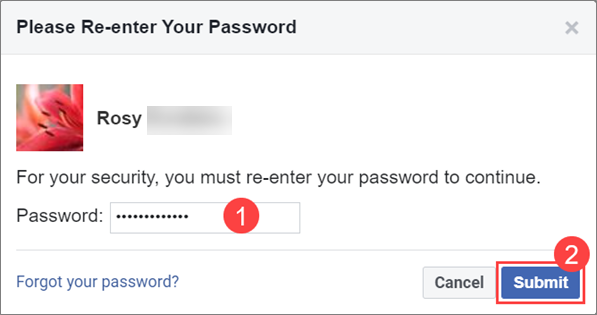
Step 7: Re-enter the password of your account and click Submit.
The app gets created, and its details page appears.
Add Phone number
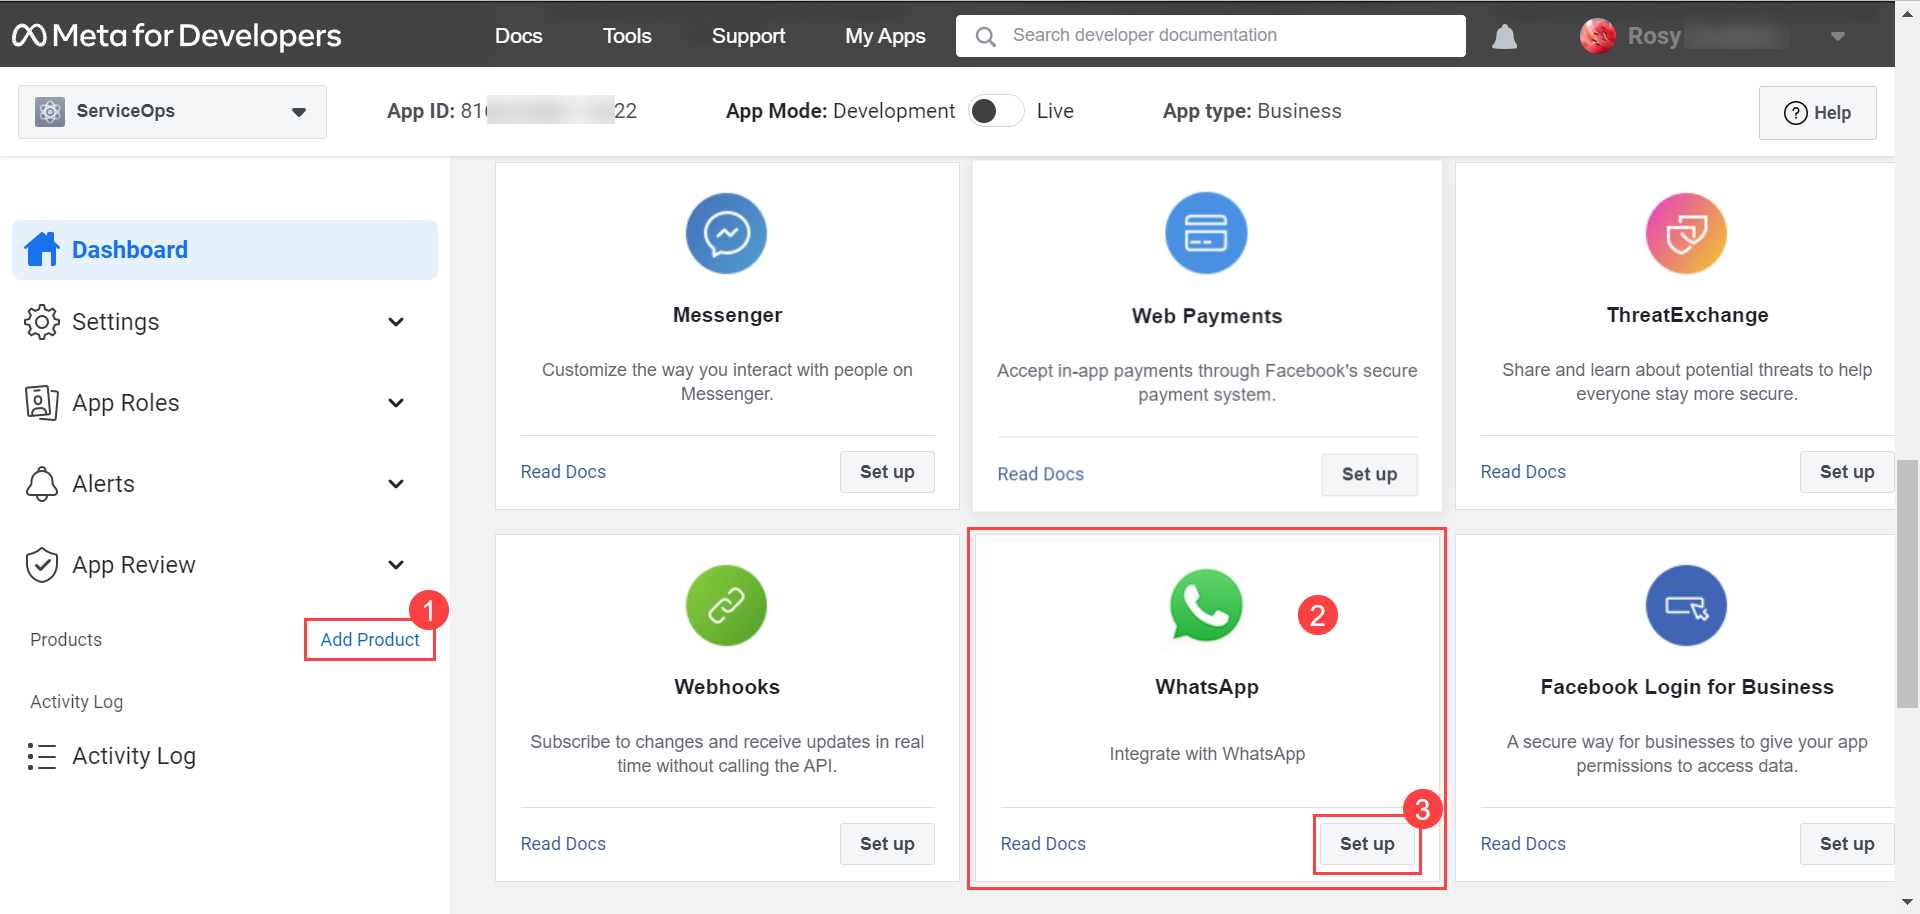
Step 8: On the left-side menu, click the Add Product link, search for WhatsApp on the right-hand side, and click Setup.
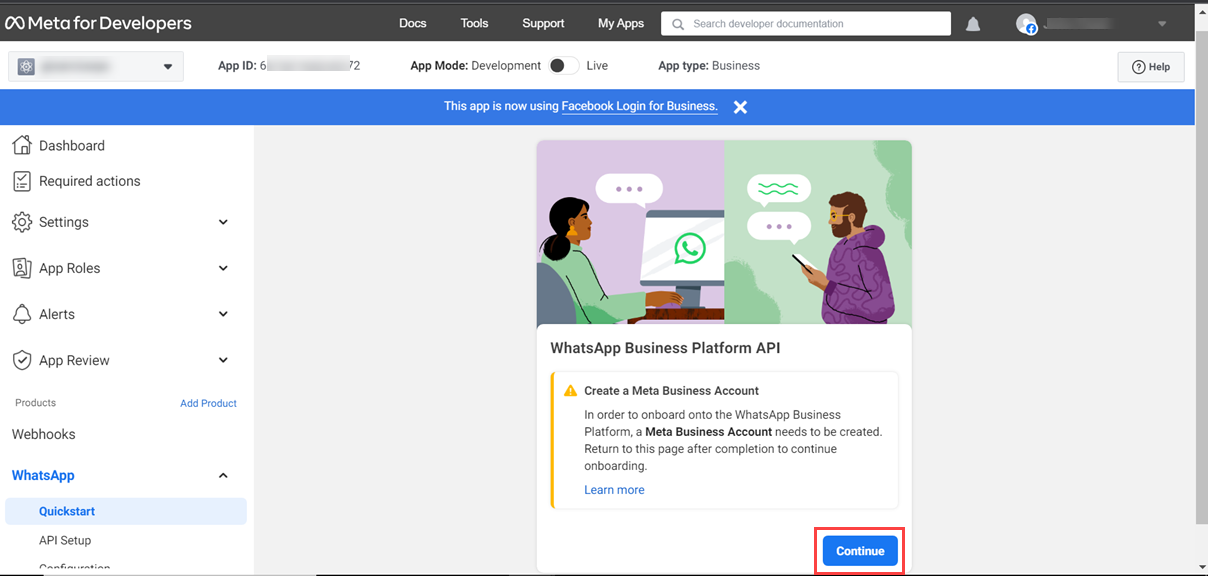
The following Quickstart page appears if the Meta Business portfolio is not created. Click Continue, and create it first.
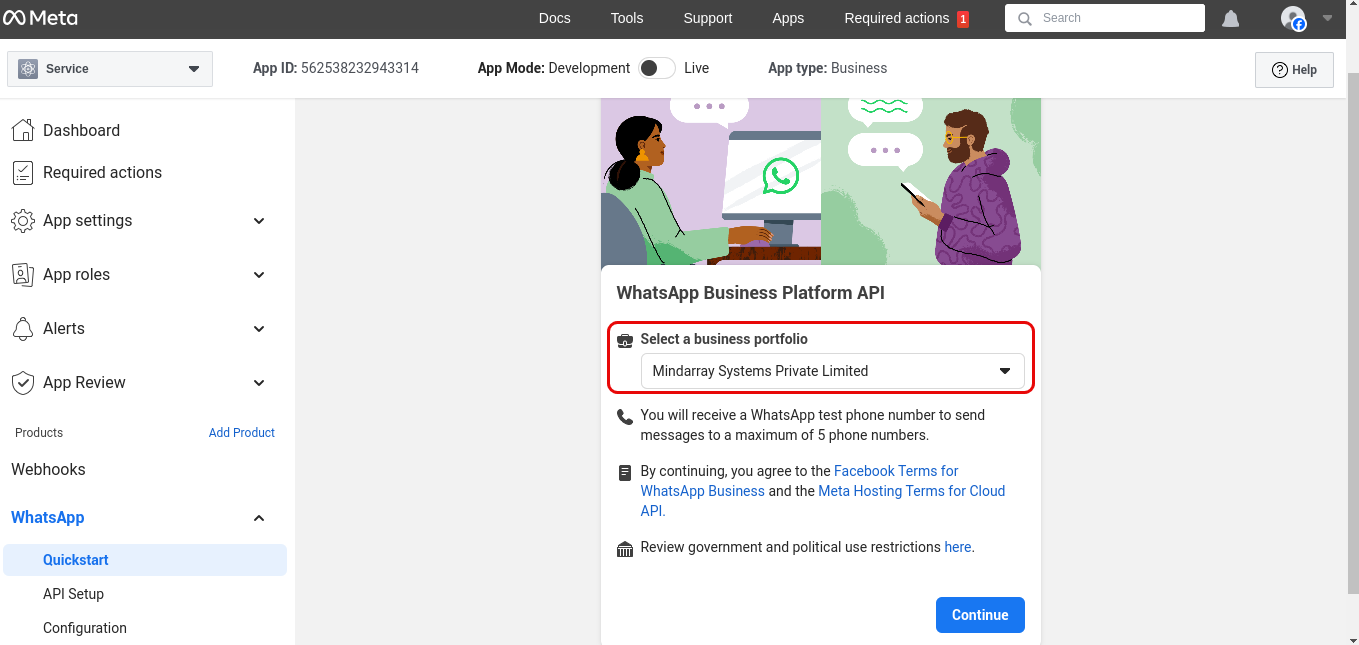
If the verified meta business portfolio is already created, select it from the dropdown, and then click Continue.
Step 9: Next, on the left panel, navigate to WhatsApp > API Setup page, scroll down to step 5, and add a phone number using the Add phone number button. For more details, refer to the Phone Numbers page.

The following popup appears.
Step 10: In the WA Business Profile tab, fill in the below details.
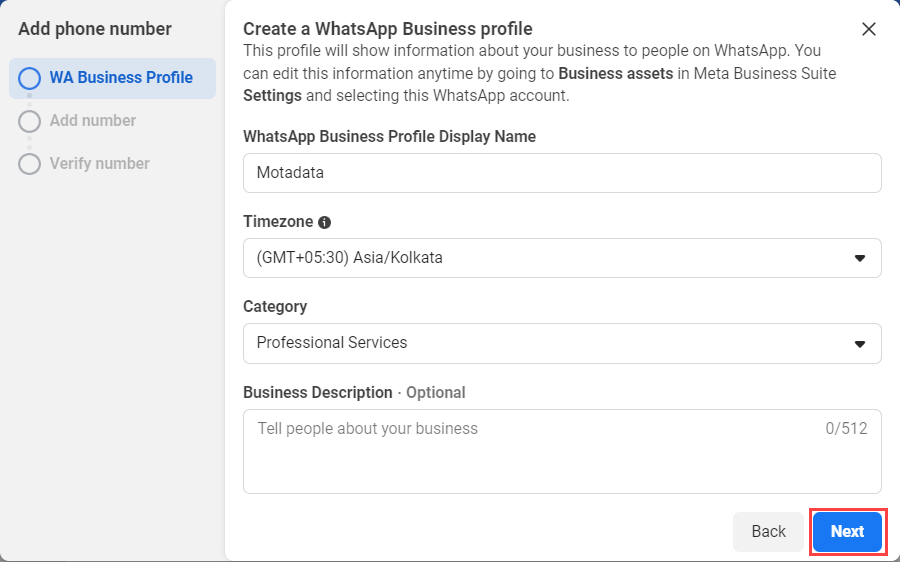
Once done, click Next.
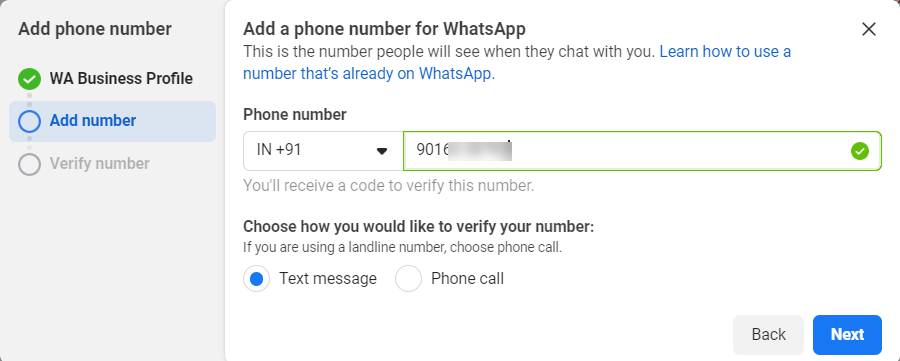
Step 11: Add a phone number for WhatsApp that is not registered and select the method for verification. You can verify your number either via a text message or phone call. Once done, click Next, and the code will be sent on this number for verification.
If the number is registered to an existing WhatsApp account, stay on this page, delete the account associated with this number, and re-verify it after 3 minutes.
Step 12: Verify the phone number using the code sent and click Next. The phone number gets added.
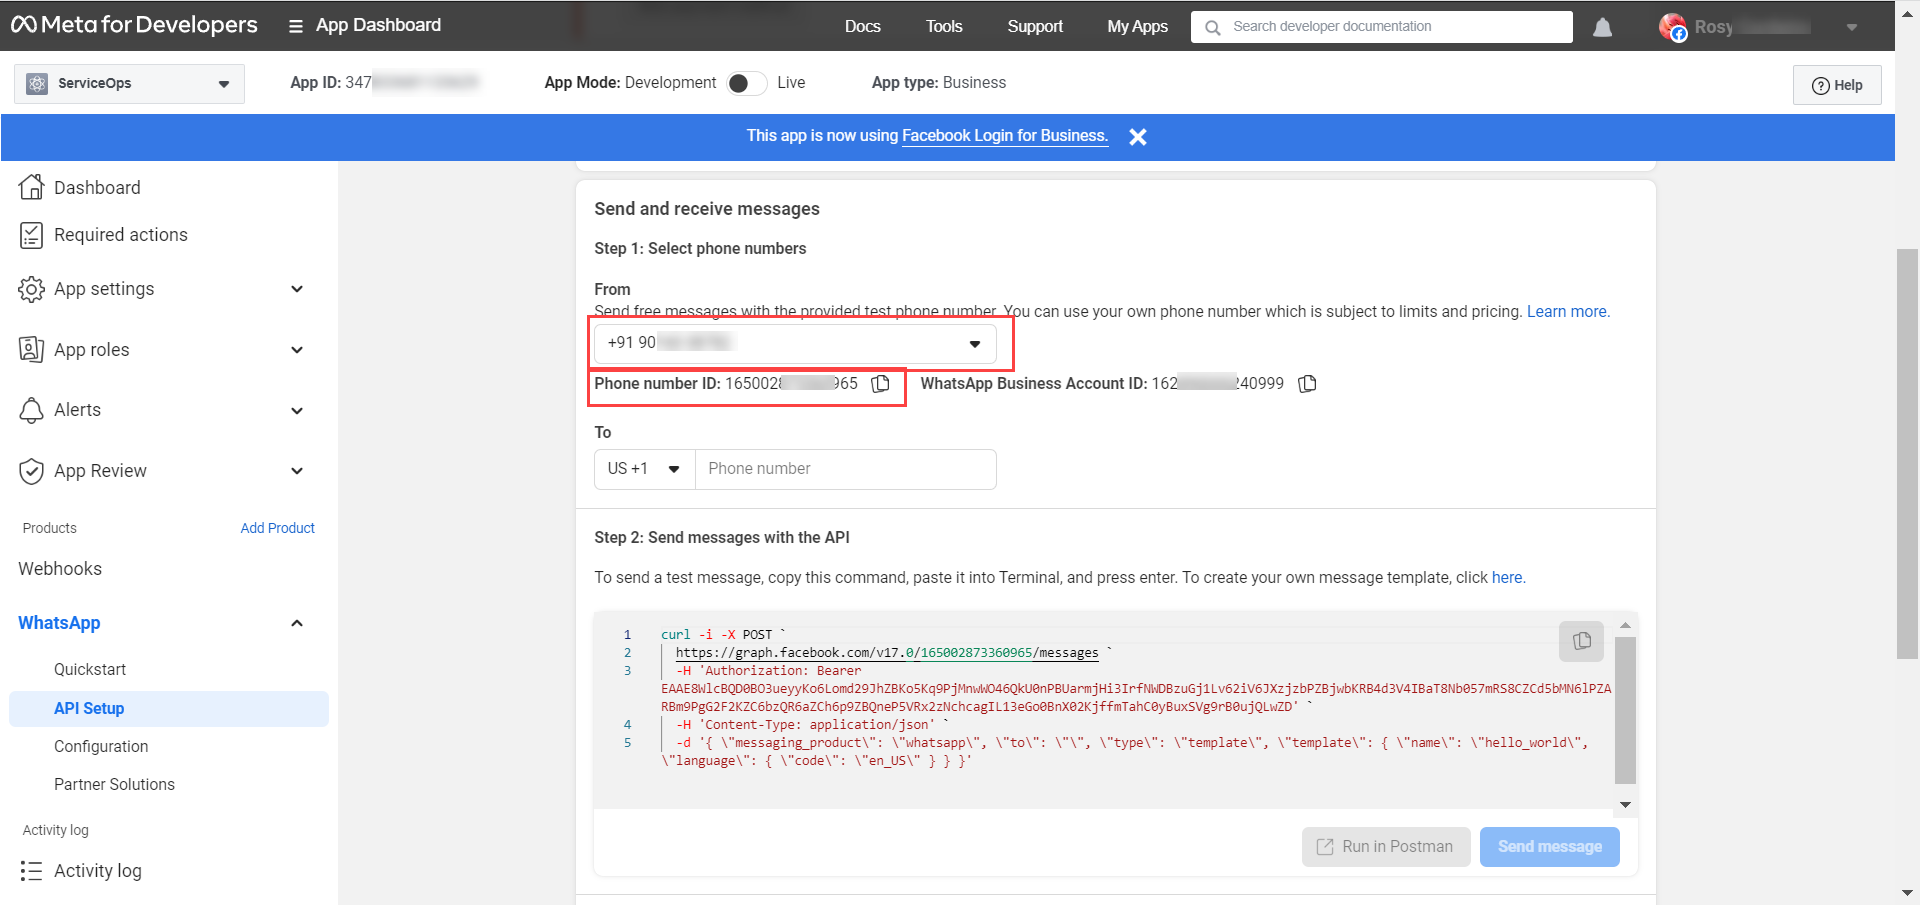
Step 13: Next, move to step 1 on the same page, and select the phone number which will be used for sending messages. The dropdown displays the number added in the above steps. Once the number is selected, its phone number ID appears as shown below.
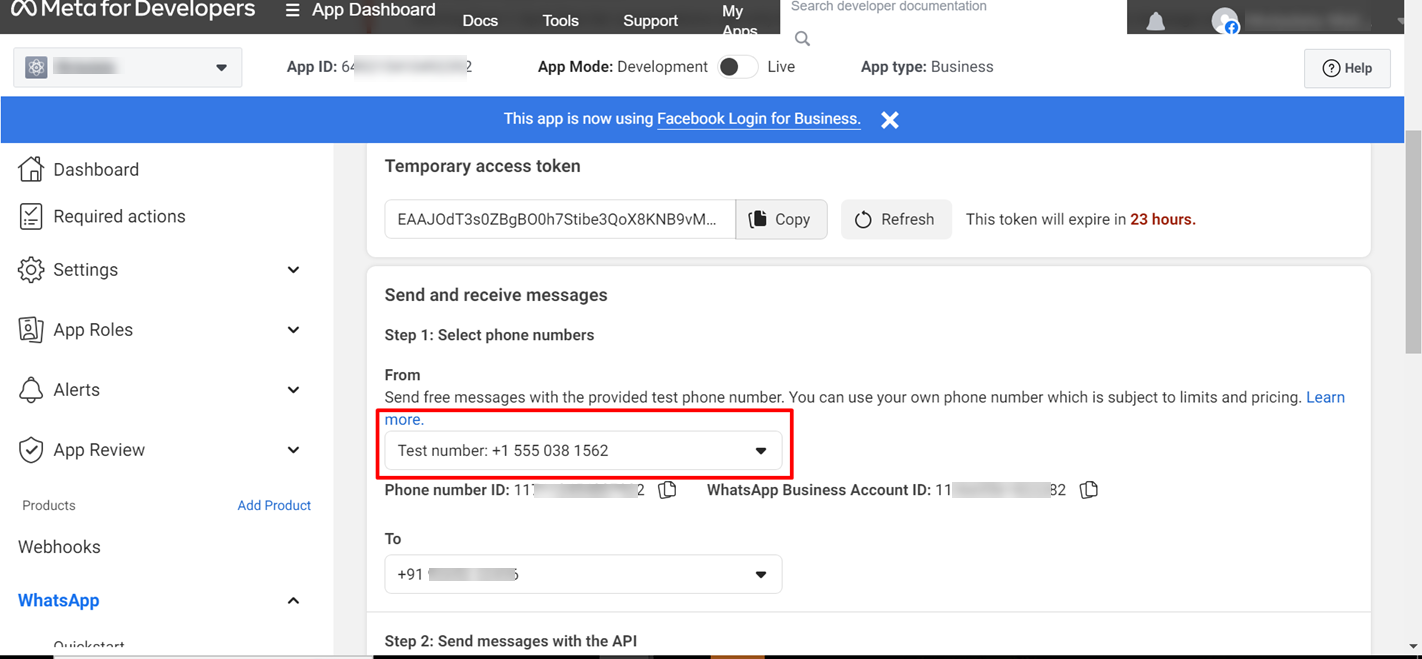
You can also use a Test Mobile number to access and get response from ServiceOps as shown below. But, with Test number, you can converse with only one Mobile number. To start a conversation with multiple members, use a valid Mobile number on which WhatsApp is not linked.
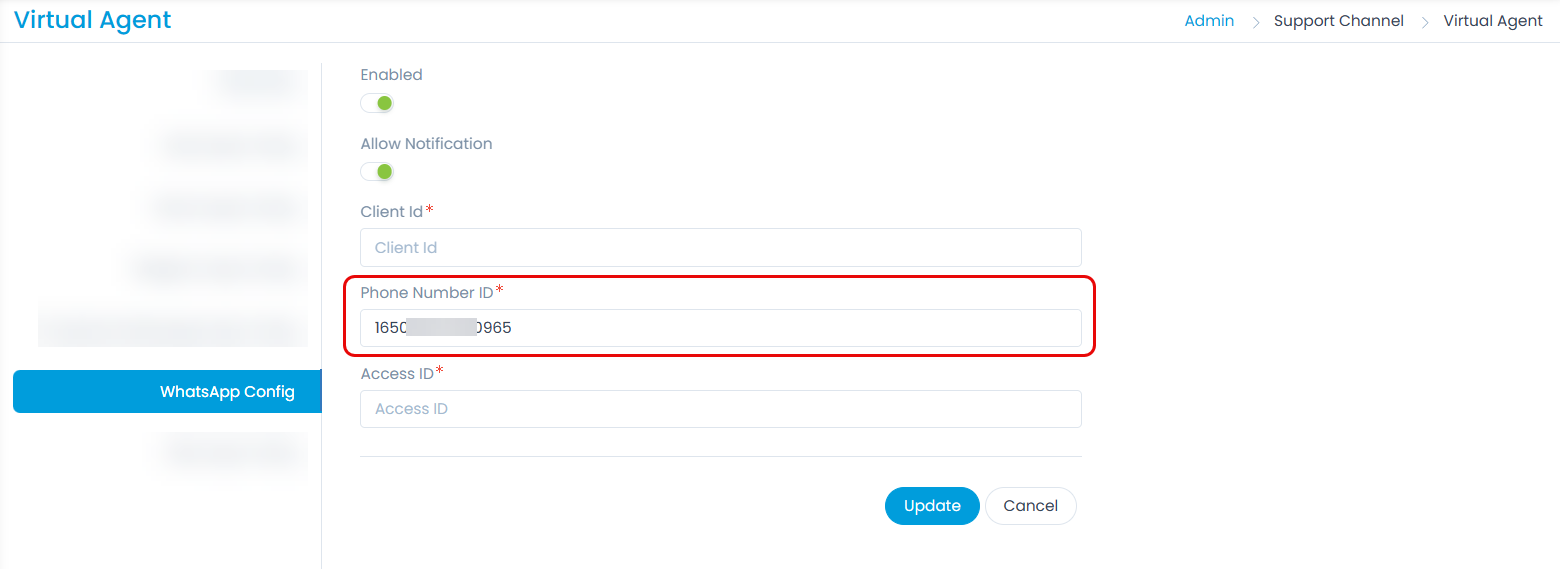
Step 14: Copy the Phone number ID and paste it to ServiceOps as shown below.
Generate Token
Step 15: To generate token, navigate to WhatsApp > Configuration > Permanent Token section, and refer to the link, Learn how to create a permanent token. Here, you can create a token in two ways:
- System User access token created in the WhatsApp Business Accounts tab of the Business Manager
- A User Access token via Facebook Login. Once the token is generated, copy and paste it into the Client ID field of ServiceOps.
Configure WhatsApp in ServiceOps
Step 16: In the ServiceOps Portal, navigate to the Admin > Support Channel > Virtual Agent > WhatsApp Config tab.
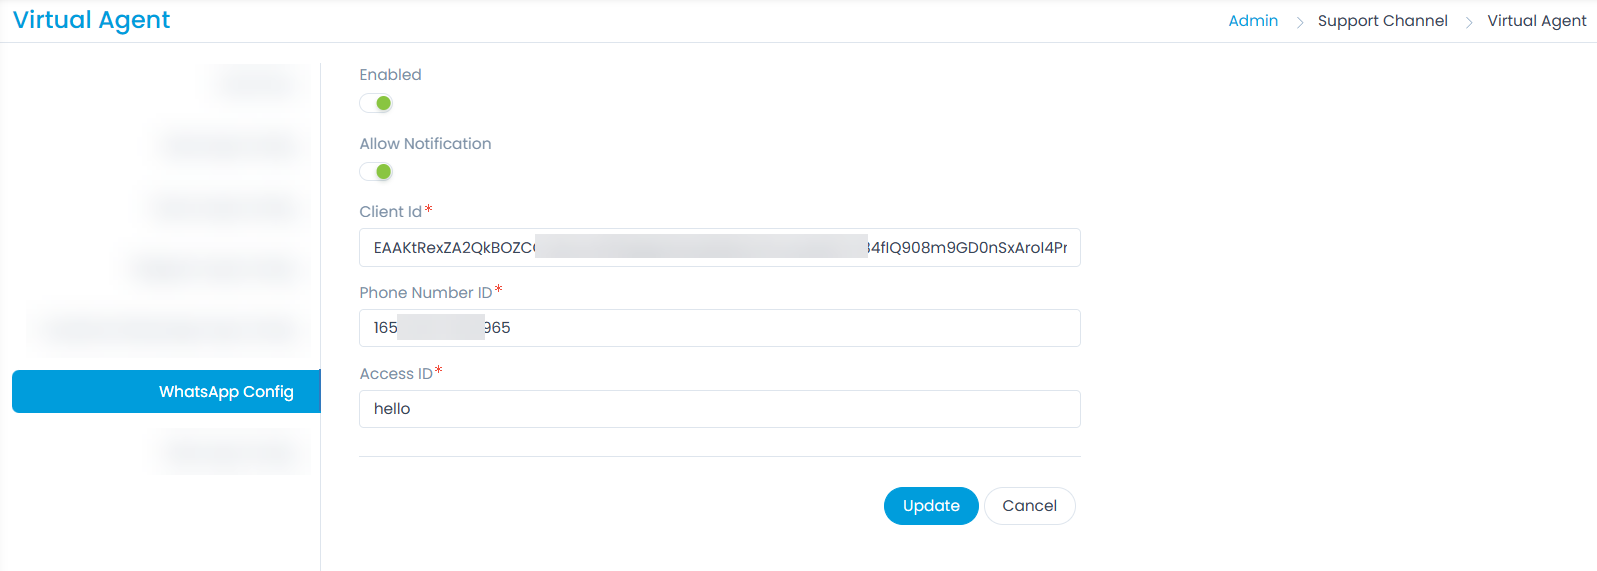
- Enable the functionality.
- Allow Notification: Enable to send notifications to the WhatsApp application. By default, it is disabled.
- Paste the Client ID (permanent token) copied from the Meta for Developers page in Step 15.
- Paste the Phone number ID copied from Step 13.
- Enter the Access ID using which a connection will be established between the Facebook and ServiceOps. The ID can be any text or combination of text and numbers. For example: Hello. Use this same Access ID in the Verify token field while editing the Webhook Callback URL.
- Once done, click Update.
Configure Webhook
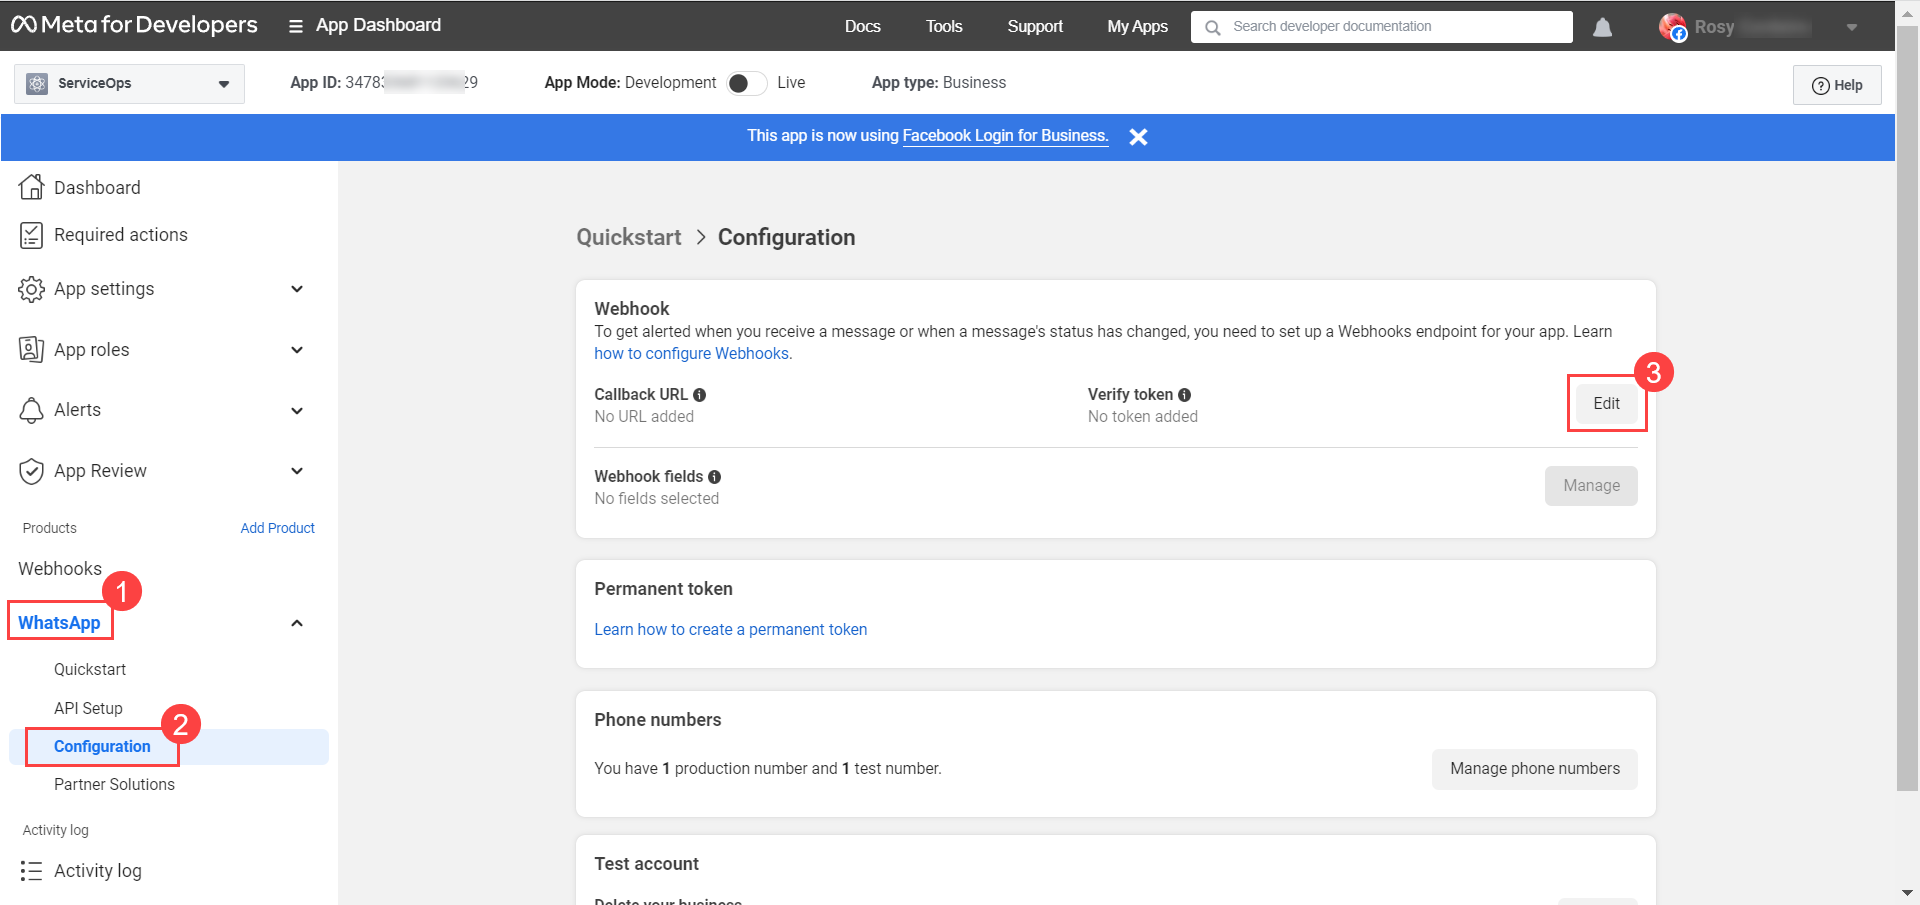
Step 17: In the Meta for Developers page, navigate to WhatsApp > Configuration menu, and click Edit.
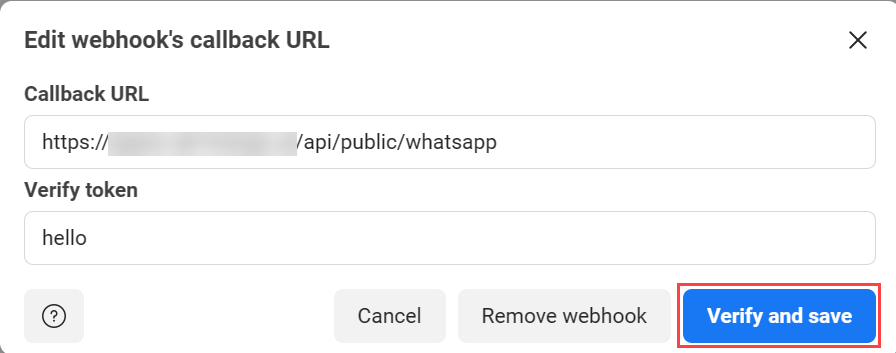
The Edit webhook’s callback URL popup appears. Enter the following:
Callback URL: Enter the URL of the ServiceOps Portal. Use the below URL format:
{server URL}/api/public/whatsapp
Verify token: Use the token entered in the Access ID field of ServiceOps (Step 16). Once done, click Verify and Save.
Step 18: Next, click the Manage button to add Webhook fields.
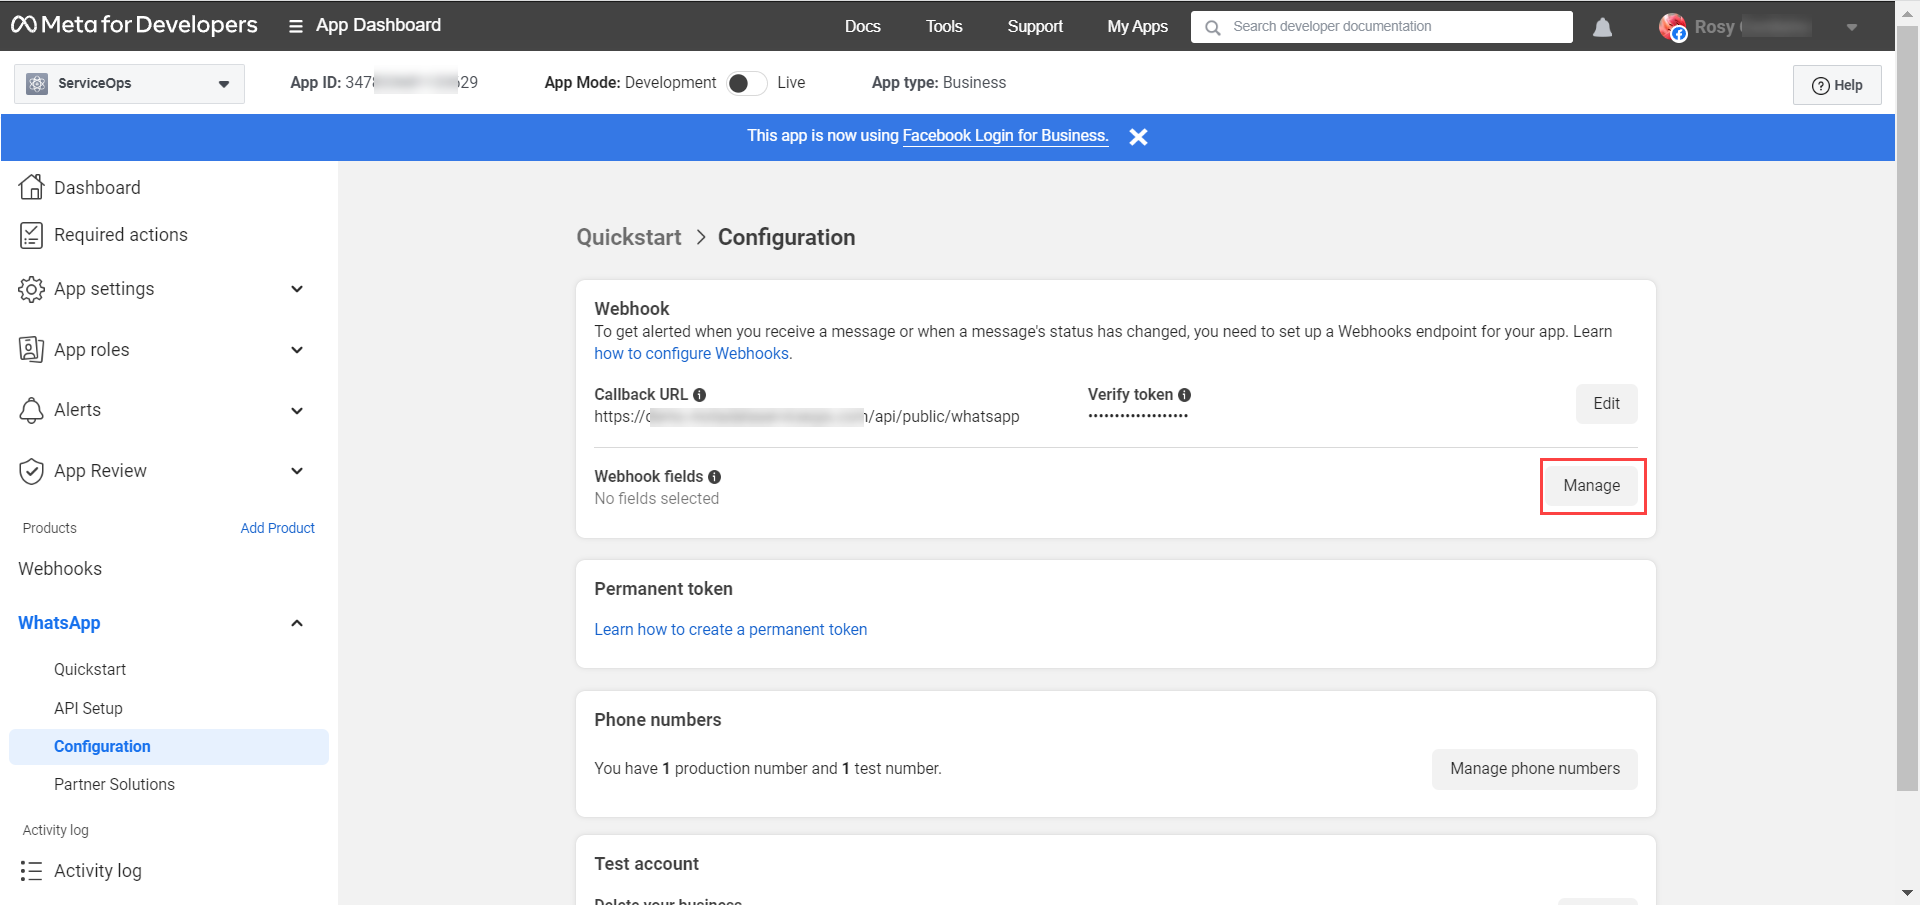
The following popup appears. Select the messages field, Subscribe, and click Done.

Step 19: In the WhatsApp, search for the phone number added, type Hi, and a welcome message appears. You can then start your conversation with the bot as shown below.

FAQs
How many numbers you can access with the Test number?
A: You can access only 1 Test mobile number.
What is the maximum limit of free conversations per month?
A: The maximum limit for free conversation is 1000 per month. Once the limit is exceeded, you will be charged.
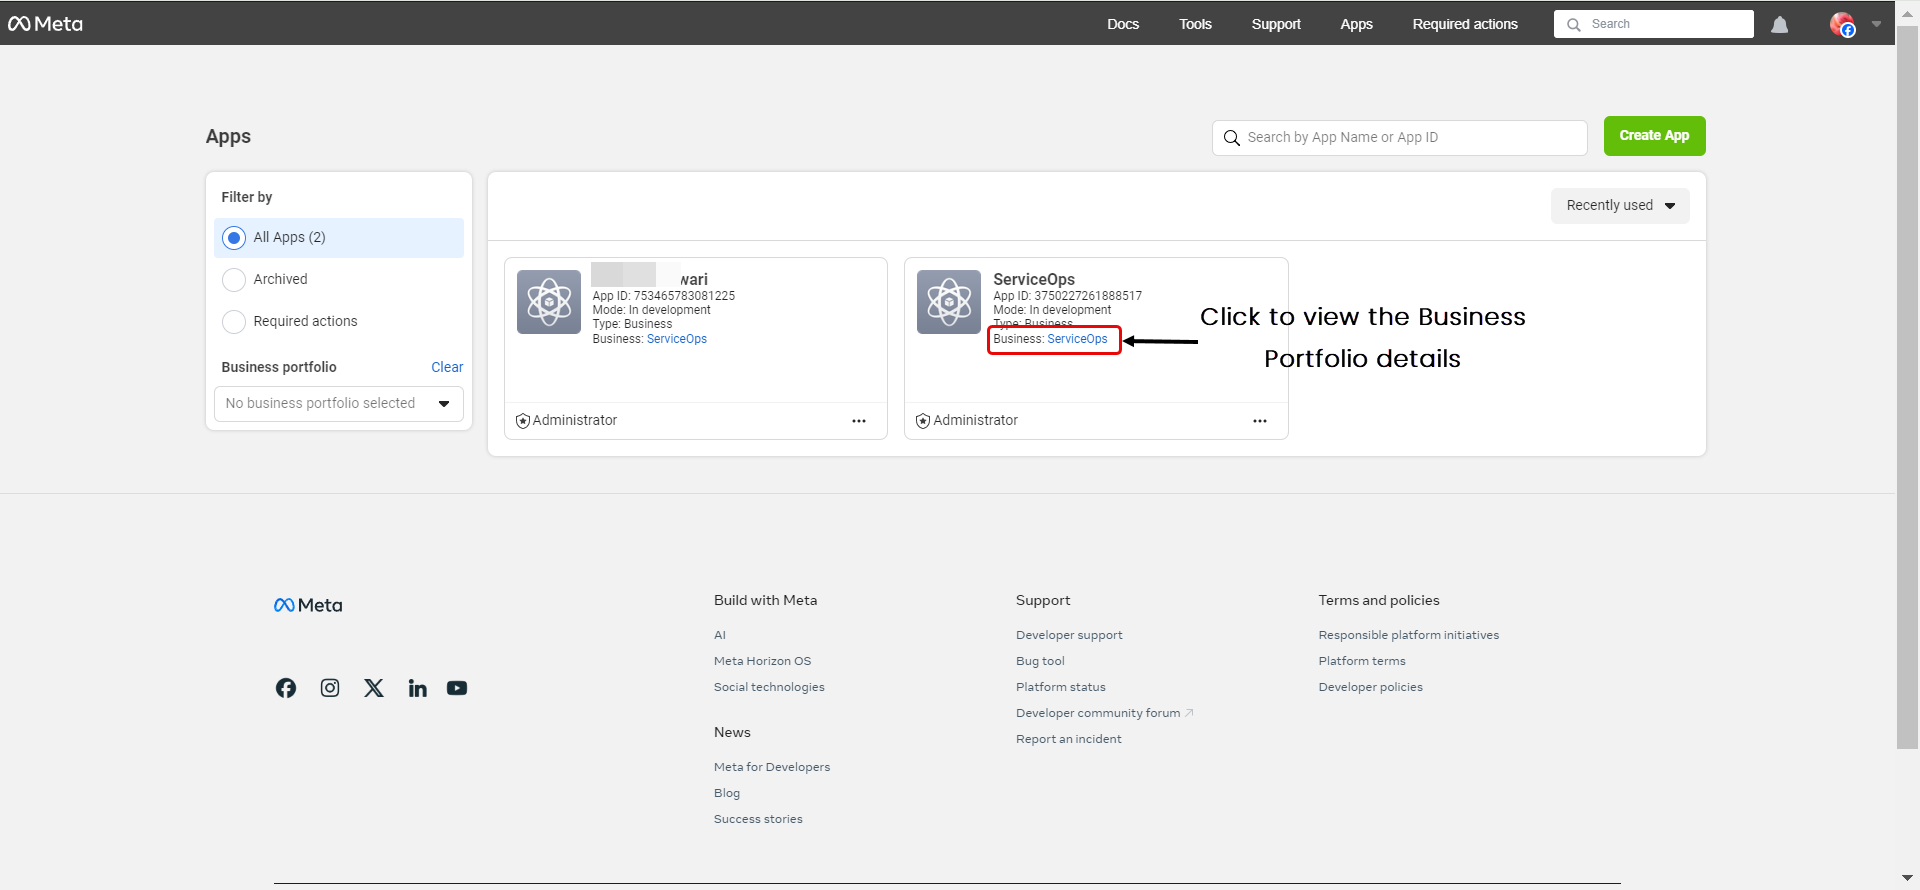
Can I check the verification status of my business portfolio?
A: Yes. To check the status of your business portfolio, go to the All Apps page, click the Business link under the app whose business portfolio you want to verify. Here, Business: ServiceOps link is clicked.
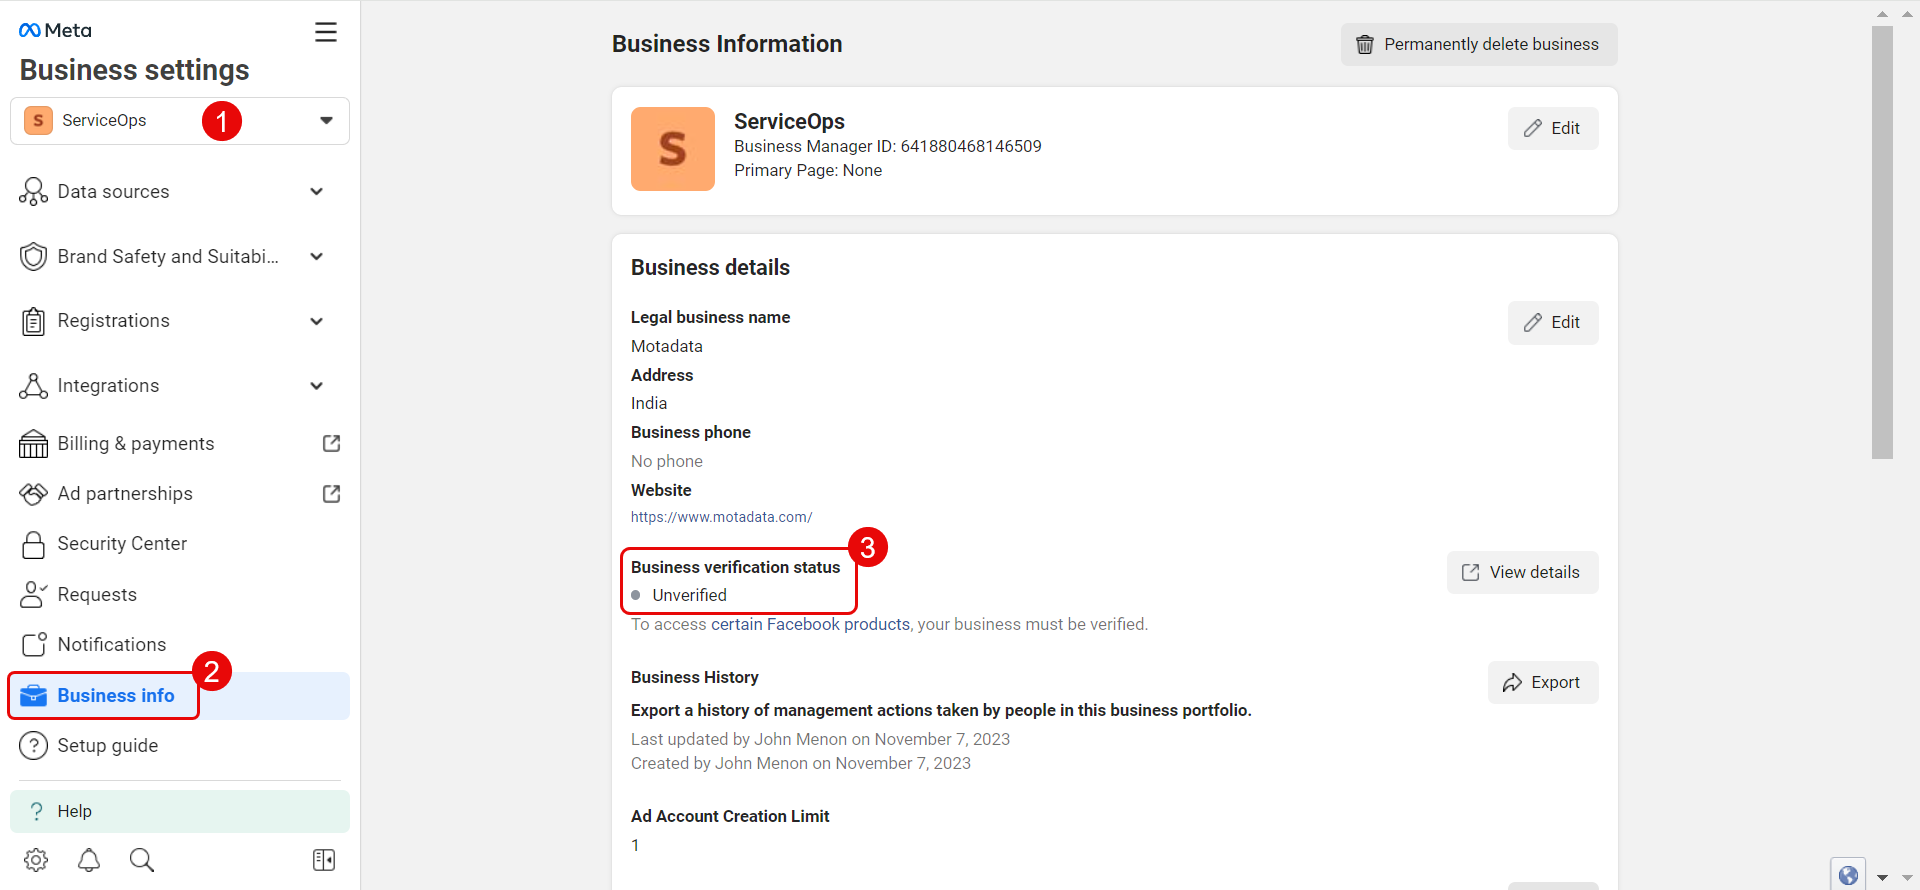
Once clicked, the following Business settings page appears. Go to the Busines Info page and there you will find the Business verification status as shown below.
How to verify my business portfolio?
A: To verify your business portfolio, refer to the "How to verify your business on Meta" page.