Chat Flow
A Chat Flow is a workflow created in ServiceOps based on which the Virtual Agent provides automated answers to the requesters on a live basis. The administrator can configure various custom chat flows according to the organization’s needs.
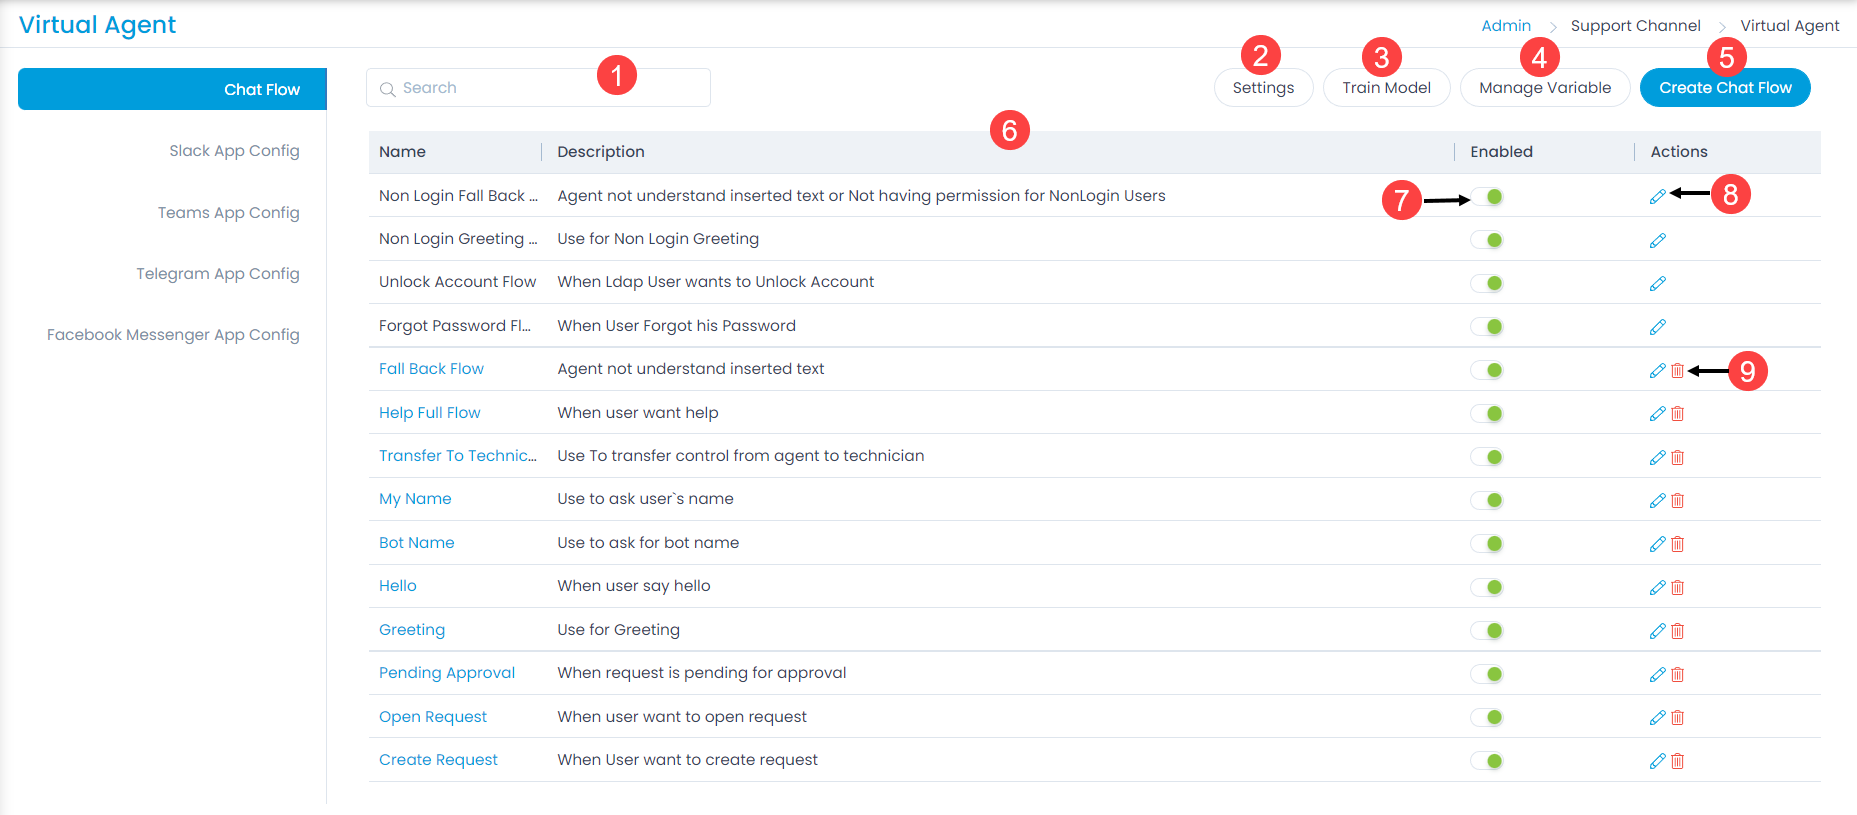
The tab provides the following features:
- Search: You can use the search query to find a Chat Flow .
- Settings: You can configure the settings for a Virtual Agent.
- Train Model: You can train the virtual agent model with the latest Chat Flows implemented.
- Manage Variable: You can manage the variable name of the virtual agent.
- Create Chat Flow: You can create new Chat Flows.
- Grid: You can view a list of default and custom Chat Flows along with their details.
- Enabled: You can enable the desired Chat Flow. If disabled, the Chat Flow will remain inactive.
- Edit: You can edit the Chat Flow. The page is similar to the create page. Clicking on the chat flow name will open the Chat Flow Builder.
- Delete: You can delete the Chat Flow if not required. A confirmation message will appear. Click Yes to continue deletion or Cancel to stop the process.
Create a Chat Flow
To create a Chat Flow, follow the below steps:
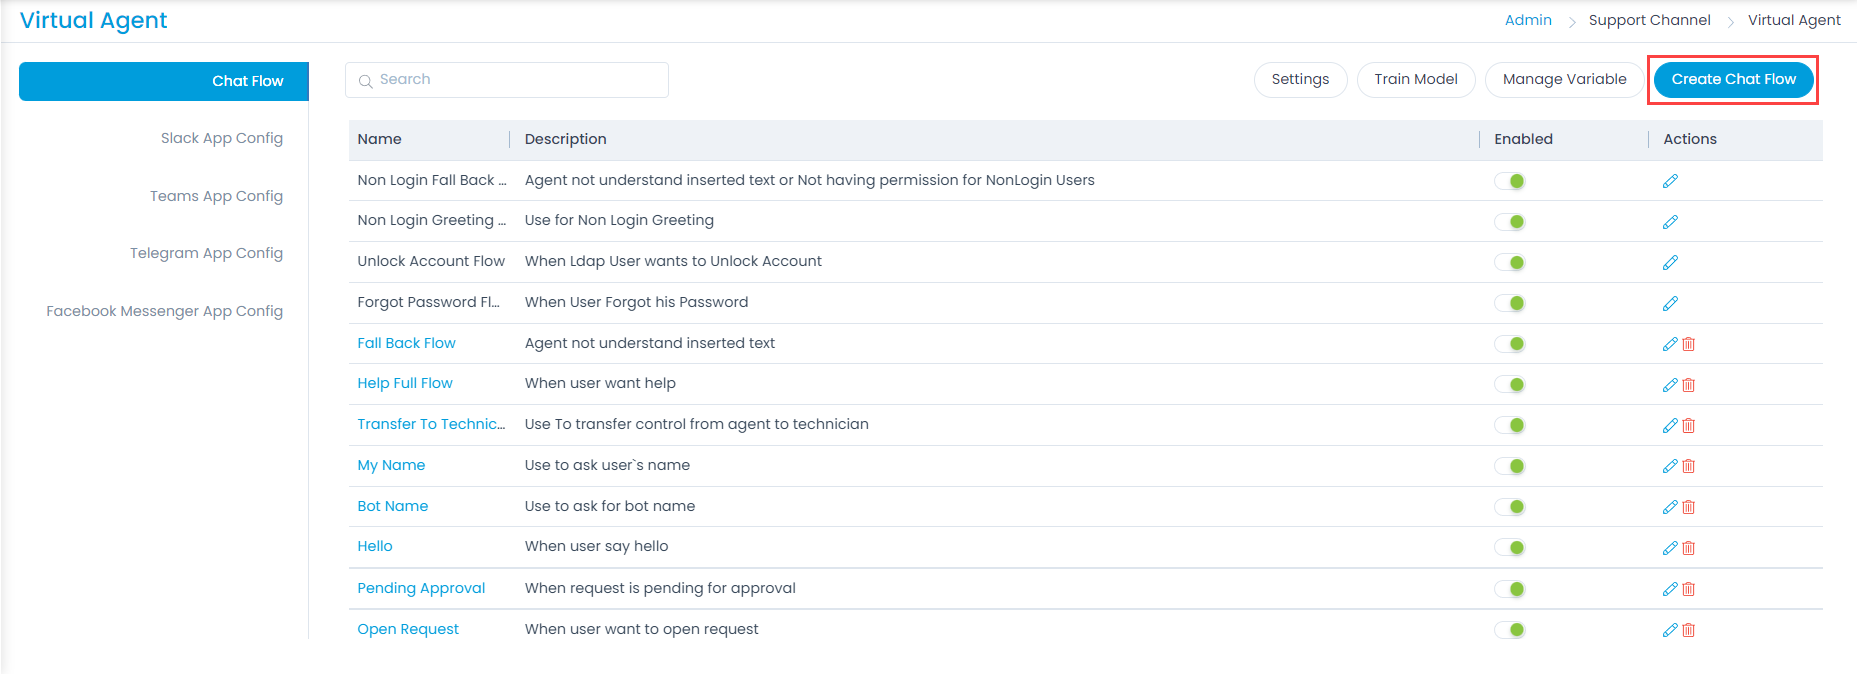
- Navigate to Admin > Support Channel > Virtual Agent > Chat Flow and click the Create Chat Flow button.

Enter the below details:
- Name: Enter the name of the Chat Flow.
- Description: Enter a brief description of the Chat Flow.
- List of Examples: Add examples of words to be used in the Chat Flow for a better response. You can add examples using the Add link.
- Apply To: Select the applications from the list to whom you want to apply this chat flow. The chat flow will work for the selected applications only. This ensures that different applications can have unique chat flows as needed.
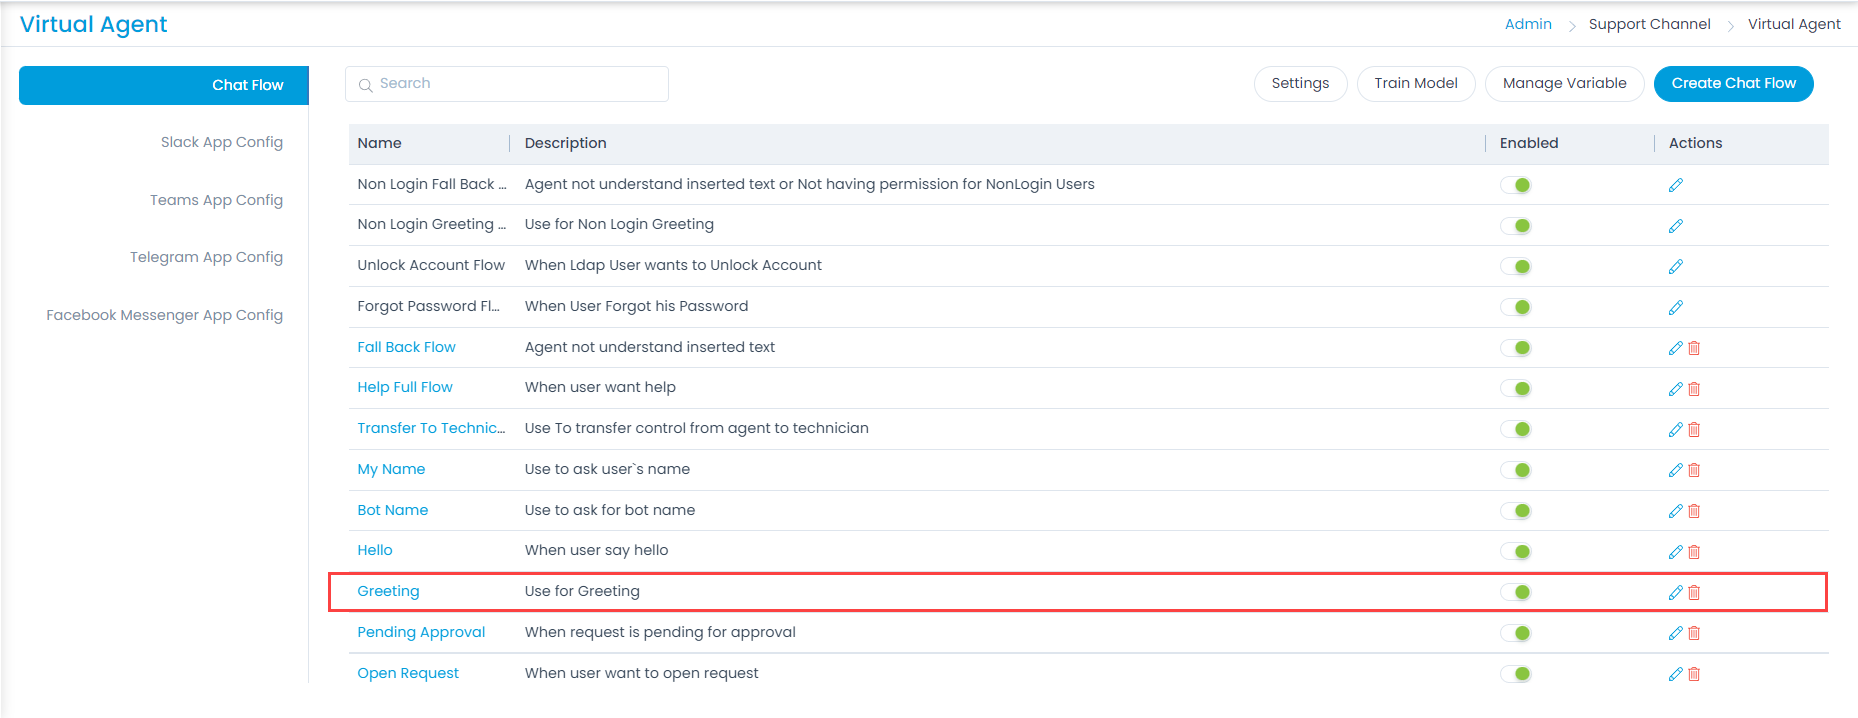
Once done, click Save, and the Chat Flow appears in the Chat flow list. By default, it is disabled.
Enable the Chat Flow from the Enabled column. If enabled, the Chat Flow gets implemented for the selected chat applications.
- Configure the flow of the Chat Flow. To configure the flow,
- Click on the Chat Flow Name, and the Virtual Agent Chat Flow Builder opens as shown below.
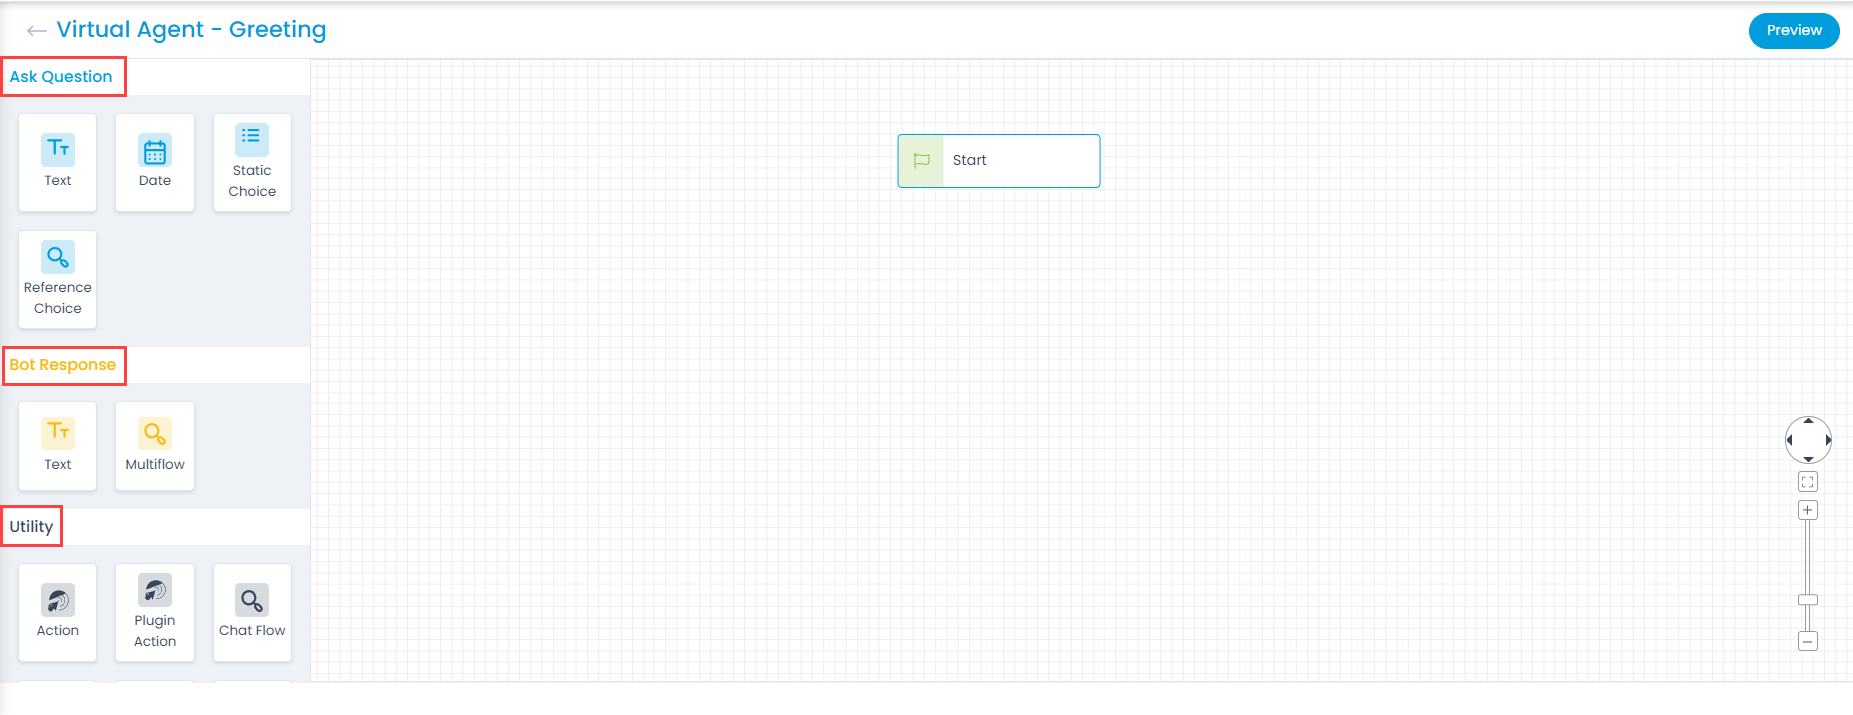
The Virtual Agent Chat Flow Builder displays three sections:
- Ask Question: Here, you can add the questions to ask the requester.
- Bot Response: Here, you can add the responses to display to the requester.
- Utility: Here, you can add the utilities based on which responses can be displayed.
- In the Ask Question section, select the required question type: You can set the following types of questions:
- Text
- Date
- Static Choice
- Reference Choice
Drag and drop the required fields from the palette on the Start node, after which it will be available, and a window will appear. For example: Here, the Static Choice field is used.
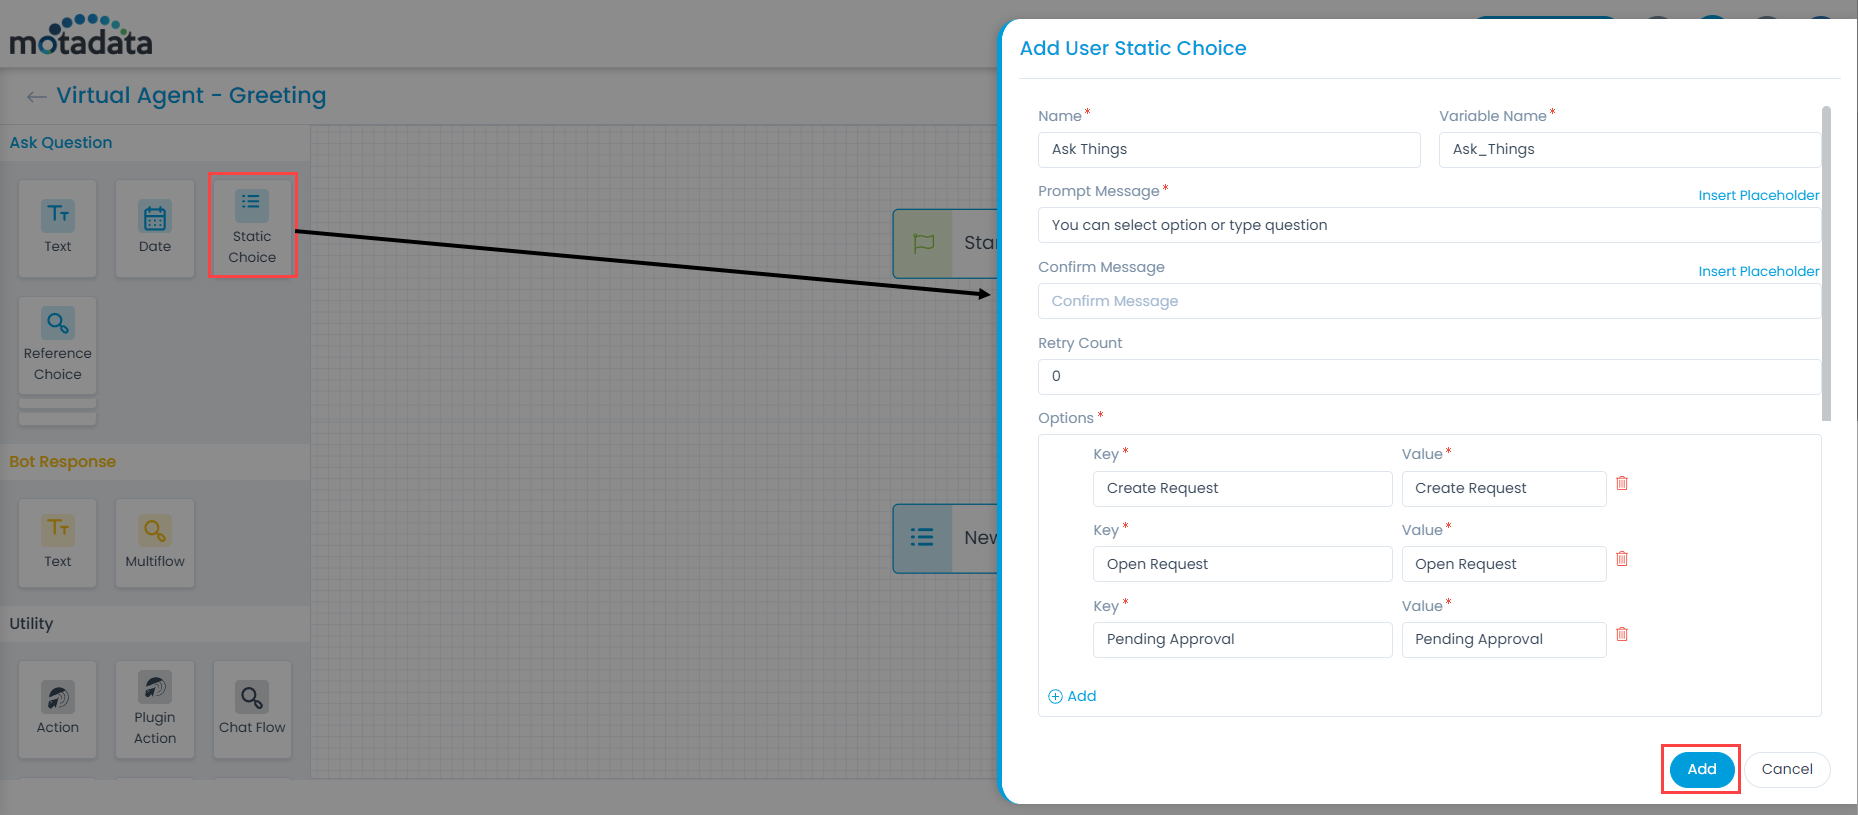
Add the following details:
- Name: Type the name of the field.
- Variable Name: The variable name will get auto-filled as per the name.
- Prompt Message: Provide the question to be prompted to the requester. You can also insert a placeholder that will display information automatically as per the selection. For Example: You can select an option or type a question.
- Confirm Message: Provide a confirmation message to be prompted to the requester. You can also insert a placeholder that will display information automatically as per the selection. For Example: you can select an option or type a question.
- Retry Count: Enter the number of times a message should be displayed to the requester. For Example: If the Retry Count is set to 2 when the agent asks to select the option or type a question, and the requester enters an invalid response multiple times, an error message, “Select an appropriate option” will appear, twice to the requester.
- Options: Enter the Key and value for the chosen type of input. For Example: Key: Create Request and Value: Create Request. To add more options, you can use the Add link.
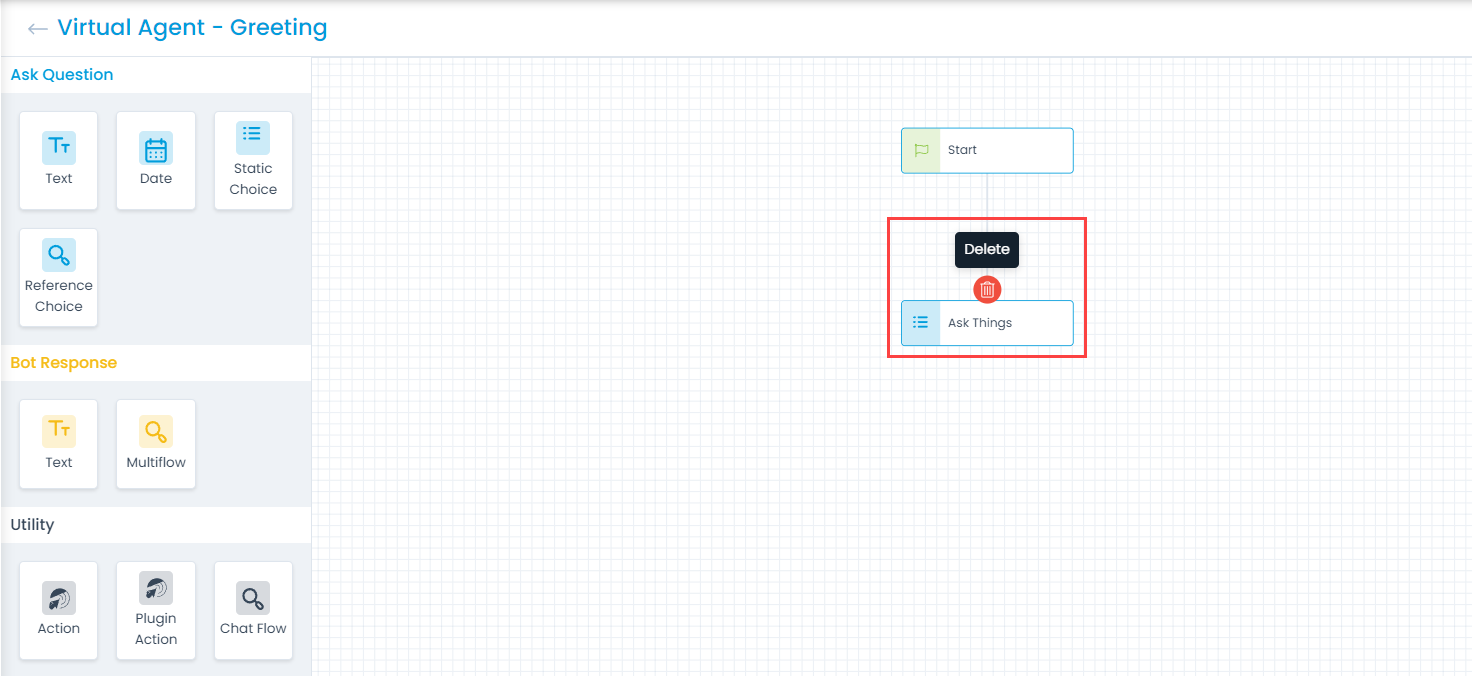
Once done, click on Add, and the field gets added to the Flow. To delete the elements, hover the mouse pointer on the specific node, and click the Delete icon as shown below:
For other fields like Text Input, Date, and Reference Choice, you can provide the below additional parameters:
- Input Type: Select the text input type. The available options are Integer, Mobile Number, Email, Alpha Numeric, and Alpha. You can also search for the same.
- Date Input Type: Select the date input. Options are Date, Time, and Date. This field applies to the Date field.
- Reference Choice Type: Select the choice type from the dropdown. This field applies to the Reference Choice type. If custom field is selected, select the module and custom field which has to be referenced. The supported custom field types include: Text Input, Dropdown, Multi Select Dropdown, Checkbox, and Attachment.
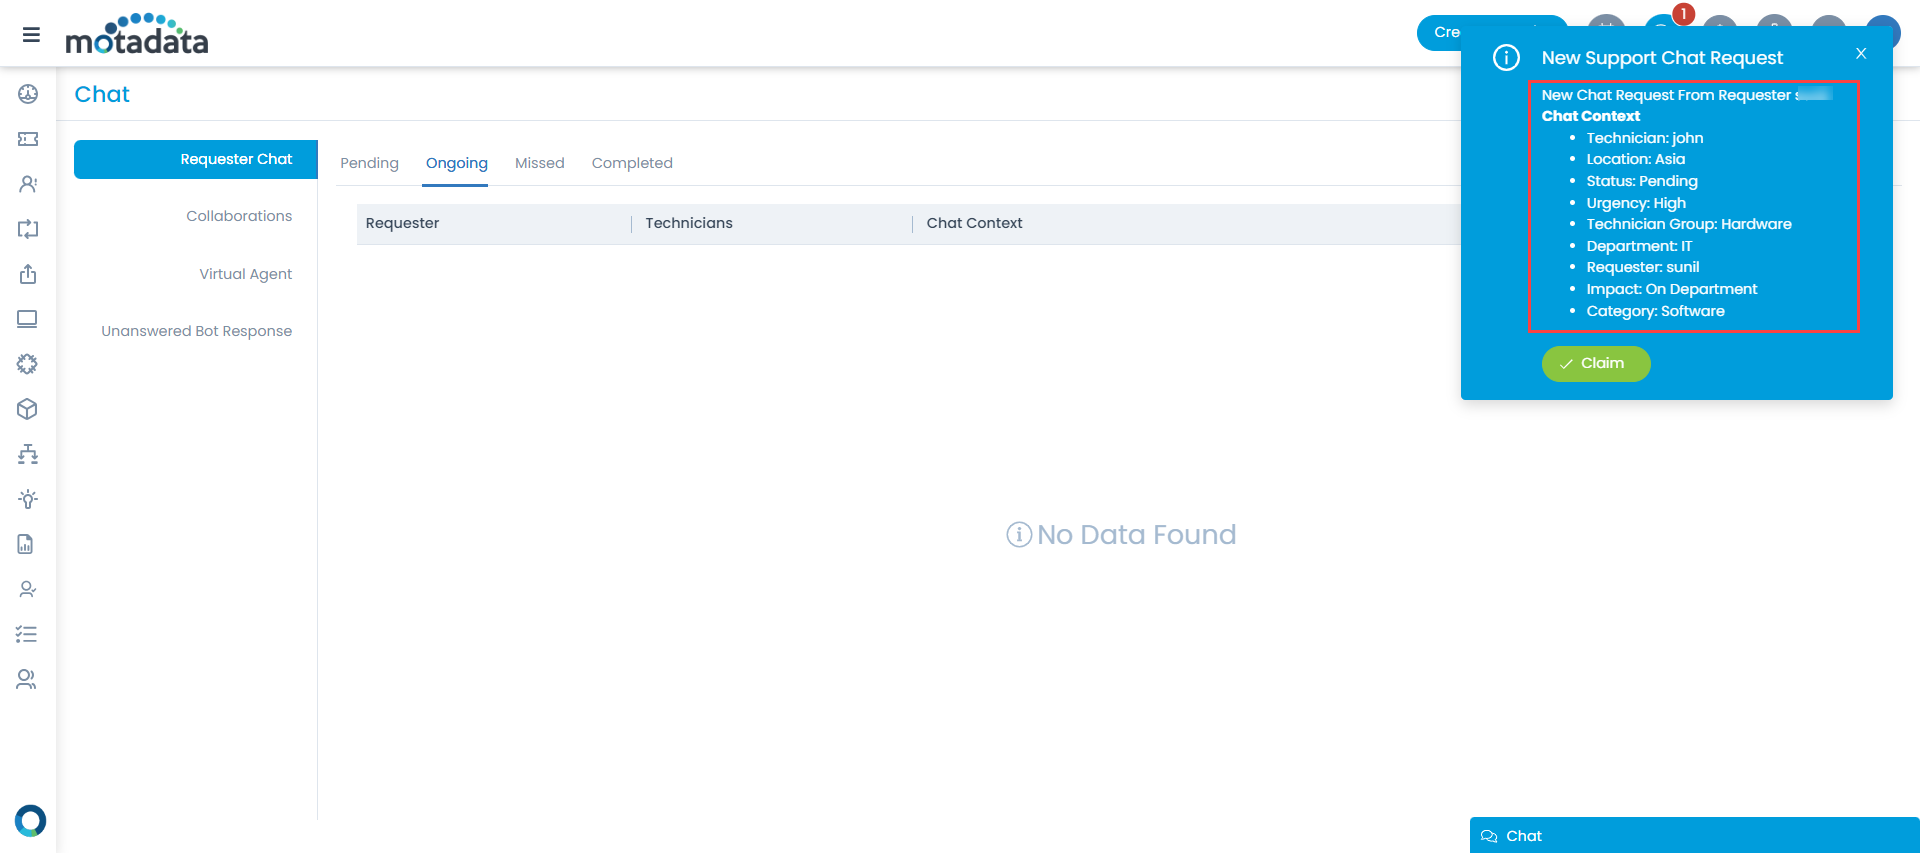
- Show in Chat Context: Enable to capture the details entered in the Reference Choice Type field and display to the Technician along with the Claim notification as shown below. By default, it is disabled.
- In the Bot Response, select the type of responses. You can set Text and Multiflow types of agent responses from here.
Multiflow field is used while taking decisions and configuring another flow.
Drag and drop the Multiflow field from the palette on the Ask things node, after which it will be available, and a window will appear. For example: Here, the Multiflow field is used.
Add the below details:
- Name: Type the name of the bot response.
- Variable Name: The variable name will get auto-filled as per the name.
Once done, click on Add, and the field gets added to the Flow.

For the Text field, you can provide the below detail:
- Response: Provide a response message to be displayed to the requester. You can format the response content as per your requirement using the Rich Text Editor. Also you can insert a hyperlink to jump to the desired page. Additionally, you can insert a placeholder that will display information automatically as per the selection.
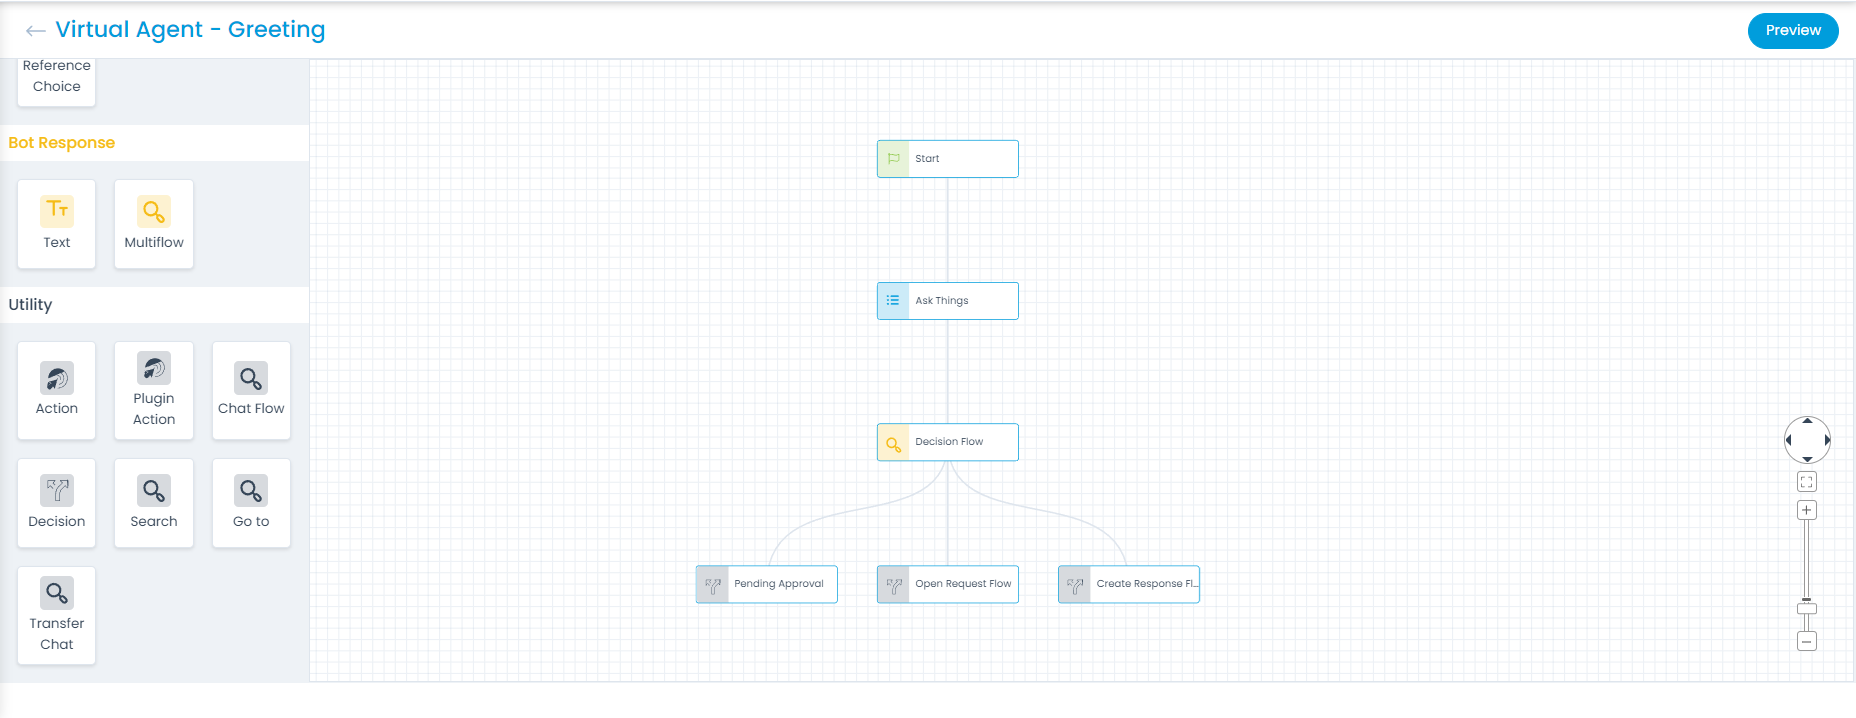
- In the Utility, select the desired Utility, drag and drop it on the Decision node, after which it will be available, and a window will appear. For example: Here, the Decision Utility field is used.
Add the below details:
- Name: Type the name of the Utility.
- Variable Name: The variable name will get auto-filled as per the name.
- Condition: Select the condition based on which a decision is to be taken; accordingly, other activities will be taken in the Flow. You can also add more conditions by clicking the plus icon.
- Add Condition Group: Select to add a group of conditions based on which the result will be displayed. Click Remove All Conditions to delete the applied condition(s).

Once done, click Add, and the field gets added to the Flow. Similarly, add 2 more Decision Utilities on the Decision Flow node and name them Open Request Flow and Pending Approval.
- Add Chat flow Utility to the Decision Utilities. Drag and drop the Chat Flow Utility on the Create Request node, and the below popup appears.
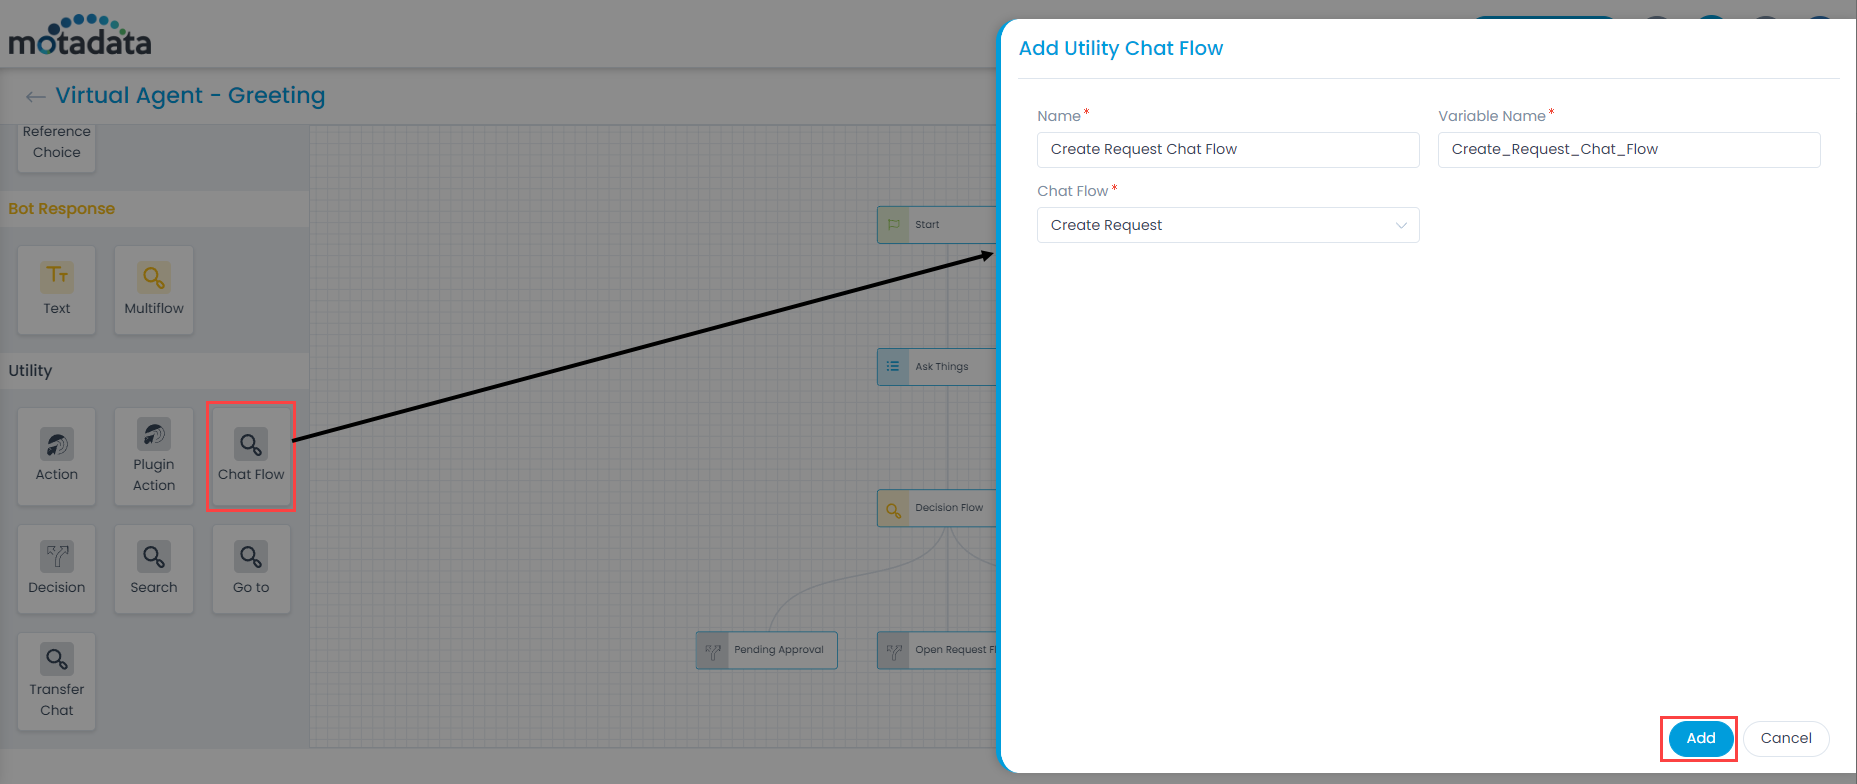
Add the below details:
- Name: Provide the name.
- Variable: The variable name will get auto-filled as per the name.
- Chat Flow: Select the chat flow to be used from the dropdown. It displays the already created chat flows.
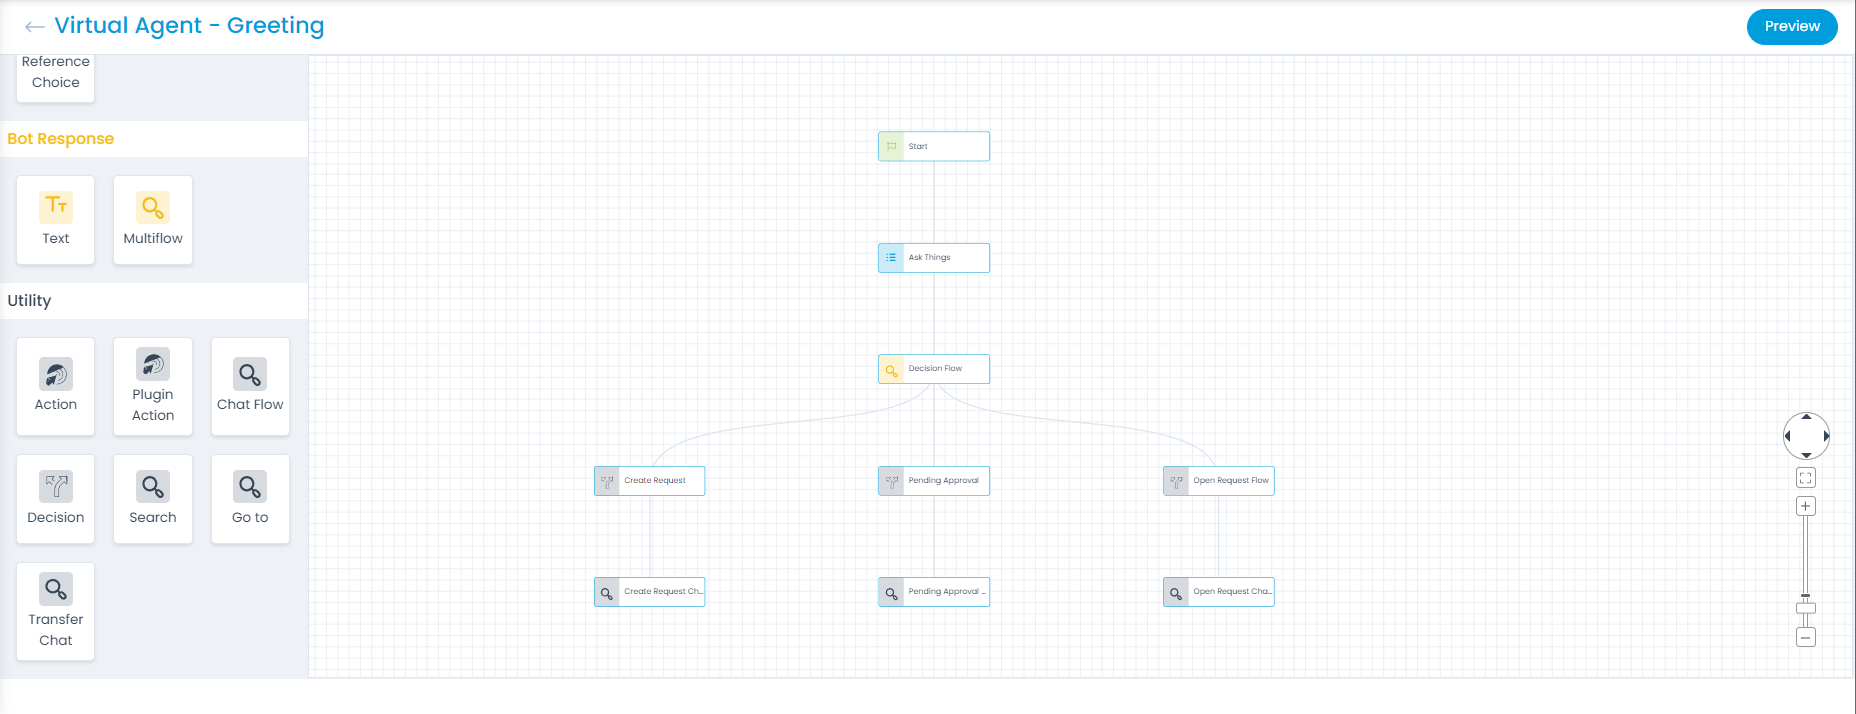
Once done, click Add, and the field gets added to the Flow. Similarly, add 2 more Chat Flow Utilities on the Pending Approval and Open Request nodes, respectively, and name them Pending Approval Chat Flow and Open Request Chat Flow. The Greeting Chat Flow is created as shown below. You can also test and preview the chat flow using the Preview button if required.
- Similarly, you can add other utilities like:
Action: Add this field when an action is to be taken on a request or a service request.
- Name: Provide the name.
- Variable Name: The variable name will get auto-filled as per the name.
- Module: Select the module on which the action is to be performed. Options are Request and Service Request. If Request is selected, Action Type will be available. If Service Request is selected, Service Catalog will be available.
- Action Type: Select the action type for the Request module as ‘Create.’ The Request will get created using this field via Chatbot. Also, once the Request is created, you can click on it and view the request details in the portal.
- Service Catalog: Select the Service Catalog from the dropdown.
- Mapping Field: Select the Key and value based on which information will be displayed to the requester.
- Output Field: Select the Key (values) displayed to the requesters. Example: Subject and Status.
Plugin Action: Add this field when a plugin is required to be shared with the requester.
- Name: Provide the name.
- Variable: The variable name will get auto-filled as per the name.
- Plugin: Select the plugin to be provided to the requester. To add plugins, Go to Admin> Automation> Integrations.
Search: Add this field when a Search is performed in the Flow.
- Name: Provide the name.
- Variable: The variable name will get auto-filled as per the name.
- Module: Select the module in which the search is to be performed. Options are Request, Approval, and Service Request.
- Condition: Select the condition based on which the required response will be searched in the Flow. You can also add more conditions by clicking the plus icon. To delete, click the Delete icon.
- Add Condition Group: Select to add a group of conditions based on which the result will be displayed. Click Remove All Conditions to delete the applied condition(s).
- Output Field: Select the Key (details) displayed to the requesters. Example: Subject and Status.
- No Data Message: Provide the message displayed when no information is found. You can also insert a placeholder in this field. For example: No Records Found.
Go To: Add this field when you want to direct the requester to a particular step in the flow. For example: If you want the user to go to the previous step, you can use this utility.
- Name: Provide the name.
- Variable: The variable name will get automatically filled as per the name.
- Go to Step: Select the node (step) to which the requester will be redirected. Example: If there is no suitable response, the Virtual Agent will display the initial message.
Transfer Chat: Add this field when the chat is to be transferred directly to a technician in the Flow.
- Name: Provide the name.
- Variable: The variable name will get automatically filled as per the name.
- Response: Respond displayed when transferring the chat to the technician. The requester can then directly chat with the technician. You can also insert a placeholder that will provide your Name, Email, and Agent name.
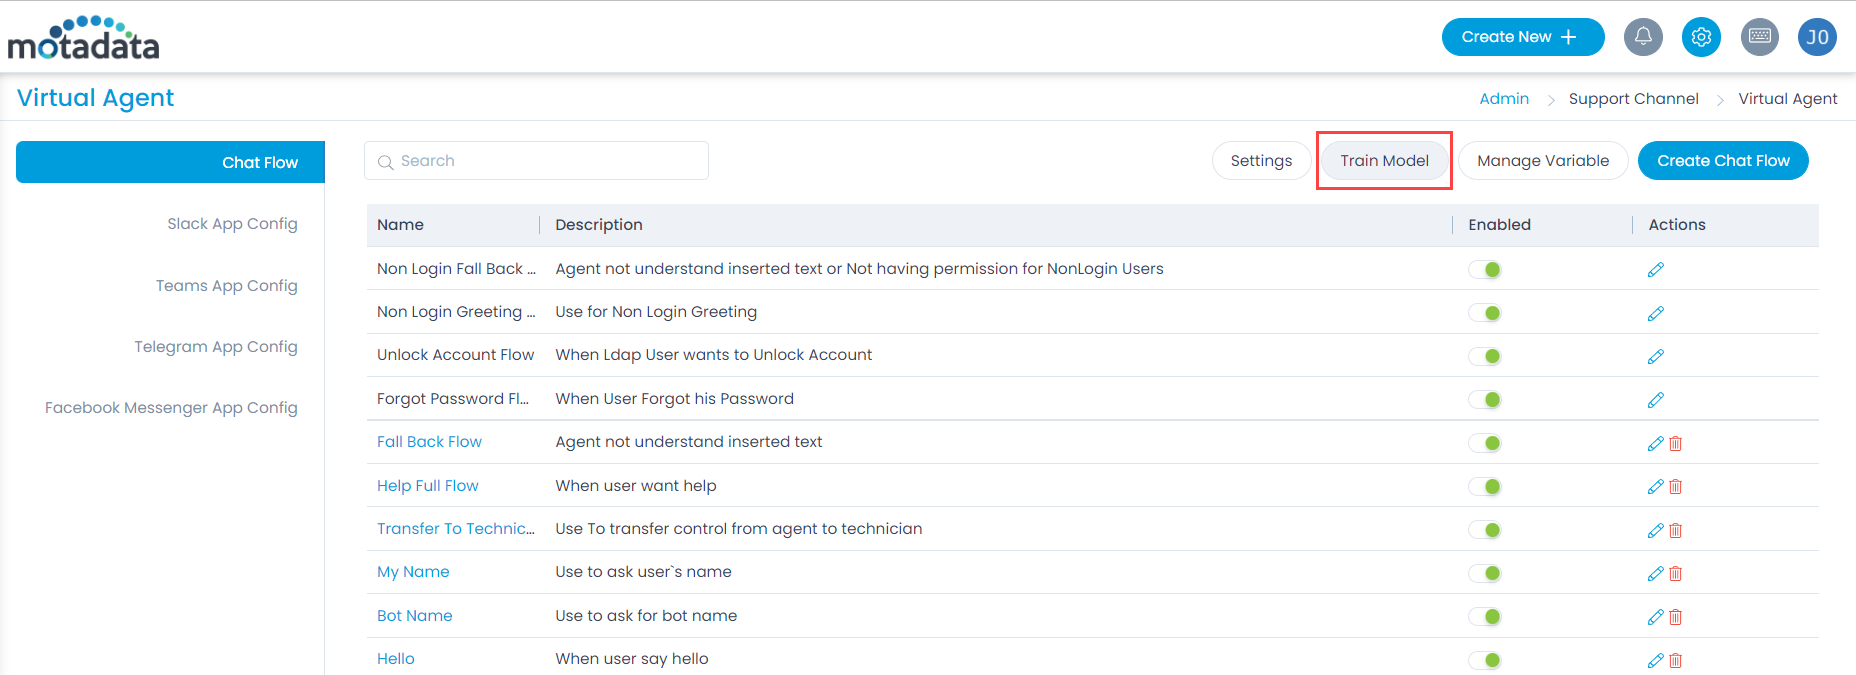
- Click the Train Model button. The Virtual Agent will get trained automatically with the latest Chat Flows and respond accordingly to the requesters. The Virtual Agent will now respond to the user using the configured Chat Flow. You can also add attachment files for reference in the chat when creating a request.

Settings
The Settings popup allows you to enable or disable a Virtual Agent. Also, you can set the greeting and fallback flow from here.

- Allow Virtual Agent Support: Enable or disable the flag to start using the Virtual Agent support. Once enabled, it will be available at the bottom-right corner of the ServiceOps Support Portal after sign-in.
- Greeting Flow: Select the desired greeting flow to be used by default. For example: When you sign-in, the Virtual Agent displays a message “Hello, how can I help you?”.
- Fallback Flow: Select the desired fallback flow to be used when the agent is unable to search for a suitable response. Additionally, you can apply a separate fallback flow for each application (WhatsApp, Teams, Slack, Telegram, Facebook Messenger, and Viber).
Once you have configured the above parameters, click Save to make the changes live.
Train Model
The Train model allows you to train your Agent with the new chat flows created and implemented.
Enable or disable any chat flow and click the Train Model button. The Agent will get trained automatically with the latest chat flows and respond accordingly to the requesters.
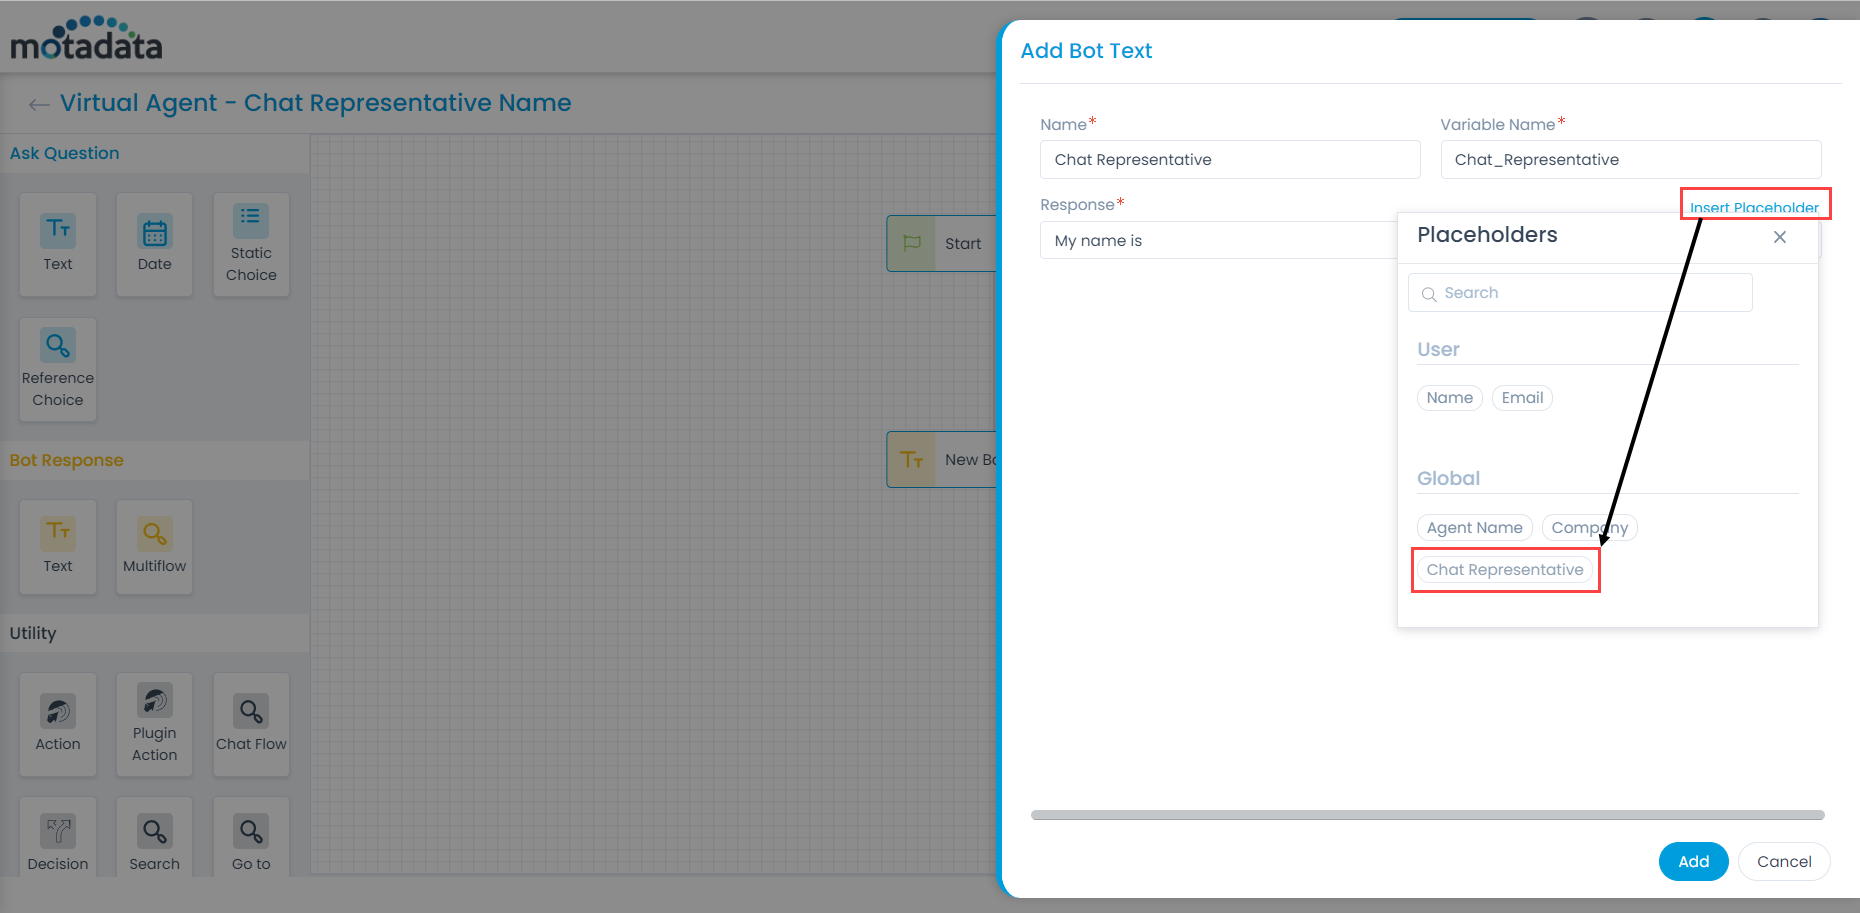
Manage Variable
This enables you to manage the variables of the Virtual Agent. Variables are fields that contain values which can be displayed to the requester at run time. You can create variables as and when required. For example, If you want to view the chat representative’s name, you can type the question in the chat and the system will respond with the name. This name is the value that is associated with the variable.
To view the variables, click on the Manage Variable button, and a window appears. It displays the list of existing created variables.

You can create a variable by clicking Create, entering the required fields, and saving it. Once saved, the variable is available in the form of a placeholder at the time of inserting fields in the chat flow.