Teams App Config
Microsoft Teams or Teams is an application to communicate with your team members. Using Teams for incident creation and management will become easier if you add the ServiceOps Virtual Agent as an app within Teams. Once added, you can generate or review requests from Teams without signing-in to the Support Portal or accessing the virtual chat agent from the portal.
You can integrate a custom-built Teams app that connects your ServiceOps Portal, enabling the Virtual Agent to send responses to the requester over the Teams application.
Applicable Version
This functionality is applicable from version 7.7 and above.
Prerequisites
- ServiceOps hosted on a live URL.
- SSL certificate enabled.
- The Base URL in ServiceOps should be the same as the portal URL.
- Requester created in the ServiceOps portal.
- Teams account created with the same requester email ID as created in the above point.
- The Developer Portal in Teams should be accessible for creating an app.
Creating and Configuring Teams Virtual Agent
To create a Virtual Agent application, follow the below steps:
Step 1: Create or Open a Teams account with admin permissions.
Step 2: Open the application and navigate to Apps > Developer Portal.
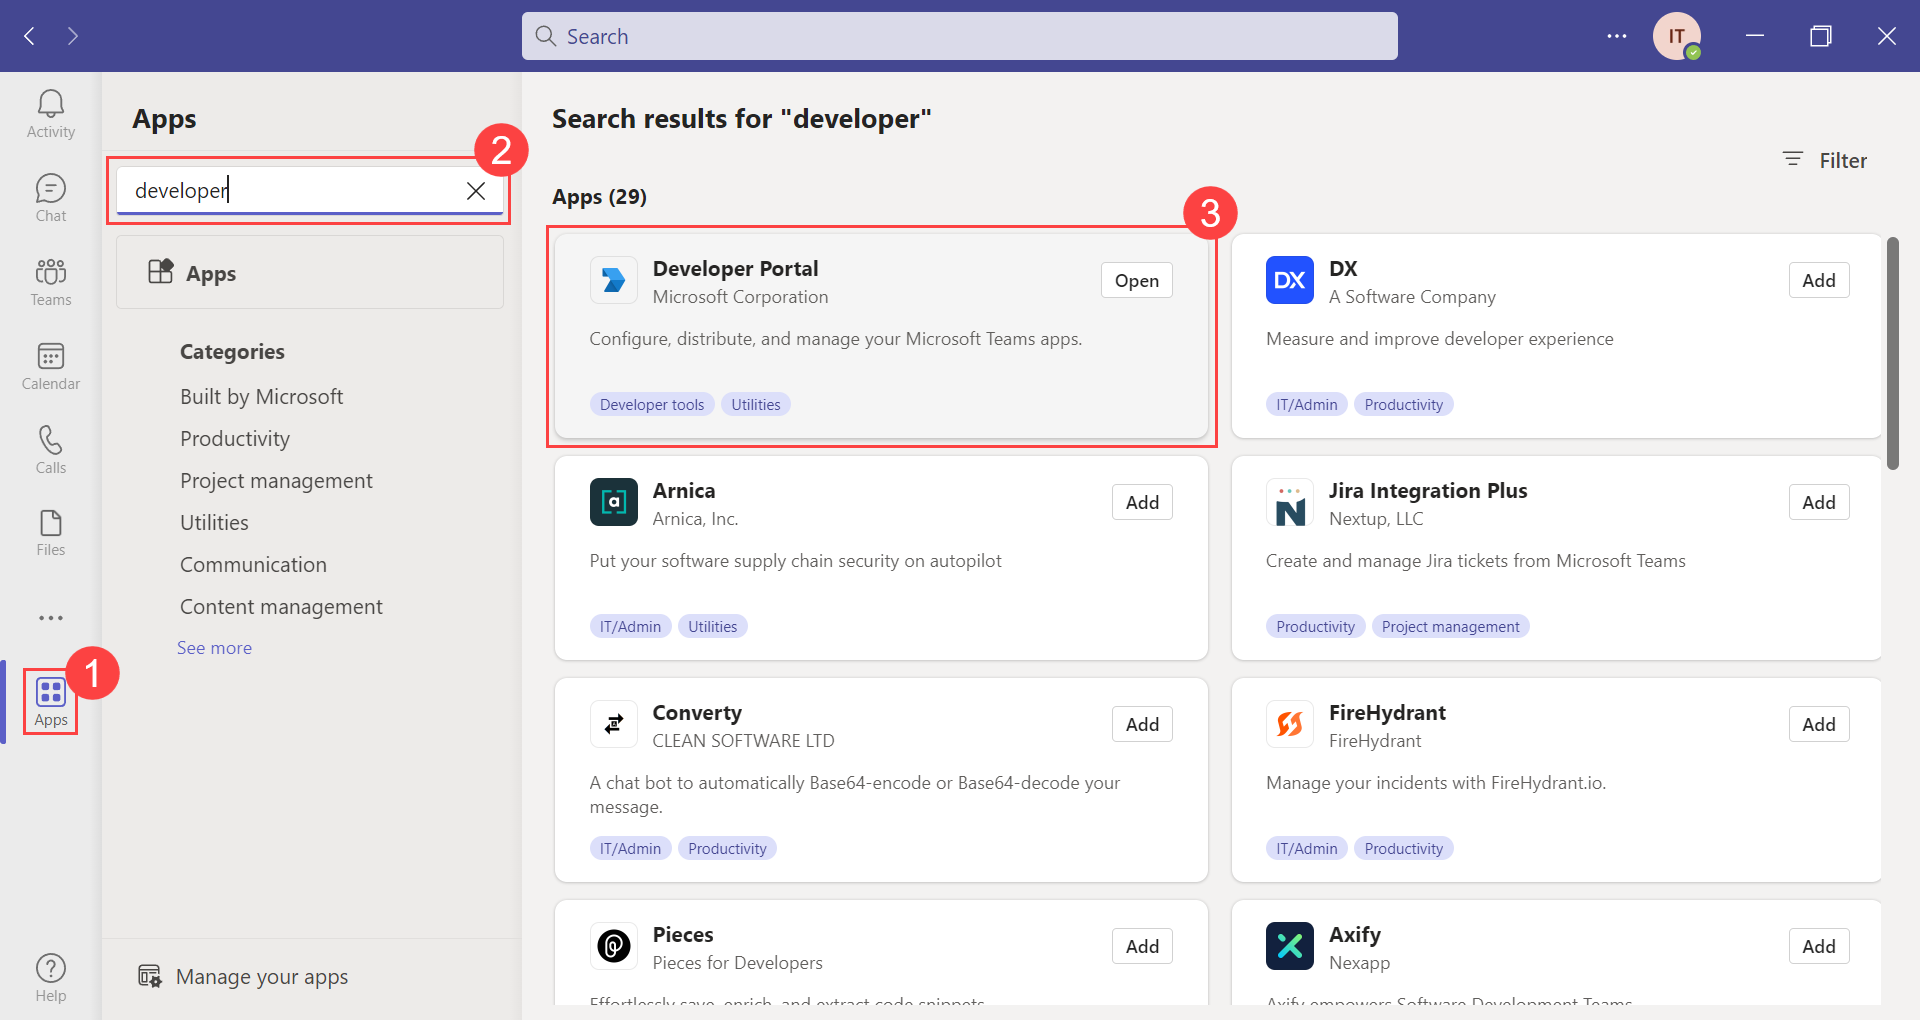
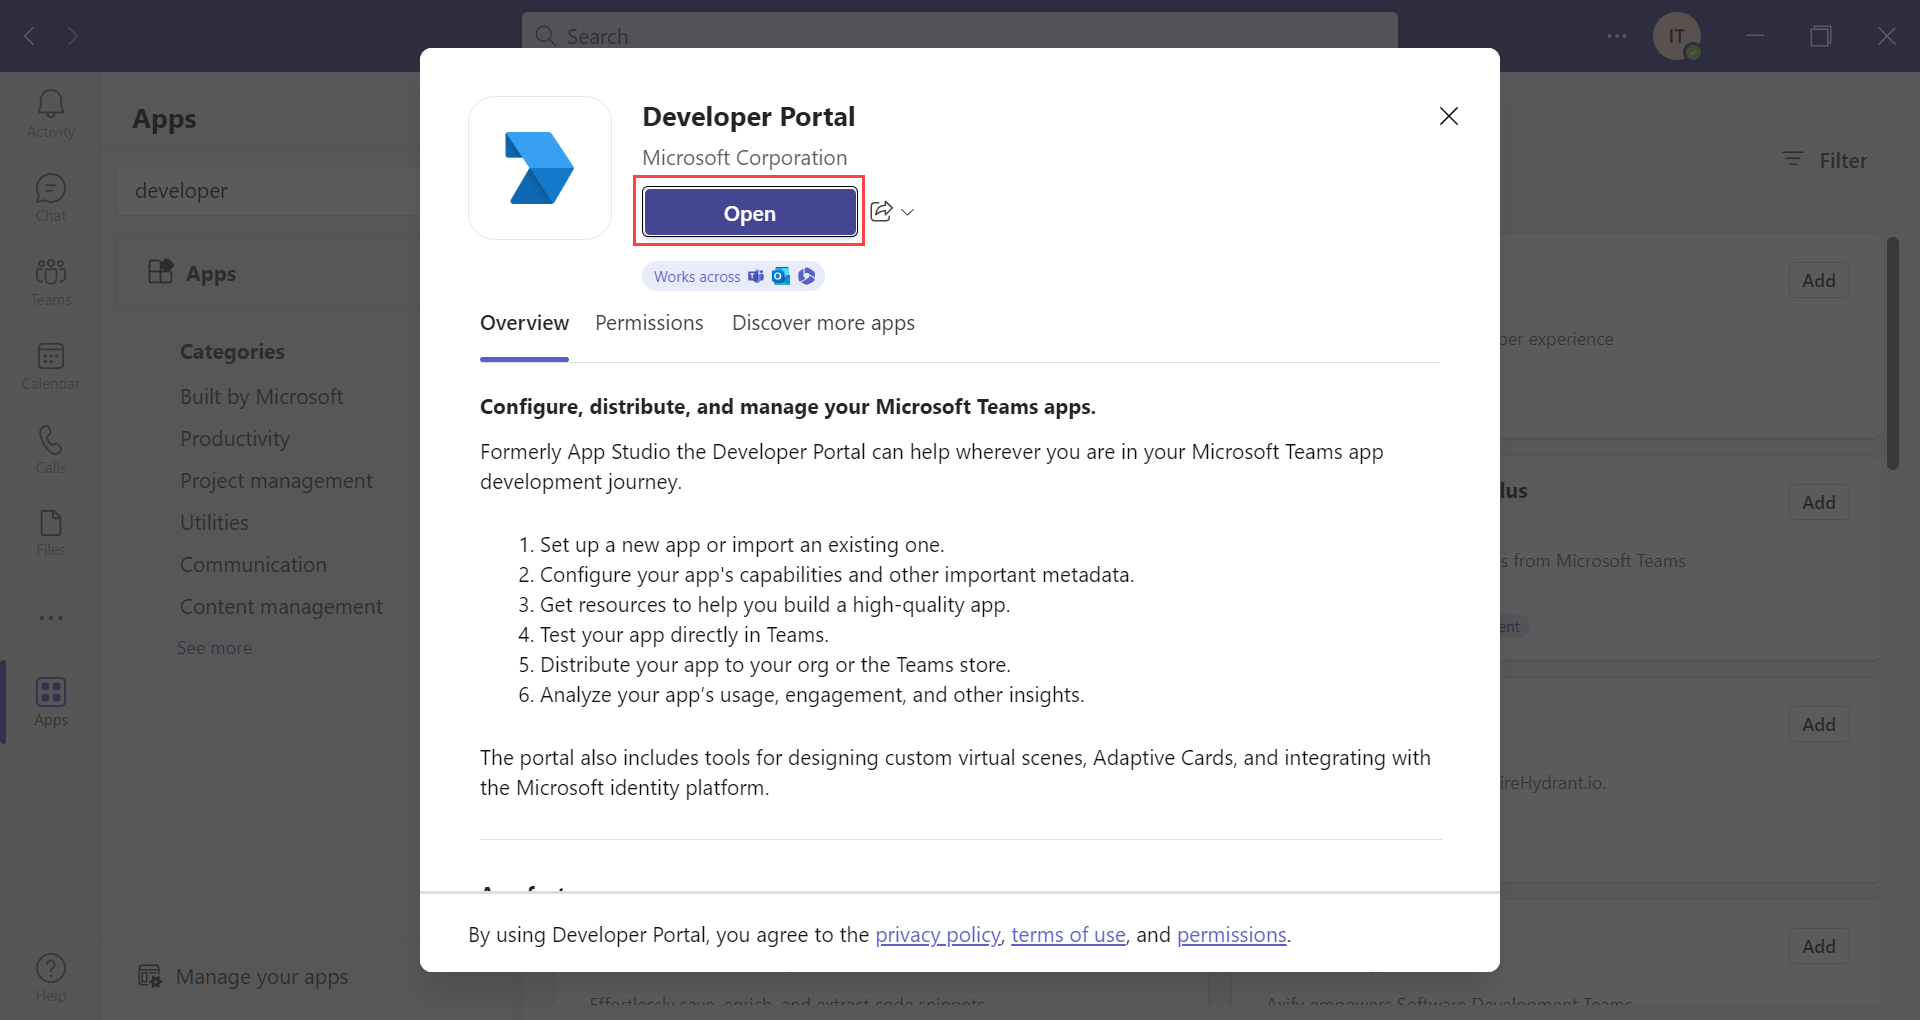
Step 3: Click Open.
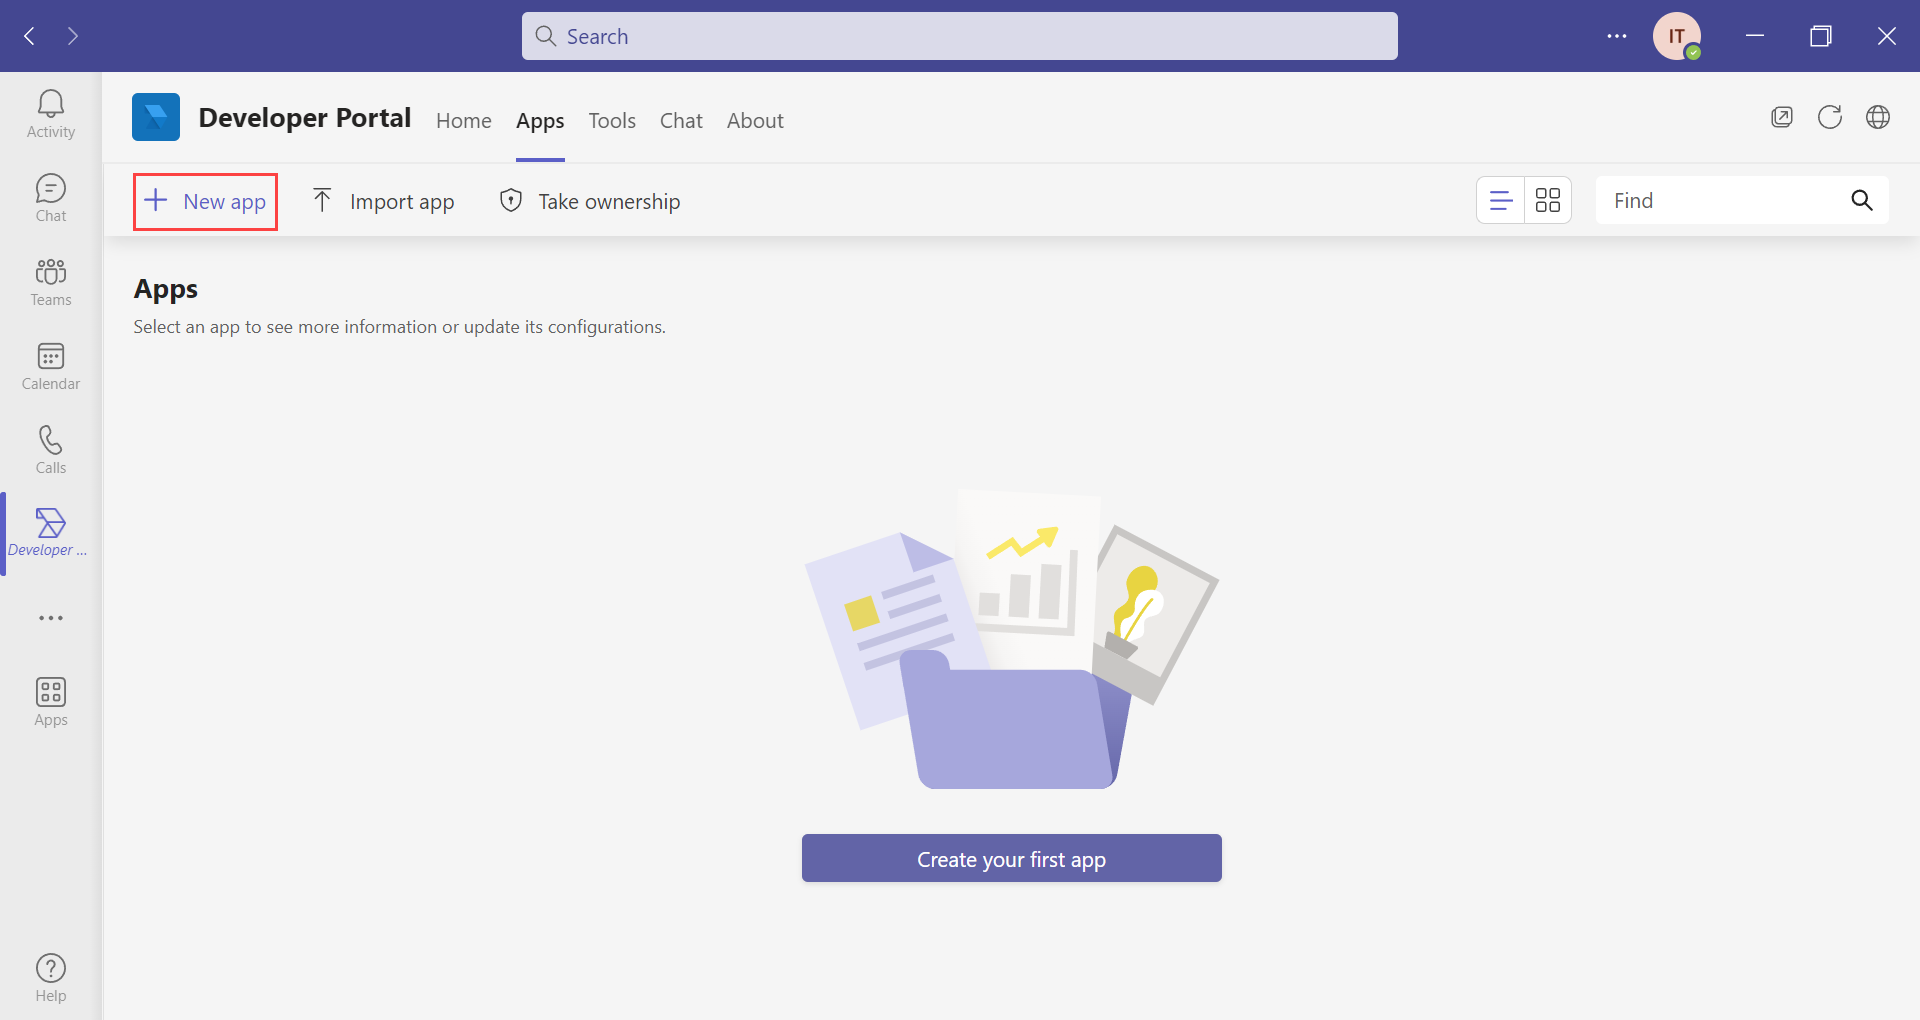
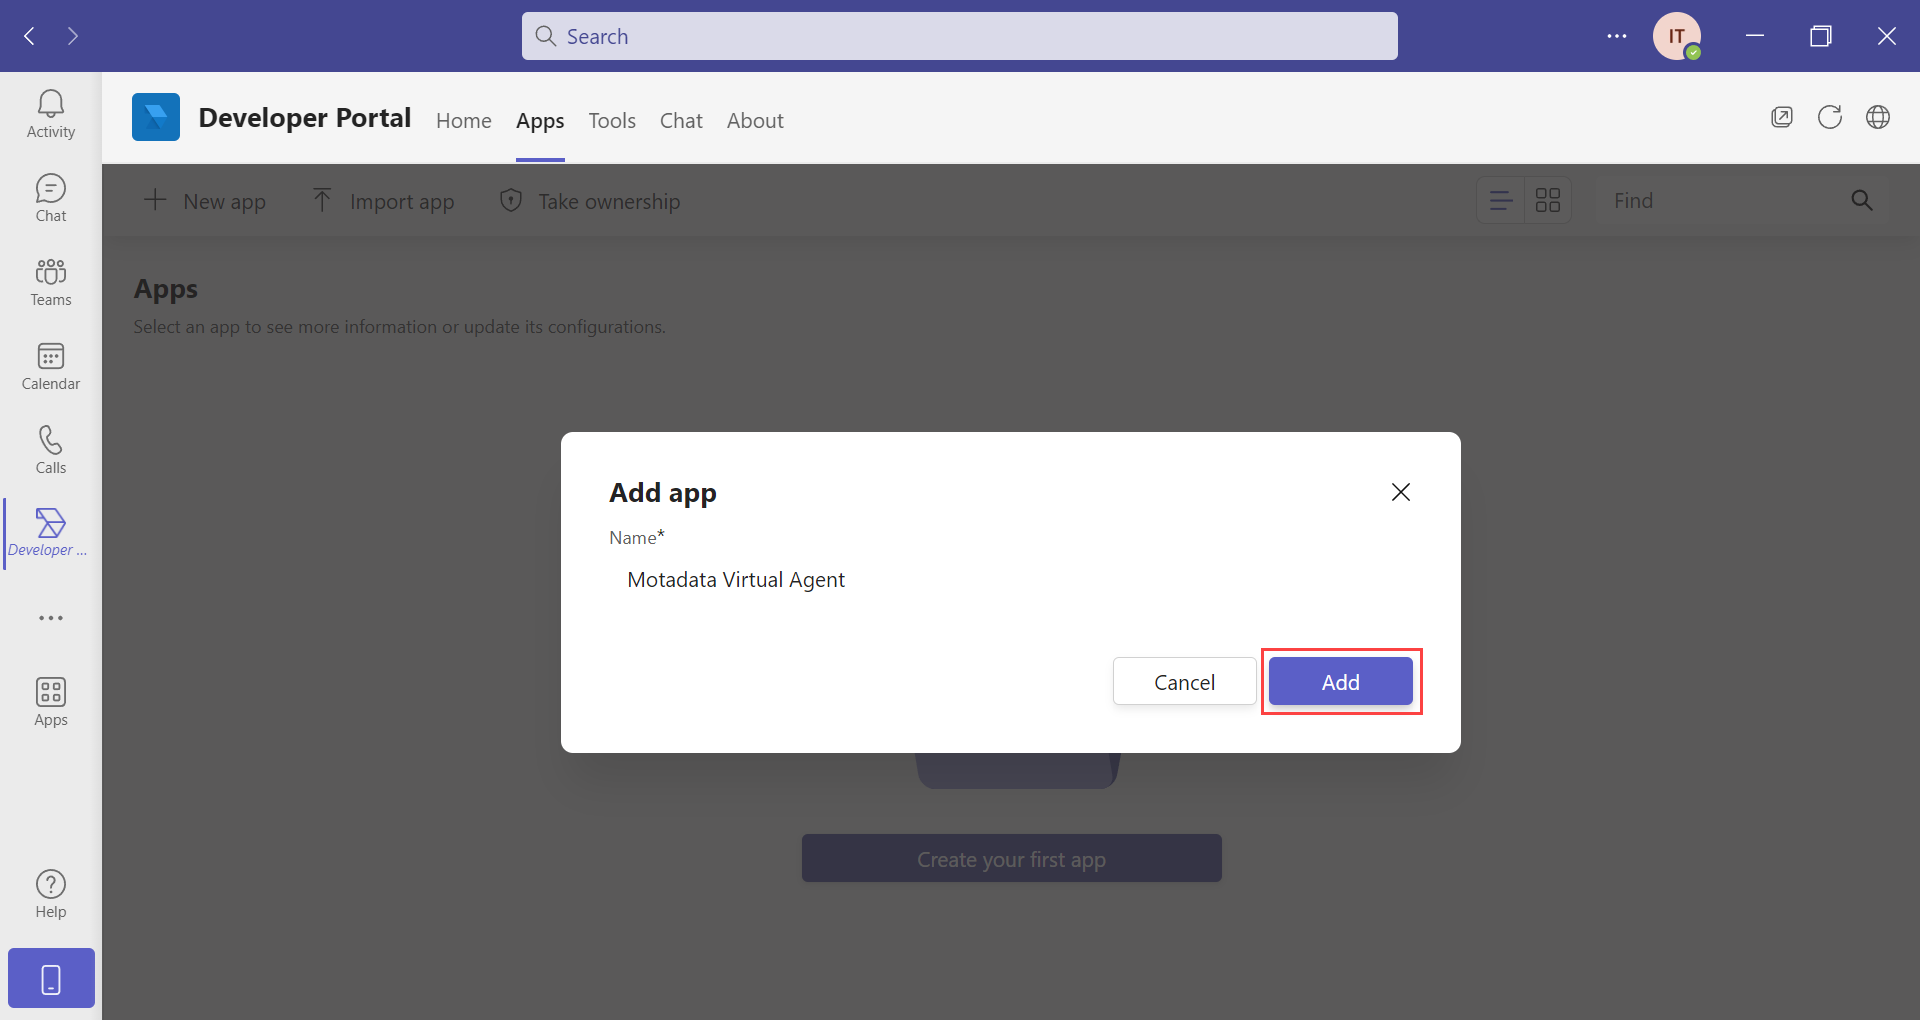
Step 4: Create a new app by clicking the "New app" option. You can also click the option "Import app" and select the sample zip file provided by Motadata. To download the sample zip file, click here.
Step 5: Enter the App name and click Add. Here, the Motadata Virtual Agent app is created.
Step 6: Navigate to Configure > Basic Information page and enter the below details:
- Descriptions: Enter the short and long descriptions of the App. These are mandatory fields.
- Developer Information: Enter the Developer/Company name and Website URL. These are mandatory fields.
- App URLs: Enter the URLs of the privacy policy and terms of use. These are mandatory fields.
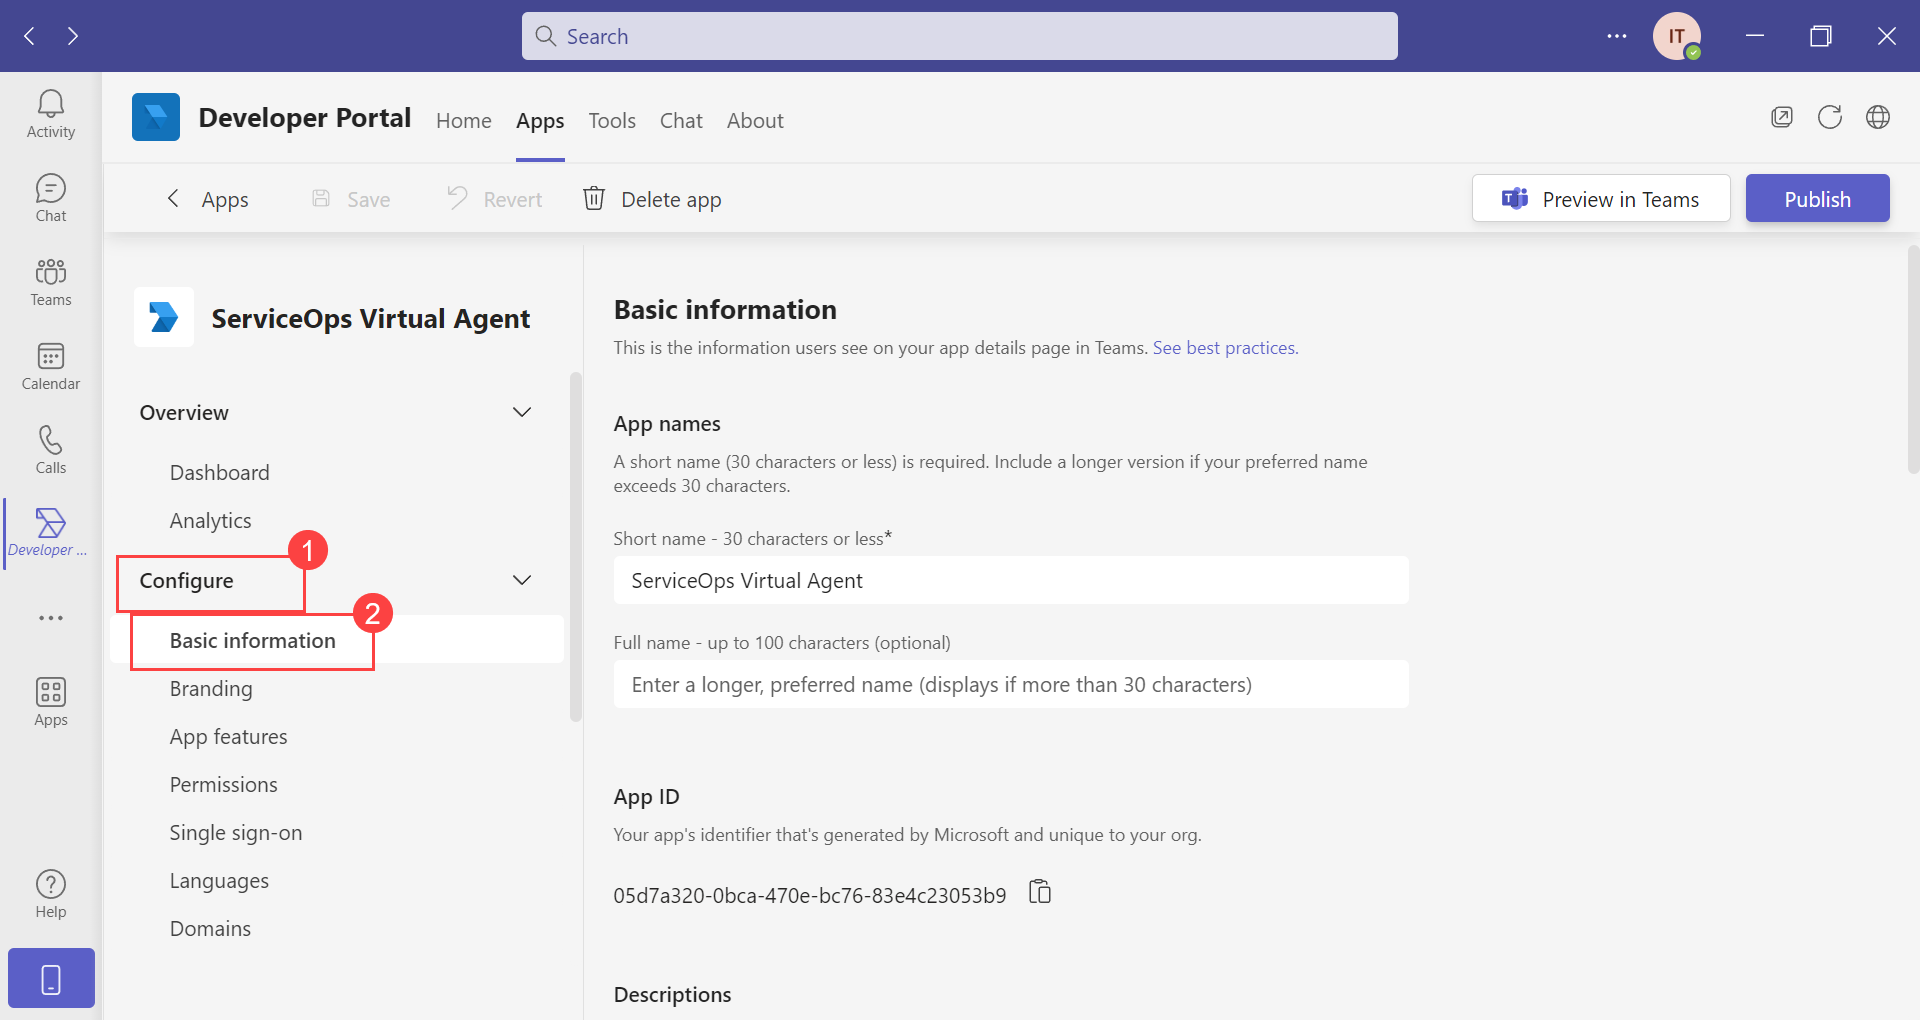
Once done, click Save.
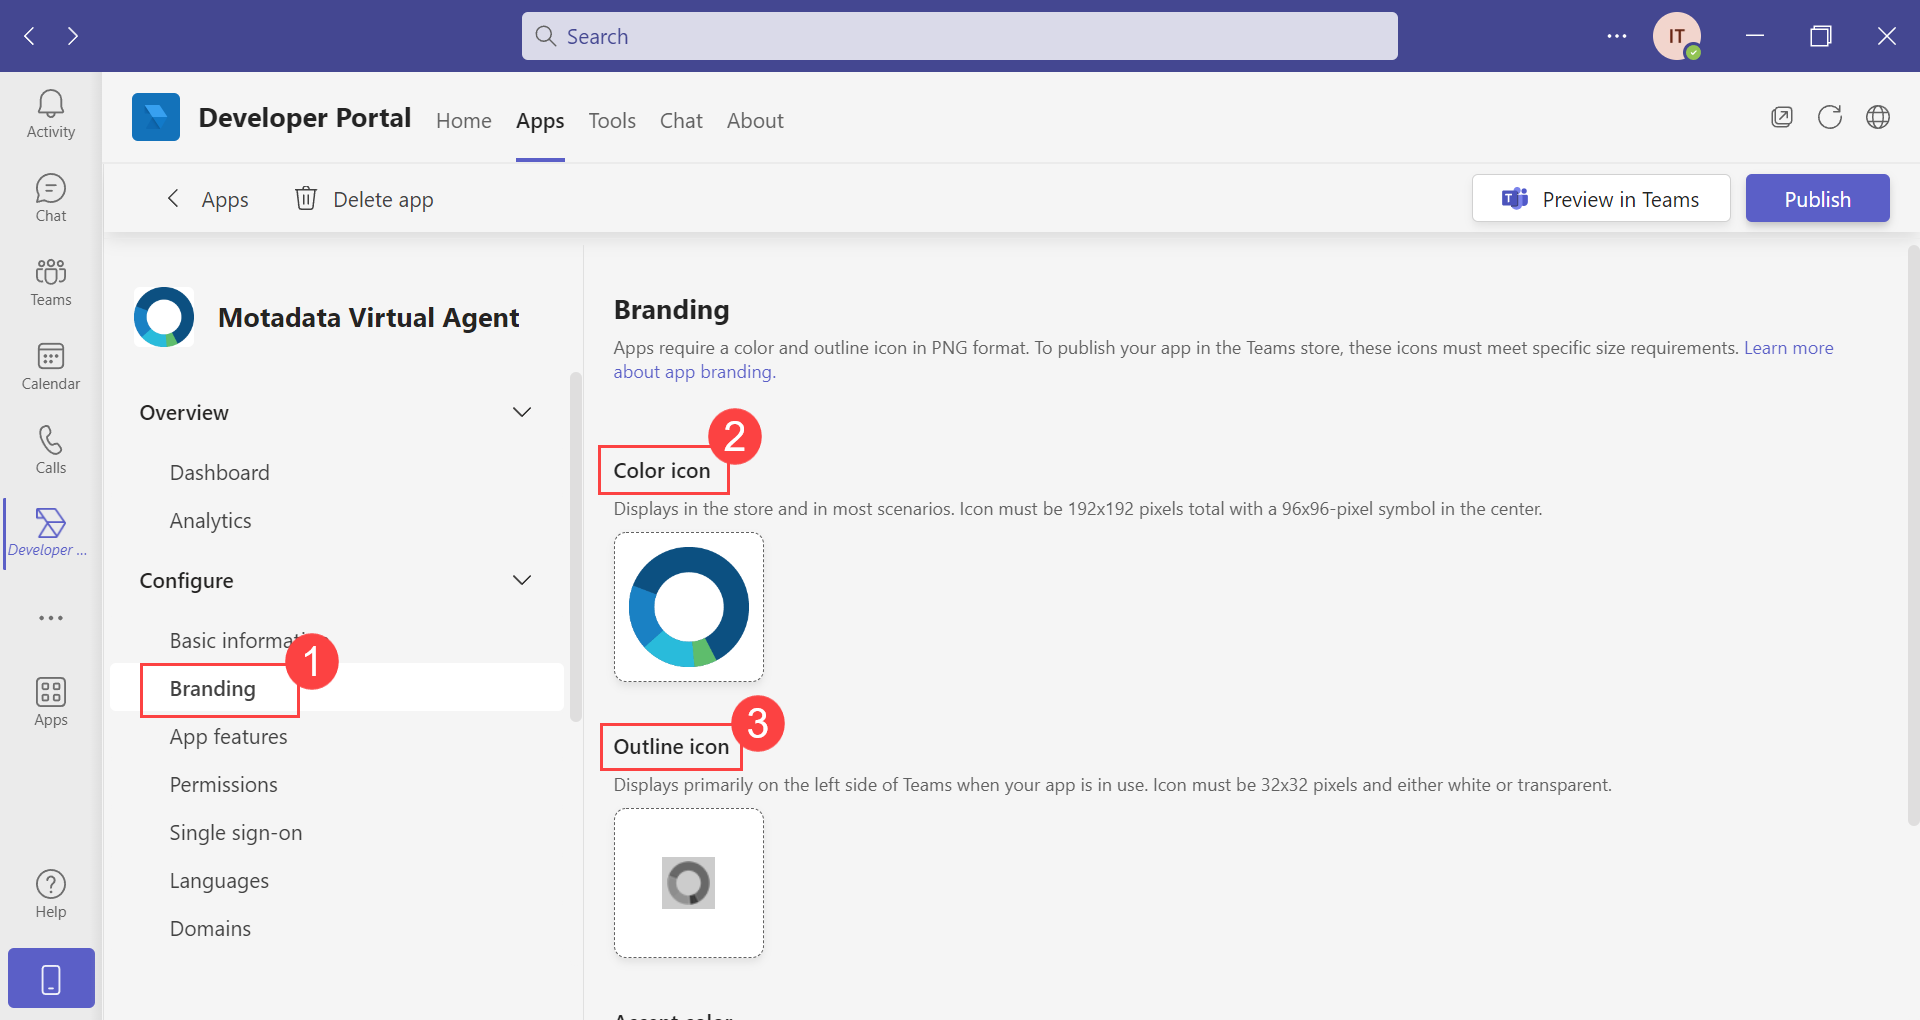
Step 7: In the Branding tab, set the Color and Outline icons for the App.
The Outline icon should be 32x32 pixels and greyscale.
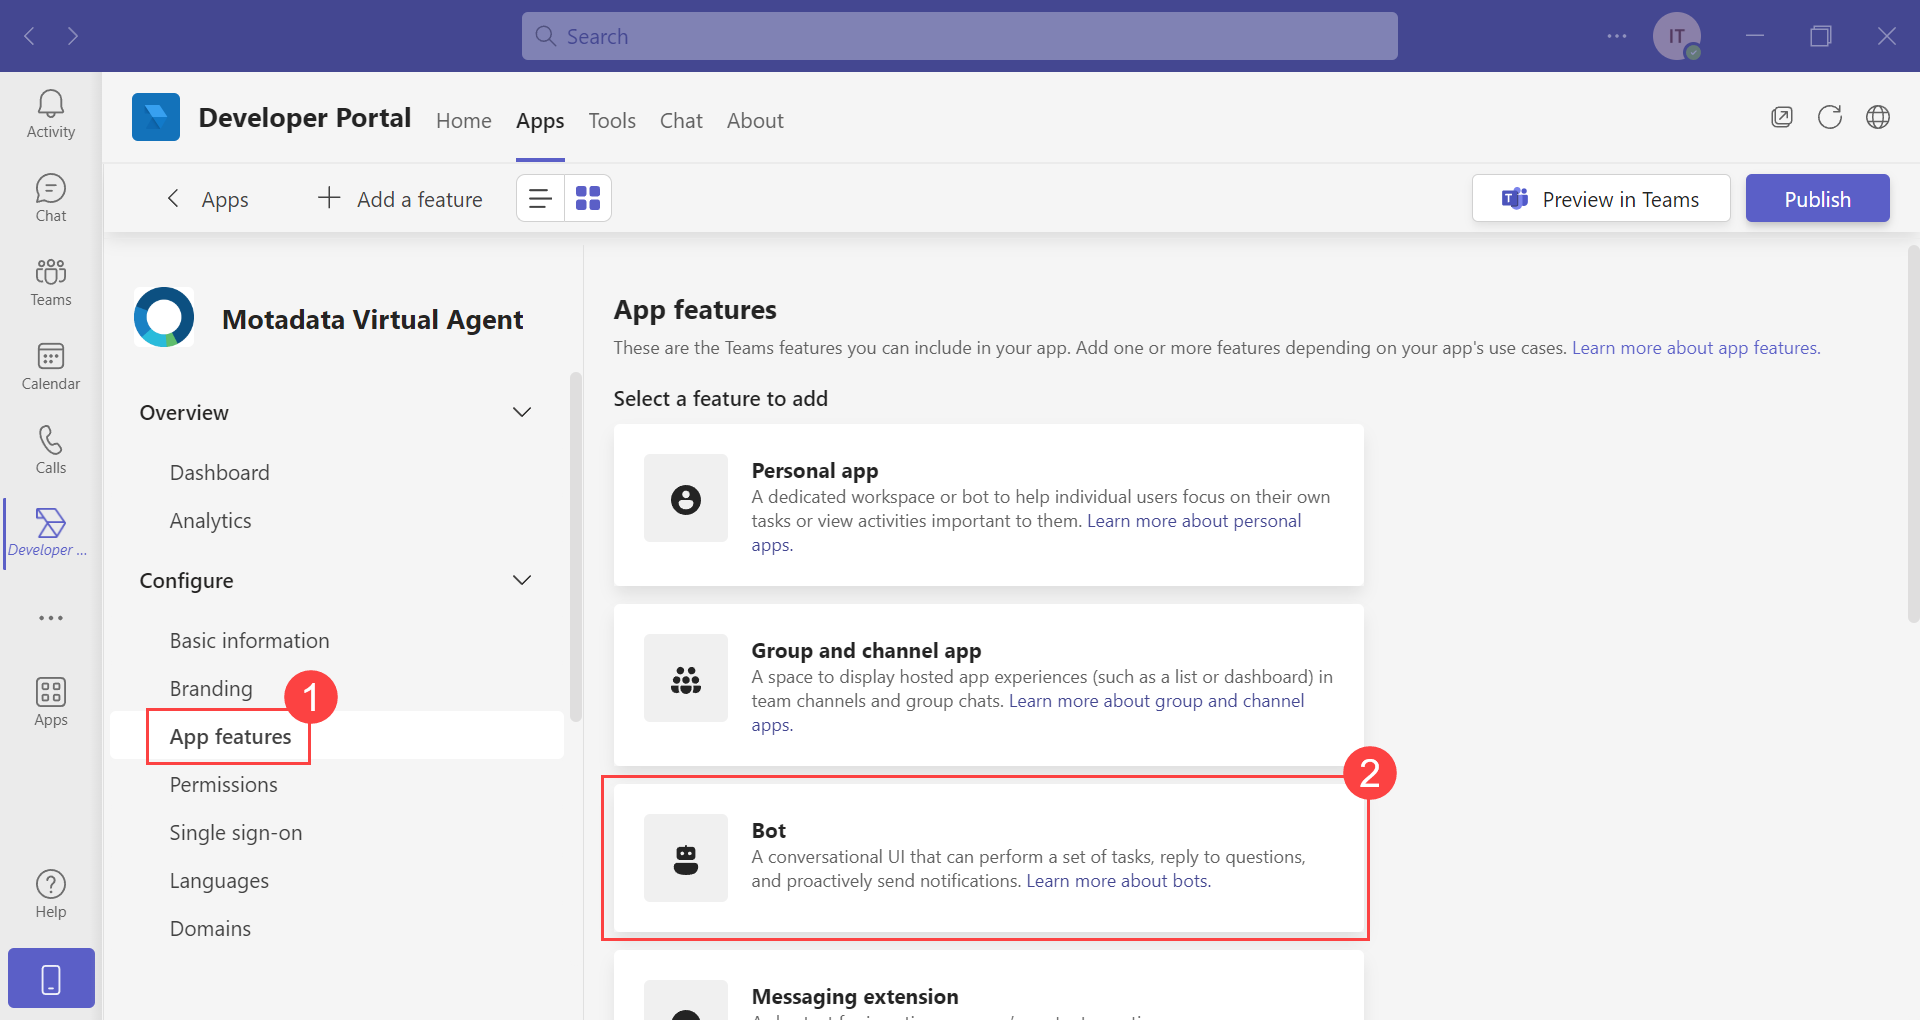
Step 8: In the App Features, select Bot.
Step 9: Click Create a new bot or select the existing one from the dropdown.
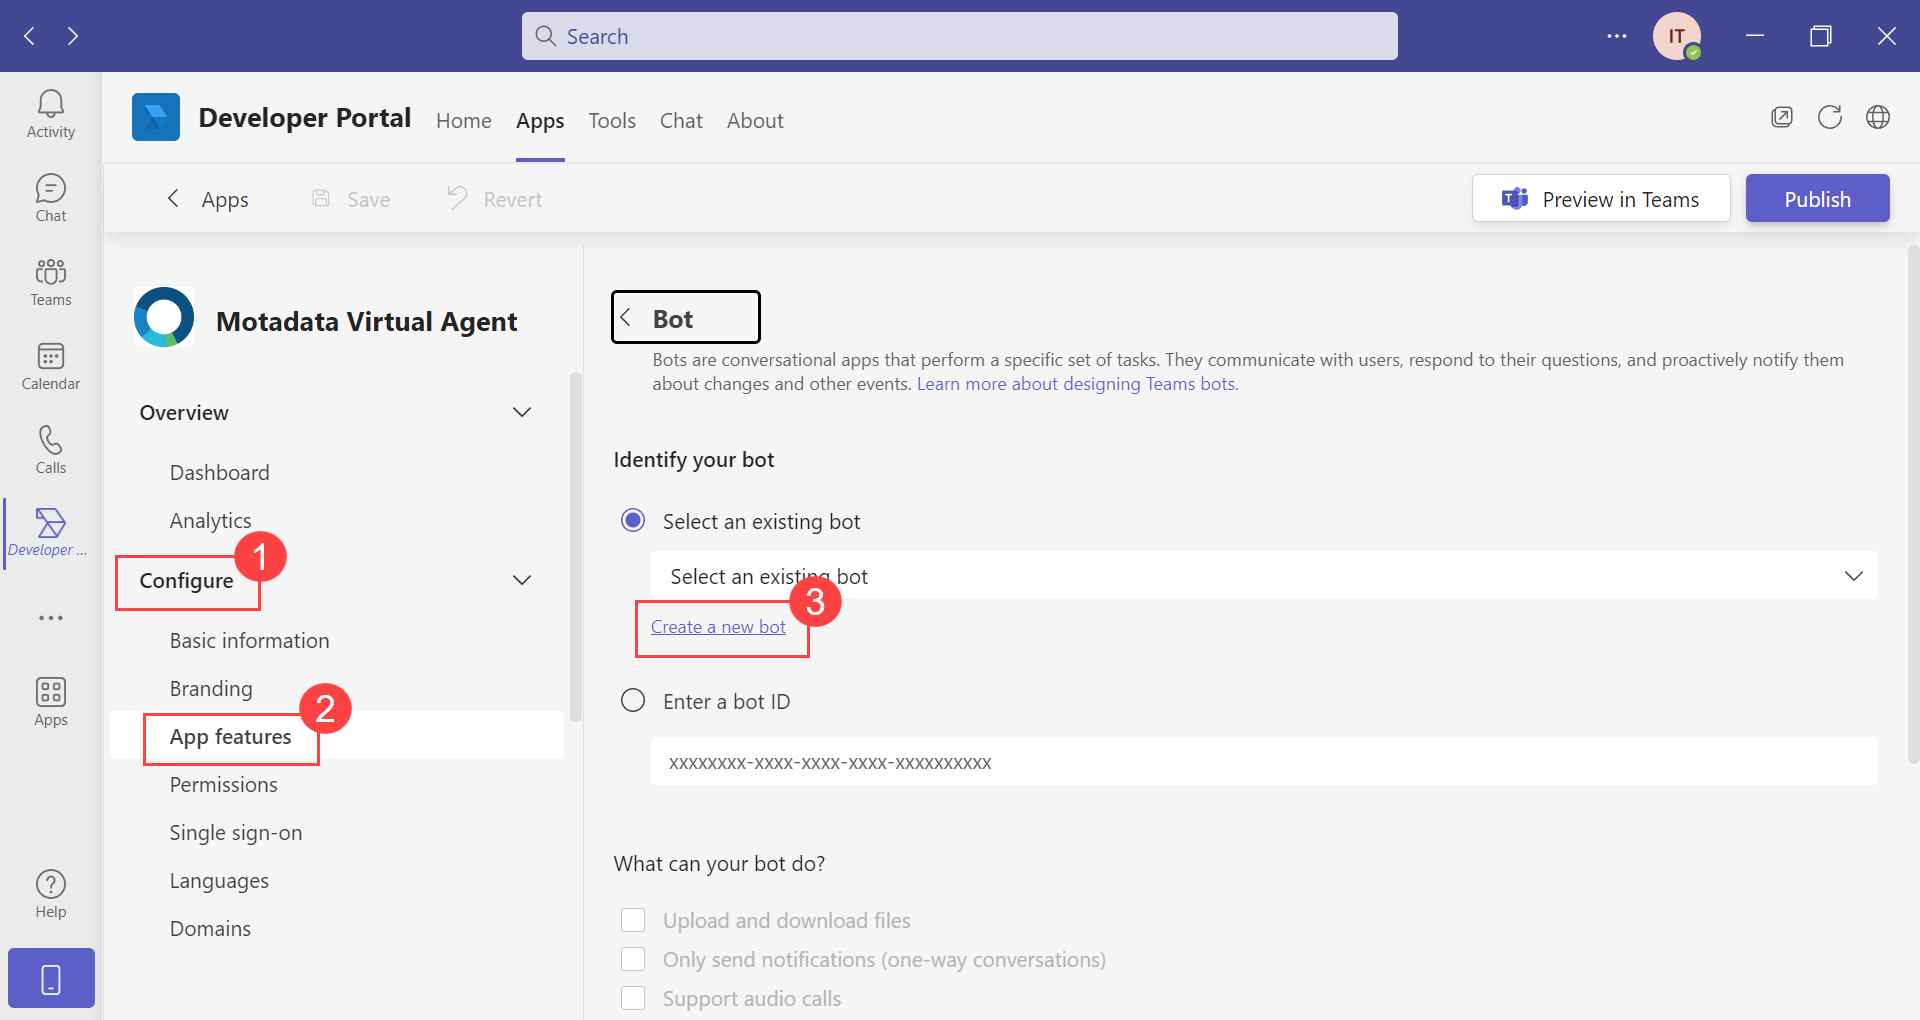
If "create a new bot" is selected, the Bot Management page appears. You can also create a bot from the Tools tab > Bot Management page.
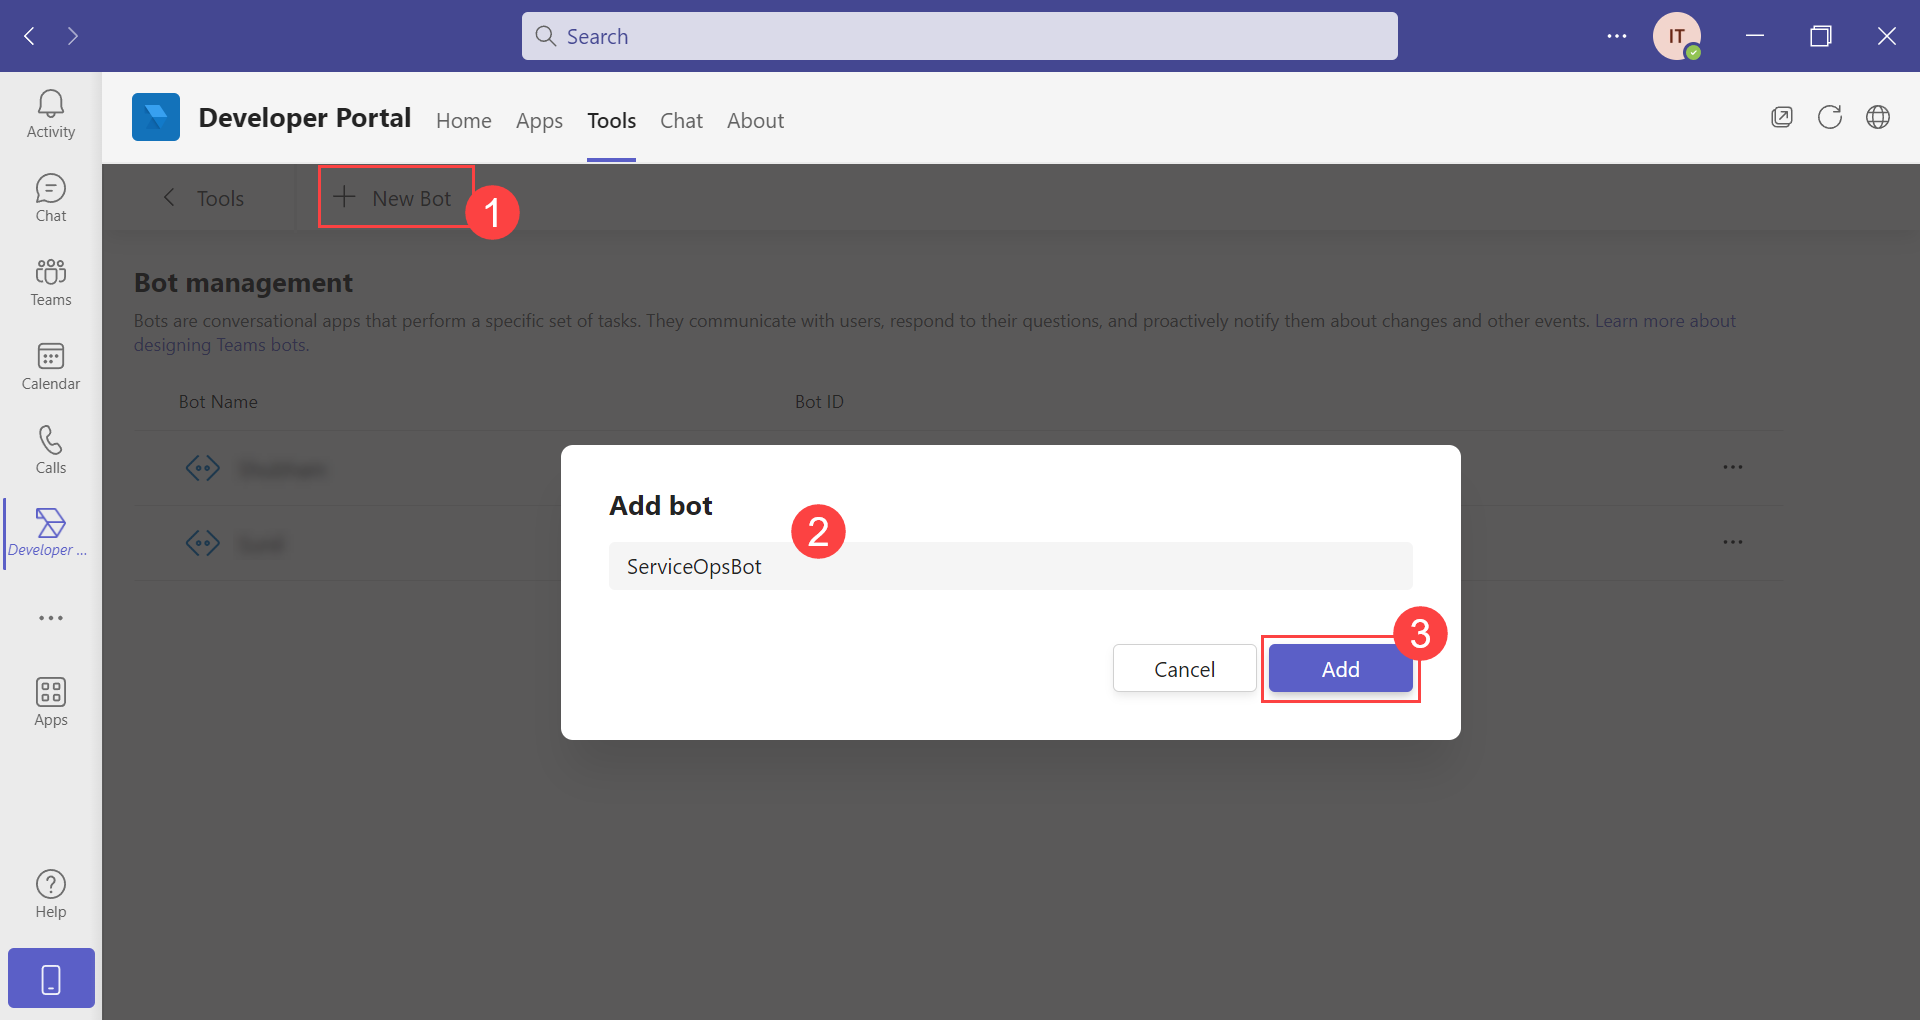
Step 10: Click New Bot, enter the bot’s name, and click Add.
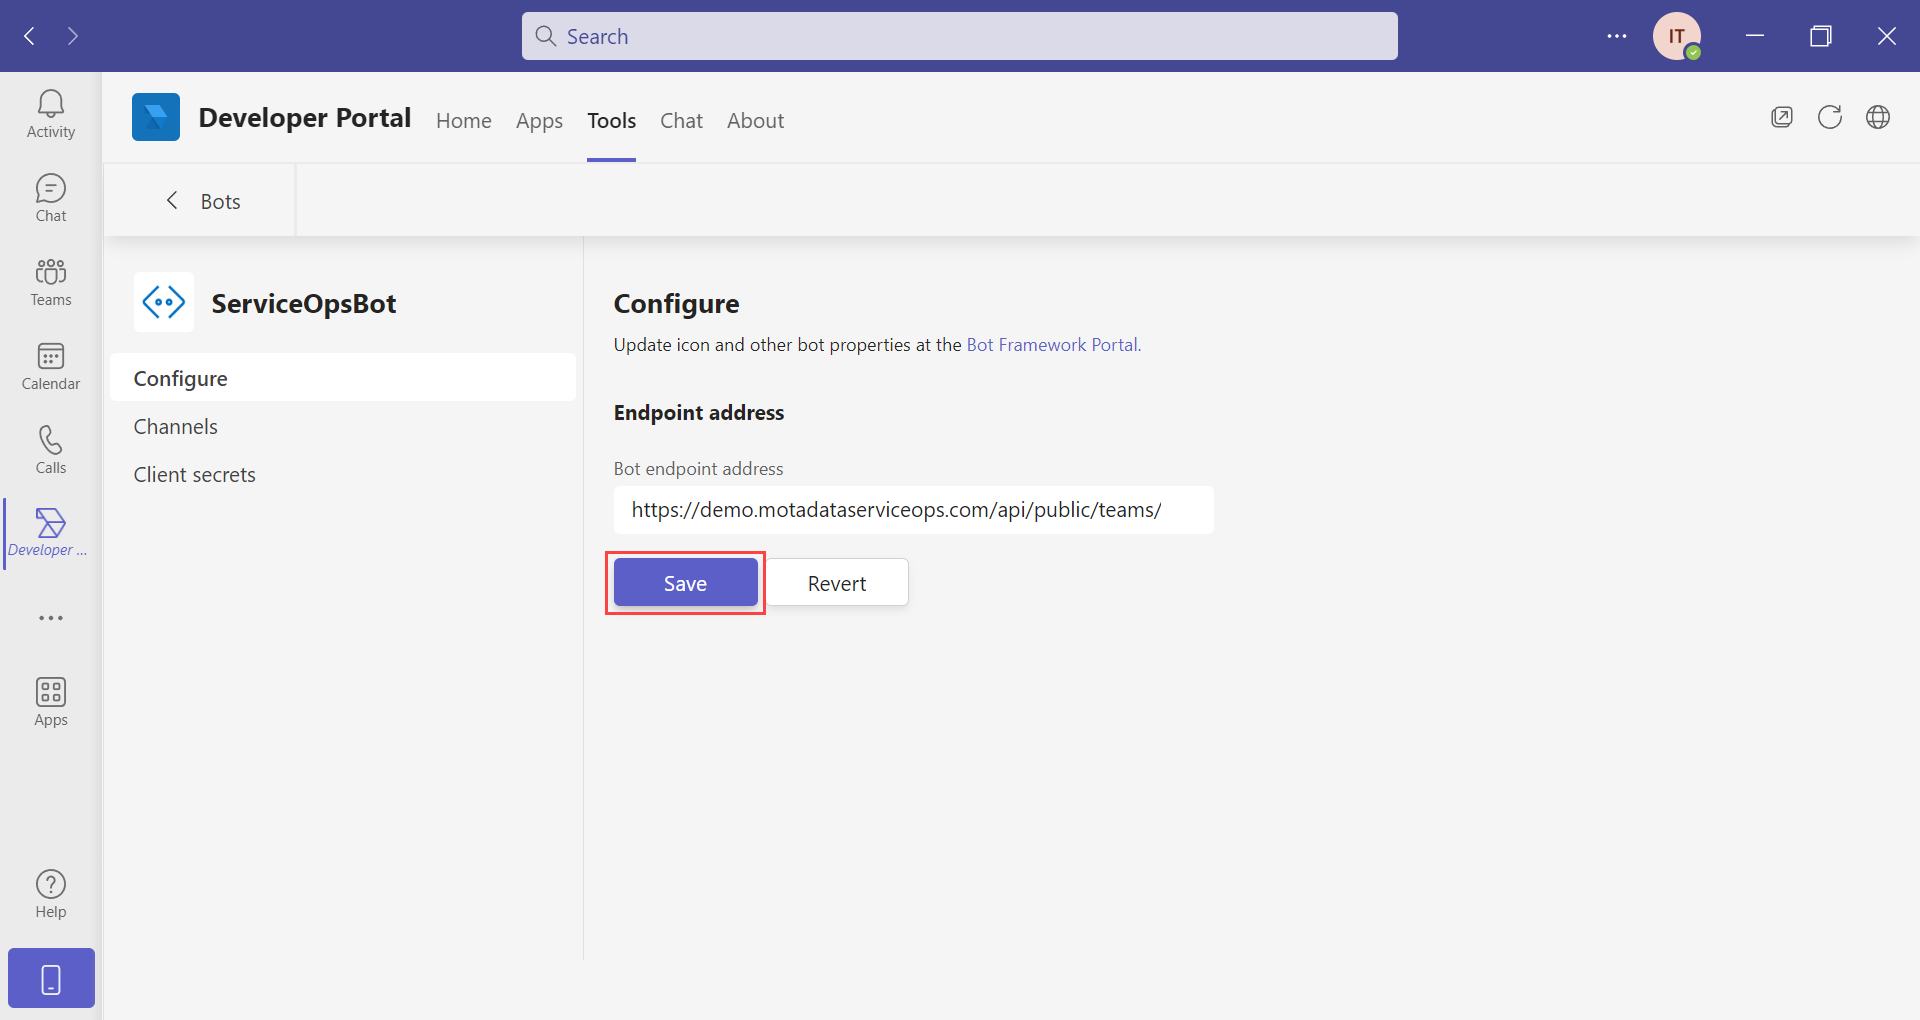
Step 11: Configure the bot endpoint address and click Save. Change the base URL before the "/api/public/teams/readMessage" section, as shown below. It is the HTTPS URL on which Teams will send the message.
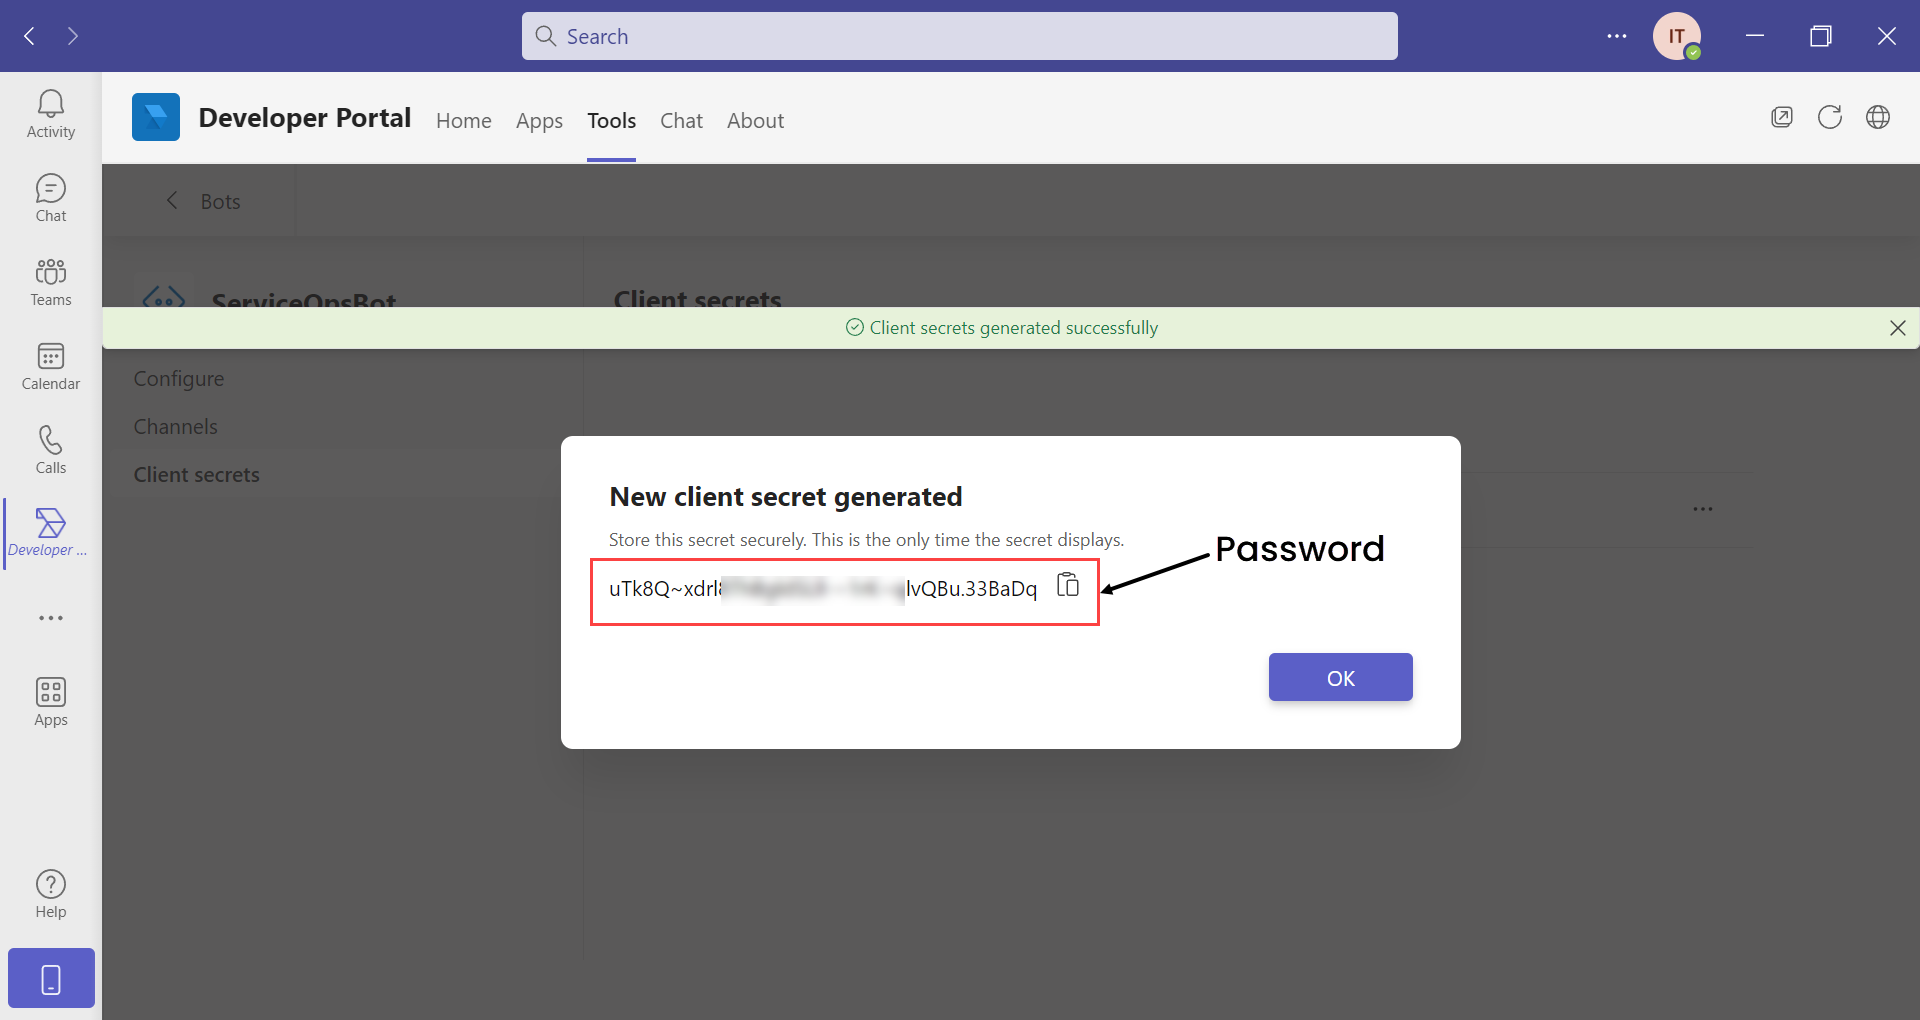
Step 12: Navigate to the Client secrets tab and click the "Add a client secret for your bot" button.
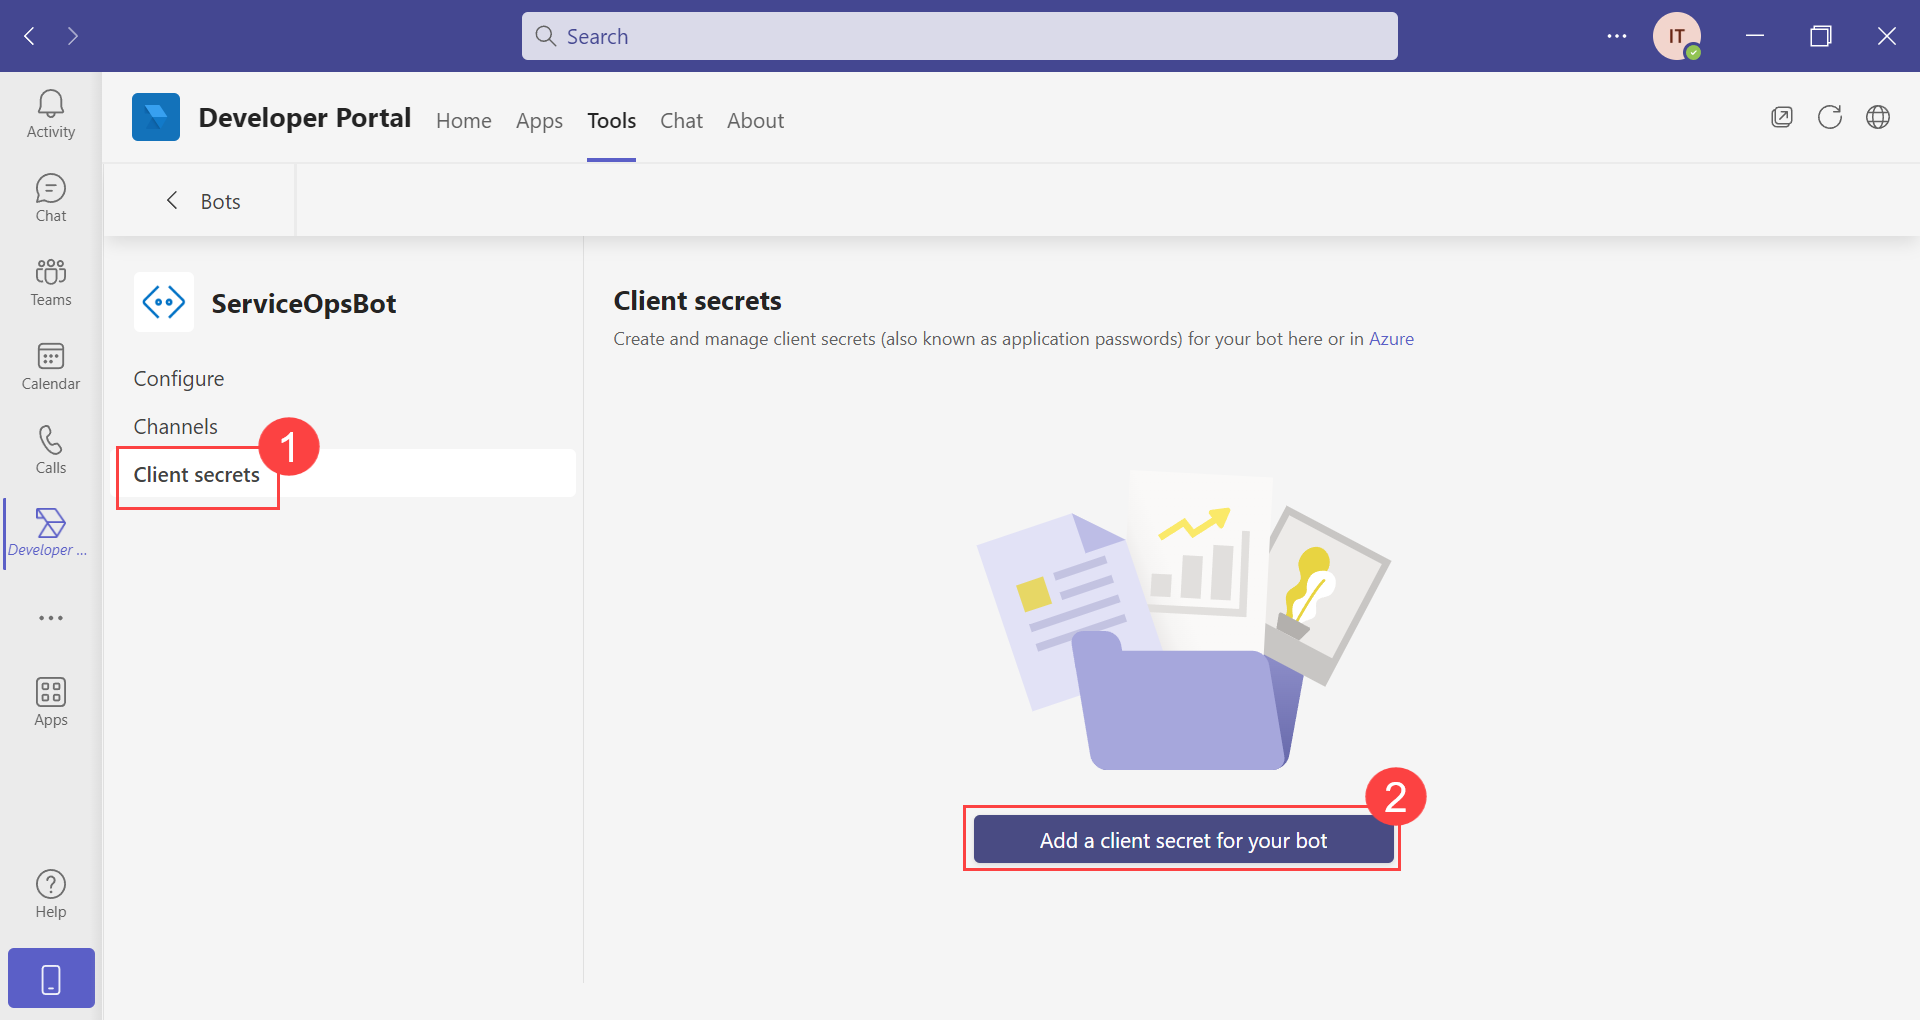
The client's secret will get generated and appear on the screen, as shown below. Copy this secret and paste it into ServiceOps in the Password field.
The Bot is now created and appears on the Bot Management as shown below. Copy the Bot ID and paste it into ServiceOps in the Client ID field.

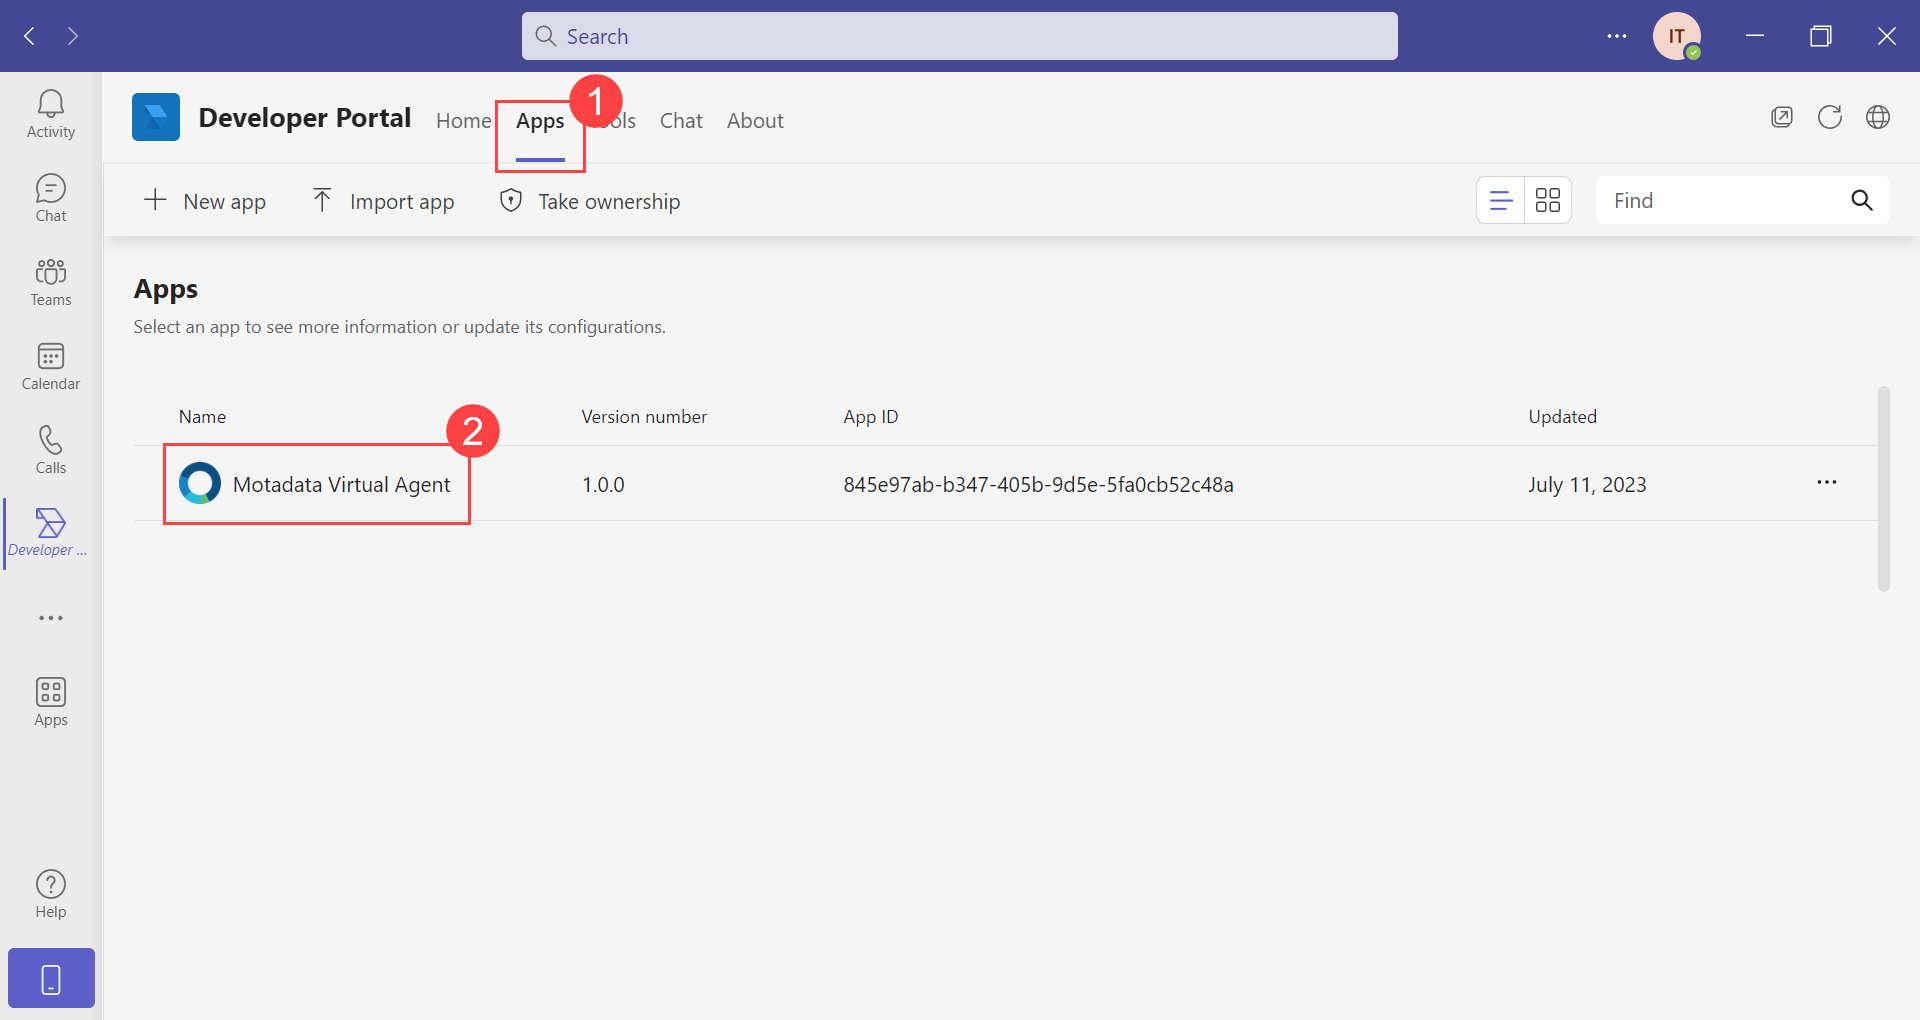
Step 13: Now, navigate to the Apps tab, and edit the created App (here, Motadata Virtual Agent) by clicking on it.
Step 14: Navigate to Configure > App features > Bot, select the Bot from the "Select an existing bot" dropdown, and select the scope for the Bot.
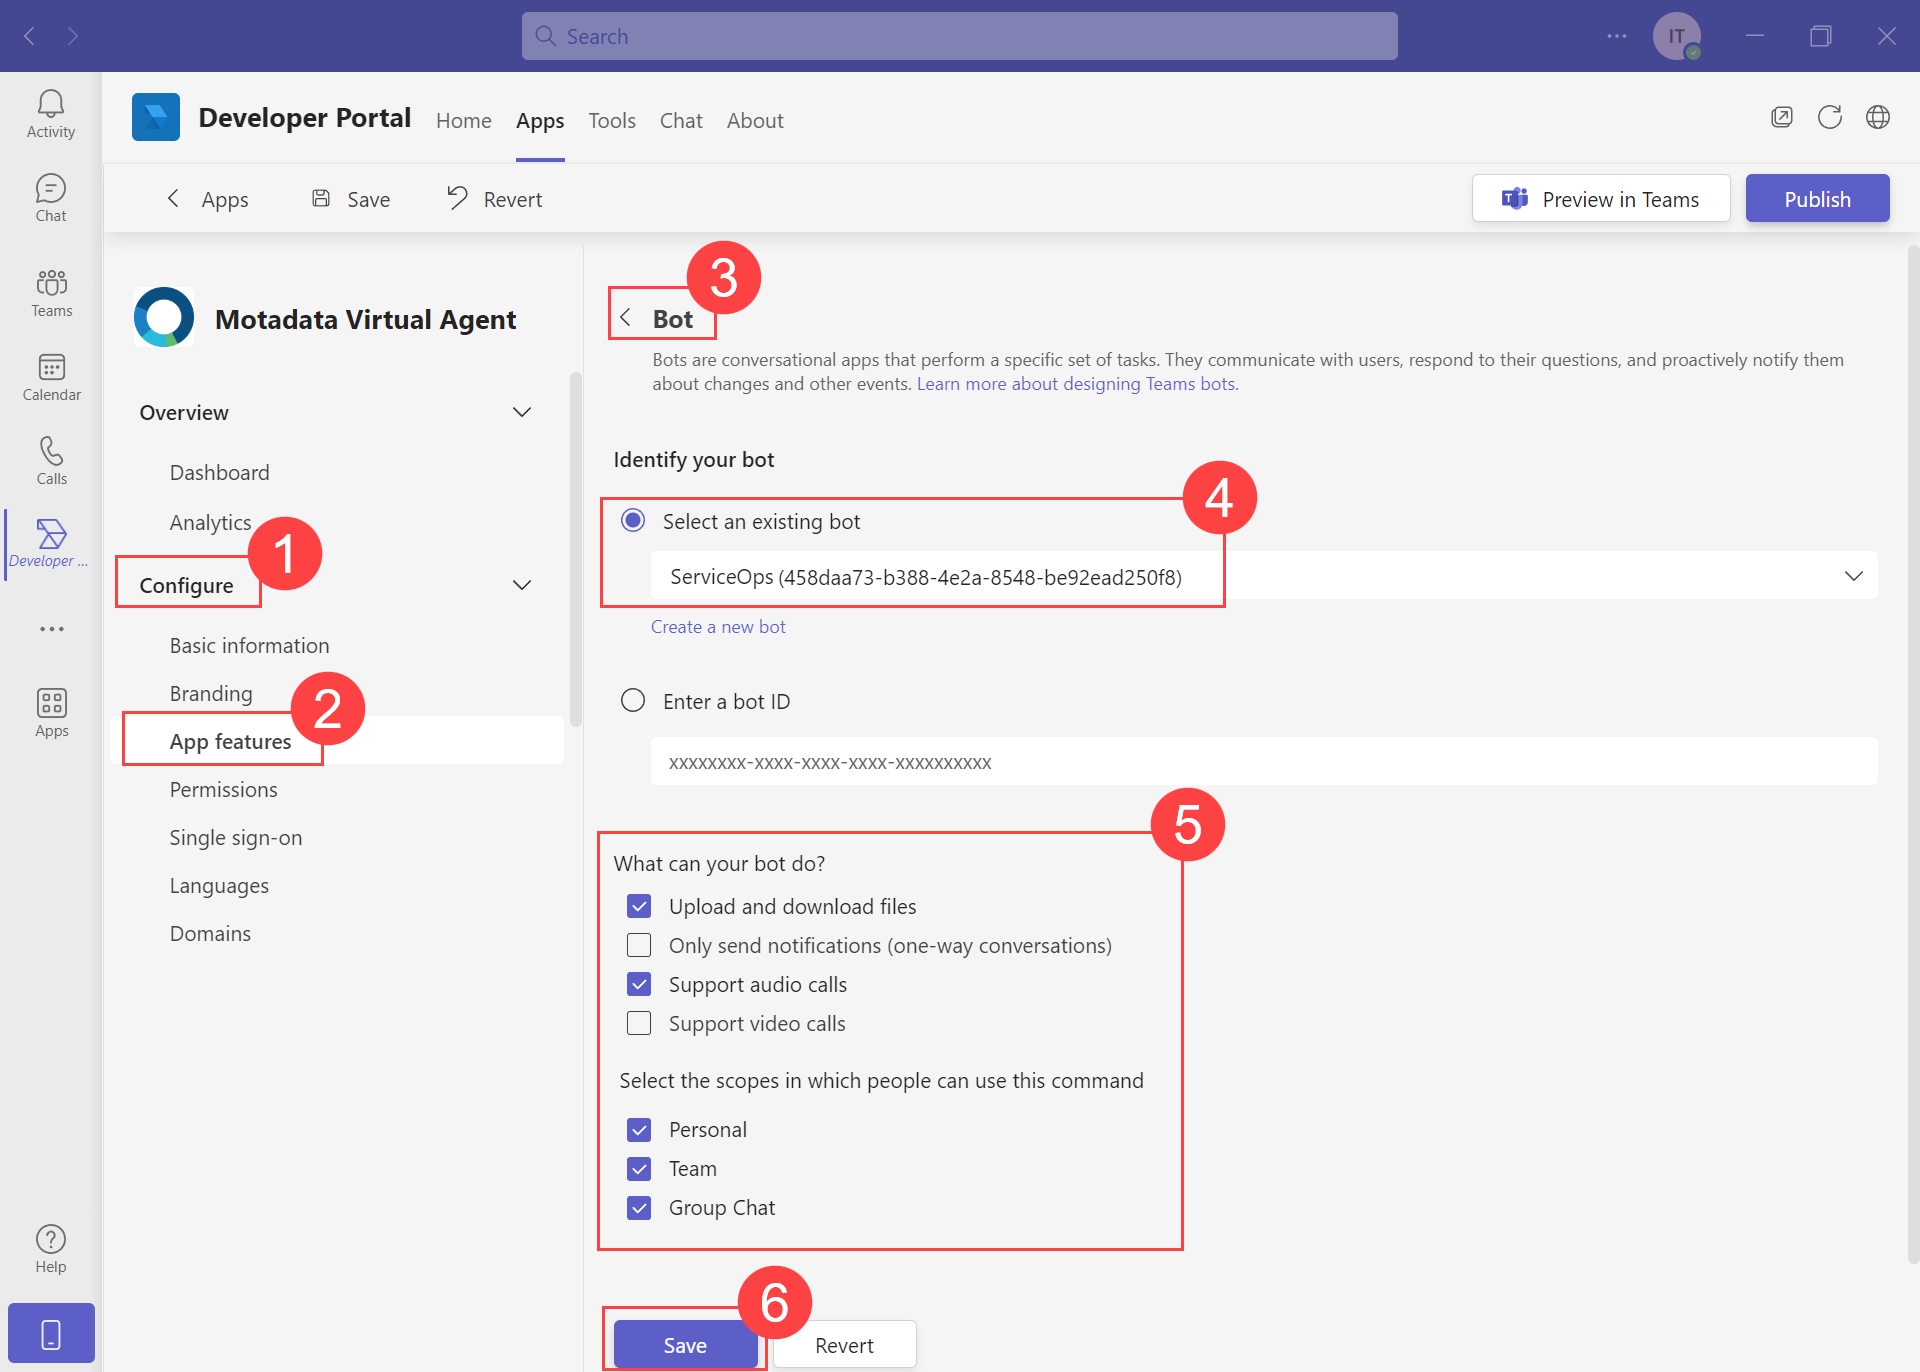
Once done, click Save.
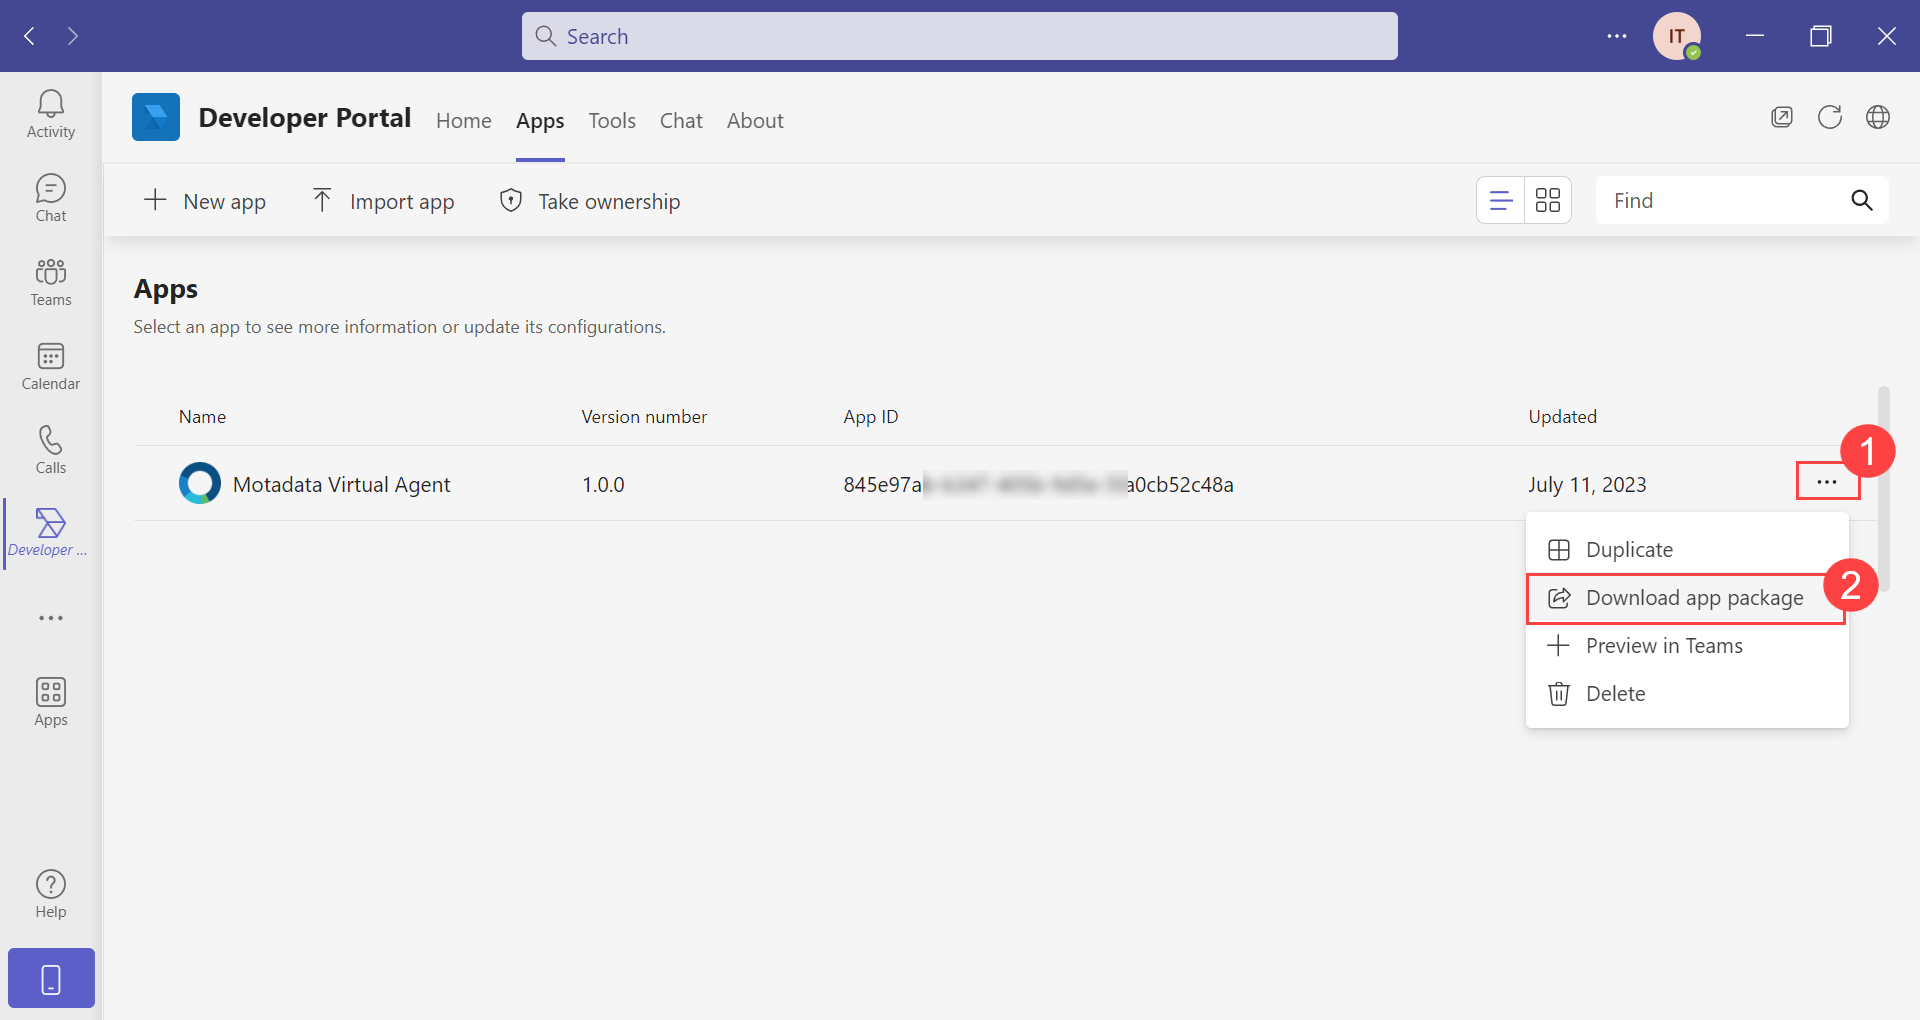
Step 15: Download the app package from the App list page below.
Step 16: In the ServiceOps Portal, navigate to Admin > Support Channel > Virtual Agent > Teams App Config page.
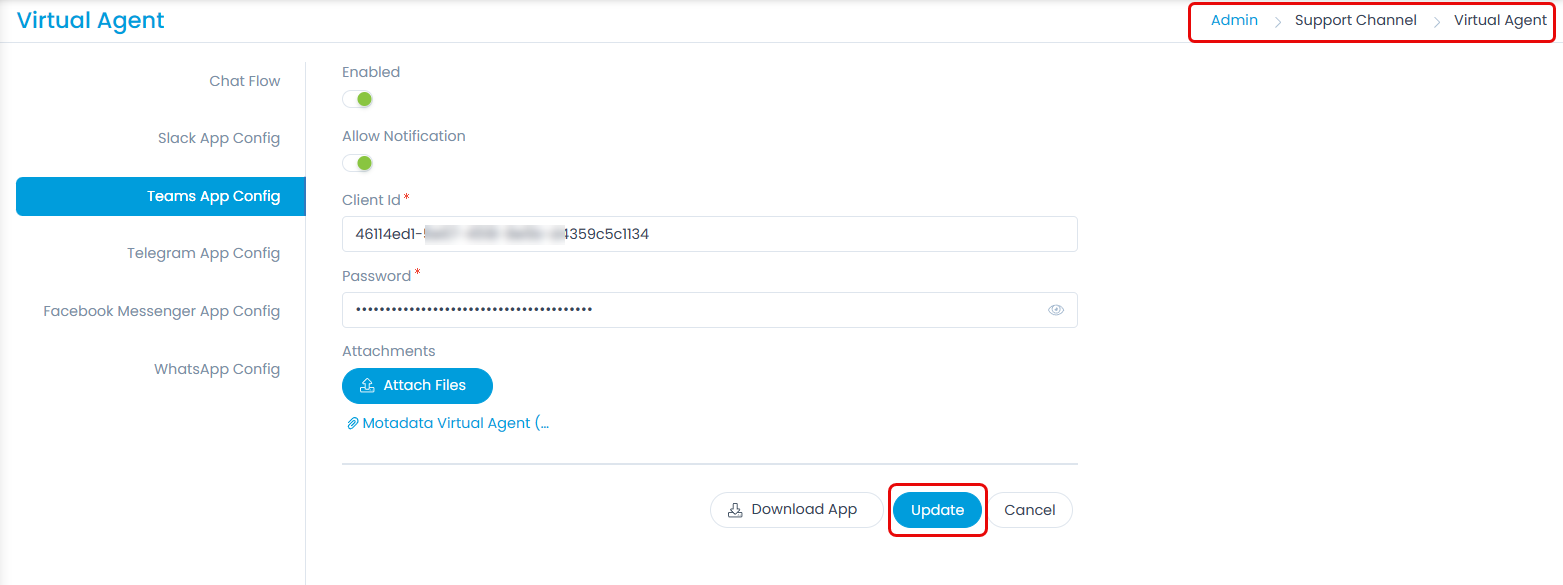
Enable the Teams functionality to allow requesters to chat via the Teams application and configure the below settings.
- Allow Notification: Enable to send notifications to the Teams application. By default, it is disabled.
Teams notifications support only those events that are displayed in the App Notifications tab.
- Client ID: Paste the Client ID (Bot ID) copied from the Teams application in Step 12.
- Password: Paste the password (Client secret) copied from the Teams application in Step 12.
- Attachments: Attach the app zip file downloaded from the Teams application in Step 15.
Once done, click Update.
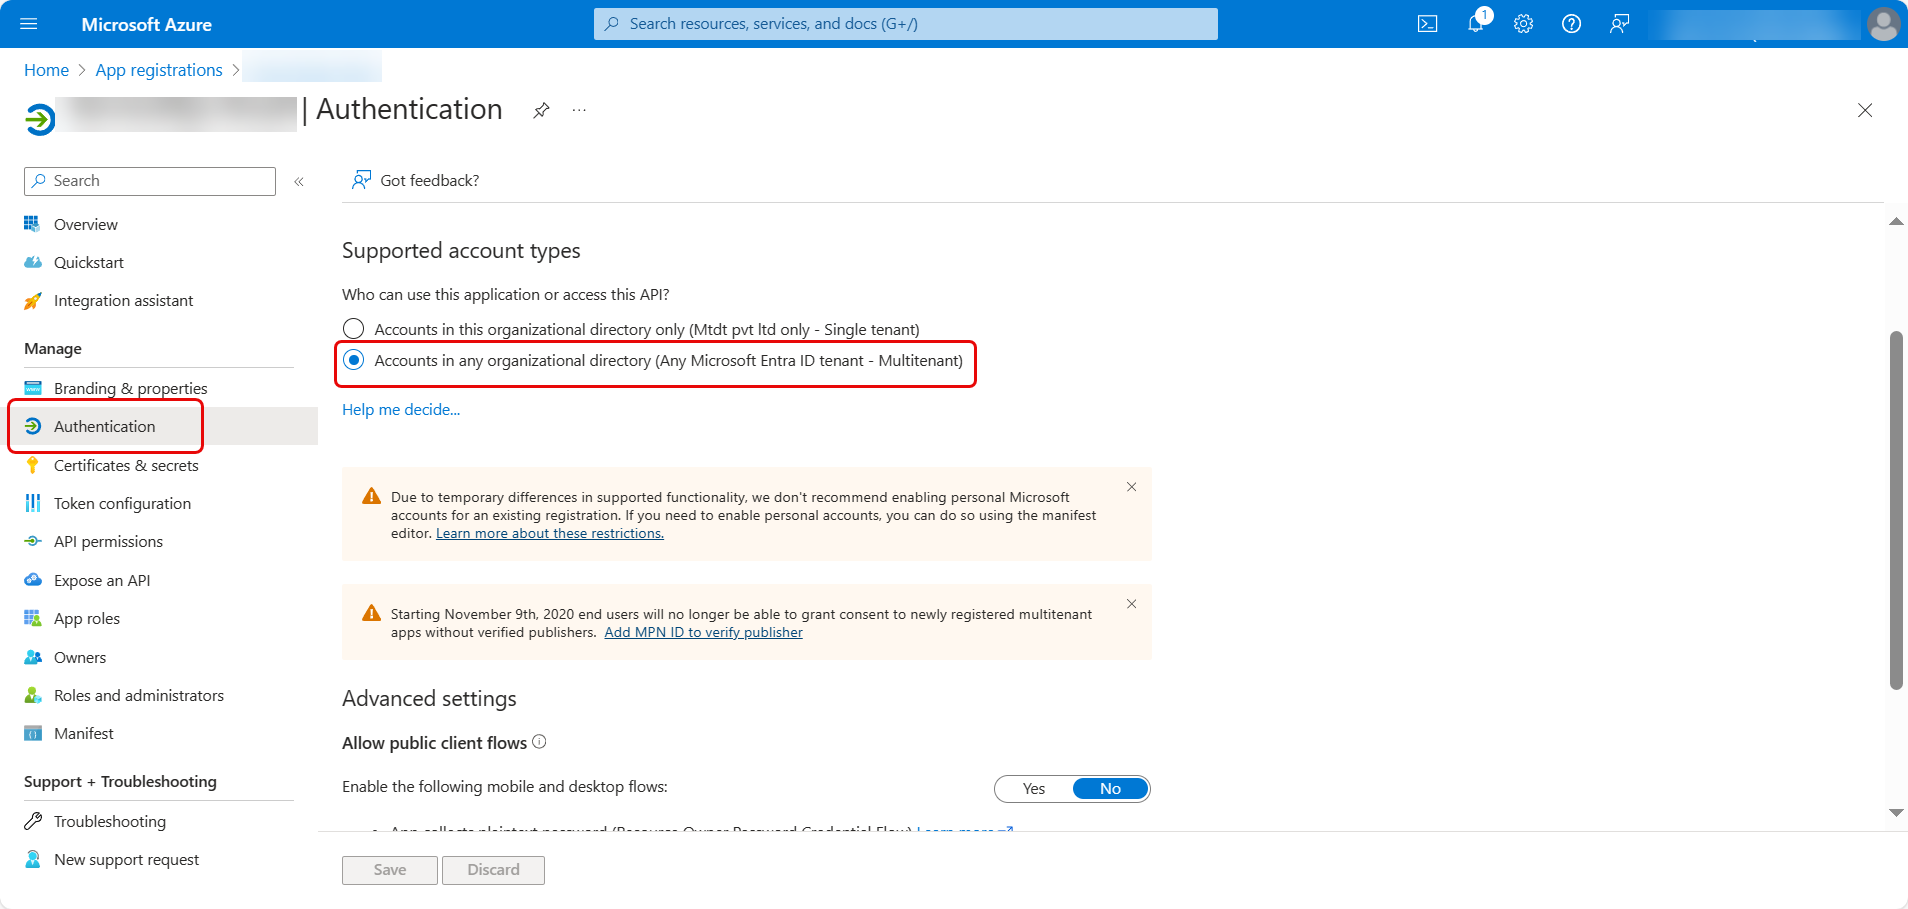
Step 17: Next, login to the Microsoft Azure portal, navigate to App Registrations > Motadata Virtual Agent > Manage > Authentication tab and enable the "Accounts in any organizational directory (Any Microsoft Entra ID - Multitenant)" field in the Supported account types section.
After creating the app in Microsoft Teams, it is automatically registered in the Microsoft Azure portal. Therefore, you will need to set up the authentication feature in Azure to enhance the functionality of your Teams application.
Step 18: In the Teams application, publish the App by clicking the Publish button and selecting "Publish to your org".
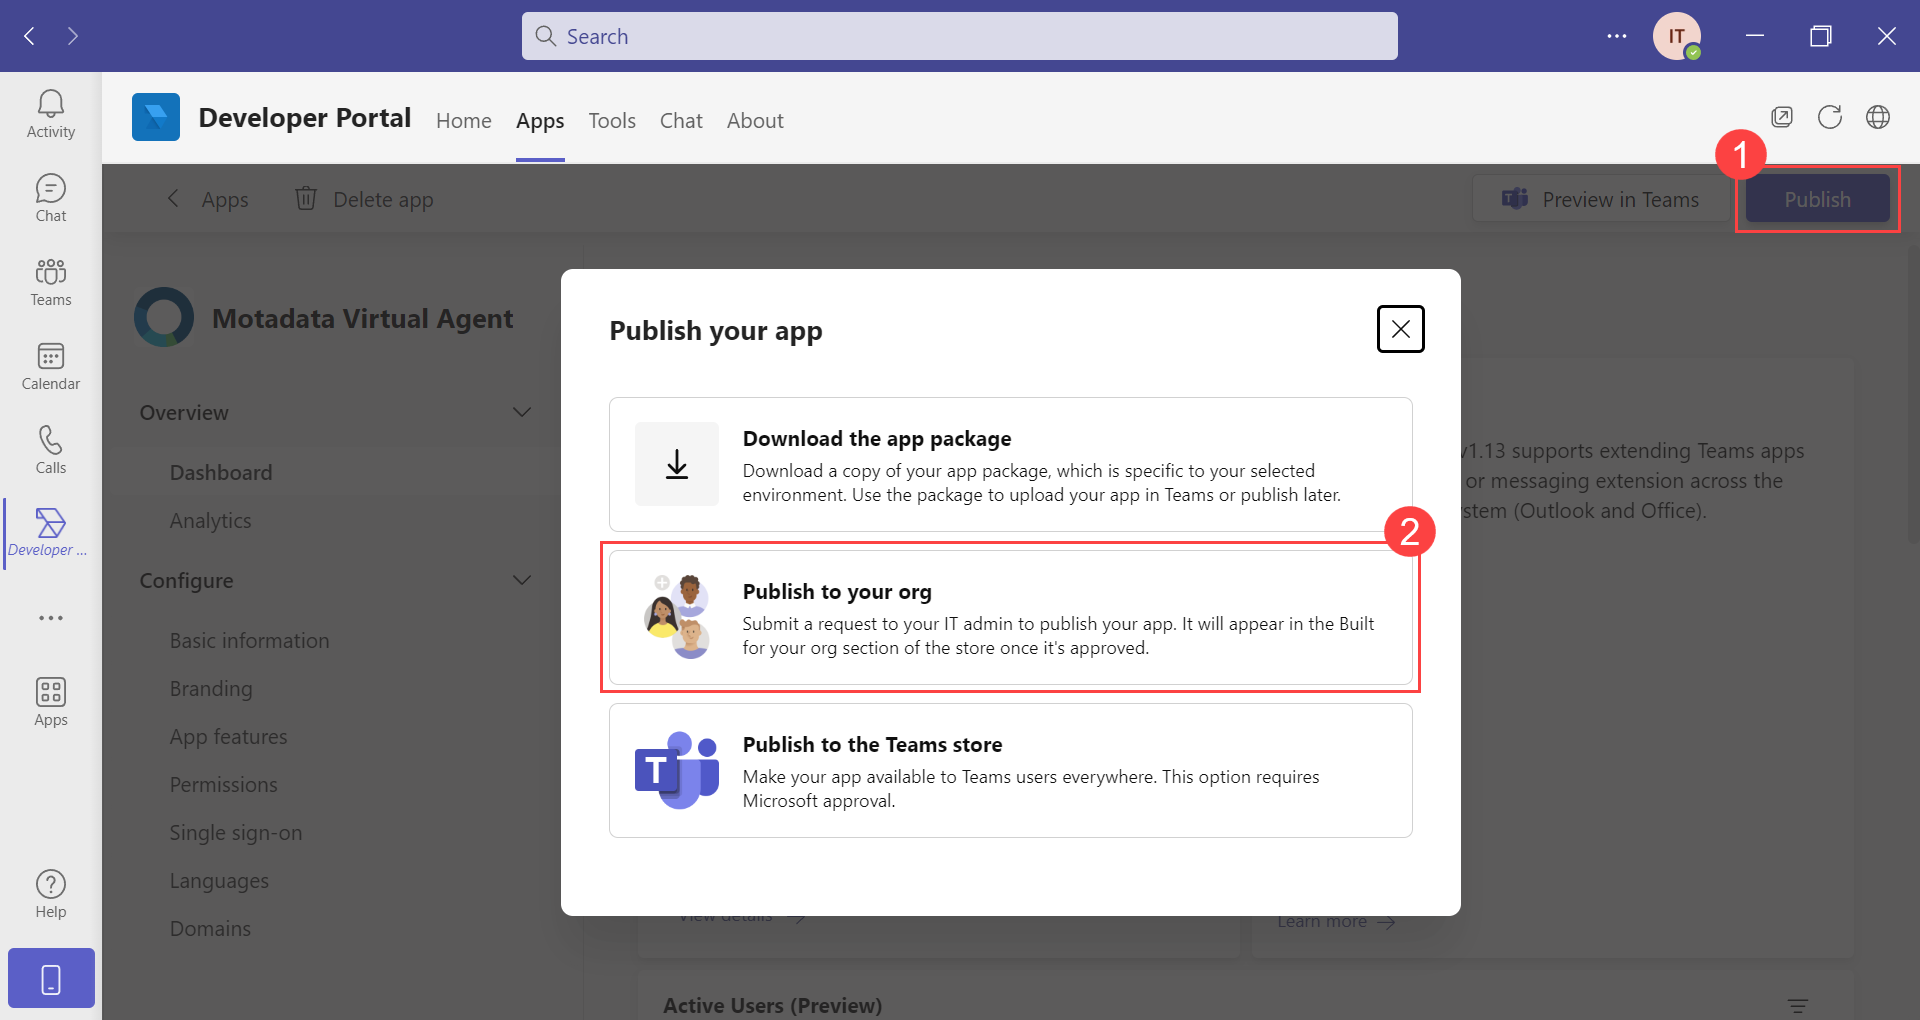
Once done, a request will be submitted to the IT Admin to publish the App. Once approved and published, it will appear in the apps list, as shown below.
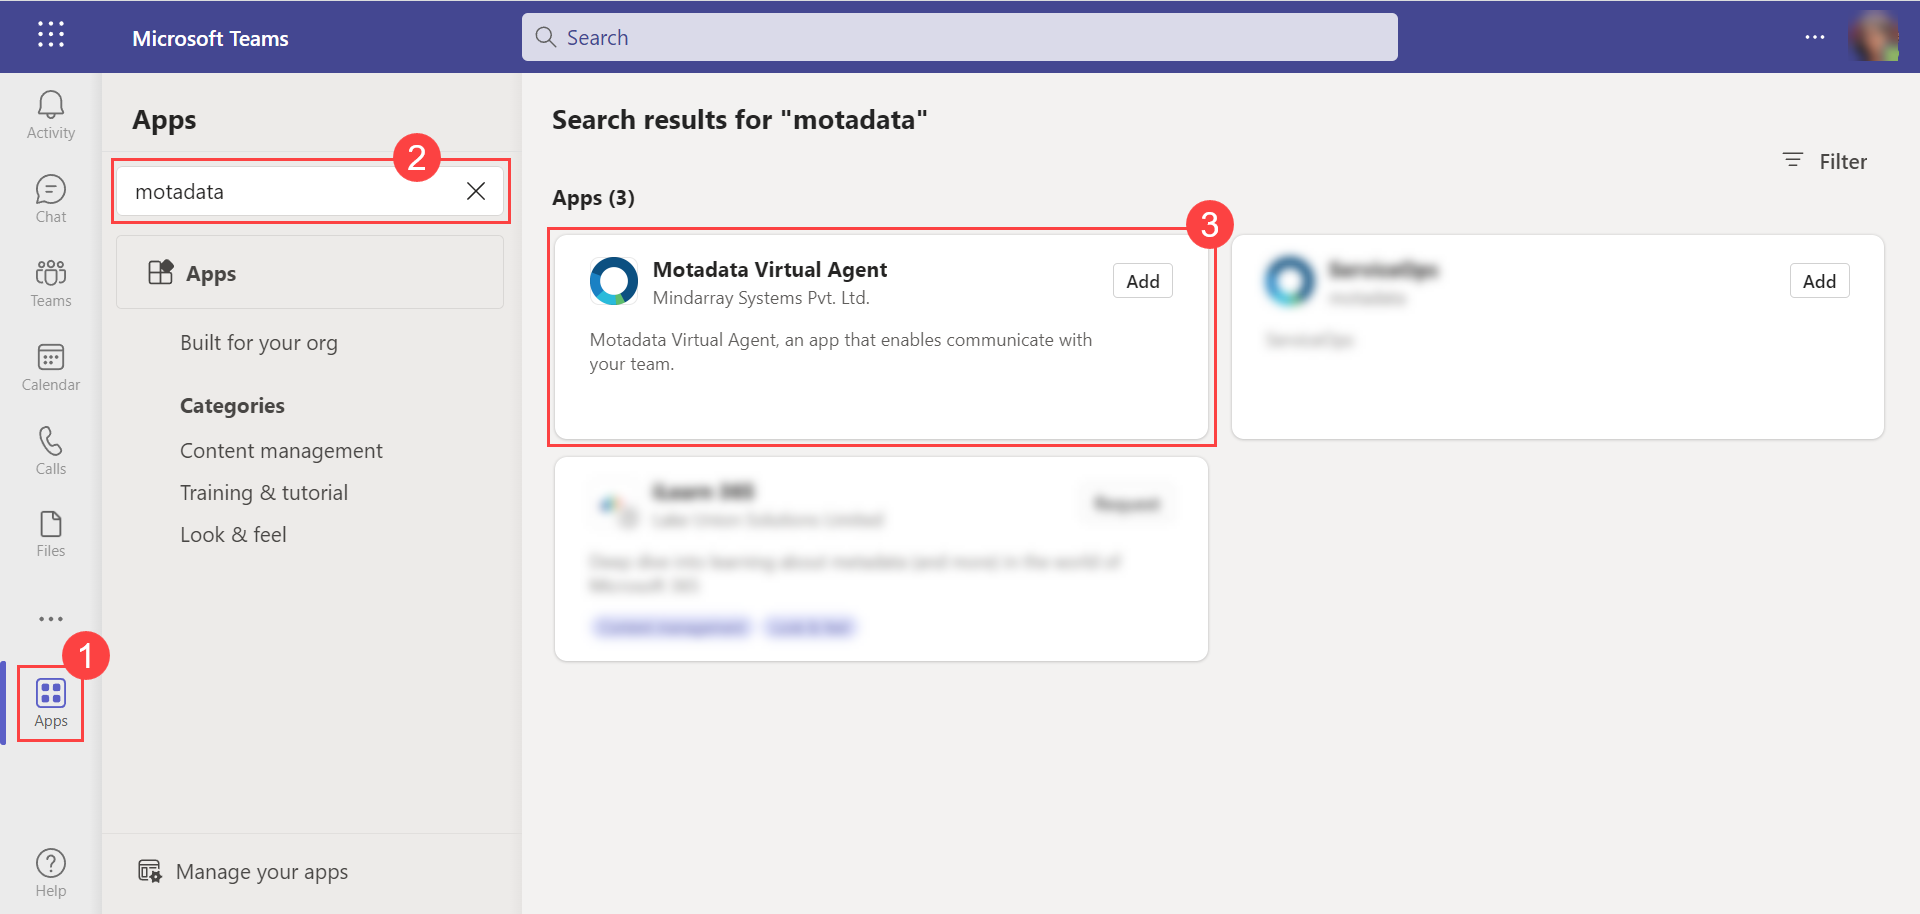
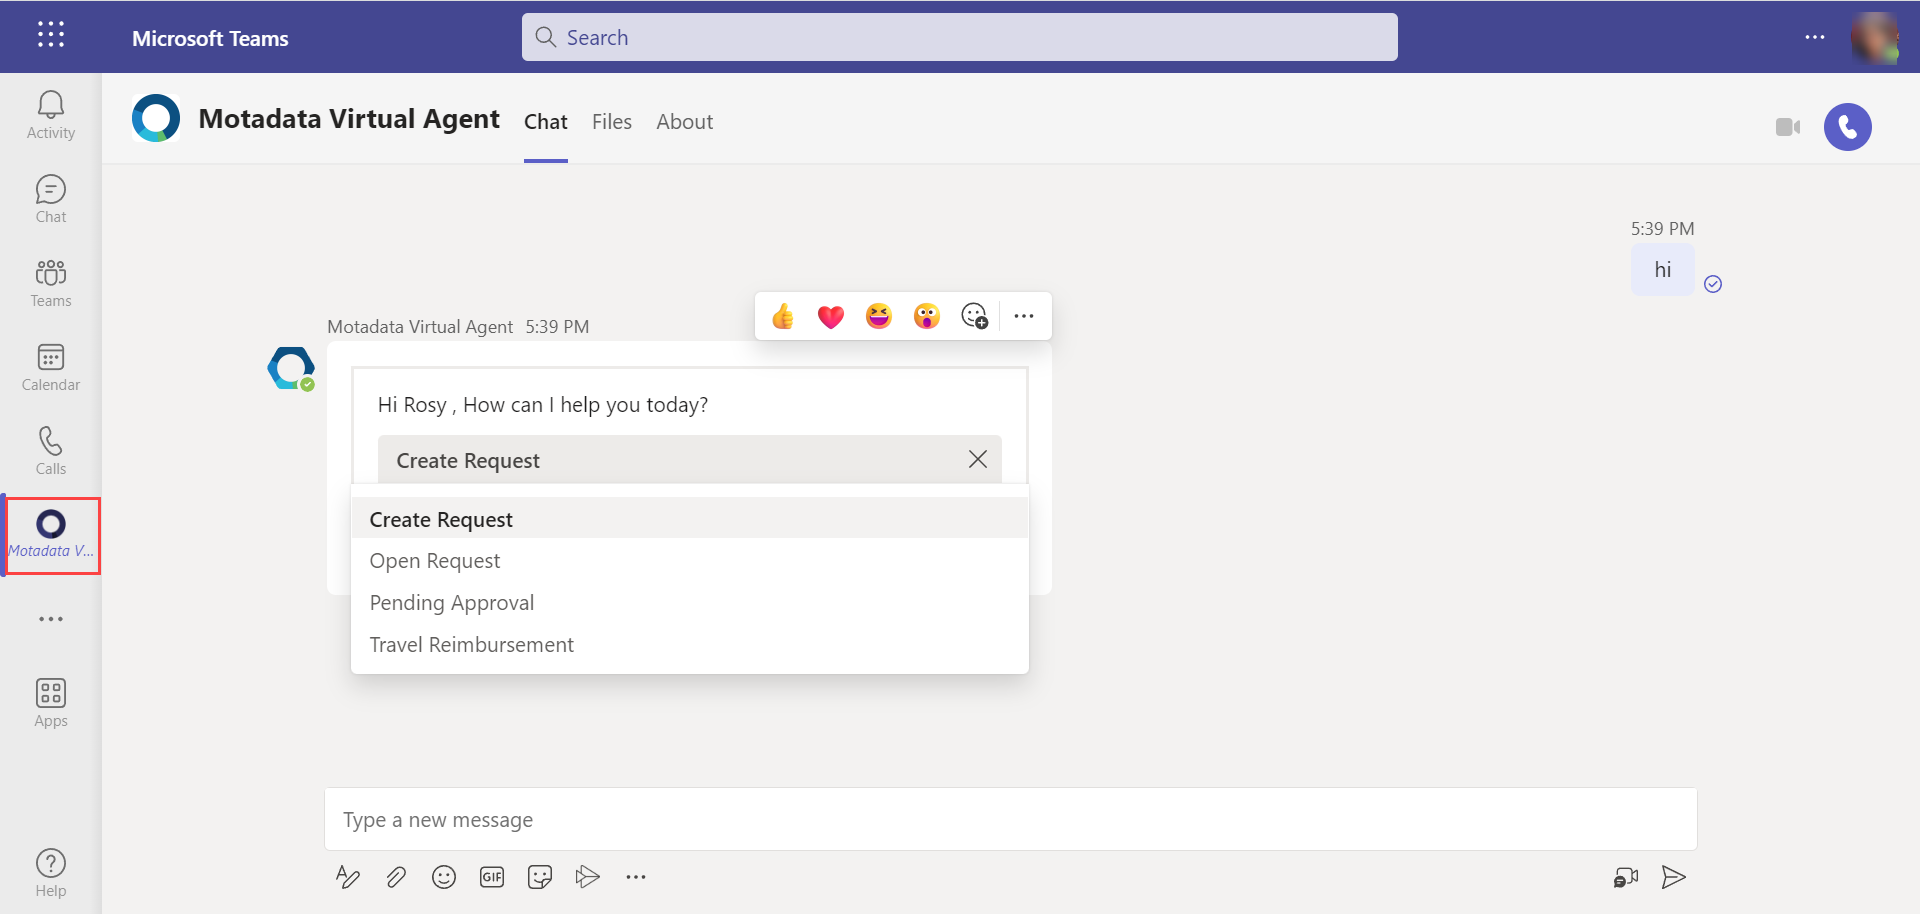
Step 19: Click on the App and Add it to the left panel.
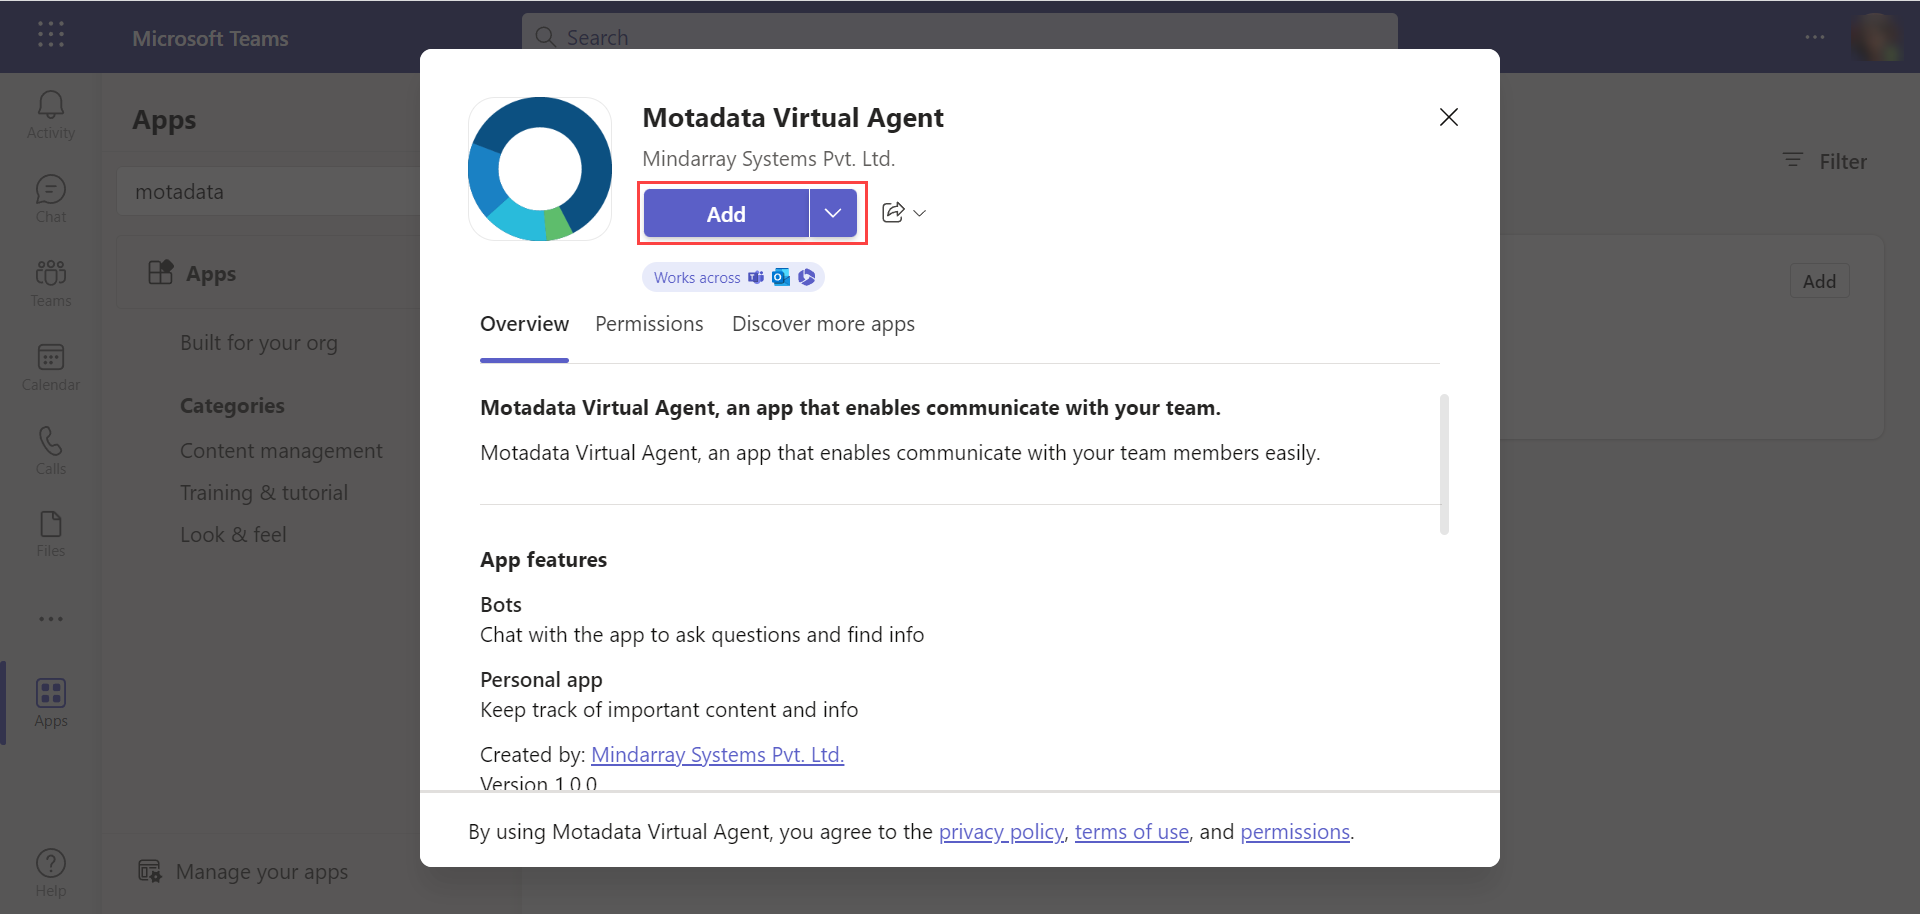
Step 20: Once added, type hi, and begin your conversation with the Motadata Virtual Agent.