App Integration
This tab enables to configure integration with the system and custom applications.
It consists of two tabs:
- System: Enables to configure integration with system and custom applications or those that can be used via Integration Connector. For example, the Microsoft Active Directory application.
- Custom: Enables to configure integration with Atlassian JIRA application.
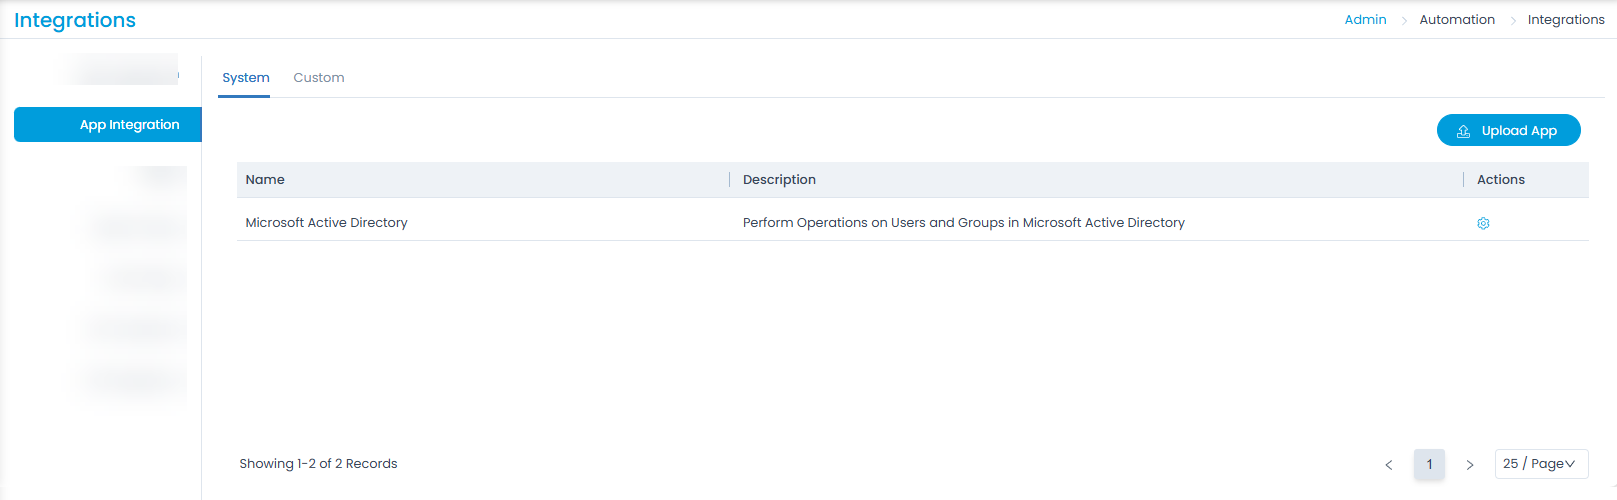
System
This tab enables to configure integration with system and custom applications or those that can be used via Integration Connector. For example, the Microsoft Active Directory application.
Also, you can upload the custom app using the Upload App button to integrate with ServiceOps and fulfill the custom requirements via Integration Connector.
To create a custom app, kindly contact the Motadata Support team.
Microsoft Active Directory
To integrate Microsoft Active Directory with the Integration Connector,
- An LDAPS certificate is required for Active Directory integration.
- If ServiceOps is hosted on SaaS and the Active Directory (AD) server is located on-premise, the Integration Connector must have network connectivity to both the SaaS instance and the on-premise AD server.
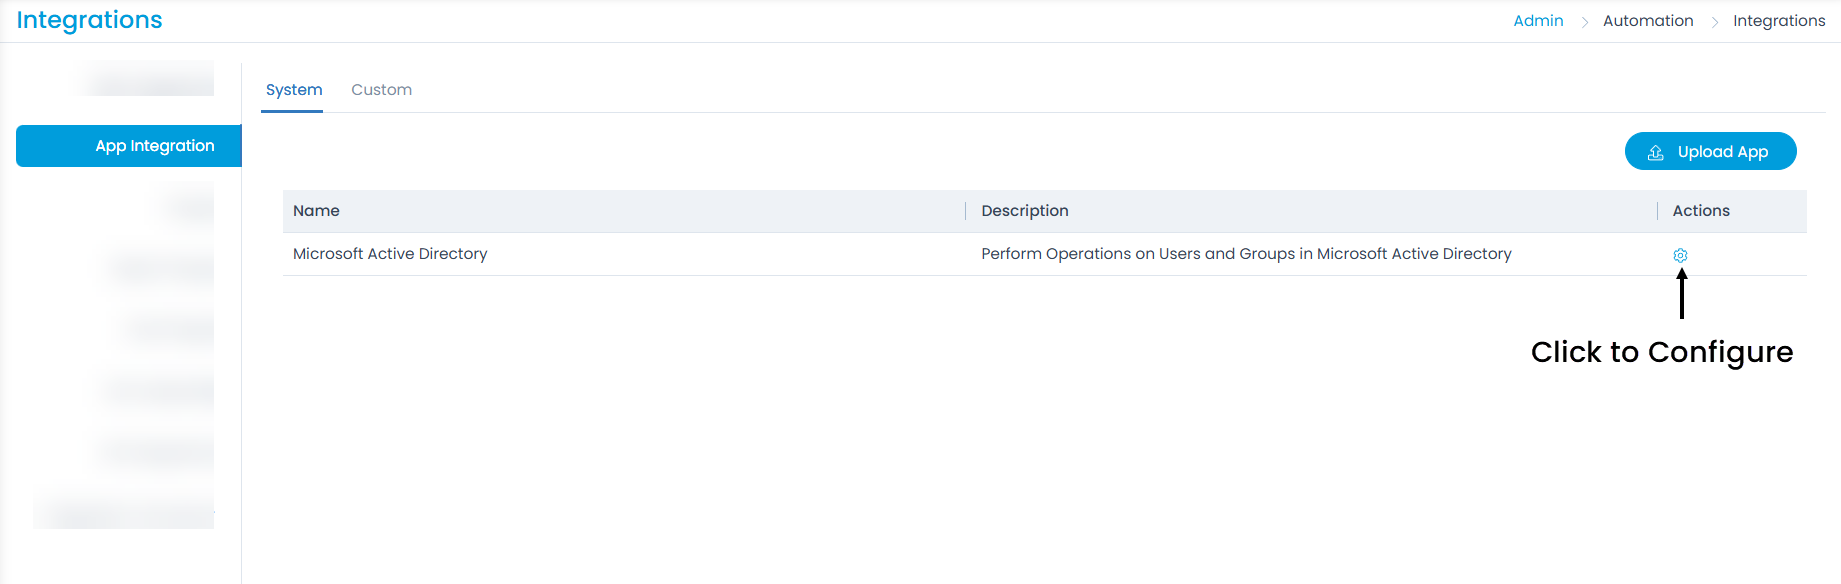
Navigate to Integrations > App Integration > System tab.
Click the Edit icon next to the Active Directory and a popup will appear.
- Click Add App Integration to configure integration with the Active Directory.

- Enter the following details:

| Parameter | Description |
|---|---|
| Name | Enter the name of the App integraion. |
| Integration Connector | Select the integration connector available from the Integration Connector List. |
| Description | Enter a brief description about the integration. |
| URL | Enter the URL of the LDAP server which begins with ldaps:// followed by the IP Address and Port Number. For Example: ldaps://172.16.12.247:636 |
| Base DN | A DN is a sequence of relative Distinguished Names connected by commas. It is the point from where a server will start looking for users in the Active Directory. You can add multiple Base DNs using +Add Base DN button. For Example: If the server has an origin as Motadata with the server Flotomate, mention the DN as shown in the above figure. |
| Username | Enter the username of the LDAPS user. |
| Password | Enter the password. |
| Enable SSL | Activate SSL to establish a secure connection. |
| Key Store | Enter the location where the LDAPS certificate was installed. |
| Key Store Password | Enter the password as "changeit". |
Once done, click Add, and the integration is created. Once connected, you can now perform operations on the Active Directory users via Workflows.
Custom
This tab enables to configure integration with Atlassian JIRA application.
What is JIRA?
JIRA is a software tool from Atlassian used for managing the project tasks, bug tracking, and other issues related to the software applications. Using ServiceOps for issue creation and management will become easier if you integrate JIRA with ServiceOps. Once integrated, you can generate project-wise tickets related to the issue types like bugs and new features from ServiceOps itself. Thus, you do not need to sign-in to the JIRA software and create the tickets specifically.
This functionality is available from version 7.2 onwards.
Prerequisites
- SSL certificate should be installed.
- JIRA, whether hosted on cloud or on-premise should have reachability from the ServiceOps server/VM.
- User should have a JIRA account.
Configuring JIRA in ServiceOps
To configure JIRA within ServiceOps, follow the below steps:
- Sign In to the ServiceOps portal.
- Click the Admin Settings icon on the top-right corner of the screen and navigate to Automation > Integrations > App Integration tab.
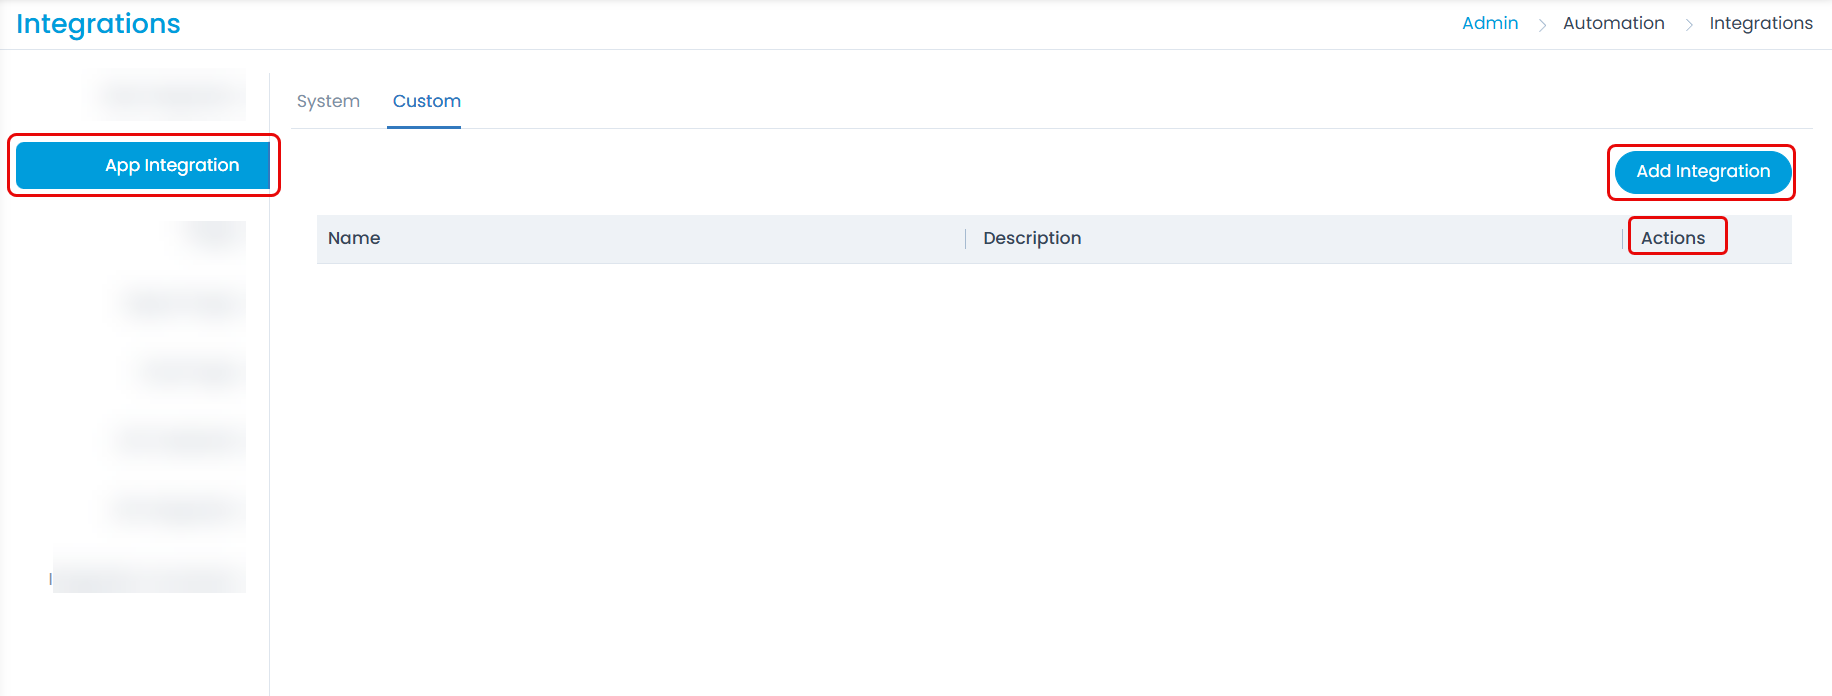
- Click Add Integration, and a popup appears.

Enter the following details:
- Name: Enter the name of integration.
- Description: Enter the description of integration.
- Domain URL: Enter the domain URL of the app to be integrated.
- Username: Enter the username of the user holding a JIRA account.
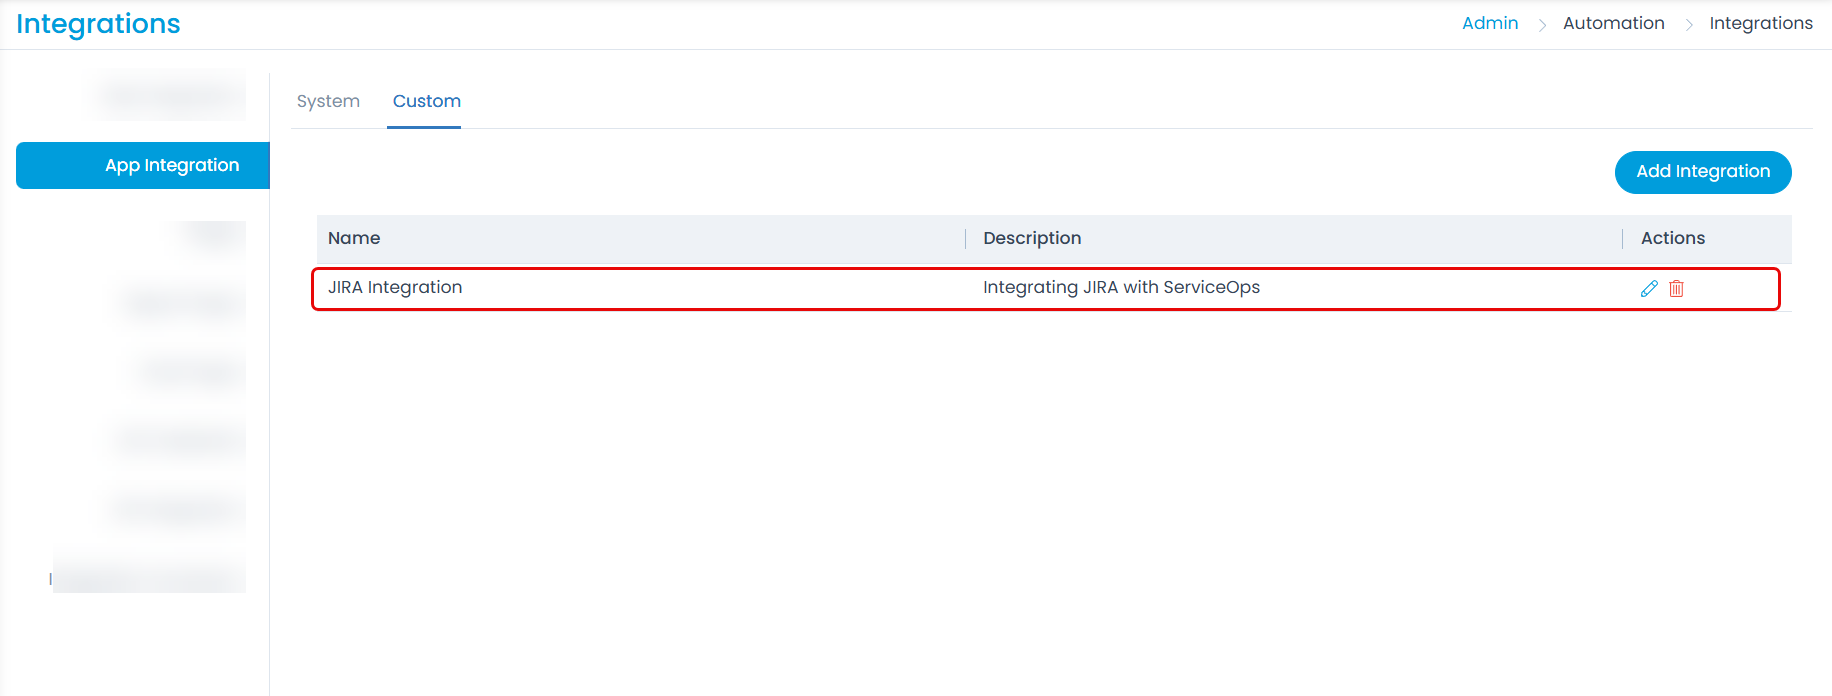
- Password: Enter the password. Once done, click Add, and it appears in the table as shown below.
- Only one JIRA Integration is allowed.
- Only one issue can be created from a single request.
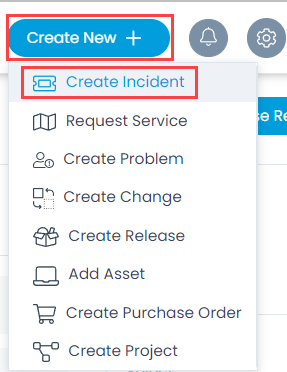
- Now to create an incident, click Create New +, and select Create Incident.
- The Create Incident page appears.

Enter the following details:
- Requester: Select the requester's name of the incident.
- Subject: Enter the subject of the incident.
- Description: Enter the description of the incident.
- Cc Emails: Add the Email Address of the users whom you want to copy. Once done, click Create.
- On the List page, click on the Subject, and open the Details page.
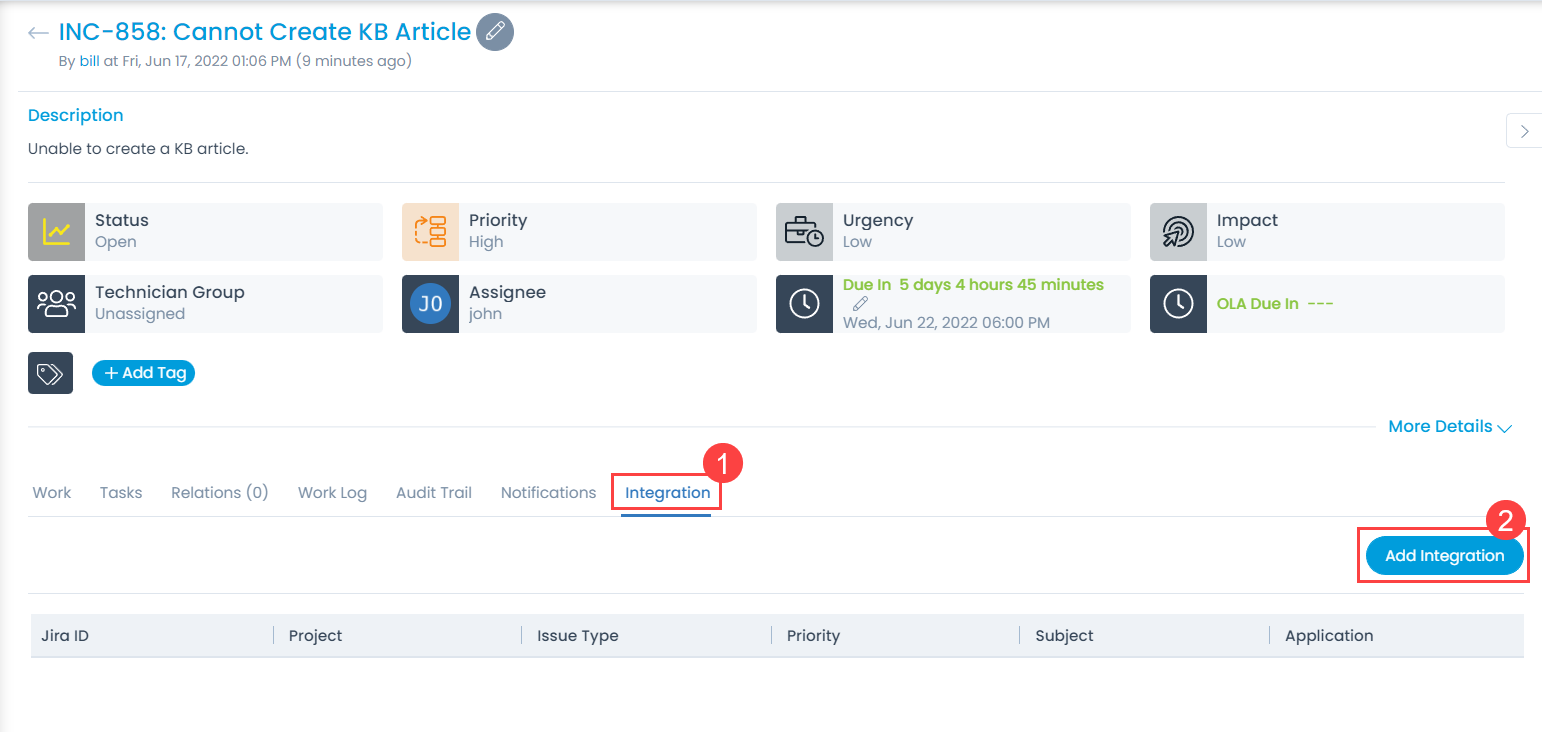
- Navigate to the Integration tab and click Add Integration. The following popup appears.

Provide the following details:
- Project: Select the project related to the incident.
- Issue Type: Select the type of issue. The options are: Sub-Task, Epic, Tech-Story, New Feature, Task, Story, Bug, and Improvement.
- Priority: Select the priority of the issue. The options are: Highest, High, Medium, Low, and Lowest. Once done, click Add, and the issue gets created as shown below.
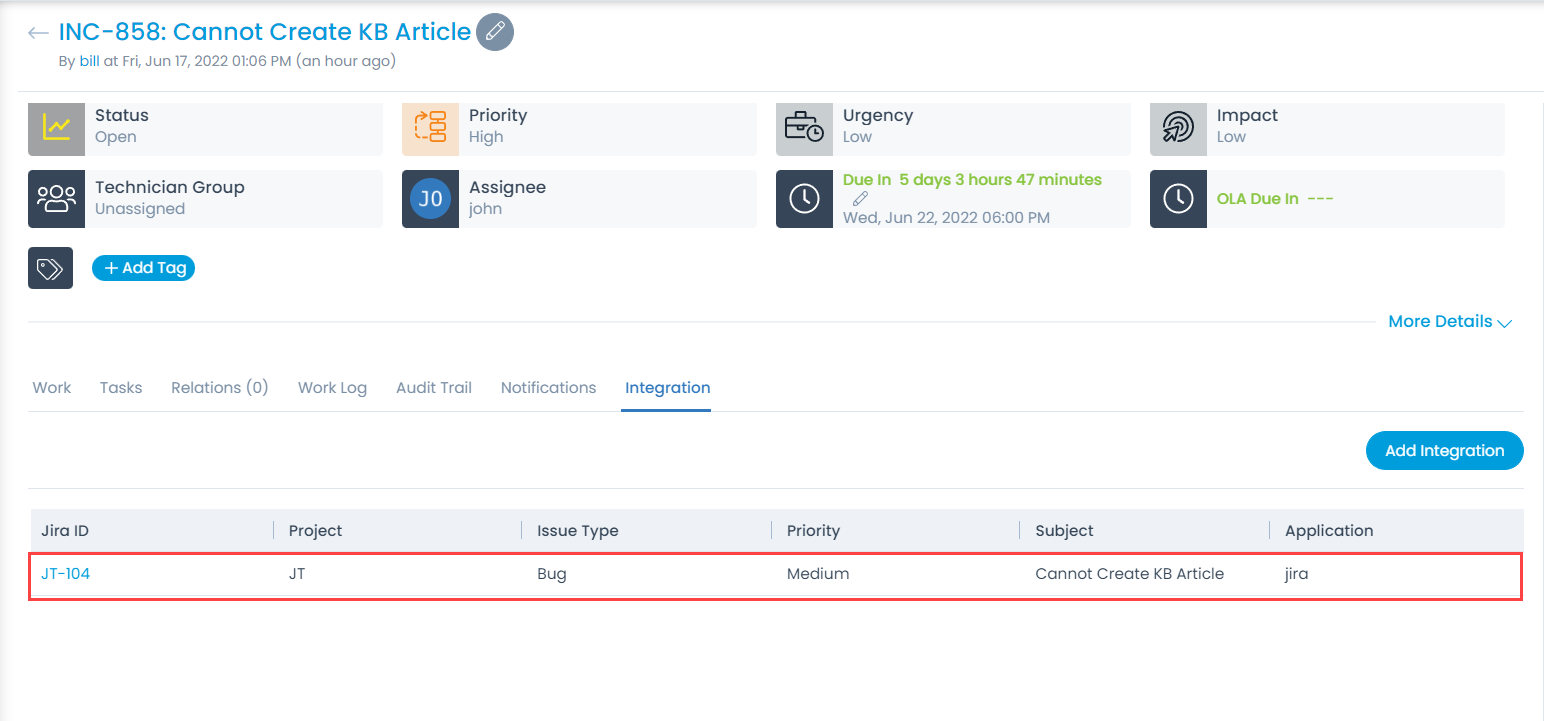
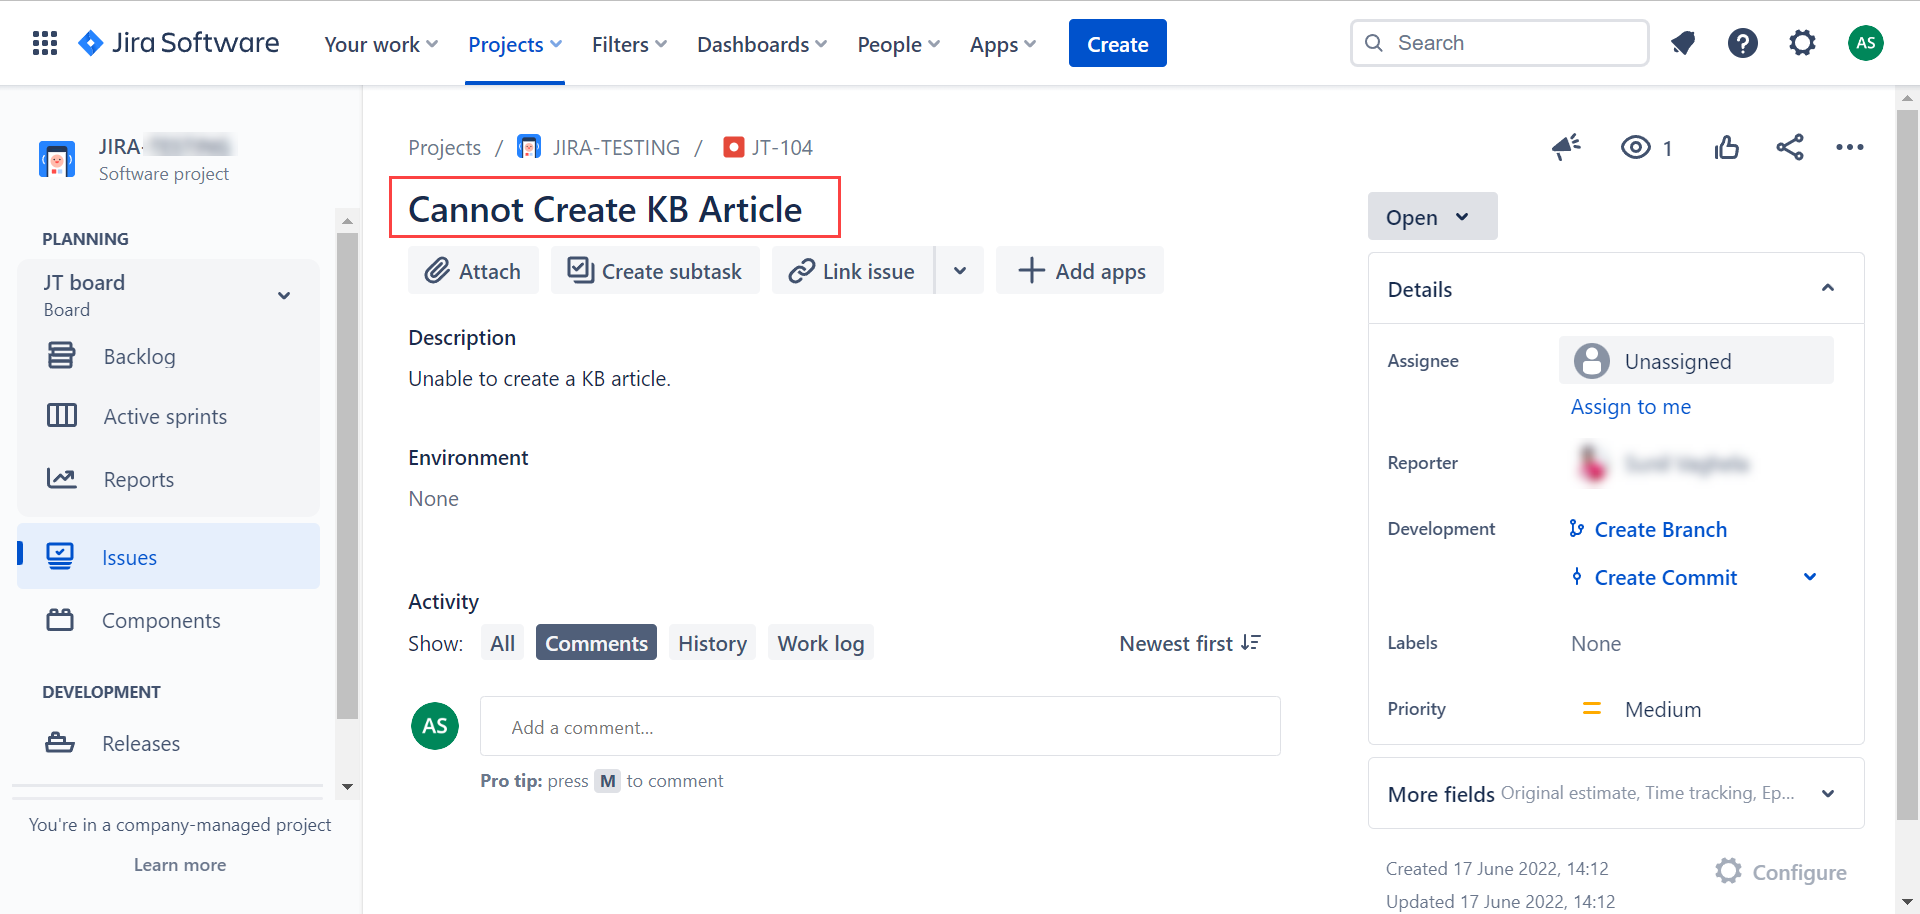
Here, you can click the JIRA ID, and review the created issue in the JIRA, as shown below.