Configuring Gmail for OAuth
Connect ServiceOps to Gmail using OAuth to send and receive emails securely, without storing passwords in the system.
What is OAuth?
OAuth is an Open Standard Authorization protocol that allows one application to authenticate with another on your behalf without sharing a password. It uses client credentials to obtain short-lived access tokens, keeping email communication secure.
This functionality is applicable from version 8.1 and above.
How OAuth Works with ServiceOps
ServiceOps uses the Google OAuth client you register as a secure intermediary for email authentication. During setup, you provide the Client ID, Client Secret, and Scope to ServiceOps. When ServiceOps needs to send or receive email, it contacts Google using these credentials to obtain a short-lived access token. Google validates the credentials against your OAuth client and returns the token. ServiceOps uses that token to access the mailbox and refreshes it automatically before it expires, so no passwords are stored in ServiceOps at any point.
Prerequisites
- A Google account with access to Google Cloud Console.
- IMAP or POP3 must be enabled on the Gmail account before configuring it for incoming email.
- The Redirect URL must use HTTPS. A valid SSL certificate is required on the ServiceOps server.
- ServiceOps version 8.1 or above.
Configuring Gmail as OAuth Provider
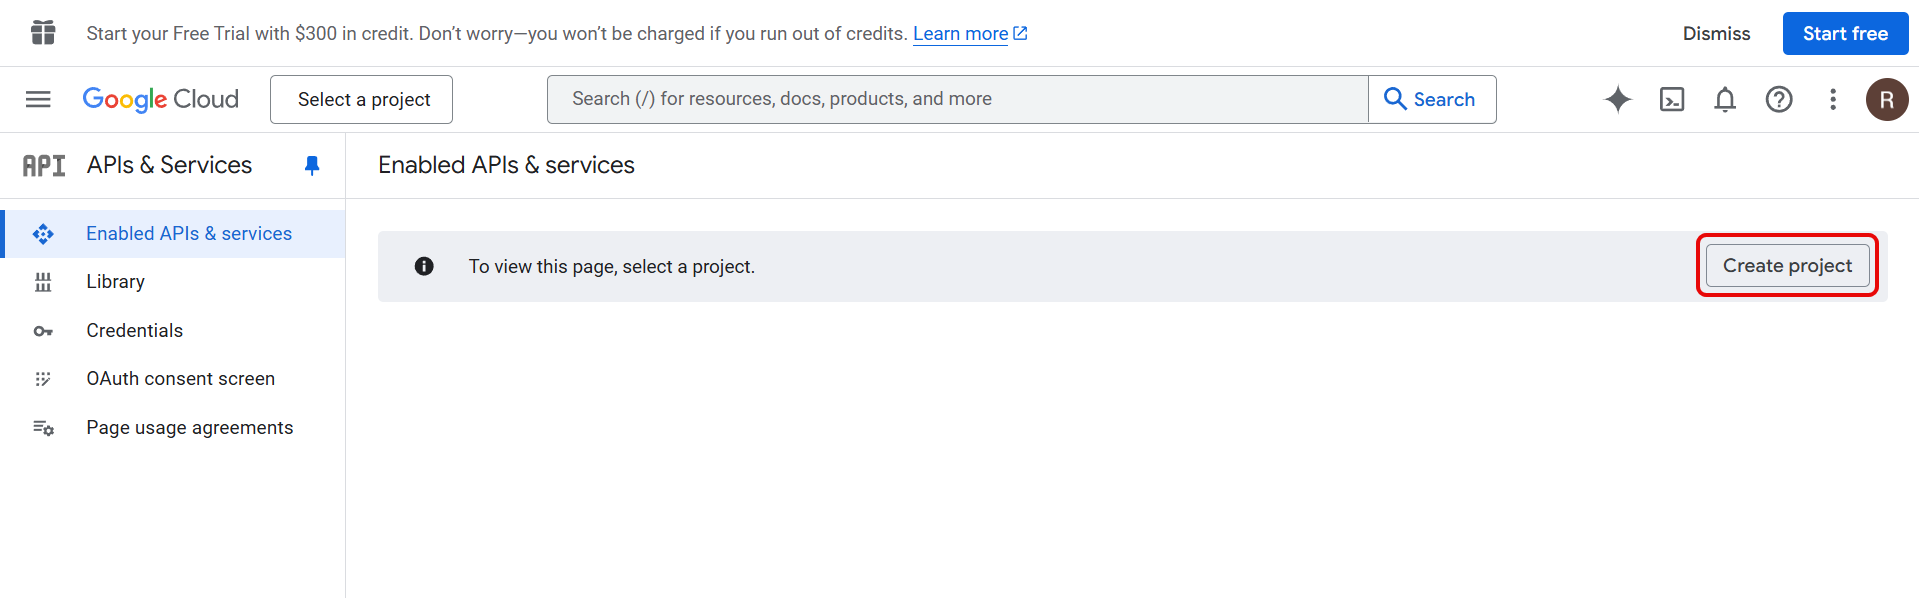
Step 1: Sign in to Google Cloud Console
Sign in to Google Cloud Console and click Create Project.
Step 2: Create a New Project
Enter the Project Name and click Create.
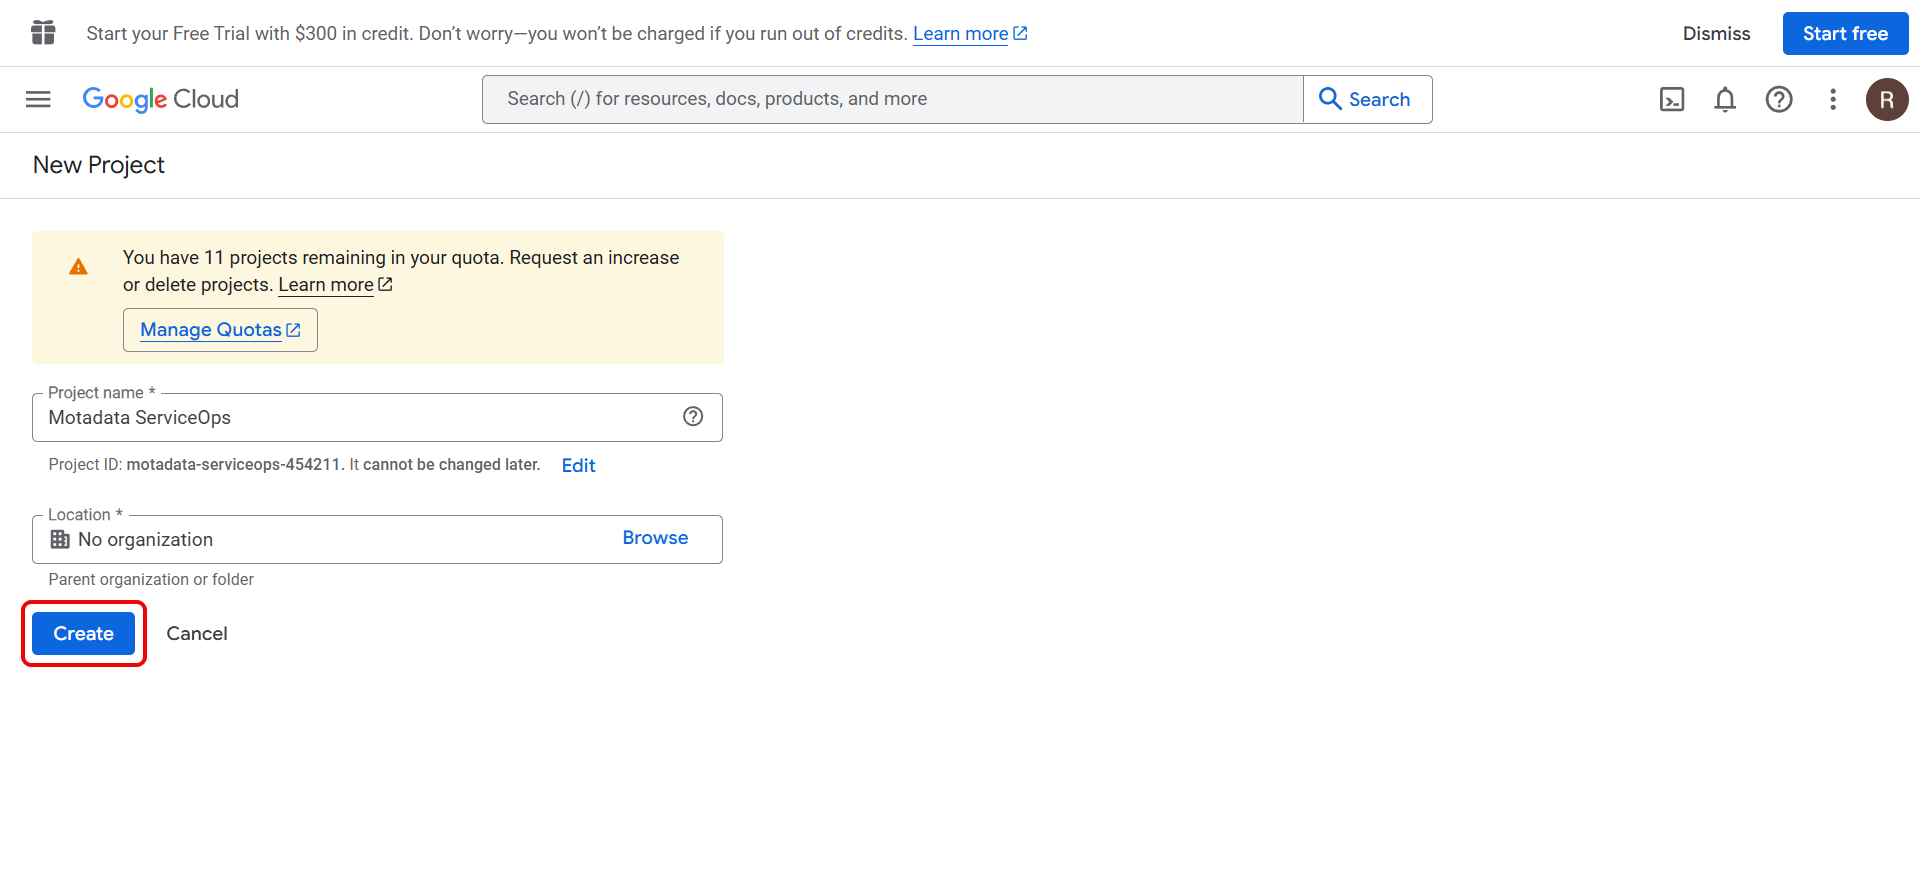
The project dashboard appears.
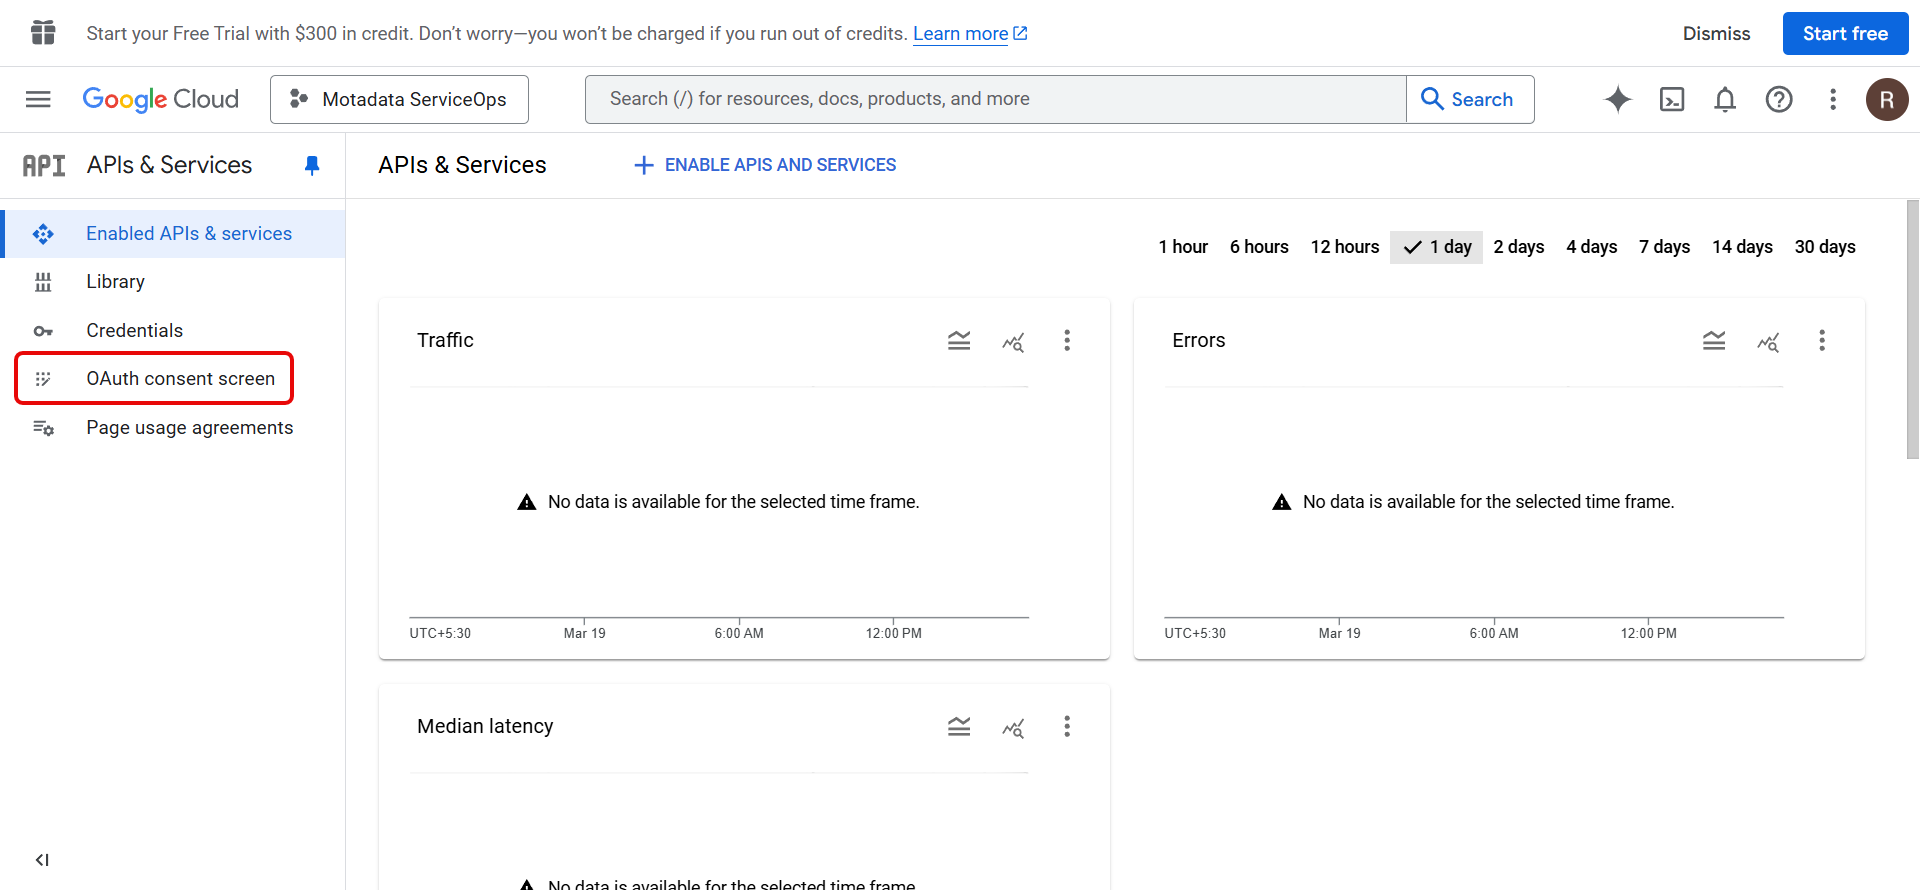
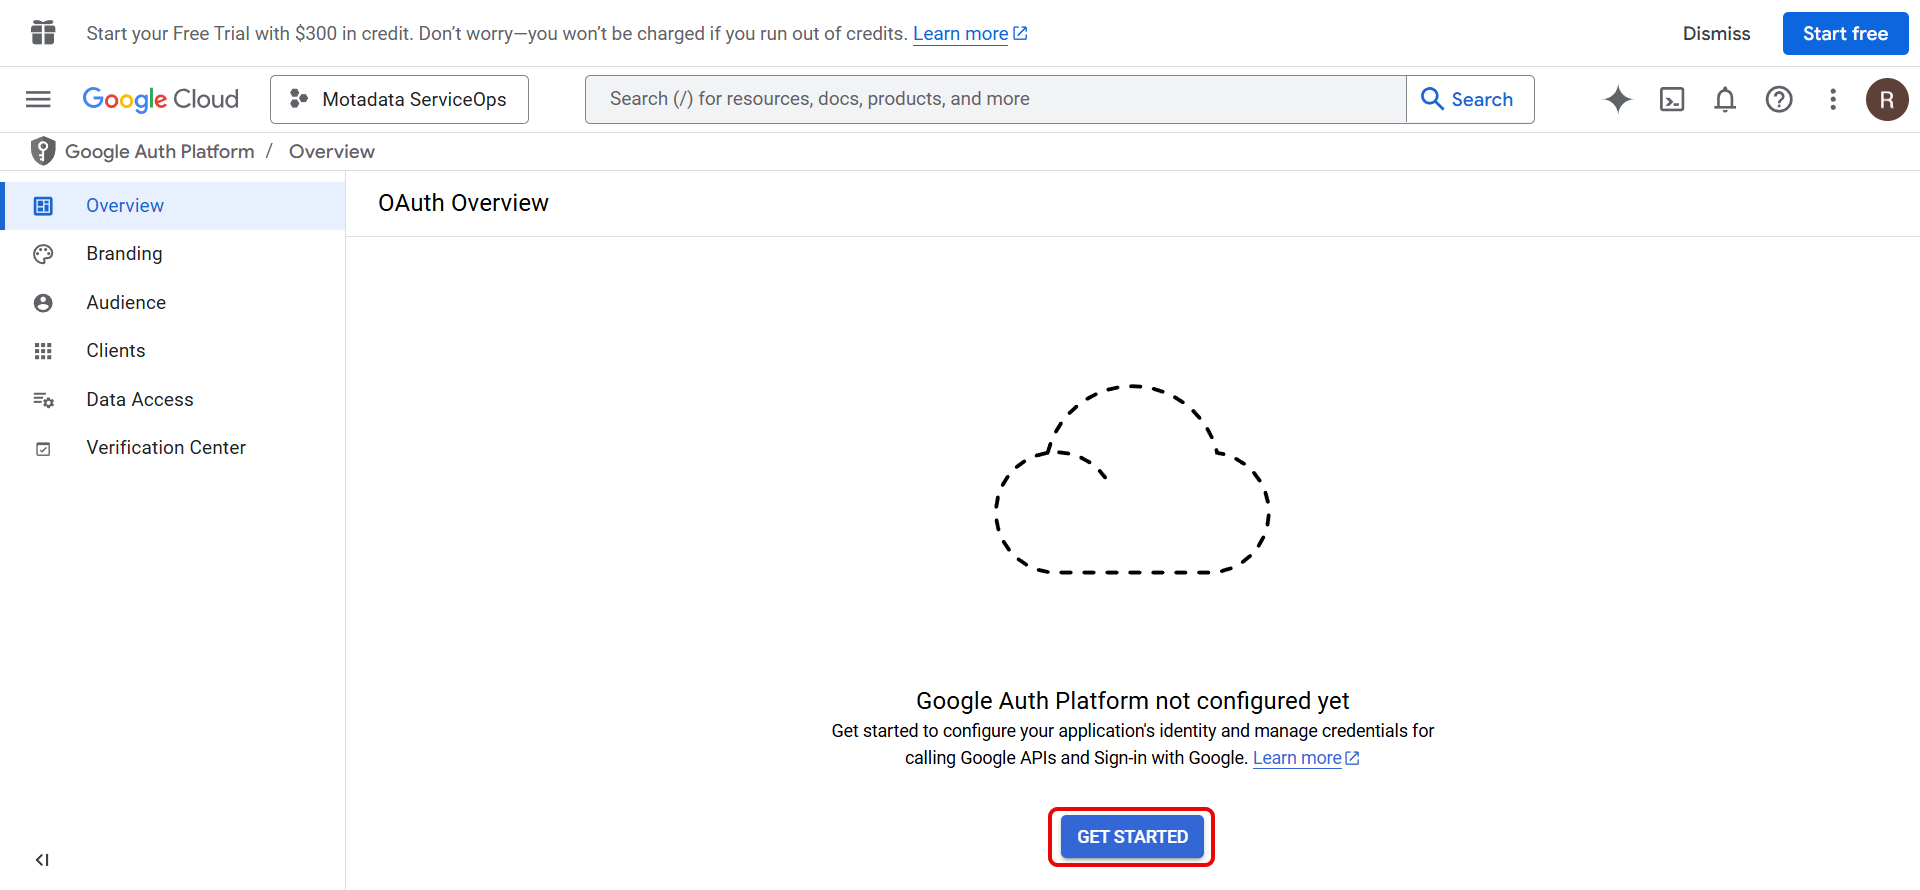
Step 3: Configure the OAuth Consent Screen
Go to the OAuth consent screen tab and click Get Started.
In the Overview tab, configure the project:
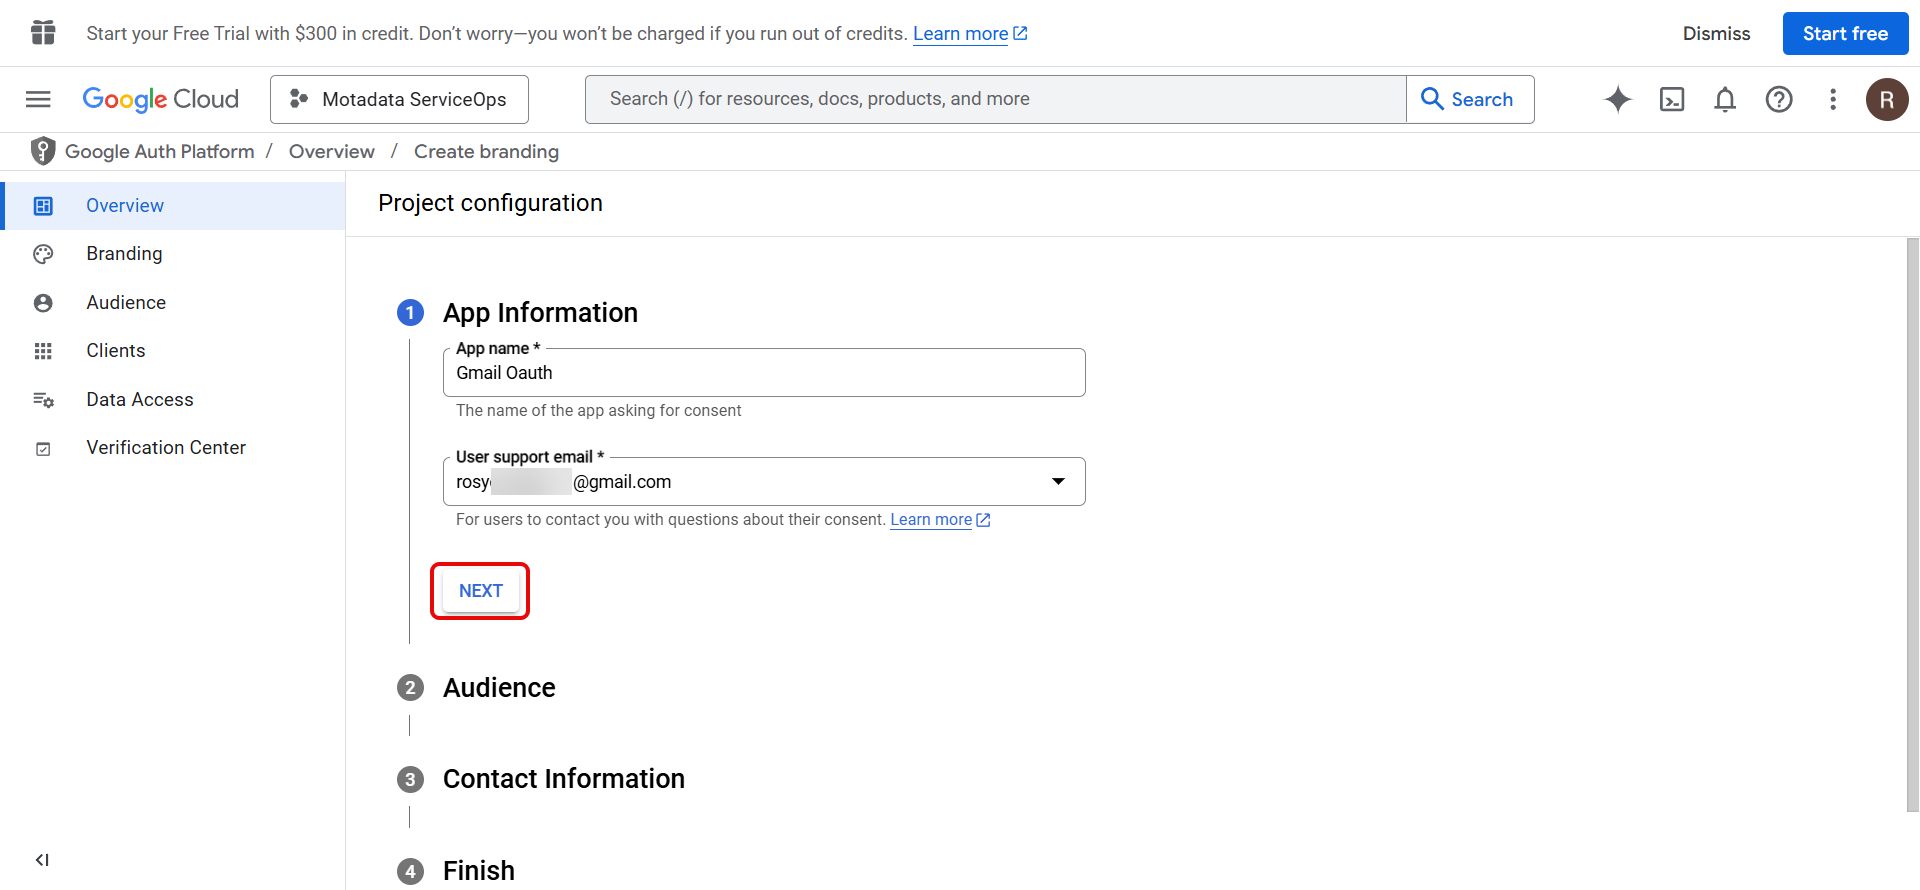
- Enter the App name and User Support Email, then click Next.
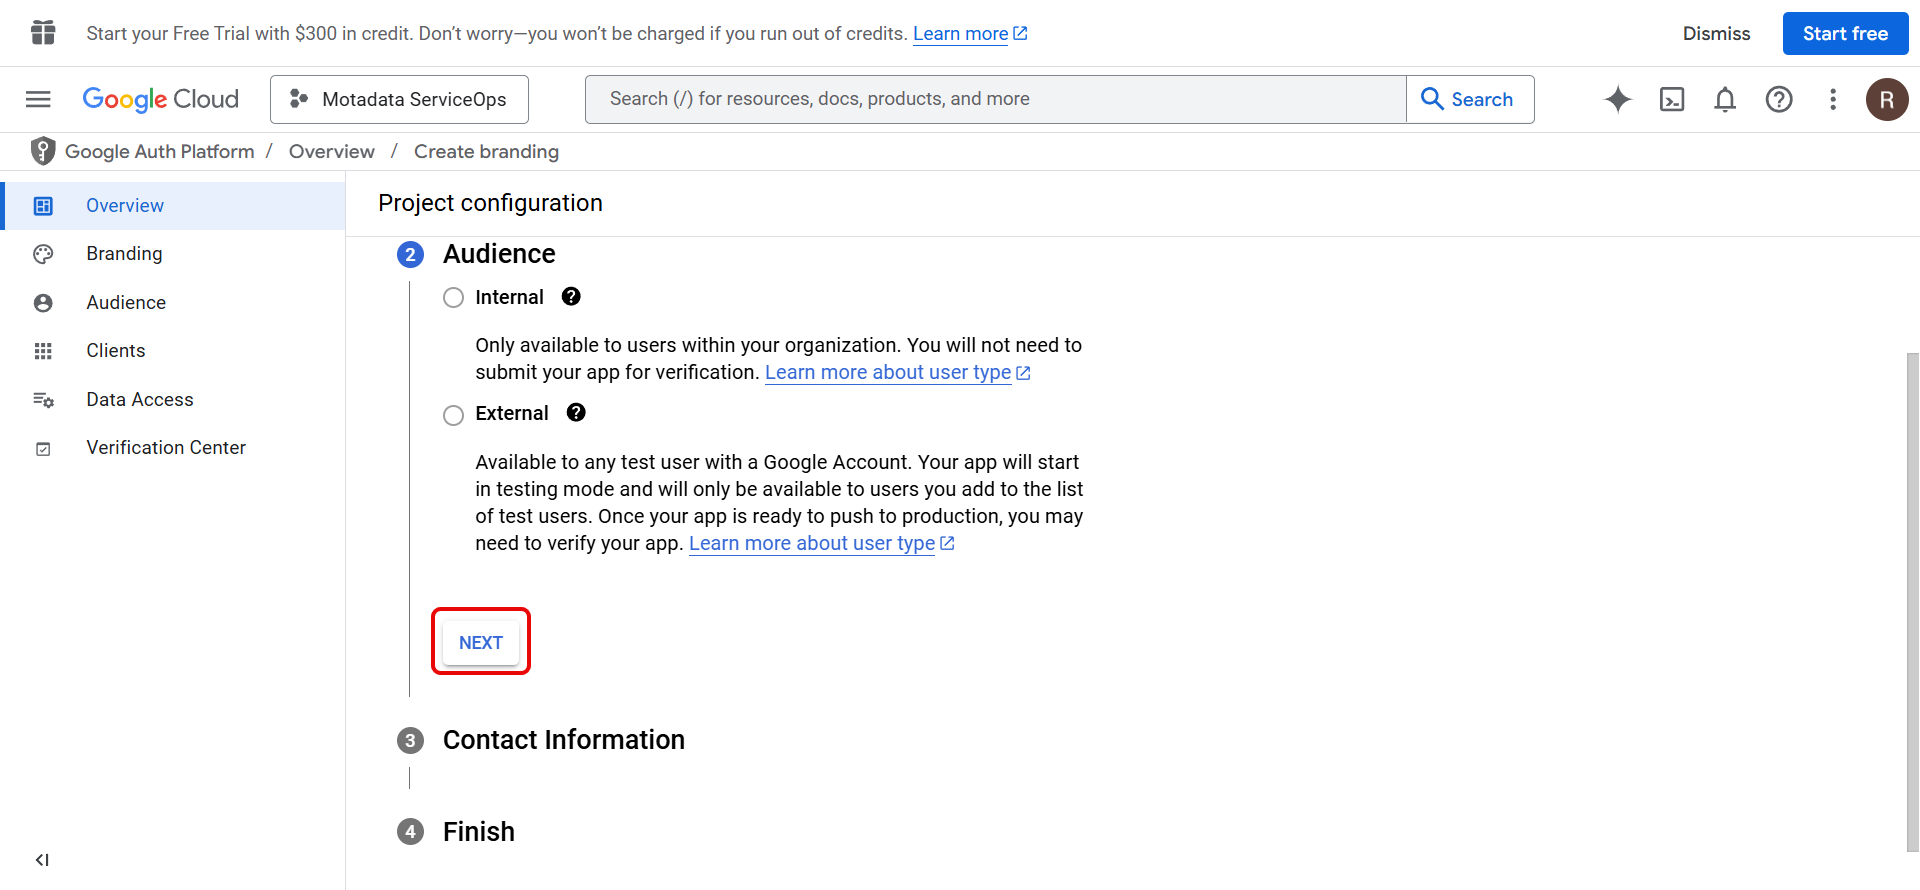
- Select the Audience:
- Select Internal if you are creating an app for your organization.
- Select External if you are testing using a standalone Gmail account.
- Enter the Contact Information and click Next.
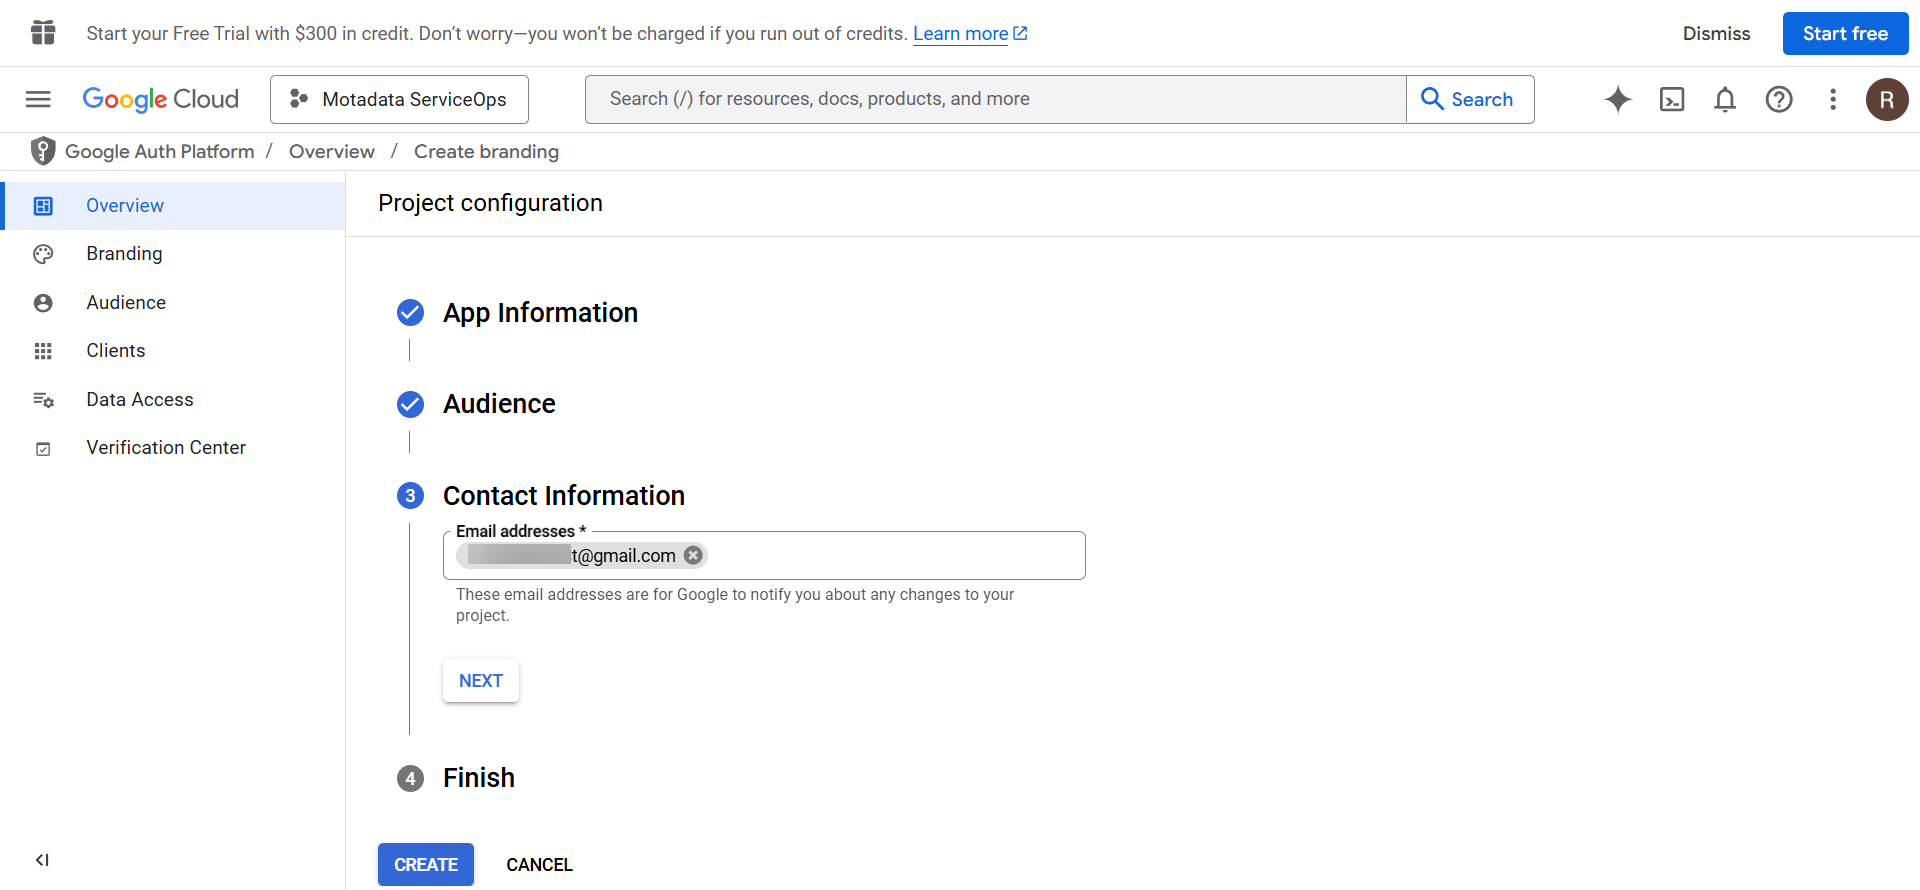
- In the Finish step, enable the I agree checkbox, click Continue, and then click Create.
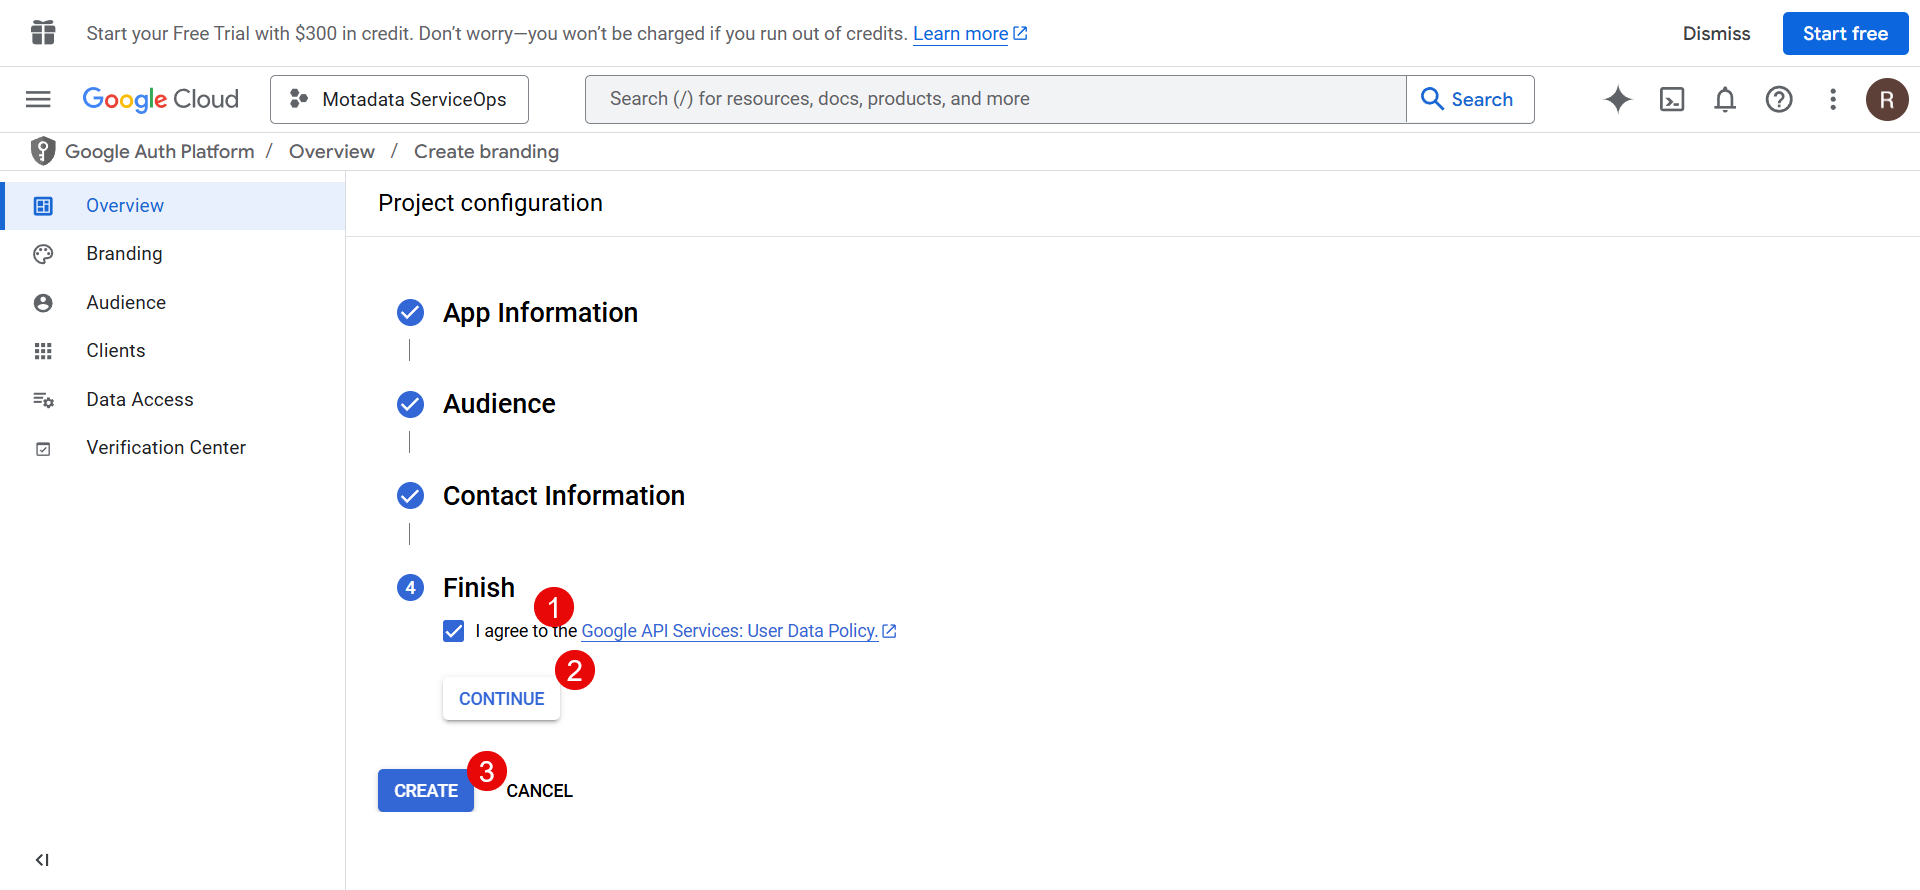
The app is created.
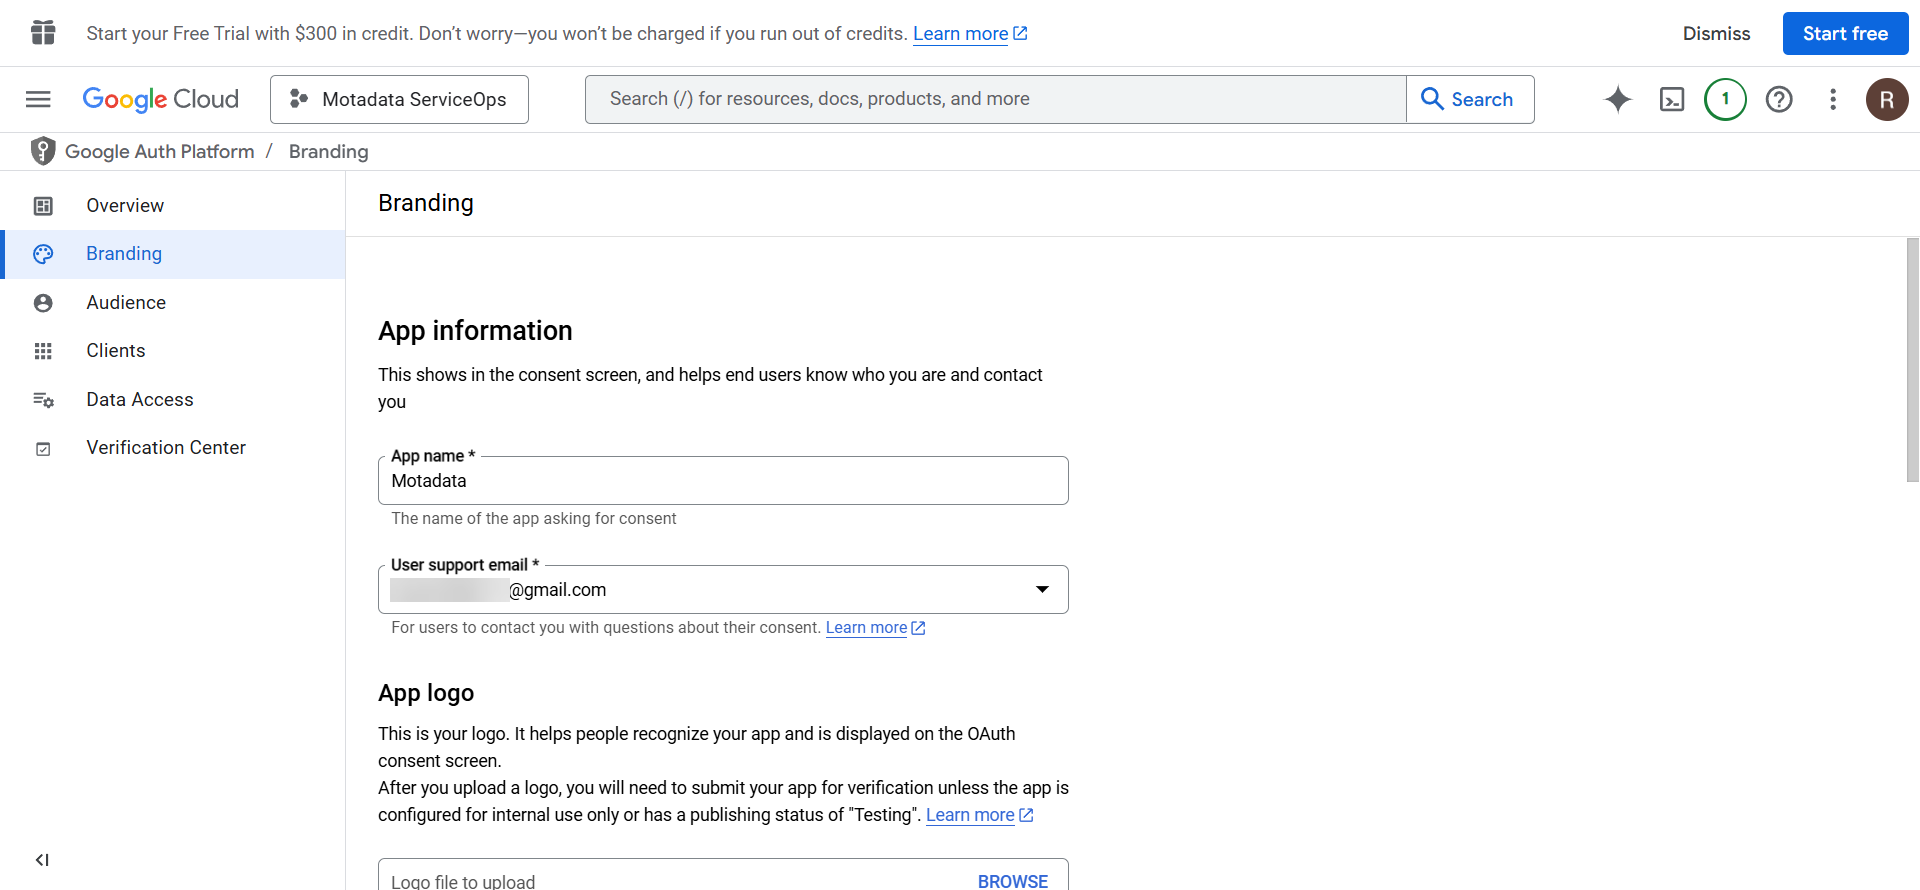
Step 4: Configure Branding (Optional)
Go to the Branding tab and configure details such as App Logo, App Domain, and Authorized Domain.
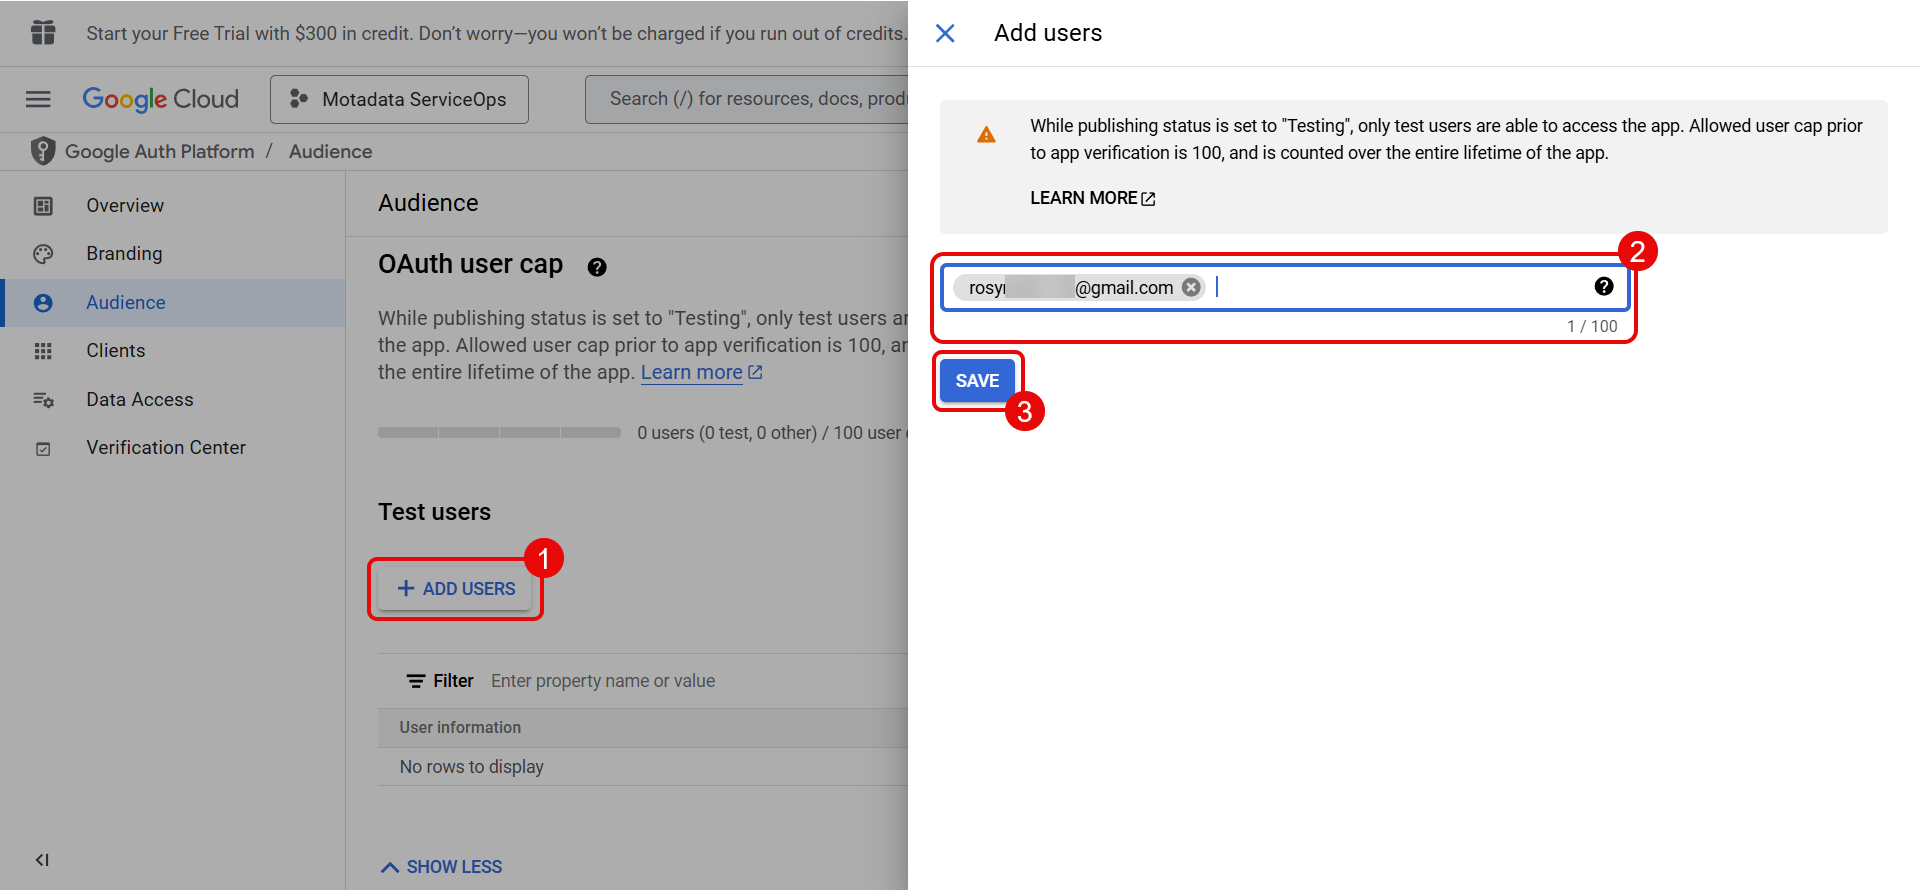
Step 5: Add Test Users
In the Audience tab, add test users and click Save. Ensure you add yourself as a tester.
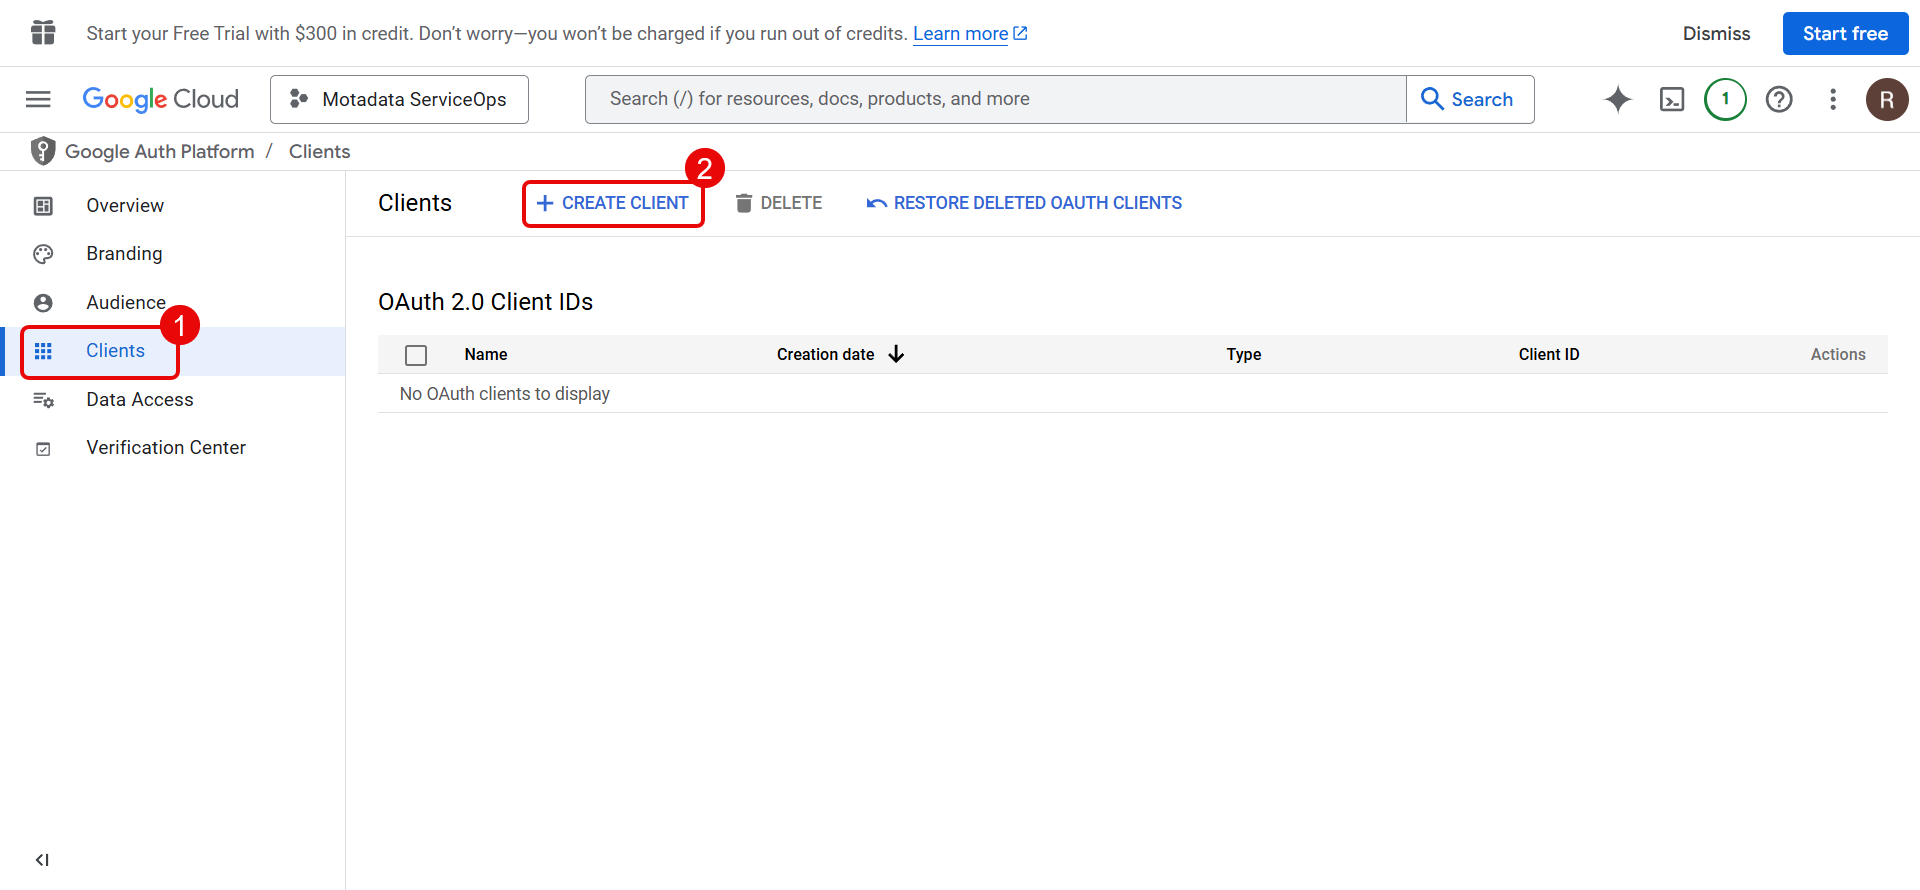
Step 6: Create an OAuth Client
Go to the Clients tab and click + Create Client.
Enter the following details:
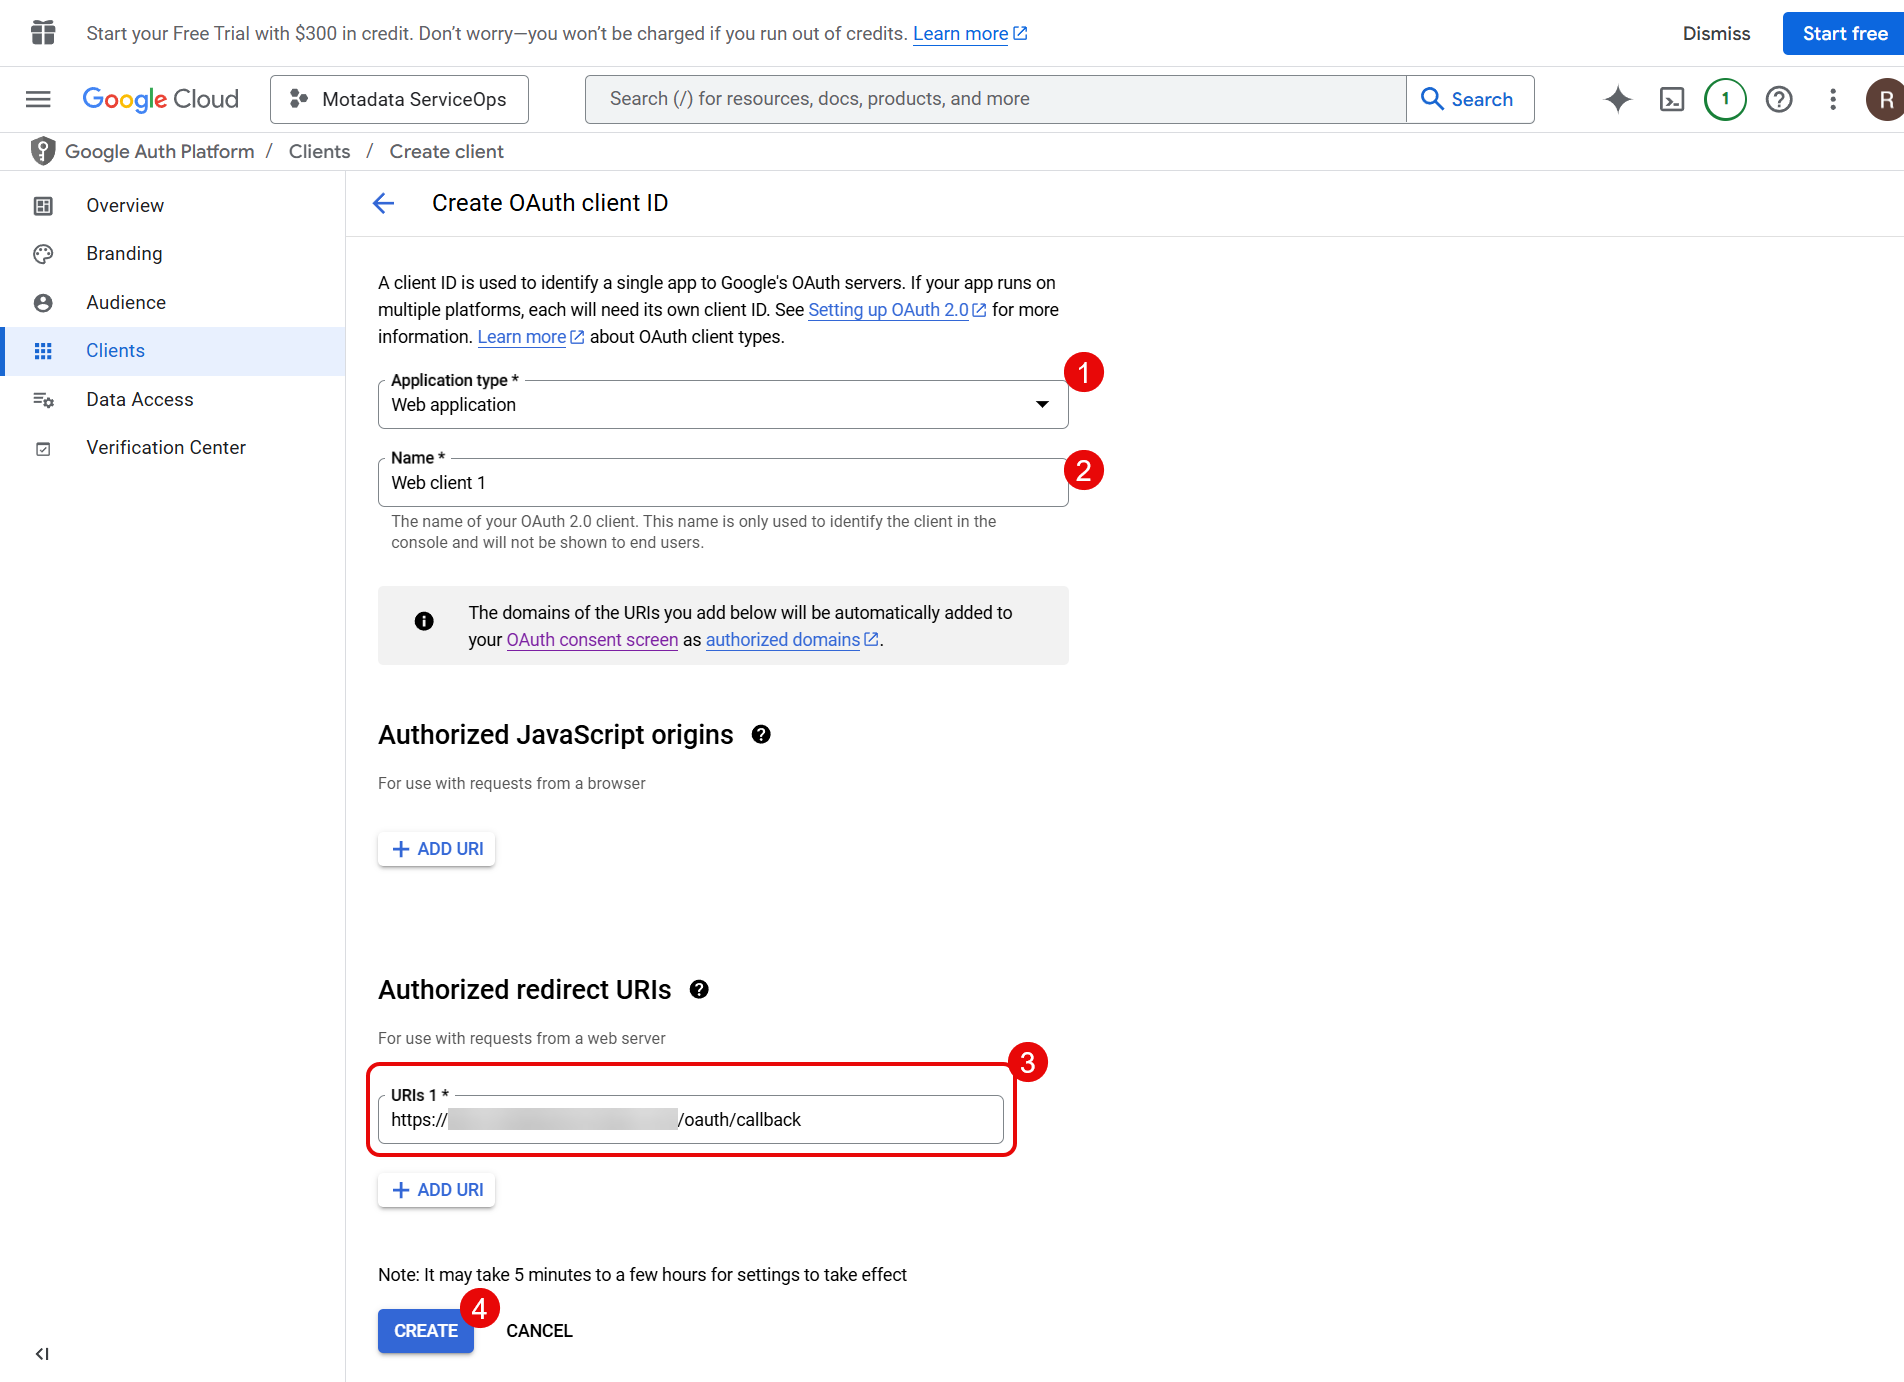
Application Type: Select Web Application.
Name: Enter the name of the web client.
Authorised Redirect URIs: Enter the redirect URI.
Syntax:
https://{server URL}/oauth/callbackExample:
https://dummy.com/oauth/callback
Click Create. The Client ID and Client Secret are displayed. Copy both values or download the JSON file.
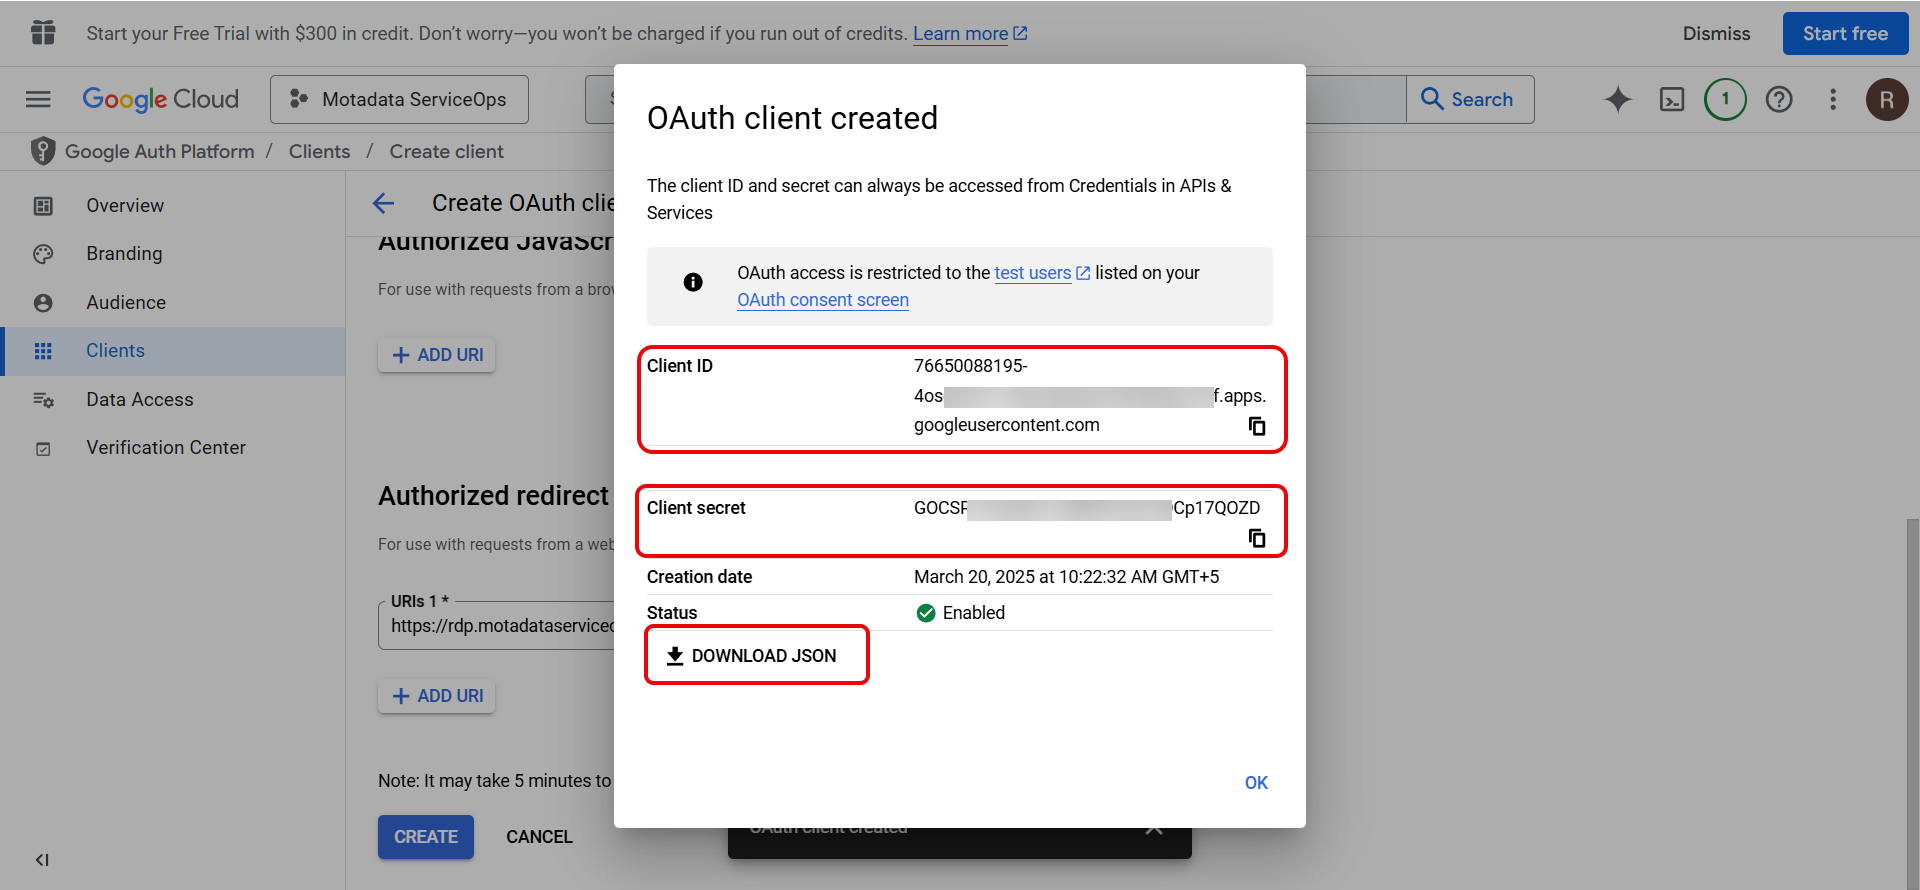
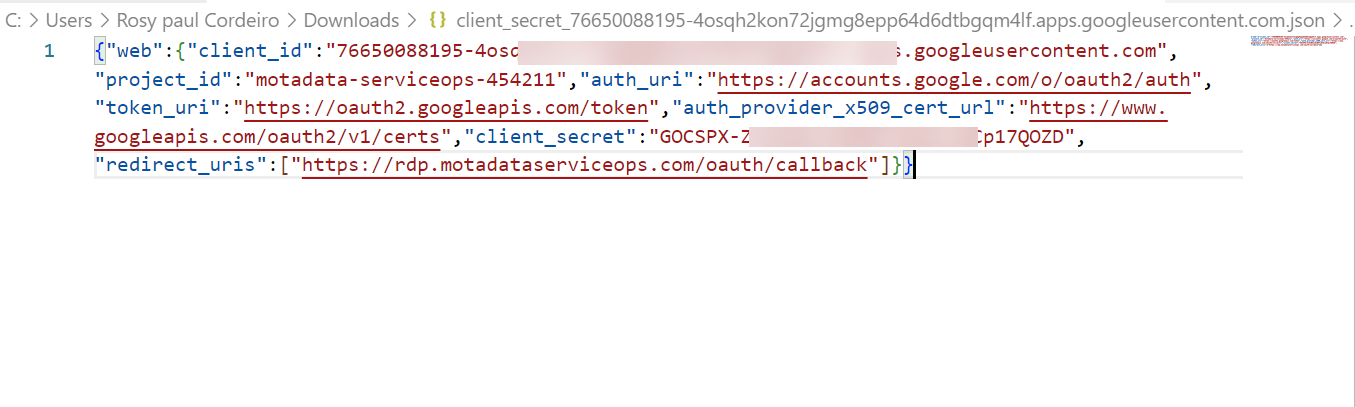
The downloaded JSON contains all the required credentials.
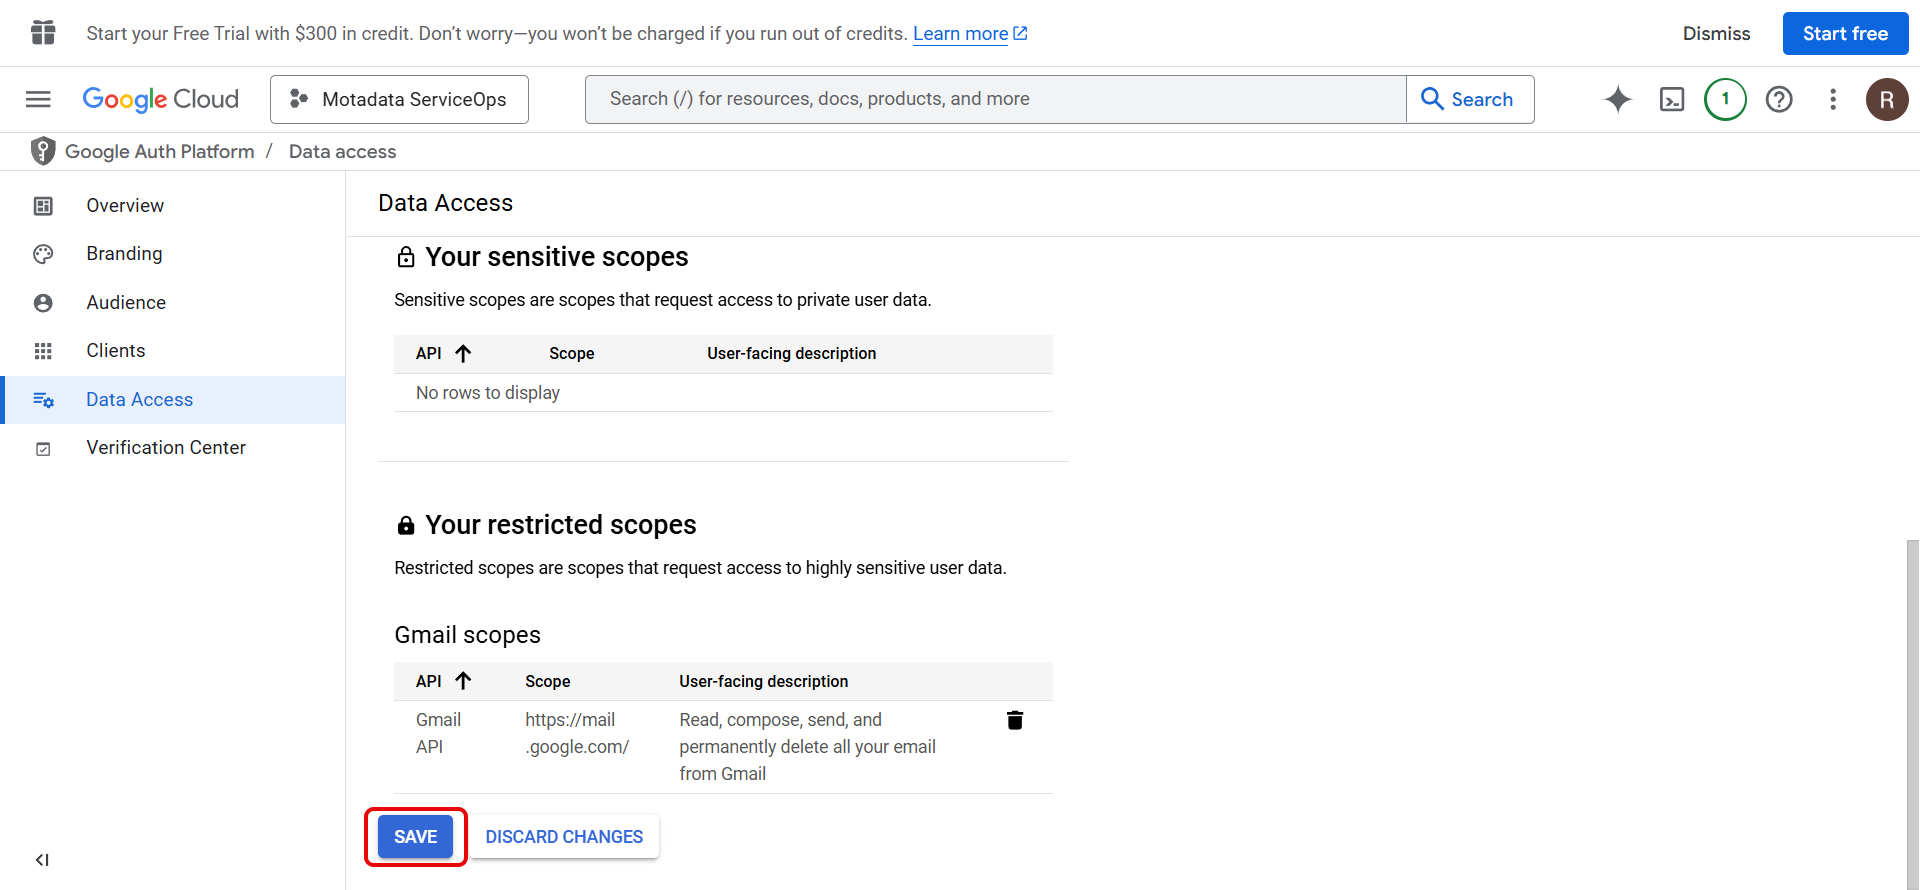
Step 7: Add Gmail API Scope
Go to the Data Access tab and click Add or Remove Scopes. Select the Gmail API from the list and click Update.
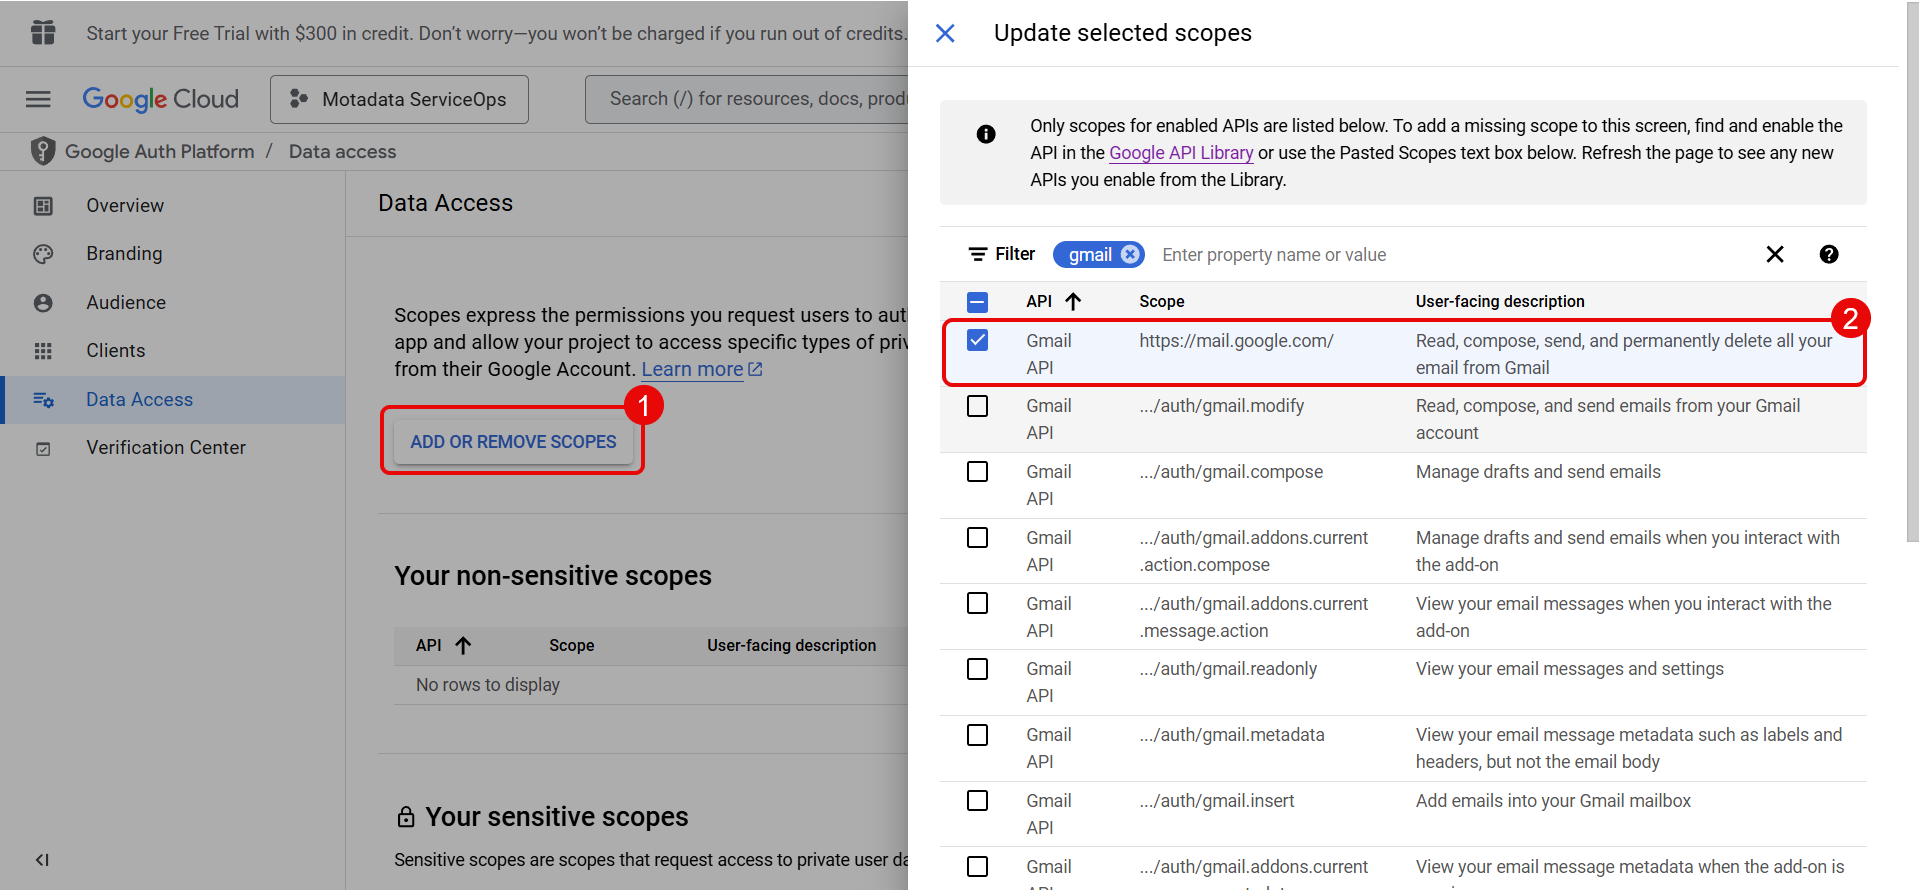
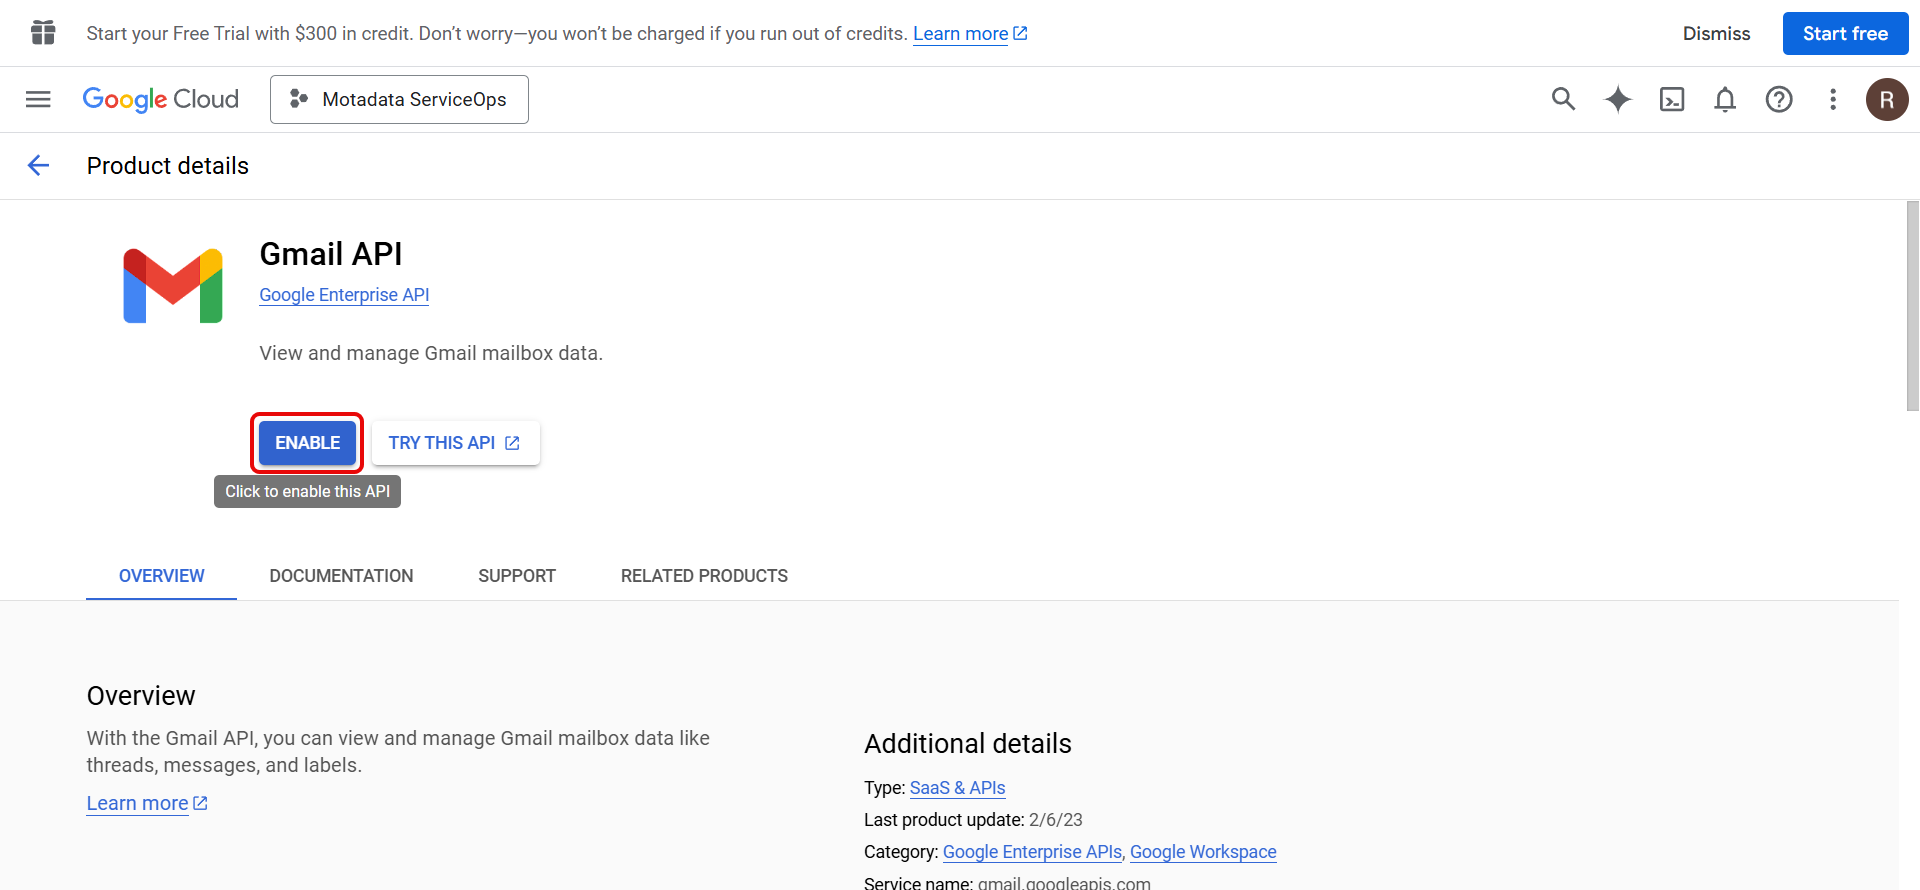
If the Gmail API is not available in the list, click Google API Library, search for Gmail API, and enable it.

Click Save once the scope is added.
Configuring Gmail in ServiceOps (Incoming)
Navigate to Admin > Support Channel > Emails > Incoming Email Servers and click Add Incoming Email Server.
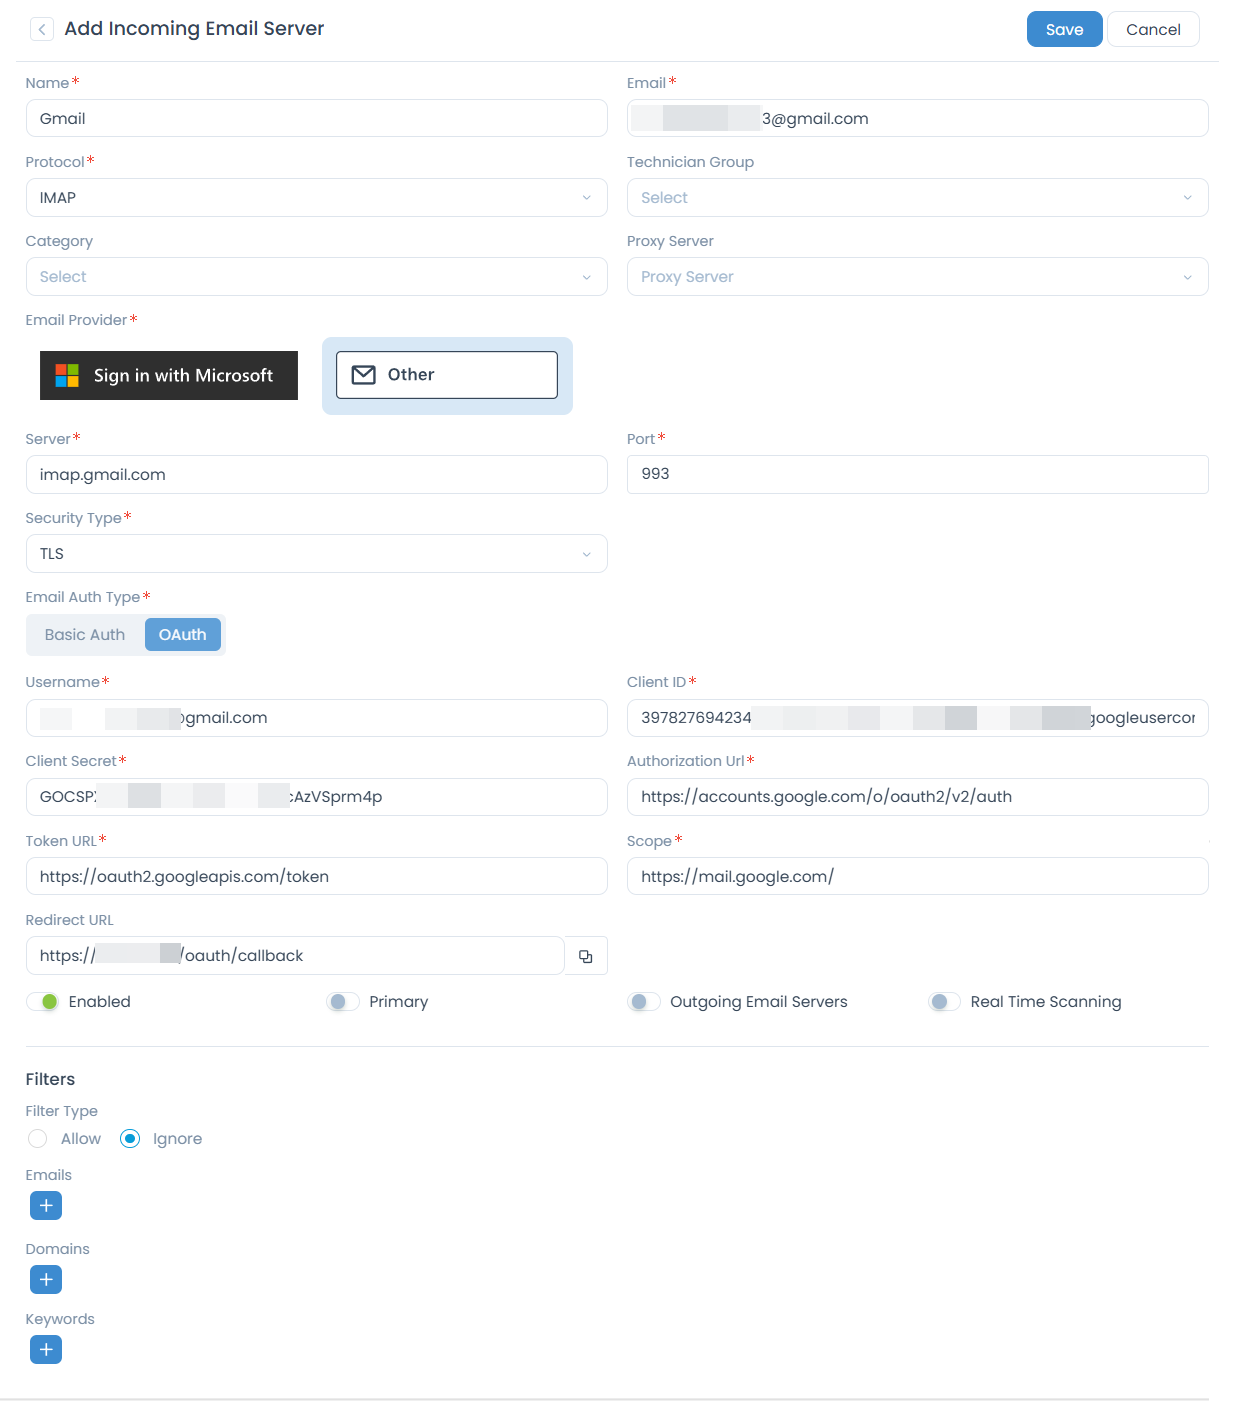
Enter the following details:
| Parameter | Description |
|---|---|
| Name | Enter the name of the email server. |
| Enter the Gmail address used for authentication. | |
| Protocol | Select IMAP or POP3. The selected protocol must be enabled on the Gmail account. |
| Technician Group | Select the technician group assigned to requests created via this email. |
| Category | Select the category assigned to requests created via this email. |
| Proxy Server | Select the required proxy server. Leave blank if ServiceOps has direct internet access. |
| Email Provider | Select Other. |
| Server | Enter imap.gmail.com for IMAP or pop.gmail.com for POP3. |
| Port | Enter the port number. Common values: IMAP: 993, POP3: 995. |
| Security Type | Select SSL or TLS. |
| Email Auth Type | Select OAuth. |
| Client ID | Paste the Client ID from Step 6. |
| Client Secret | Paste the Client Secret from Step 6. |
| Authorization URL | Enter https://accounts.google.com/o/oauth2/v2/auth. |
| Token URL | Enter https://oauth2.googleapis.com/token. |
| Scope | Enter https://mail.google.com/. |
| Redirect URL | Editable field. Set from the Application Settings Base URL. |
| Enabled | Toggle to enable or disable the server. |
| Primary | Enable to use this server as the primary incoming server. |
| Outgoing Email Server | Enable to associate an outgoing email server. |
| Filter Type | Select Allow to accept only emails from the specified addresses, domains, or keywords (all others are blocked), or Ignore to silently discard emails matching the specified values (all others are allowed). If no filter is configured, ServiceOps accepts emails from all senders by default. |
| Emails | Enter specific email addresses to filter. With Allow, only these addresses can create tickets. With Ignore, emails from these addresses are silently discarded. Example: hr@company.com. Multiple entries work as OR conditions. |
| Domains | Enter domain names to filter, without the @ symbol. Example: yahoo.com. With Allow, only emails from these domains create tickets. With Ignore, all emails from these domains are silently discarded. Multiple entries work as OR conditions. |
| Keywords | Enter words or phrases to match against the email subject and body. With Allow, only emails containing these keywords create tickets. With Ignore, matching emails are silently discarded. Multiple entries work as OR conditions. |
POP3 supports only Basic Authentication. Select IMAP when using OAuth.
Click Save. You will be redirected to the Google sign-in page.
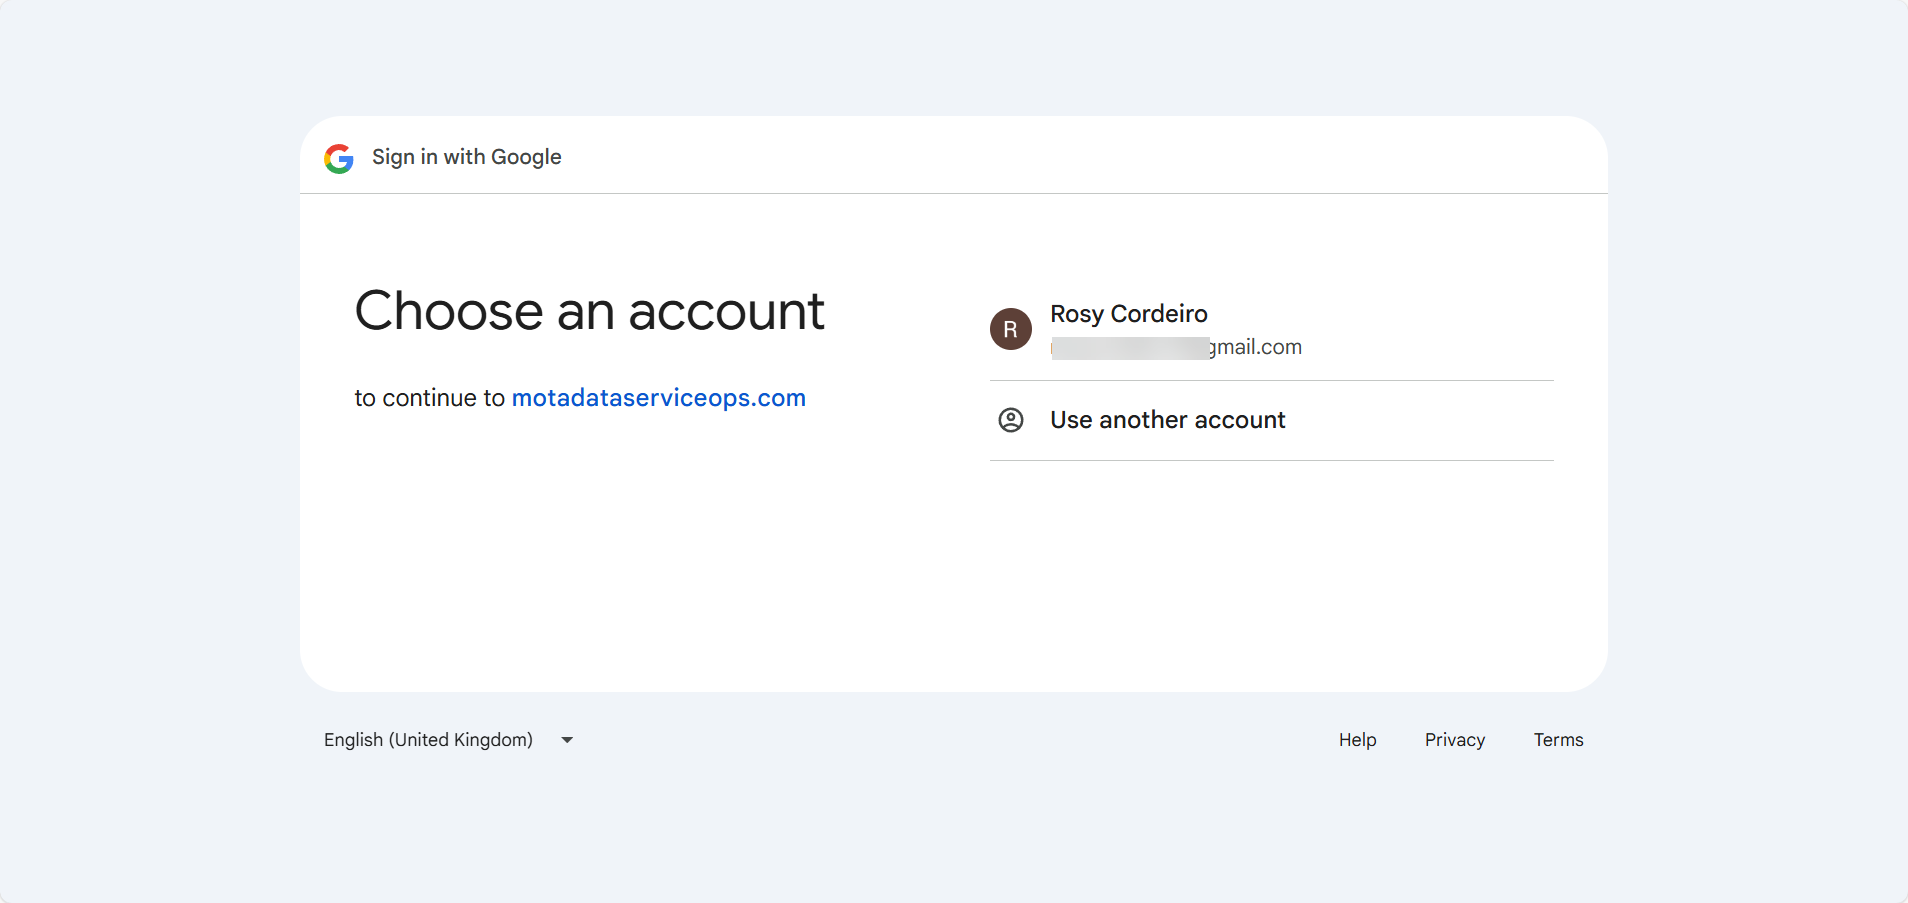
Select the account and click Continue.
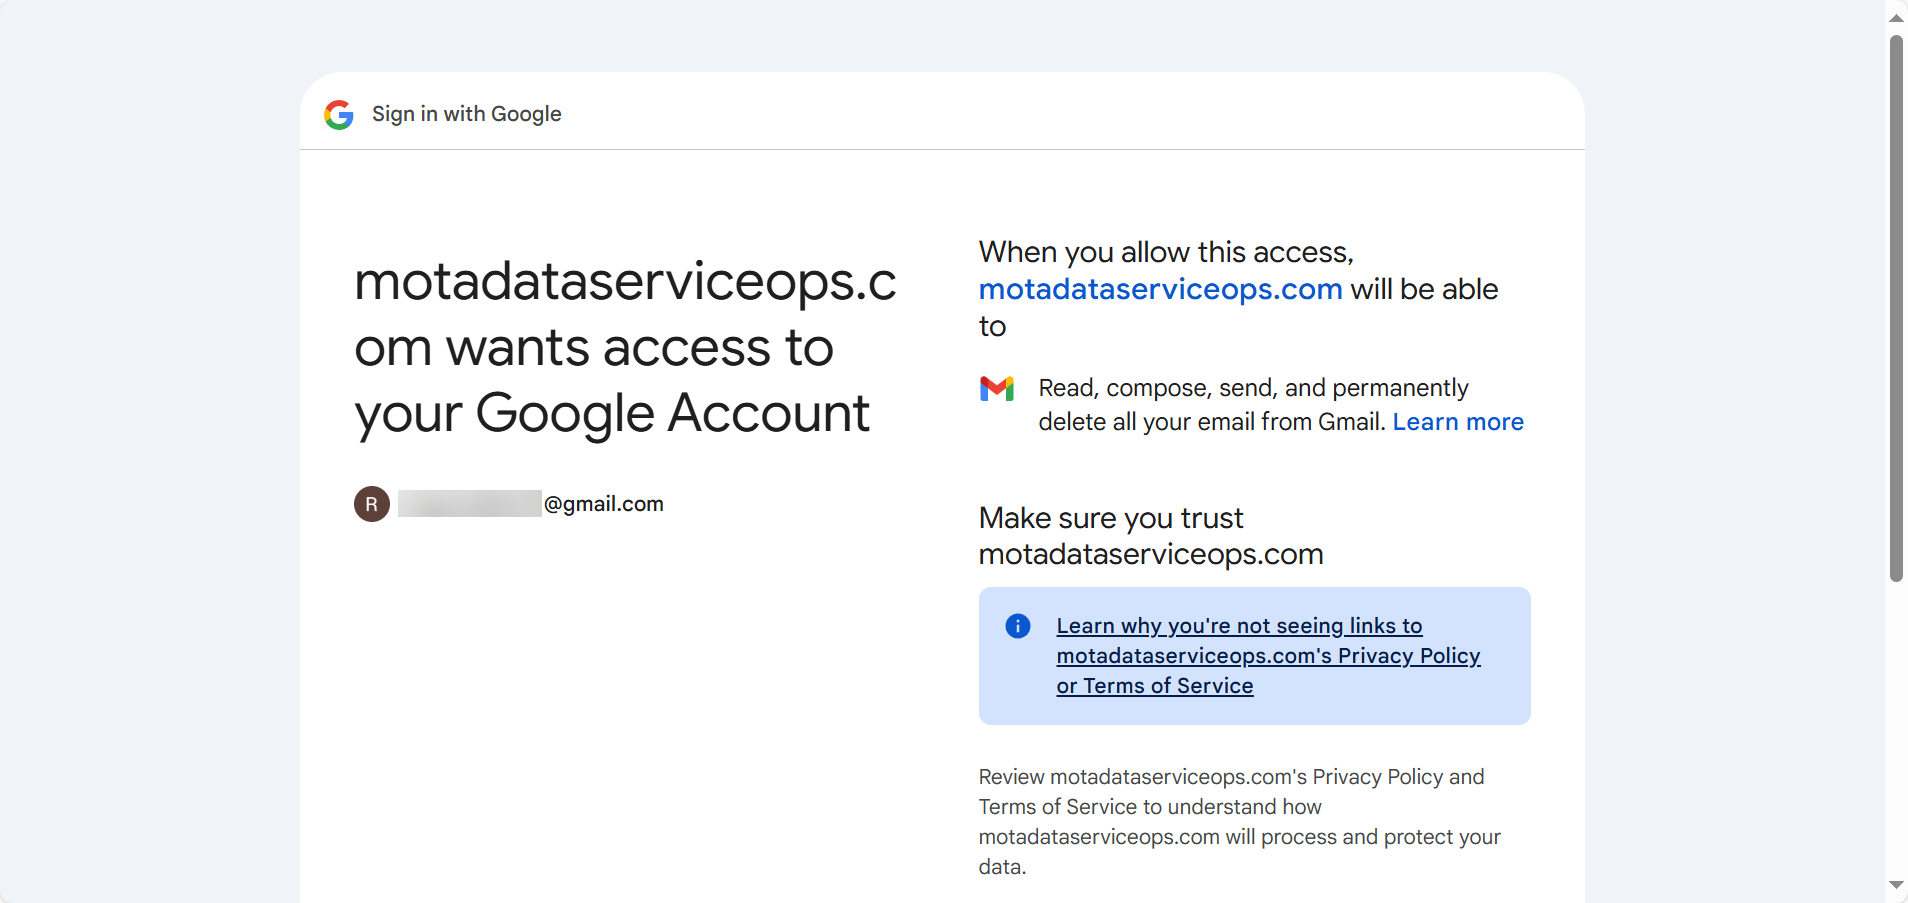
Click Continue again. You will be redirected to the Incoming Email Servers page with the configured server listed.
Configuring Gmail in ServiceOps (Outgoing)
Navigate to Admin > Support Channel > Emails > Outgoing Email Servers and click Add Outgoing Email Servers.
Enter the following details:
| Parameter | Description |
|---|---|
| Name | Enter the name of the email server. |
| Enter the Gmail address used as the From address for all notifications. | |
| Protocol | Select SMTP. |
| Sender Name | Enter the display name shown to recipients alongside the From address. |
| Email Provider | Select Other. |
| Server | Enter smtp.gmail.com. |
| Port | Enter the port number. Common values: SMTP (TLS): 587, SMTP (SSL): 465. |
| Security Type | Select SSL or TLS. |
| Authentication Needed | Enable to authenticate with the server. |
| Email Auth Type | Select OAuth. |
| Client ID | Paste the Client ID from Step 6. |
| Client Secret | Paste the Client Secret from Step 6. |
| Authorization URL | Enter https://accounts.google.com/o/oauth2/v2/auth. |
| Token URL | Enter https://oauth2.googleapis.com/token. |
| Scope | Enter https://mail.google.com/. |
| Redirect URL | Editable field. Set from the Application Settings Base URL. |
| Reply-To Email | Enter the email address to which recipient replies will be directed. Set this to a monitored mailbox so replies are captured and converted into tickets. |
| Proxy Server | Select the required proxy server. Leave blank if ServiceOps has direct internet access. |
| Enabled | Toggle to enable or disable the server. |
| Primary | Enable to use this server as the fallback when other configured outgoing servers are unavailable. |
| Filter Type | Select Allow to send emails only to the specified addresses or domains (all others are blocked), or Ignore to silently block emails to the specified values (all others are allowed). If no filter is configured, ServiceOps sends emails to all recipients by default. |
| Emails | Enter specific email addresses to filter. With Allow, only these addresses receive emails. With Ignore, emails to these addresses are silently blocked. Example: hr@company.com. Multiple entries work as OR conditions. |
| Domains | Enter domain names to filter, without the @ symbol. Example: company.com. With Allow, only addresses in these domains receive emails. With Ignore, all addresses in these domains are silently blocked. Multiple entries work as OR conditions. |
Click Save. You will be redirected to the Google sign-in page. Select the account and grant the required permissions. You will be redirected to the Outgoing Email Servers page with the configured server listed. Verify connectivity using the Test Connection button.
Troubleshooting
Access Blocked: Authorization Error
This error occurs when an incorrect scope is configured. To resolve:
- Go to the Data Access tab in Google Cloud Console.
- Verify the scope is set to
https://mail.google.com/. - Click Save and retry the OAuth flow in ServiceOps.
Error 400: invalid_scope
This error means the scope entered in ServiceOps does not match a valid Gmail API scope. To resolve:
- In ServiceOps, open the email server configuration and check the Scope field.
- Ensure the value is exactly
https://mail.google.com/with no extra spaces or characters. - Verify the Gmail API is enabled in the Google API Library.
Access blocked: app has not completed Google verification
This error occurs when the OAuth app is in testing mode and the signed-in user has not been added as a tester. To resolve:
- Go to the Audience tab in Google Cloud Console.
- Under Test users, add the email address you are using to sign in.
- Click Save and retry the OAuth flow.