Configuring Admin Consent
Grant admin consent once and every user in your organization can connect ServiceOps to Microsoft email without individual permission prompts.
When integrating ServiceOps with Microsoft services, users may encounter a prompt requiring admin approval. Admin consent grants organization-wide permissions to the ServiceOps application in Azure AD, so individual users do not need to approve access themselves. This is required when your Azure tenant has user consent disabled.
How Does Admin Consent Work?
Azure AD controls whether users can consent to applications on their own behalf. When user consent is allowed, a user clicking Sign in with Microsoft in ServiceOps sees a standard permissions acceptance screen and can proceed independently. When user consent is disabled by an administrator, the user instead sees an Approval required screen and must submit a consent request for an Azure Global Administrator to review and approve.
Once an admin grants consent for the organization, all current and future users in the tenant can use the ServiceOps email integration without individual prompts, unless an admin later removes consent.
Configuring Admin Consent
Step 1: Verify the Enterprise Application Exists
Sign in to the Microsoft Azure portal and navigate to Enterprise Applications > All Applications. Search for ServiceOps-Email-Global-App.
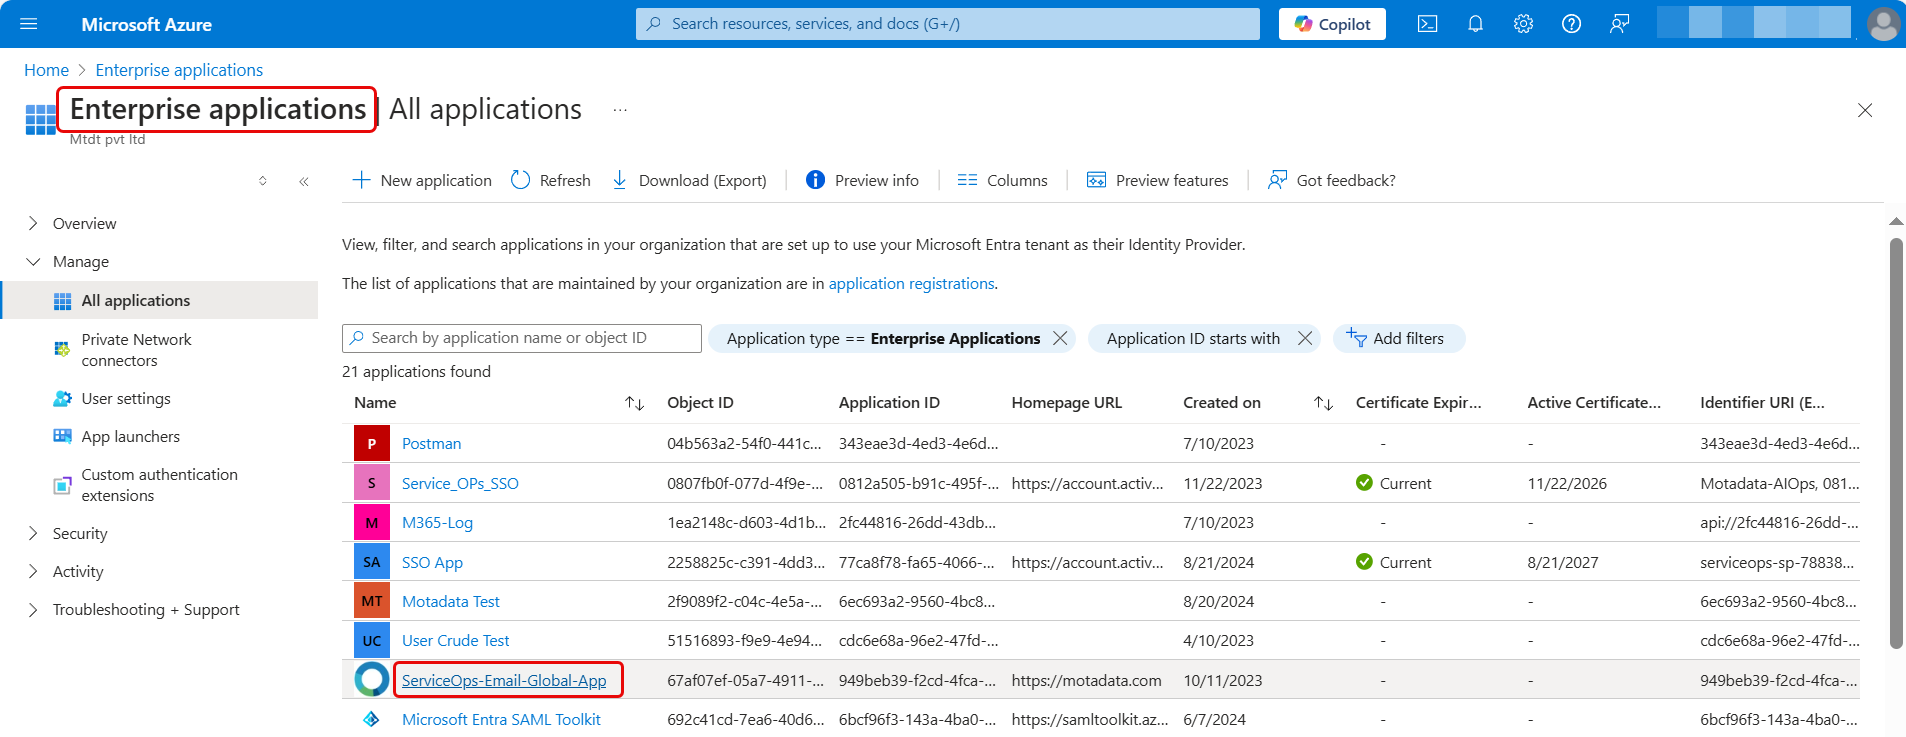
If the application is not listed, proceed to Step 3. The user consent request flow will register it.
Step 2: Verify Users and Groups
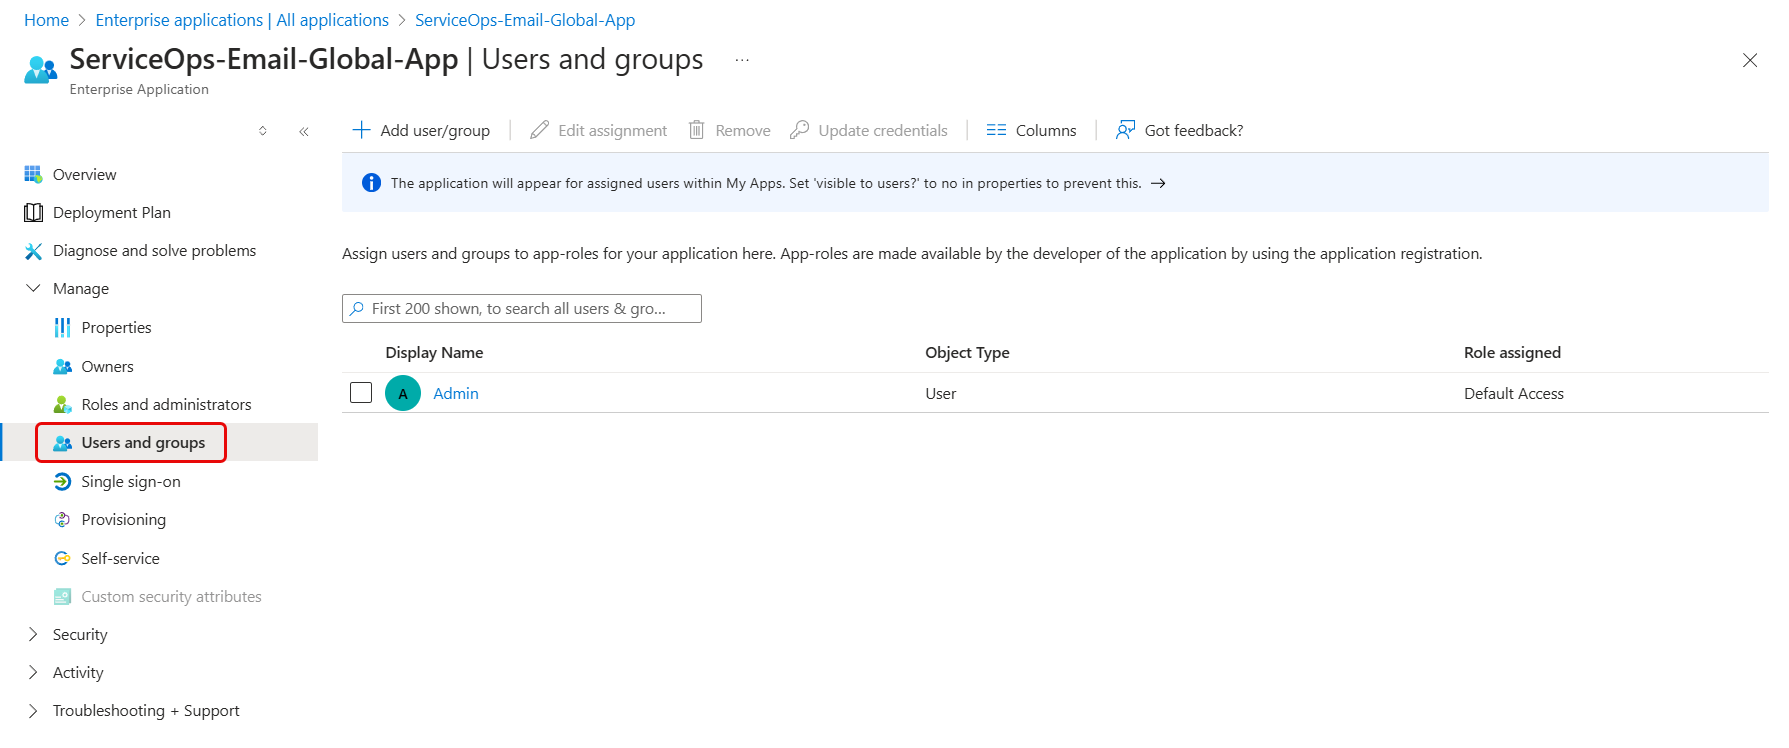
If the application is listed, click it and navigate to Manage > Users and groups. Confirm the email user is listed and has the Default Access role assigned. If the user is missing, click Add user/group to add them.
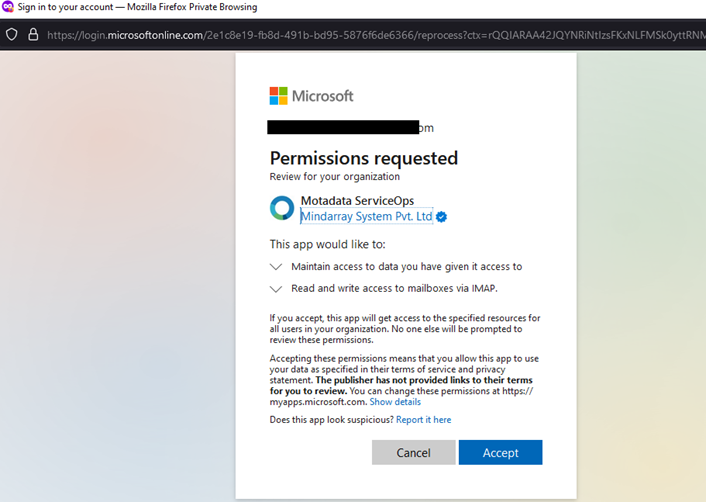
If user consent is allowed in your Azure tenant, clicking Sign in with Microsoft in ServiceOps shows the standard permissions acceptance screen below. No further action is needed. Click Accept to proceed.

Step 3: Identify That Admin Consent Is Required
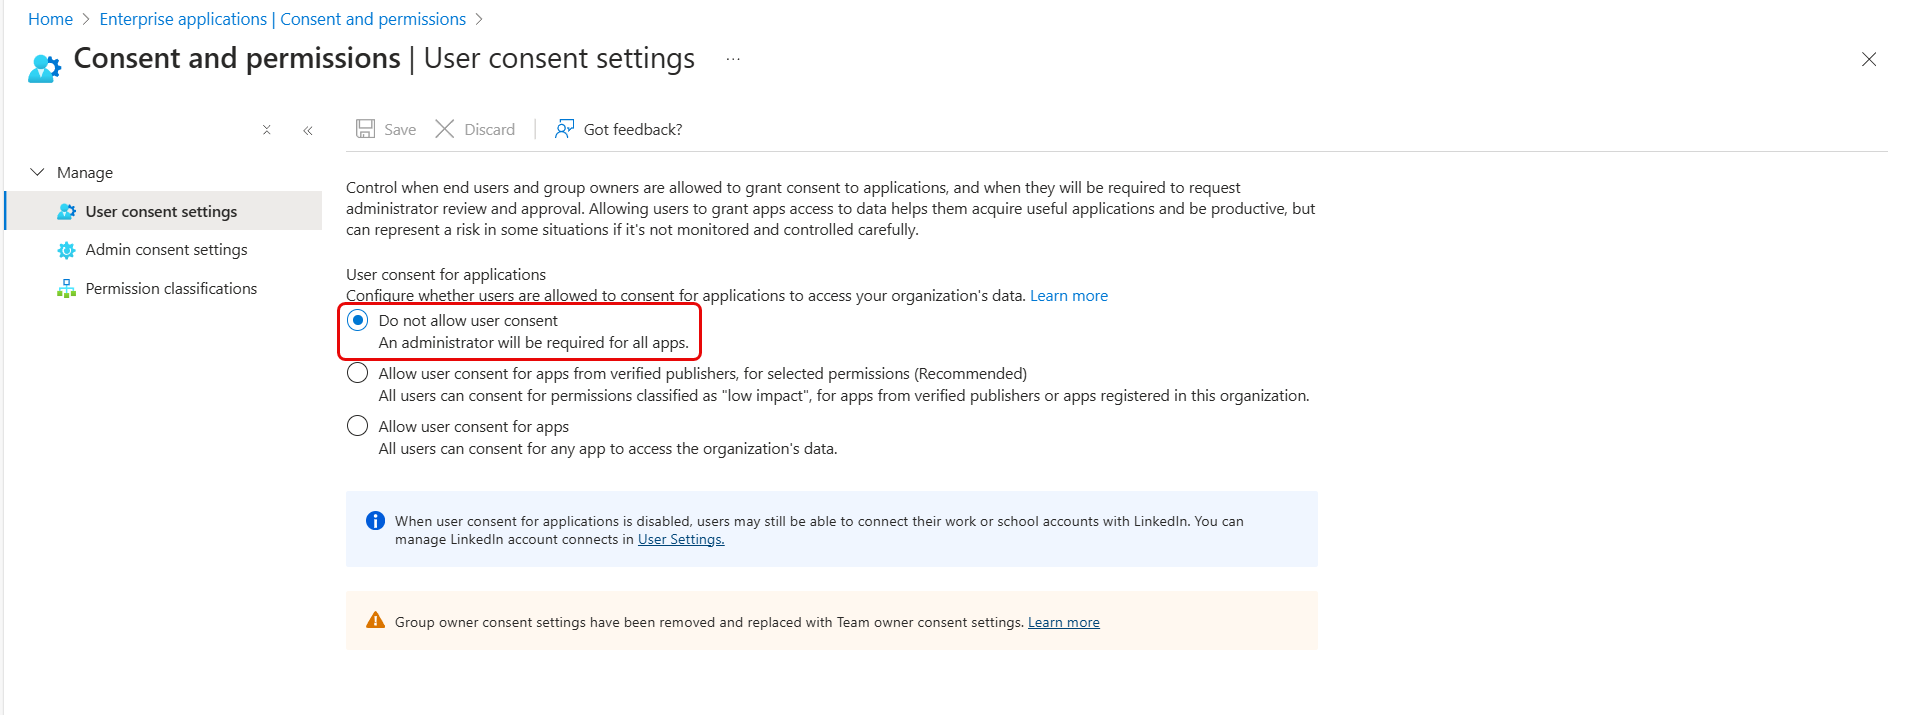
If your Azure tenant has user consent disabled, navigate to Enterprise Applications > Consent and permissions > User consent settings. The Do not allow user consent option is selected, which means an administrator must approve all application consent requests.
In this case, when a user attempts to sign in with Microsoft in ServiceOps, the following Approval required screen appears instead of the standard permissions screen.
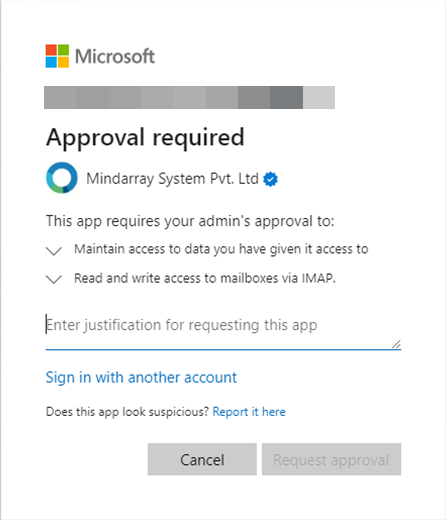
Step 4: Submit the Consent Request
Enter a justification for requesting the application and click Request approval. The request is added to the Admin consent requests queue in Azure.
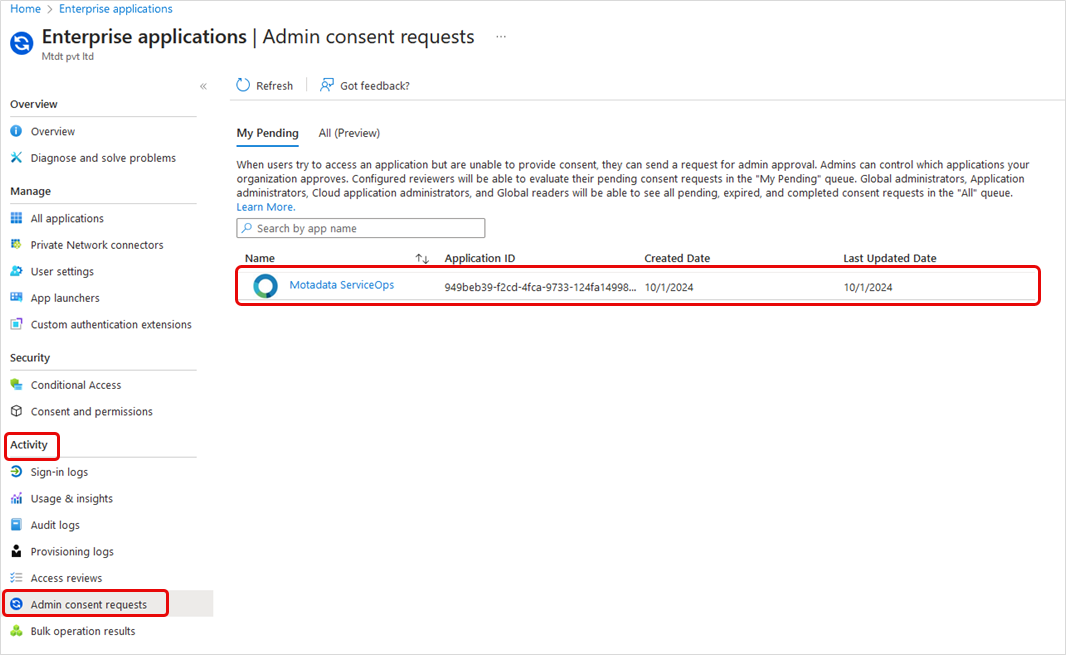
Step 5: Review the Request Details
The Azure Global Administrator navigates to Enterprise Applications > Admin consent requests and clicks the pending request to view its details.
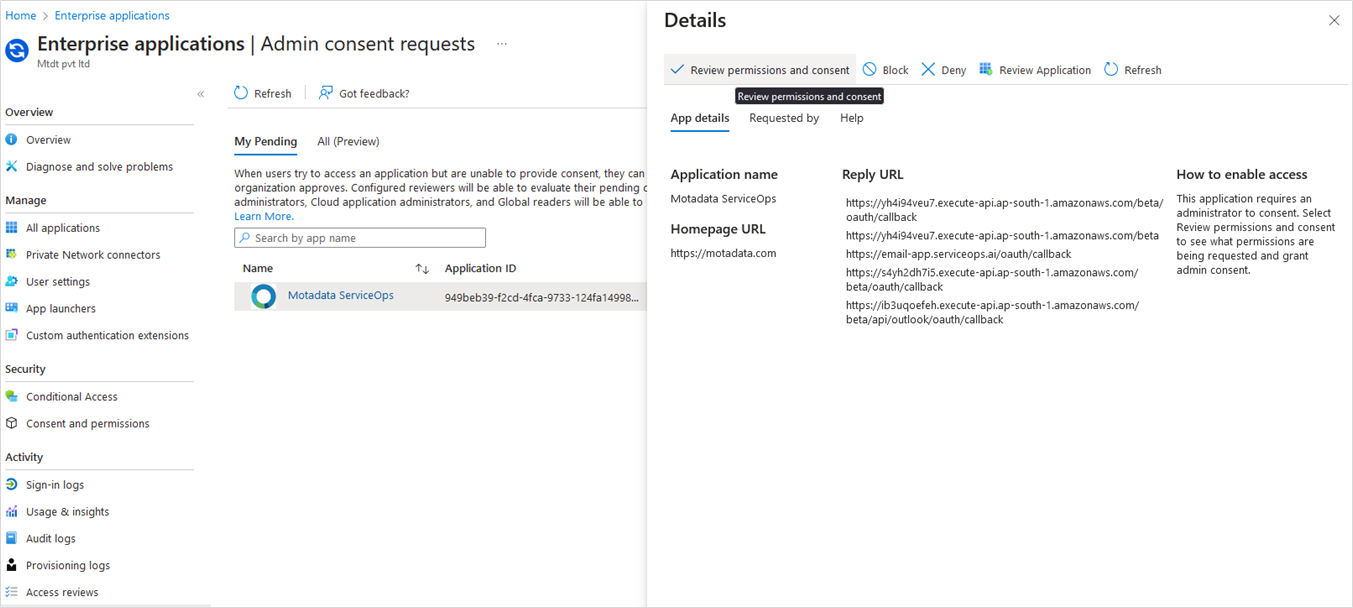
Step 6: Grant Admin Consent
Click Review permissions and consent. The permissions dialog appears listing all access the application is requesting. The admin reviews the permissions and clicks Accept to grant organization-wide consent.
Step 7: Verify and Configure
Once consent is granted, the ServiceOps-Email-Global-App appears in Enterprise Applications. Admins can review the granted permissions under the Permissions section and confirm the user is listed under Users and groups.
The user can now navigate to Admin > Support Channel > Emails in ServiceOps and configure the incoming or outgoing email server using the Sign in with Microsoft option without encountering the approval prompt.