Patch Control
Patch Control streamlines patch management by centralizing patch approval and exclusion rules, enhancing security and operational efficiency.
Patch Control allows you to define rules for approving patches for deployment and excluding specific patches or applications from being deployed across your IT assets. This ensures systematic patch management, aligning with your organizational policies and minimizing security risks.
To view the Patch Control page, navigate to Admin > Patch Management > Patch Administration > Patch Control.
The Patch Control page provides two main tabs: Approval Policy and Decline Policy.
- Approval Policy
- Decline Policy
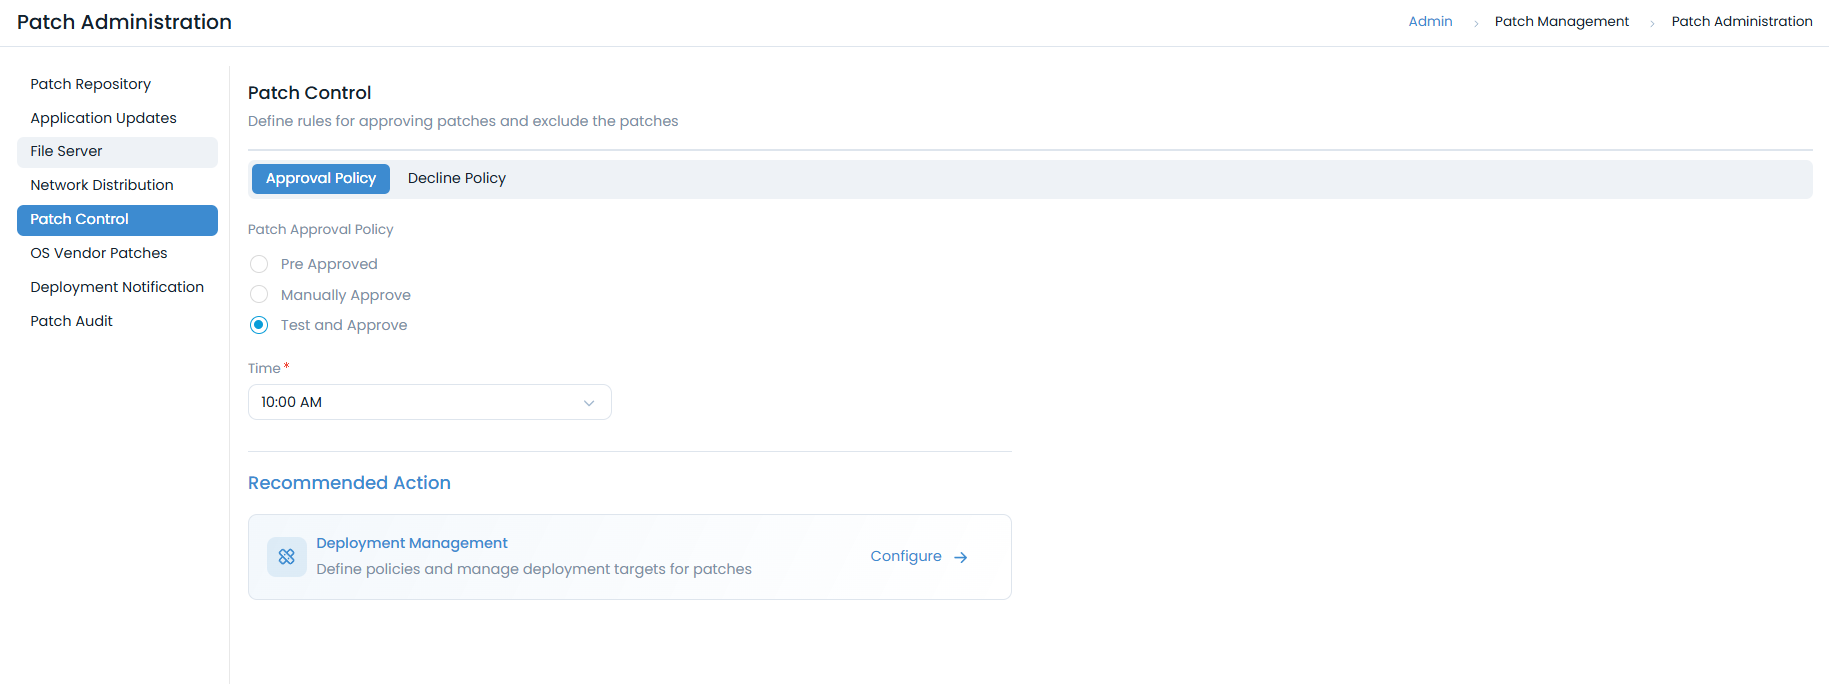
Approval Policy
This tab enables you to set the approval policy for patch deployment.
- Pre-Approved: All incoming patches (both new and missing) are Pre-Approved by default. A user can manually change the Approval status of a patch to Reject or Approved. The Automatic Patch Test fails to function with this selection. This selection comes into effect for incoming future patches, while it remains ineffective on already existing patches in the product.
By default, the Definition Updates Patches will always be pre-approved.
- Manually Approve: All new incoming patches have the Approval status Not Approved by default. A user has to change the status manually to either Approved or Reject.
- Test and Approve: All new incoming patches have the status Not Approved by default. You can manually set the status. Also, you can create a Test Task. Once enabled, select the Time when the patch is to be tested and approved. A Test Task, also known as Automatic Patch Test, deploys a selected set of patches to a specific set of computers. If deployment is successful in all the computers, the patches are auto-approved after a set number of days. Test Task only works in this setting.
Select an approval policy type and click Update.
Decline Policy
Decline Patch Configuration allows you to automate the process to ignore Patches for a specific set of Computers, which is different from manual ignoring.
A decline configuration jumps into action whenever a Computer demands a Patch. It checks whether the Patch is a part of any DC and updates the Patch database accordingly. Patches ignored automatically are also added to the global ignored list, but you can drill down to the specific Computers where they have been ignored using the UI features.
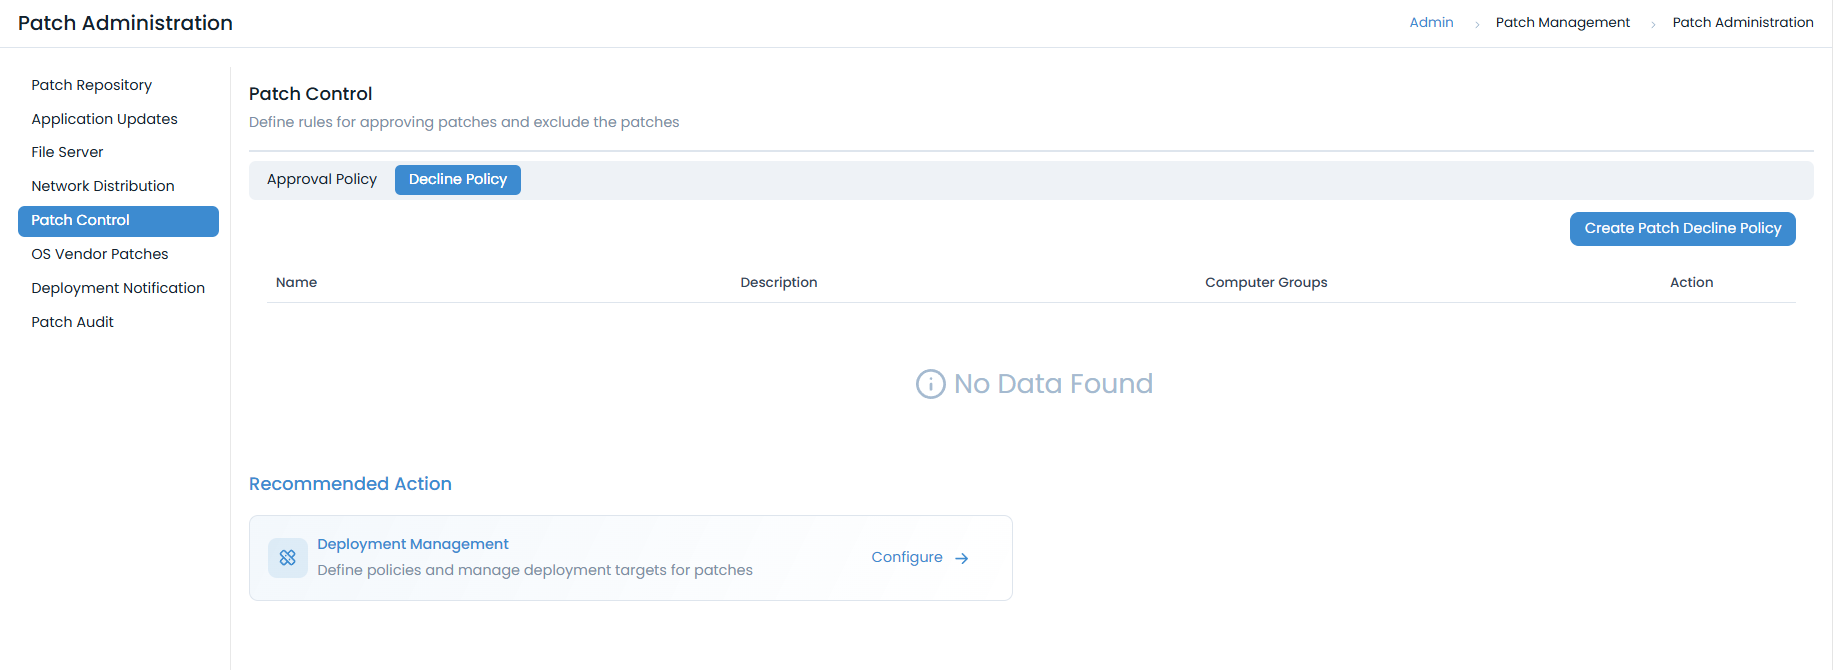
Here, you can view, create, edit, and delete the patch decline policy.
Create a Patch Decline Policy
To create a patch decline policy, follow the below steps:
- Click the Create Patch Decline Policy button and a popup appears.
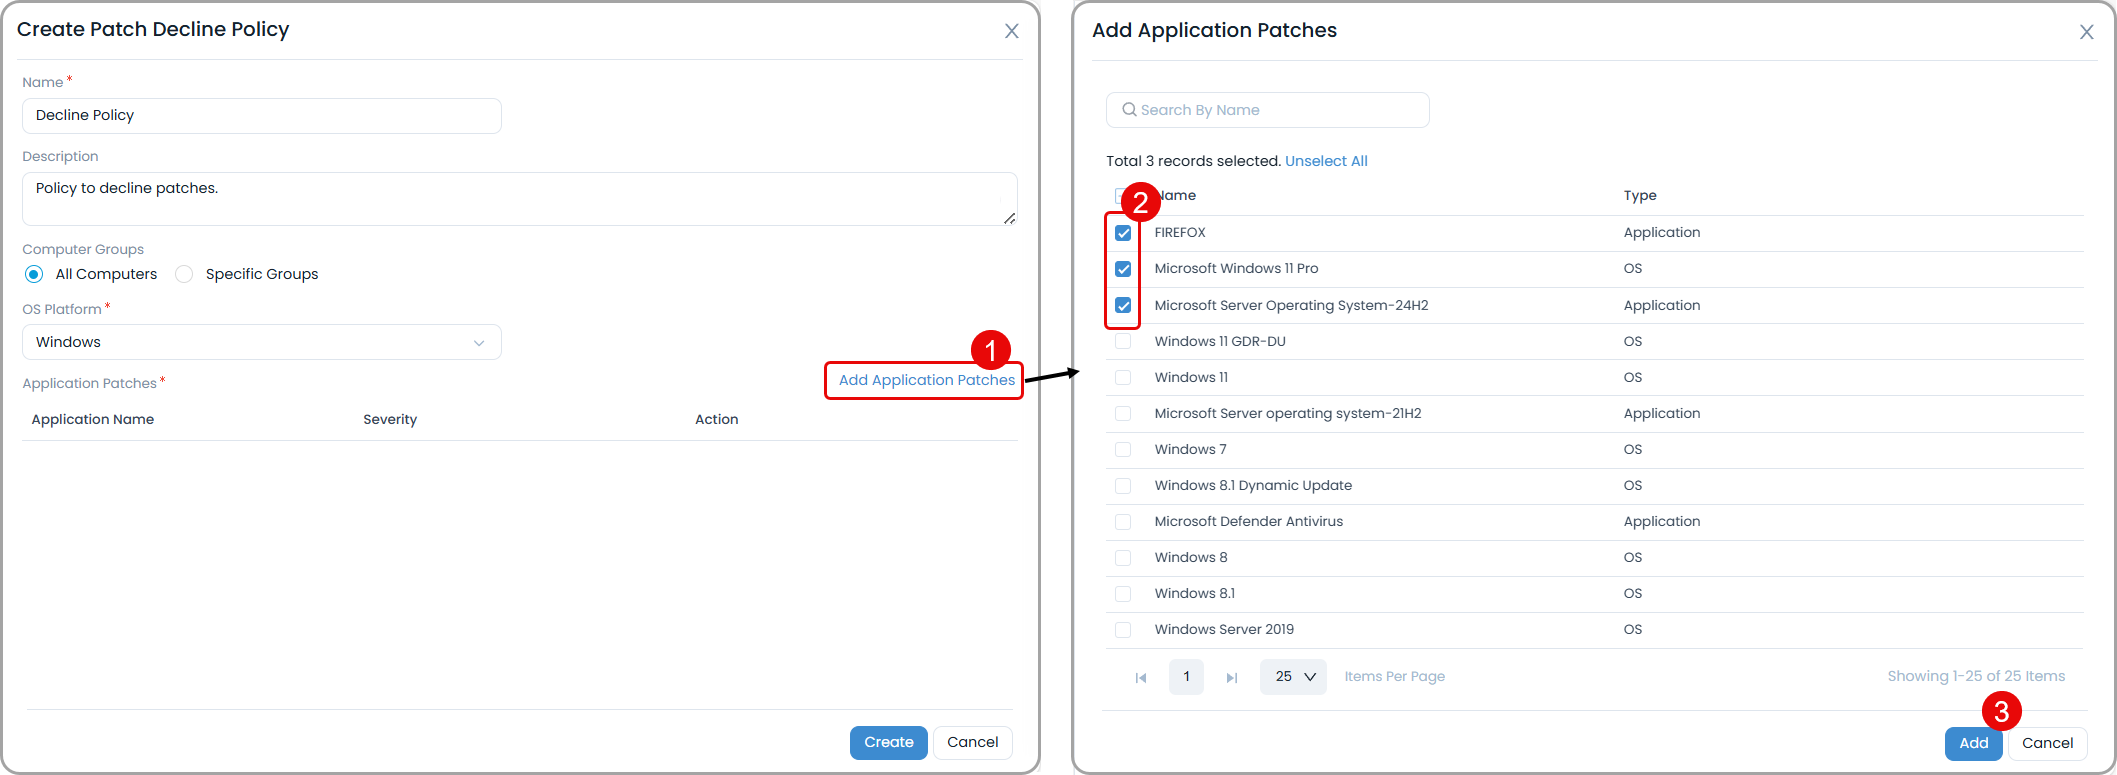
- Enter the below details:
| Parameter | Description |
|---|---|
| Name | Enter the name of the policy. |
| Description | Enter a short description about the decline policy. |
| Computer Groups | Select the groups of computers on which the policy should be applicable. The options are: - All Computers: Select if you want to decline the policy for all the computers. - Specific Groups: Select if you want to decline the policy for some specific groups of computers only. If selected, select the desired Computer Groups from the dropdown. |
| OS Platform | Select the OS platform on which the policy is to be applied. The options are: Windows, MAC, Linux Ubuntu, Linux Mint, Linux CentOS, Linux Redhat, Linux Opensuse, Linux Debian, Linux Pardus, Linux Oracle, Linux Rocky, and Linux Alma. |
| Application Patches | Select the application patches on which the policy will be applicable. To add patches, click the Add Application Patches link and a popup appears as shown below. Select the required patches and click Add. |

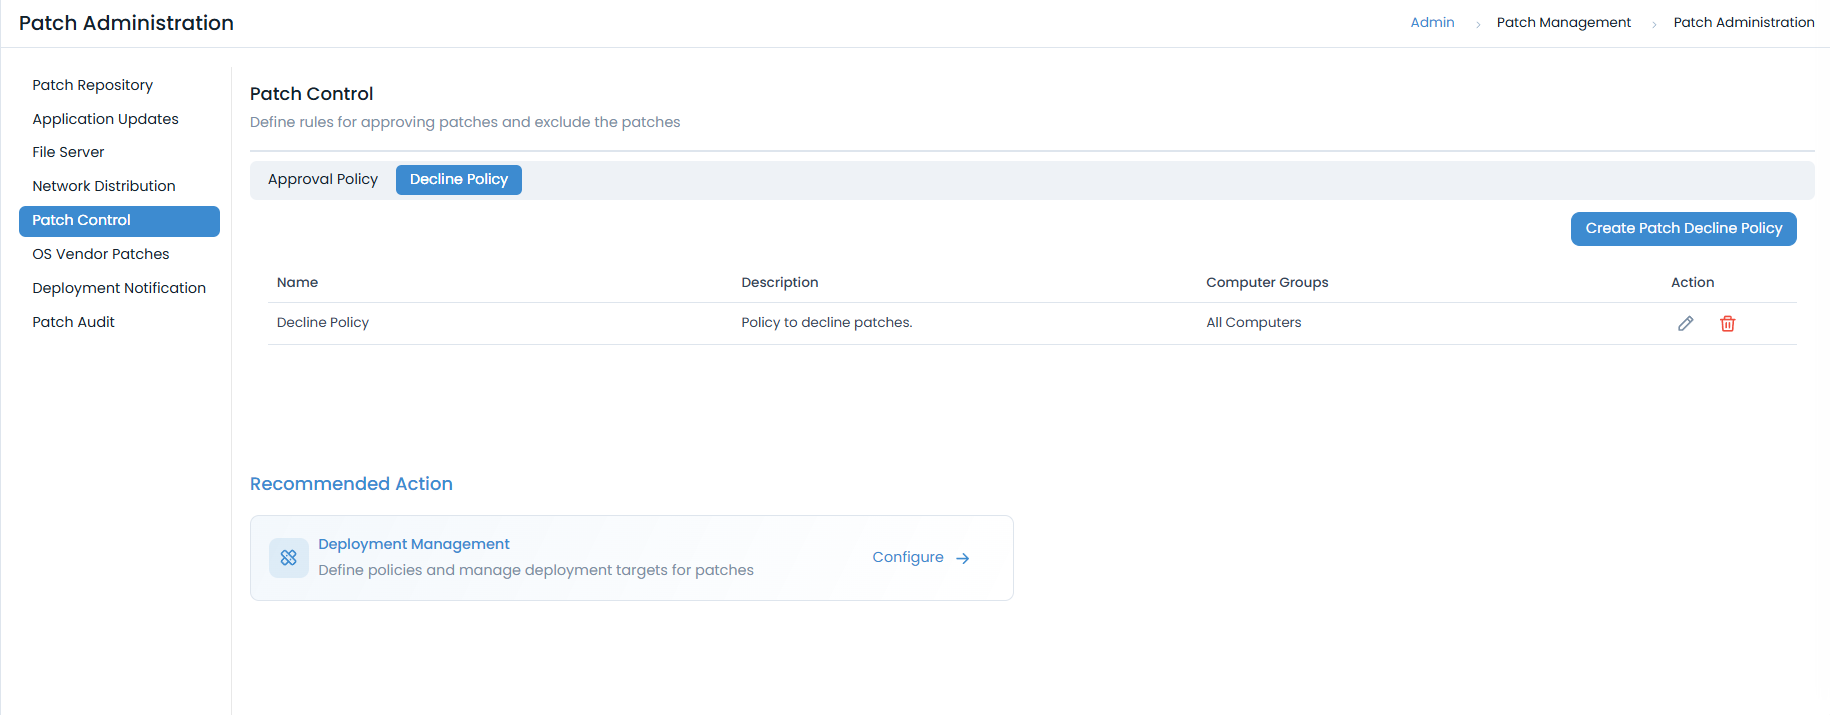
- Once done, click Create, and the decline policy gets created. Once created, the added application patches will be declined from being deployed on all or the selected computers.
Recommended Action: Deployment Management
Define policies and manage deployment targets for patches. For details, see Deployment Management