System Preference
System Preference provides configurations based on the various modules. These can be set and applied to the entire application. The system behaves and displays information according to these settings.
To view the System Preference page, navigate to Admin > Organization > System Preference.
It consists of the following tabs:
- User Preference
- Request Preference
- Asset Preference
- Purchase Order Preference
- Agent Preference
- Survey Preference
- Project Preference
- Application Settings
- Search Preference
- Task Preference
User Preference
This tab enables you to set the preference of the users.
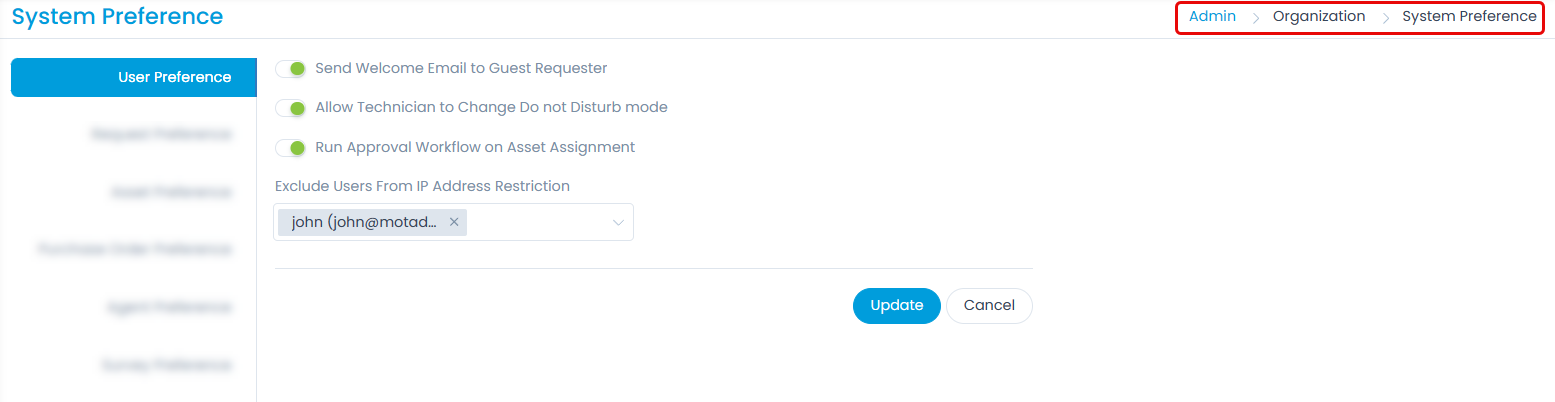
You can set the following parameters:
- Send Welcome Email to Guest Requester: You can manage if the welcome Email is to be sent to the Guest Requester or not.
- Allow Technician to Change Do not Disturb mode: You can allow the technicians to configure the Do Not Disturb Mode.
- Run Approval Workflow on Asset Assignment: You can run an approval workflow and ask for approval from the desired approver whenever the asset is assigned to someone. Once enabled, whenever an asset is assigned, the approval workflow with matching conditions will get triggered and an approval will be sent to the respective approver.
- Exclude Users from IP Address Restriction: You can exclude the Users from restricting the IP address.
Request Preference
This tab enables you to set the preferences for requests.
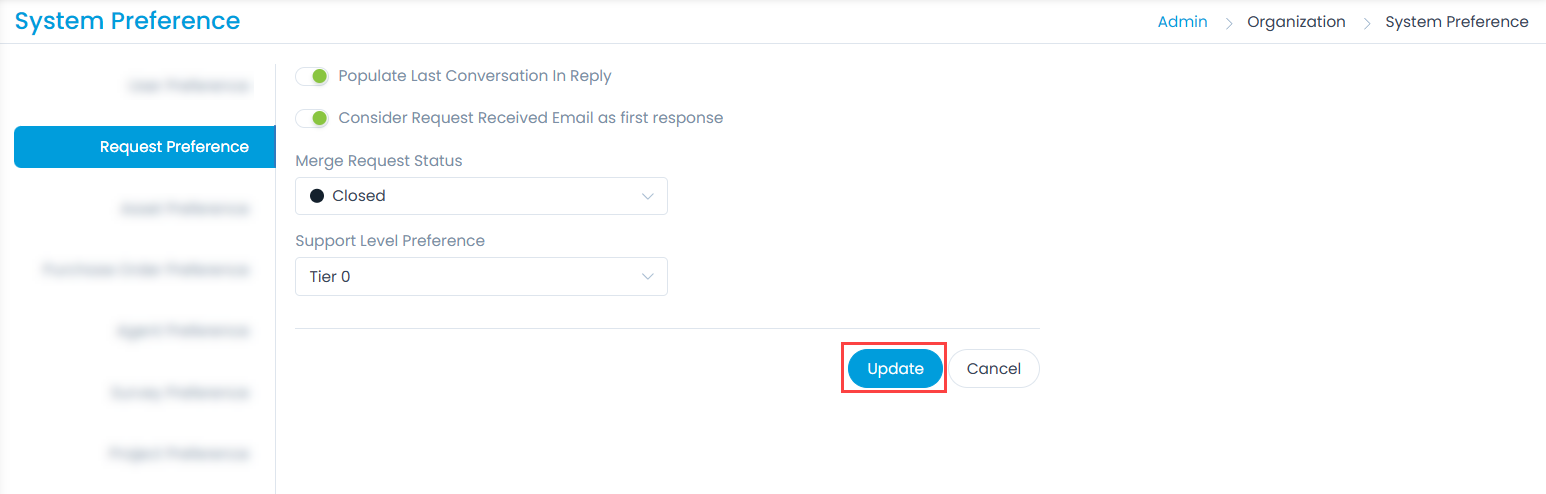
Populate Last Conversation in Reply: Enable if you want to populate the last conversation in the replies for the request module. This flag will display the last replies in the Request Reply Email.
Consider Request Received Email as first response: Enable if you want to consider the acknowledgment email that the System sends on receiving a request as the first response. By default, it is disabled.
Prerequisites:
- A valid Outgoing Email Server should be configured.
- The Email notification "Notify Requester when new Request is created" should be enabled.
- The respective SLA should be enabled.
Merge Request Status: Select the status you want to set for the secondary requests when multiple requests are merged. By default, the Closed status is set.
Support Level Preference: Select the support level to set as default for all the new request tickets. The options are Tier 0, Tier 1, Tier 2, Tier 3, and Tier 4.
After upgrading ServiceOps to v8.3.6 and above, the default value for the old existing Requests will be Tier 1.
Asset Preference
This tab enables you to set the configurations for the asset. You can also set the prefix of the barcode, hardware, software, and Non IT assets.

| Parameter | Description |
|---|---|
| Consider Last Logged In User on Asset as UsedBy | Using this option, the last logged in person on the registered asset will be counted as the last user who used it. |
| Discover Software on Linux Machine | Using this option, the system will discover the software properties along with the Linux machine discovery. |
| Auto Change Asset Status for Agent-less Discovery | Enable automatic updating of the asset status to the default status during the next scan cycle. You can set the default status from the Asset Status page. |
| Auto Change Asset Status for Agent-based Discovery | Enable automatic updating of the asset status to the default status during the next scan cycle. You can set the default status from the Asset Status page. |
| Enable Asset Confirmation from Used By | Enable to take confirmation from the user for asset assignment. Once enabled, enter the below details: - Asset Type: Select the asset type(s) you want confirmation from. It is mandatory. - Acceptance Period: Enter the number of days the assigned user should respond to the approval email. It is mandatory. If the period is passed, the user will not be able to approve or reject the approval, and its entry will move to the Ignored tab of the My Approvals page. - Reminder Interval: Enter the number of interval hours or days after which the reminder emails and notifications should be sent to the user for accepting the confirmation. Notes: - Reminder Interval should be less than the Acceptance Period. - If 0 o no value is set, no reminder email will be sent to the user. Once the above details are set, assign the asset to the user by setting the "Used By" field on the Asset Details page. |
| Auto Change Asset Type for Agent-less Discovery | Enable automatic updating of the asset type to the default type during the next scan cycle. You can set the default asset type from the Asset Type page. |
| Auto Change Asset Type for Agent-based Discovery | Enable automatic updating of the asset type to the default type during the next scan cycle. You can set the default asset type from the Asset Type page. |
| Overwrite Asset Name as per format on discovery | If you enable this flag, a duplicate asset will get created when you change the host name. It will appear on the asset list page with the new host name. By Default: Disabled. |
| Fetch Shared Folder Details for Windows Asset | You can fetch the details of the shared folder for Windows Asset. If enabled the Shared Folder tab appears in the Hardware tab of the Asset Details page. |
| Fetch USB Port Details for Windows Asset | You can fetch the details of the USB Ports for Windows Assets. If enabled, the USB Hub and USB Controller tabs will be available in the Hardware tab of the Asset Details page. |
| Hardware Asset Name Preference | Define the format for the asset name of the discovered assets. You can also use placeholders to set the format. For example: If the preference is set as "{#asset.assetType#}-{#asset.hostname#}". Now, when an asset is discovered, its name will be displayed as Hardware-Jerry. If not defined or duplicate assets are found, the system will add the Host Name in the Asset Name by default. |
| Software Asset Name Preference | Define the format for the asset name of the discovered assets. You can also use placeholders to set the format. For example: If the preference is set as "{#asset.assetType#}-{#software.name#}". Now, when a software is discovered, its name will be displayed as Software-Anydesk. If not defined, the system will add the Software Display Name in the Asset Name by default. |
| Barcode Prefix | You can set the prefix of the Barcode Number generated. Numerals and more than 4 characters are not allowed. |
| Auto Barcode Generation Strategy | This parameter indicates whether Barcode Prefix overriding is supported or not and if is supported then it is based on Asset Type or based on Location value of asset. The options are: - None: This is the default value. - Asset Type Wise: Select if you want to generate the barcode based on asset type. If selected, Asset Type option is available while generating the barcode. - Location Wise: Select if you want to generate the barcode based on location. If selected, Location option is available while generating the barcode. |
| Asset Unique Identifier for SSH | Select the Identifiers based on which the assets will get added to ServiceOps. This prevents duplicate assets from getting added. If the asset with same identifiers already exists, the details will get updated. In case of MAC Address identifier, multiple Hardware Asset Network Adapter MAC Addresses will be checked, and accordingly, either the details will be updated in the existing asset, or a new asset will be created. Note: This is applicable for WMI and SSH protocols (Windows, Linux, and MAC machines). |
| Asset Unique Identifier for WMI | Select the Identifiers based on which the assets will get added to ServiceOps. This prevents duplicate assets from getting added. If the asset with same identifiers already exists, the details will get updated. In case of MAC Address identifier, multiple Hardware Asset Network Adapter MAC Addresses will be checked, and accordingly, either the details will be updated in the existing asset, or a new asset will be created. Note: This is applicable for WMI and SSH protocols (Windows, Linux, and MAC machines). |
| Asset Unique Identifier for SNMP | Select the Identifiers from the dropdown for the SNMP protocol. |
| QR Code Support | Enable if you want to support the QR code feature. If enabled, you can select the various details or parameters that can be printed in the QR code. |
| Fetch Asset Utilization Details for Windows | Enable to fetch the asset utilization details of the Windows asset. The details will be available in the Hardware Asset Details page > History > Asset Utilization History tab. If enabled, specify the number of days for which the data should be retained. By default, it is blank. Note: To fetch data, the parameter Turn on fast startup from Control Panel > Hardware and Sound > Power Options > System Settings should be disabled. If enabled, the data for that particular duration may not be captured. |
Once the required parameters are configured, click Update.
Purchase Order Preference
This tab enables you to set the preferences for the Purchase Order.
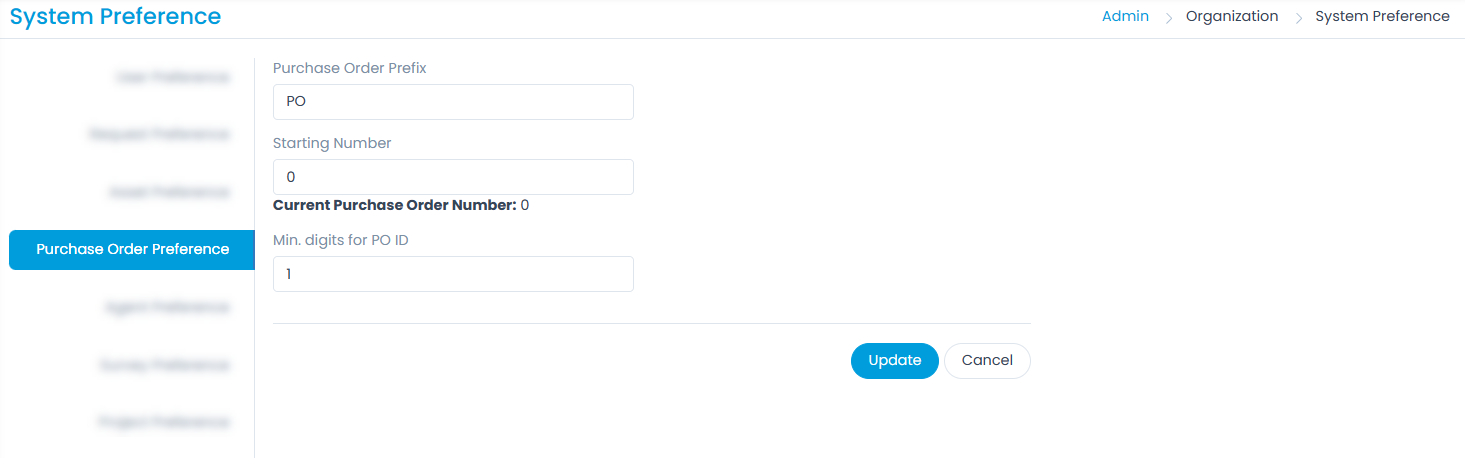
Purchase Order Prefix: You can set the prefix for Purchase Order. The default prefix is PO.
Starting Number: You can set the starting number of the Purchase Order. Also, you can view the Current Purchase Order Number.
noteStarting number of the Purchase Order should be greater than the Current Purchase Order Number.
Min. digits for PO ID: Set the minimum digits allowed in the PO-ID. It is defined based on the starting number.
Agent Preference
This tab provides the options for setting the agent with respect to the Discovery.
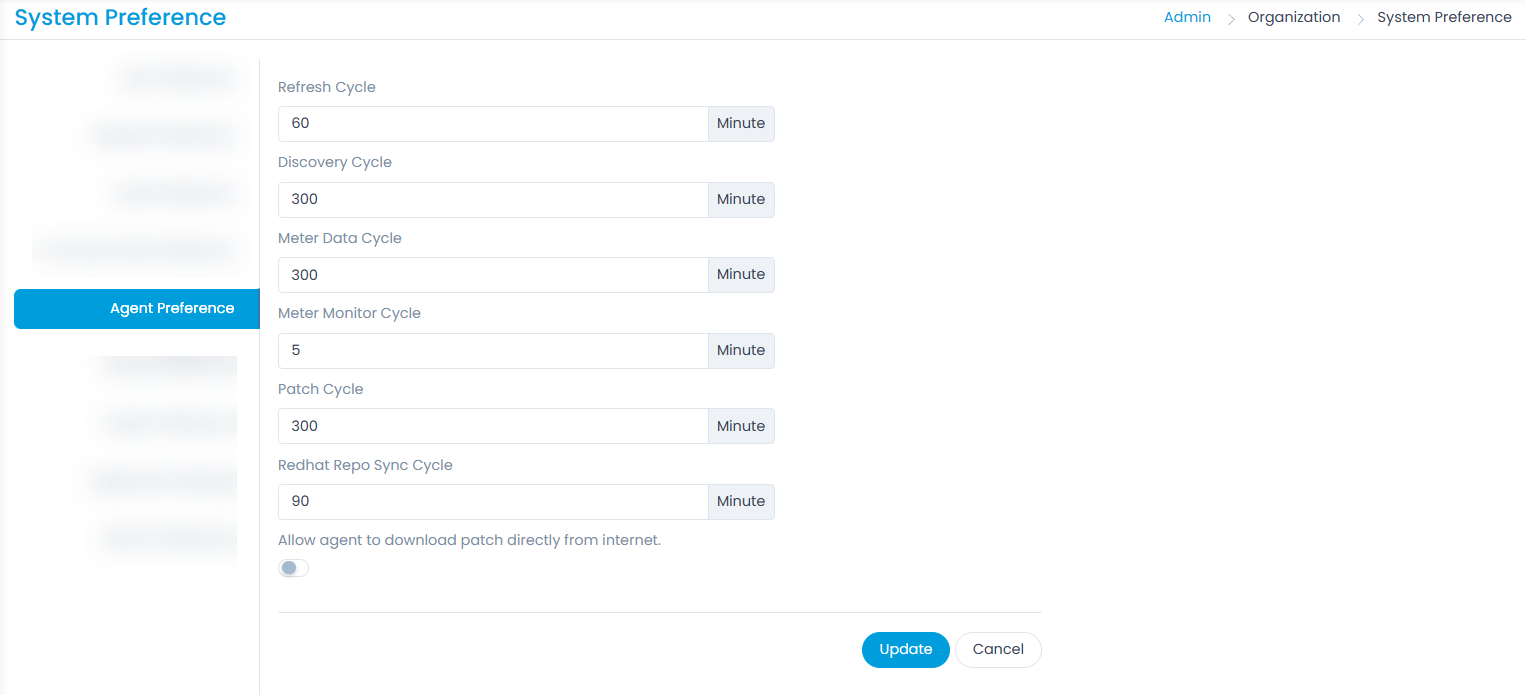
The settings are according to the minutes/cycle scale.
| Parameter | Description |
|---|---|
| Refresh Cycle | Set the time interval in minutes after which the Agent will send data to the server. The default value is 5. |
| Discovery Cycle | Set the time interval in minutes after which the Agent will run the discovery process and send the data to the server. The default value is 60. |
| Meter Data Cycle | Set the time interval after which the Agent will send the software meter data of the active machines to the server. The default value is 120. |
| Meter Monitor Cycle | Set the time interval after which the Agent will monitor the active machines in which the Software meter is configured. The default value is 5. |
| Patch Cycle | Set the time interval after which the Agent will check the asset for missing and installed patches and update the server accordingly. The default value is 60. |
| Redhat Repo Sync Cycle | Set the time interval after which the Agent will sync data with the Redhat Repo every time. The default value is 60. |
| Allow agent to download patch directly from internet | Enable to allow the agent to directly download the patch from the Internet instead of the server. Thus, saving the bandwidth. By default, it is disabled. |
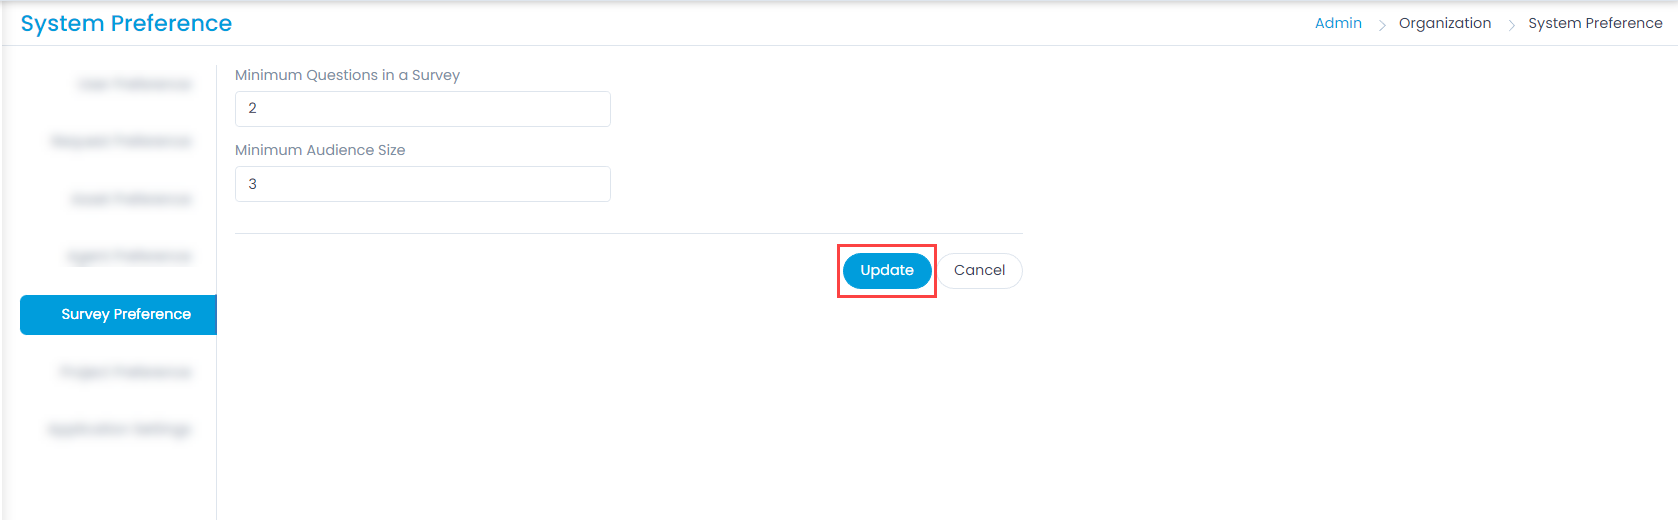
Survey Preference
This tab enables you to set the minimum questions and audience size limit in the survey. For more details on Survey, refer to the link User Survey.
The options are:
- Minimum Questions in a Survey: You can set the minimum number of questions in a survey. The default value is 5. The maximum questions can be 30.
- Minimum Audience Size: You can select the minimum size of the audience in a survey. i.e. Number of Requesters to be selected. The size can be from 3 to 100.
Once set, click Update to apply the setting.
A user with Super Admin role and holding Manage User Survey permission can access this module.
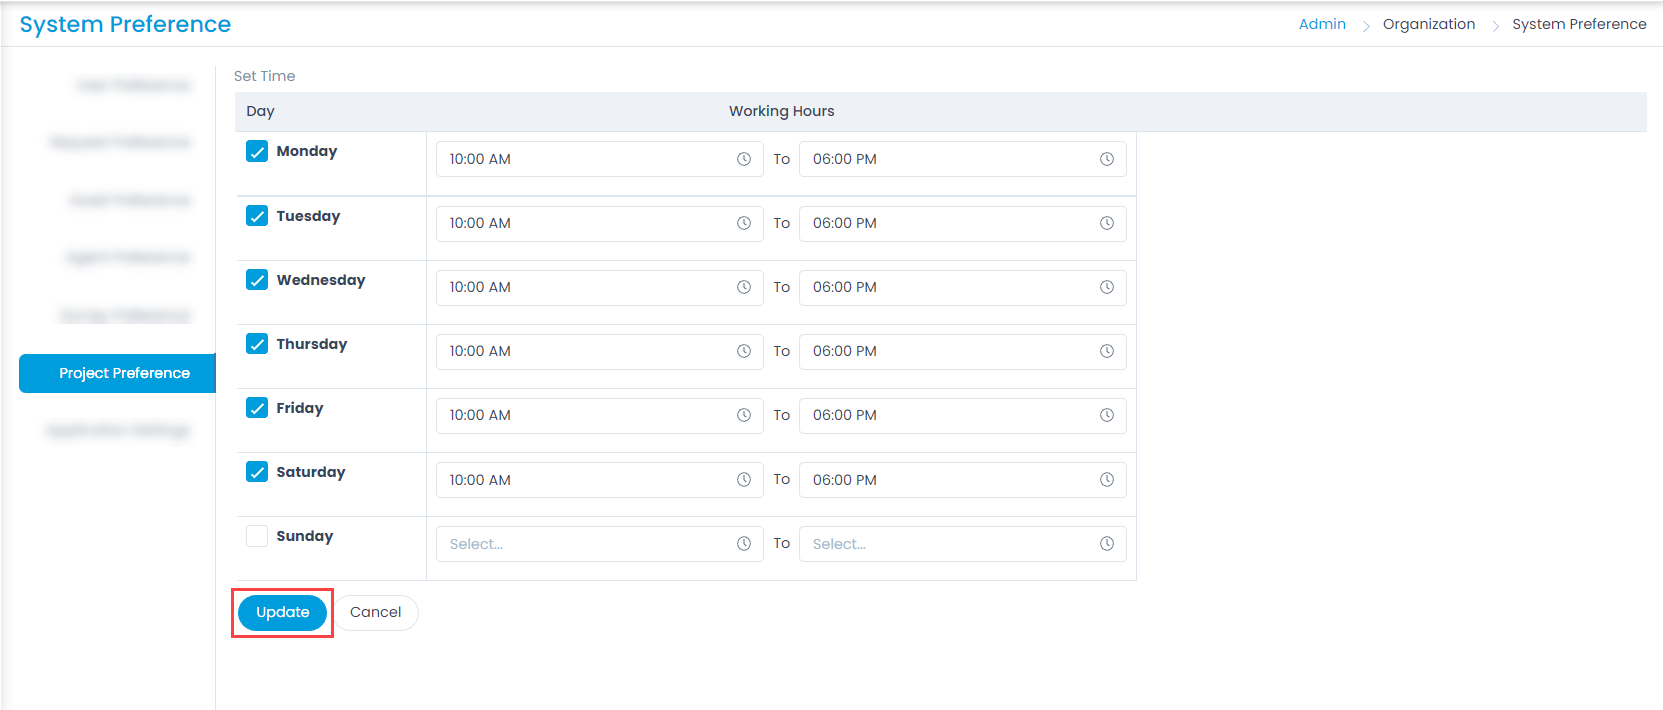
Project Preference
This tab enables you to set the timing as per the requirement for the complete week and working hours.
Application Settings
This tab enables you to configure the settings applicable for the entire application. The settings are:
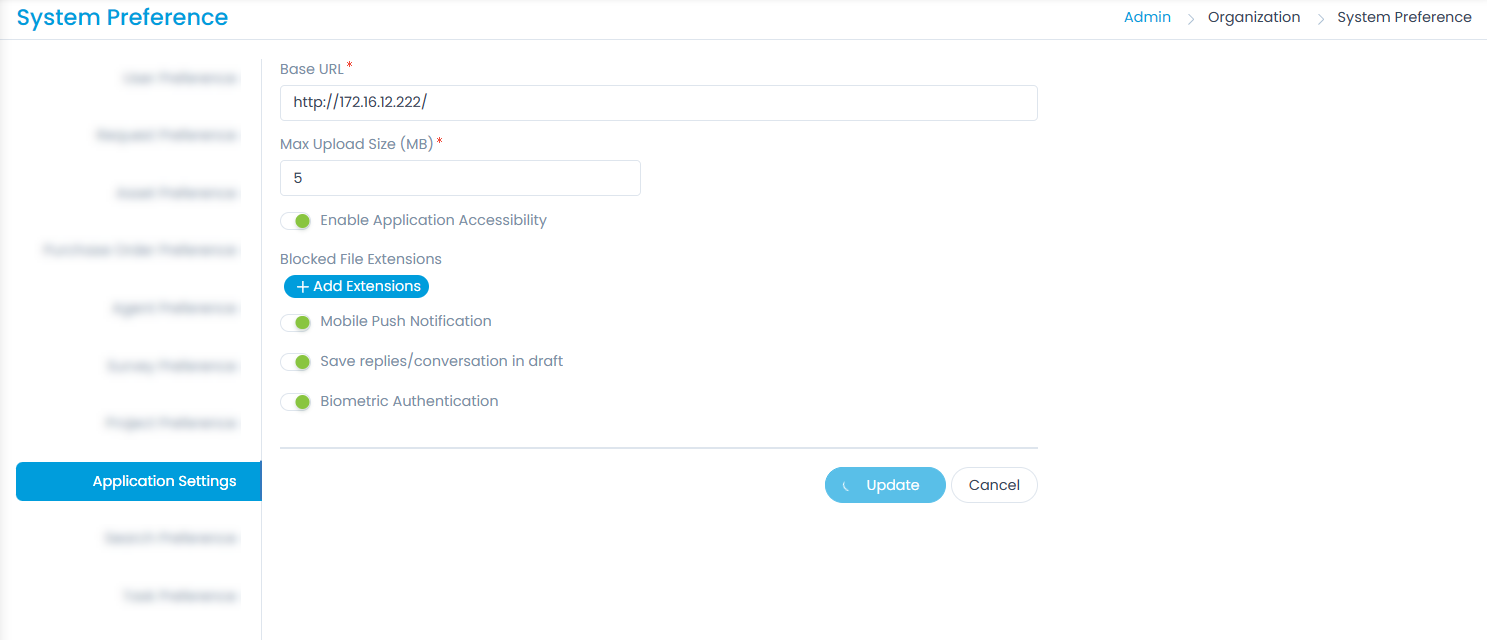
- Base URL: Specify the URL of the installed application page where the GUI needs to be accessed. This field is read-only in the SaaS application.
- Max Upload Size (MB): Specify the maximum size of the file which a user can upload. The maximum file size limit is 1024 MB. This field is read-only in the SaaS application.
- Enable Application Accessibility: Enable to resize the font of the content in the application. You can increase, decrease, and reset the font size. If enabled, the font size icon will appear next to the Create New + button at the top of the screen.
- Blocked File Extensions: Specify the file extensions which you want to block. to block the file, click the + Add Extensions button, enter the extension, and click the green (right) symbol.
- Mobile Push Notification: Enable to send the mobile push notifications. By default, it is disabled.
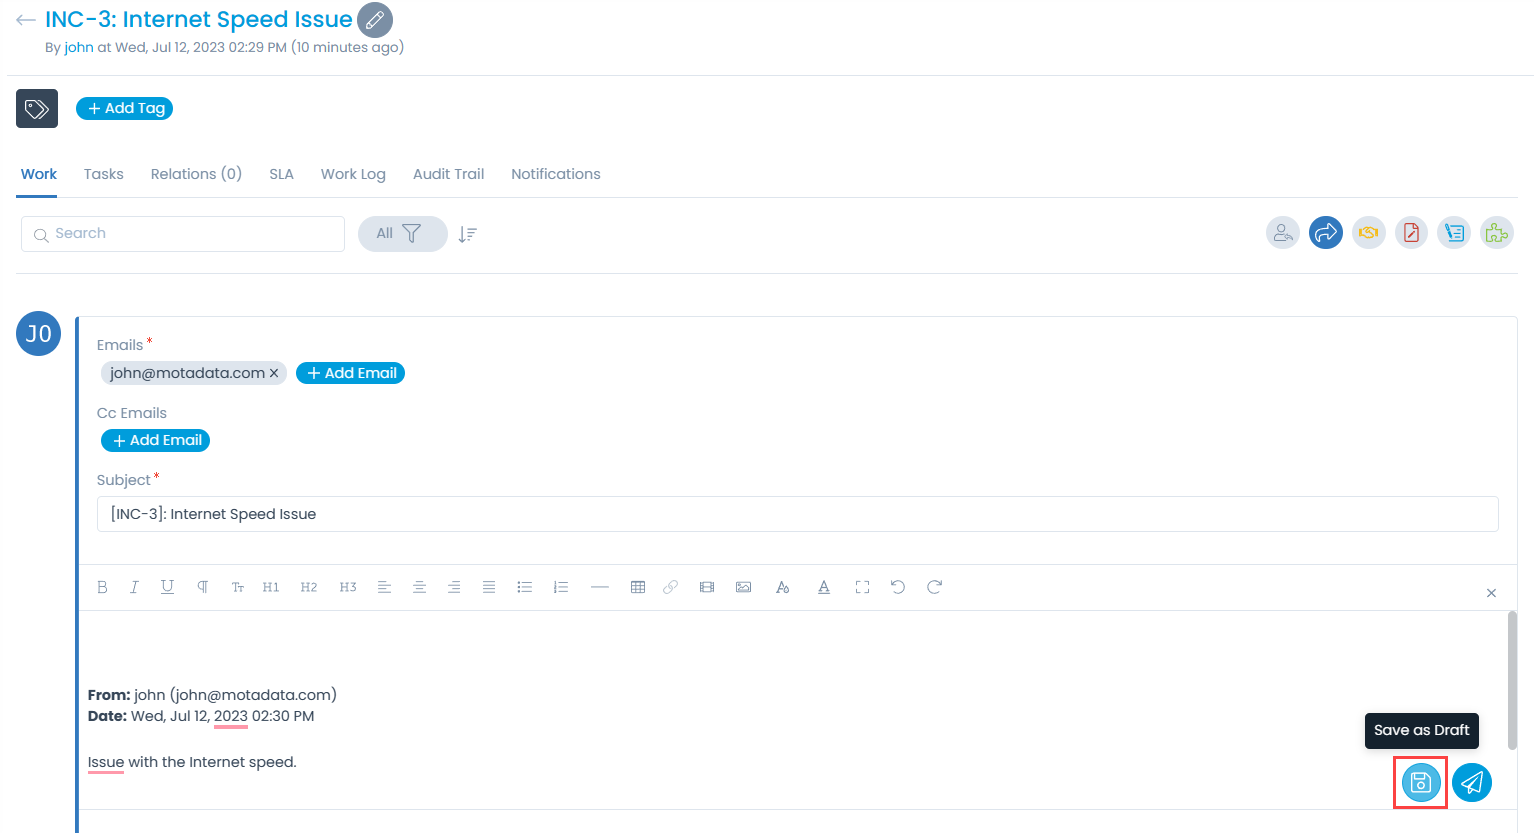
- Save replies/conversation in draft: Enable to save the replies and conversations as a draft. Once enabled, the icon "Save as Draft" will appear on the ticket's Details page while sending a reply, forward, or collaborate email to the desired user, as shown below. It is only available for Requests, Problems, Changes, and Releases modules.
- Biometric Authentication: Enable to activate the biometric authentication feature in the Mobile App. Once enabled, it will be available in the Mobile App settings.
Once configured, click Update and the settings will get applied to the entire application.
Search Preference
This tab enables you to set the search preferences using which the desired result can be achieved easily.
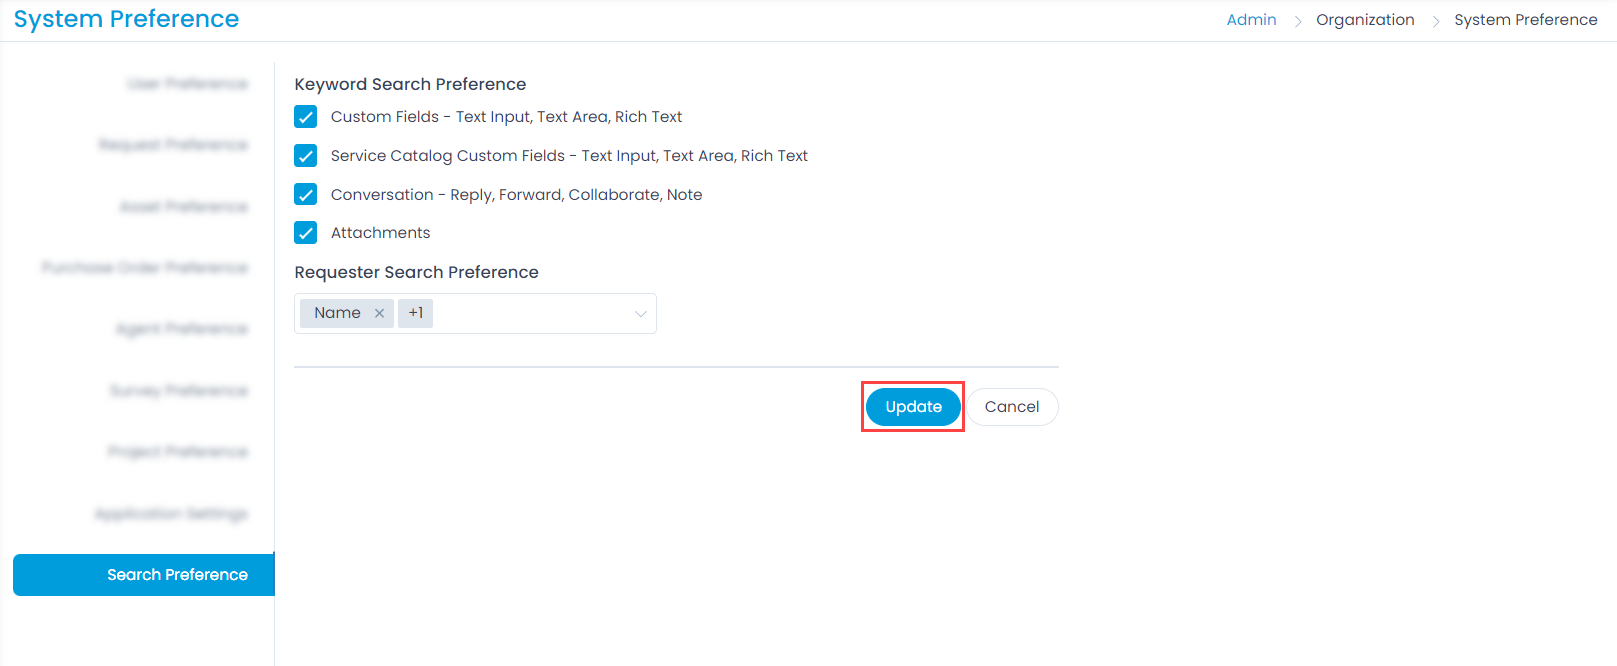
The options are:
Keyword Search Preference
- Custom Fields - Text Input, Text Area, Rich Text: The custom fields can be used to perform search. It is applicable to all the modules.
- Service Catalog Custom Fields - Text Input, Text Area, Rich Text: The Service Catalog Custom Fields can be used to perform search in the Service Catalog module only.
- Conversation - Reply, Forward, Collaborate, Note: It is applicable to all the modules.
- Attachments: The Incident and Service Request tickets can be searched based on the attachment names and their content. Requests containing custom Attachment field can also be searched.
- If "Conversation" and "Attachments" both are enabled, search will be performed on the attachments attached to the Request ticket and also in its Conversation (Reply, Forward, Collaborate, and Note) tab.
- The file types supported for search are PDF, Word, Excel, Doc, Text, and Email Attachment.
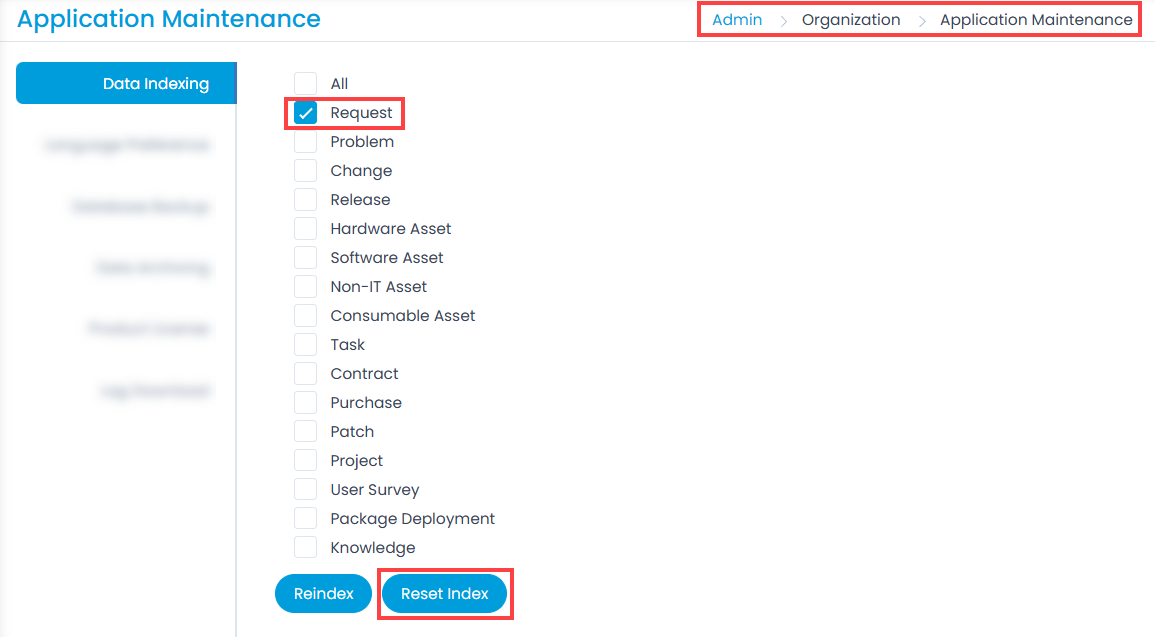
- Once the "Attachments" option is enabled, the search will be performed only on newly created tickets. To search the old tickets, Reset Index for Request module from the Application Maintenance > Data Indexing tab.
- Attachments of Custom Fields will not be searched.
The preferences set enables you to use the value of those fields in the Search filter and get the required result.
Example 1: If Service Catalog Custom Fields option is enabled, and you type the "Dell" word in the Search filter on the Requests List page, all the Requests containing the word "Dell" as a value of Text Input, Text Area, or Rich Text custom field, will be displayed in the list as shown below.

Example 2: If Attachments option is enabled and "HA Configuration" text is entered in the Search field, the system will search for the text in the attachment's content and display tickets accordingly.

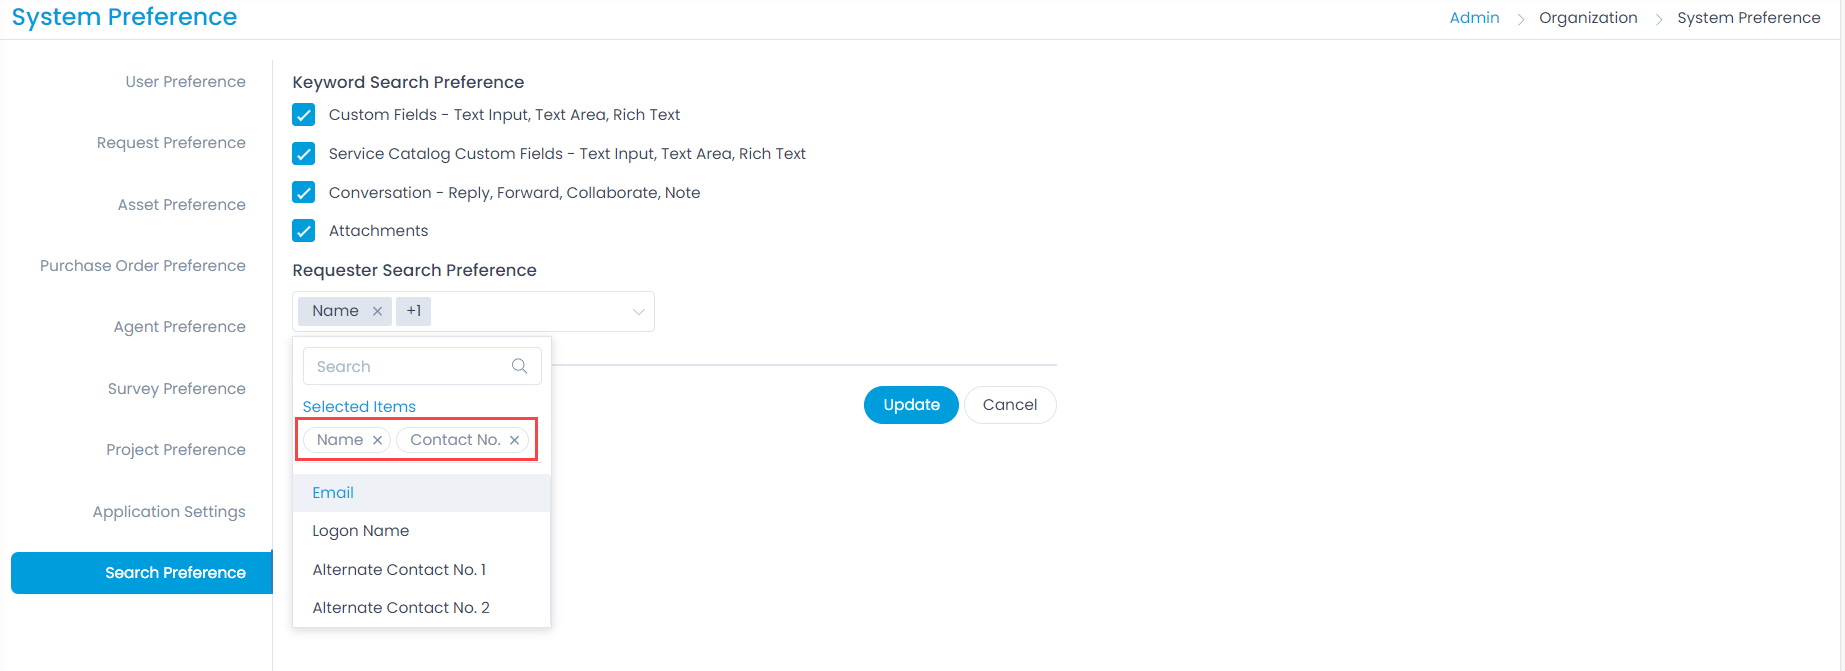
Requester Search Preference
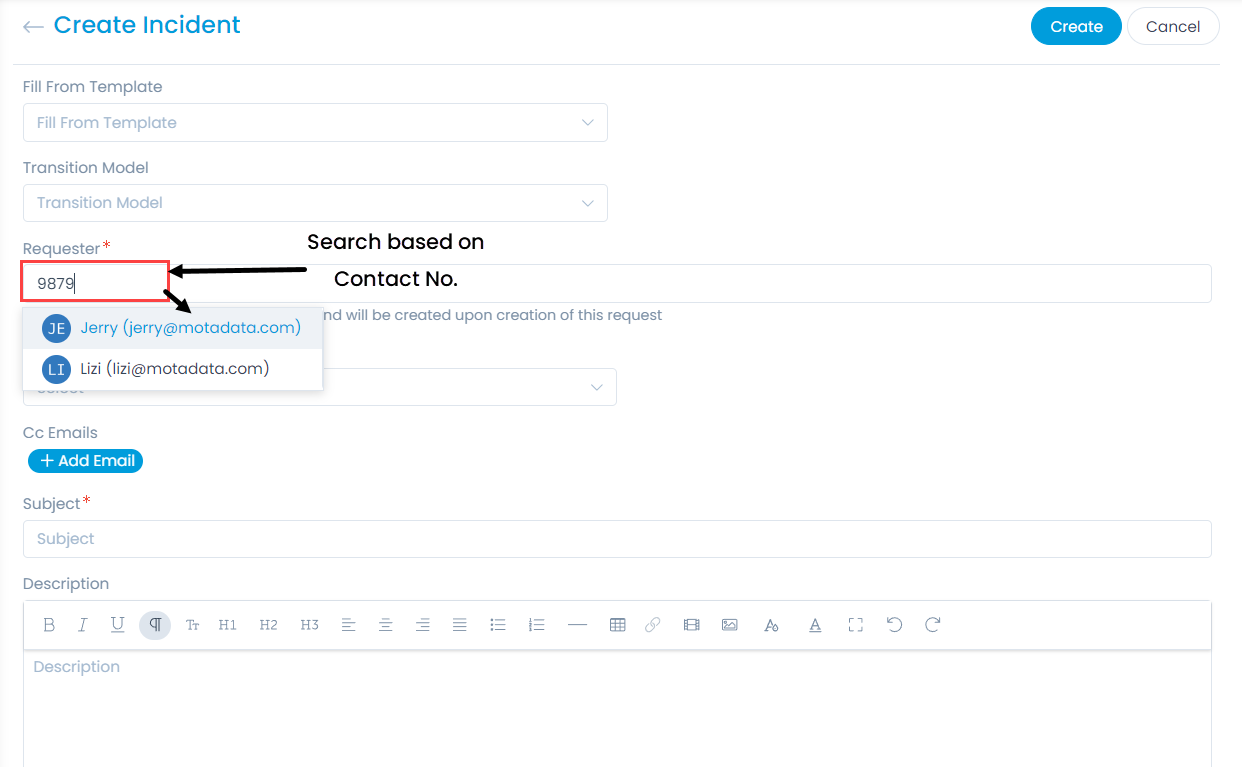
Select the required fields from the dropdown based on which the requesters can be searched in the Requester field while creating an Incident Request. By default, the Name field is already selected and cannot be removed. For example, If Name and Contact No. fields are selected in the Requester Search Preference.
While creating an Incident Request, in the Requester field enter the contact no. and you will get the result as shown below. Similary, if you try to search using the Logon name you will not get the result.
Task Preference
Set the preferences for the task.
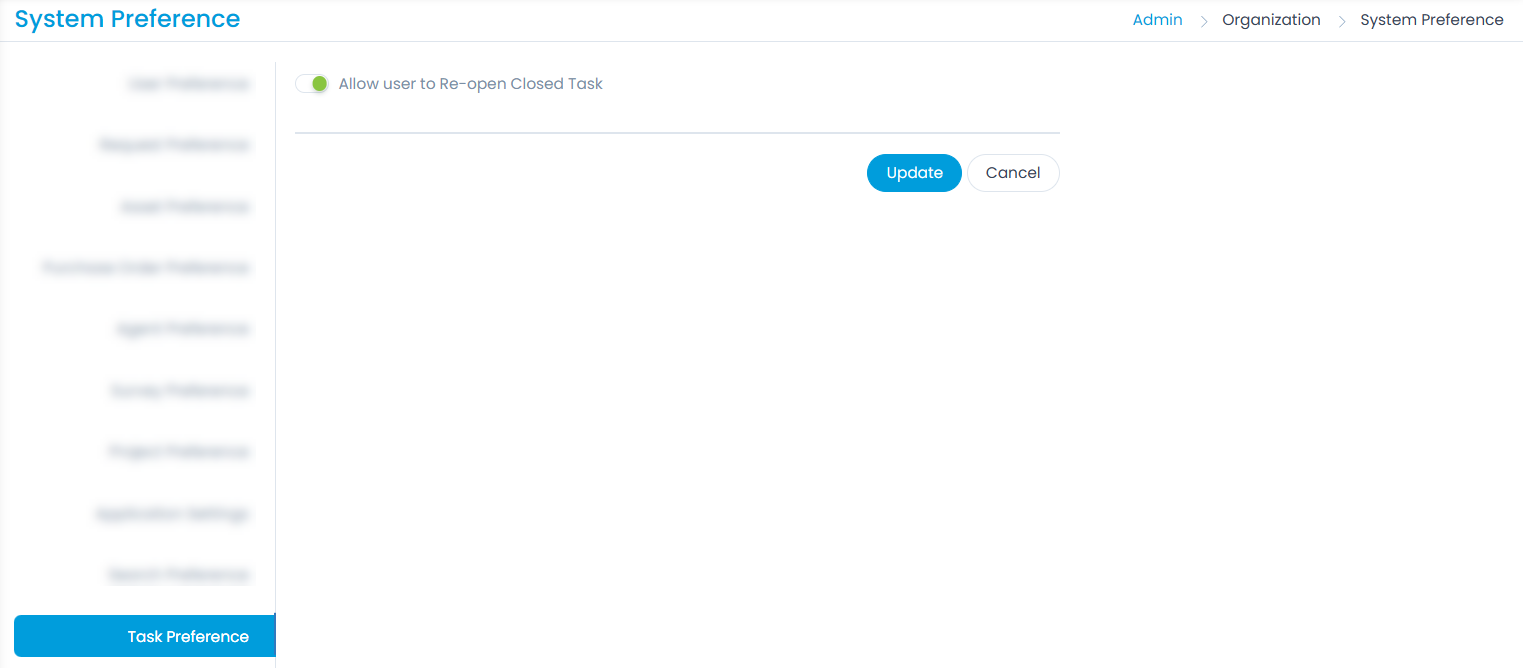
- Allow user to Re-open Closed Task: Enable to allow the users to re-open the task once closed.If disabled, the user cannot re-open the closed tasks. By default, it is enabled. Once configured, the setting will apply to all the modules' tasks.