Linux Poller Installation
The Linux Poller service provides robust asset discovery capabilities for Linux-based environments, enabling comprehensive monitoring and data collection across your IT infrastructure.
This guide provides step-by-step instructions for installing and configuring the Linux Poller service on supported Linux distributions (Ubuntu 22/24, Red Hat 9.2/9.4).
Prerequisites and Supported Features
System Requirements and Supported Features
System Requirements
- Supported OS: Ubuntu 22/24, Red Hat 9.2/9.4
- Network: Port 8090 must be allowed for communication between the Poller and other machines.
- Permissions: Root/admin access is required for installation.
Required Information from ServiceOps
Secure Auth Code
Activation Code
ServiceOps Server IP Address
Protocol (HTTP/HTTPS)
noteThis guide applies to both Ubuntu and RedHat. Auto-upgrade is not supported for the Linux Poller. The Poller requires both activation and secure auth codes to function and works with ServiceOps v8.6.3 and above.
Supported Discovery Features
- Windows (WMI), Linux/macOS (SSH), SCCM, SNMP, Cloud (AWS, Azure), Chrome OS, Virtual (VMware, Nutanix)
- Wake on LAN
- Gateway to Agent Communication
- Local Storage for Patch/CAB Files
Installation and Configuration
Step 1: Download and Install
Download: Get the Linux Poller setup file (
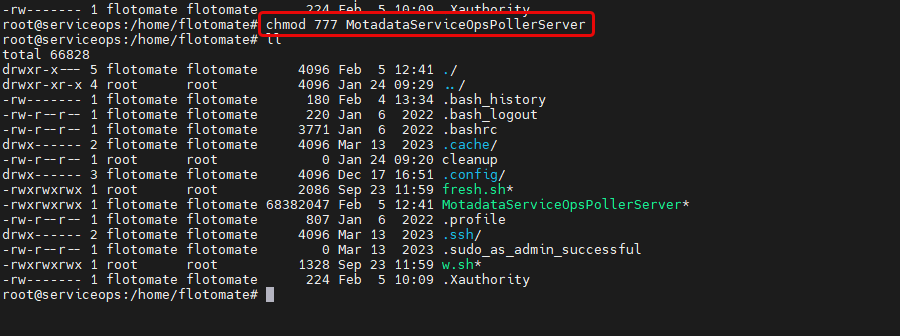
MotadataServiceOpsPollerServer) from the Download Links.Set Permissions: Navigate to the download directory and run
chmod 777 MotadataServiceOpsPollerServer.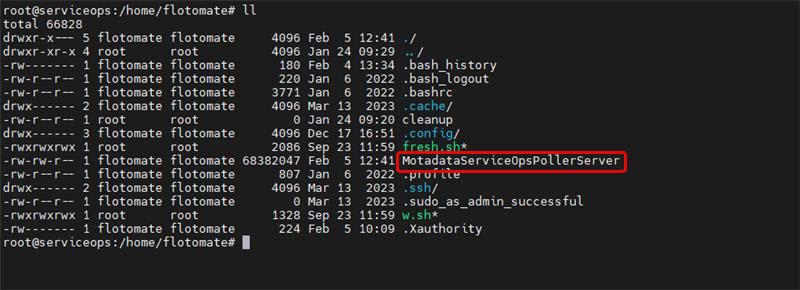
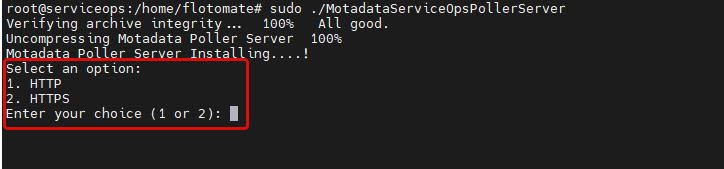
Run Installation: Execute the installer with root privileges:
sudo ./MotadataServiceOpsPollerServer.
Step 2: Configure Poller
During the installation, you will be prompted for the following information:
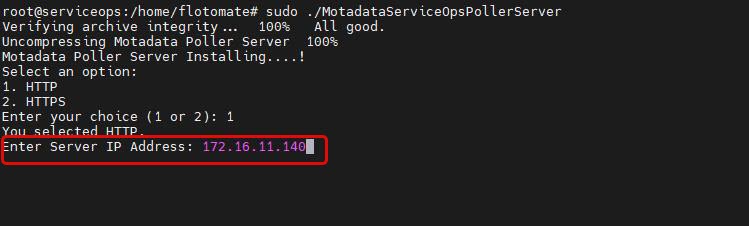
- Protocol: Select
1for HTTP or2for HTTPS.
Here, 1 (HTTP) is entered. The following prompt appears.
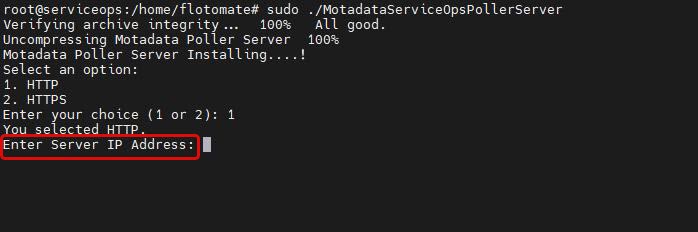
- ServiceOps Server IP: Enter the IP address of your ServiceOps server.
Once entered, the following “Enter SecureAuth” prompt appears.
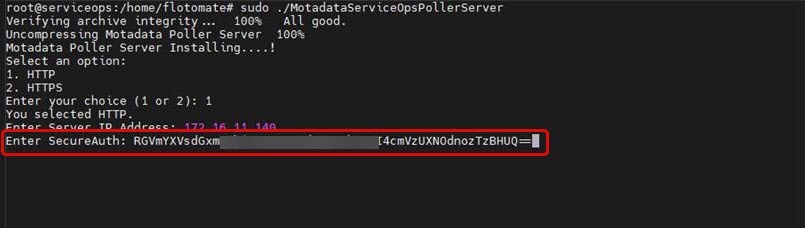
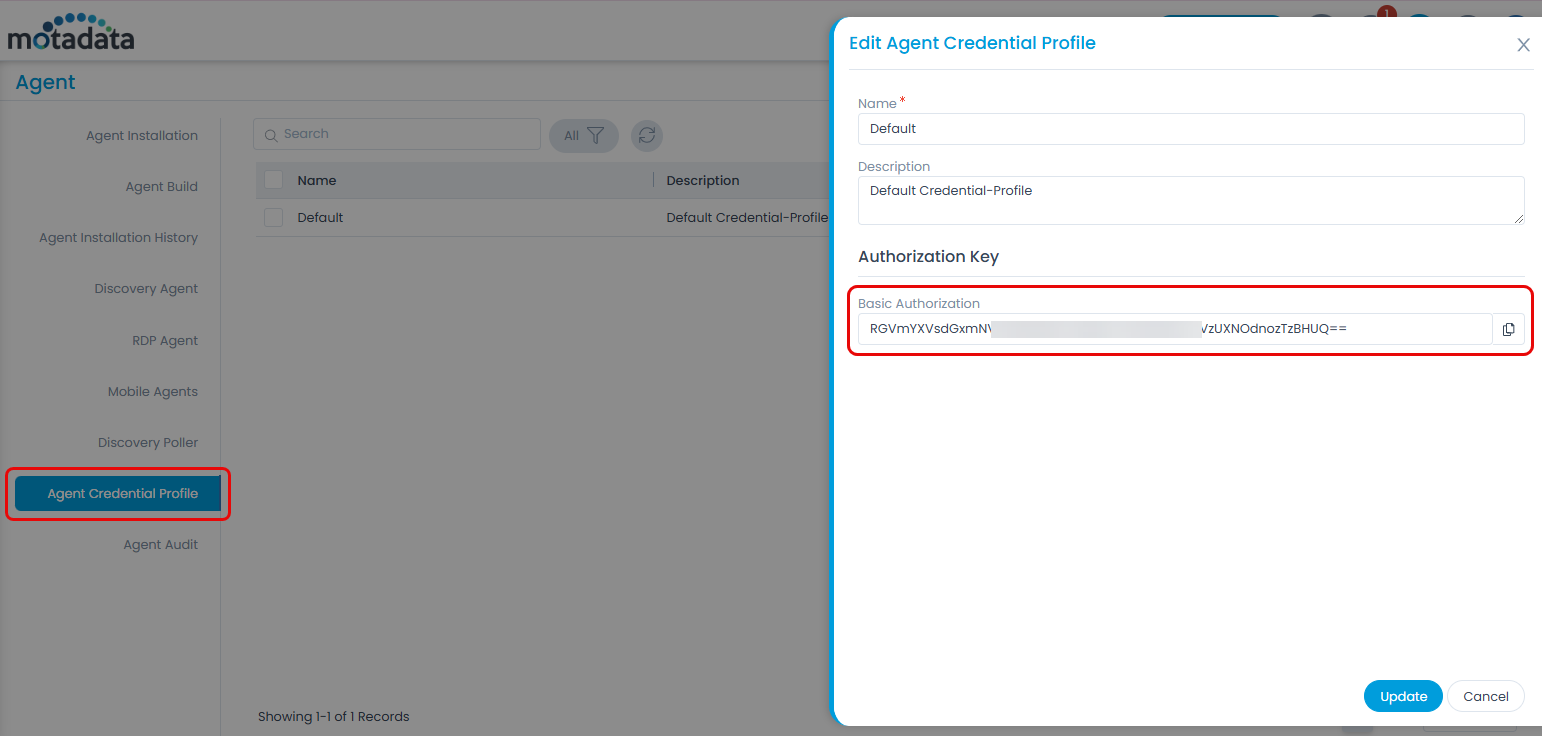
- Secure Auth Code: Enter the code from your Agent Credential Profile.
- Activation Code: Enter the code from your License Details tab.
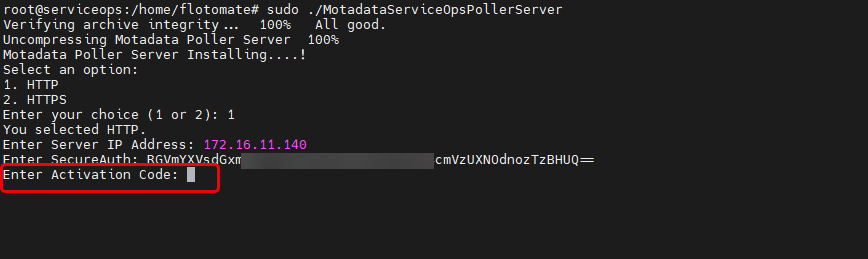
You can get the activation code from the ServiceOps portal, which is shown below.

Please copy the code from here and paste it into the terminal below.
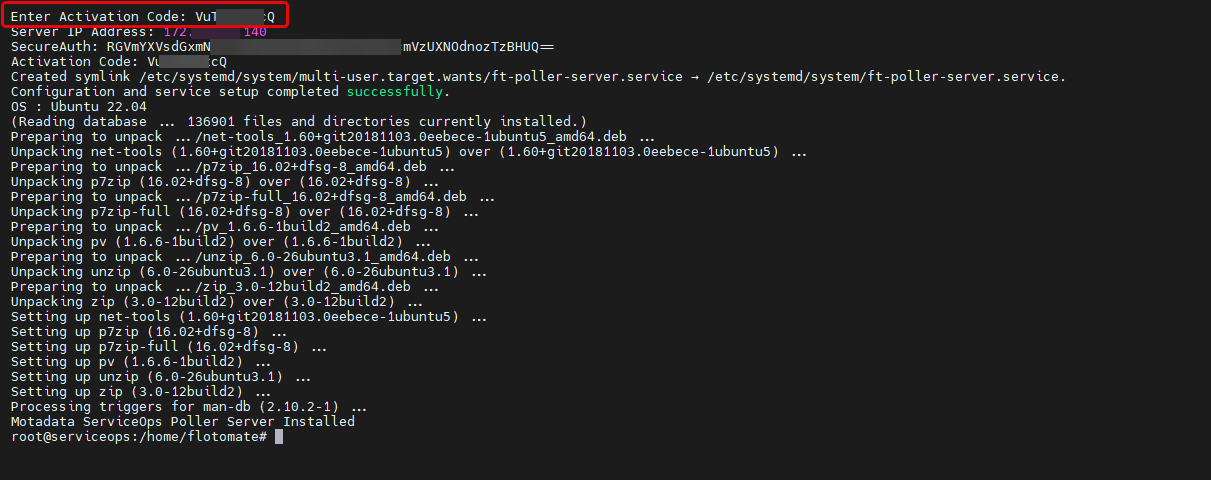
Once entered, the details will appear, and the setup will be completed successfully.
Step 3: Verify and Set Up Agent Communication
Verify Service: Check that the service is running:
systemctl status ft-poller-server.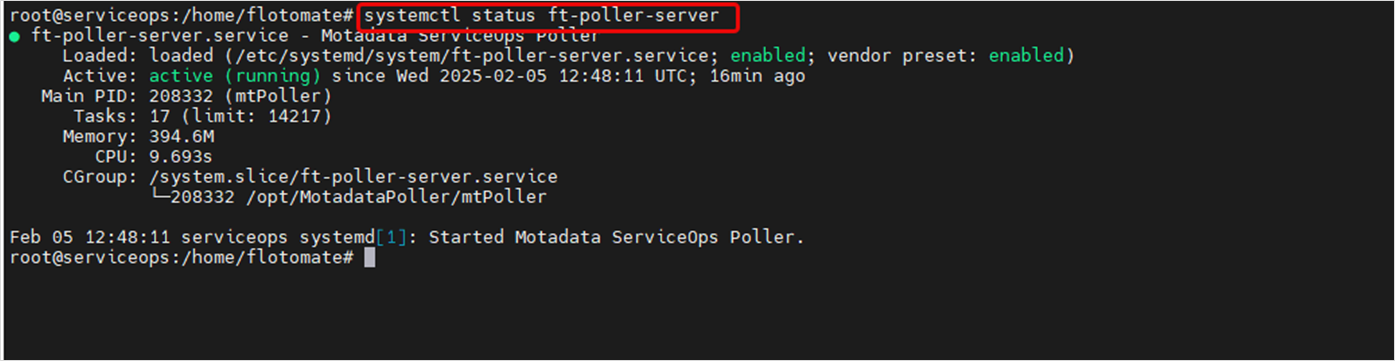
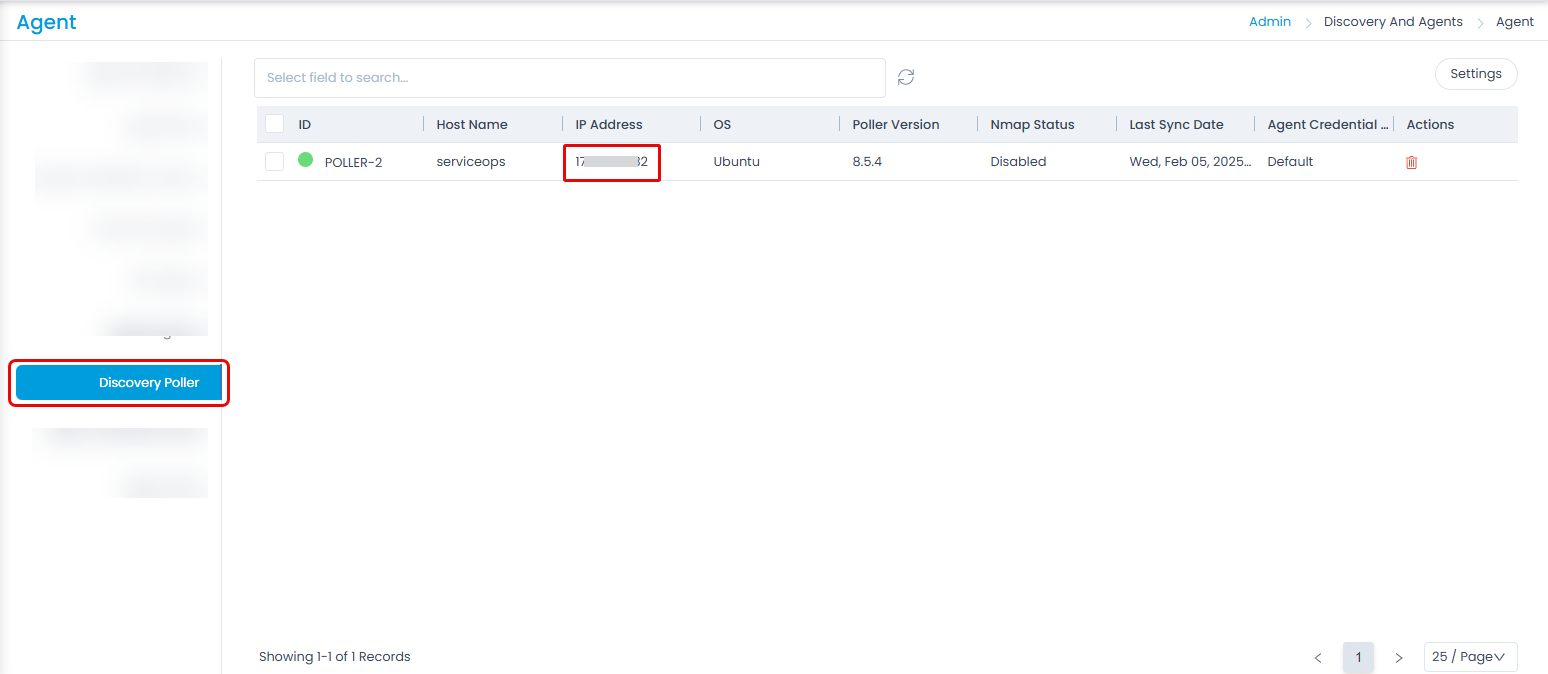
Verify Portal Registration: The Poller will appear in the Discovery Poller section of your ServiceOps portal.
Agent Communication:
- When installing the Discovery Agent on client machines, provide the Poller IP Address, Port
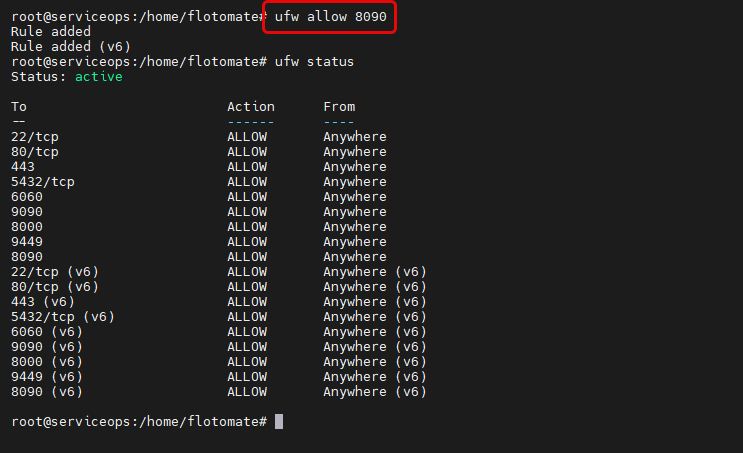
8090, and the Secure Auth Code. - Ensure your firewall allows traffic on port 8090:
ufw allow 8090.
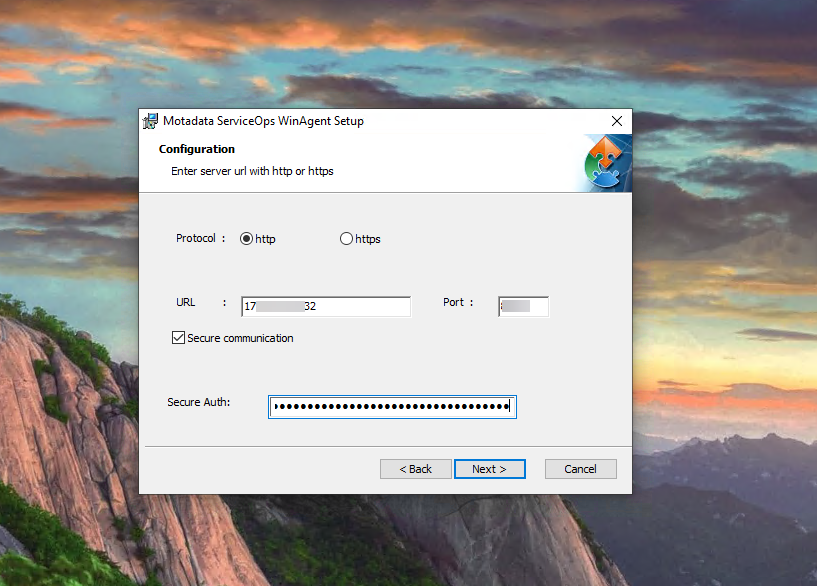
- When installing the Discovery Agent on client machines, provide the Poller IP Address, Port
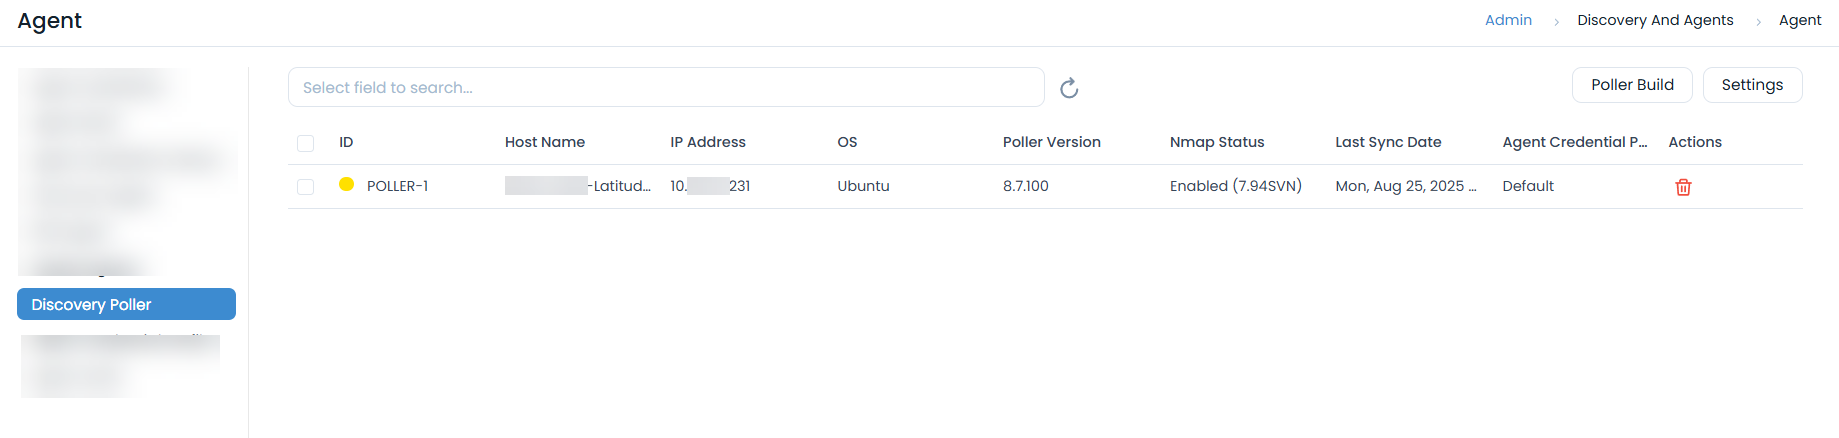
Verify Poller Registration: The pollers installed will appear in the ServiceOps portal under Admin > Discovery and Agents > Agent > Discovery Poller tab as shown below.
Poller Uninstallation Steps
To uninstall the Linux Poller service, follow these steps:
Stop the Poller Service:
sudo systemctl stop ft-poller-serverThis command stops the running Poller service.
Disable the Poller Service:
sudo systemctl disable ft-poller-serverThis command prevents the Poller service from starting automatically on boot.
Remove the Service Unit File:
sudo rm -rf /etc/systemd/system/ft-poller-server.serviceThis command deletes the systemd service unit file for the Poller.
Reload Systemd Daemon:
sudo systemctl daemon-reloadThis command reloads the systemd manager configuration.
Remove Installation Directory:
sudo rm -rf /opt/MotadataPoller/This command removes the Poller's installation directory.
Troubleshooting and Best Practices
Troubleshooting Common Issues
- Installation Issues: Check for
sudoand file permissions. - Connection Issues: Verify the server IP and network connectivity.
- Authentication Issues: Double-check Secure Auth and Activation codes.
- Service Issues: Check system logs for errors.
- Firewall Issues: Ensure port 8090 is allowed.
Configuration Best Practices
- Network: Place the Poller in the same subnet as target assets.
- Security: Keep authentication codes confidential and use HTTPS.
- Performance: Monitor system resources and configure appropriate scan schedules.