Deployment
A deployment task links a registered OS image to a provisioning window, defines how target machines authorize deployment, and tracks progress across all machines in the campaign. After setup is complete and at least one image is registered, create a deployment task. Target machines that boot via MotadataPXE during the active window receive the assigned image.
Prerequisites
- The MotadataPXE Utility is installed and DHCP is configured. See Setup.
- At least one OS image is registered in ServiceOps. See Image.
- Target machines are blank or fully backed up. Deployment permanently overwrites the disk.
- You have the Manage Deployment permission under Manage OS Deployment.
Deployment Methods
ServiceOps supports two methods for authorizing deployment on a target machine.
| Feature | Manual | Passcode-Based |
|---|---|---|
| Authorization | ServiceOps credentials entered on target machine | 6-digit passcode entered on target machine |
| Technician presence | Required at each machine | Not required |
| Best for | Small deployments, high-security environments | Large-scale rollouts, remote or unattended provisioning |
| Passcode required | No | Yes, generated by ServiceOps |
| Performed from | Target machine | ServiceOps server |
The Deployment List Page
Navigate to Admin > OS Deployment > Deployment.
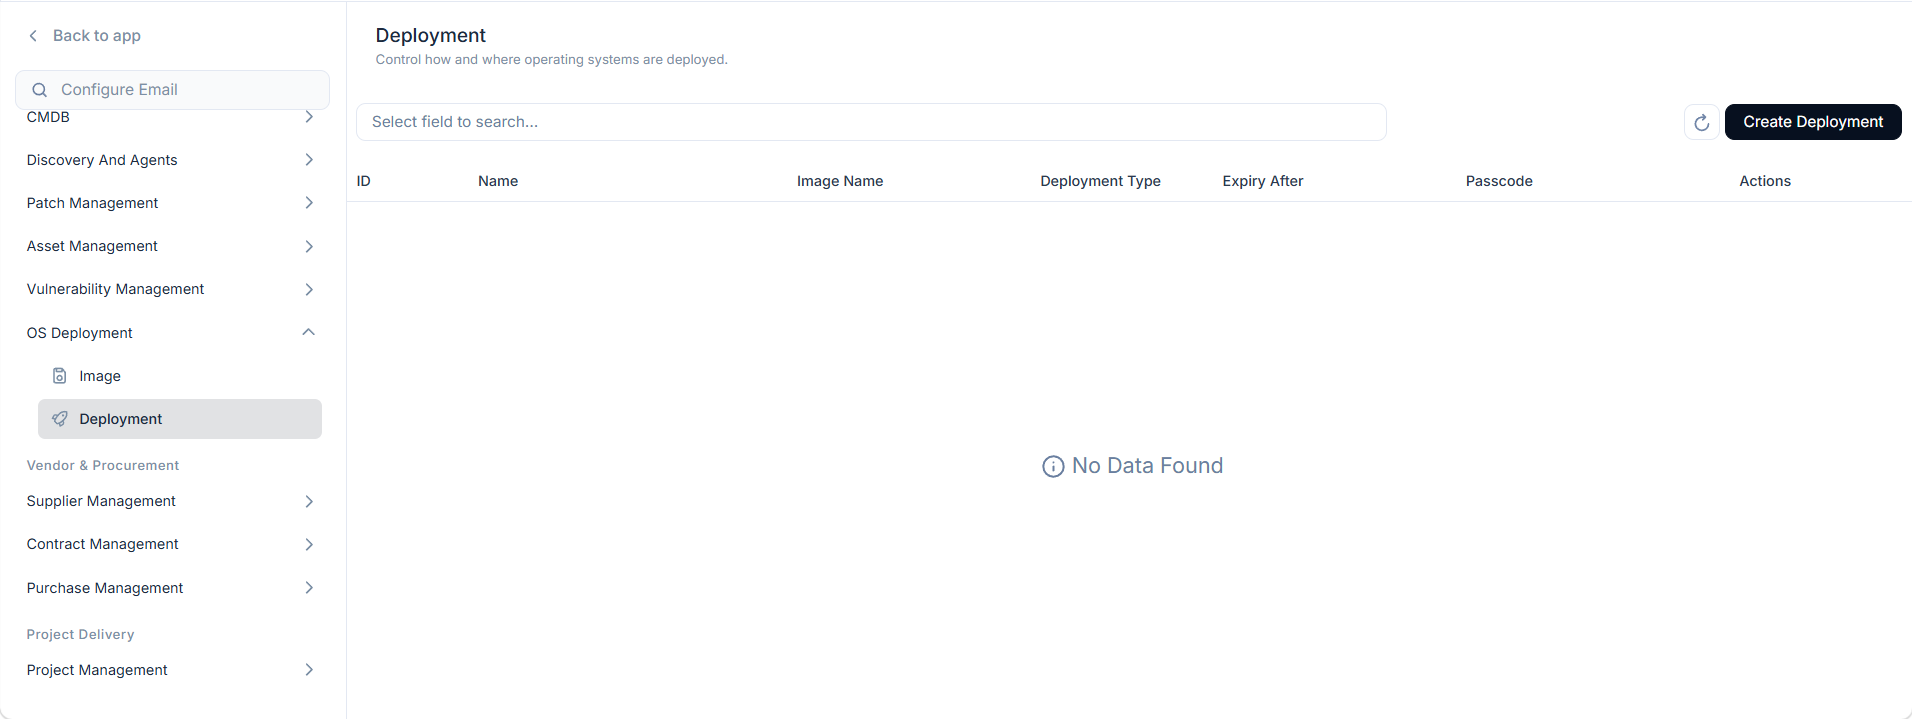
The Deployment list page shows all deployment tasks with the following columns:
| Column | Description |
|---|---|
| ID | Auto-generated unique identifier for the deployment task |
| Name | Display name of the deployment task |
| Image Name | The OS image assigned to this deployment task |
| Deployment Type | Authorization method: Manual or Passcode-Based |
| Expiry After | Date and time after which the deployment task expires |
| Passcode | The 6-digit passcode for Passcode-Based deployments. Empty for Manual deployments. |
| Actions | View the details of depoyment and delete if required. |
Create a Deployment Task
Creating a deployment task takes two steps in the wizard: configuring the task details and setting the deployment window.
Click Create Deployment to open the wizard.
Step 1: Configure the Deployment
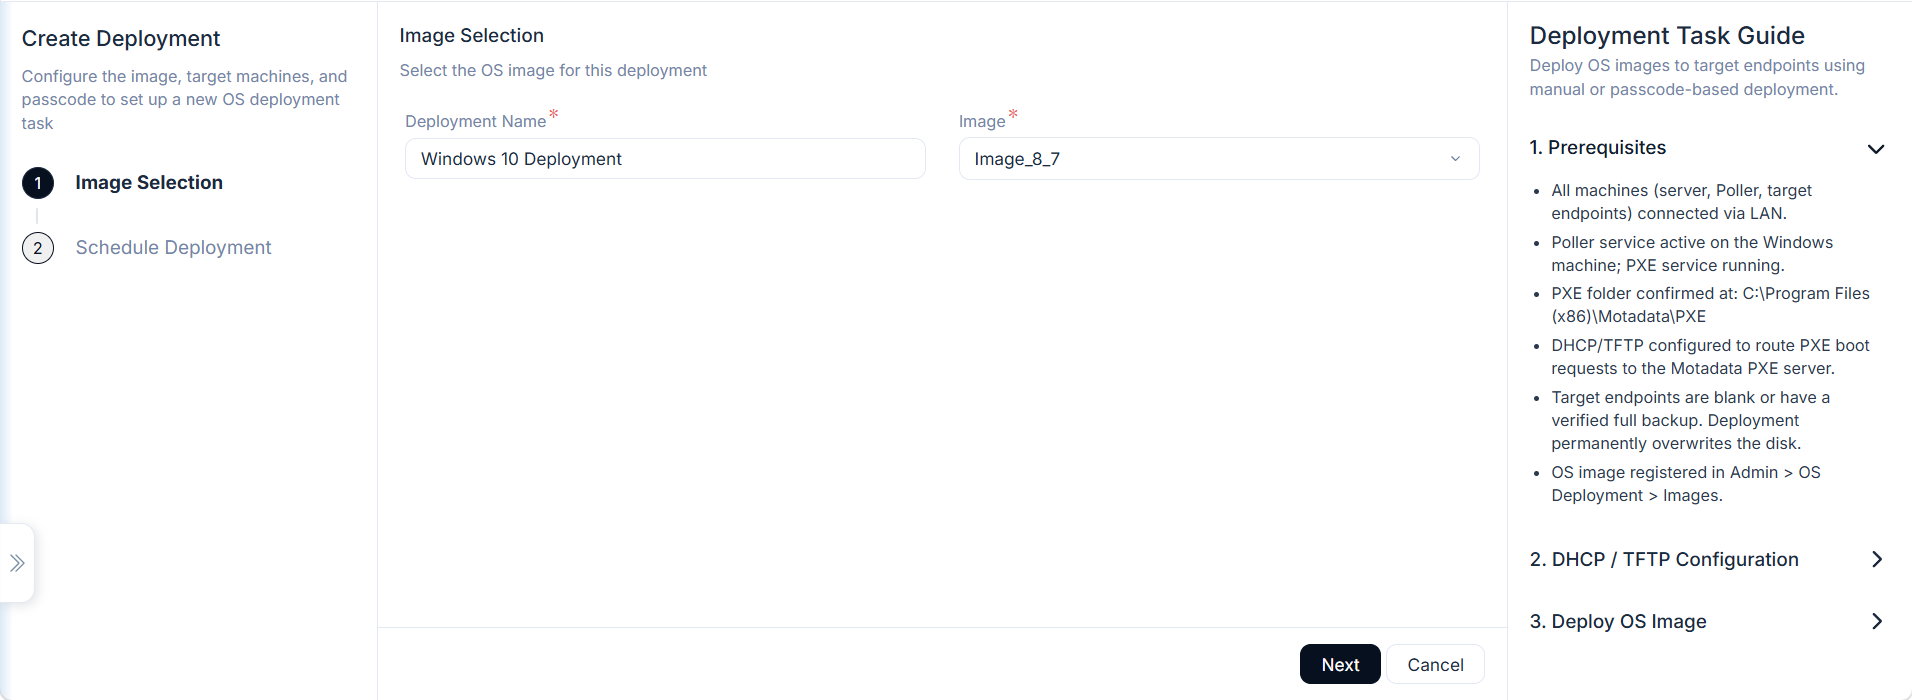
Fill in the following fields:
| Field | Description |
|---|---|
| Deployment Name | A descriptive name for this task, for example Q3 Laptop Refresh - Finance Dept |
| Image | The registered OS image to deploy to target machines |
The wizard includes a Deployment Task Guide panel on the right. It summarizes the steps target machines follow during MotadataPXE boot and deployment. Use it as a reference when coordinating with field technicians.
Step 2: Set the Passcode-Based Deployment Window
Click Next to proceed to the schedule configuration.
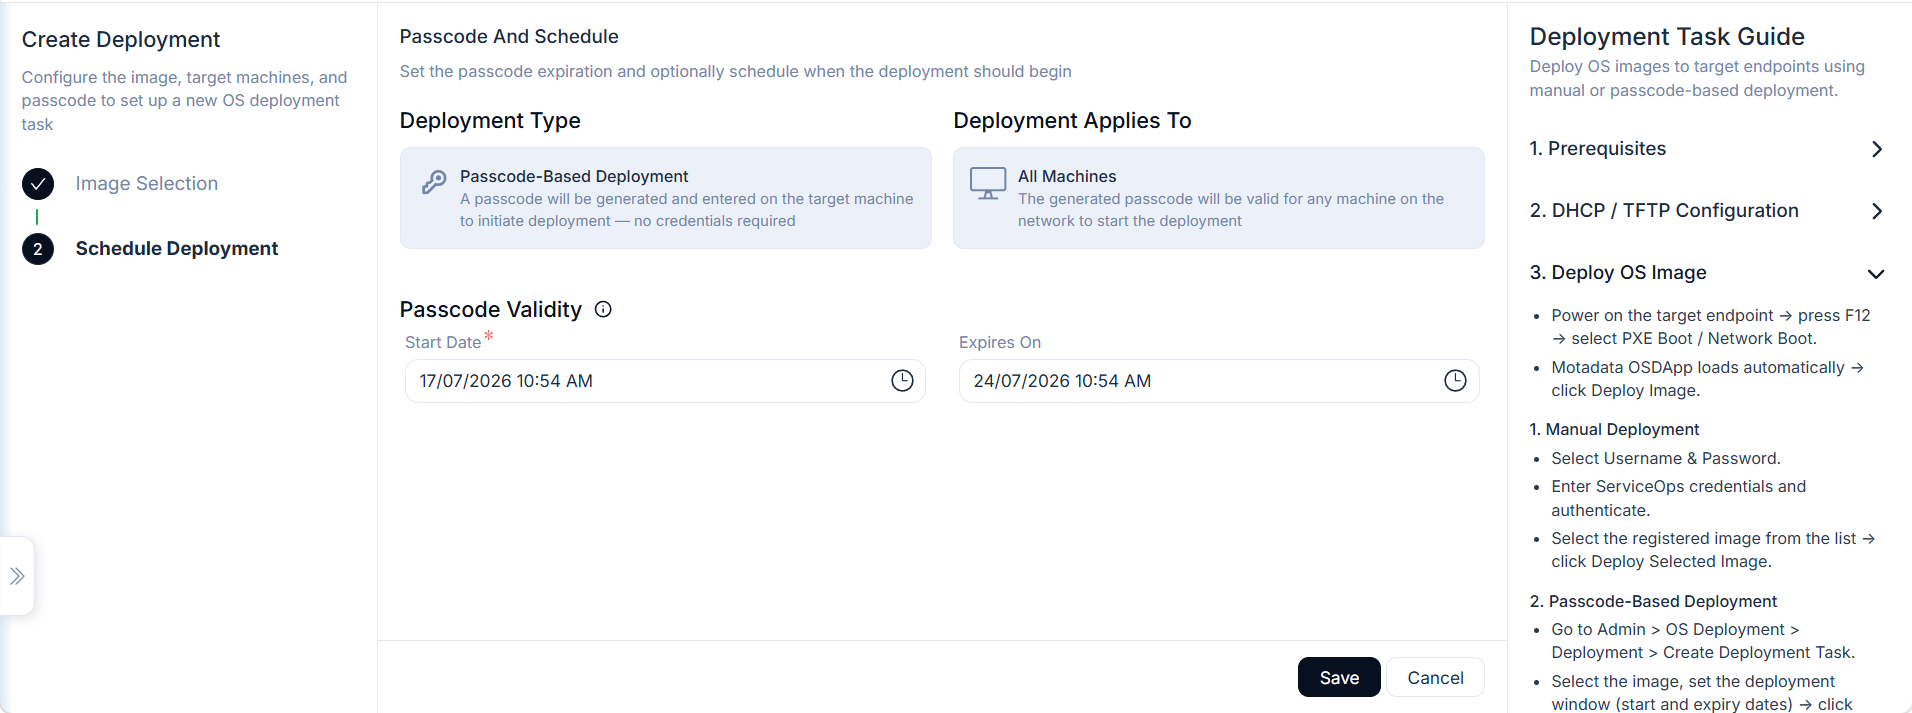
For Passcode-Based deployments, configure the validity:
| Field | Description |
|---|---|
| Start Date | Date and time the passcode becomes active. Target machines cannot authenticate before this time. |
| Expiry Date | Date and time the passcode stops working. Machines that boot after this time cannot authenticate. |
Click Save to create the task. ServiceOps generates a 6-digit passcode automatically after the task is saved. The passcode appears in the Passcode column on the Deployment list page.
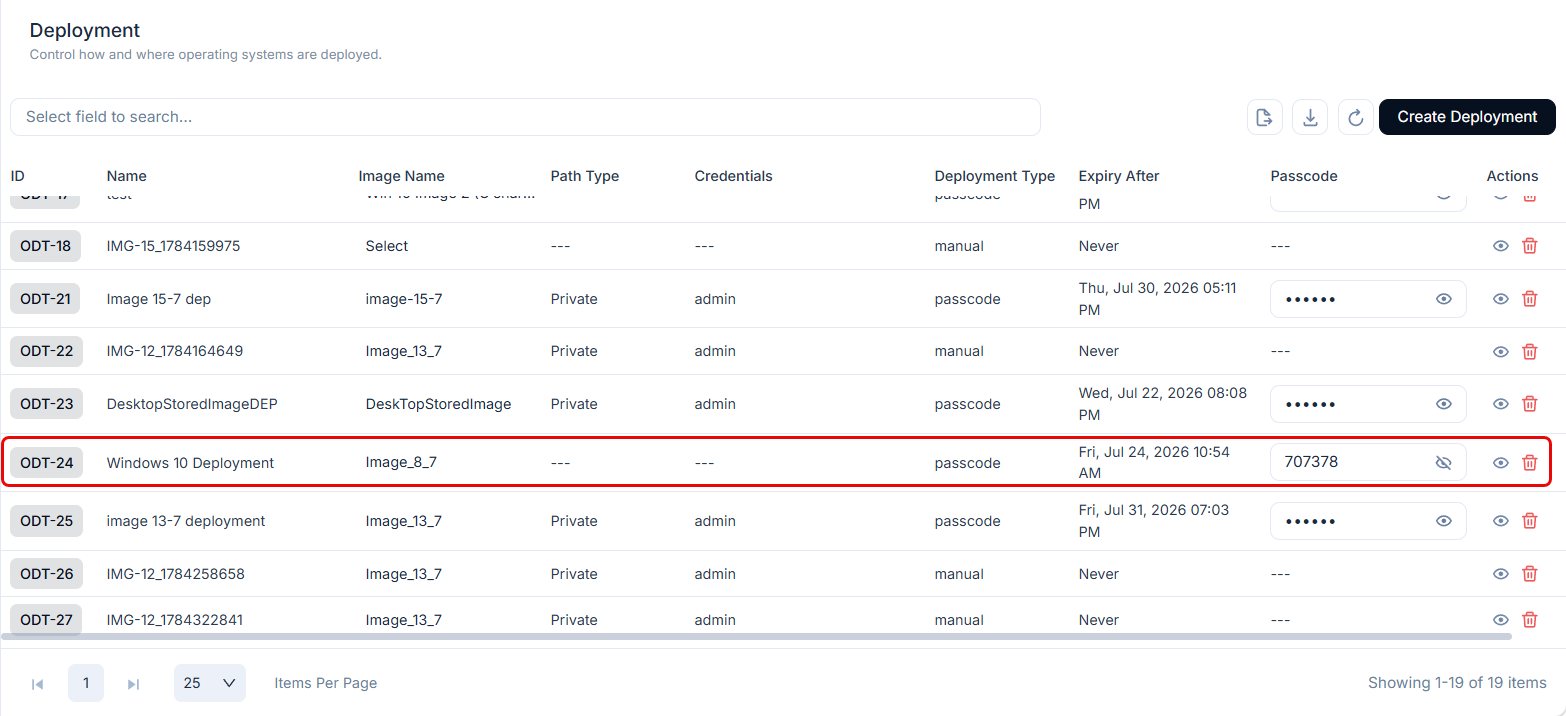
Once the deployment is created, you can view its details by clicking the Eye icon or delete is required.
Treat the passcode like a password. Share it only with authorized individuals through a secure channel. Any machine that MotadataPXE boots and enters the passcode during the active window receives the OS deployment. Set the shortest practical expiry window for your provisioning schedule.
Deployment Task Details
Click any deployment task in the list to open its detail page. The detail page shows the task configuration, passcode information, and per-machine deployment status.
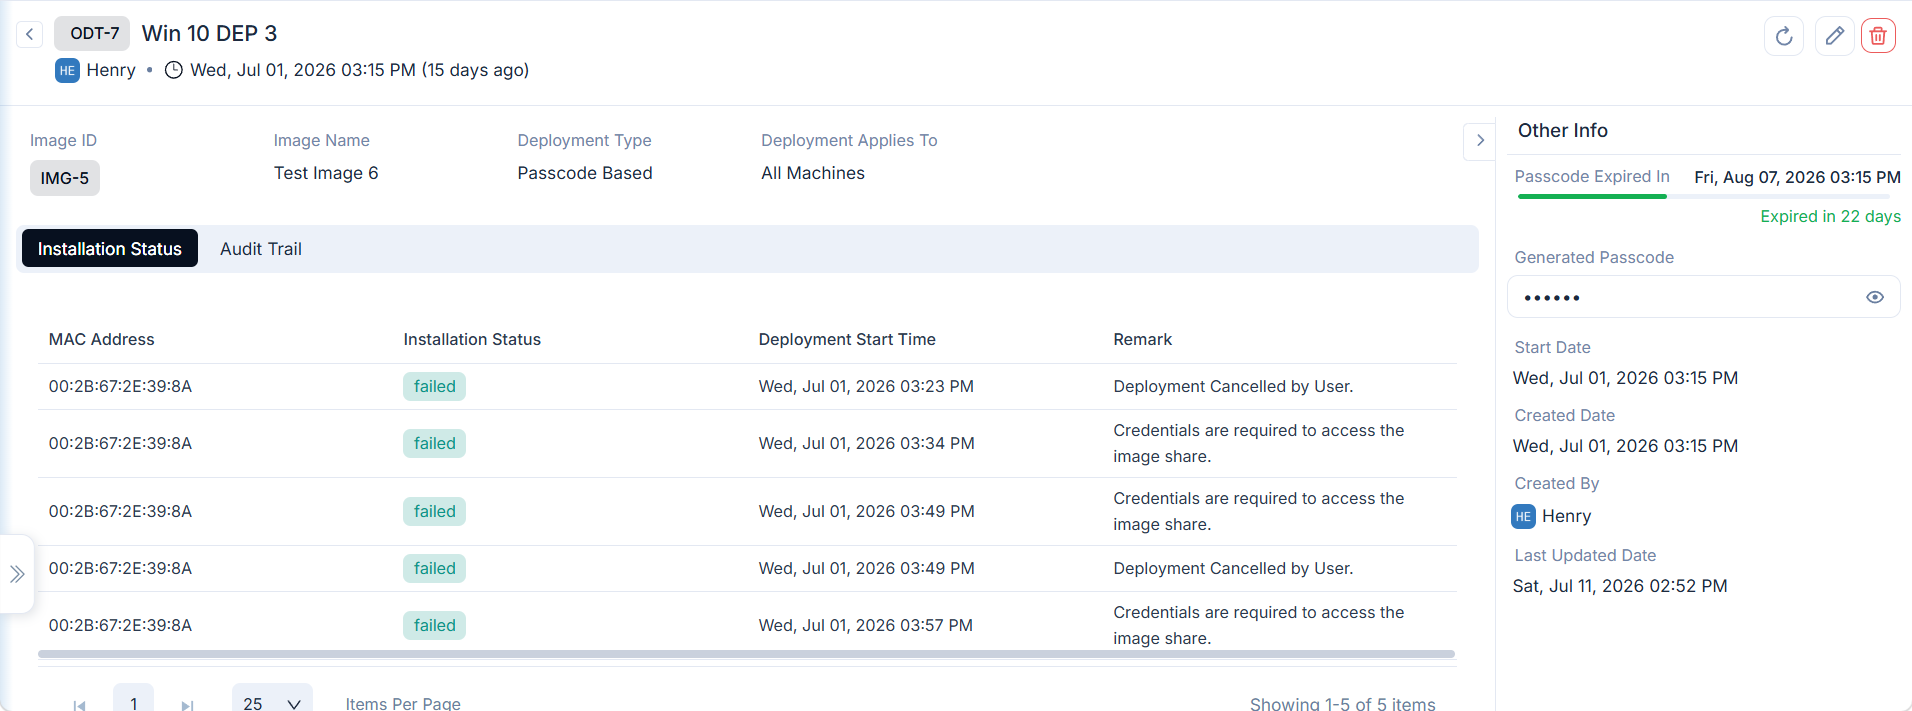
The header displays the deployment ID, name, created by, and creation date. The following summary fields appear below the header:
| Field | Description |
|---|---|
| Image ID | The ID of the registered OS image assigned to this task. |
| Image Name | The name of the registered OS image. |
| Deployment Type | Authorization method: Manual or Passcode-Based. |
| Deployment Applies To | The scope of machines targeted by this task. |
The Other Info panel on the right shows:
| Field | Description |
|---|---|
| Passcode Expired In | The expiry date and time of the passcode, with a countdown indicator. |
| Generated Passcode | The 6-digit passcode for this task. Masked by default. Click the eye icon to reveal it. |
| Start Date | The date and time the passcode became or becomes active. |
| Created Date | The date and time the task was created. |
| Created By | The admin who created the task. |
| Last Updated Date | The date and time the task was last modified. |
Installation Status Tab
The Installation Status tab shows the deployment outcome for each target machine.
| Column | Description |
|---|---|
| MAC Address | The MAC address of the target machine. |
| Installation Status | The deployment result for this machine. |
| Deployment Start Time | The date and time the deployment started on this machine. |
| Remark | Additional context about the deployment outcome, for example the reason for a failure. |
Audit Trail Tab
The Audit Trail tab logs every change made to the deployment task and every system event triggered during deployment.
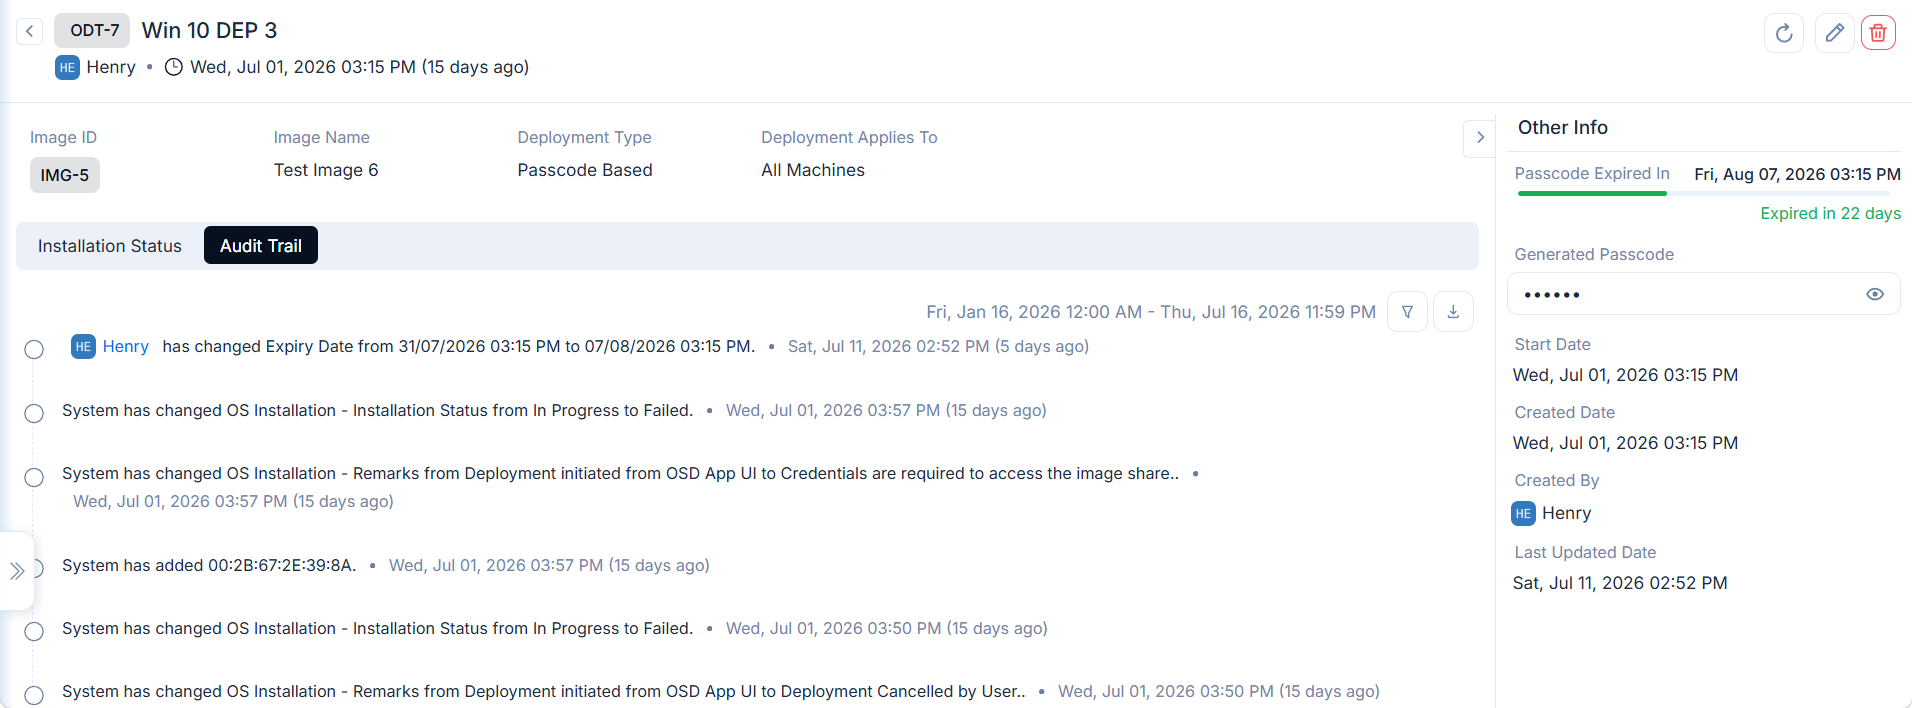
Each entry shows the actor (user or system), the change made, and the timestamp. Use the audit trail to investigate failures, verify when passcode dates were modified, and maintain a record of deployment activity for compliance.
You can filter the audit trail by a time range to narrow down events to a specific window. Use the Download option to export the audit trail data in Excel or CSV format for offline review or compliance reporting.
Execute a Deployment on the Target Machine
After creating the task, the deployment runs on the target machine when it boots via MotadataPXE. The steps differ depending on the deployment method.
Manual Method
A technician must be present at the target machine to enter ServiceOps credentials.
Power on the target machine and press F12 (or the boot menu key for your hardware) to open the boot selection menu.
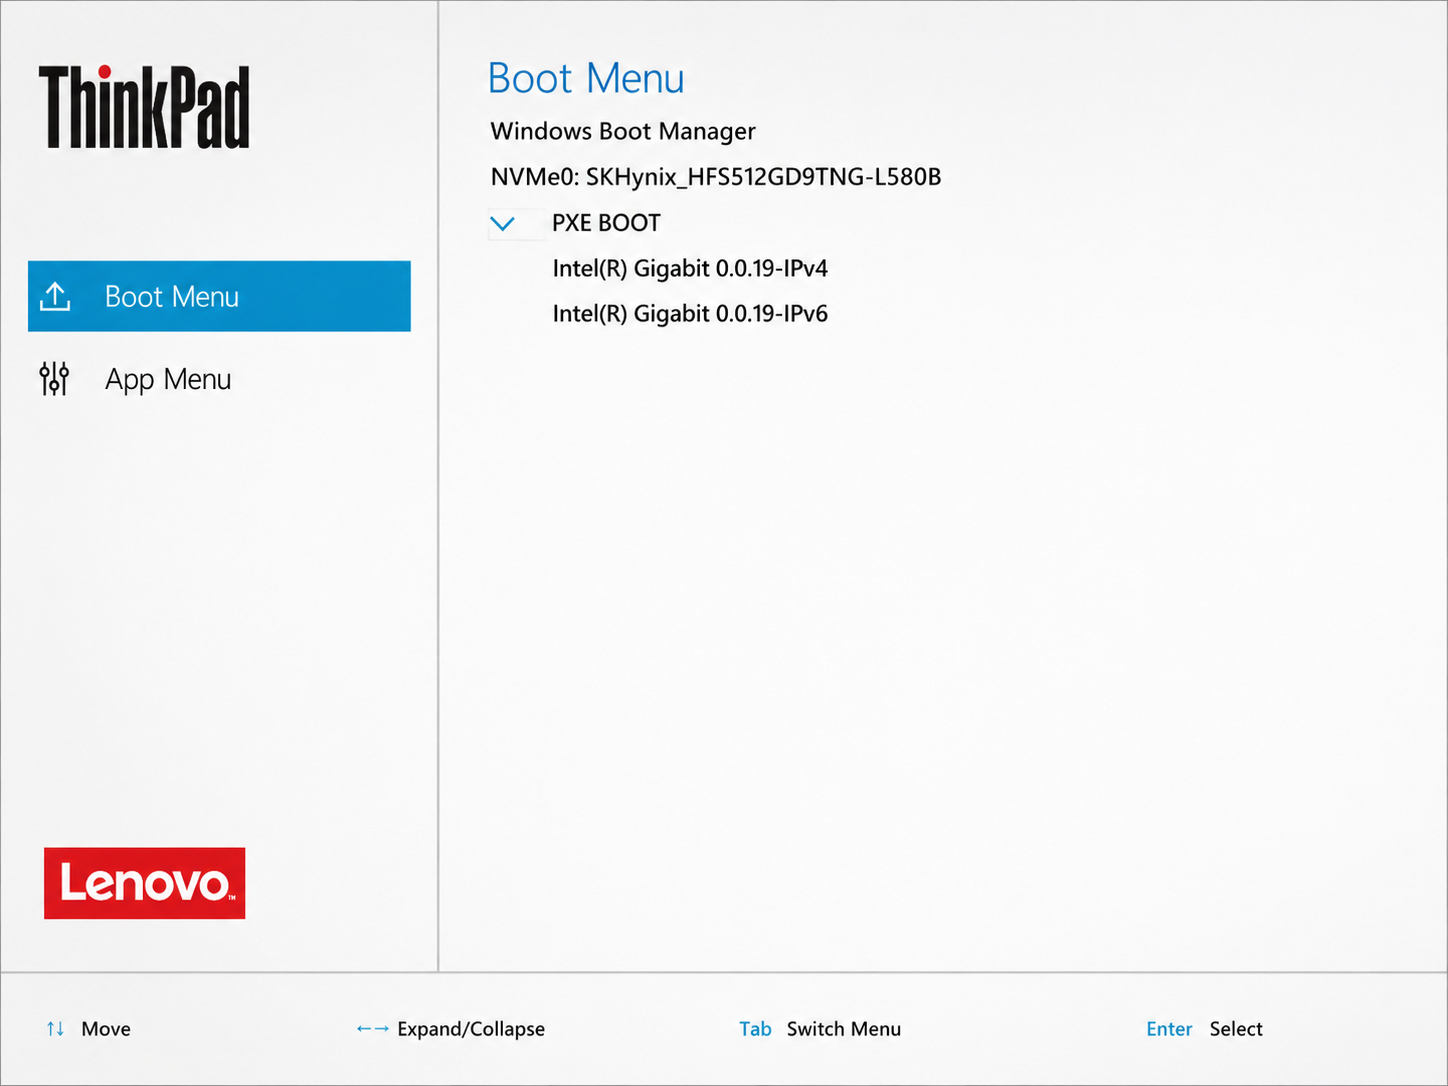
Select Network Boot or PXE Boot from the boot menu.
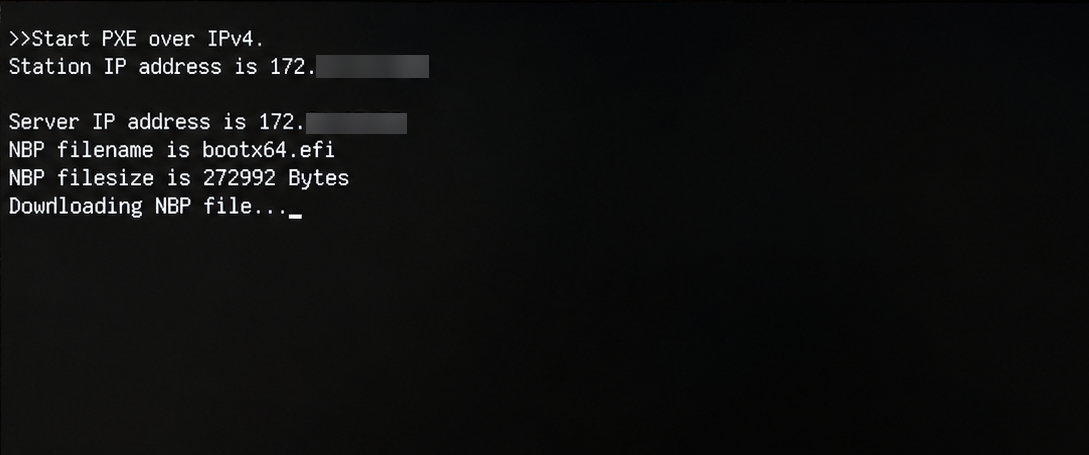
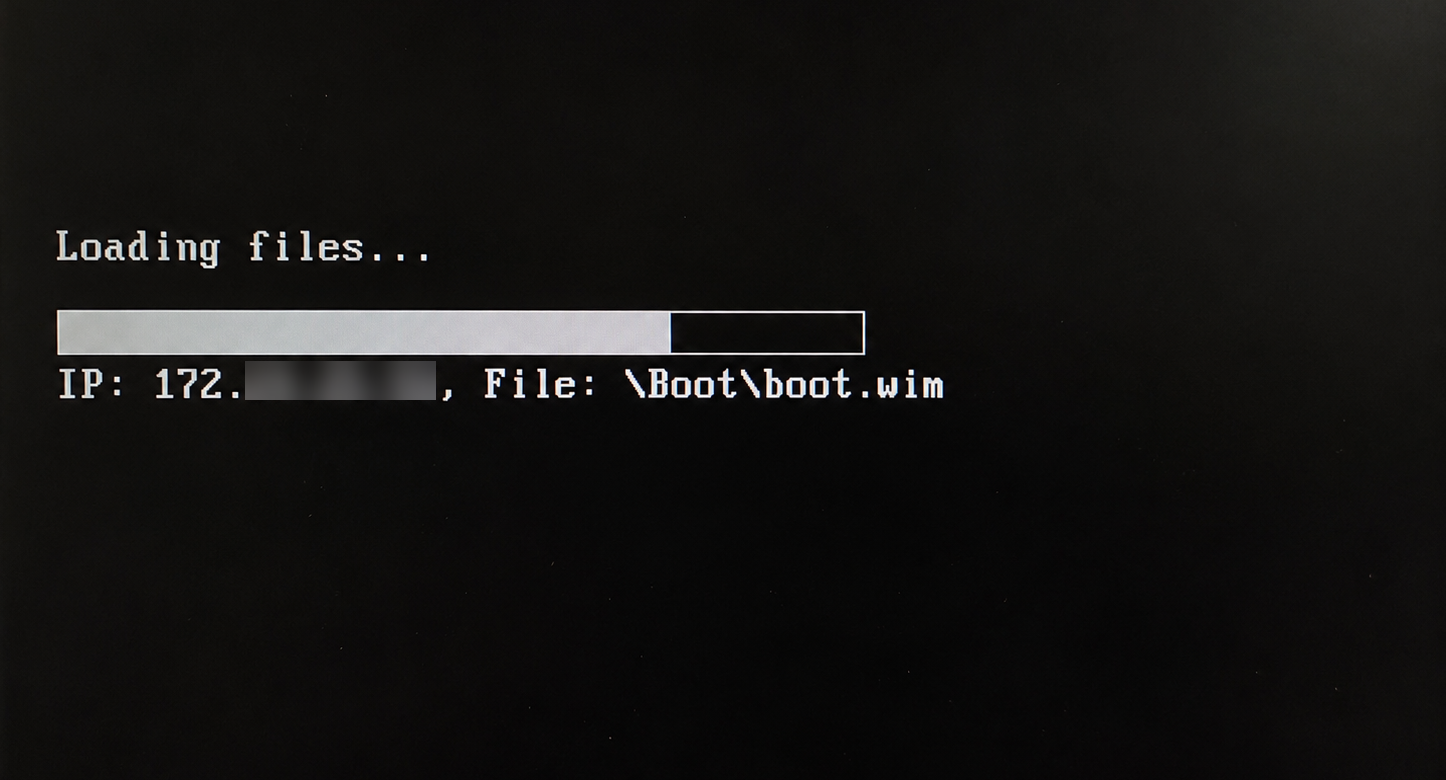
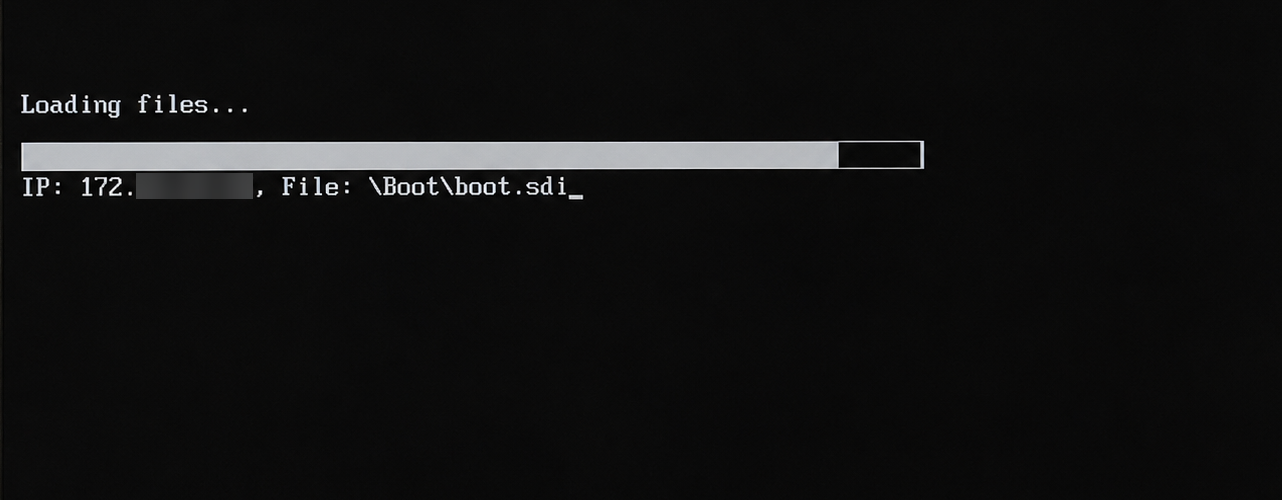
The Motadata OSDApp UI loads automatically over the network.
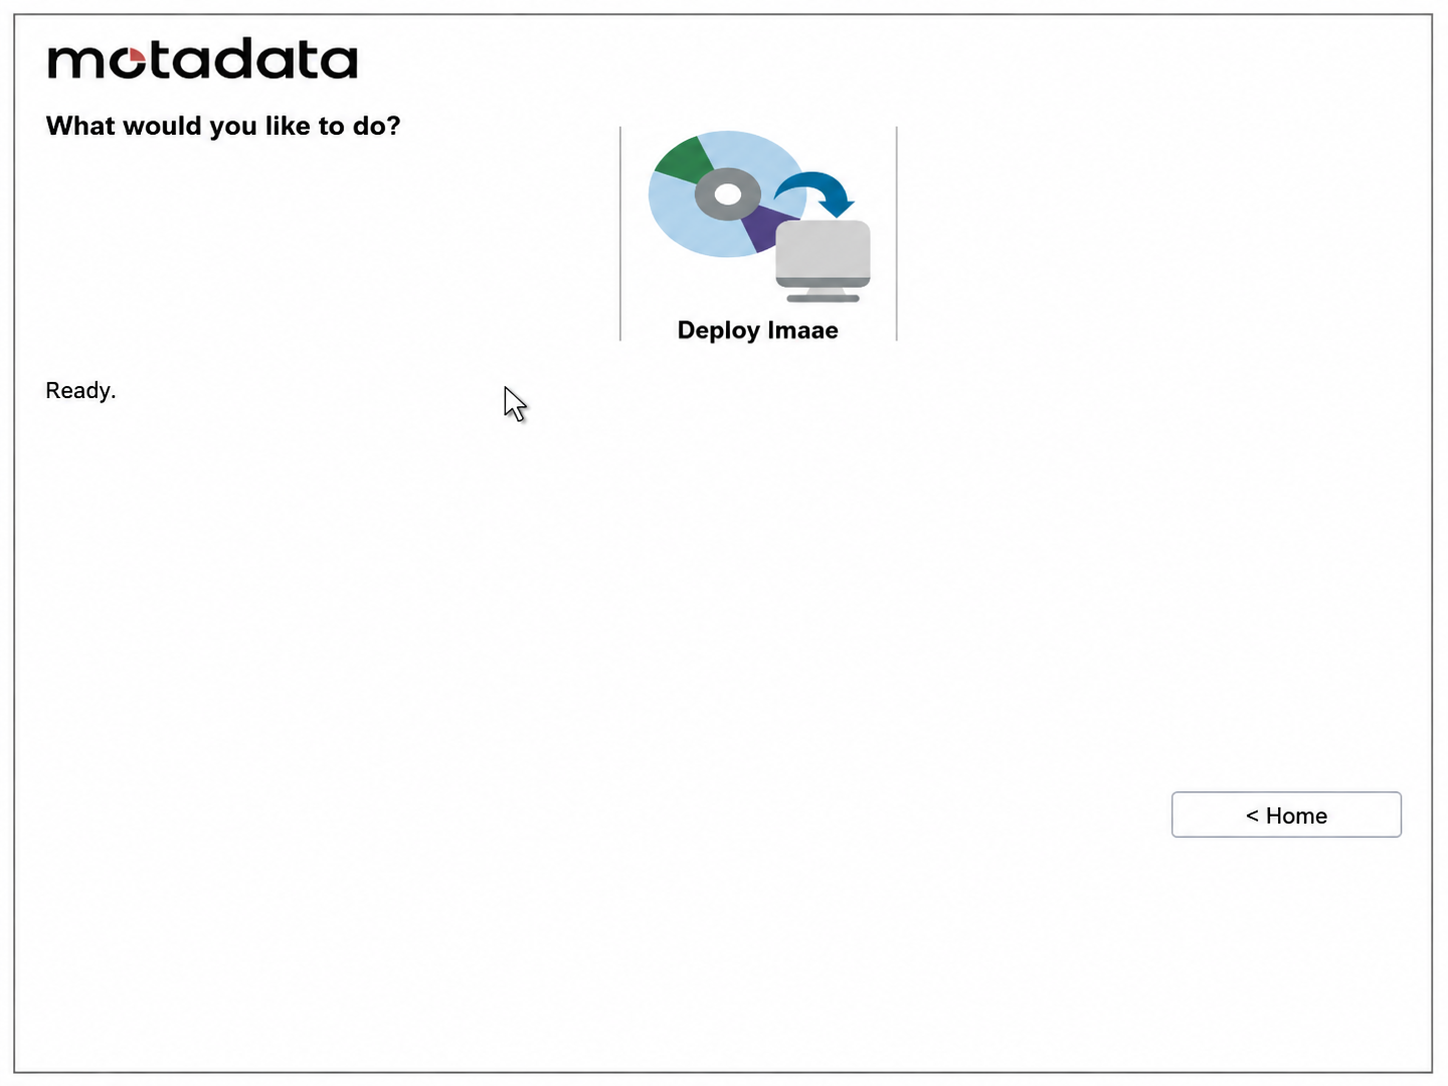
Click Deploy Image.
Select the Username and Password authentication tab.
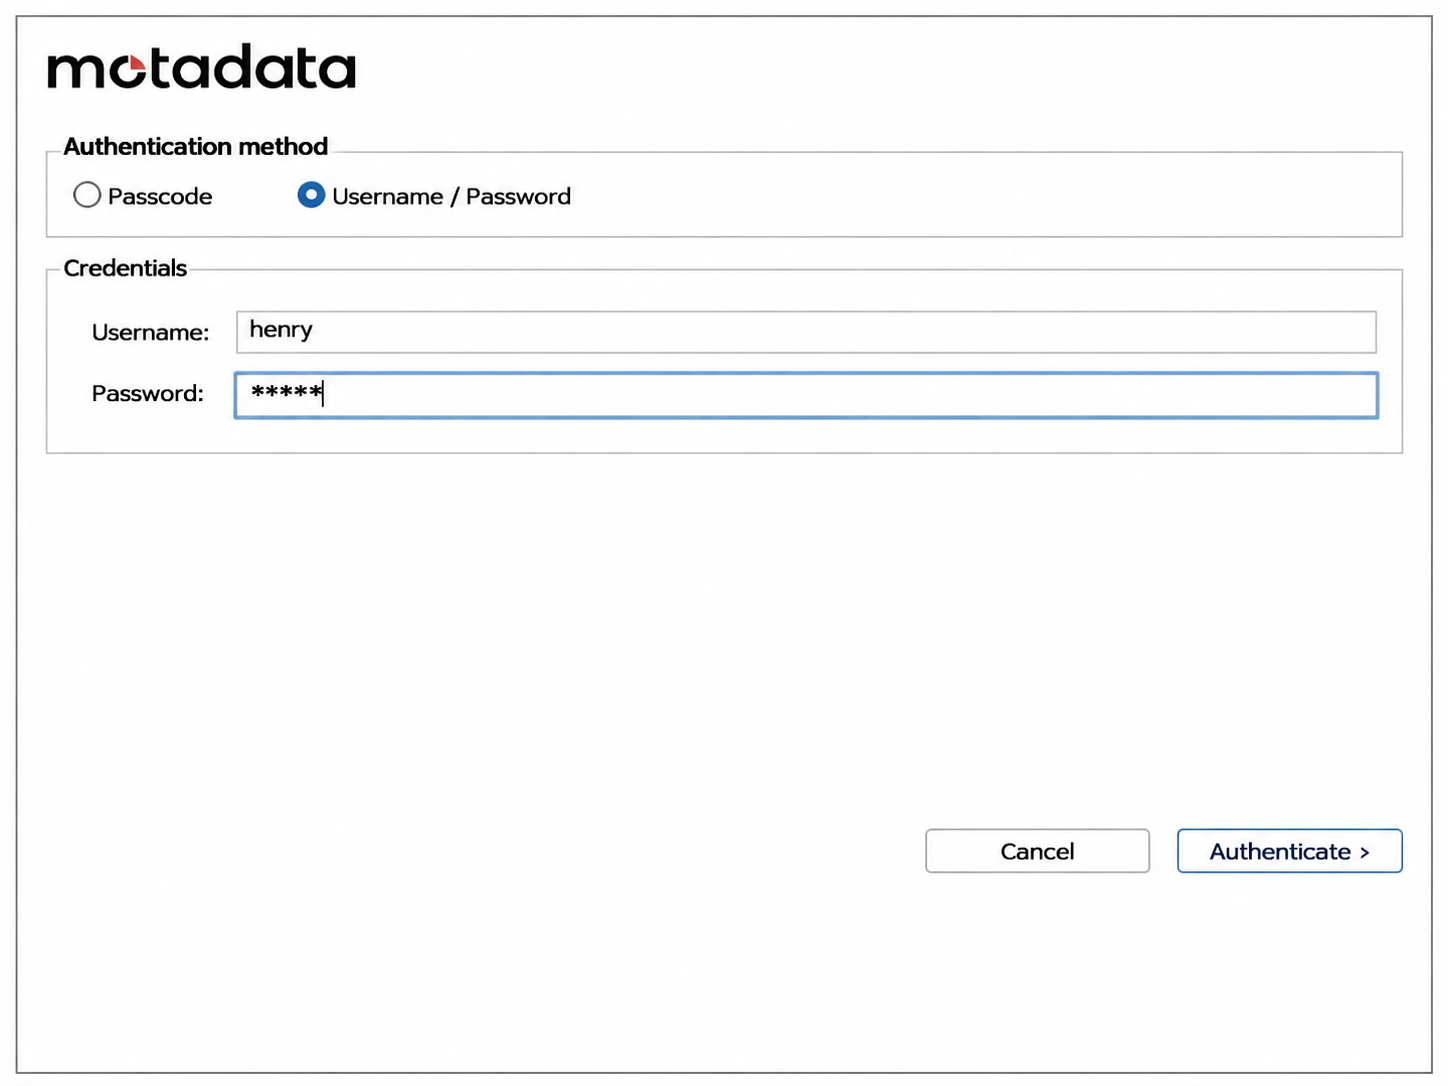
Enter valid ServiceOps credentials.
Select the image from the list.
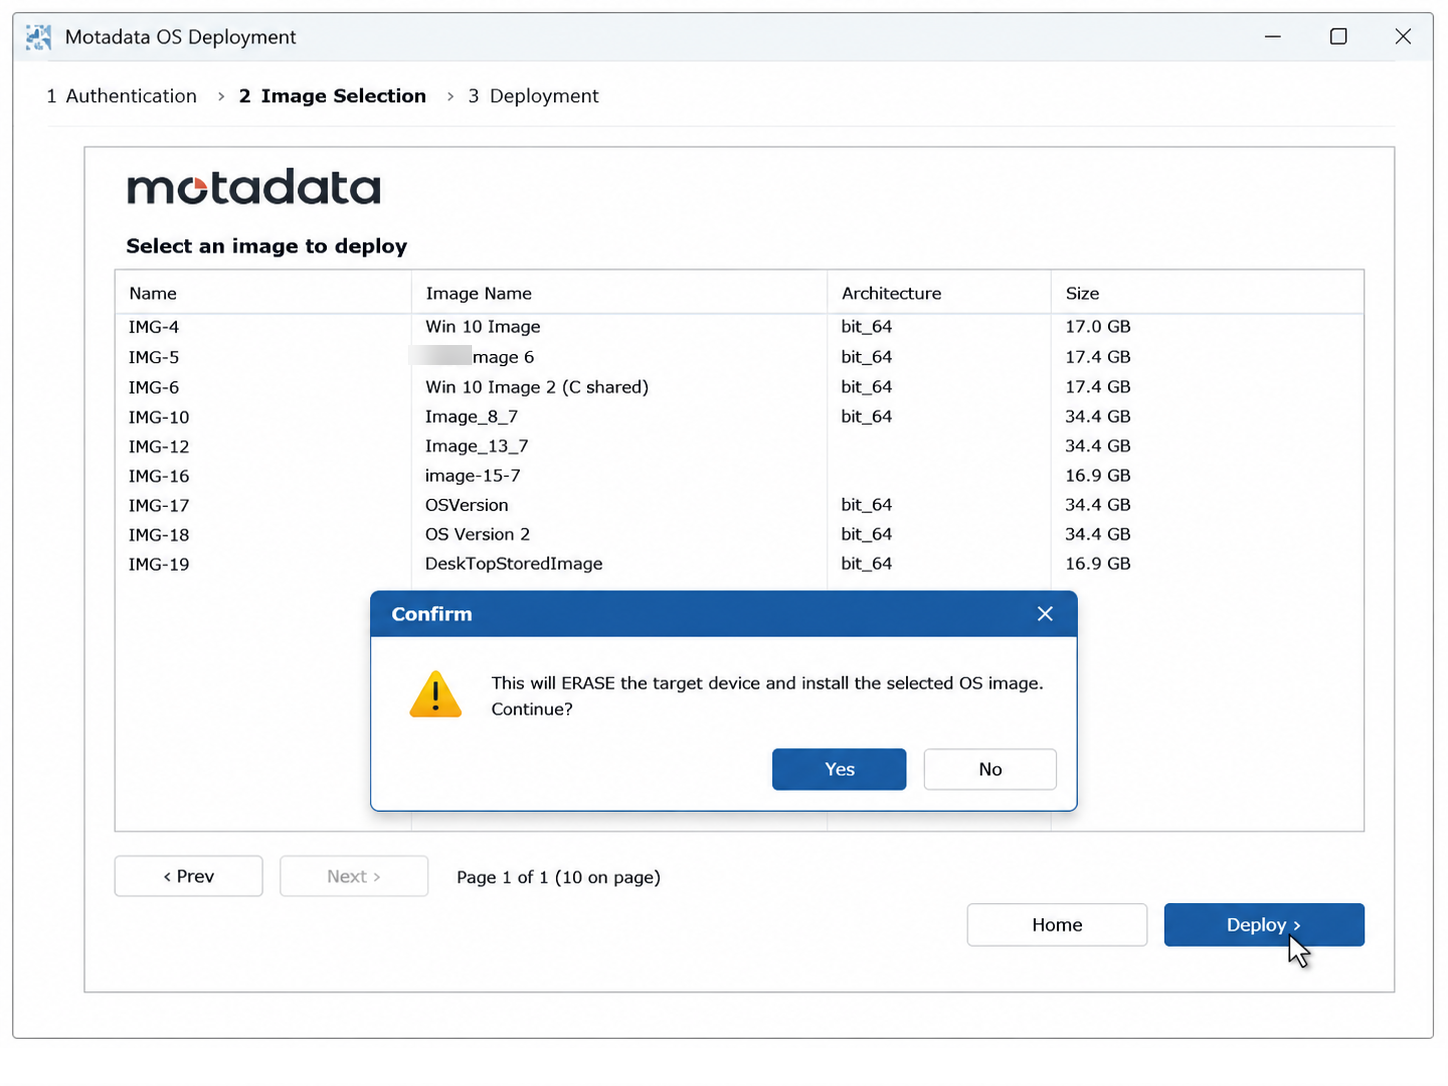
Click Deploy. The deployment begins and progress is shown on screen.
The machine restarts automatically when deployment completes.
Passcode-Based Method
The target machine user enters only the passcode. No ServiceOps credentials are required.
Power on the target machine and press F12 to open the boot selection menu.
Select Network Boot or MotadataPXE Boot.
The Motadata OSDApp loads automatically over the network.
Click Deploy Image.
Select the Passcode authentication tab.
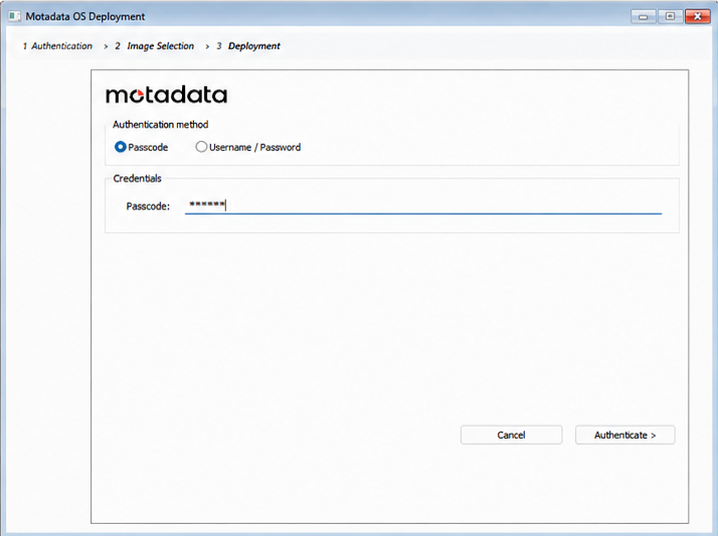
Enter the 6-digit passcode provided by the administrator.
Click Authenticate. The deployment starts automatically.
The machine restarts automatically when deployment completes.
Domain join, endpoint agent installation, and MDM enrollment are not part of the image. Complete these steps after the machine restarts. See Golden Machine Preparation for the full list of post-deployment tasks.
Example
Contoso IT is rolling out 60 new laptops for the Finance department. All machines need Windows 11 Pro 23H2 with the standard Finance build.
The IT admin registers a golden image as Win11-Finance-Q3-2026 and creates a Passcode-Based deployment task named Finance Q3 Refresh with a start date of Monday 08:00 and an expiry of Wednesday 18:00. ServiceOps generates passcode 482193.
On deployment day, the 60 laptops are unboxed and connected to the network. Each machine boots via MotadataPXE, the OSDApp appears, and each person enters 482193. All 60 machines complete provisioning without any technician sitting at each one.
Reports and Analytics
ServiceOps includes KPI widgets, dashboard charts, and three report types for OS Deployment. See Reports and KPIs for the full reference.
Best Practices
- Test on a single machine first: Before deploying to 50 machines, run one test deployment and verify applications launch, drivers load, and the machine comes up correctly.
- Set realistic expiry windows: Match the expiry to your provisioning schedule. A window that is too long leaves an active passcode exposed unnecessarily.
- Coordinate with users: Confirm with department heads that target machines are off-duty before starting a deployment campaign.
- Regenerate the passcode if exposed: If the passcode is shared in an unsecured channel, create a new deployment task with a new passcode before deployment day.
- Audit completed tasks: After a campaign ends, review the Tabular report to confirm all machines received the image successfully before closing the task.
Troubleshooting
Common issues when creating and running OS deployment tasks.
Target machine does not MotadataPXE boot or does not reach the OSDApp UI
Cause: DHCP Options 66 and 67 are not configured correctly, or the target machine BIOS boot order does not prioritize network boot.
Fix:
- Confirm DHCP Option 66 is the IP address of the MotadataPXE or TFTP host and Option 67 is
bootx64.efi. - Verify the options are applied to the scope covering the target machine's subnet.
- On the target machine, enter BIOS/UEFI settings and set the network adapter first in the boot order.
- Confirm
tftpd64.exeis running as Administrator on the MotadataPXE host.
Passcode authentication fails on the target machine
Cause: The passcode validity window is not active, the start date is in the future, or the passcode was entered incorrectly.
Fix:
- Open the deployment task in ServiceOps and check the Start Date and Expiry Date.
- If the start date is in the future, wait until it becomes active or edit the start date to the current time (task must be in Scheduled state).
- If the task is Expired, edit both the start date and expiry date to reactivate it.
- Confirm there are no typos when entering the passcode on the target machine.
Deployment fails after authentication with a connection error
Cause: The target machine cannot reach the ServiceOps server or the image storage path after MotadataPXE boot.
Fix:
- Confirm the target machine received a valid IP address via DHCP.
- Verify network connectivity from the target subnet to the ServiceOps server.
- Check that the UNC image path is accessible from the target machine's network location.
- Review firewall rules between the target subnet and the file server hosting the image.
Image does not appear in the list on the OSDApp
Cause: The deployment task is not yet active, or the image was deleted from ServiceOps after the task was created.
Fix:
- Confirm the deployment task status in ServiceOps. The start date must have passed and the expiry date must not have passed.
- Verify the image assigned to the task still exists in Admin > OS Deployment > Image.
- If the image was deleted, register it again and create a new deployment task.
OS Deployment section not visible in the Admin panel
Cause: The OS Deployment license is not active, or the Discovery and Agents section is disabled.
Fix:
- Go to Admin > Organization > License Details and verify an OS Deployment license is present and not expired.
- Confirm the Discovery and Agents section is enabled in the Admin panel.
- Contact your Motadata account manager if the license is missing or expired.