Image
Before registering an image, capture it using Image Creator on a fully configured golden machine. The captured file is stored at a UNC network path that both ServiceOps and target machines must be able to reach.
Prerequisites
- The MotadataPXE Utility is installed and DHCP is configured. See Setup.
- The Windows Poller (
Poller_V87500.msi) is installed on the Windows host machine. The Poller must be running before you can register an image in ServiceOps. - A golden machine with the desired OS, applications, and settings is ready for capture.
- A file server or dedicated machine is available to host the image storage share. See Step 1 below.
- You have the Manage Images permission under Manage OS Deployment.
Step 1: Prepare the Image Storage Share
The captured image file is dependent on the drives selected and must be stored on a network share that both the golden machine and the ServiceOps Poller can reach. Set this up before starting the capture.
- On your file server, create a dedicated folder for OS images, for example
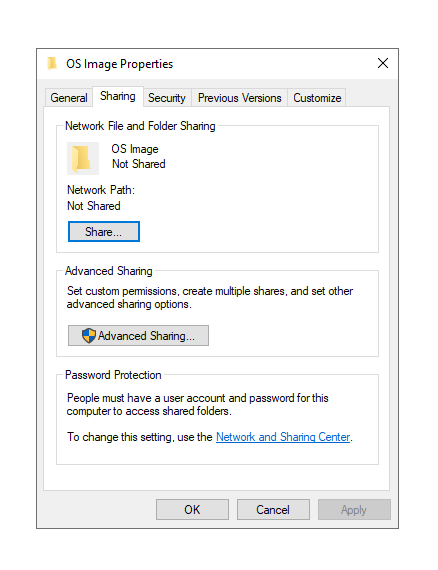
OS Image. - Right-click the folder and select Properties. Go to the Sharing tab and click Share.
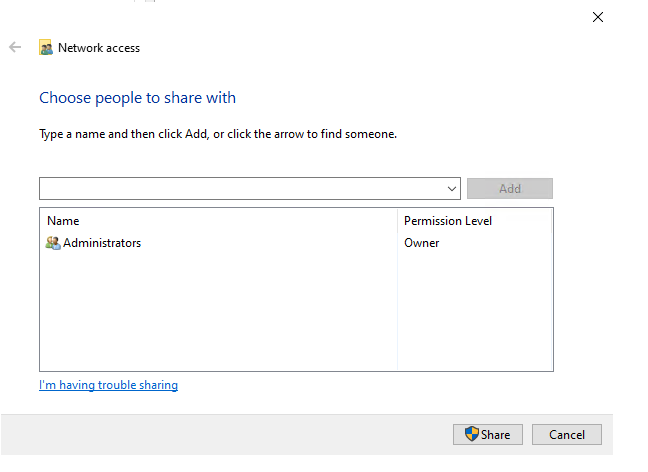
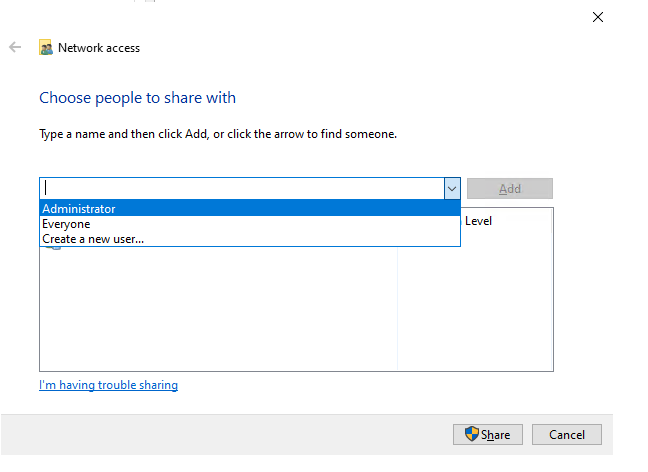
- The Network access dialog opens. Click the dropdown and select the user to share with, for example Administrator or Everyone.
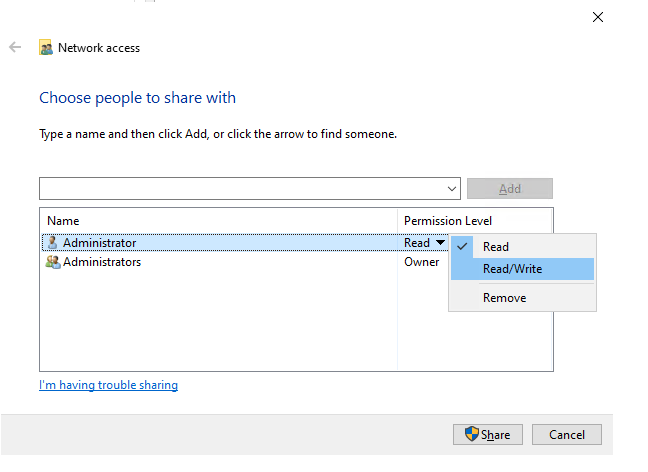
- Set the Permission Level to Read/Write.
Read/write permission must be granted to Everyone and Guest users.
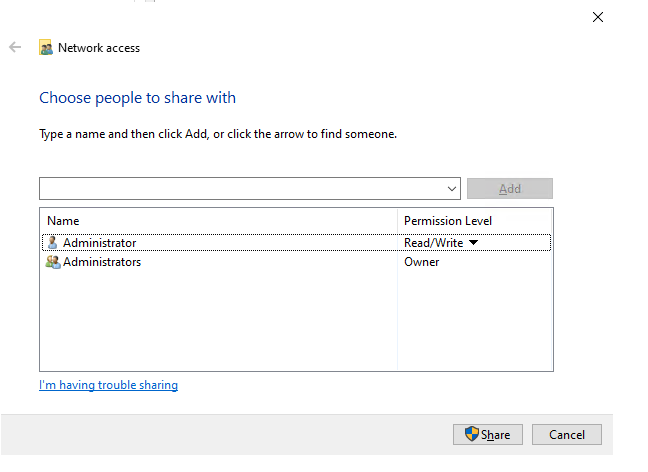
- Click Share. The confirmation screen displays the UNC path for the shared folder, for example
\\fileserver\OS Image. Note this path, you will need it in the capture and registration steps.
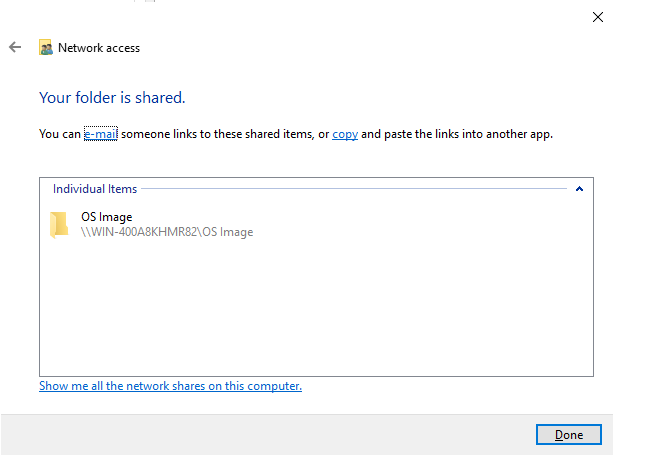
- Click Done.
The image storage share must be on a separate machine or a drive that is not selected for capture. Saving the image to the same drive being captured causes errors.
Step 2: Capture the Image
Before registering an image in ServiceOps, capture it from your golden machine using the Image Creator tool.
OS Deployment supports offline images only. The golden machine must be in a clean, fully configured state before capture. Live or online imaging of a running machine is not supported.
Configure the golden machine with the exact OS version, applications, drivers, and settings you want on target machines.
On the golden machine, navigate to
C:\Program Files (x86)\Motadata\PXE.Right-click OSDApp and select Run as administrator.
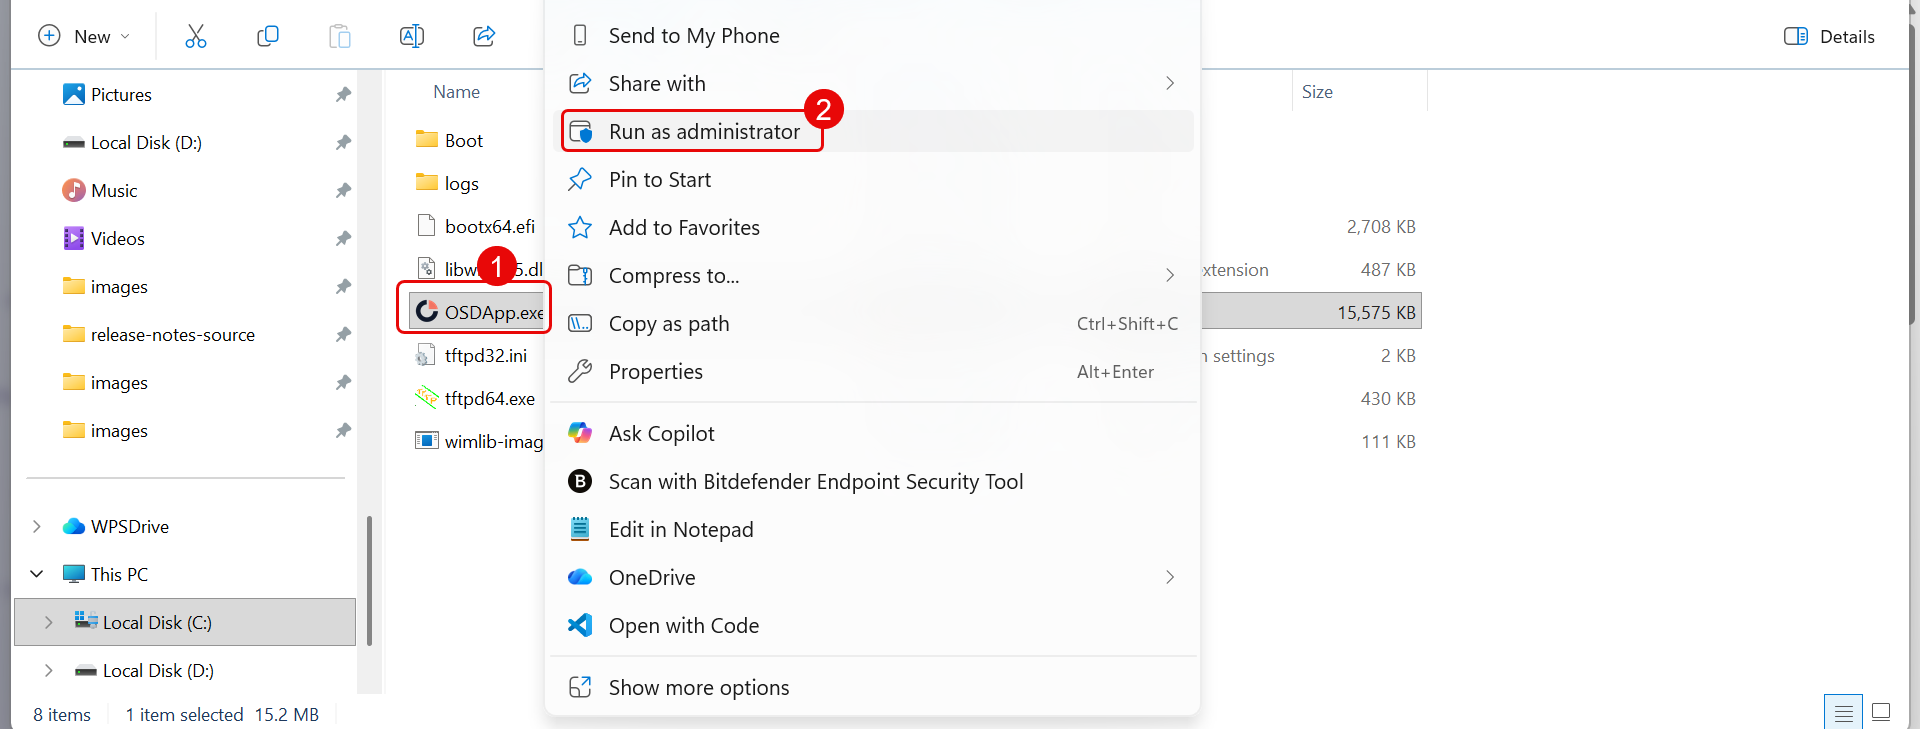
The Image Creator window opens.
Under Drives to capture, select the drives (C:\ drive is mandatory) you want to be included in the image.
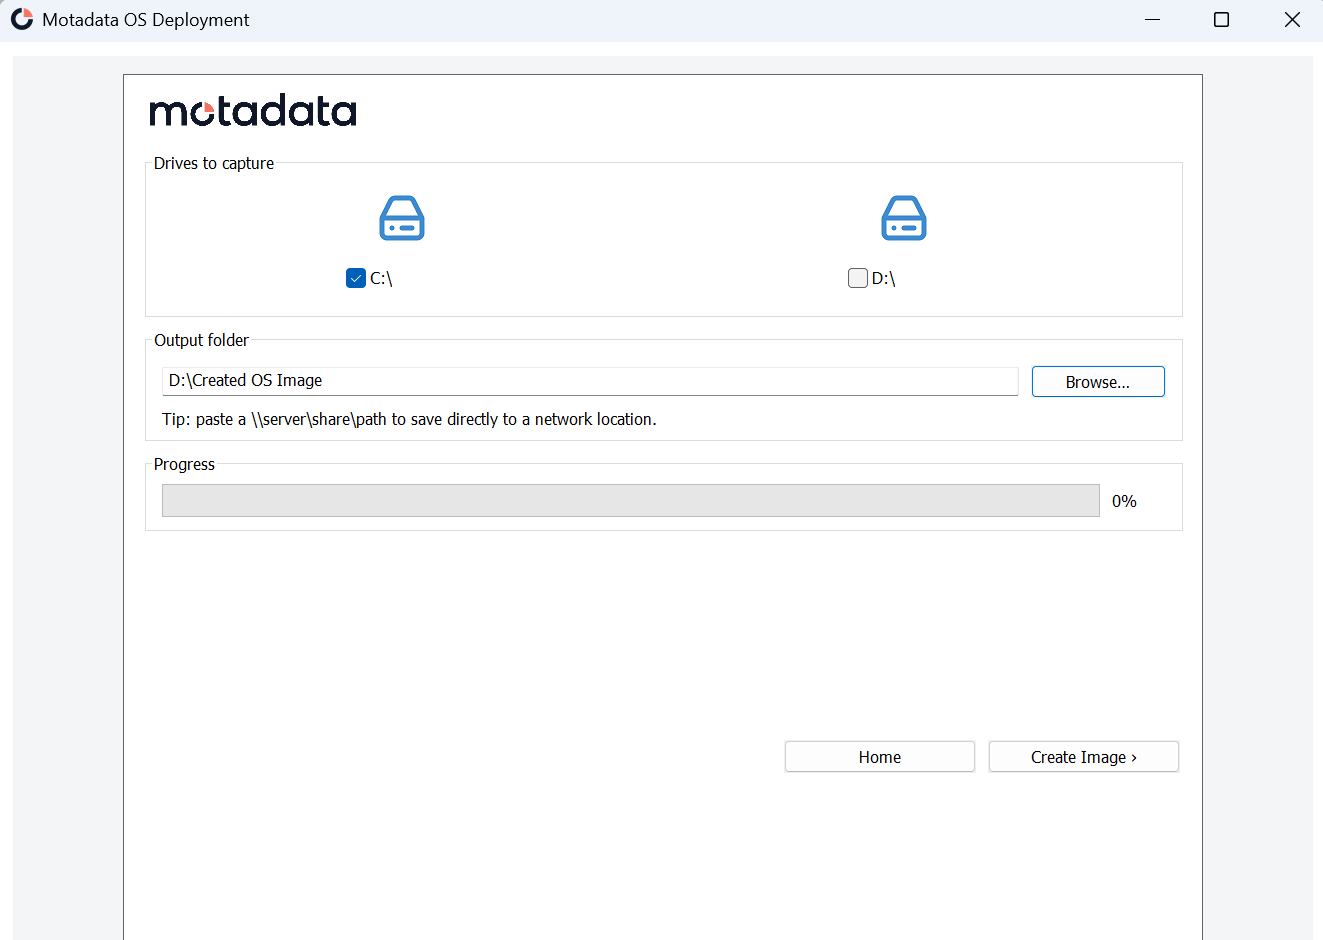
Under Output folder, click Browse and select the folder where the image file will be saved. You can also paste a UNC path directly (for example
\\fileserver\os-images\) to save to a network location or specify a path on another drive.Click Create Image. The progress bar tracks the capture. Do not close the window or restart the machine during this process.
When capture completes, a confirmation message appears. A wimlib-imagex.exe file is also created in the output folder. This folder is required for deployment and must remain in the same location as the image file.
Confirm the image file and wimlib-imagex file are accessible from the output path before proceeding to registration.
The Add Image form in ServiceOps includes an inline Image Creation Guide panel on the right side. Open the form and follow that panel if you need a quick reference during capture.
Step 3: Register the Image
Navigate to Admin > OS Deployment > Image.
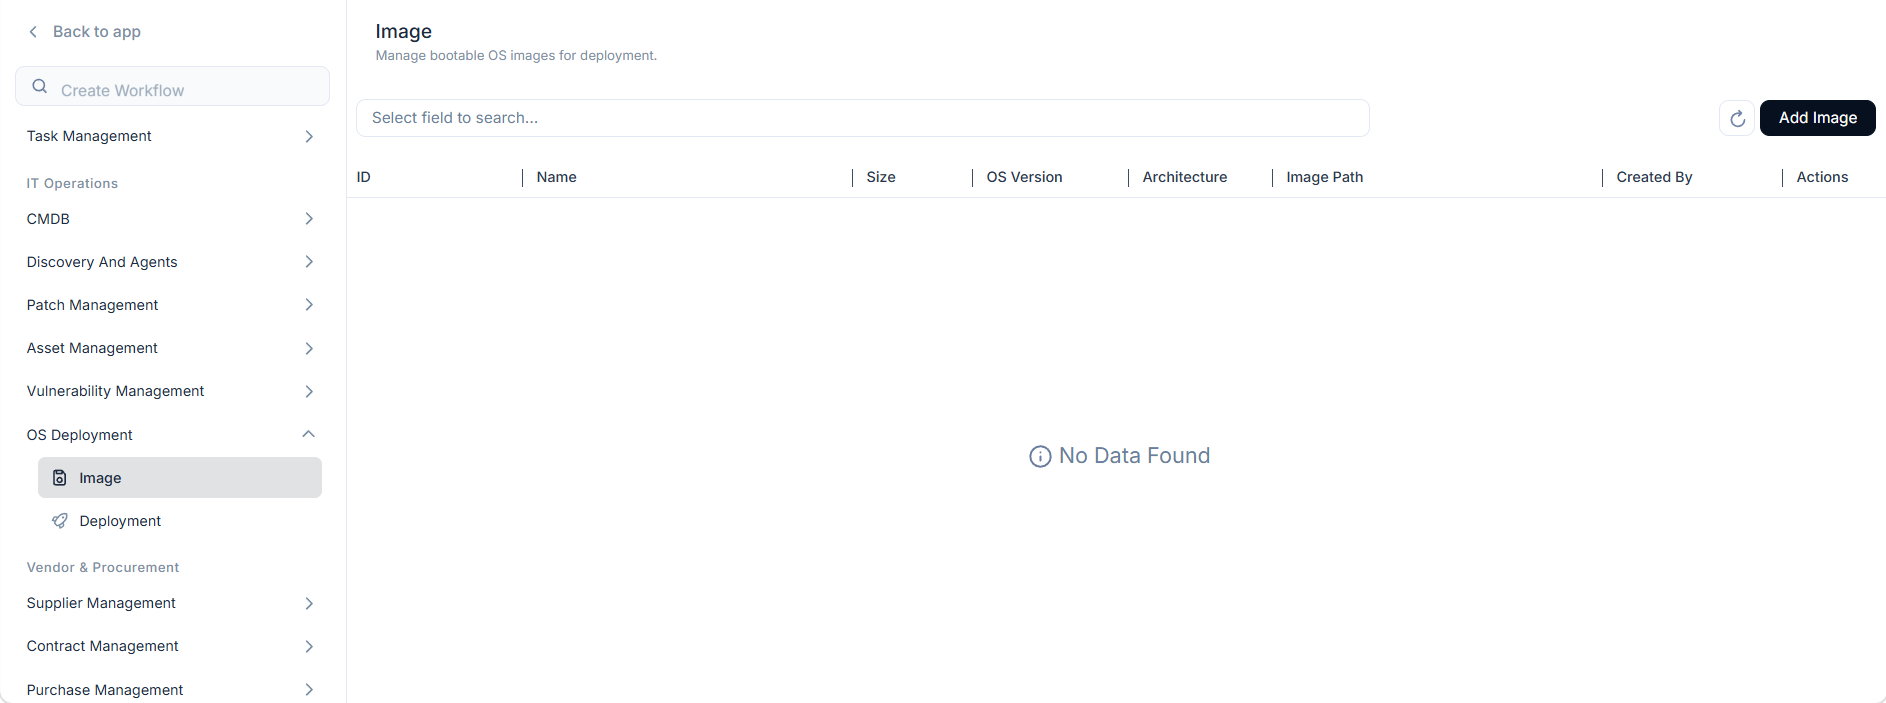
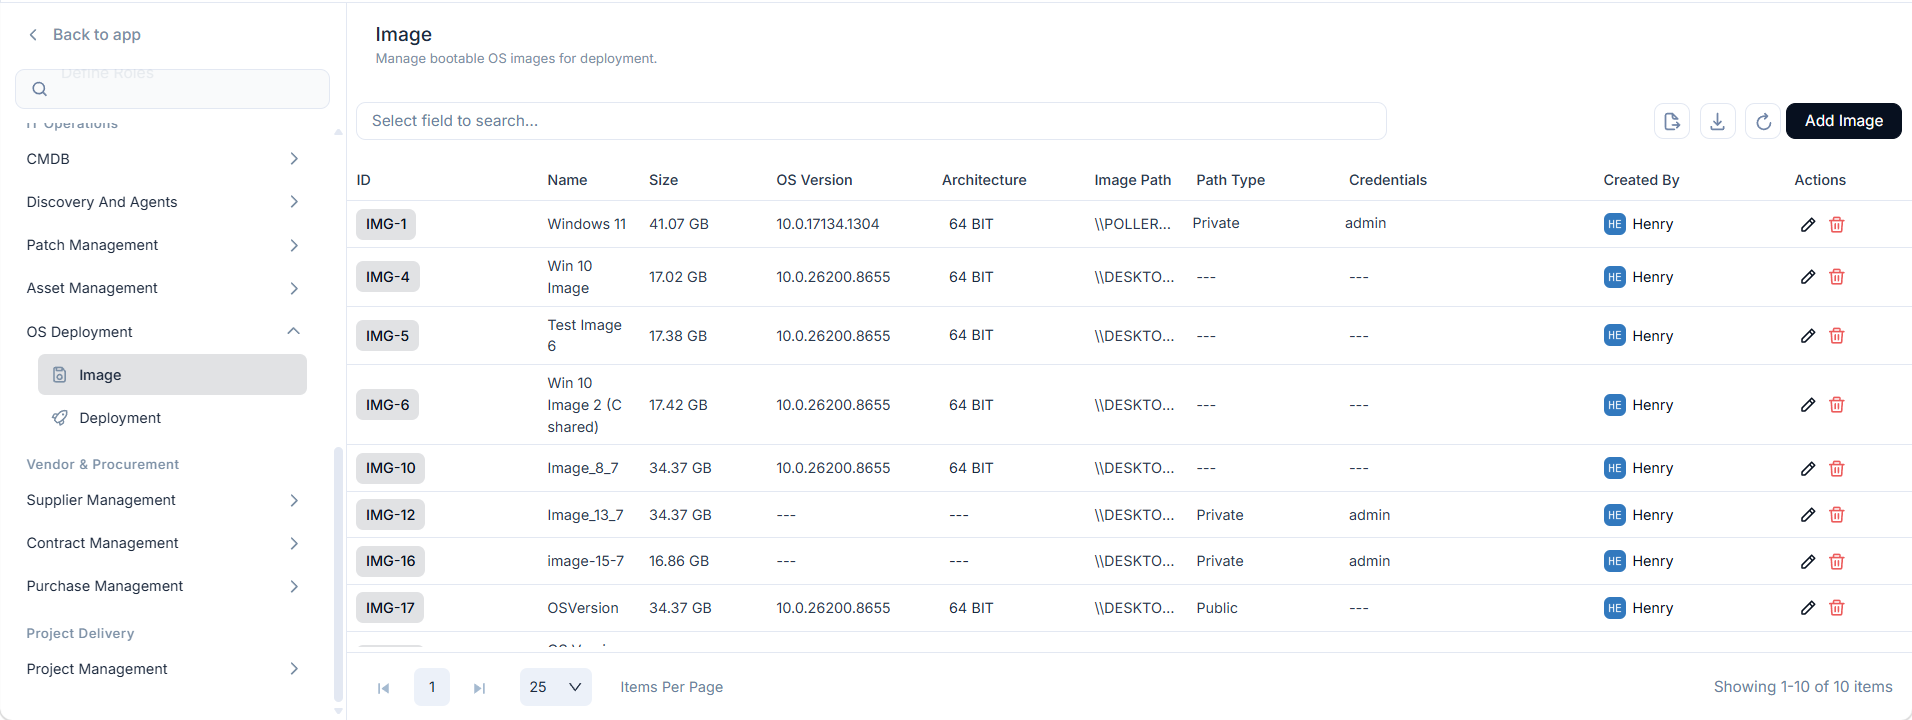
The Image list page shows all registered images with the following columns:
| Column | Description |
|---|---|
| ID | Auto-generated unique identifier for the image. |
| Name | Display name assigned to the image during registration. |
| Size | File size of the captured image. |
| OS Version | Operating system version captured in the image. |
| Architecture | Processor architecture of the image (32-bit or 64-bit). |
| Image Path | UNC network path where the image file is stored. The path must point directly to the image.wim file (for example, \\fileserver\images\Win11\image.wim). |
| Created By | Name of the admin who registered the image. |
| Actions | Click the delete icon to remove the image from ServiceOps. Deleting an image does not delete the image file from the network share. |
Click Add Image to register a new image.
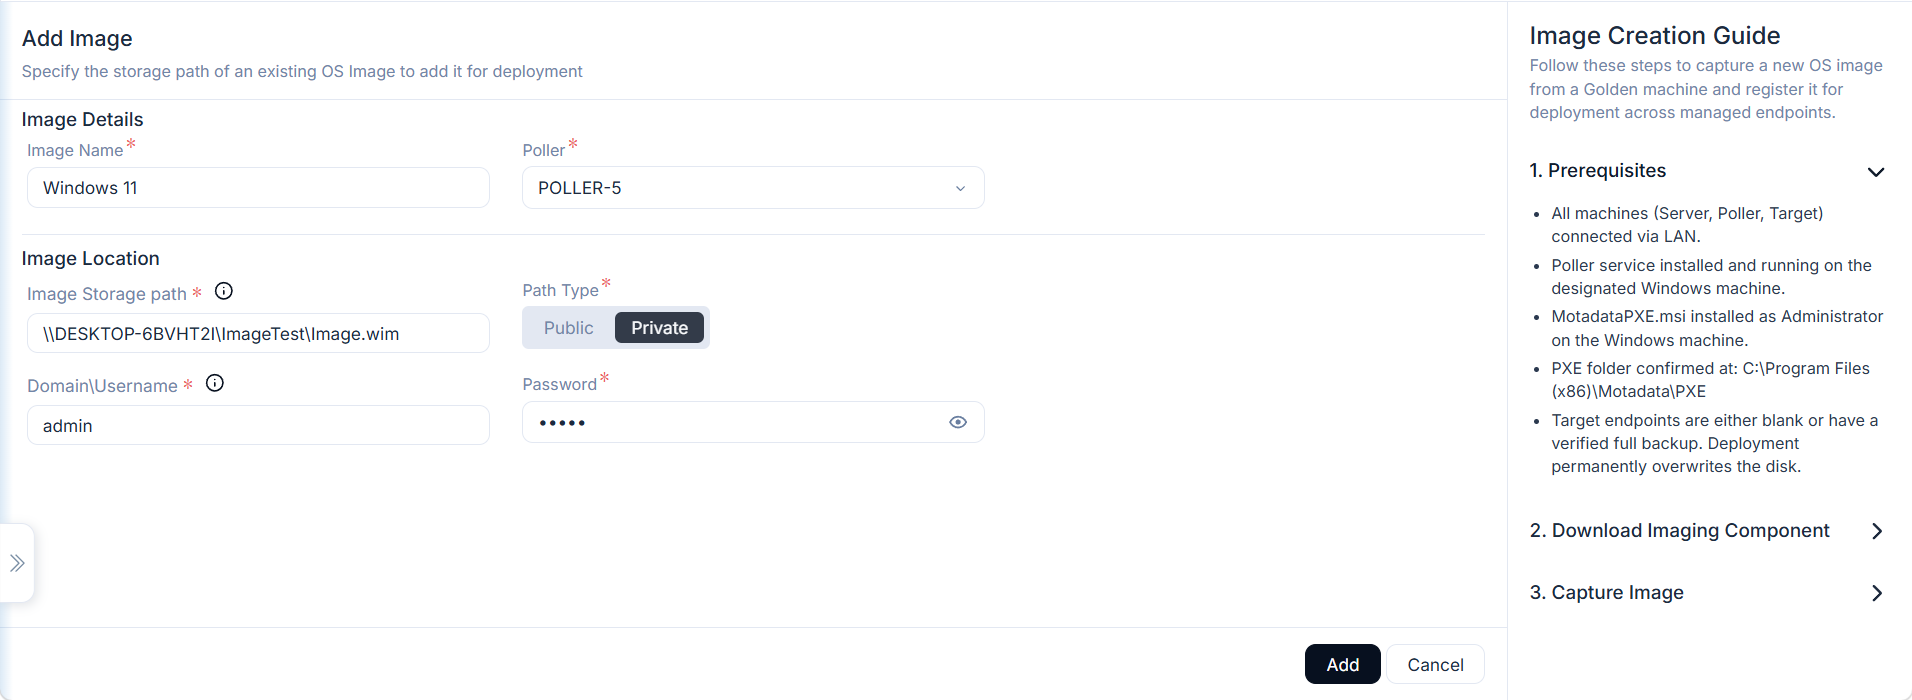
Fill in the following fields:
Image Details
| Field | Description |
|---|---|
| Image Name | A descriptive name for the image, for example Windows 11 Pro 23H2 Standard Build. Include the OS version and build date so technicians can identify the correct image when creating a deployment. Required. |
| Poller | Select the Poller installed on the Windows host. The Poller validates that the storage path is reachable. Required. |
Image Location
| Field | Description |
|---|---|
| Image Storage Path | The UNC path to the .wim image file, for example \\fileserver\os-images\Image.wim. All machines involved in deployment must be able to reach this path. Required. |
| Path Type | Select Public if the share is accessible without credentials. Select Private if the share requires authentication. When Private is selected, the Domain\Username and Password fields appear. Required. |
| Domain\Username | The domain and username used to authenticate to the image storage share, for example DOMAIN\admin. Visible only when Path Type is set to Private. Required for private shares. |
| Password | The password for the account specified in Domain\Username. Visible only when Path Type is set to Private. Required for private shares. |
Click Add. The Poller validates that the image file exists at the specified path. If validation succeeds, the image appears in the list and is available for deployment tasks. If the Poller cannot reach the file, the entry is not created. Verify the UNC path and share permissions and try again.
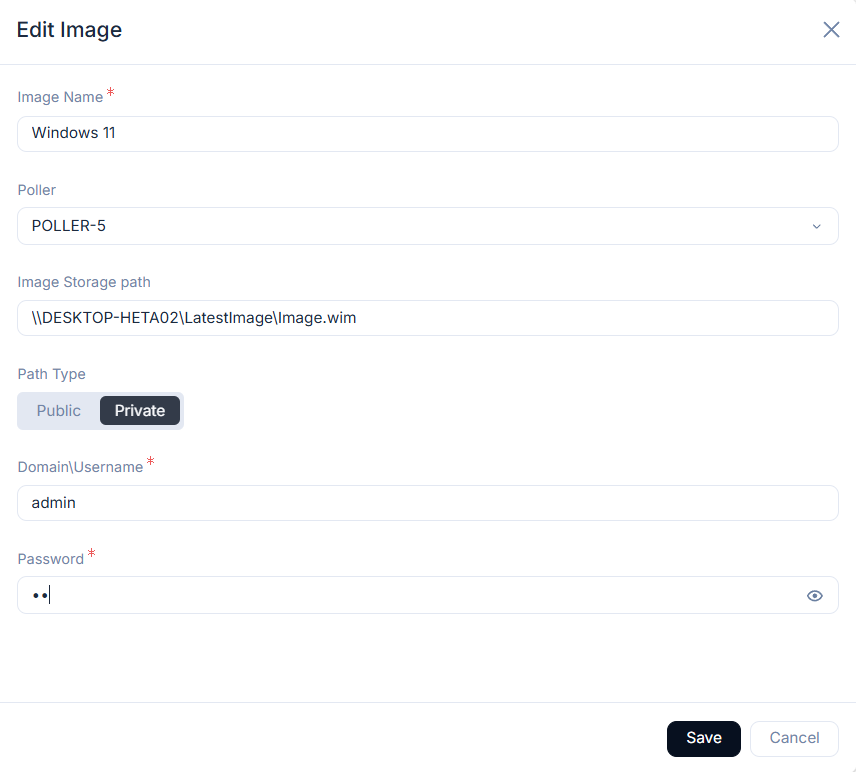
Once created, you can edit the image if required. You can only edit the name and credentials.
Best Practices
- Use versioned names: Include the OS version and capture date in the image name, for example
Win11-Pro-23H2-2026-06. This makes it easy to identify the latest image and gives you a rollback option. - Use separate images for separate hardware: Drivers differ between laptop models and desktop models. Maintain separate golden images for each hardware class.
- Store images on a reliable file server: Image files can be several gigabytes. Use a file server with sufficient storage, redundancy, and network bandwidth. A failed image transfer mid-deployment leaves the target machine in an unbootable state.
- Retire outdated images: Remove old images from the list once they are no longer used in active deployments. This prevents technicians from accidentally selecting a stale image.