Credential-Less Authentication
Users can perform credential-less discovery (assets and CIs) in ServiceOps using the Nmap tool. Nmap (Network Mapper) is a free, open-source network discovery and security auditing tool. It allows users to scan networks to identify active devices, open ports, services, and operating system versions.
- In the case of On-premise, the Nmap tool is pre-installed.
- In the case of SaaS-based architecture or the machine in which Poller is installed, Nmap and npcap must be installed manually. For more details, refer to the Nmap installation section.
To perform Credential-less discovery, provide the following details:

- Name: Enter the name for network scan.
- IP Range Type: Select the type of IP Range. The options are:
- Entire Network: All the IPs in the whole network will be scanned for the discovery. If selected, enter the IP Range Start.
- Specific IP Range: Select if assets from a specific IP Range is to be scanned. If selected, enter the IP Range Start and IP Range End for discovery.
- Specific set of IPs: Select if you want to scan only specific IP Addresses for asset discovery. If selected, enter the IP Addresses. Also, you can import the IP addresses via a CSV file using the Import IP Addresses link.
- Authentication Preference: Select the authentication preference as Crendetial-Less.
- Location: Select the location of network scan. It is optional.
- Department: Select the department of network scan. It is optional.
- Protocol Type: Select the protocol type. The default is Static.
- Description: Enter a brief description.
- Poller: If Poller is installed, select the Poller using which you want to perform the discovery. The dropdown will display only the Poller in which Nmap is installed.
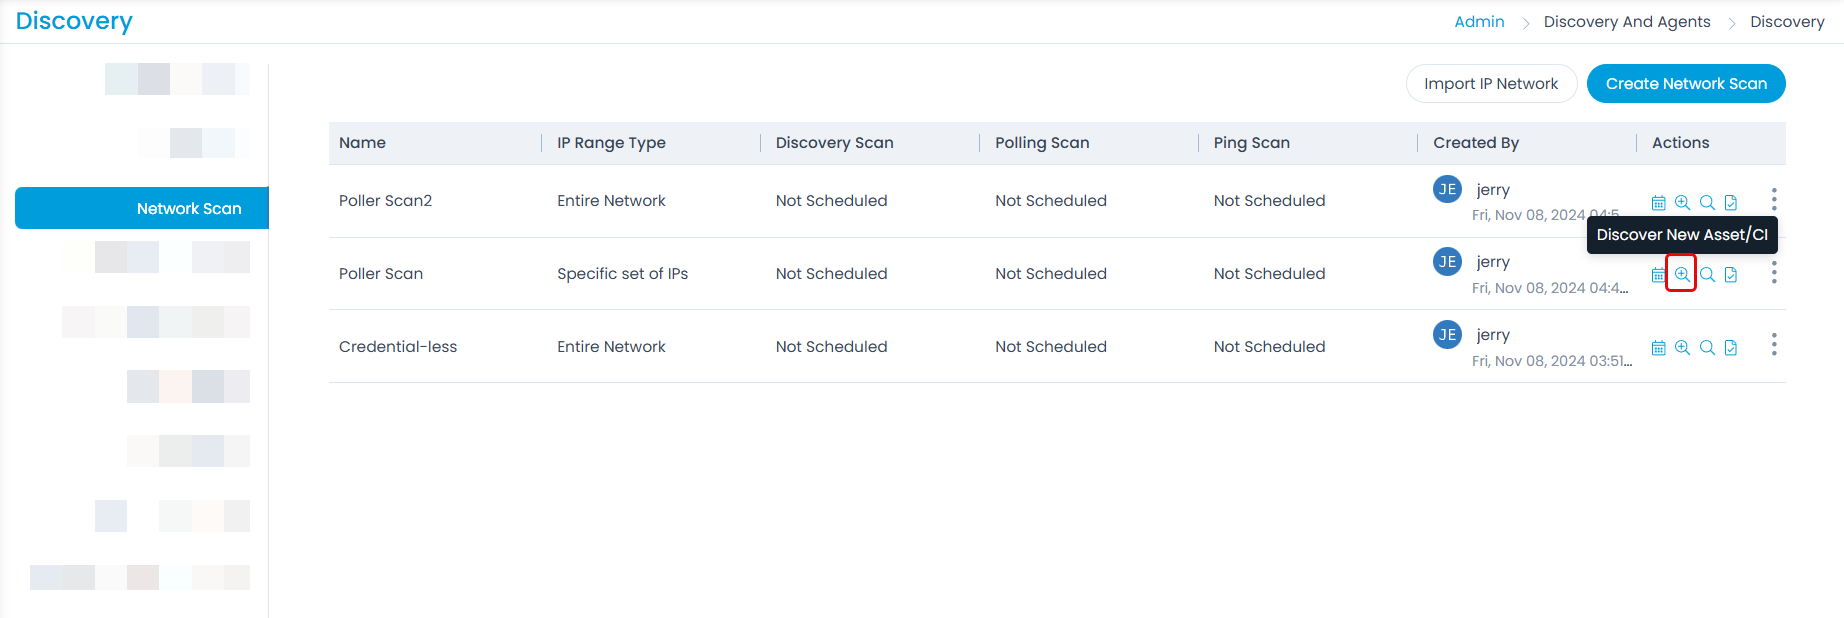
- Once done, click save and run the discovery process using the Discover New Asset/CI option.

Nmap Installation
This section provides a step-by-step guide on how to install Nmap, a powerful network scanning tool widely used for network discovery, security auditing, and troubleshooting. Nmap (Network Mapper) is open-source software that allows users to detect live hosts, services, and operating systems on a network, making it a valuable asset for both IT professionals and cybersecurity enthusiasts.
This guide covers installation instructions for the Windows Operating System.
To install Nmap manually,
- Open the nmap.org website and download the latest stable release self-installer.
- Once downloaded, run the setup exe file and the wizard opens.

- Click I Agree and the following screen appears.

Click Next. The Npcap component must be selected.
- Click Install.

- The Npcap setup initiates as shown below. Click I Agree.

- Click Install.

- Once the Npcap installation is completed, click Next.

- Click Finish. The Npcap is installed succesfully.

- Next, the Nmap installation process resumes. Once the Nmap installation is completed, click Next.

- If required, create shortcuts by selecting the required option, and click Next.

- Click Finish.

- Once the nmap and npcap are installed, you can check its version in the poller UI.

- Once the installation is complete, set the variable path in the system. To set, navigate to System Properties > Advanced System Settings > Environment Variables.

- In the Environment Variables popup, edit the Path System variable, and add a new path for the Nmap directory in it as shown below.

Once done, click OK in all the windows.
- You can view the Nmap status on the portal from Admin > Discovery and Agents > Agent > Discovery Poller page.
