CI Status
CI Status determines the progress of the CI tickets at each stage. Using these you can know how much work is done or pending on the ticket and accordingly actions can be taken. The system provides some default status values that are ready for use.
To view the CI Status page, navigate to Admin > CMDB > CI Status > CMDB tab.
Here, you can manage the status of the tickets and map the CI status values with the Asset status. Also, you can edit the status names, set the default status, and change the color of the status values as per the organization’s theme.
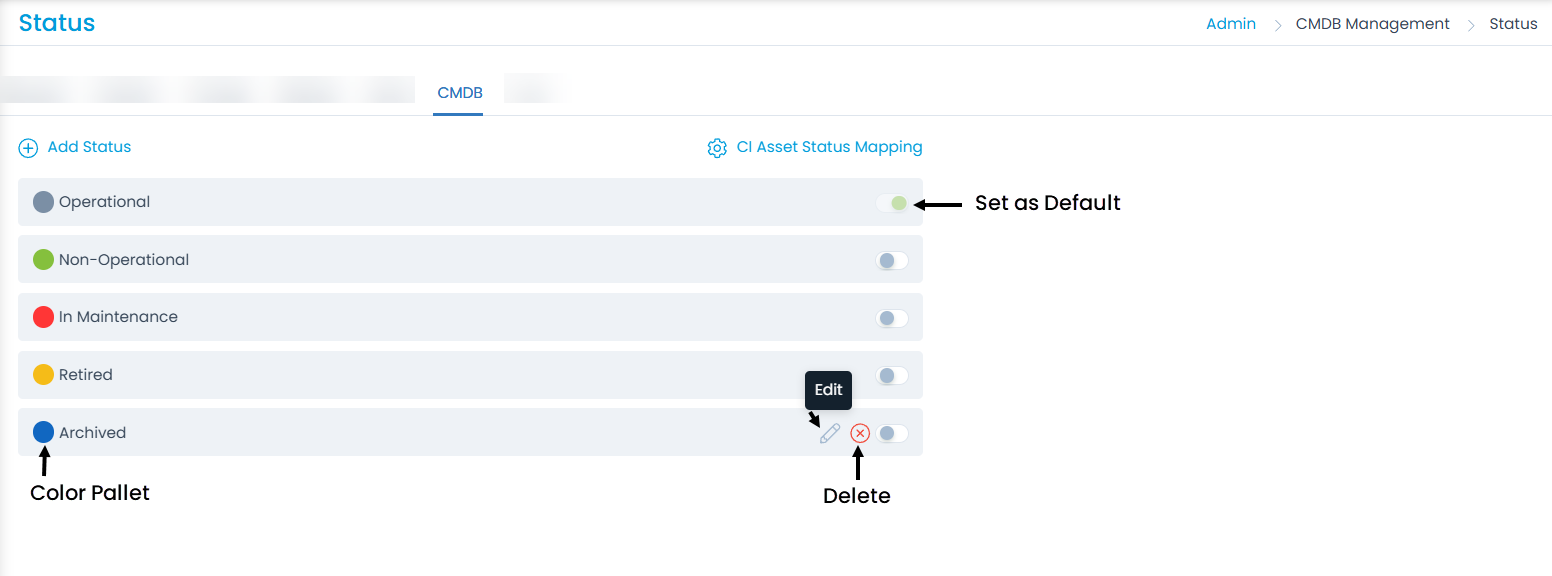
Here, you can do the following:
- View and edit the default status.
- Add and manage the Custom status.
- Re-order the statuses using drag and drop.
- Set the default status of the ticket when a new CI is added.
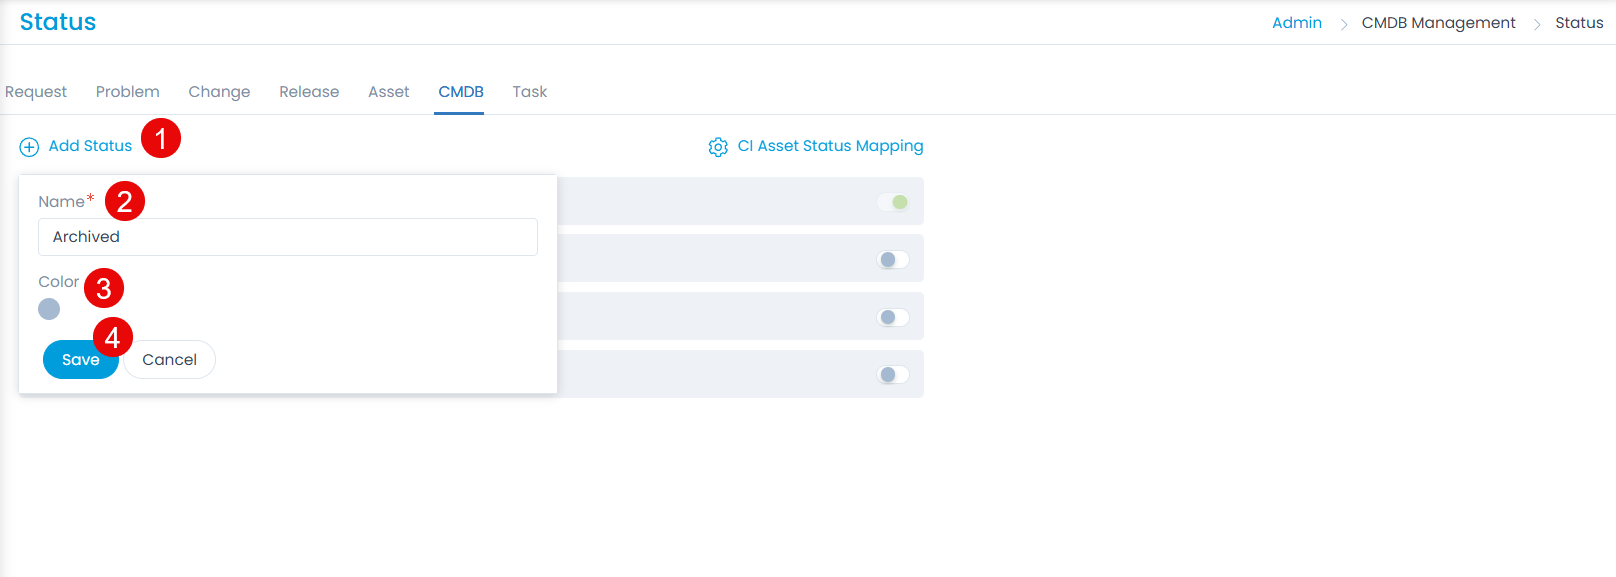
Add Status
To add a custom status,
- Click the Add Status link.
- Enter the Name of the status.
- Select the color or enter the hexadecimal code by clicking color pallet icon.
- Click Save.
- Once added, you can edit or delete the custom status. You can only edit the default statuses and not delete.

CI Asset Status Mapping
This enables to map the CI status values with the Asset status. You can also map the custom statuses.
note
- Status Mapping will function only for Asset/CI discovered or polled through Discovery. Also, the value of the auto-change preference setting from the System Preference will be considered.
- Only unique CI-Asset pair mappings will be allowed.

To map any status,
- Click the Add Status Mapping button.
- Select the CI status and Asset Status values that you want to map from the respective dropdowns.
- Once done, click Done.
- Now, when the status of the CI will change the status of the asset associated with it will also change as per the mapping configured.