SLA List Page
The list page displays all the SLAs available in the system.
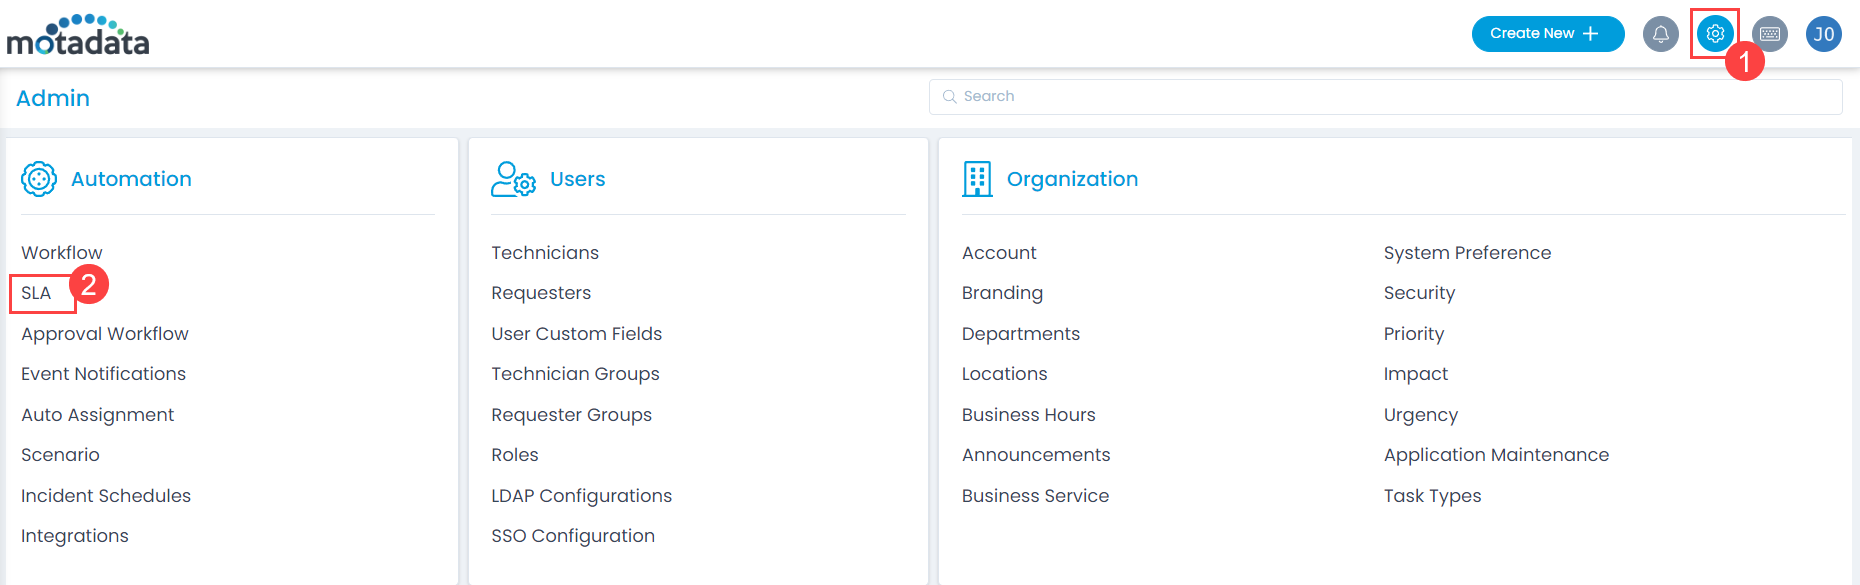
To view the list page, navigate to Admin > Automation > SLA.
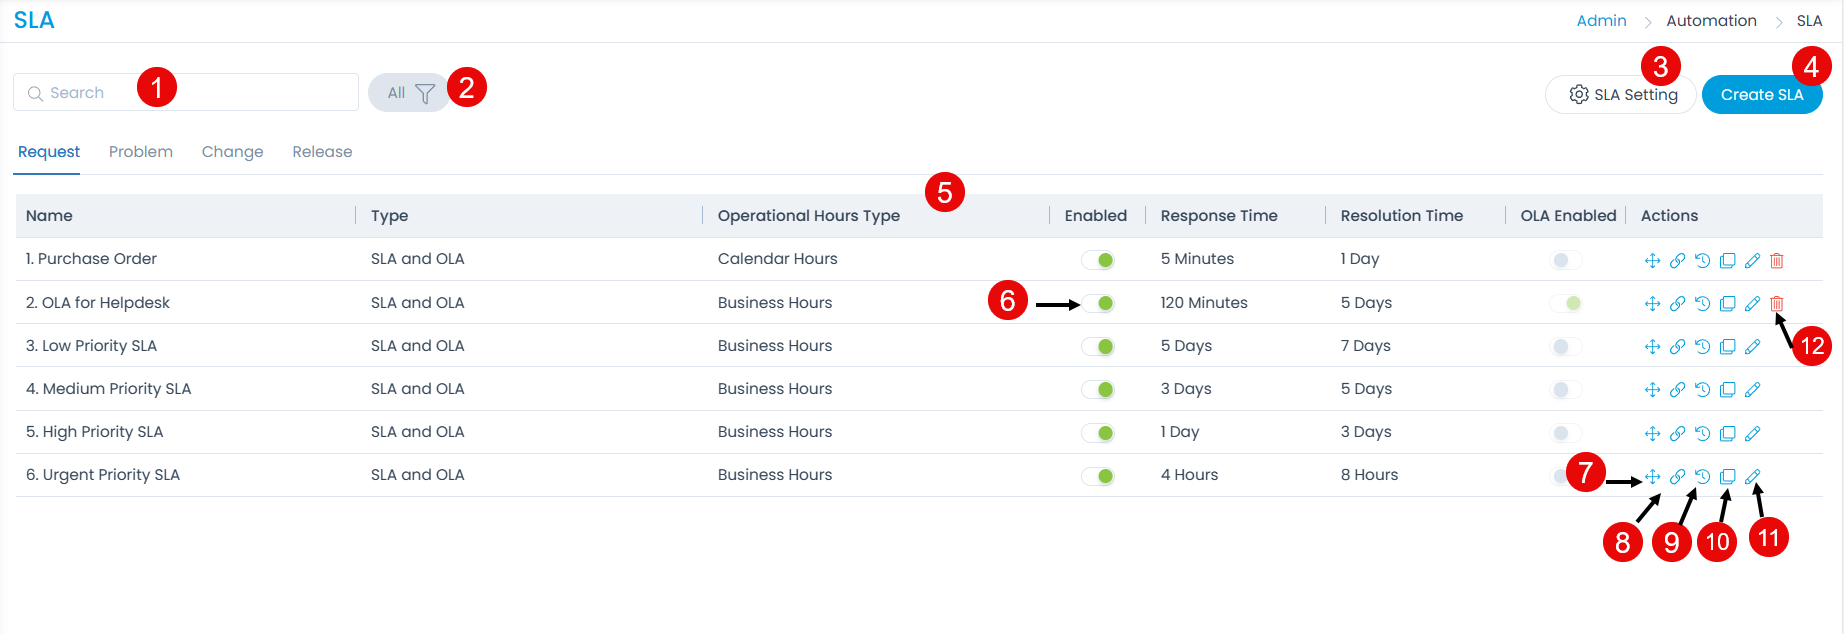
The page provides the following features:
Search: You can enter a word and search for the required SLA that contains the text. The system displays a list of SLAs that contains the word.
Filter: You can filter the SLAs based on their status i.e. All, Enabled, and Disabled.
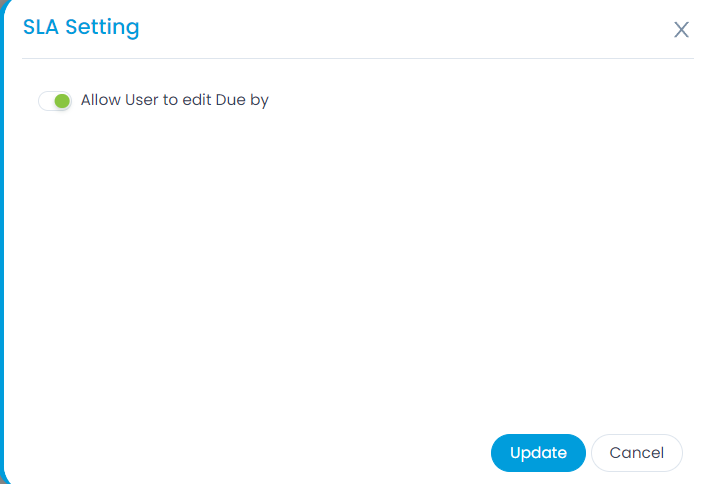
SLA Setting: You can configure the SLA settings.
- Allow User to edit Due by: Enable to allow the user to edit the SLA Due by classifier on the Ticket Details page. By default, this setting is enabled. When disabled, the "Due by" classifier will be set only as per the configured SLA. In such a case, the edit icon will remain hidden. This setting applies to the Request, Problem, Change, and Release modules.
noteIf this field is disabled before the upgrade, the Update Due By role permission will stay disabled for all the OOB and custom roles after the upgrade.
- Create SLA: You can create an SLA.
- Grid: You can view the details of the SLA in the grid.
- Enable/Disable SLA: You can enable or disable an SLA from the list. Enable the SLA to use it. Disable the SLA if you do not want the system to use it.
- Change Priority: You can change the priority of the SLA by moving the snowflakes icon up or down. When more than 1 SLA passes the evaluation condition, the system takes the first SLA (from the top), and applies it to the request. The 2nd SLA will be evaluated only when the 1st SLA conditions are not applicable anymore.
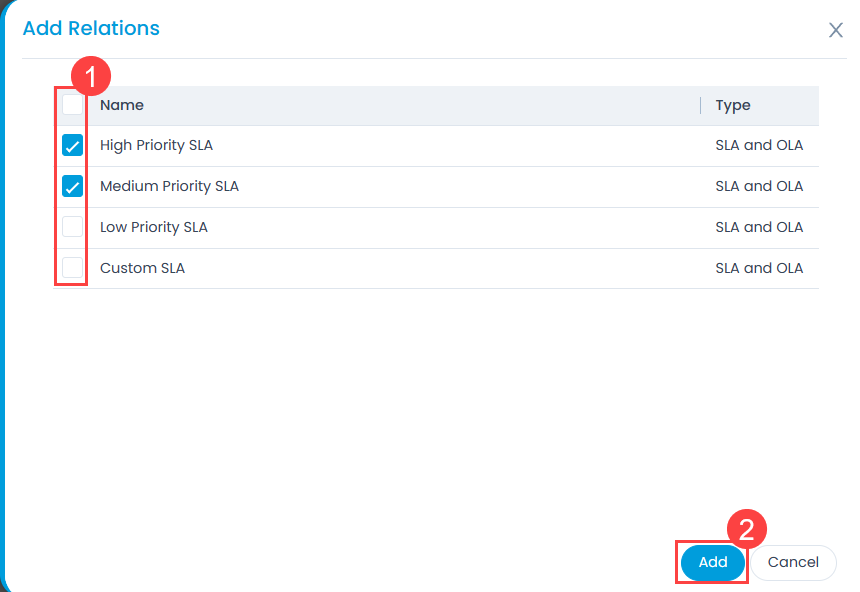
- Relations: You can relate SLA with other SLAs. To create relations,
- Click the Relations icon and a popup appears.
- Click Add Relation.
- Select the desired SLAs with whom you want to relate.
- Click Add.
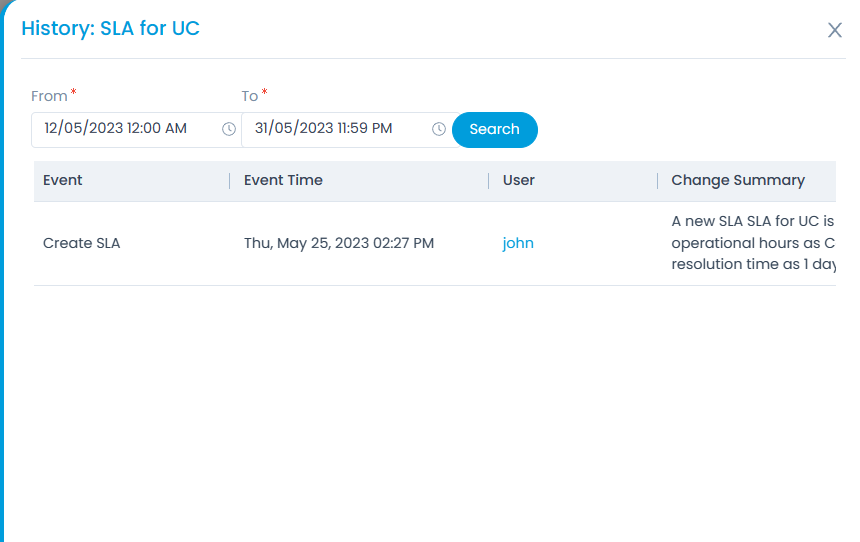
- History: You can view the SLA configuration change history and addition/removal of Relations from an SLA . Also, you can view the user details by clicking on the User name.
- Duplicate: You can create a duplicate SLA of an existing SLA with the same settings.
- Edit: You can edit the required SLA using the edit icon.
- Delete: You can delete the SLA(s) if no longer required. The default SLA can only be edited and not deleted.
Understanding SLA Priority
Here, the scenario what happens when more than 1 SLA is applicable in a request is considered. For Example: There are 2 SLAs available: A Low Priority SLA and a Low Impact SLA.

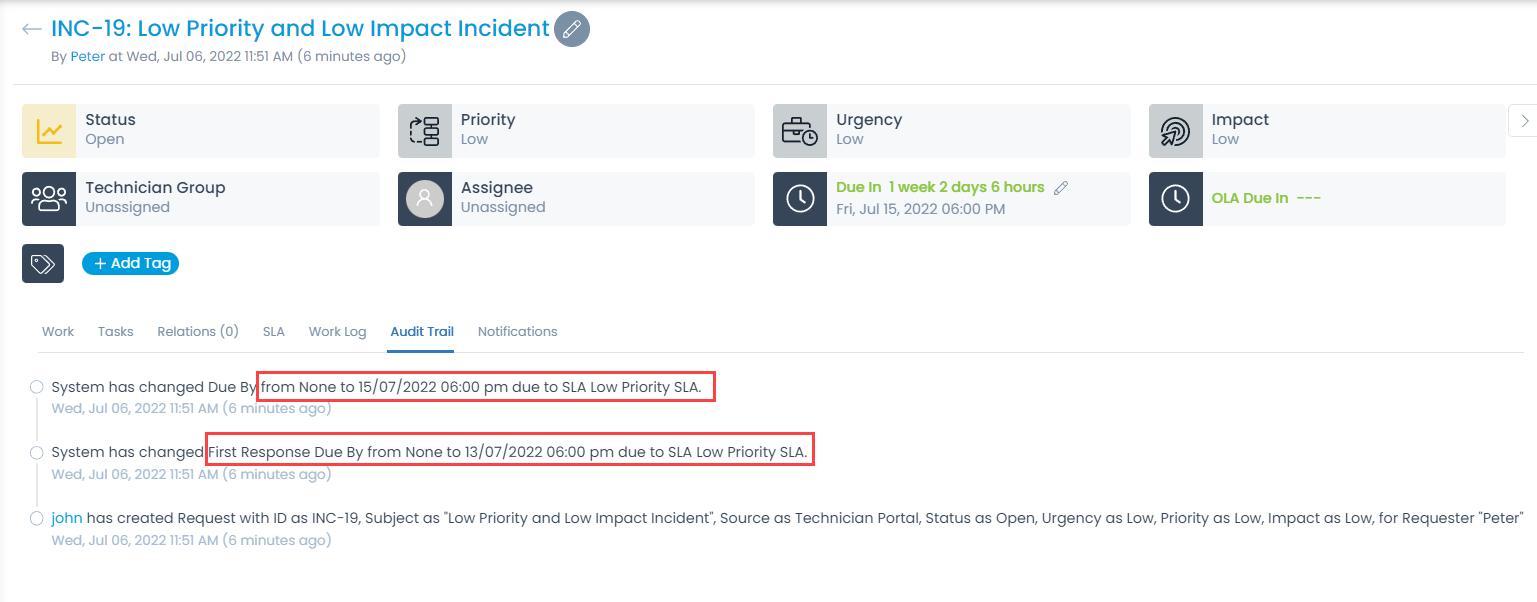
According to the rule, if both the SLAs qualify, the first SLA from the top shall only be applicable. To test this, a request with low priority and low impact is created. The audit trail displays that low impact SLA is applied on the request.
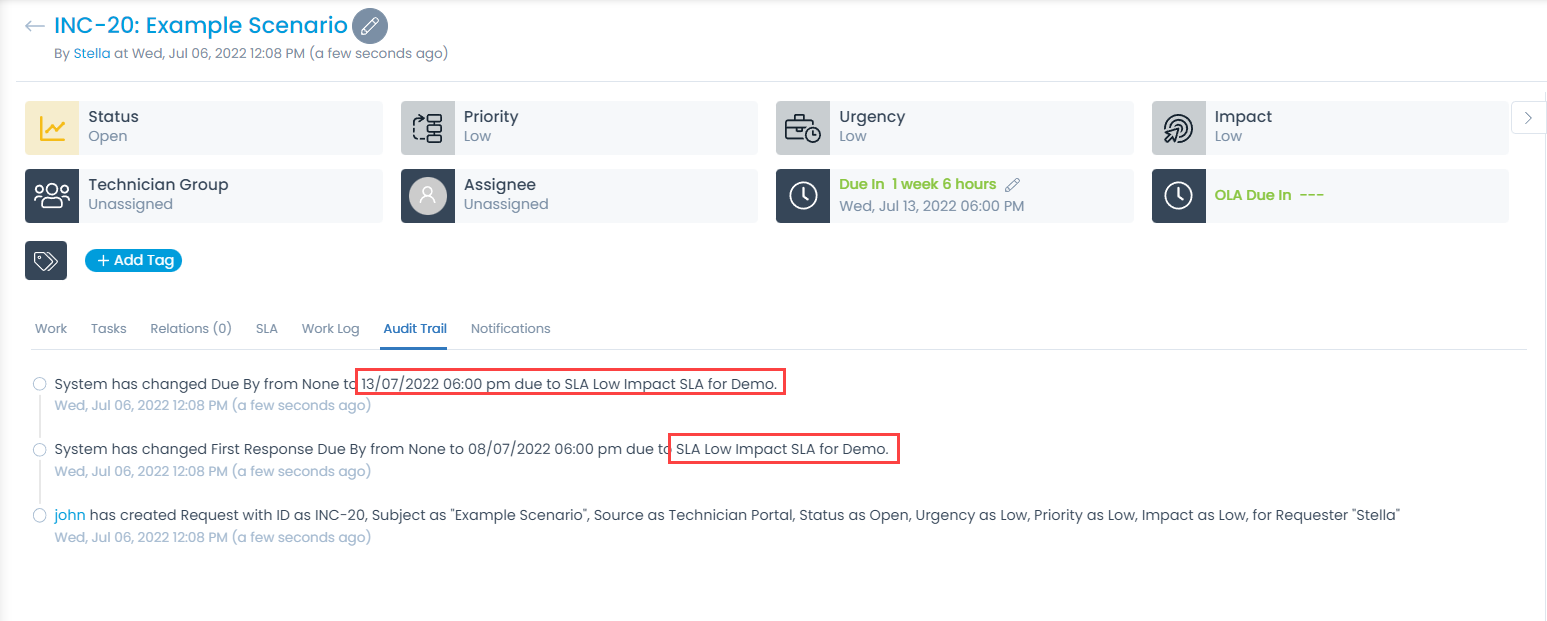
Now, change the Impact of the request from 'Low' to 'On Users'. The low priority SLA is applied on the request. The due date of the request will be computed using its created date.
Whenever you make a change in the request, the system again evaluates all the SLAs and applies the first fitting SLA. Some important facts about the SLA are:
- Due date of any request is calculated only on its created date.
- Every time you make a change in the request, the system evaluates the best applicable SLA and applies to the request. Even the new SLA will use request's created date to compute the due date.
- As an admin, you should be very careful with the enabled SLAs and their order.