Create SLA
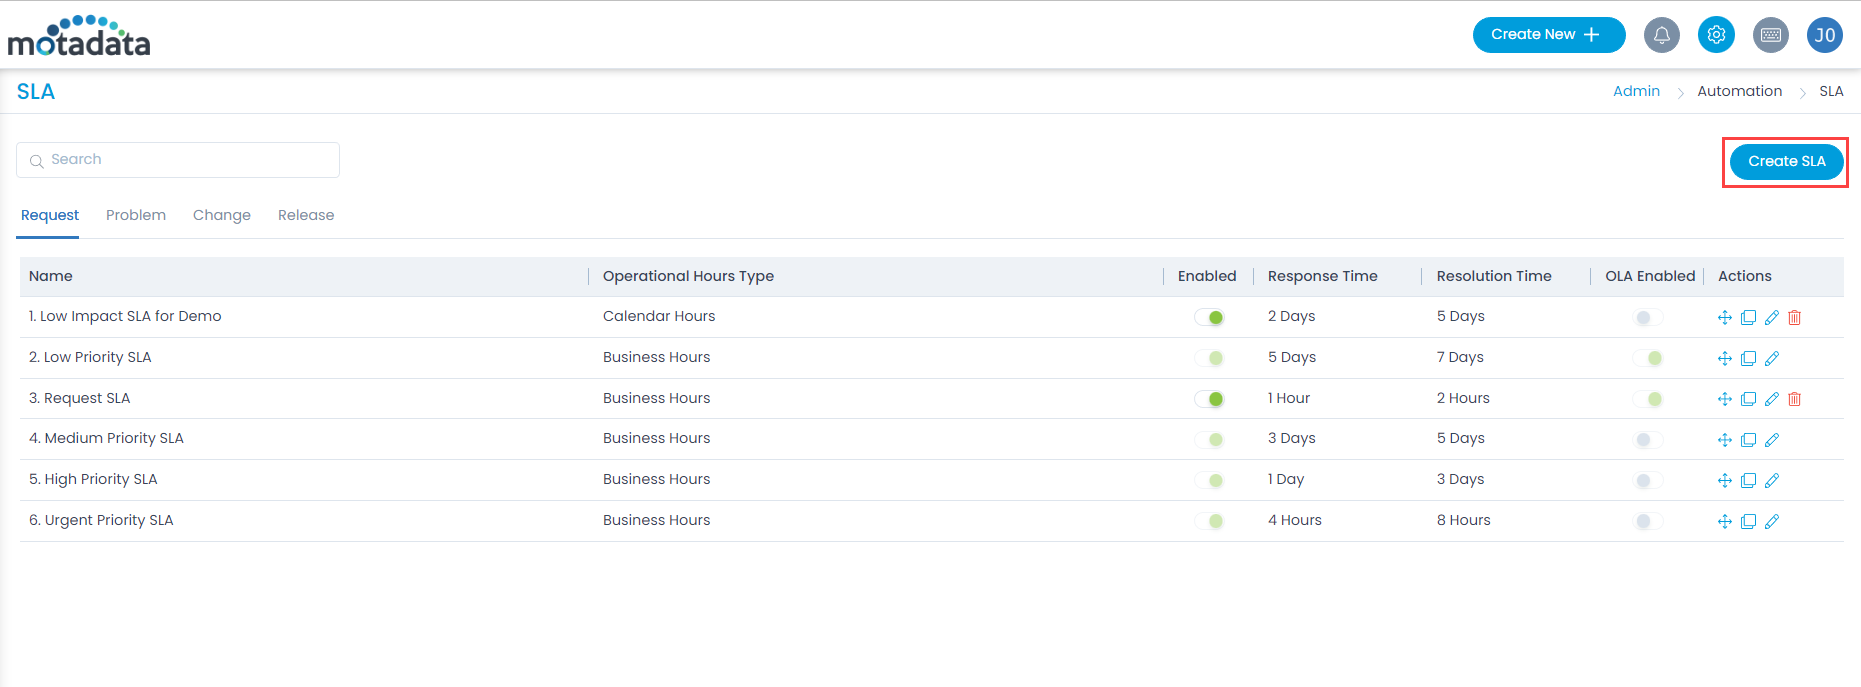
The create page helps you to create an SLA with custom conditions and rules. To create an SLA, on the list page, click the Create SLA button on the top-right corner, and the page appears.
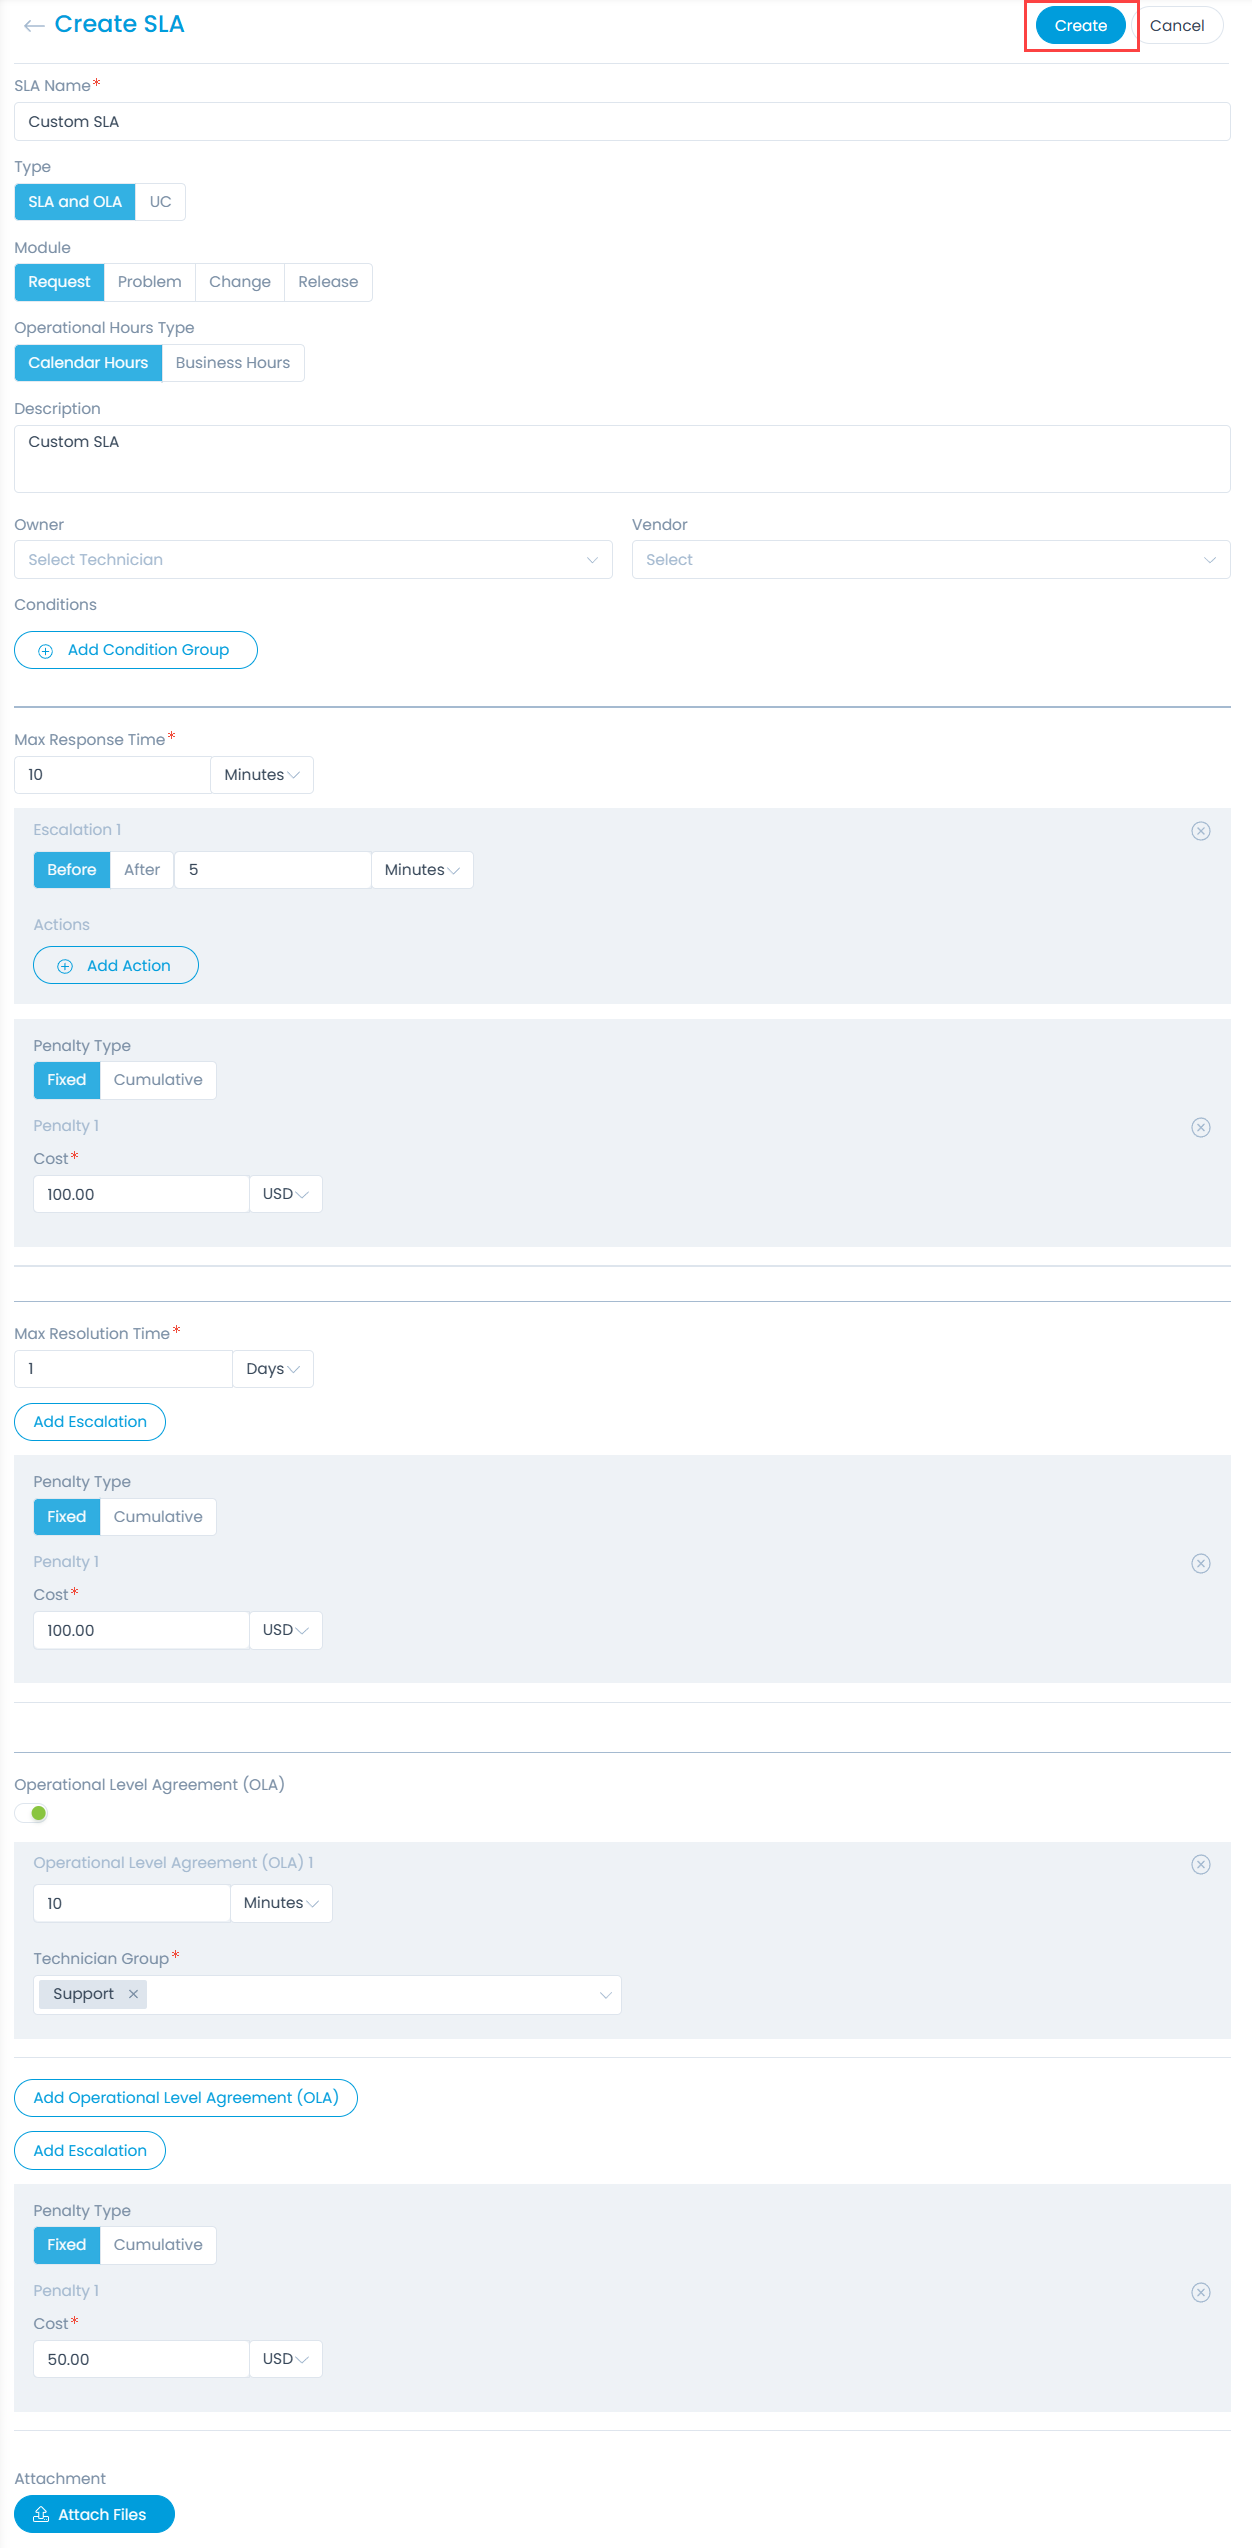
Enter the following details:
- SLA Name: Enter the SLA name.
- SLA Type: Select the type of SLA. By default, SLA and OLA is selected. The options are:
- SLA and OLA: Select if you want to create a simple SLA.
- UC: Select if you want to create an Underpinning Contract SLA.
- Module: Select the module on which the SLA should work. The options are: Request, Problem, Change, and Release.
- Operational Hours Type: Select the operational hours based on which the SLA will be calculated. The options are:
- Calendar Hours: The SLA takes 24-7 as the working hours.
- Business Hours: The SLA uses the settings from business hours section.
- Description: Enter a detailed description about the SLA. This field helps other people to know exactly what is the SLA about and what could be its implications.
- Owner: Select the owner (technicians) of the request.
- Vendor: Select the vendor from the list. You can more vendors from the Vendor Catalog page.
Conditions
Define the conditions here that will be evaluated in the request to apply the SLA. You can define multiple conditions here. All the conditions work in AND form. It means the SLA is applicable only when all the conditions are true.
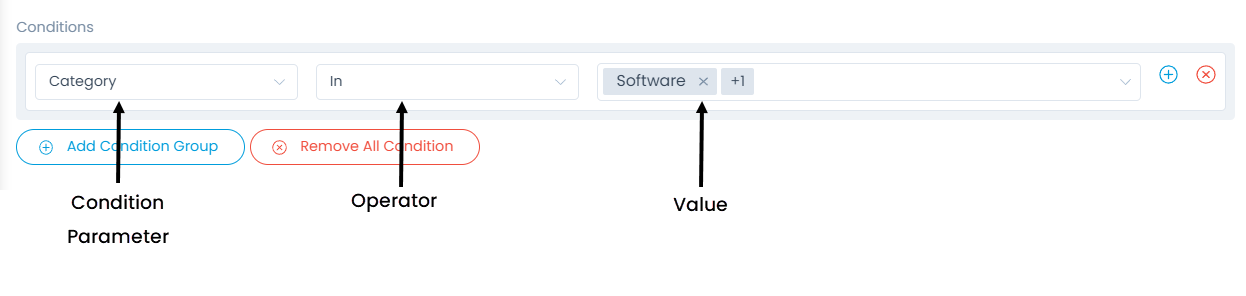
- Condition Parameter: Select a condition parameter from the dropdown list.
- Operator: Select the operator: In/Not In from the dropdown list.
- Value: Select the value for condition. You can select multiple values of which the first value will be displayed in full, followed by the count of all additional values selected.
You can also click the Add Condition Group button to add more conditions in the SLA. Click on Remove All Conditions to remove all the conditions of the SLA.
The SLA will not be applicable when the Custom field selected in the SLA Condition is removed. This applies to Request, Service Request, Problem, Change, and Release modules respectively.
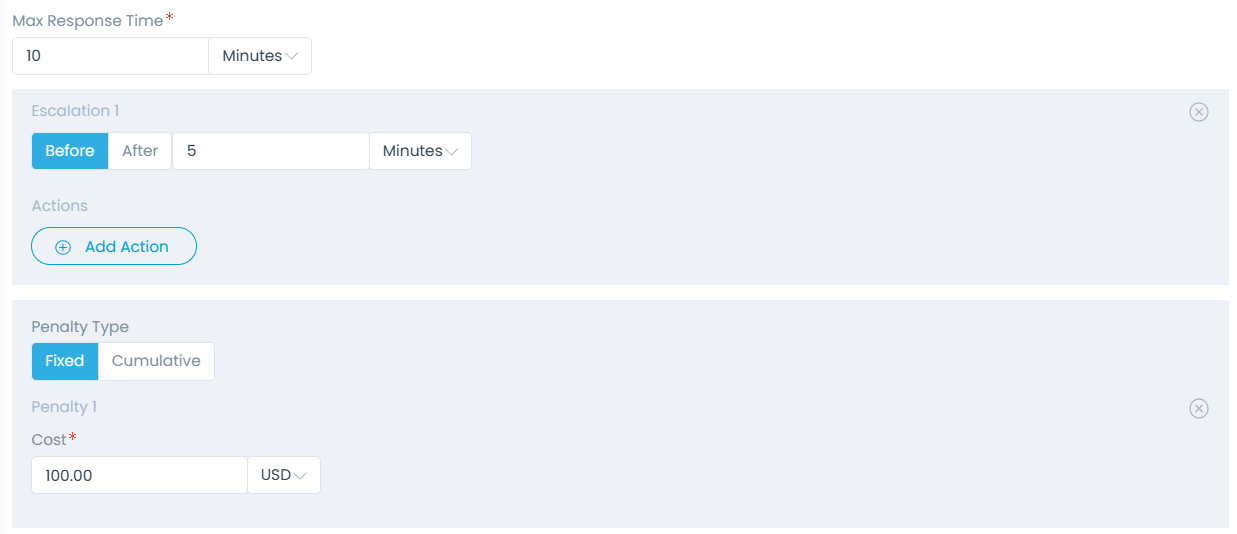
Max Response Time
Enter or select the maximum response time and unit for the technician to respond. The values can be whole numbers only. The units can be minutes, hours, and days. In case minutes is selected, the response time must be 5 or more.
Max Response Time is available for SLA and OLA type only.
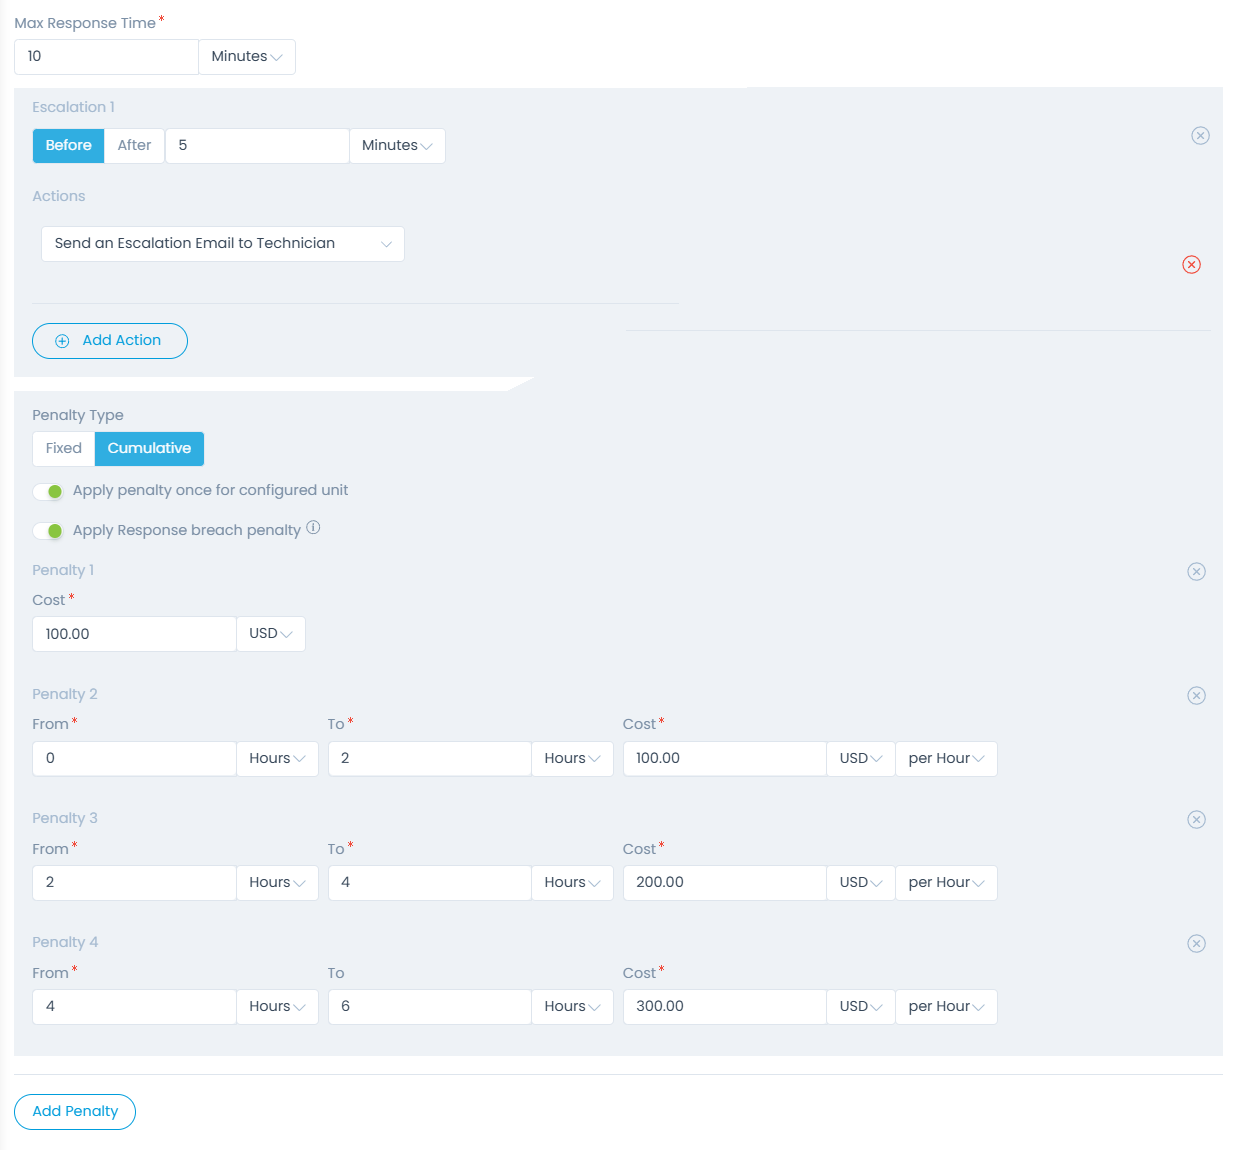
Add Escalation in Response Time: When someone fails to give a response in the SLA defined time frame, the escalation rule will apply. You can add only 1 level of escalation for SLA and OLA Type. In case of UC a maximum of 5 escalations can be added.
- Before/After: Select the time when the escalation should take place. For example: In the above figure, the escalation will take place before 5 minutes of response due date time.
- Actions: Select the action that you want to perform to escalate the ticket based on the above set time. You can add multiple actions. In the above figure, the escalation email will be sent to the Technician 5 minutes before the SLA is breached.
Penalty Type: Select the type of penalty that you want to apply when the SLA is breached.
- Fixed: Select if you want to apply the penalty cost only once when the SLA is violated. If selected, enter the Cost, and select its Currency.
Penalty Type:
- Cumulative: Select if you want to apply the penalty cost amount that increases as and when the SLA is violated along with the time duration passed. If selected, enter the Duration, Cost, Currency, and per Hour/Minute/Day based on which the penalty should be calculated when the SLA is breached. Also, you can enable the following two options:
- Apply penalty once for configured unit
- Apply Response breach penalty
Apply penalty once for configured unit
If enabled, when the SLA is breached, full penalty will be applied to the ticket as per the configured day/hour/minute. By default, it is disabled.
noteThe units must be consistent when applying the penalty for the configured unit.
For example, If Penalty is configured for 1-2 days with 500 Rs/day. Now, when the SLA is breached, as soon as 1st day is passed 500 Rs penalty will be applied altogether at once. Similarly, when the 2nd day is passed again 500 Rs penalty will be applied altogether at once. If disabled, instead of applying the whole penalty amount at once, it will be calculated by dividing the amount in minutes, and then applied at each instance. Here, it will be 500/24*60 in case of days.
For example, if the below penalties are set for SLA:
Penalty 1: From: 0 To: 2 Hours and Cost: 100 USD per Hour
Penalty 2: From: 2 To: 4 Hours and Cost: 200 USD per Hour
Penalty 3: From: 4 To: 6 Hours and Cost: 300 USD per Hour
noteThe From value should be greater than or equal to the To value of its previous penalty. For example: Penalty 2's From value can be >=2 hours, if Penalty 1's To value is set as 2 hours.
The following will be the behavior:
- Once the SLA is violated, the penalty counter will get started and from the time it is breached till further 2 hrs the penalty cost i.e. 100 USD per hour will be applied to the ticket.
- If the response is not yet received and the time exceeds, then Penalty 2 will come into effect, and 200 USD per hour will get applied after the Penalty 1 duration is completed from 2 to 4 hours.
- Next, if still the response is not received, after 4 hours Penalty 3 will come into effect till 6 hrs, and the penalty cost i.e. 300 USD per hour will be applied to the ticket.
- The total penalty amount will appear in the SLA tab of the ticket's details page. Also, in the reports you can view the total SLA Penalty (Response) amount.
- Cumulative: Select if you want to apply the penalty cost amount that increases as and when the SLA is violated along with the time duration passed. If selected, enter the Duration, Cost, Currency, and per Hour/Minute/Day based on which the penalty should be calculated when the SLA is breached. Also, you can enable the following two options:
Apply Response breach penalty
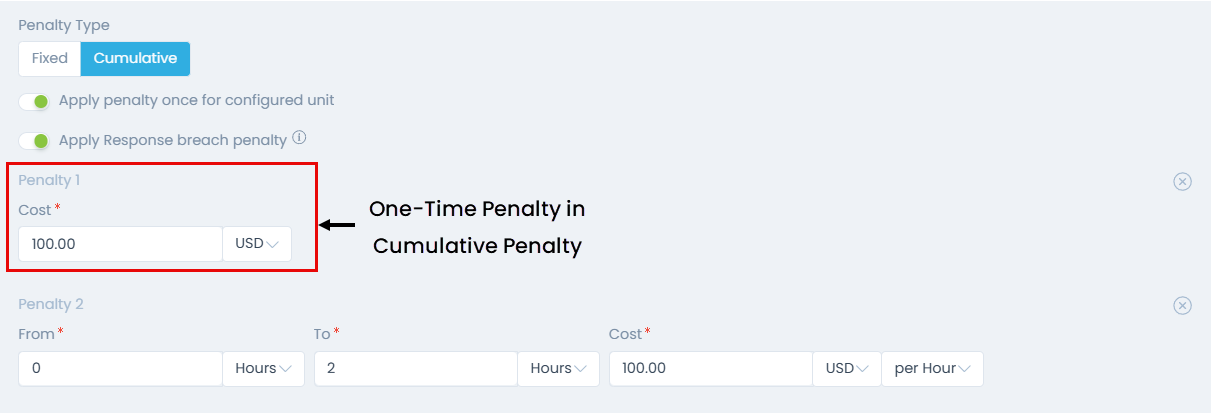
This flag will apply an initial one-time penalty along with cumulative penalties for SLA Response breach. If enabled, administrators must enter the cost and select the currency. Now, when the maximum response time SLA is breached or violated, the configured one-time penalty will be enforced immediately. Then later again, if the SLA is breached, the next cumulative penalties will be applied as per the "Apply penalty once for configured unit" field.
For example, if the one-time penalty is set to 100 USD and the cumulative penalty is defined as 0-2 hours – 100 USD, a 100 USD penalty will be applied immediately upon breaching the SLA, with an additional 100 USD penalty enforced after two hours.
If the "Apply penalty once for configured unit" is disabled, instead of applying the whole penalty amount at once i.e. 100 USD, it will be calculated by dividing the amount in minutes, and then applied at each instance.
Max Resolution Time
Select the maximum resolution time value and unit. Values can be whole numbers only. The units can be minutes, hours, and days. The resolution time is always equal to or higher than response time. In case of minutes unit, the value must be 5 or more.
The resolution time excludes periods such as holidays, non-business hours, break times, and any duration when the SLA is paused.
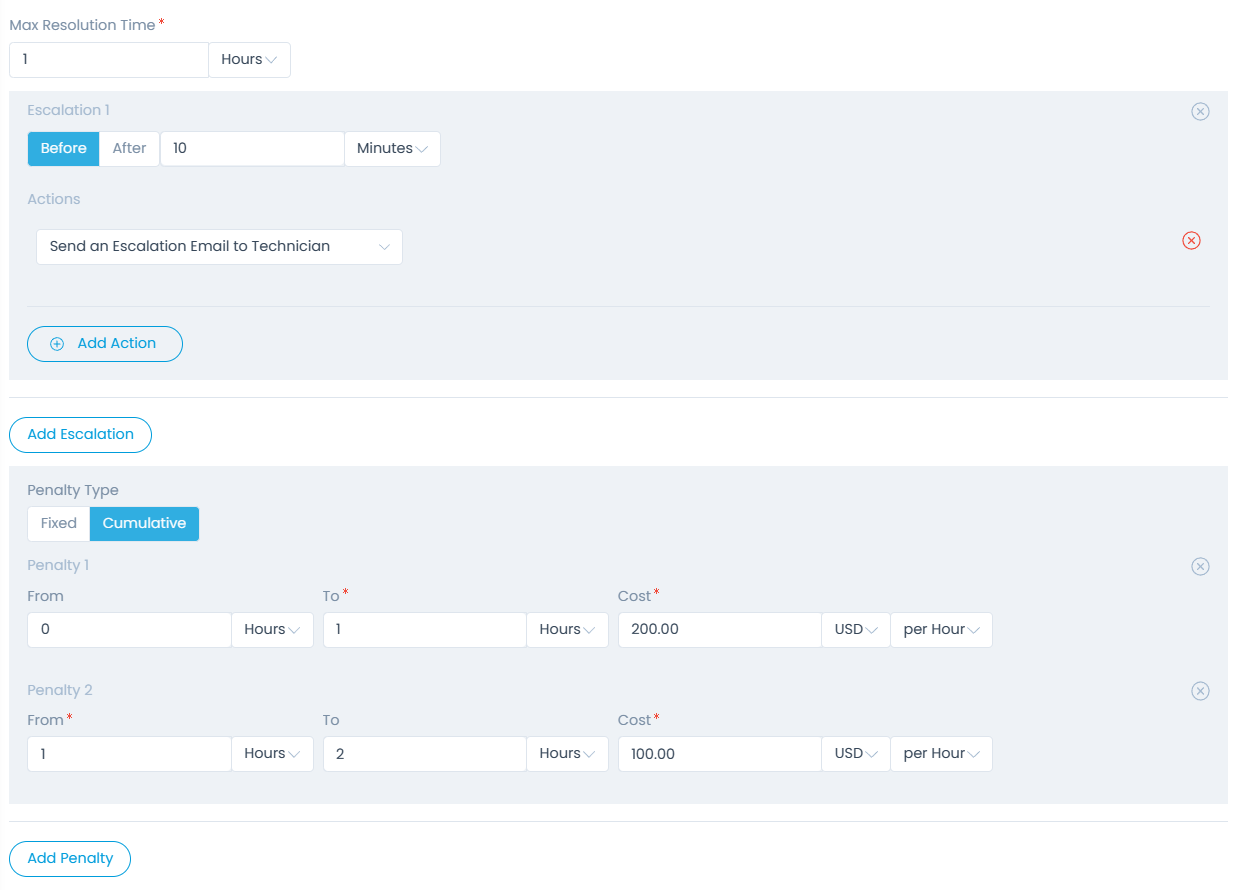
Add Escalation in Resolution Time: When someone fails to resolve the request in the SLA defined time frame, the escalation rule will apply. You can add up to 5 levels of escalation.
- Before/After: Select the time when the escalation should take place. For example: If the 1st escalation takes place after 10 minutes of resolution due date time. The 2nd escalation will take place when the 1st level escalation is over.
- Actions: Select the action that you want to perform to escalate the ticket based on the above set time. You can add multiple actions. In the above figure, the escalation email will be sent to the Technician 10 minutes before the SLA is breached.
Penalty Type: Select the type of penalty that you want to apply when the SLA is breached for resolving the ticket.
Fixed: Select if you want to apply the penalty cost only once when the SLA is violated. If selected, enter the Cost, and select its Currency.
Cumulative: Select if you want to apply the penalty cost amount that increases as and when the SLA is violated along with the time duration passed. If selected, enter the Duration, Cost, Currency, and per Hour/Minute/Day based on which the penalty should be calculated when the SLA is breached.
For example, if the below penalties are set for SLA:Penalty 1: From: 0 To: 1 Hours and Cost: 200 USD per Hour
Penalty 2: From: 1 To: 2 Hours and Cost: 100 USD per Hour
noteThe From value should be greater than or equal to the To value of its previous penalty. For example: Penalty 2's From value can be >=1 hour, if Penalty 1's To value is set as 1 hour.
The following will be the behavior:
- Once the SLA is violated, the penalty counter will get started and from the time it is breached till further 1 hr the penalty cost i.e. 200 USD per hour will be applied to the ticket.
- If the response is not yet received and the time exceeds, then Penalty 2 will come into effect, and 100 USD per hour will get applied after the Penalty 1 duration is completed from 1 to 2 hours.
- The total penalty amount will appear in the SLA tab of the ticket's details page. Also, in the reports you can view the total SLA Penalty (Resolution) amount.
Operational Level Agreement (OLA)
OLA defines the timeline for each individual technician group. It is defined per SLA and is optional. It works similar to SLA but includes only the working hours of the technician group. OLA time should be less than or equal to the Max Resolution Time.
OLA is available for SLA and OLA type only.
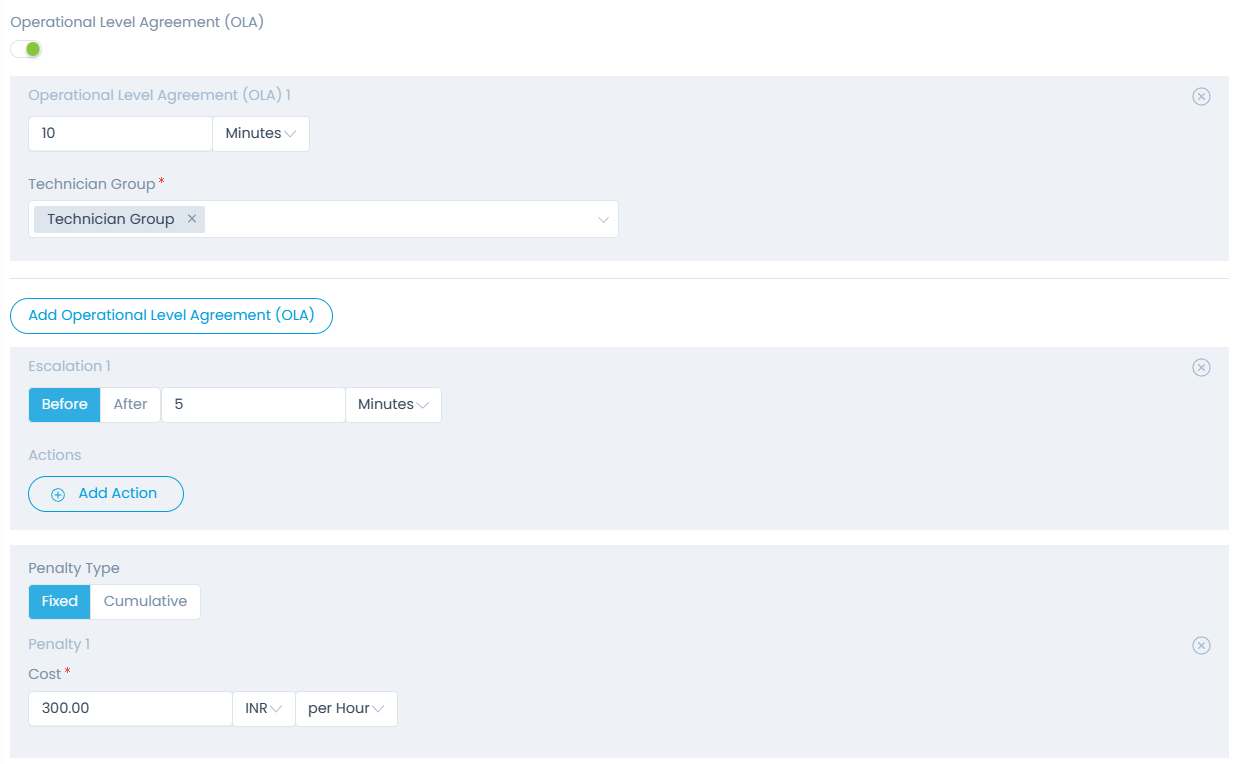
To configure OLA,
- Enable the OLA option.
- Click the Add Operational Level Agreement button and specify the time. Values can be whole numbers only. The units can be minutes, hours, and days. In case of minutes unit, the value must be 5 or more.
- Select the Technician Groups to whom you want to apply the OLA rule. You can select multiple groups.
- You can click the Add Operational Level Agreement (OLA) button to add more OLAs in the SLA. You can add up to 5 levels of OLAs.
- Along with OLA, you can add Escalation and Penalty to the OLA in the same way as added in Max Response/Resolution Time section.
Once all the details are filled, click Create, and the SLA gets created. By default, it is enabled. Now, whenever the SLA is applied and breached, its entry appears in the SLA tab of the Request Details page.
Once the SLA is created/updated, the configured penalty cost will also get applied to the already existing tickets in the following cases:
- If the SLA's priority is high in the SLA list.
- If the SLA of the existing tickets is already violated.
- If the conditions of the existing tickets match this SLA.
Similarly, you can create SLA for Problem, Change, and Release modules.