Upgrade Guide for Poller
This guide provides step-by-step instructions on how to upgrade the Poller for both ServiceOps SaaS and On-Premises deployments.
The Poller is a key component for discovering assets in networks behind firewalls. To ensure security, compatibility, and uninterrupted discovery, it is mandatory to keep your Pollers updated to the latest version.
This guide is intended for IT Administrators and System Administrators responsible for maintaining the ServiceOps environment.
Upgrade Methods
The available upgrade method depends on your ServiceOps deployment type.
1. Manual Upgrade (On-Premises & SaaS)
This method involves uninstalling the old version and installing the new one. This is the standard procedure for both deployments.
- Stop the Service: On the server where the Poller is installed, stop the Motadata ServiceOps Poller service.
- Uninstall: Uninstall the existing Poller application using the Add or Remove Programs feature in Windows.
- Install New Version: Download the latest Poller installer and follow the standard Poller installation guide.
2. Bulk Upgrade (On-Premises & SaaS)
This method allows you to upgrade multiple Pollers at once directly from the ServiceOps UI.
The bulk upgrade feature for Pollers is supported from ServiceOps version v8.6.1 onwards. From version 8.6.2, it is mandatory to upgrade all existing Pollers to the latest build to ensure continued functionality.
A. Upload the Poller Build
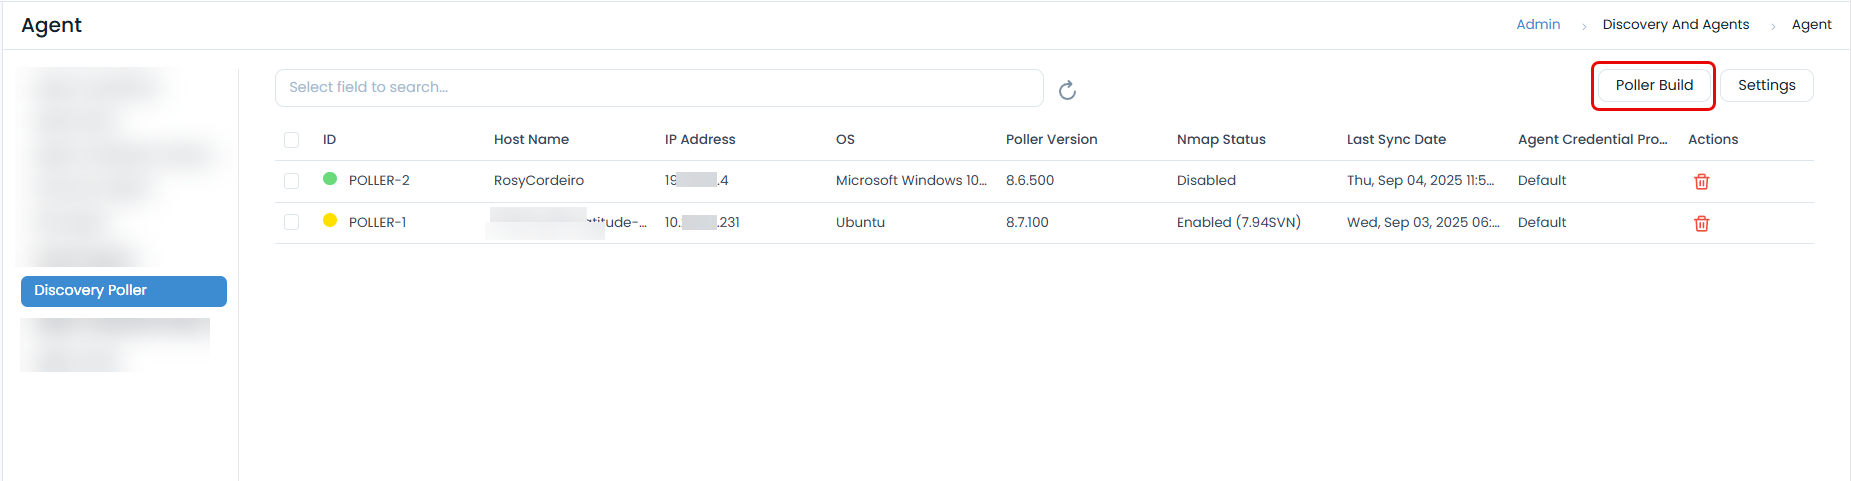
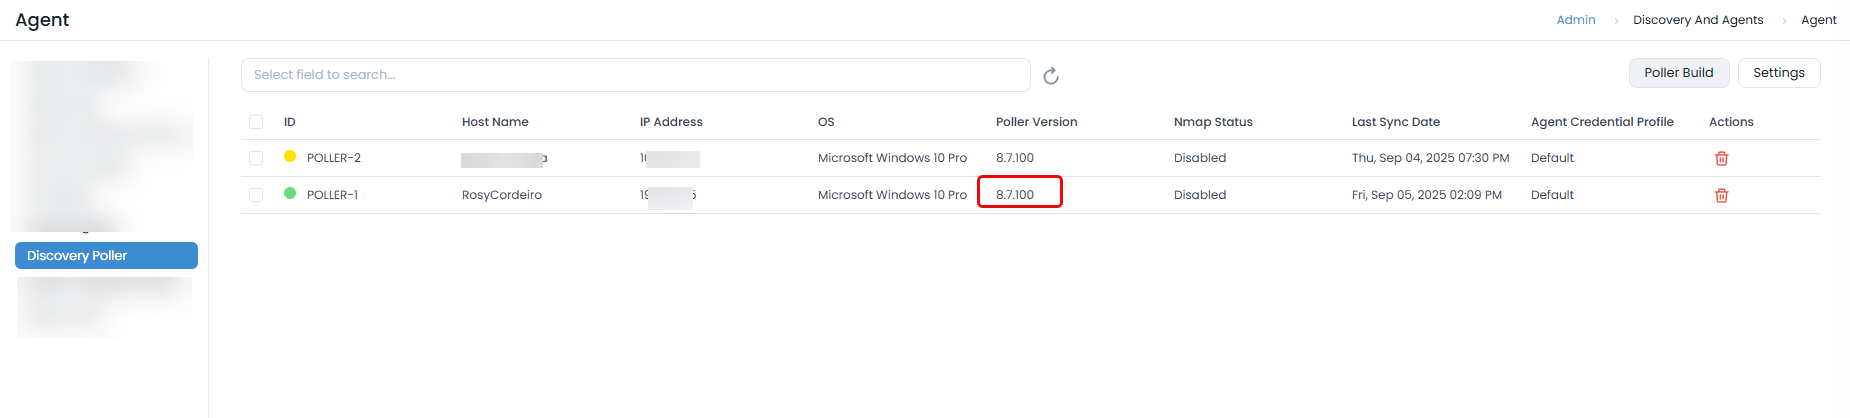
- Navigate to Admin > Discovery and Agents > Agents > Discovery Poller and click Poller Build.
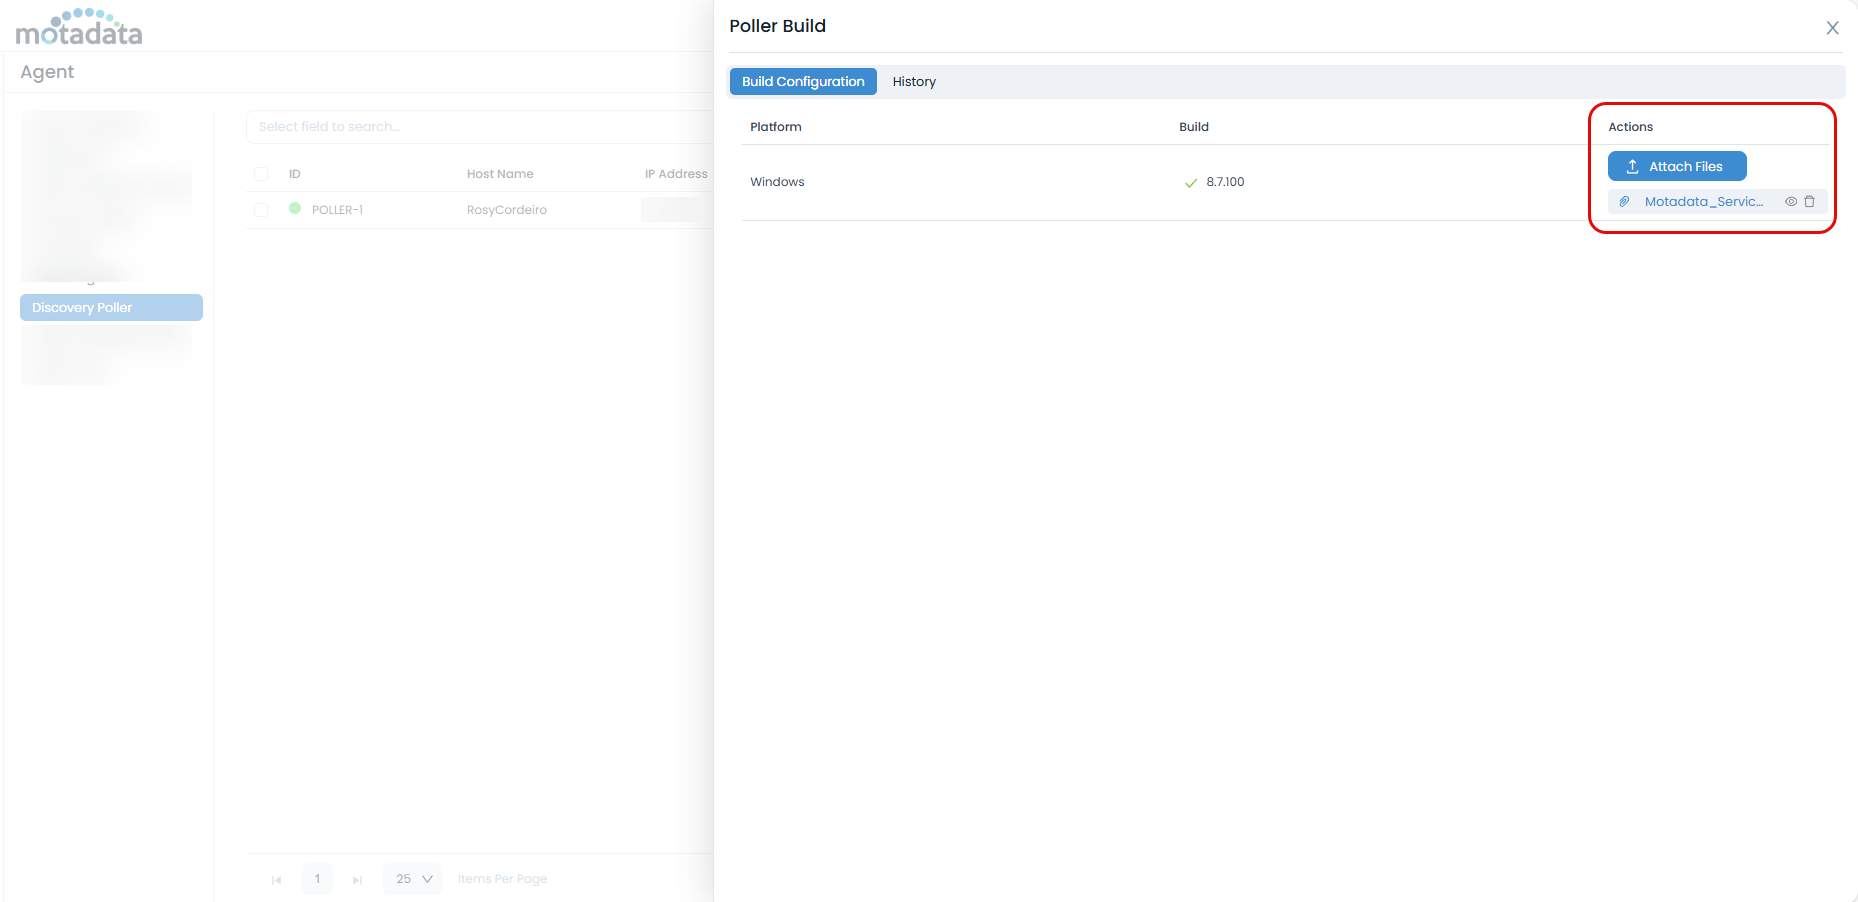
- In the popup, click Attach Files and upload the required poller build.
B. Initiate the Bulk Upgrade
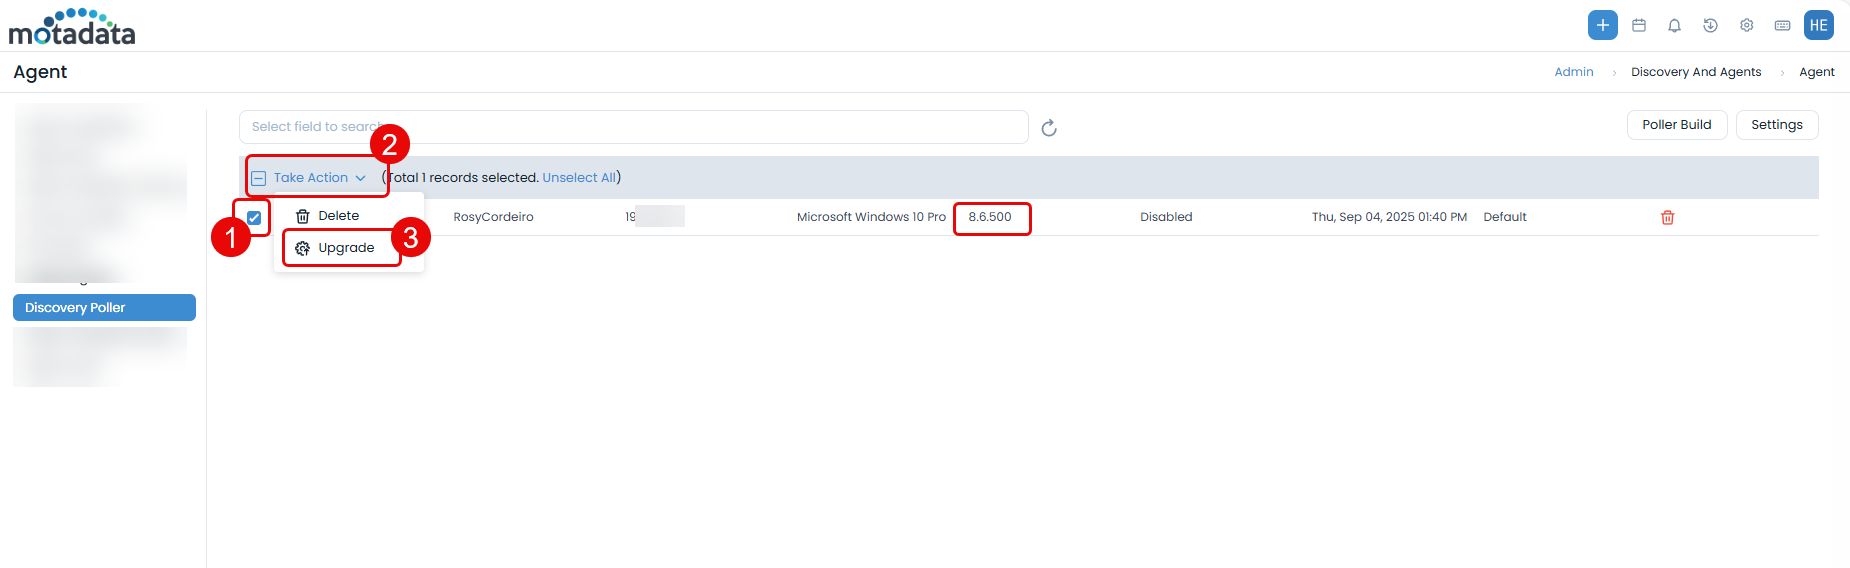
- In the Discovery Poller tab, select the pollers you want to upgrade from the list.
- Click Take Action and select Upgrade.
- A confirmation message will appear. Click Yes to proceed.
Post-Upgrade Verification
After upgrading, verify that the process completed successfully.
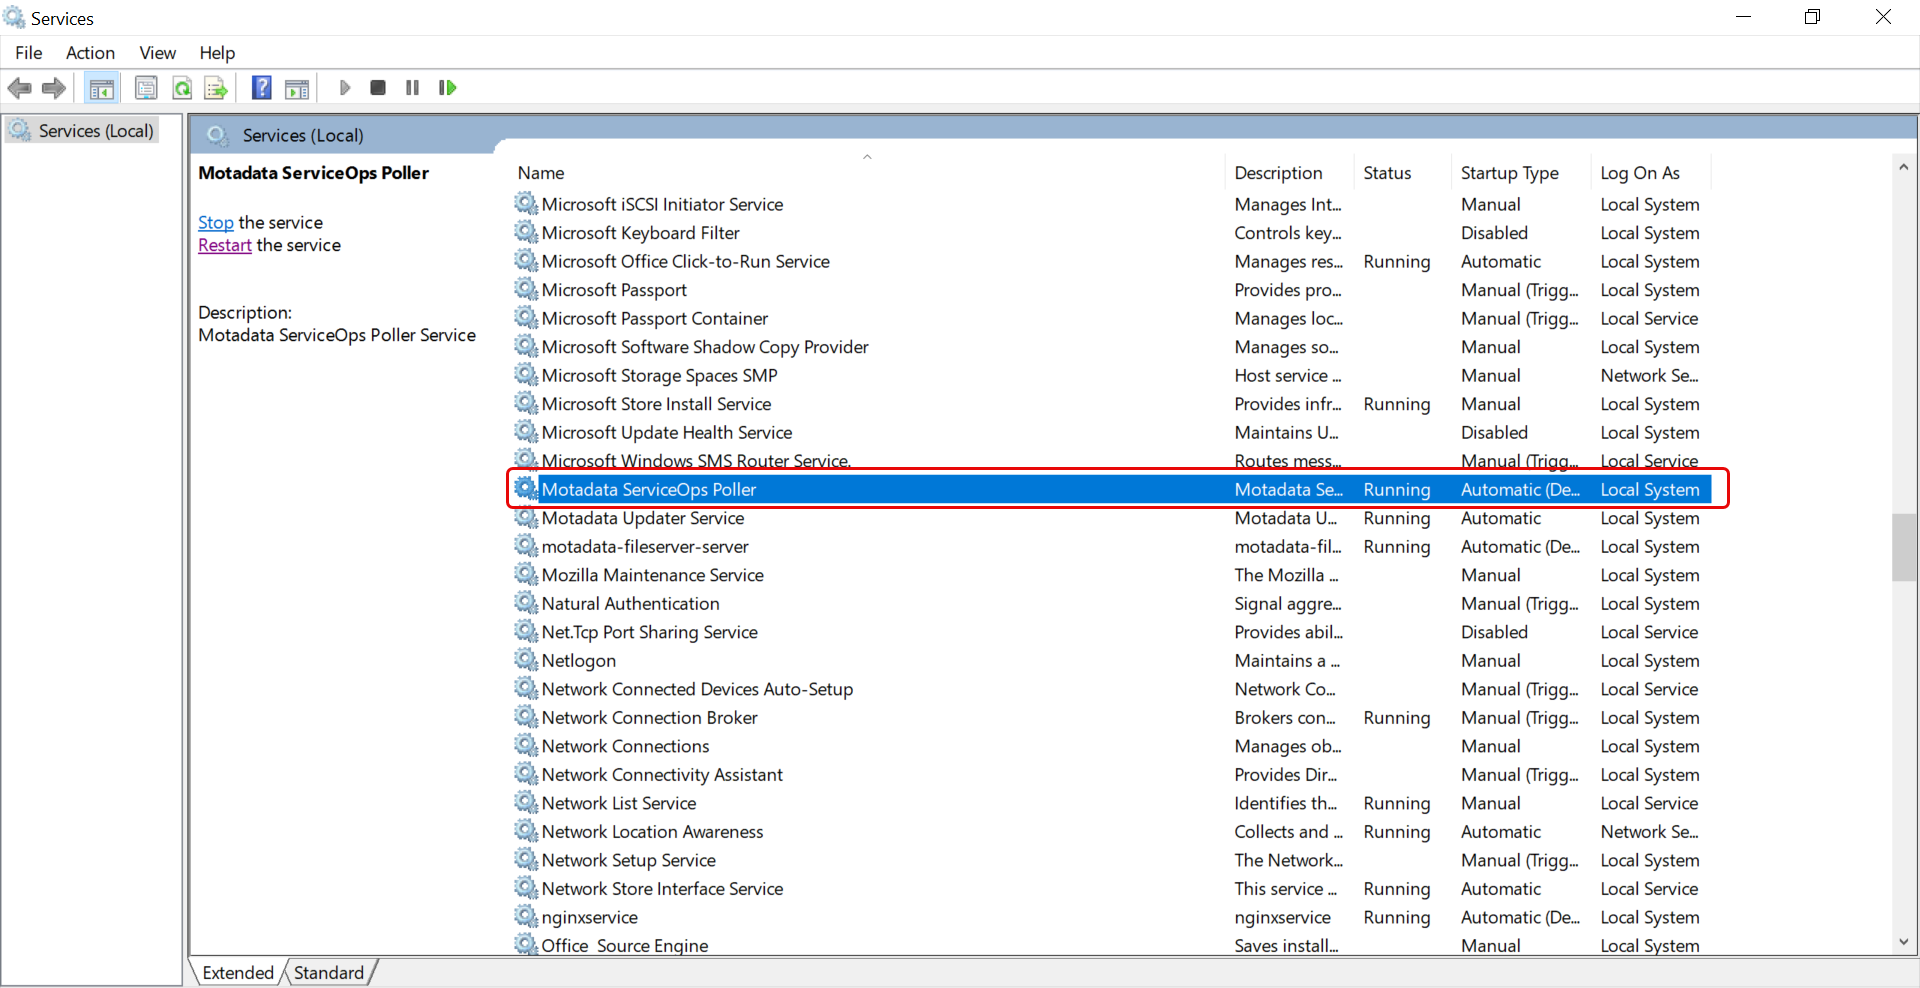
Verify Service Status (Manual): Open the Services application on the Windows machine and ensure the Motadata ServiceOps Poller service is Running. After confirming the service is running, check that the Poller has successfully registered in the ServiceOps UI under Admin > Discovery and Agents > Agents > Discovery Poller.
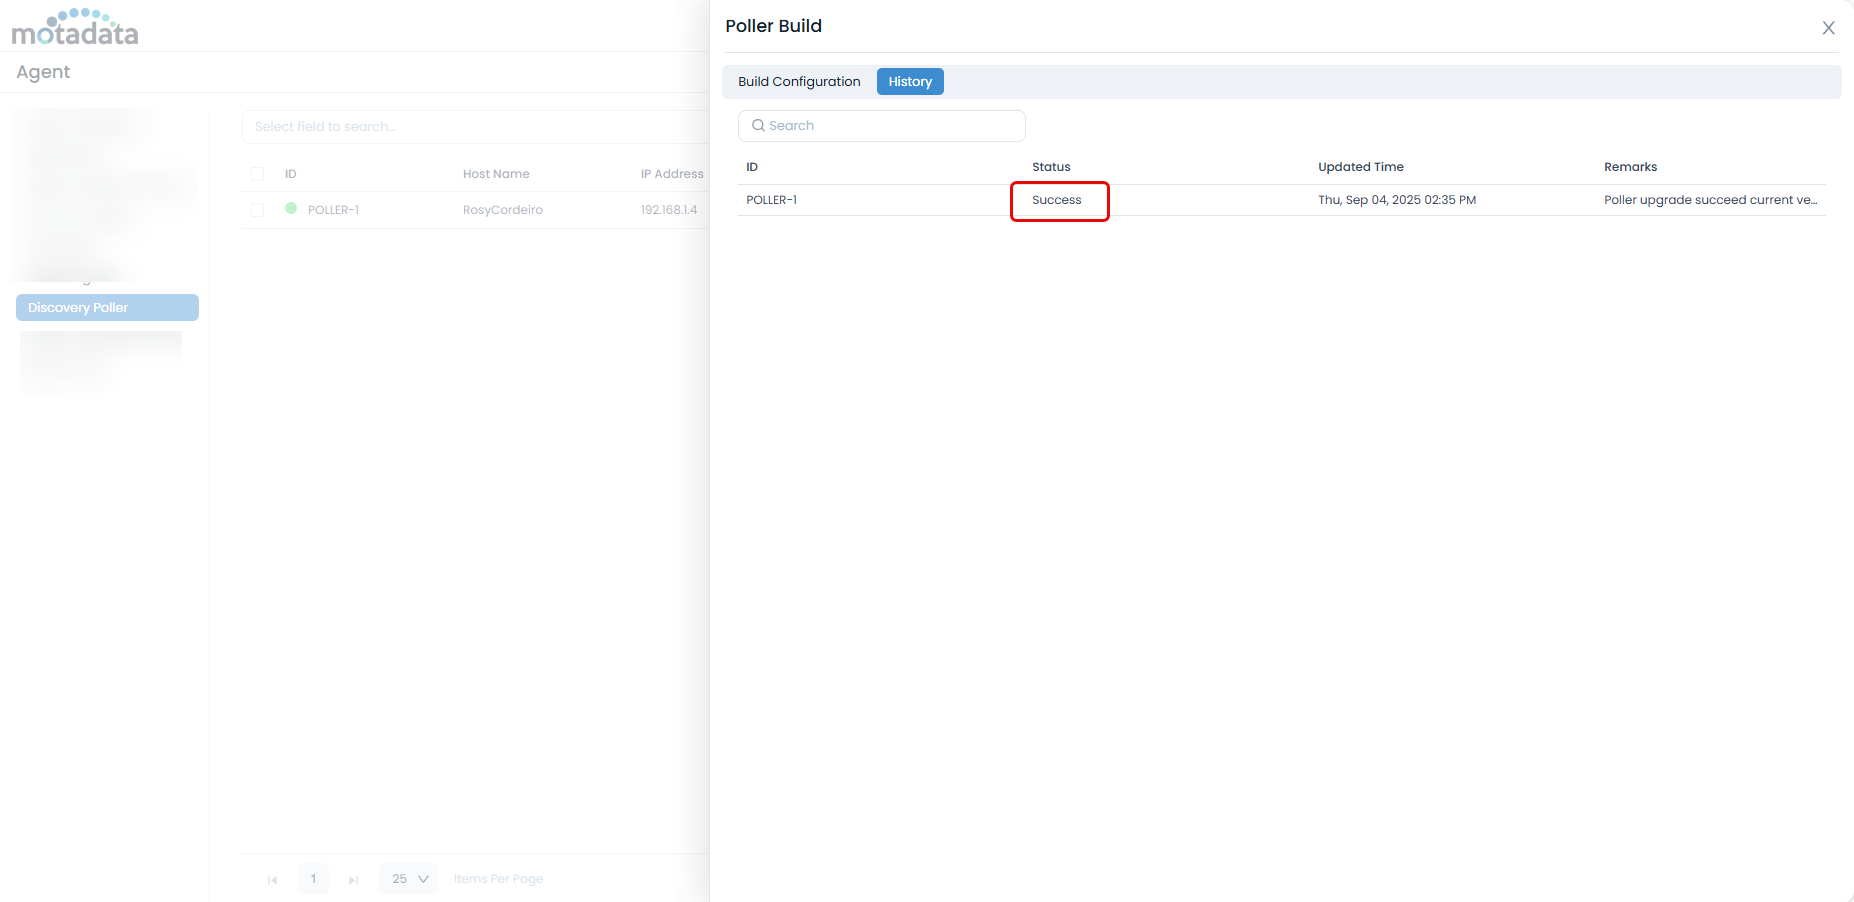
Verify Upgrade Status (Bulk): In the Discovery Poller screen, click Poller Build, then the History tab to view the status. The Version column in the poller list will reflect the new build number.
Troubleshooting
- Upgrade Fails (Bulk): If a bulk upgrade fails, check the History tab for error messages. Ensure the ServiceOps server can reach the Poller machine and no firewall is blocking the connection.
- Service Fails to Start (Manual): If the service fails to start after an upgrade, check the Windows Event Viewer for application errors.
- Poller Not Registering: If the Poller does not appear in the UI after an upgrade, verify the configuration details entered during installation.