Upgrade Guide for Standalone Deployment
A comprehensive guide for upgrading ServiceOps servers across different deployment architectures with minimal downtime and maximum reliability.
In a standalone ServiceOps environment, all components, including the application server, database, and other services, are hosted on a single server. This consolidated setup simplifies the upgrade process, as all actions are performed on one machine. This guide provides a unified procedure to update all components seamlessly.
ServiceOps server upgrades can be performed on standalone servers with specific considerations for the environment. From version v8.2 onwards, incremental upgrades are not required - you can upgrade directly from v8.2 to the latest version.
Key Upgrade Features
- Single Installer: From v8.6.0, use a single common installer across all supported operating systems
- Direct Upgrades: Skip incremental versions (e.g., v8.2 to latest available release version directly)
- Cross-Platform Support: Ubuntu 24 and RedHat 9.4
- Minimal Downtime: Structured upgrade procedures to minimize service interruption
Pre-Upgrade Requirements
System Requirements
Supported Operating Systems:
- Ubuntu: 22, 24
- RedHat: 9.2, 9.4
Pre-Upgrade Checklist
Before initiating any upgrade, complete these essential steps:
- Application Backup: Backup the application and filedb folder
- Database Backup: Take a complete database backup
- VM Snapshot: Take a snapshot of the virtual machine for recovery
- Verify Disk Space: Ensure sufficient space for upgrade files and backups
- Review Release Notes: Check for any breaking changes or new requirements
- Schedule Maintenance Window: Plan upgrade during low-usage periods
Backup Requirements: Always perform complete backups before upgrading. Refer to the Backup Procedure for detailed steps.
Application Upgrade Steps
Step 1: Download the Release Build
- Download the latest Common Upgrade Build from the Download Link
Step 2: Prepare the Installer
Copy the
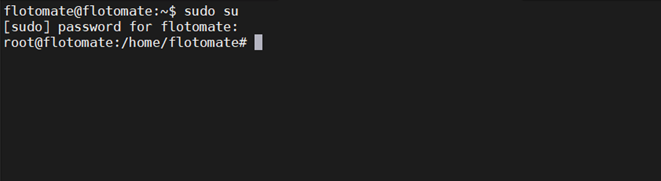
MotadataServiceOpsCommonUpgradeinstaller to the target machineLogin to the terminal server with root user rights:
sudo su
Stop the main server and analytics server services:
systemctl stop ft-main-server.service ft-analytics-server.service
Check the status of the services:
systemctl status ft-main-server.service ft-analytics-server.service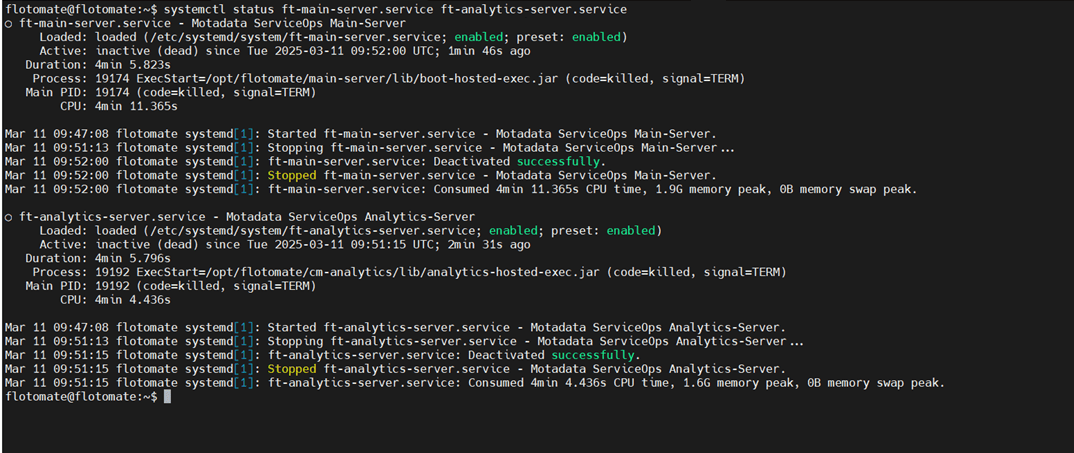
Grant execute permissions for the installer file:
chmod 777 MotadataServiceOpsCommonUpgrade_V860
Replace MotadataServiceOpsCommonUpgrade_V860 with the actual filename of the installer you downloaded. The version number may vary.

Step 3: Run the Installer
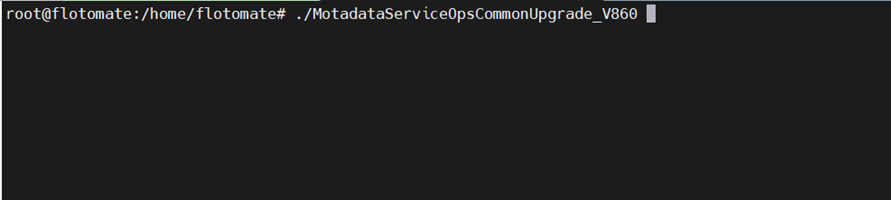
Execute the installer:
./MotadataServiceOpsCommonUpgrade_V860
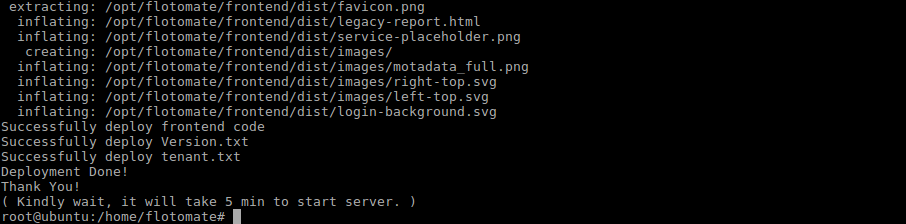
- The upgrade procedure will begin automatically
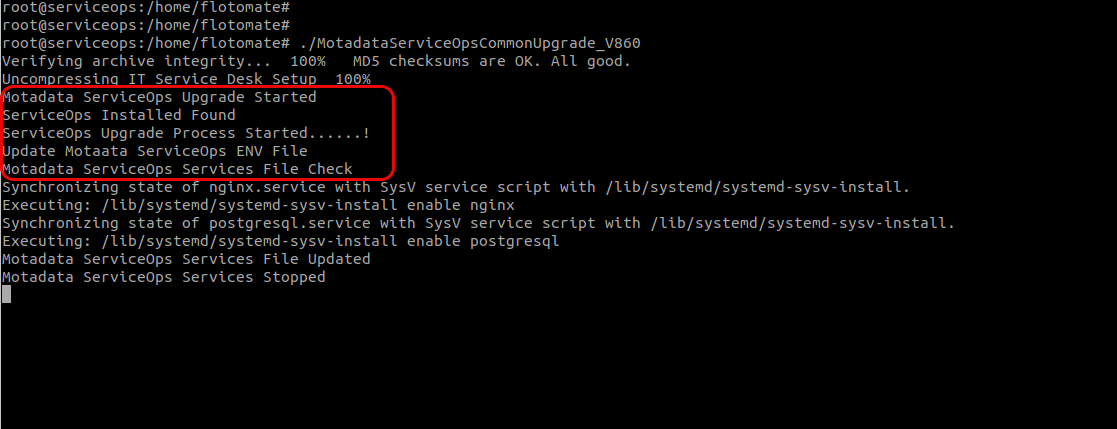
Once you see the completion screen, the upgrade is successful
Database Upgrade Steps (Optional)
In a standalone deployment, the database upgrade is optional. You should only perform these steps if a specific ServiceOps version requires a newer version of PostgreSQL.
Pre-Upgrade Checklist
- Check Disk I/O Speed: Ensure that the I/O speed is greater than 150 MB/s:
dd if=/dev/zero of=/tmp/test1.img bs=1G count=1 oflag=dsync - Check Available Disk Space:
df -h - Check Memory Availability:
free -h - Clear Cache:
sudo sync; sudo sysctl -w vm.drop_caches=3 - Backup and Snapshot: Take a full database backup along with the config file and create VM snapshot.
Step 1: Stop All Services
Before upgrading the database, stop all running ServiceOps services to avoid conflicts.
Stop Services: Log in to the terminal and stop all services:
sudo systemctl stop ft-analytics-server.service ft-main-server.service ft-chat-server.service ft-ai-server.service ft-file-server.service ft-plugin-server.service meshcentral.service
Verify Service Status: Verify that all services are stopped:
sudo systemctl status ft-analytics-server.service ft-main-server.service ft-chat-server.service ft-ai-server.service ft-file-server.service ft-plugin-server.service meshcentral.serviceIf any service is still running, repeat the stop command.
Step 2: Prepare for PostgreSQL Upgrade
After ensuring that all services are stopped, follow these steps to upgrade PostgreSQL:
Download Upgrade Tool: Download the MotadataDatabaseUpgrade file from the Download Links.
Login and Switch to Root: Log in to the server and switch to the root user.
Set Permissions: Provide the necessary execution permissions:
chmod 777 MotadataPGDatabaseUpgrade
Run Installer: Execute the PostgreSQL upgrade installer:
./MotadataPGDatabaseUpgrade
Respond to Upgrade Prompts: The script will prompt for upgrade options. Enter
yfor the relevant version upgrade.Upgrade PostgreSQL 16 → 17? (y/n):
Upgrade PostgreSQL 11 → 17? (y/n):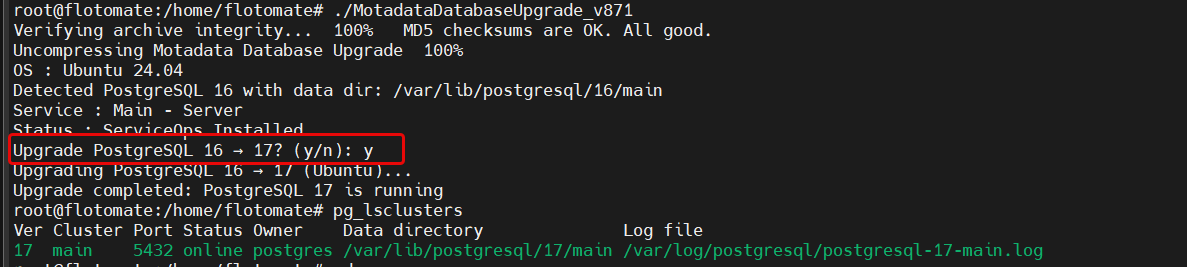
Wait for Completion: The upgrade may take some time. Do not interrupt the process.
Step 3: Verify PostgreSQL Upgrade
Once the upgrade is installed, check the PostgreSQL version to confirm it was successful.
Switch to Postgres User:
sudo su
su postgres
Open PostgreSQL Console and Check Version:
psqlCheck Cluster Status:
pg_lsclustersCheck Version:
select version();Ensure that the version displayed matches the expected upgraded version.
Step 4: Restart Services
Once the PostgreSQL version is upgraded successfully, restart all the previously stopped services:
sudo systemctl start ft-analytics-server.service ft-main-server.service ft-chat-server.service ft-ai-server.service ft-file-server.service ft-plugin-server.service meshcentral.service
Post-Upgrade Verification
Check the status of all services:
systemctl status ft-main-server.service ft-analytics-server.service
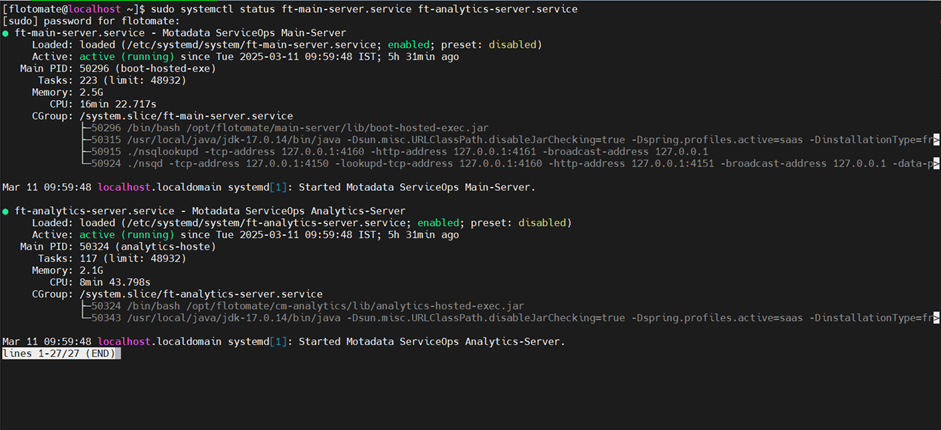
Wait for at least 5 minutes to allow restart of all Motadata services
Login to the ServiceOps portal and verify the application version from Admin > Organization > Account > License Details

Perform sanity checks and verify the functionality.
If you are upgrading from a version older than 8.6.3, external integrations such as incoming and outgoing email may throw a certificate error after the upgrade. This happens when the integration is configured with an IP address instead of a valid hostname. TLS validation introduced in newer versions rejects IP addresses that do not match the server certificate's subject alternative names.
Verify all external integration settings after the upgrade and replace any IP addresses with the correct hostname.
Example error:
Caused by: java.security.cert.CertificateException: No subject alternative names matching IP address 10.90.128.156 found
Fix: Open the affected integration configuration (for example, Admin > Support Channel > Emails > Outgoing Email Server for outgoing email) and replace the IP address with the actual hostname of the mail server. Save the configuration and test the connection.
If NMS-ServiceOps integration is configured in your deployment, the NMS ServiceOps Trouble Ticket plugin must also be upgraded after upgrading ServiceOps to version 8.7.3. Download the plugin upgrade package from the Motadata Support Portal.
System Health Checks
- Service Status: Verify all services are running
- Application Access: Test login and basic functionality
- Database Connectivity: Confirm database connections
- File Operations: Test file upload/download functionality
- Agent Communication: Verify agent connectivity and discovery
Performance Monitoring
- System Resources: Monitor CPU, memory, and disk usage
- Response Times: Check application response times
- Error Rates: Monitor error logs for any issues
- User Feedback: Gather feedback from end users
Troubleshooting Upgrade Issues
Common Upgrade Failures
Click to expand Common Upgrade Failures
- Service Startup Failures: Check service status and logs
- Database Connection Issues: Verify PostgreSQL service and connectivity
- File Permission Errors: Ensure proper file permissions and ownership
- Insufficient Disk Space: Check available disk space before upgrade
Log Collection for Troubleshooting
Click to expand Log Collection for Troubleshooting
If upgrade fails, collect logs from the following locations:
Main Log Directory:
/opt/flotomate/main-server/logs/
Apollo Folder Logs (Default Tenant):
| Log Category | Description | Purpose |
|---|---|---|
| Admin | Administrative operations | User management, permissions, system configuration |
| Discovery | Asset and service discovery | Network scanning, device detection, inventory updates |
| Error | Error tracking and debugging | Application errors, exceptions, failure logs |
| NSQ | Message queue operations | Inter-service communication, task processing |
| Shutdown | Service shutdown events | Graceful shutdown logs, cleanup operations |
| Agent | Agent communication logs | Agent connectivity, data collection, status updates |
| Elastic | Search and indexing logs | Elasticsearch operations, data indexing |
| Email service operations | Email notifications, SMTP communication | |
| Scheduler | Task scheduling logs | Automated job execution, cron operations |
| SMS | SMS service operations | Text message notifications, SMS gateway logs |
| CSV Import | Data import operations | CSV file processing, bulk data imports |
| API Logger | API request/response logs | REST API calls, authentication, rate limiting |
| Events | System event tracking | User actions, system events, audit trails |
| Service | Core service operations | Main application services, business logic |
| System | System-level operations | OS interactions, resource management |
| Audit | Security audit logs | Access attempts, security events, compliance |
Common Folder Logs:
| Log Category | Description | Purpose |
|---|---|---|
| API Logger | API request/response logs | REST API calls, authentication, rate limiting |
| Error | Error tracking and debugging | Application errors, exceptions, failure logs |
| NSQ | Message queue operations | Inter-service communication, task processing |
| Service | Core service operations | Main application services, business logic |
| Agent | Agent communication logs | Agent connectivity, data collection, status updates |
| Events | System event tracking | User actions, system events, audit trails |
| Integration | Third-party integrations | External system connections, API integrations |
| Shutdown | Service shutdown events | Graceful shutdown logs, cleanup operations |
Recovery Procedures
Click to expand Recovery Procedures
- Rollback to Snapshot: If upgrade fails, restore from VM snapshot
- Database Restore: Restore from database backup if needed
- Service Restart: Restart all services in proper order
- Contact Support: Share collected logs with Motadata QA/Dev team
Related Topics
- Backward Compatibility - Understand compatibility aspects with previous versions of ServiceOps.
- PostgreSQL Upgrade Guide - Detailed instructions for upgrading your PostgreSQL database.
- High Availability Upgrade Guide - Comprehensive guide for upgrading ServiceOps in High Availability environments.
- Disaster Recovery Upgrade Guide - Step-by-step instructions for upgrading Data Center-Disaster Recovery setups.