Windows RDP Agent Installation Guide
This document describes the steps for installing the Motadata Windows RDP Agent.
System Requirements
- Windows 8 and above versions
- OS – Windows (32 & 64 bit)
- .NET version 4 and above
- Microsoft Visual C++ 2015 and above
- Architecture: 32bit and 64bit
Prerequisites
Before installing the RDP agent, the respective asset (Agentless or Agent-based) must be discovered in ServiceOps.
The ServiceOps Server Client Domain name or Domain URL must be publicly accessible. If it is not, add its host entry on the client agent machine (target machine - where Motadata ServiceOps Agent is installed). You can add the host entry at the below path:
- Windows OS: c:\Windows\System32\Drivers\etc\hosts
Syntax for host entry:
{Live IP Address} {ServiceOps Server Client Domain name}
For Example:
172.16.12.134 demo.motadataserviceops.com
Fulfill the below prerequisites in case of the remote agent bulk installation being performed either by using GPO or utility.
- File sharing should be allowed.
- UAC (User Access Control) should be allowed in the Registry Editor from the path: Computer\HKEY_LOCAL_MACHINE\SOFTWARE\Microsoft\Windows\CurrentVersion\Policies\System\LocalAccountTokenFilterPolicy.
- Add a folder (C:\Windows) in the Exclusions section under Virus and Threat Protection Settings.
- If Firewall is on, allow the below Inbound Rules:
- Windows Management Instrumentation (DCOM-In) (Private, Public)
- Windows Management Instrumentation (DCOM-In) (Domain)
- Windows Management Instrumentation (WMI-In) (Private, Public)
- Windows Management Instrumentation (WMI-In) (Domain)
- Remote Service Management (NP-In) (Private, Public)
- Remote Service Management (NP-In) (Domain)
If the agent does not get installed after fulfilling the above prerequisites, reboot the machine, and try again to install the agent.
Installation in Windows
Download the latest RDP Agent msi file.
Run the msi file with administrator rights.
The User Access Control popup will appear. Click Yes and continue with the installation.
Follow the wizard as per the below mentioned screenshots:
a. Click Next.

b. It will ask for URL and Port. Select a Protocol based on which the URL supports.
In case the target machine exists in the no Internet zone, enter the poller URL in the URL field.
If there’s no Port, then leave it blank. For HTTPS, enter the 443 port number.
Here, enter either the Activation Code or Secure Auth code based on the type of installation, i.e. upgrade or fresh installation.
In case of Upgrade Scenario,
If you are upgrading the ServiceOps application from v8.5.0 to 8.5.1, you can use either of the the below two options to establish communication with the Agent. They are:
- Secure Communication: Enter the "Secure Auth" key generated from the Agent Credential Profile if enabled. Once enabled, you cannot use the activation code.
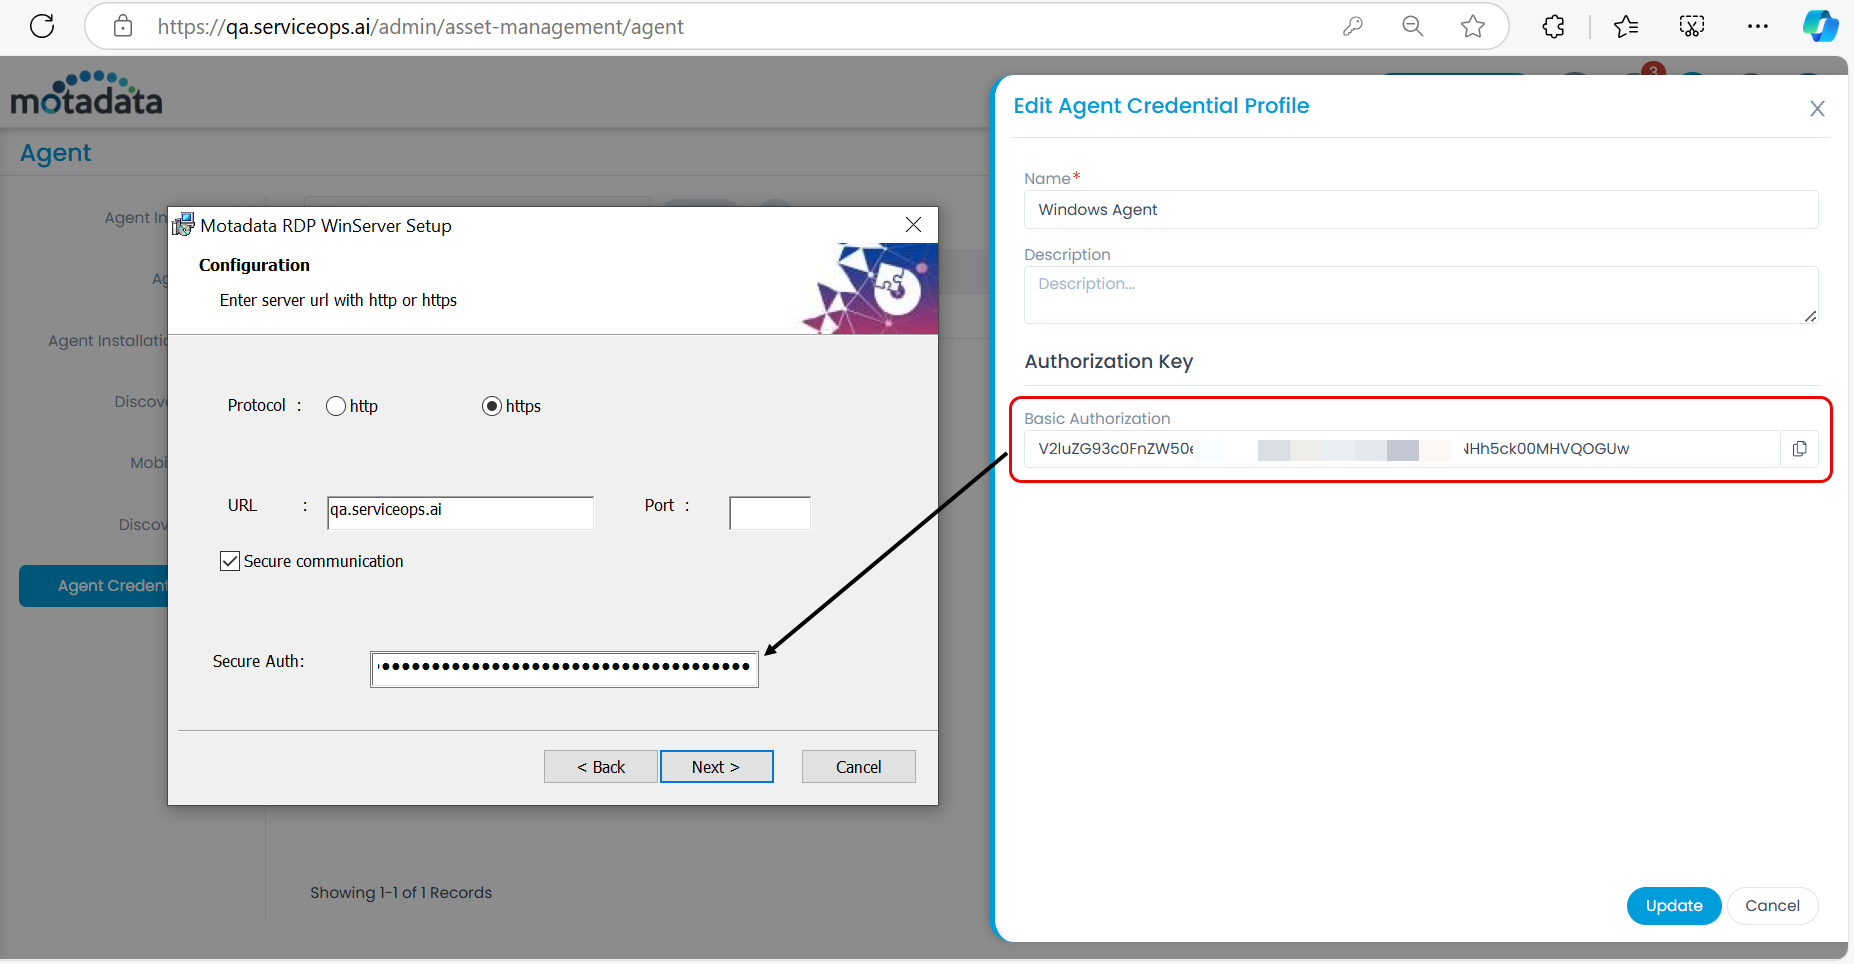
- Activation Code: Enter the activation code to continue using the less secure method. You can get the activation code from the Motadata ServiceOps portal in Admin > Organization > Account > License Details tab.
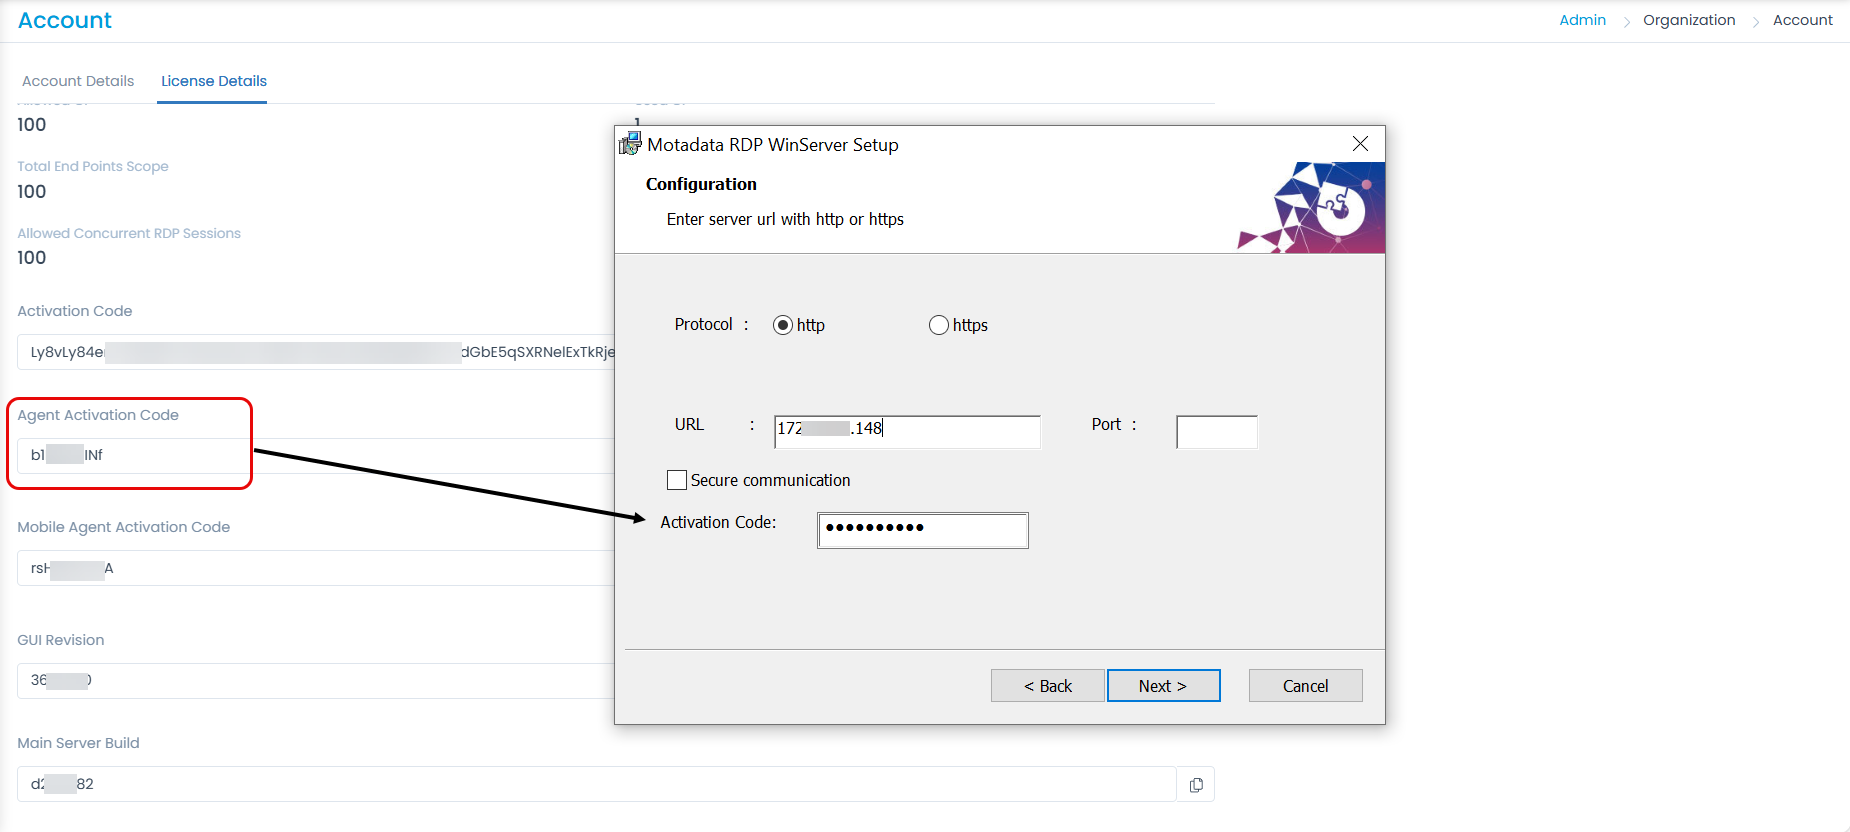
In case of New Installation Scenario:
When the application is installed for the first time, select the "Secure Communication" option and enter the Secure Auth key generated from the Agent Credential Profile. Here, the activation code feature will not work.
The communication will stop if the Agent Credential Profile is deleted or archived from the portal. In such a situation, you can either restore the credential profile or create a new one and then use it for agent installation.
c. Click Install and finish the installation process.


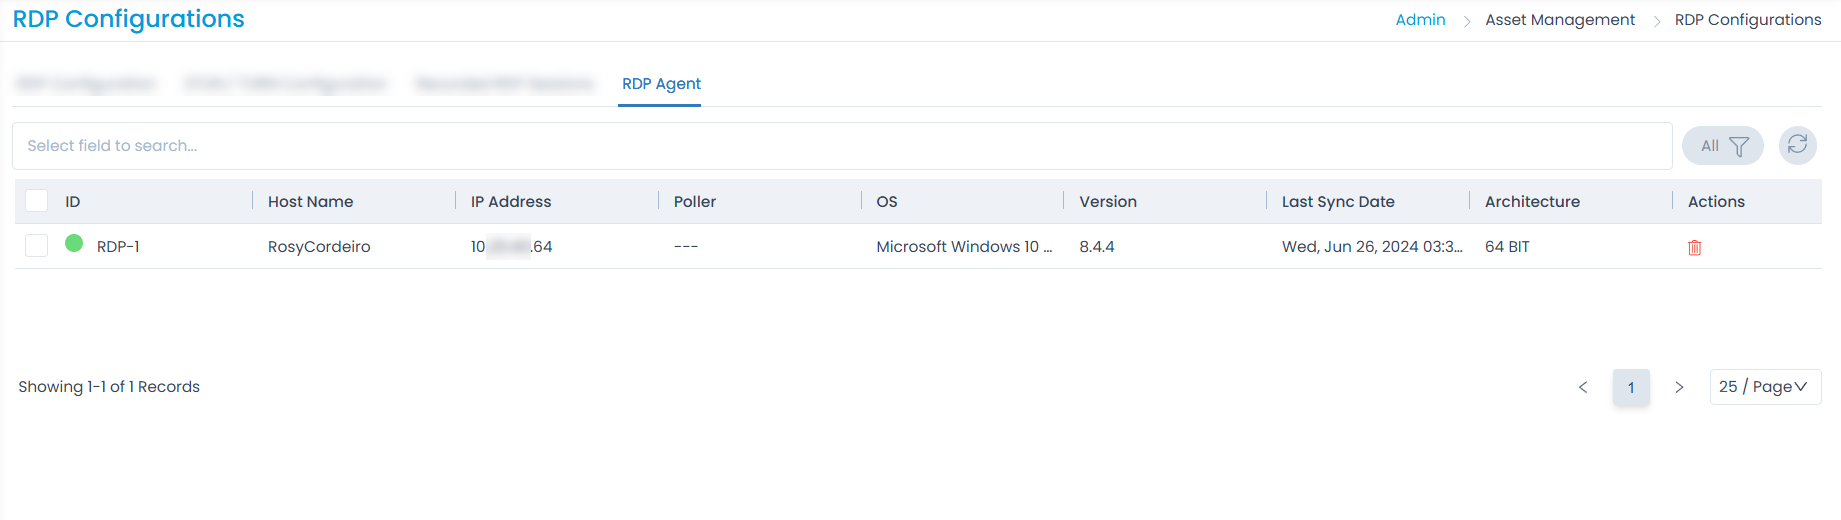
Once installed, it will appear locally in the apps or Programs and Features Window. Also, the agent will appear in the RDP Agent tab of the RDP Configuration page as shown below.
Verification of RDP Agent Installaion and Functionality
Follow these steps to ensure the RDP Agent is installed correctly and functioning as expected:
1. Verify Discovery Agent Installation:
- Action: Install the Discovery Agent.
- Verification:
- Check if the agent appears in the Discovery Agent List.
- Confirm that an Asset has been created in the system.
2. Verify RDP Agent Installation
- Action: Install the RDP Agent.
- Verification:
- Check if the RDP Agent appears in the RDP Agent List.
3. Test RDP Functionality
- Action: Wait for at least 5-7 minutes after installation before testing.
- Verification:
- Try to establish an RDP connection to verify if the agent is working.
- Ensure that the RDP session connects successfully without errors.