Motadata RDP Server Installation Guide
The RDP server (MeshCentral Server) communicates with the RDP Agent and ServiceOps to establish the Remote Desktop (RDP) connection. To do so,
- First download and install the RDP Server
- Configure the RDP Settings
- Lastly install the RDP Agent from the Agent Installation page.
- The RDP server can be deployed on both On-Premise and SaaS platforms.
- It supports the following deployment environments:
- Local Deployment: The RDP Server and ServiceOps Server are installed on the same machine.
- Remote Deployment: The RDP Server and ServiceOps Server are installed on different machines.
Prerequisites
ServiceOps Server should be up and running
ServiceOps Server's IP Address is required
Internet access is required for RDP server installation to verify the Wildcard certificate
Wildcard certificate is required
If Database is configured on a different server, the ServiceOps Database port 5432 should be acccessible from the Meshcentral server
For local connection type, 8443 port must be enabled. To check the port list in Ubuntu, use the below command:
ufw statusTo enable 8443 port in Ubuntu use the below command:
ufw allow 8443For remote connection type 443 port is used
If the ServiceOps server is not publicly accessible, host entry of the IP Address and Domain name must be done in the server and local machine .
This document applies to Ubuntu OS v22, 24 and RedHat OS v9.2 and 9.4.
Procedure
- Download and install the RDP server.
- Perform the additional settings to align with your environment
- Grant chown permissions to root user in the local and remote environments.
- Local: Grant permission to the user account on the machine hosting the ServiceOps application and RDP server.
- Remote: When RDP Server is installed on a remote machine, grant permission to the user account on the machine hosting the ServiceOps application.
After installation, ensure the chown permission is applied to the meshcentral folder by going to the path cd /opt/, and using the following command:
Command Syntax: chown -R {user}:{usergroup} meshcentral
For example: chown -R flotomate:flotomate meshcentral
- Restart the RDP and Nginx server services.
Installation Steps
The RDP server can be installed in local machine and at remote location.
To install the RDP server in remote machine, follow the below steps.
- Download and run the Motadata RDP Server file on a Linux machine.
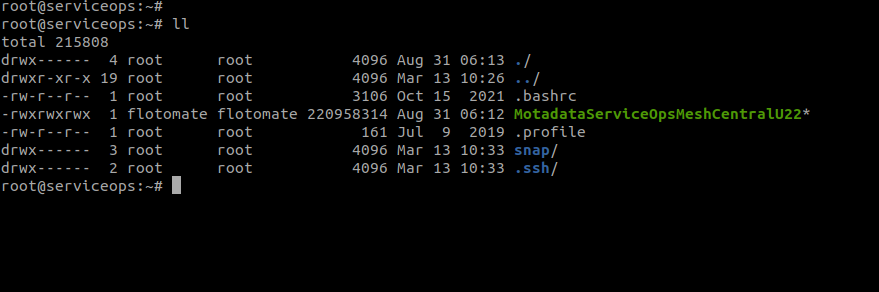
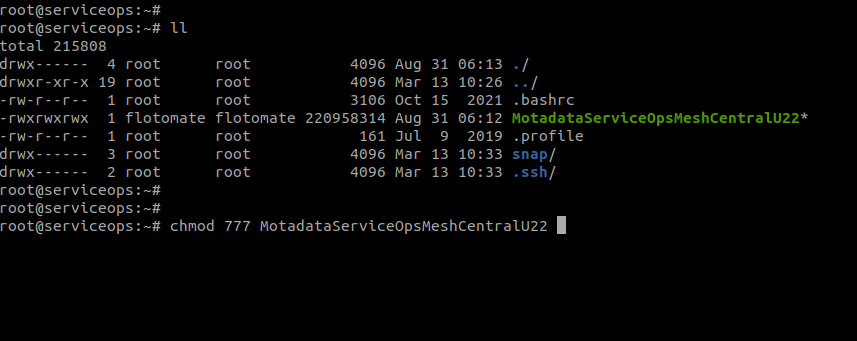
Assign executable permission and run the setup using the below command:
chmod 777 MotadataServiceOpsMeshCentralU22
Add host entry for domain name and IP Address in your system using the below command.
Command Syntax:
echo “IPADDRESS DOMAINNAME” >> /etc/hostsExample:
echo “172.16.12.83 mydomain.example.com” >> /etc/hosts
- Ensure you have the Domain name.

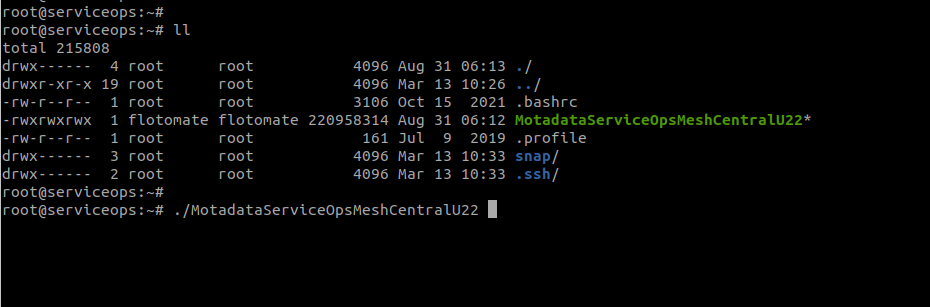
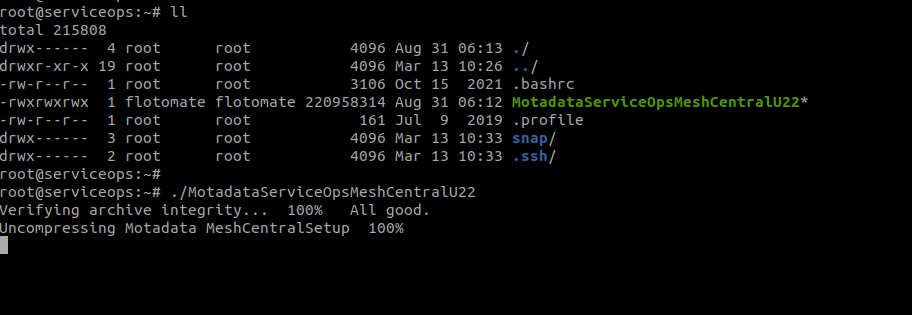
Run the file using the below command:
./MotadataServiceOpsMeshCentralU22noteUse root user to run the command.
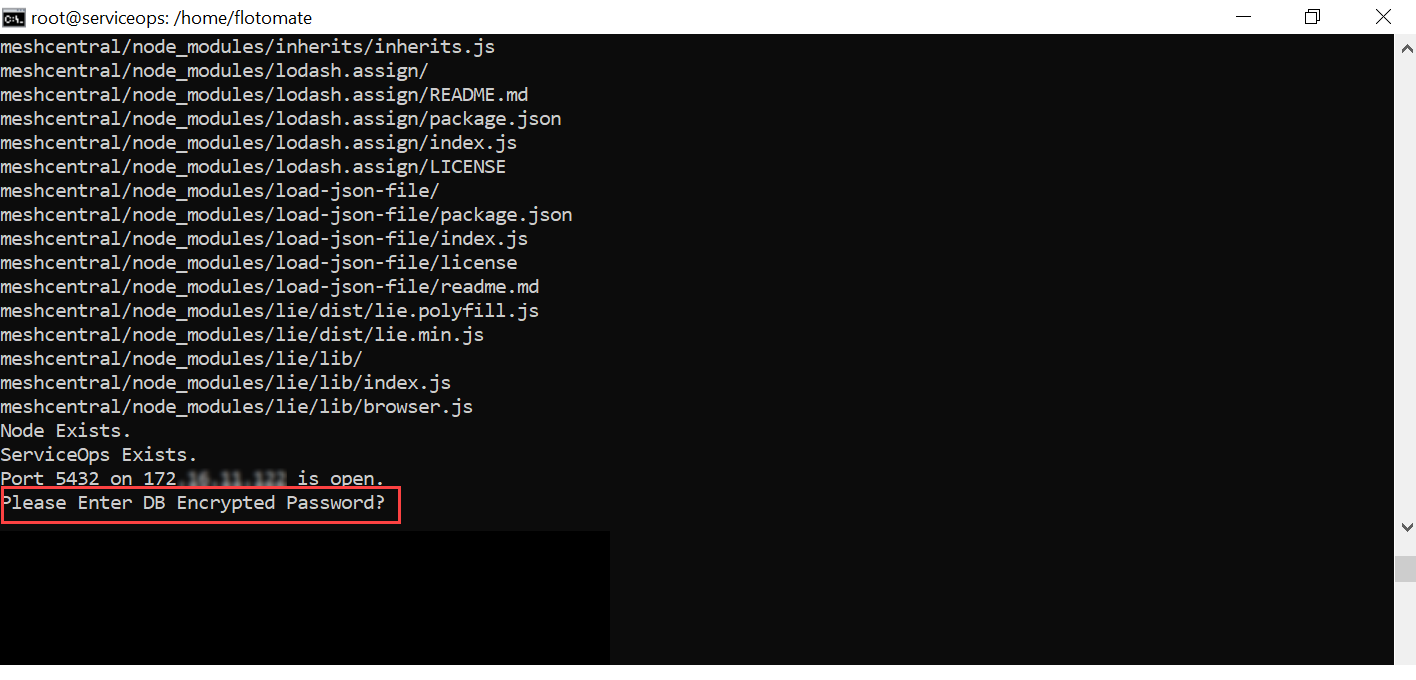
- Enter the IP Address of the ServiceOps Server as shown below. The IP Address is required when the RDP Server and the ServiceOps Server are installed on different machines.

- The IP Address is not asked, if the RDP Server and ServiceOps Server are installed on the same machine.
- Avoid installing the Nginx server on the remote machine that hosts the RDP server.
- Enter the DB Password of the ServiceOp Server as shown below.
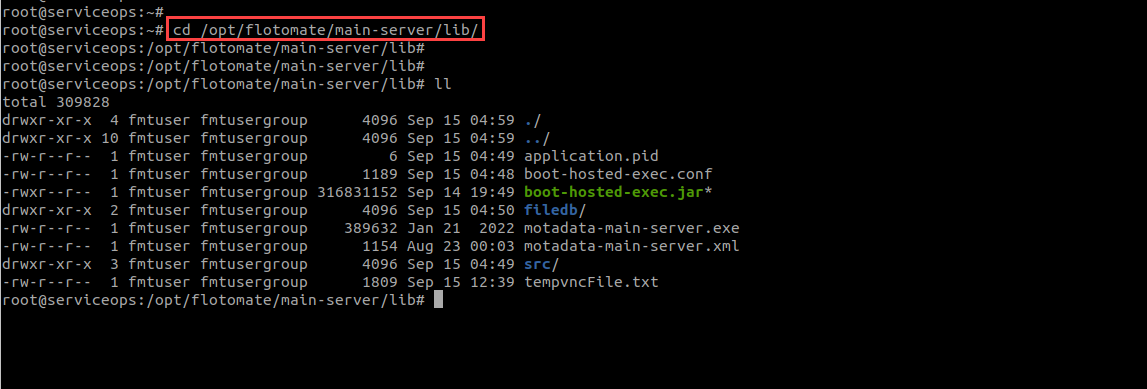
It is an encrypted password. To get the password follow the below steps:
Go to the path cd /opt/flotomate/main-server/lib.
Run the below command to get the password.
cat boot-hosted-exec.conf | grep DB_PASSWORD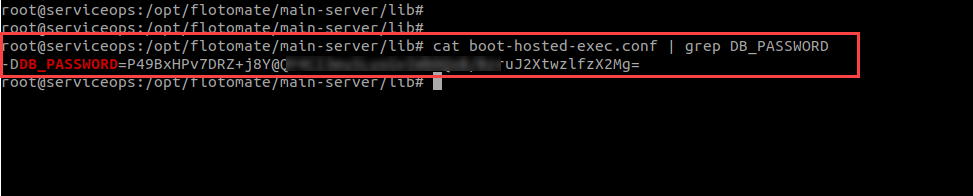
The installer might take approx 5 minutes to install.
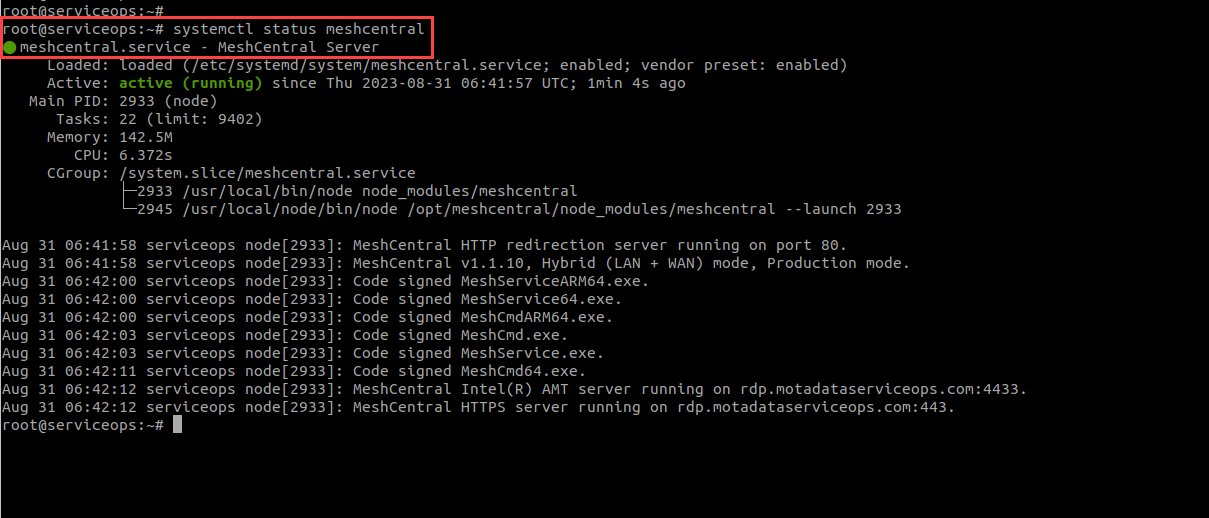
The RDP server is now successfully installed. You can verify the service status using the below command.
systemctl status meshcentral.service
- Once installed, configure the RDP settings from the Technician Portal, and then the RDP Server Agent.
Additional Settings
Once the RDP Server is installed, perform additional configurations to align it with your organizational environment by changing the domain name, port, and SSL certificate.
Change Domain Name
To change the domain name,
Change the domain name in the following 3 files:
- nginx.conf
- hosts
- config.json
Nginx Config File
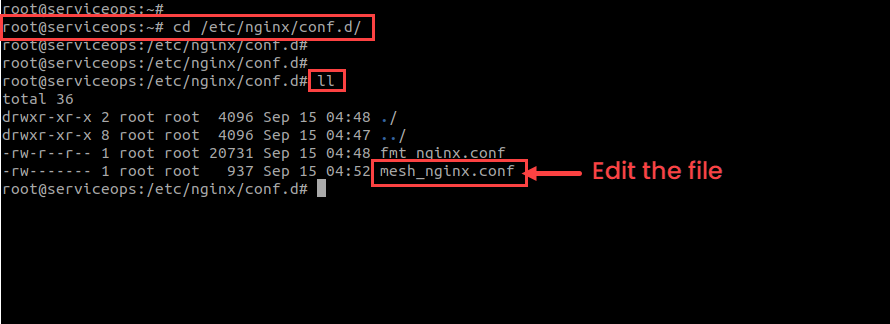
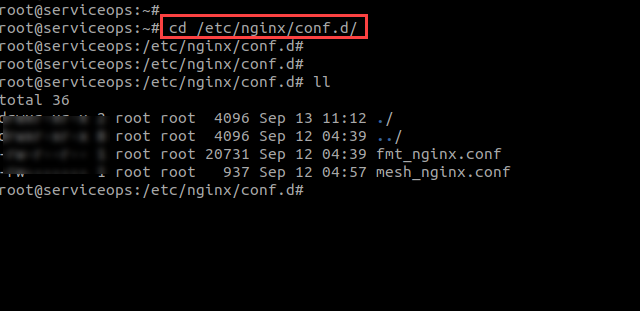
- Open the Terminal server and go to the path /etc/nginx/conf.d/.
- Check the list of files in it using the
llcommand.
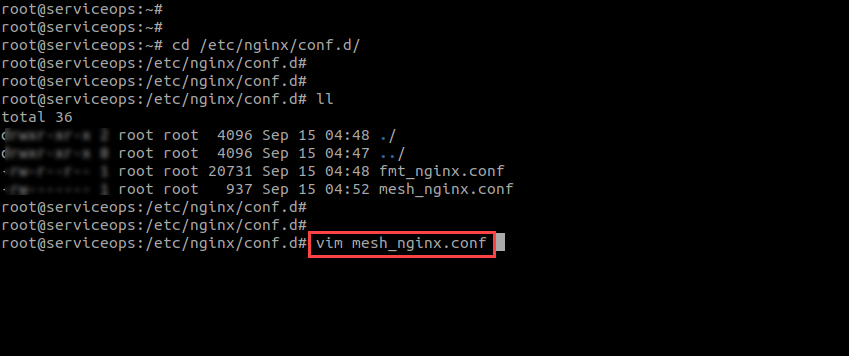
Open and edit the nginx.conf file using the command:
vim mesh_nginx.conf
The below screen appears.
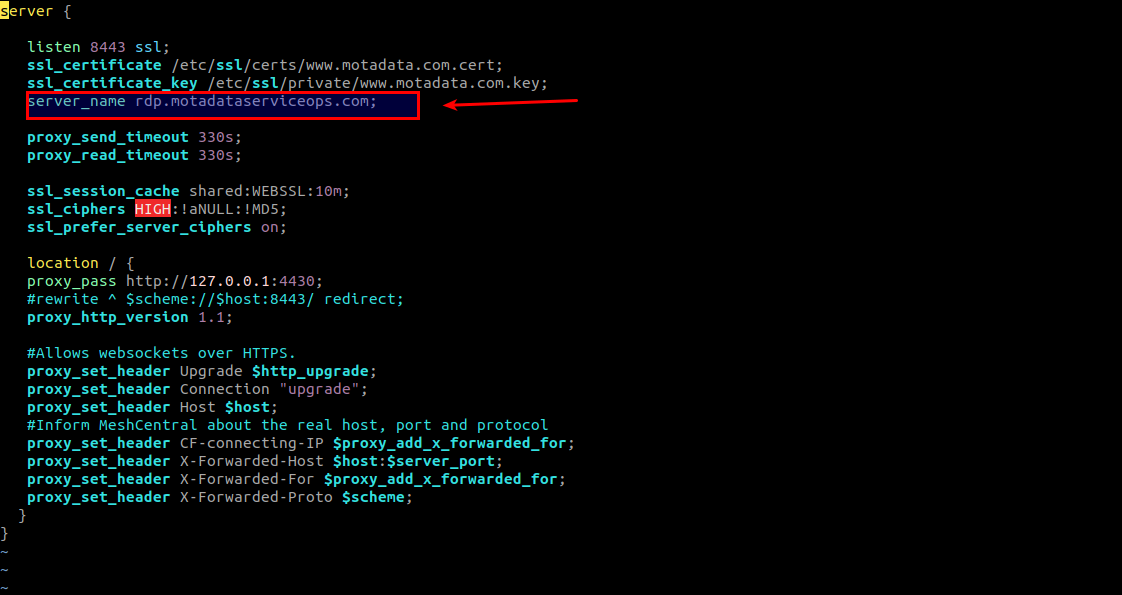
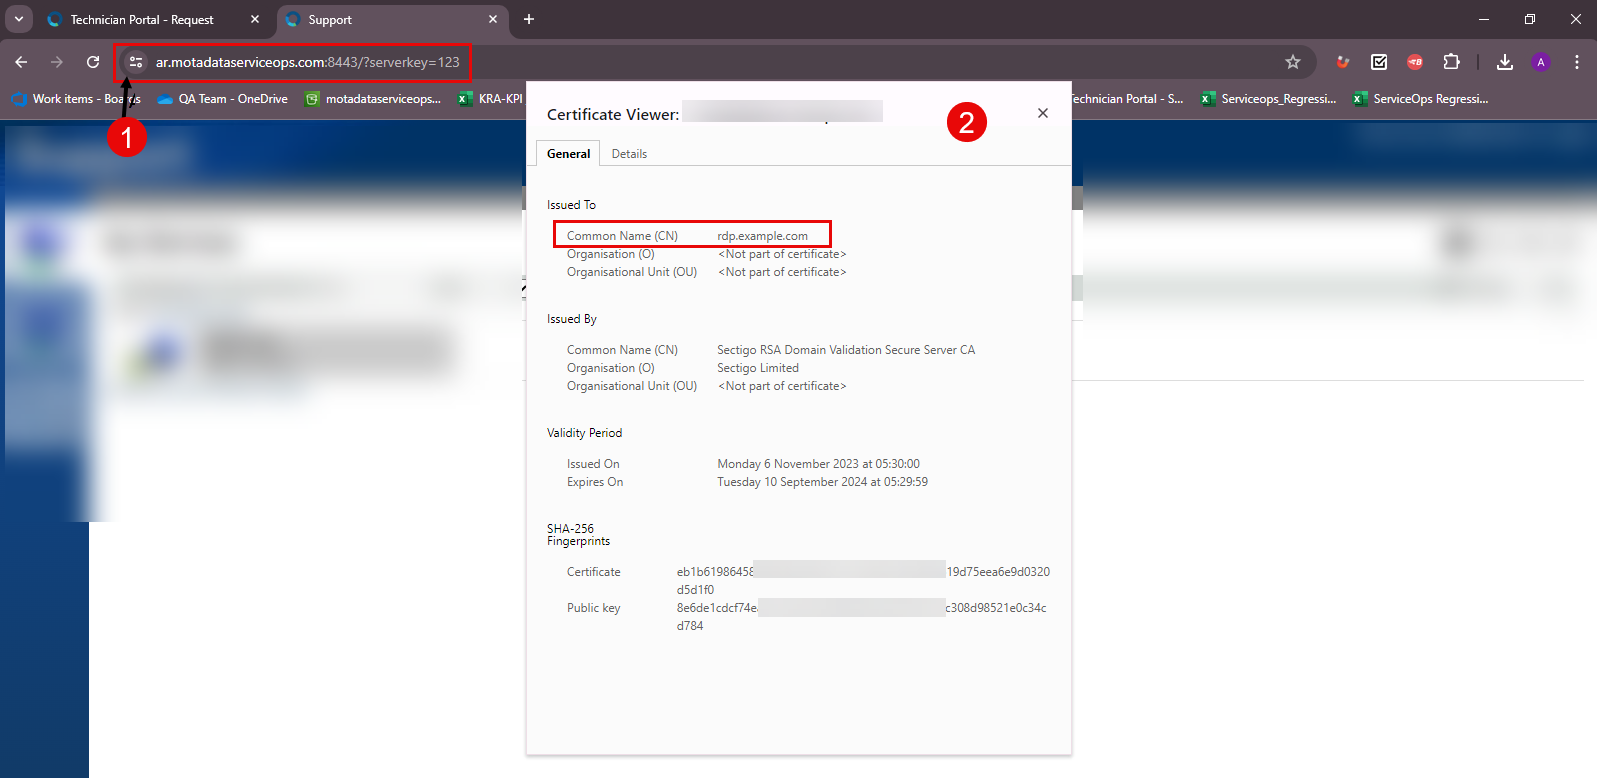
- Replace the server_name with the desired domain name. For example: rdp.example.com. By default the server domain name is rdp.motadataserviceops.com.
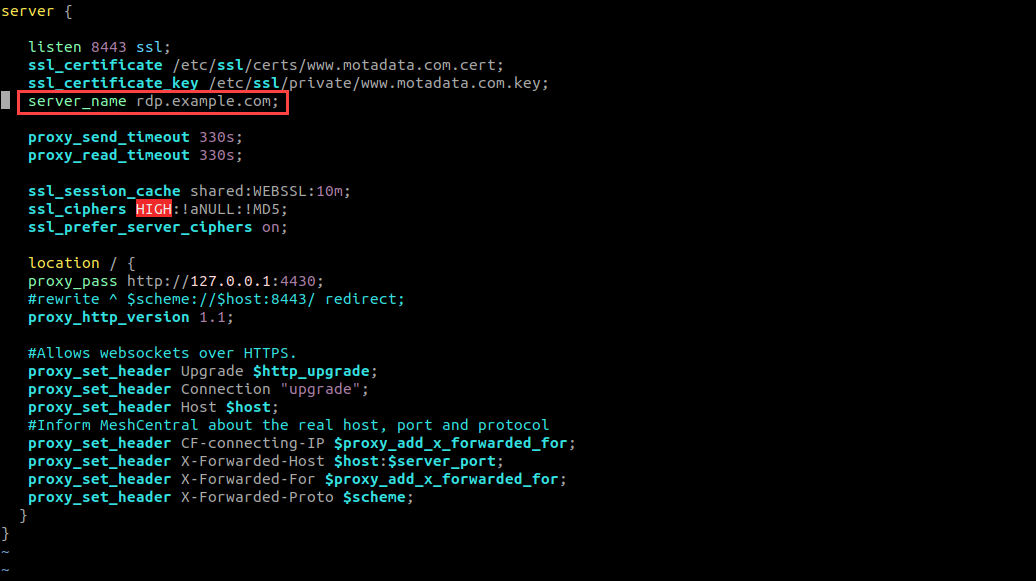
- Once done, save the file using the
:wq!command.
To replicate the changes, restart the nginx service whenever any changes are made in the nginx.conf file.
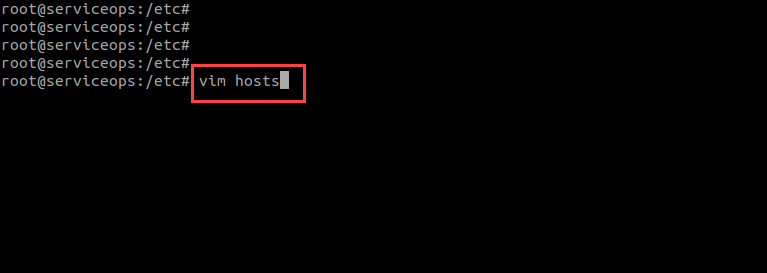
Host File
To edit the host file,
Go to the path /etc/hosts.
Edit the file using the below command:
vim hosts
- Edit the domain host name and also add the server IP Address before it, as shown below.
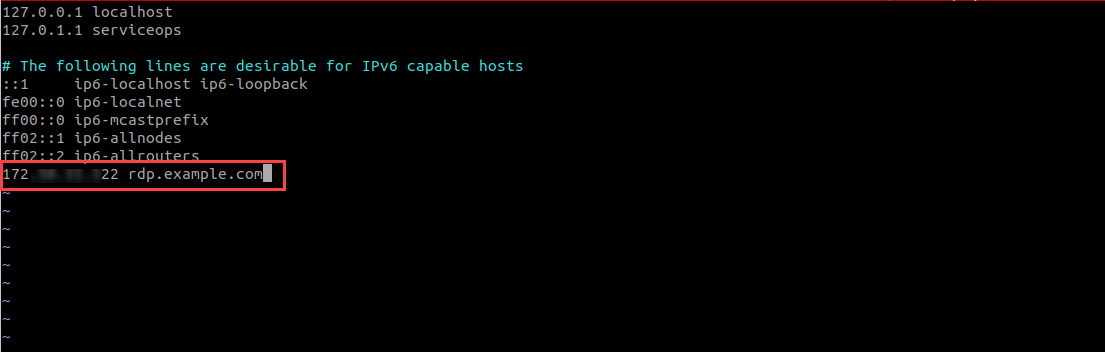
- Once done, save the file using the
:wq!command.
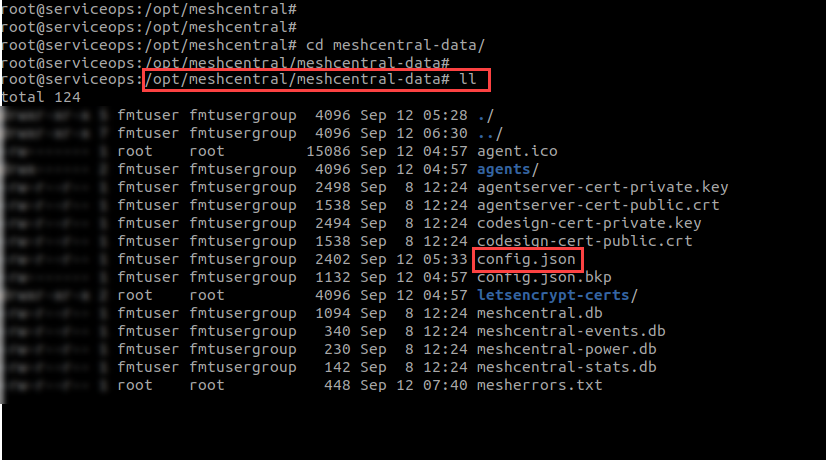
Config File
To edit the RDP config file,
- Navigate to the path /opt/meshcentral/meshcentral-data and view the files in it using the
llcommand as shown below.
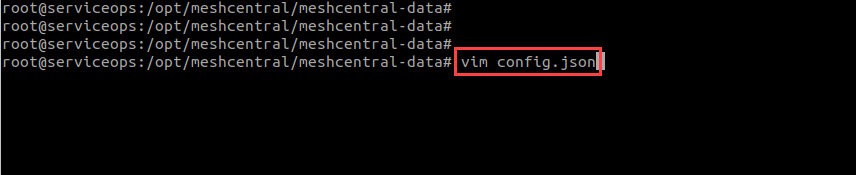
Next, edit the config.json file using the below command.
vim config.json
- Change the Domain name in the config file as shown below.
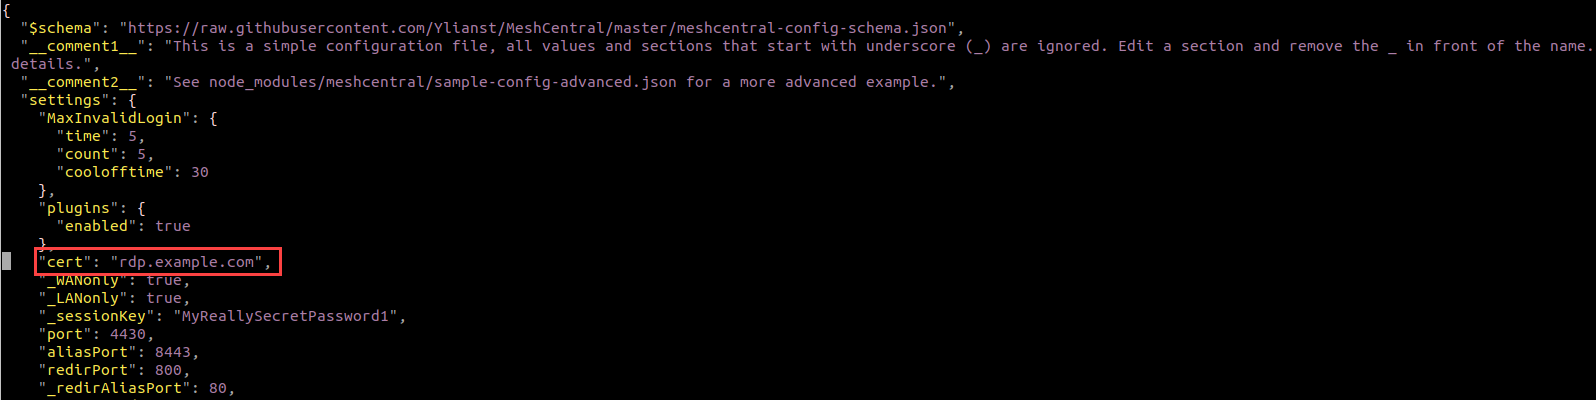
- Next, in the same file change the Email address and Domain name in the "letsencrypt" section as shown below.
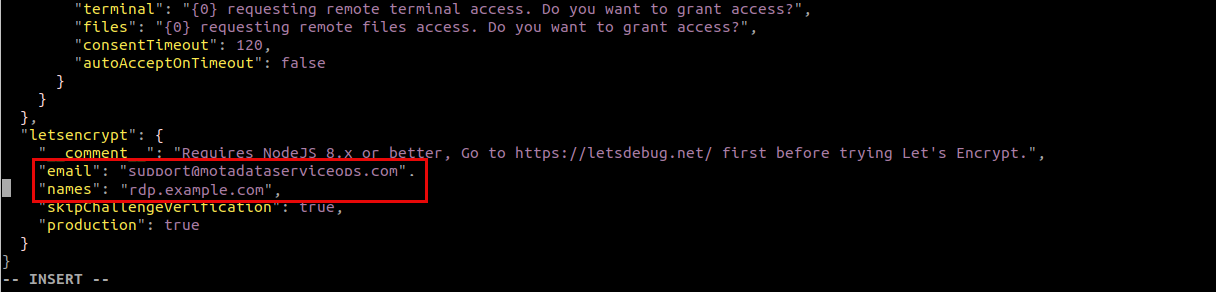
Once done, save the file using the
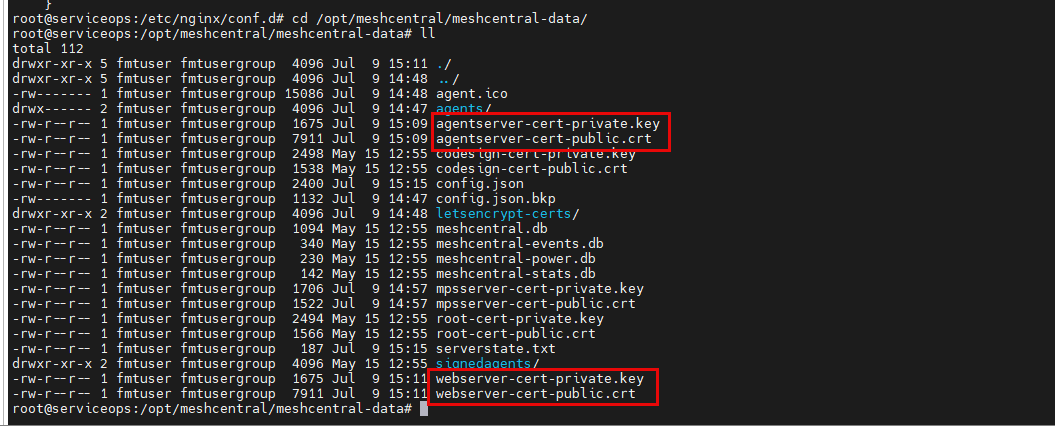
:wq!command.Navigate to the path "/opt/meshcentral/meshcentral-data" and ensure that SSL key and SSL certificate are present in the following files on the RDP server:
SSL key
- agentserver-cert-private.key
- webserver-cert-private.key
SSL CRT
- agentserver-cert-public.crt
- webserver-cert-public.crt
The user should have administrator rights.
Apply chown permission to the user and user group using the below command:
chown -R fmtuser:fmtusergroup meshcentral-dataFor example:
chown -R flotomate:flotomate meshcentral-dataRestart the Nginx and RDP server services using the below commands and wait for 30 seconds approx:
systemctl restart meshcentral.service
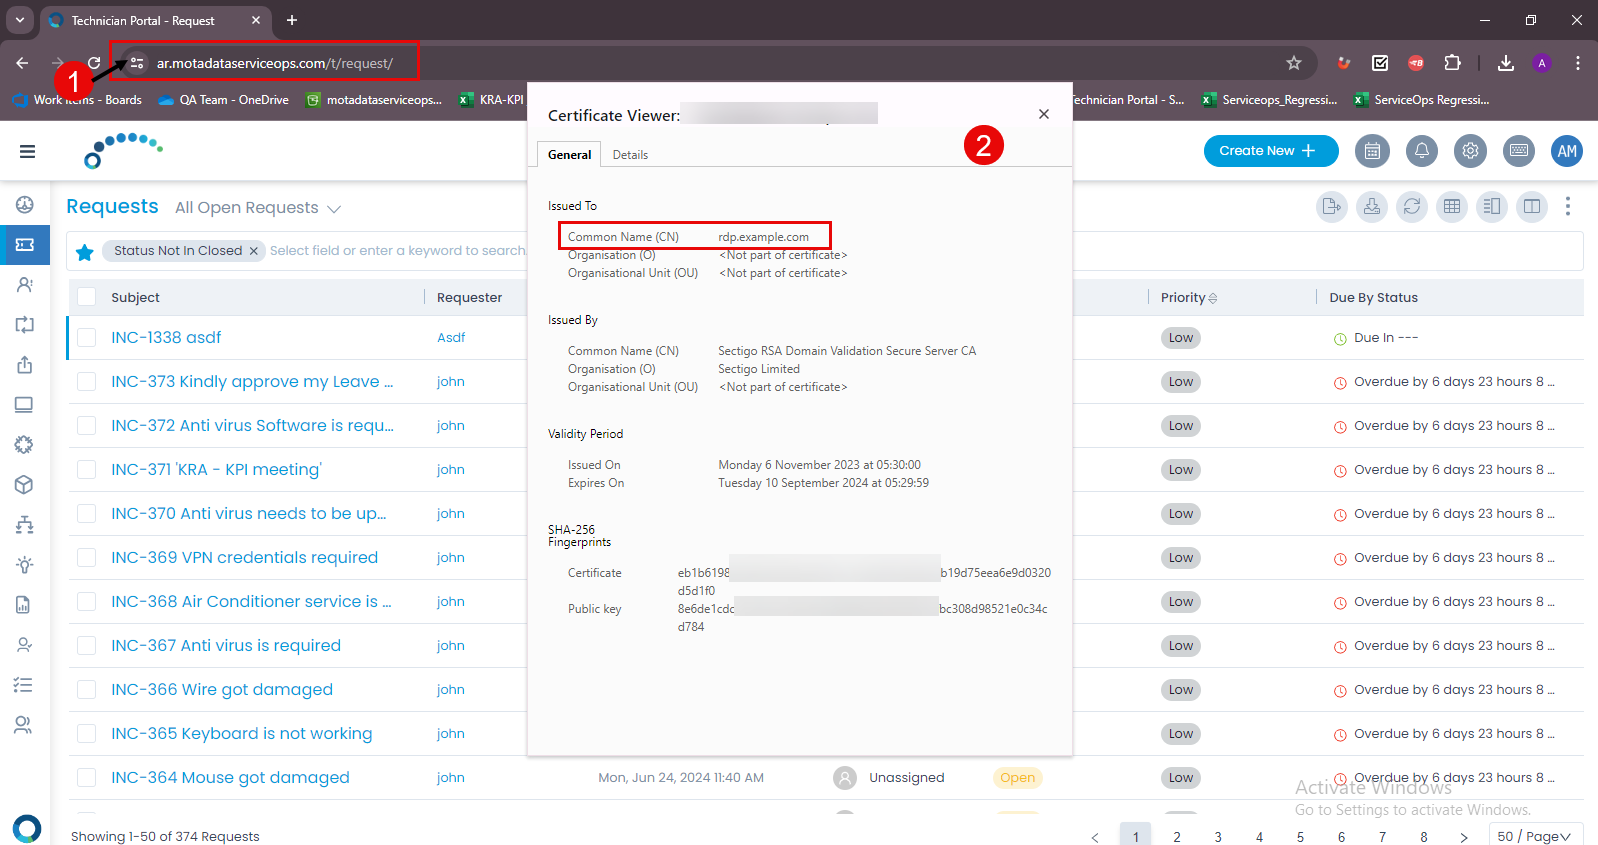
systemctl restart nginxNow, access the ServiceOps URL, and click on "Reload Certificate" in Admin > Asset Management > RDP Configurations.
Restart the RDP agent service (RDPWrapper.exe) to immediately reflect the changes made with the new signed agent in the asset. If not restarted manually, these changes will automatically be applied after the configured refresh cycle.
To ensure the self-signed certificate works correctly, the domain associated with the certificate should be resolvable from any PC where the RDP agent is installed.
The simplest way to achieve this is by adding the IP address and domain name to the hosts file located at the path "C:\Windows\System32\drivers\etc\hosts".
You can verify this by pinging the domain name (rdp.example.com.) associated with the certificate from the PC where the RDP agent is installed.
12.Once the certificate is changed, verify it by accessing both the ServiceOps URL and the RDP Server URL, and checking the certificate names displayed.
Change SSL Certificate
To change the SSL Certificate file for RDP,
- Navigate to the path /etc/nginx/conf.d/.
- Open the mesh_nginx.conf file.
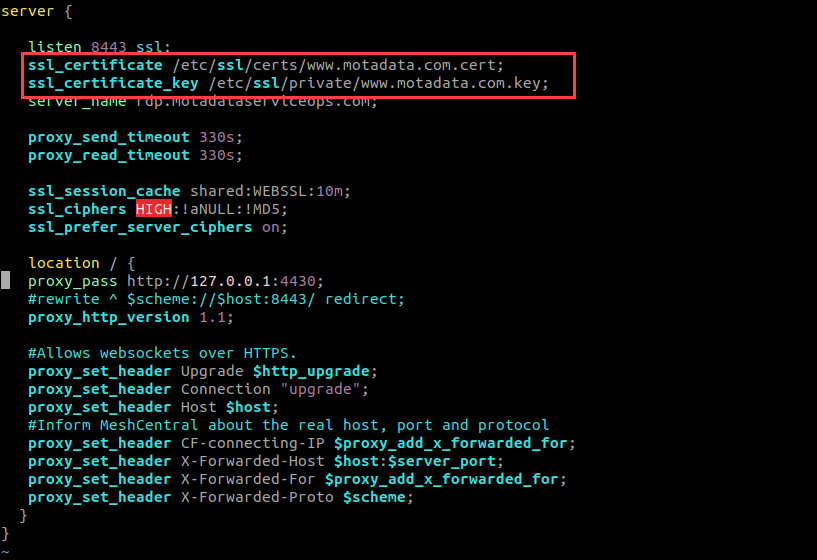
- Edit the ssl_certificate as shown below.

Once done, save the file.
Restart the Nginx server service and wait for 30 seconds approx.
Change Port Number
ServiceOps uses the default 8443 and 4330 port numbers. In case, these are not free you can change the port to the desired one by following the below procedure.
- To change the port numbers, edit the following 3 files:
- nginx.conf
- fmt_nginx.conf
- config.json
- Before editing, kindly take the backup of config files.
- Ensure that the port is not used by any services or the ServiceOps Server.
RDP Nginx Config File
To edit the file,
- Navigate to the path /etc/nginx/conf.d/.
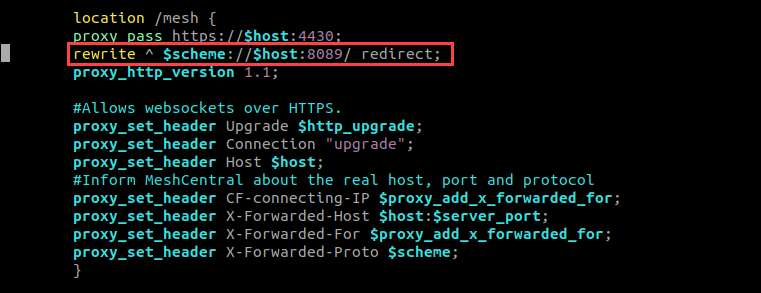
- Open the mesh_nginx.conf file. It contains the default port number 8443.
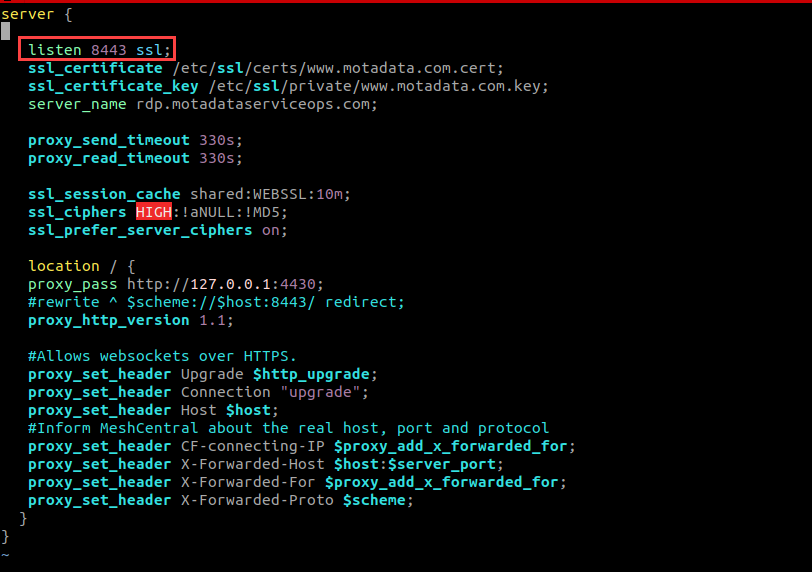
- Next, edit the file and change the port number from 8443 to 8089 as shown below. Here, port number 8089 is used as an example.
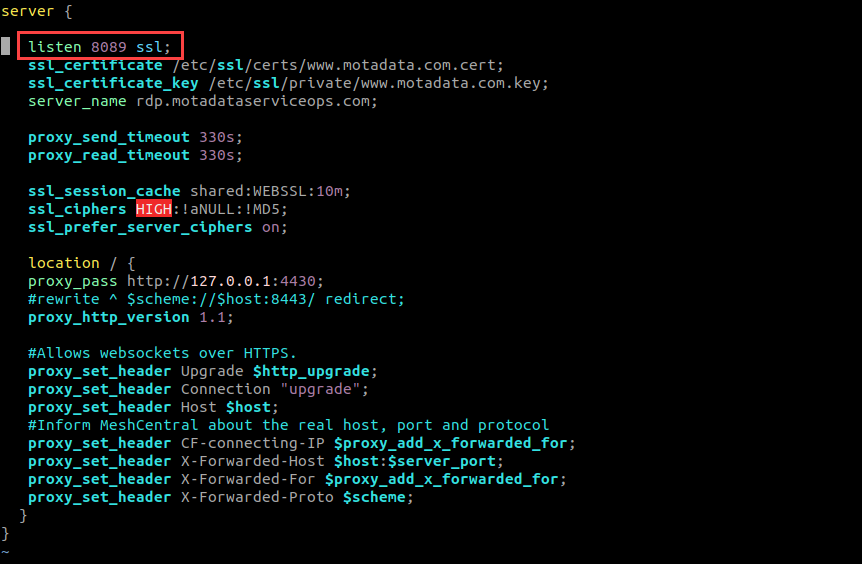
- Once done, save the file.
- Restart the Nginx Server service.
Fmt Nginx Config File
To edit the fmt_nginx.conf file,
- Navigate to the path /etc/nginx/conf.d/.
- Open the fmt_nginx.conf file. It contains the default port number 8443.

- Next, edit the file, and change the port number from 8443 to 8089 as shown below. Here, port number 8089 is used as an example.
- Once done, save the file.
- Restart the Nginx server service.
Ensure the same port numbers are updated in the fmt_nginx.conf and mesh_nginx.conf files.
Config.json
To edit the RDP config file,
- Navigate to the path /opt/meshcentral/meshcentral-data and view the files in it using the
llcommand as shown below.
Next, edit the config.json file using the below command.
vim config.json
- Change the aliasPort in the config file as shown below. Here, port number 8443 is replaced with 8089.
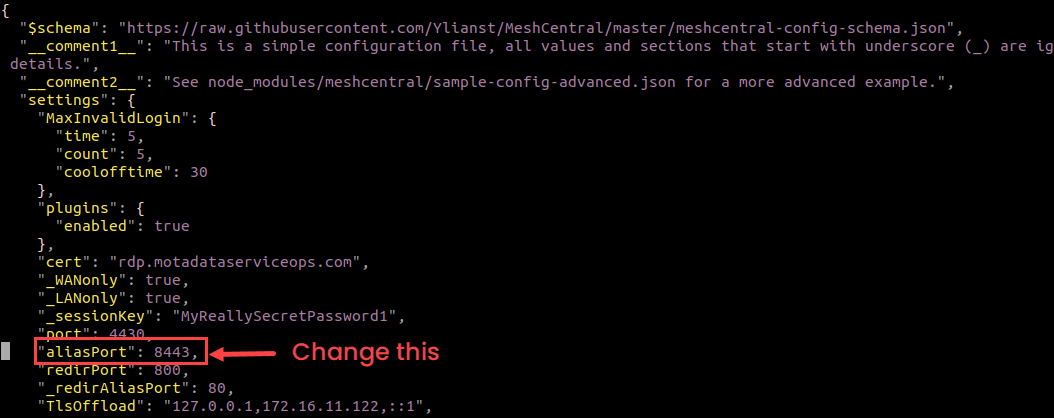
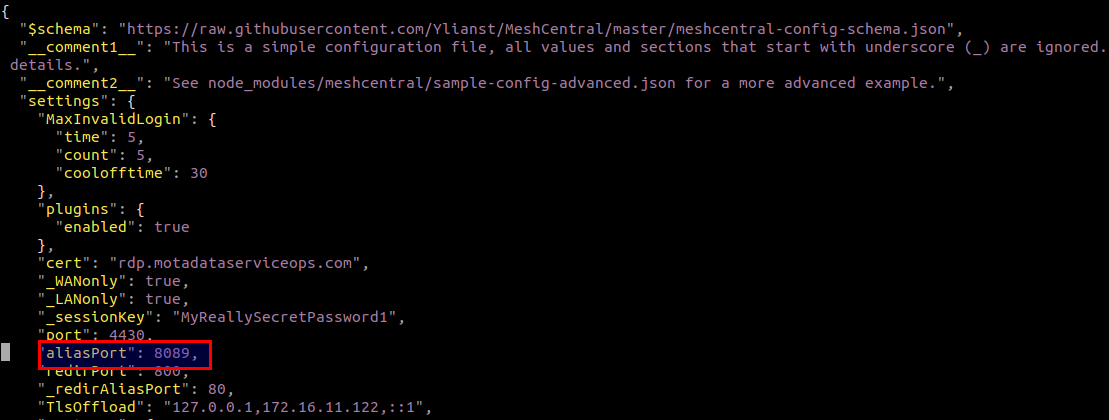
- Once done, save the file using the
:wq!command.
Once the port number is changed in all the 3 files, allow it from Firewall using the below commands.
ufw status
ufw allow 8089
Restart the Nginx and RDP server services using the below commands:
systemctl restart meshcentral
systemctl restart nginx
Similarly, using the above steps, you can change the port number 4430 in all the 3 files.
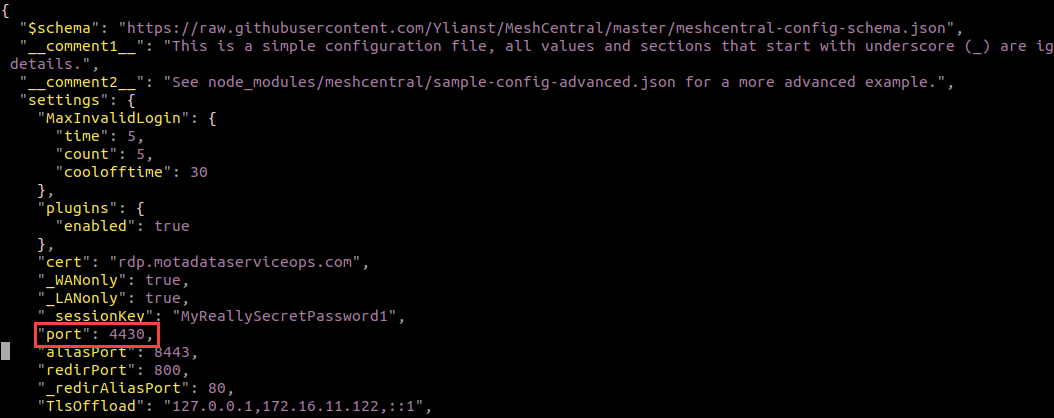 config.json
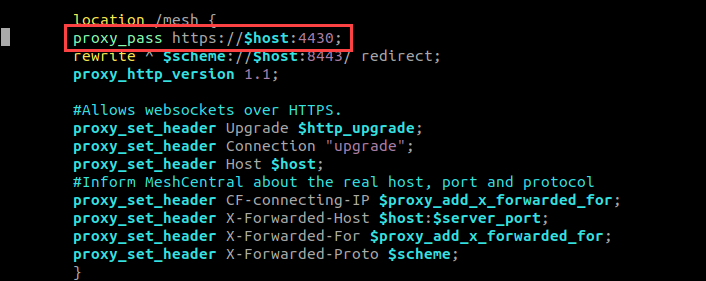 mesh_nginx.conf
 fmt_nginx.conf
Uninstallation Steps
To uninstall the RDP Server, follow the below steps:
Login to the terminal server with root user.
Stop and disable the meshcentral service using the below commands:
systemctl stop meshcentral.service
systemctl disable meshcentral.service
Remove the meshcentral.service using the below command:
rm -rf /etc/systemd/system/meshcentral.serviceRemove the meshcentral folder using the below command:
rm -rf /opt/meshcentral/After uninstalling the server, verify the uninstallation by navigating to the /opt folder and checking for the presence of the meshcentral folder. If the folder is not found, the uninstallation was successful.
Frequently Asked Questions
Why do we need a Wildcard Certificate?
A: An SSL/Self-Signed Certificate is required, matching the domain of the ServiceOps Nginx server.
For Example: If ServiceOps has a certificate for abc.motadataserviceops.com and RDP Server has rdp.motadataserviceops.com, a wildcard certificate (*.motadataserviceops.com) ensures both use the same SSL.
Both ServiceOps and RDP Nginx must have the same SSL Certificate.
Do we need HTTP or HTTPS?
A: Only HTTPS is required for security.
What ports need to be open on the RDP server?
A: The required ports are:
- Local Access: Port 8443
- Remote Access: Port 443
- ServiceOps DB: Port 5432
Can RDP Server be deployed On-Premise while ServiceOps is on SaaS?
A: Yes, but the customer must use a private cloud and be willing to expose its database to the public.
Is the Internet required for On-Premise setups?
A: Not necessarily. However, if an SSL certificate requires validation, Internet access is needed.